Browsing Tag

Ginger

Dinner, Fish, Kimchi, Korean, Lactose Free, Recipes

Kimchi Tuna Salad

April 9, 2023

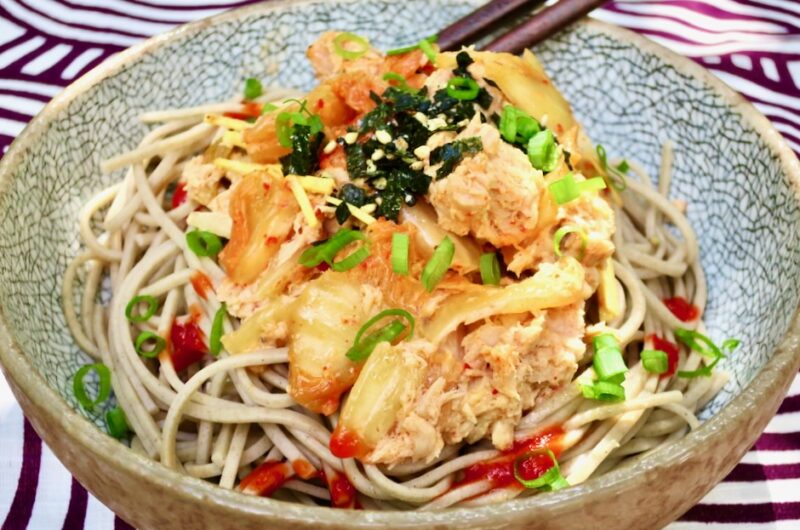
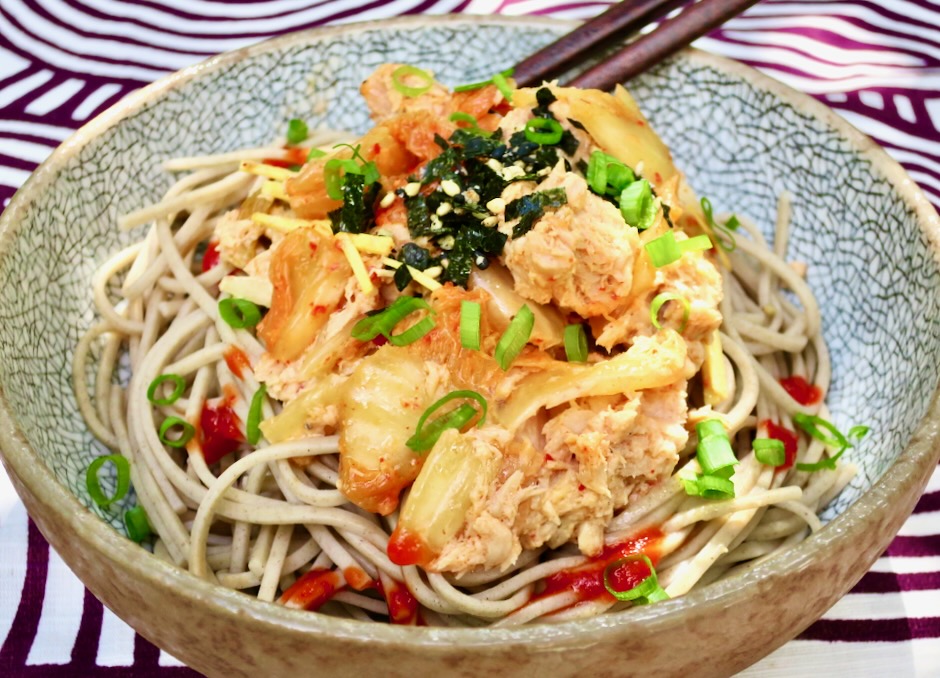
From the first time I made this kimchi tuna salad I knew it would become a regular on our lunch menu. Making kimchi has inspired me to use the spicy and crunchy Korean side dish in all types of recipes. Dishes such as fried rice, kimchi soup and cheesy kimchi ramen illustrate the versatility of this fiery fermented vegetable. In this dish it is paired up with tuna, fresh ginger, sesame oil, rice vinegar, and celery (for added crunch). You can have it as is, however, my favorite way to serve it is over soba or with rice.
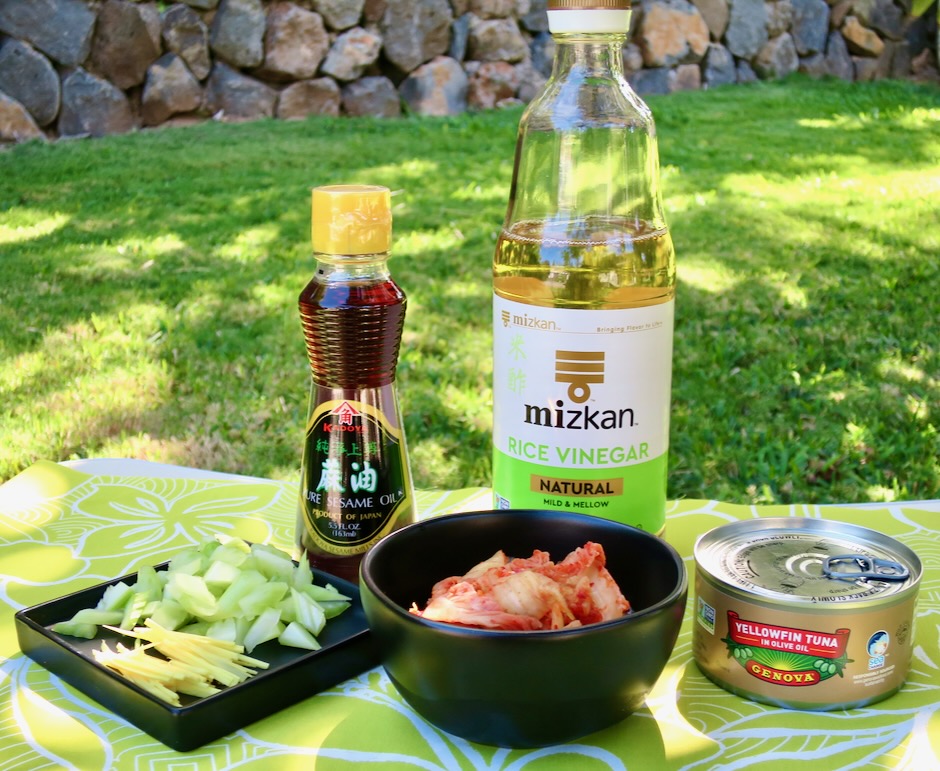
A short list of ingredients make up this recipe adapted from NYT Cooking. Tuna in olive oil makes this extra luxurious but a good brand of tuna in water will work fine.
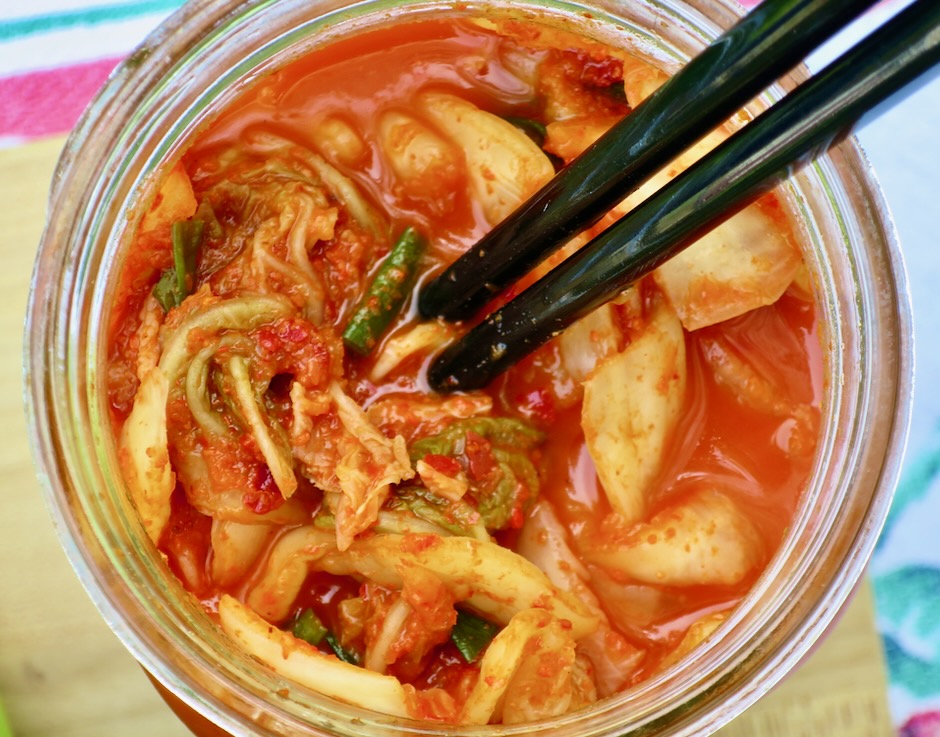
If homemade kimchi is not something you have in your refrigerator, use your favorite store-bought brand. There are so many to choose from these days, from mild to spicy (go spicy!).
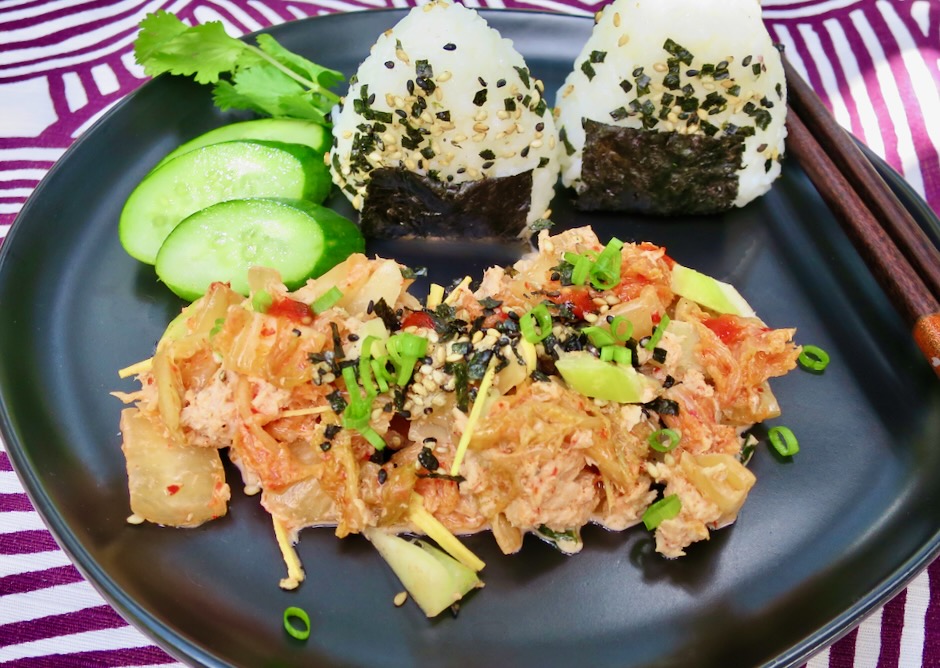
Serve the kimchi tuna salad over rice or make onigiri (rice balls) to accompany the salad. A drizzle of sriracha adds extra spice.
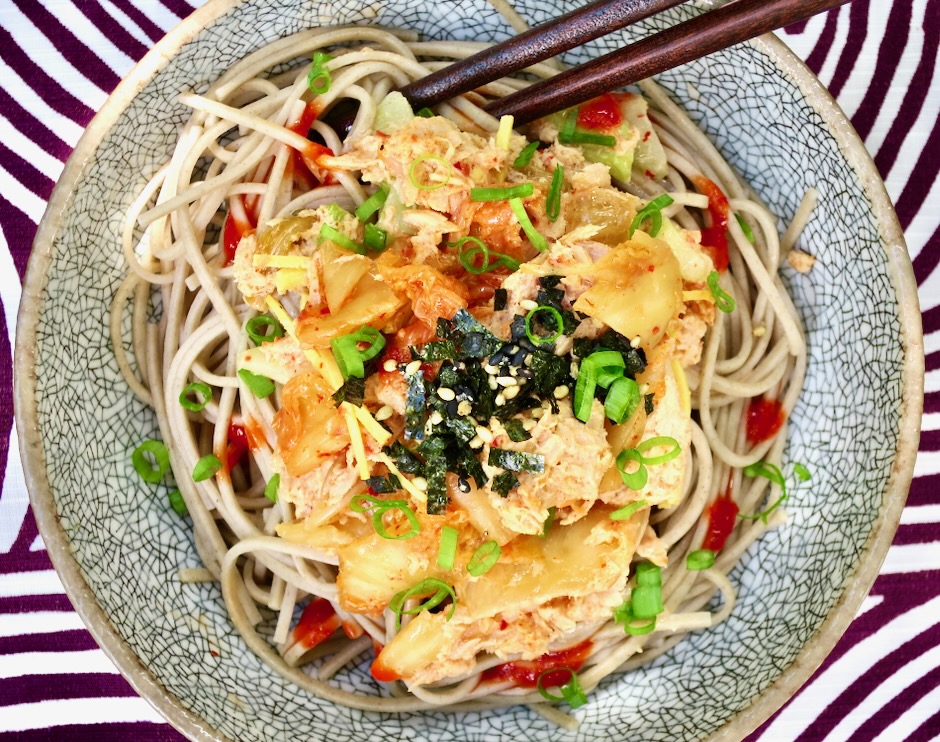
Kimchi Tuna Salad

Recipe by Kiyo
Servings

2

servings

Adapted from NYT Cooking

Ingredients

  • 8 ounces kimchi + 2 1/2 tablespoons kimchi juice

  • 1 tablespoon unseasoned rice vinegar

  • 1 1/2 teaspoons toasted sesame oil

  • 5 to 7 ounce canned tuna (preferably oil-packed), drained

  • 1 celery stalk, thinly sliced

  • 1 (1-inch) piece fresh ginger, peeled and sliced into 1/8-inch matchsticks

  • 2 1/2 tablespoons mayonnaise

  • 2 teaspoons roasted sesame seeds

  • 1-2 tablespoons thinly sliced green onions

  • Nori furikake (optional)

  • Sriracha sauce (optional)

  • Cooked soba noodles or rice

Directions

  • Cook soba noodles or rice according to package directions. If serving salad with onigiri (rice balls), make these once the rice is cool enough to handle and wrap in plastic wrap until ready to serve. Set aside.
  • Place kimchi in a small colander set over a bowl and drain the kimchi. Reserve the kimchi juice. Coarsely chop the kimchi (you should have about 1 cup)
  • In a medium bowl, whisk together 2 1/2 tablespoons of the reserved kimchi juice, rice vinegar, sesame oil and mayonnaise. If you prefer a thicker sauce, add another 1/2 tablespoon mayonnaise. Gently stir in the drained tuna and celery, breaking up the tuna into large chunks.
  • Add the chopped kimchi and ginger, and gently stir to combine. Because kimchi batches taste different, adjust seasonings as needed by adding a bit more vinegar if the salad needs more tang or a few extra drops of sesame oil if you prefer a toasty flavor.
  • Serve over soba noodles or rice or alongside onigiri. Sprinkle salad with green onions, roasted sesame seeds, furikake, and sriracha sauce.

Notes

  • Kimchi tuna salad is best eaten the day it is made, however, any leftovers can be stored in the refrigerator for a few days.
Dinner, Kimchi, Korean, Lactose Free, Recipes, Soups, Vegetarian, Veggies

Kimchi Noodle Soup with Wilted Greens

December 30, 2022

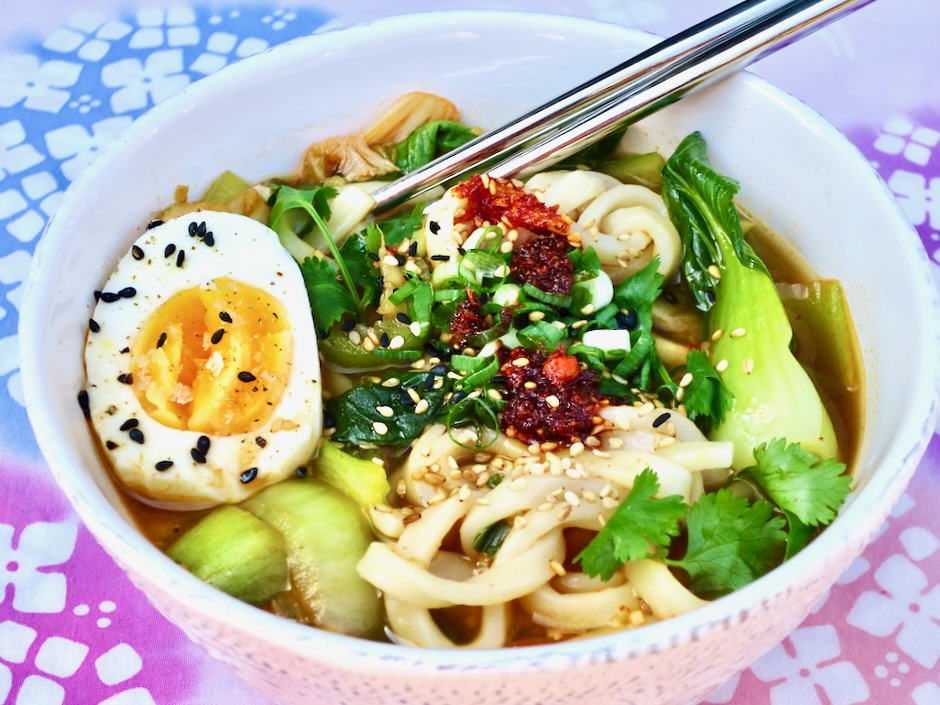
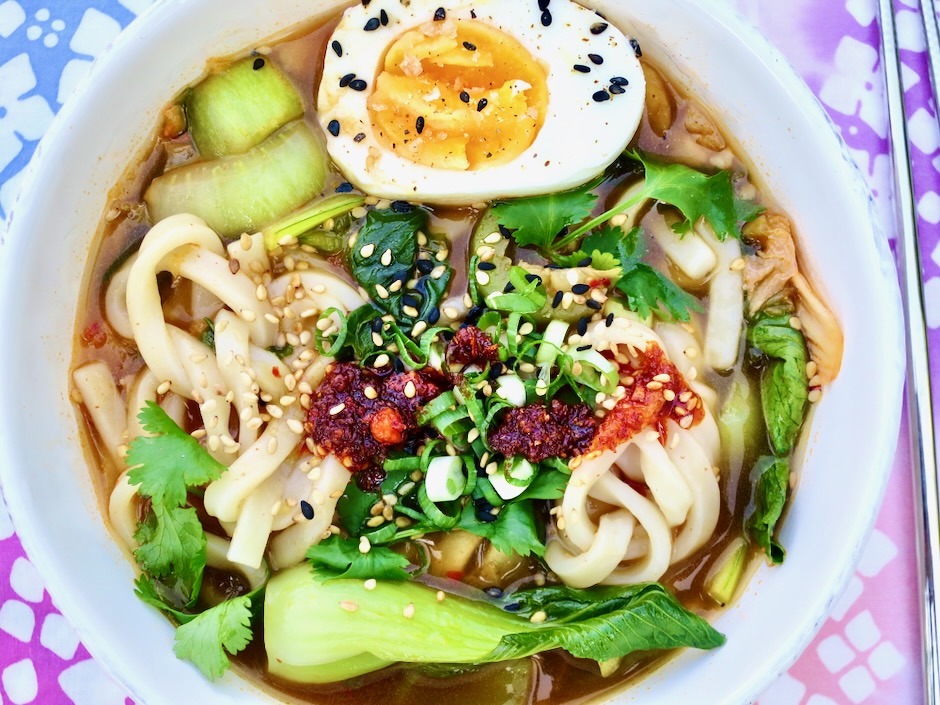
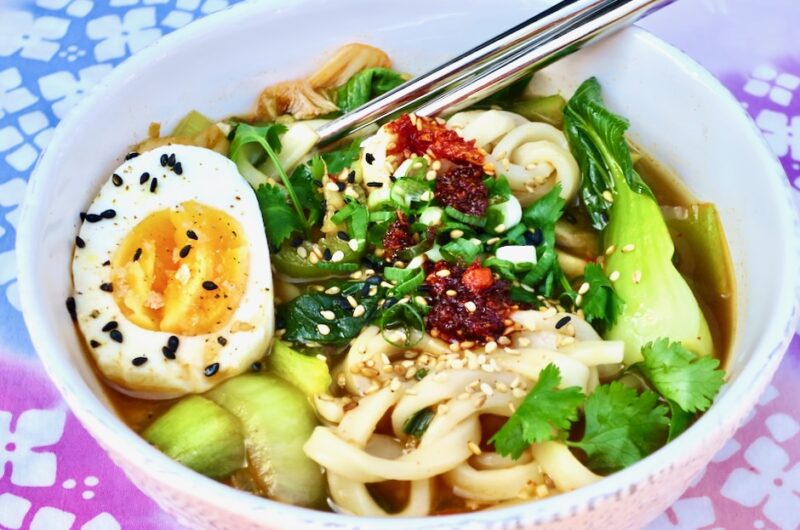
Is there anything more delicious than a bowl of spicy kimchi noodle soup to warm you up? A riff on the beloved Korean dish jjigae (kimchi stew), this easy soup is quick to make and calls for just a handful of inexpensive ingredients. This kimchi soup is warm, spicy, hearty and has lots of umami flavor. Once you take your first bite, you won’t be able to stop until your bowl is completely empty.

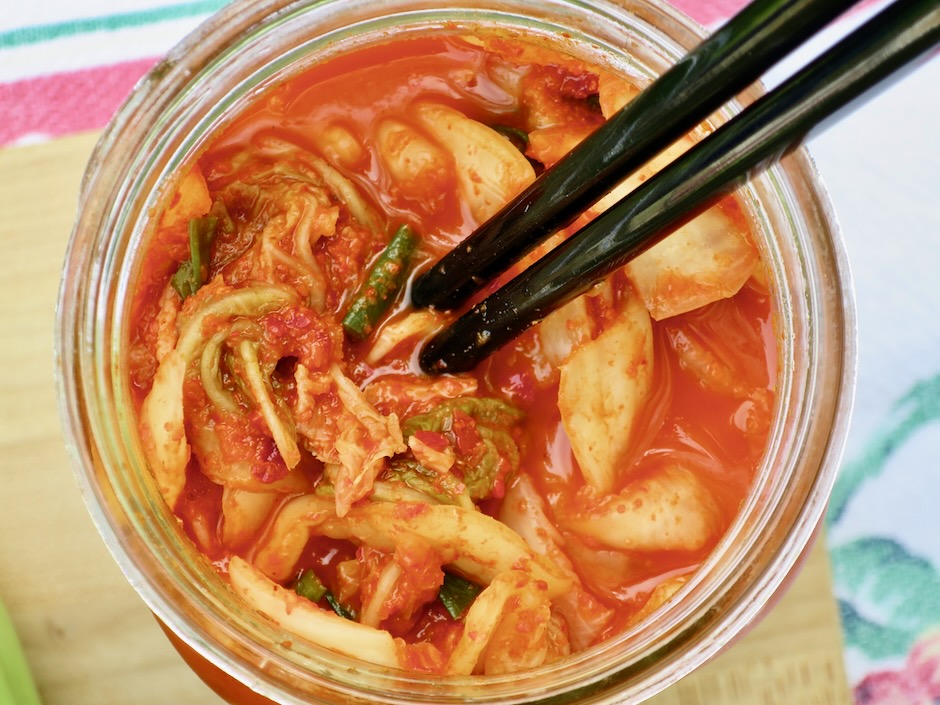
I recently made a big jar of kimchi that was ready to be eaten and wanted to try it in a new recipe. I’ve made kimchi fried rice, cheesy kimchi noodles, and kimchi pancakes , but never kimchi soup. I found this recipe on one of my favorite sites, New York Times Cooking.

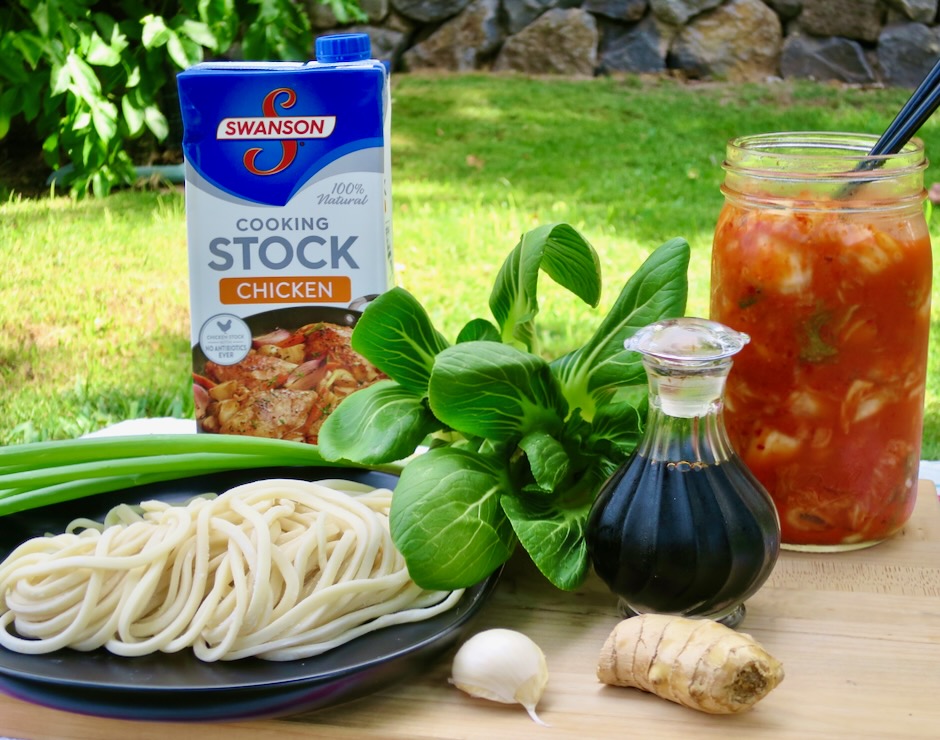
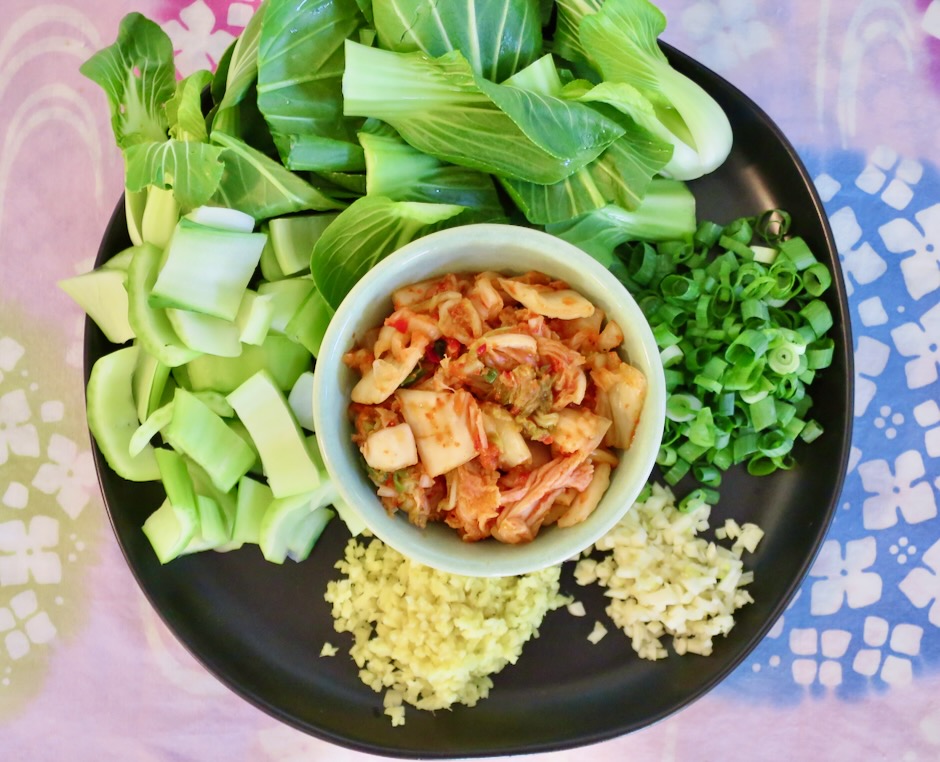
You’ll need just a few ingredients besides the kimchi. If you don’t have homemade kimchi, use your favorite store bought brand.

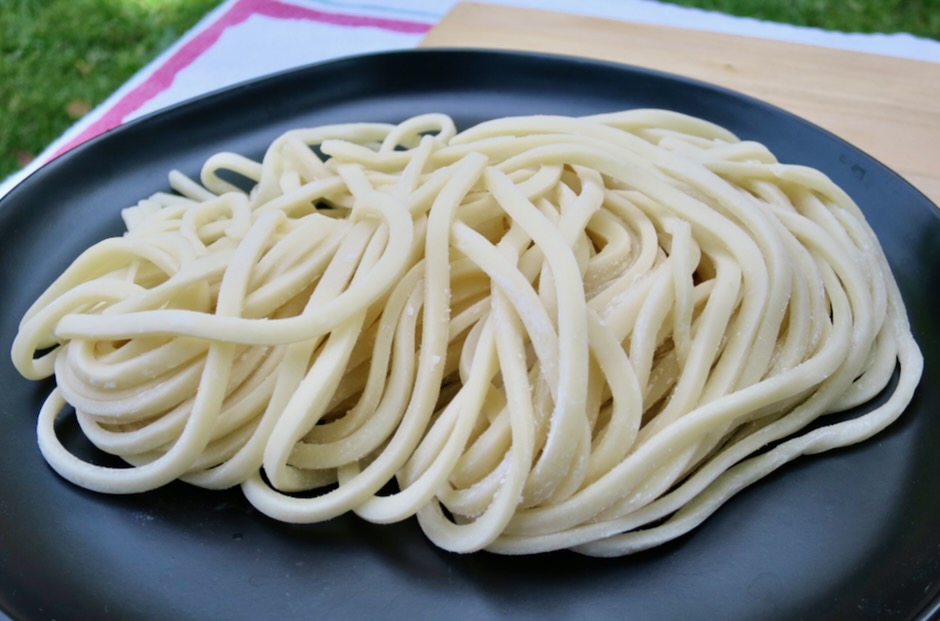
I am particularly fond of Sun Noodle’s fresh udon which are thick, chewy, and oh so delicious. They elevate any dish that calls for udon noodles. Here on Maui they are available at Island Grocery in Kahului so if you’re in the area stop by to pick up a package. Otherwise, feel free to use another brand of fresh or dried udon.

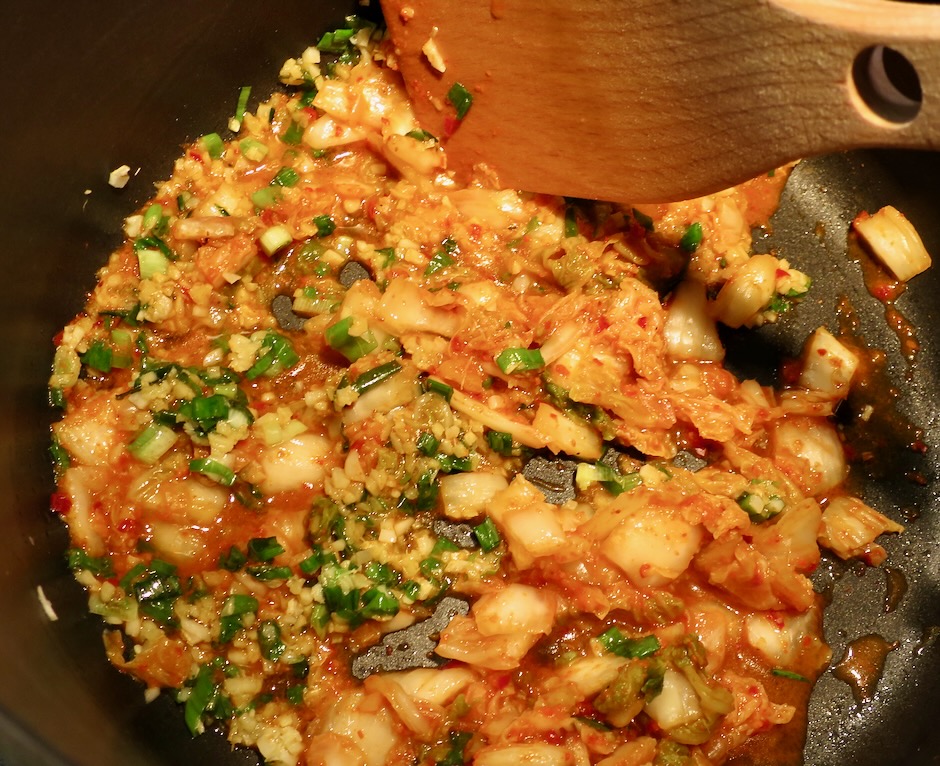
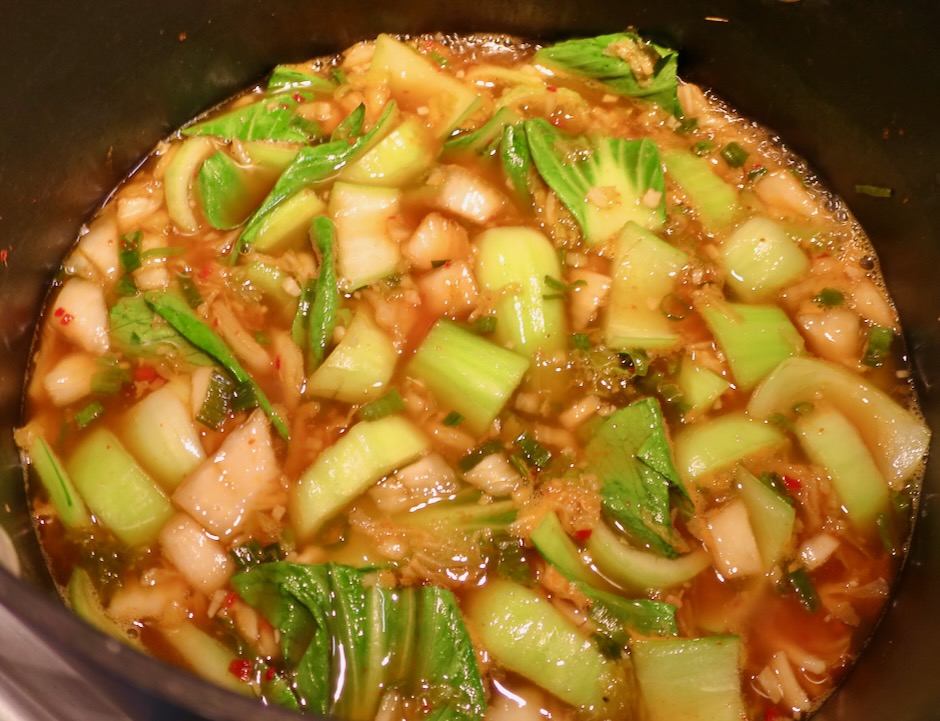
This recipe is pretty straight forward. Once you have all of your ingredients ready to go, the scallions, ginger and garlic are briefly cooked until fragrant. The kimchi and kimchi juice are then added to the pan followed by the stock, soy sauce and greens. Once the greens are tender, the soup is ladled over the udon noodles and garnished with more scallions and sesame seeds. Extra toppings such as a boiled egg and fresh sprigs of cilantro (if you are a fan) and crunchy garlic chili crunch for added heat transform this into a truly memorable bowl of soup.

Kimchi Noodle Soup with Wilted Greens

Recipe by Kiyo
Servings

2

servings

Adapted from New York Times Cooking

Ingredients

  • 6 ounces udon (fresh recommended)

  • 1 tablespoon neutral oil

  • 4 scallions thinly sliced, plus more for garnish

  • 1 (1 1/2-inch) piece fresh ginger, about 1 1/2 tablespoons finely chopped

  • 1 large garlic clove, finely chopped

  • 1/2 cup roughly chopped kimchi, plus 3 tablespoons kimchi juice

  • 2 1/2 cups chicken stock (or vegetable stock for vegetarian version)

  • 2 tablespoons less sodium soy sauce (Kikkoman recommended)

  • 2 cups roughly chopped baby bok choy (substitute with kale or spinach)

  • White roasted sesame seeds, boiled eggs, chili crunch, and roughly chopped cilantro (optional)

Directions

  • Bring a large pot of water to a boil and cook udon according to package instructions. Drain and distribute evenly among two serving bowls.
  • In the same pot used for boiling udon, heat 1 tablespoon neutral oil over medium heat. Add the scallions, ginger, and garlic, and cook until they begin to soften and the garlic is fragrant, about 2-3 minutes. Stir in kimchi and kimchi juice and cook for 1 minute.
  • Add the stock and soy sauce and stir together to combine. Bring to a simmer and stir in your greens. If using baby bok choy, stir in the chopped stems and let simmer for a minute before adding the greens. Allow everything to simmer until the greens are tender and the flavors come together, about 5 minutes. Taste and adjust with salt if needed.
  • Ladle soup over the udon and garnish with scallions and other toppings to taste.

Notes

  • Using baby bok choy adds a nice crisp texture to the soup, however, feel free to use other greens such as spinach or kale.
  • Place the cooked noodles in a colander and run hot water over them to briefly warm them up before adding the soup to the bowl.
Beef, Dinner, Grill, Korean, Lactose Free, Recipes

Kalbi Ribeye

December 23, 2021

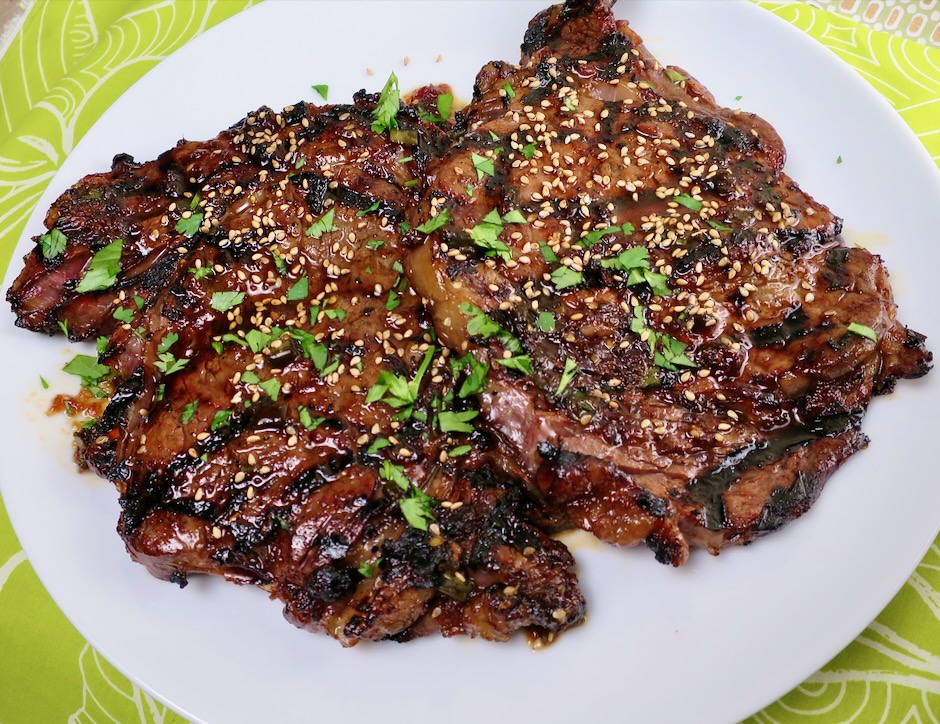
Korean kalbi ribs are a local island favorite in Hawaii.  It is most common to use flanken-style short ribs for this recipe. It is sometimes difficult to find this cut of meat, however, your butcher should be able to accommodate your request. Though this is the most common cut of meat used for kalbi, I found that using a boneless ribeye is superb.  The ribeye is tender and so flavorful.

Ribeye Steaks

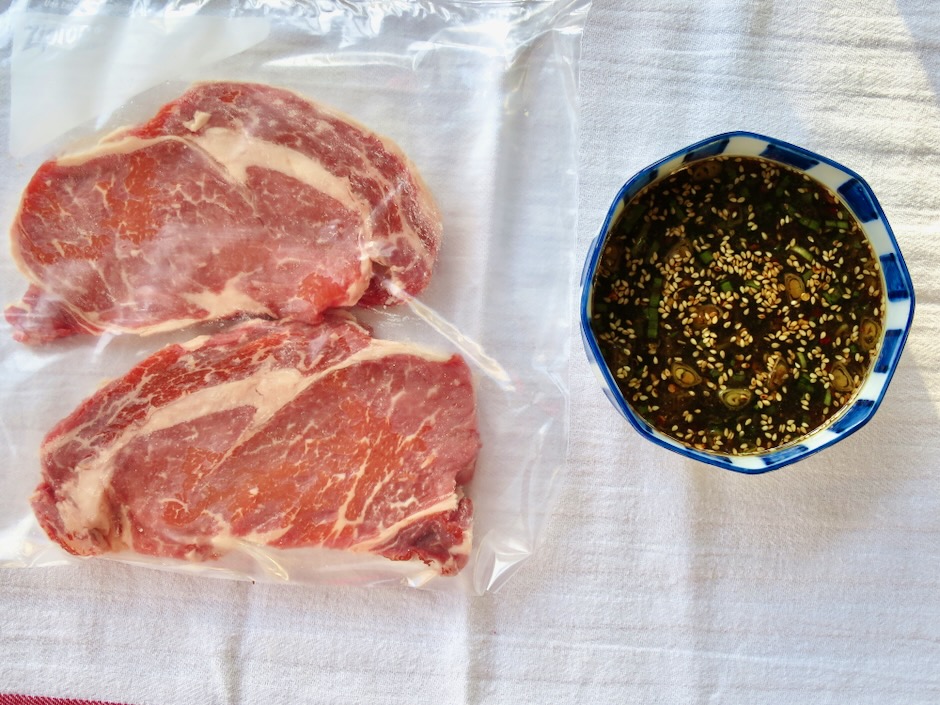
I bought a thick cut ribeye from Whole Foods and asked the butcher to slice it into two thinner pieces. It worked out perfectly for kalbi.

Ribeye Steaks & Marinade

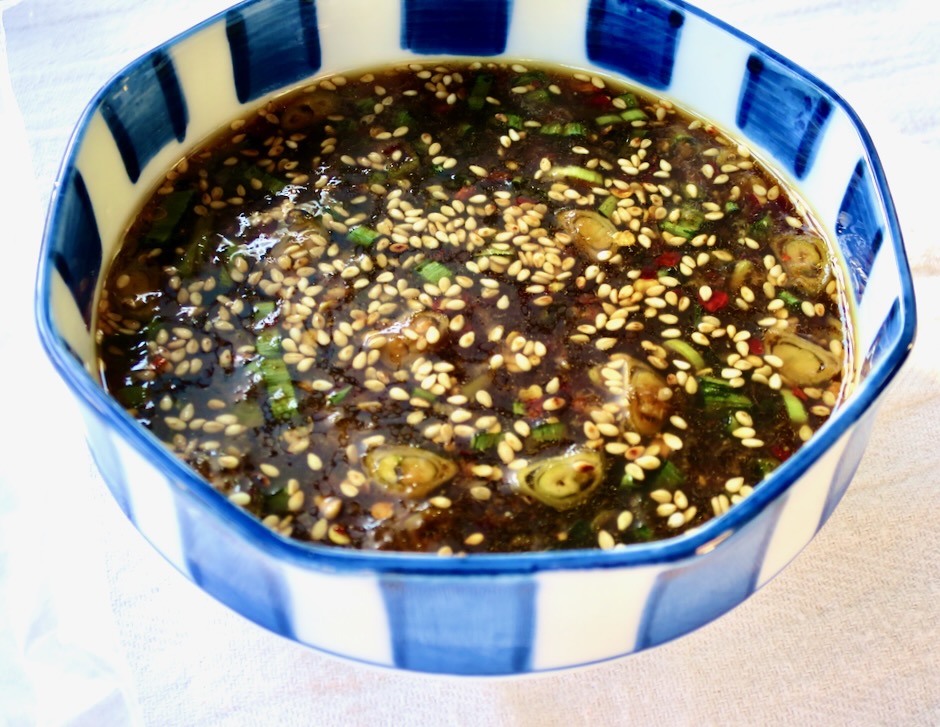
Kalbi Marinade

The marinade is easy to prepare with ingredients you most likely have on hand.

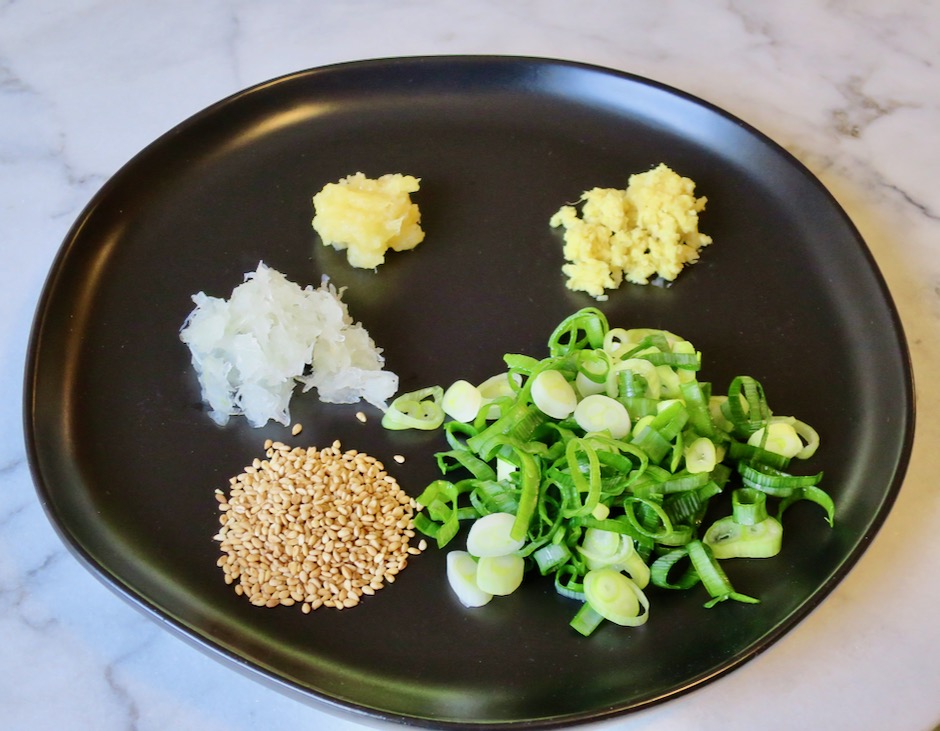
Garlic, Ginger, Green Onions, Sesame Seeds, Onion

The main ingredients for the marinade are garlic, ginger, green onion, sesame seeds and onion.  Though it may seem very ordinary, these common ingredients come together to make the best marinade.

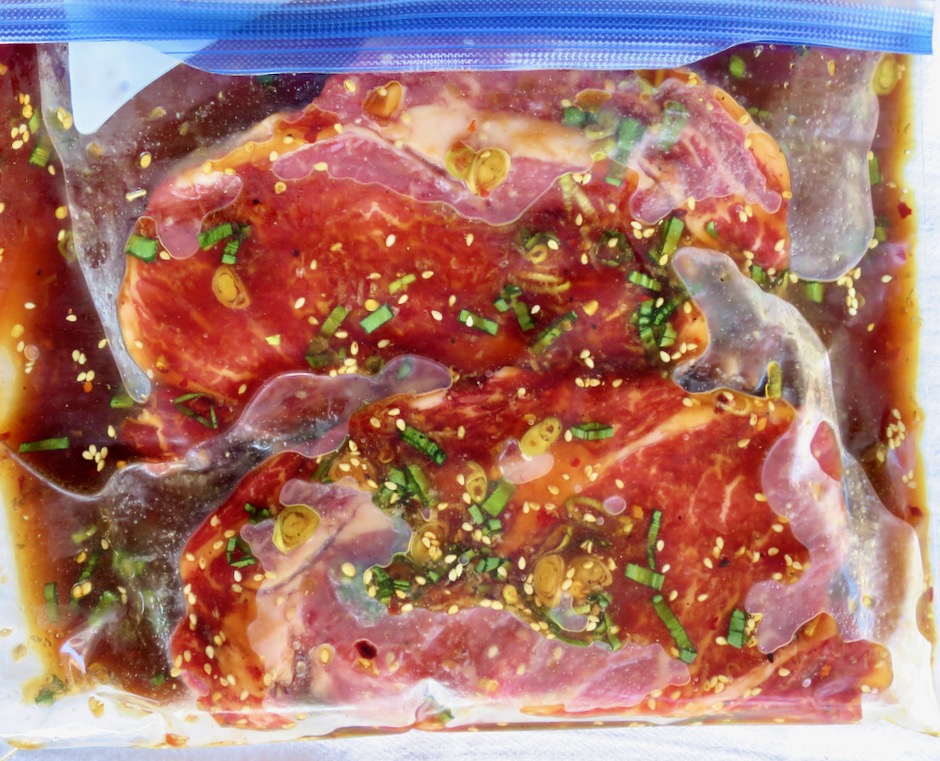
Marinating Kalbi Steaks

I mix up the marinade early in the morning and let the steaks soak up the tasty sauce for about 10 hours.

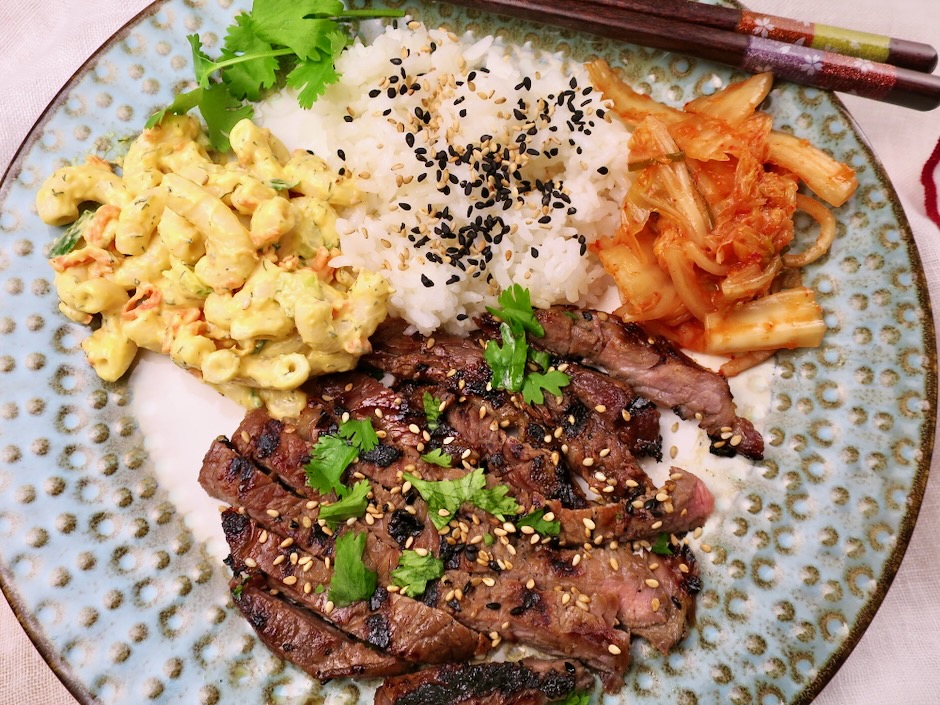
Kalbi Steak, Mac Salad, Rice & Homemade Kimchi

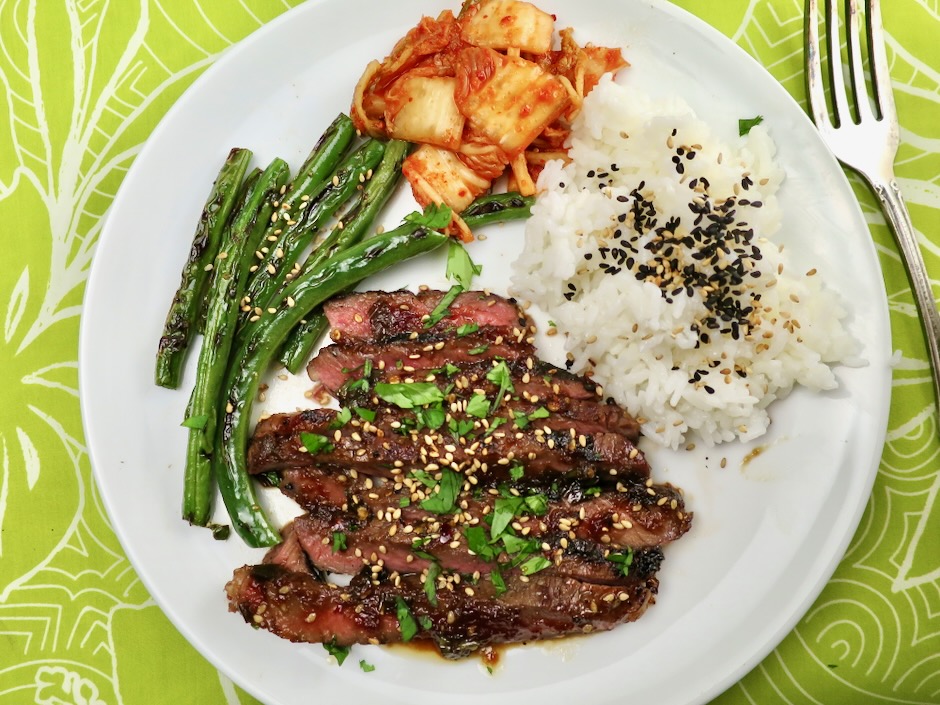
The end result is a delicious kalbi-style ribeye steak that is perfectly seasoned and grilled to perfection.  Sometimes we serve the kalbi with mac salad and homemade kimchi, other times with charred green beans.  Rice is always a part of the meal.

Kalbi Steak, Charred Green Beans, Homemade Kimchi &  Rice

Kalbi Ribeye
 
Author:
Serves: 2
Ingredients
  • 1 thick cut ribeye steak (about 1 pound, cut into two ¾-inch thick each pieces)
  • Marinade:
  • ¼ cup soy sauce
  • ¼ cup mirin
  • ¼ cup sesame oil
  • ¼ cup packed dark or light brown sugar
  • 2 tablespoons water
  • 1 tablespoon finely grated onion
  • 1 tablespoon finely grated garlic (A Microplane works great for the garlic and ginger)
  • 2 teaspoons finely grated ginger
  • 5 green onions finely sliced
  • ¾ teaspoon red pepper flakes
  • 2 teaspoons roasted sesame seeds
  • freshly ground black pepper
Preparation
  1. Whisk together the marinade ingredients in 2-cup glass measuring cup or medium sized bowl. Reserve ¼ cup of marinade.
  2. Place the steaks in a single layer in a ziplock bag. Pour marinade over top and bottom of steaks making sure each steak is coated well. Place bag in the refrigerator for 8 - 10 hours, turning the bag occasionally.
  3. For gas grill: Turn all burners to high, cover and heat grill until very hot, about 15 minutes. Clean and oil grates liberally once grill is hot. Grill steaks for about 5 minutes total, brushing reserved marinade over the steaks and turning several times for an even char. Check temperature with Thermapen or other digital thermometer. Remove when internal temperature reaches 140 degrees.
  4. ***The steaks can also be cooked over a hot charcoal grill.


Breakfast, Dinner, Eggs, Lactose Free, Recipes, Rice Dishes, Side Dishes, Veggies

Kale Fried Rice

March 8, 2021

Kale Fried Rice

There are countless versions of fried rice.  It can be a stand-alone meal or a splendid side dish. Some of my favorites are ramen fried rice and kimchi and Spam fried rice.  Quick and inexpensive, this particular version couldn’t be easier to make.  Leftover brown rice with wilted kale makes for a healthy meal.  I make it regularly and I don’t think I’ll ever tire of it.

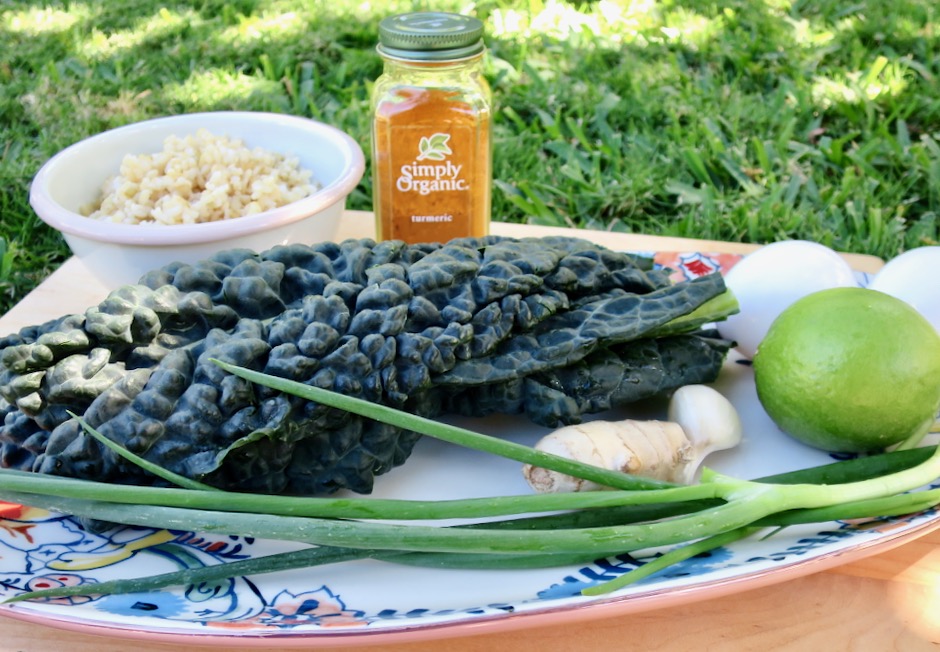
Kale, Brown Rice, Turmeric, Eggs, Lime, Garlic, Ginger, Green Onions

Don’t skip the turmeric.  It’s what gives this dish a slightly earthy flavor and a gorgeous color.

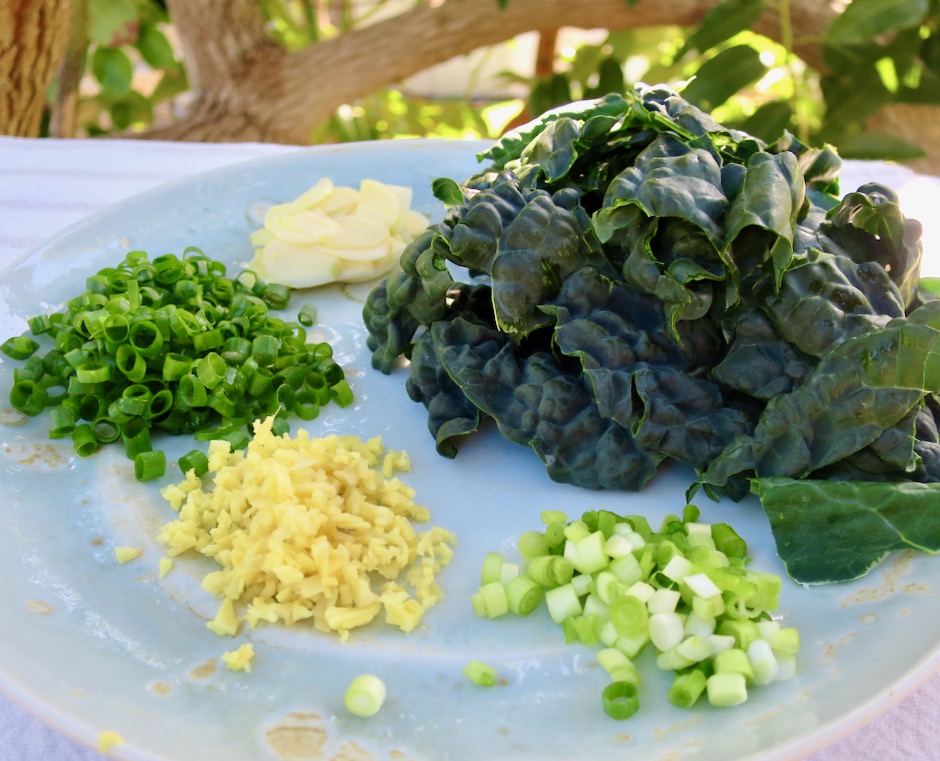
Sliced Garlic, Kale, Light Green Onions, Ginger, Green Onions

Once the rice is warmed and crisped, handfuls of kale get tossed into the pan until wilted.  If your pan is hot enough, some of the kale will get a bit charred.  This adds another level of flavor to the fried rice.

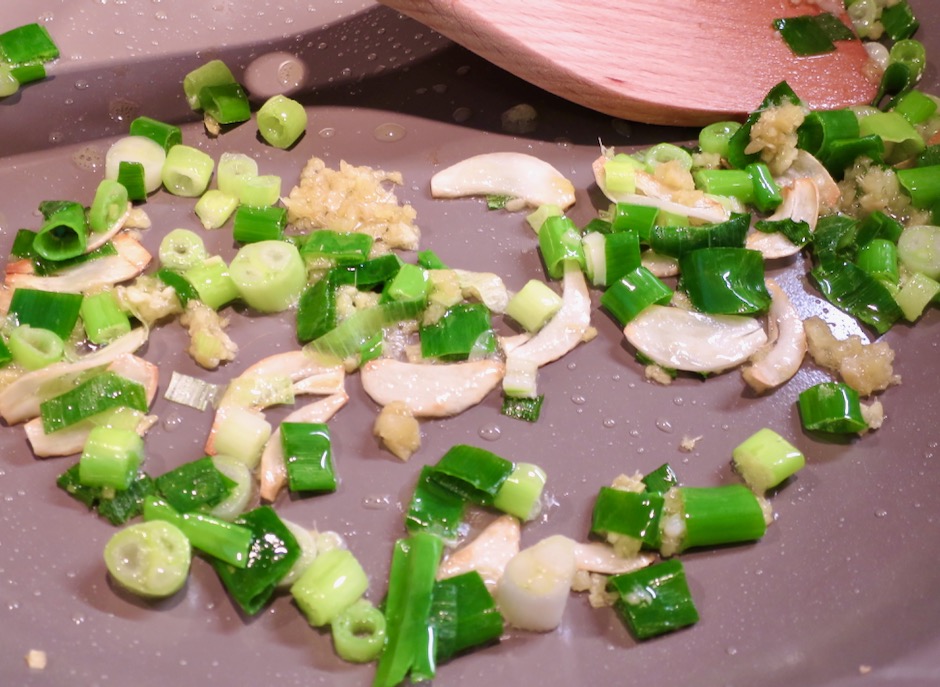
Garlic, Green Onions, Ginger

The garlic is cut into thin slices then lightly browned until the edges are crisp.  Fresh ginger and green onions are stir-fried with the garlic before adding the turmeric and eggs.

Kale Fried Rice

You’ll end up with a gorgeous pan of fried rice that is healthy and delicious.  

Kale Fried Rice

Kale Fried Rice

I like to serve the fried rice with sriracha sauce which adds the perfect kick to this meal.  Sprinkle sliced green onions and squeeze fresh lime juice over the rice just before serving.

Kale Fried Rice
 
Adapted from Bon Appetit
Author:
Serves: 2
Ingredients
  • 6 green onions, thinly sliced (set aside a tablespoon for serving)
  • 2 tablespoons grapeseed oil, divided (or another mild flavored oil such as canola)
  • 2 cups cooked short grain brown rice (day old is best)
  • 1 small bunch Tuscan kale, ribs and stems removed, leaves torn (about 2-3 ounces)
  • 2 small garlic cloves, thinly sliced
  • 1 tablespoon finely chopped peeled ginger
  • ¾ teaspoon ground turmeric
  • 2 large eggs
  • lime wedges for serving
Preparation
  1. Heat 1 tablespoon of oil in a large nonstick skillet over medium heat. Add rice, breaking up any lumps. Pat down into an even layer and cook, undisturbed until beginning to crisp, about 3 minutes. Toss and continue to cook, adding kale by the handfuls and letting wilt slightly before adding more. Toss occasionally, until rice is heated through and all the kale is wilted, about 3 minutes. Season with salt and transfer to a plate.
  2. Heat remaining 1 tablespoon oil in same skillet over medium-low heat. Add garlic, ginger, and green onions, stirring often until garlic is lightly browned (careful not to burn) around the edges, about 1-2 minutes. Turn heat up to medium sprinkle turmeric over, then stir in eggs. Using a pair of chopsticks or a heatproof spatula, blend whites and yolks with garlic, ginger, and green onions until the eggs are barely set. Return rice and kale to the skillet, tossing occasionally until hot, adjusting heat as necessary. Divide fried rice between two plates and top with reserved green onions. Serve with sriracha sauce.


Dinner, Japanese, Lactose Free, Pork, Recipes

Spicy-Sweet Sambal Pork Noodles

May 8, 2019

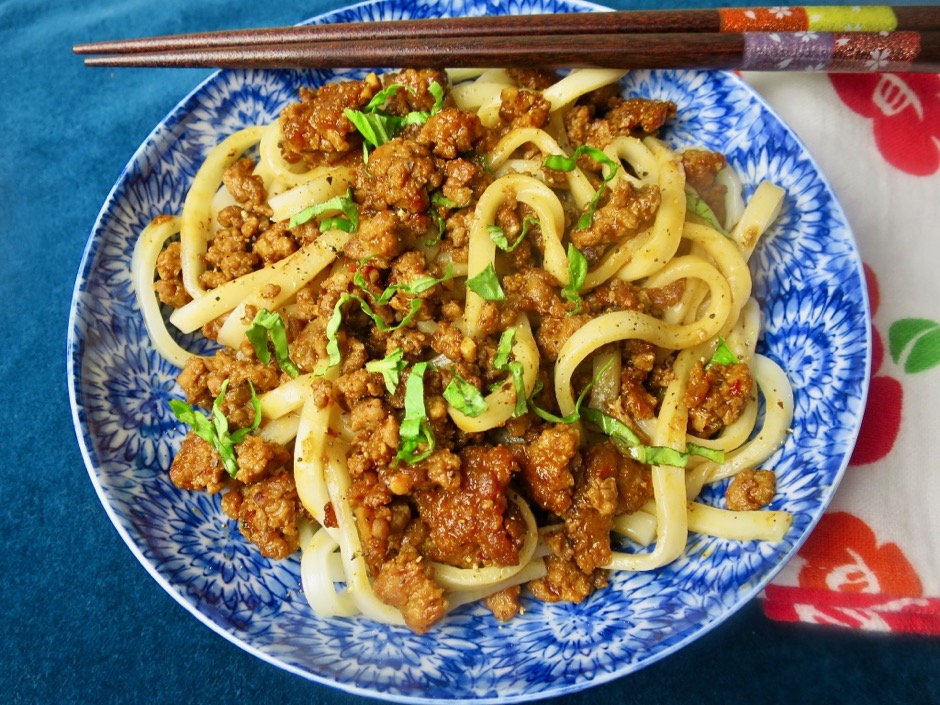
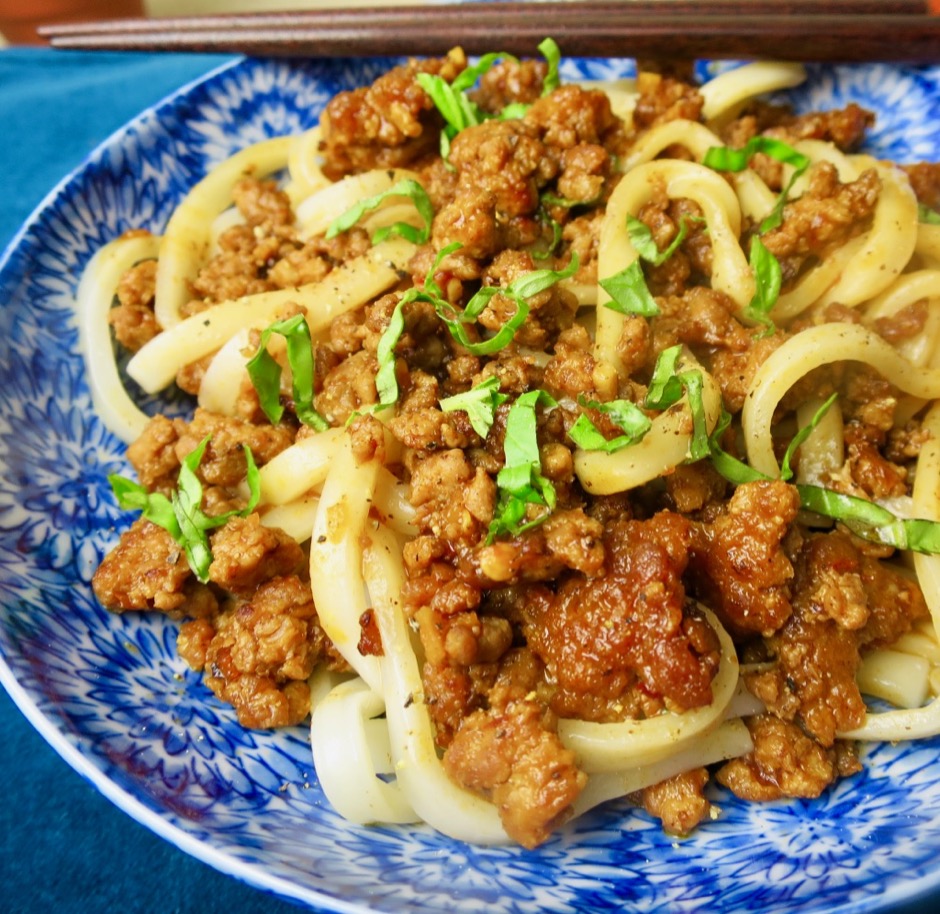
Spicy-Sweet Sambal Pork with Udon Noodles

Leave it to Chris Morocco, Senior Editor of Bon Appetit magazine to come up with this terrific pork and noodle dish.  The flavors of both sweet and spicy along with the crispy bits of pork and chewy noodles can’t be beat.  I made this with fresh ramen noodles and udon noodles. They are both delicious, but if I had to choose one or the other, it would be the udon noodles because they are a bit thicker, springy, and toothsome (ramen noodles are my favorite for soup based bowls).  Luckily, we have some pretty decent fresh noodles available at the markets.

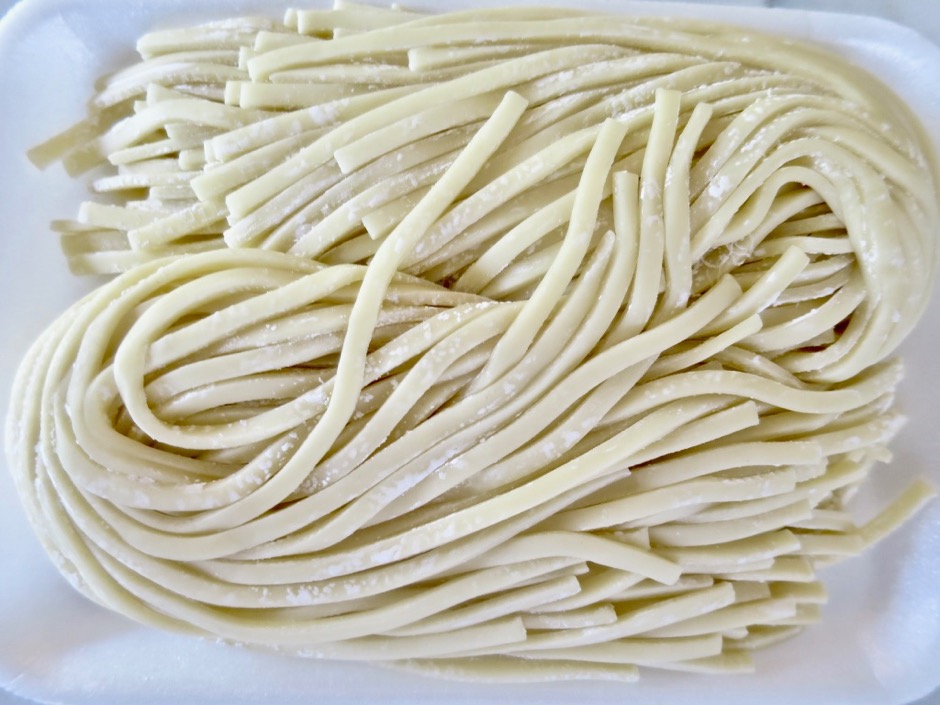
Sun Noodle Fresh Udon

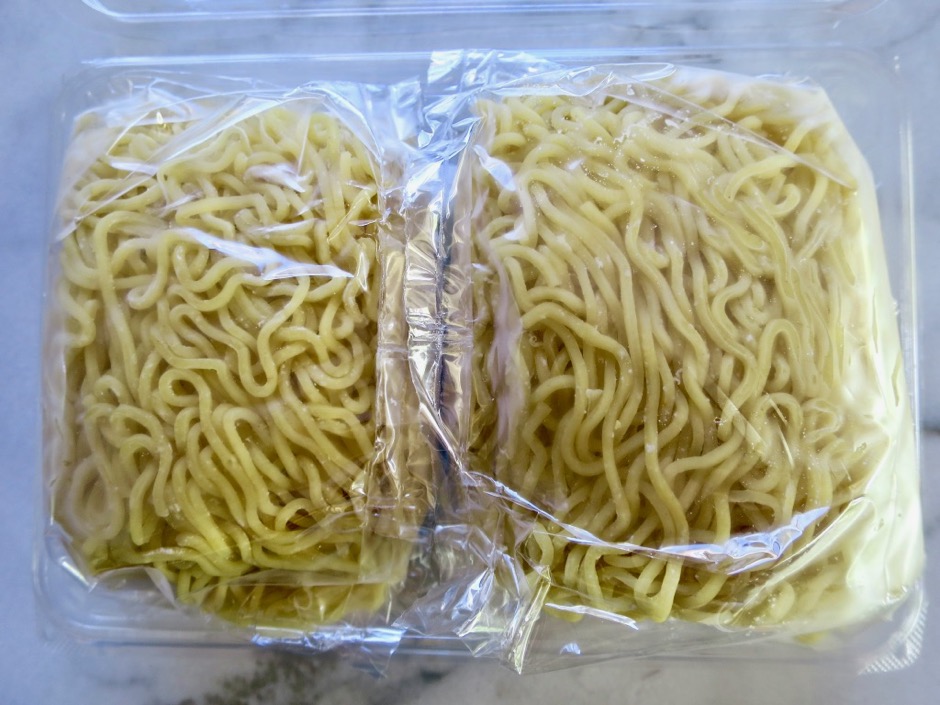
Sun Noodle is one of the largest producers of specialty Asian style noodles.  They make over 300 different types of fresh noodles for markets and restaurants.  Both the ramen and udon are made by Sun Noodle and sold at our local Island Grocery store.

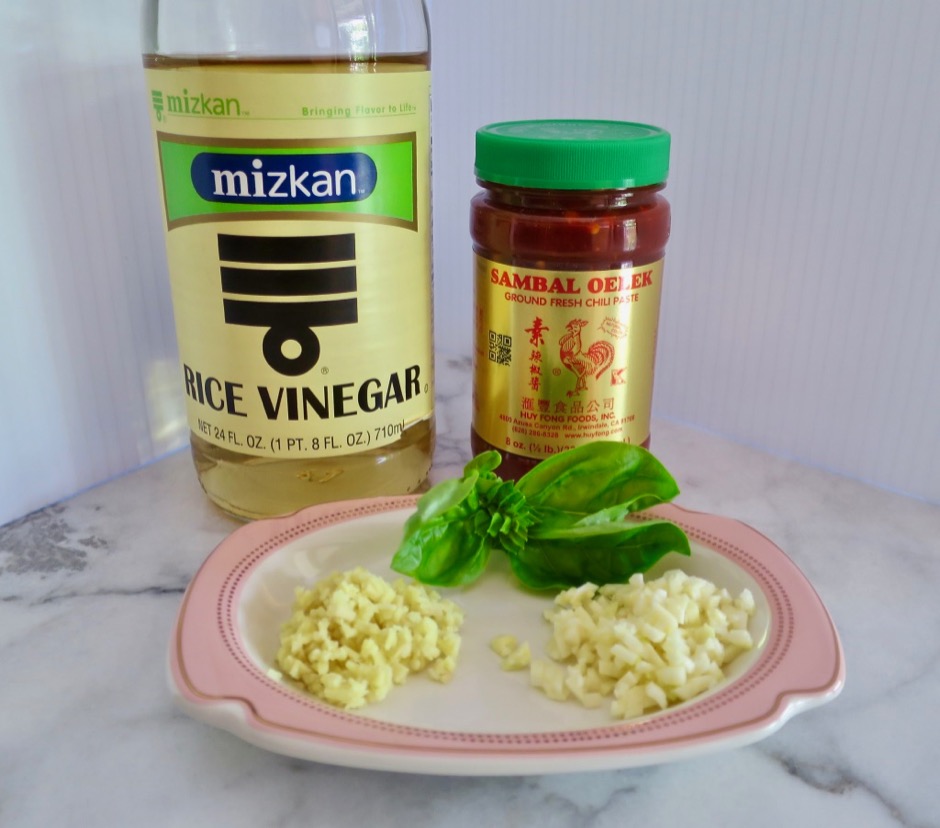
Rice Vinegar, Sambal Oelek, Ginger, Garlic, Basie

A few of the seasoning ingredients are shown above.  There’s also a bit of tomato paste, soy sauce and sugar that gets mixed in with the pork.

Spicy-Sweet Sambal Pork with Ramen Noodles

Don’t skip the basil.  It is an essential topping that brings the dish together just before serving it.

Sun Noodle Fresh Ramen

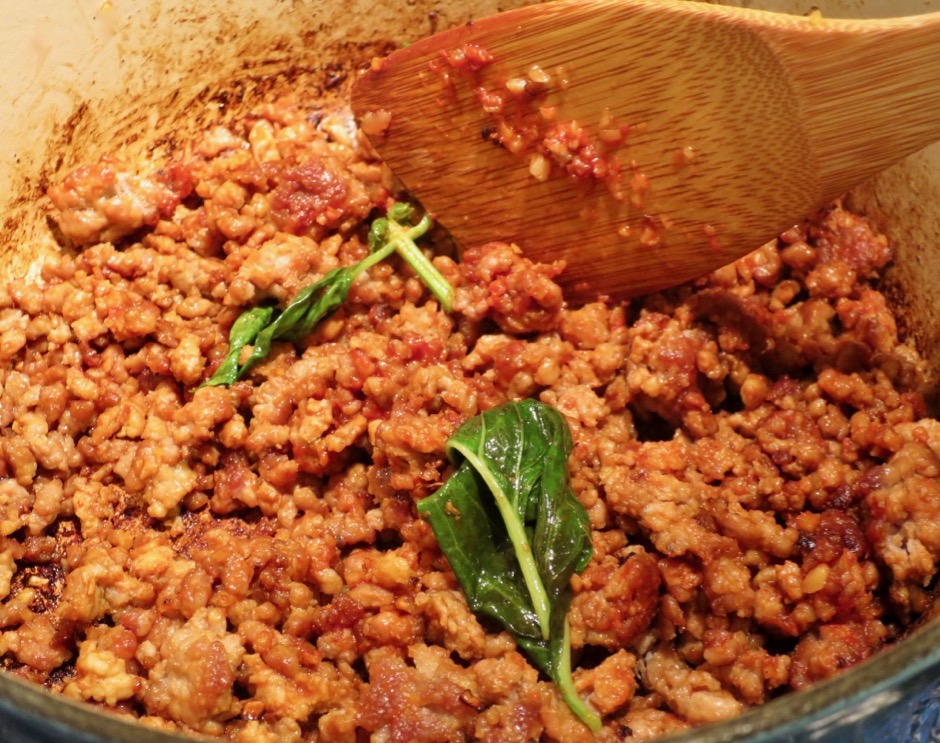
Cooking Pork with Seasonings

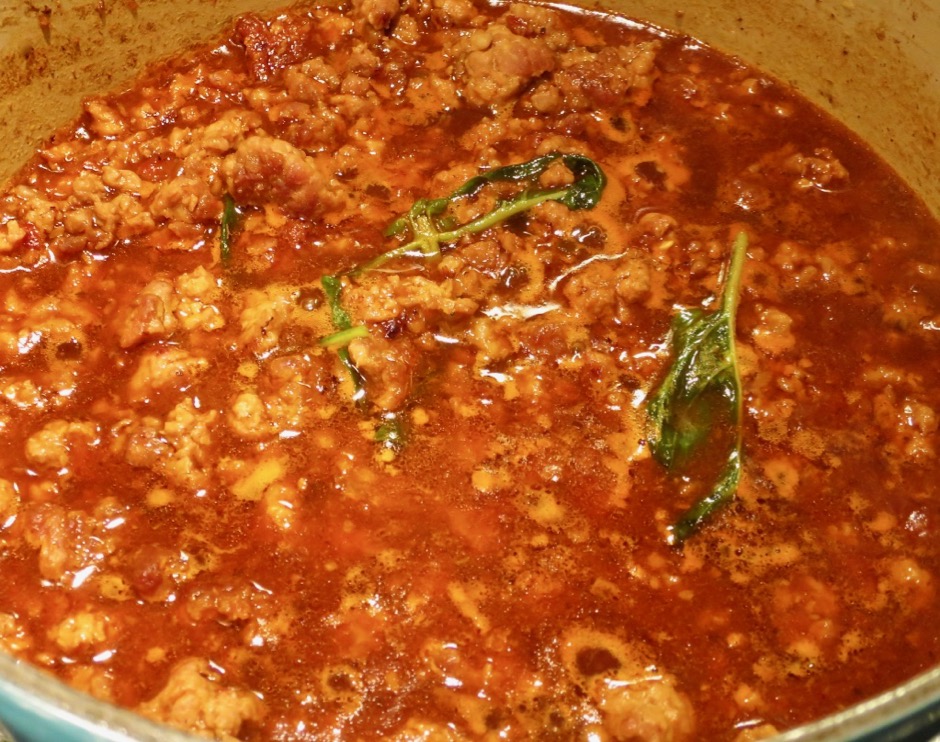
A portion of the pork is first cooked until the edges are crisp.  The rest of the pork and seasonings are added to the pan along with water.  Everything simmers until the sauce is thickened and the flavors have melded.

Simmering Pork

If you happen to have any leftovers (rarely the case) pack it up and take it to work for lunch.

Spicy-Sweet Sambal Pork Noodles

Spicy-Sweet Sambal Pork Noodles
 
Adapted from Bon Appetit Magazine
Author:
Serves: 2-4 servings
Ingredients
  • 1 tablespoon extra virgin olive oil
  • 1 pound ground pork, divided
  • 1-inch piece of fresh ginger, peeled and finely chopped
  • 2 large garlic cloves, minced
  • 1 tablespoon sugar
  • 1 tablespoon tomato paste
  • 2 sprigs fresh basil
  • 2 tablespoons Sambal Oelek ground chili paste
  • ⅛ cup soy sauce
  • ⅛ cup unseasoned rice vinegar
  • ¾ pounds fresh udon or ramen noodles
  • 1 tablespoon butter (optional)
  • kosher salt to taste
Preparation
  1. Heat oil in a large wide heavy pot (Le Creuset works great) over medium to medium-high heat. Add half of the pork, breaking apart into 3 large chunks with a wooden spoon. Cook, undisturbed, until well browned underneath, about 5 minutes. Turn pieces and continue to cook until pork is nicely browned on both sides, about 3-4 minutes longer.
  2. Add ginger, garlic, sugar, and remaining pork to the pot and cook, breaking up pork into small clumps, until meat is nearly cooked through, about 5 minutes, adjusting heat as necessary. Add tomato paste and 1 basil sprig. Cook, stirring occasionally until tomato paste darkens, about 2 minutes. Add chili sauce, soy sauce, vinegar, and 1 cup of water. Bring to a simmer and reduce heat too low. Cook uncovered, stirring occasionally , until sauce is slightly thickened and flavors have melded, about 30 minutes.
  3. Cook noodles per the instructions, in a large pot of boiling salted water (short of al dente). Add noodles to the pot with sauce along with the butter. Add a splash of pasta cooking water if sauce seems too thick. Simmer, tossing occasionally until the sauce begins to cling to the noodles, about 1 minute. Remove basil sprig.
  4. Divide noodles among plates or bowls and top with torn basil.


Beef, Dinner, Korean, Lactose Free, Recipes

Korean-Style Pan-Fried Beef

December 1, 2017

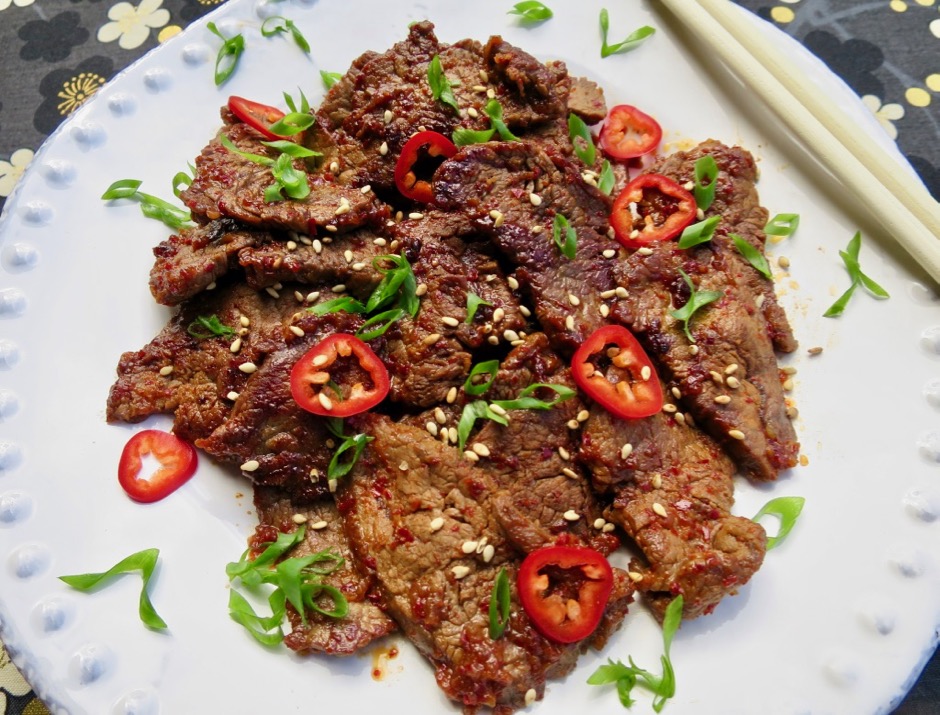
Korean-Style Pan-Fried Beef

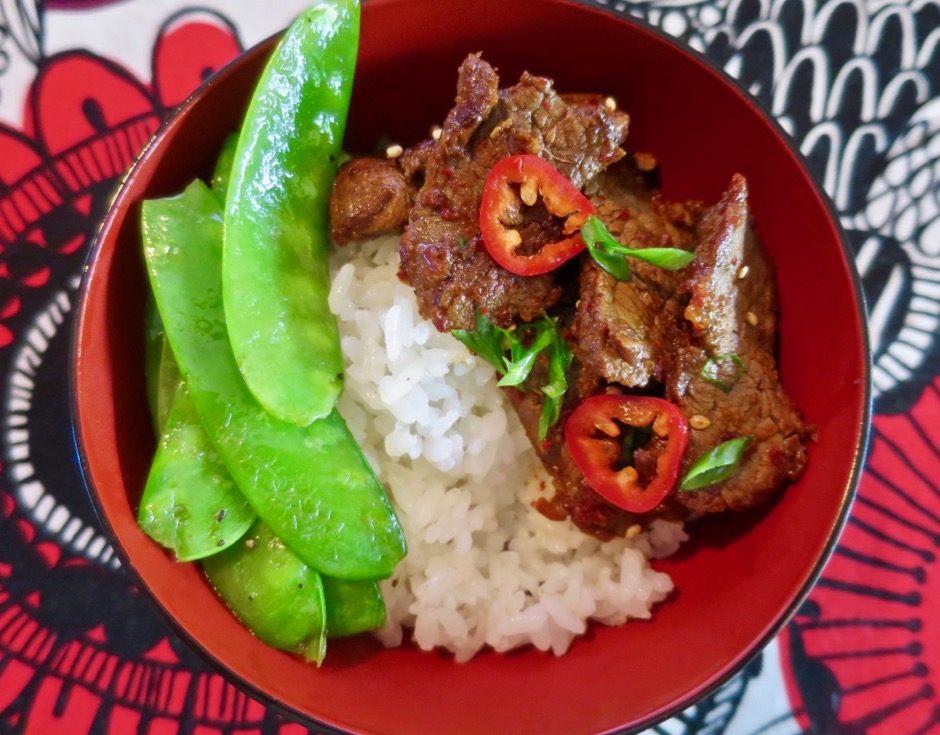
If you want a quick, tasty meal, this Korean-style dish fits the bill.  The thin slices of meat marinate in a flavorful sauce for just 30 minutes.  A quick sear in a hot pan makes for perfectly cooked beef with crisp edges that are delicious served with a bowl of rice.

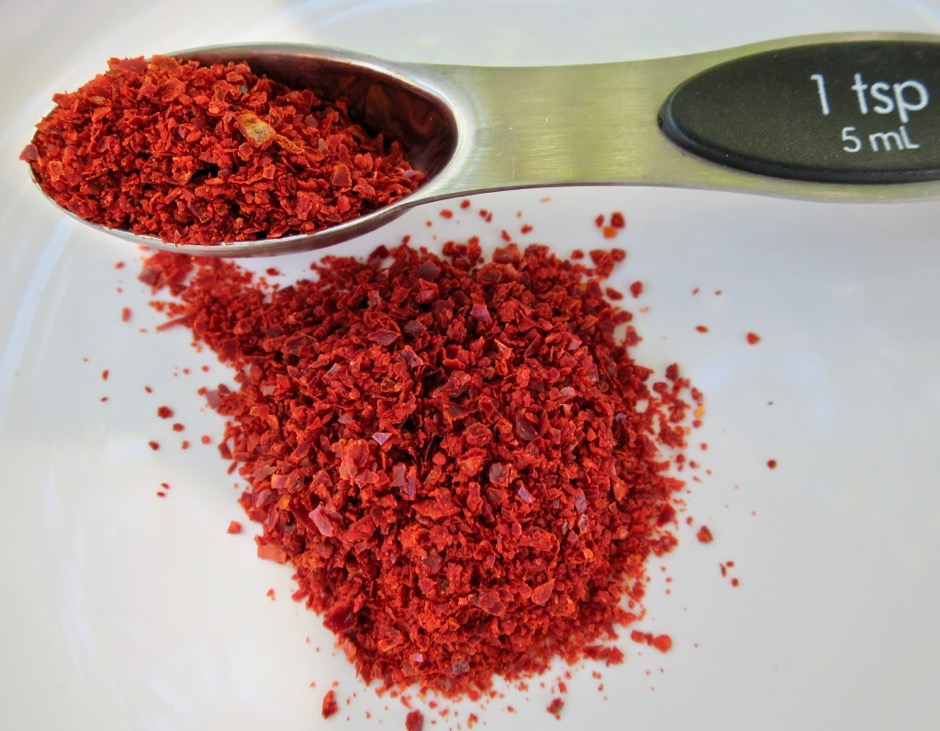
Gochugaru

I am a fan of Whole Spice brand Korean chili flakes (also known as gochugaru).  The chili flakes add a depth of flavor to this, and many other dishes.  Vibrant red in color, mildly spicy, slightly smoky and sweet at the same time, it’s an essential seasoning for Korean cuisine.

Asian Pear

Marinade

This meal is ready in just about 45 minutes from start to finish.  The bold flavors in the sauce are what make this dish stand out.  The key is to cut your meat in to thin slices so that it marinades and cooks quickly.

Korean-Style Pan-Fried Beef

Korean-Style Pan-Fried Beef
 
Adapted from Bon Appetit Magazine
Author:
Serves: 2
Ingredients
  • 2 tablespoons grated pear
  • 1 small garlic clove, grated
  • 2 tablespoons soy sauce
  • 2½ teaspoons gochugaru
  • 2 teaspoons finely grated ginger
  • 1 tablespoon light brown sugar
  • 1 tablespoon sesame oil
  • 8 ounces filet mignon, cut into thin strips (you may opt to use another cut of beef, chicken or pork)
  • canola oil for pan frying
  • sliced green onions for serving
  • Fresno pepper (optional)
  • roasted sesame seeds (optional)
Preparation
  1. Combine the grated pear, garlic, soy sauce, gochugaru, ginger, brown sugar and sesame oil in a medium bowl. Add sliced beef and toss to coat each piece well. Cover and refrigerated for 30 minutes.
  2. Heat 1 tablespoon vegetable oil in a large skillet over medium-high heat. Remove meat from marinade and season lightly with kosher salt. Working in batches and adding more oil along the way if needed, cook meat in a single layer without moving until lightly browned, about 1 minute. Continue to cook tossing occasionally until cooked through and crisp at edges, about 1 - 2 minutes longer.
  3. Transfer to a plate and serve topped with green onions, sliced Fresno peppers and roasted sesame seeds.


Follow

Get every new post delivered to your Inbox

Join other followers: