Bread, Breakfast, Dinner, Lactose Free, Recipes, Side Dishes

Chive Biscuits

January 11, 2013

Chive BiscuitHere it is, January which is supposed to be our “winter.” Usually we are 10 degrees cooler this time of the year but it feels like summer.  I bought a pretty Nic & Zoe sweater on my last trip to Oahu and I still haven’t had the opportunity to wear it.  Lord love a duck!

Chives
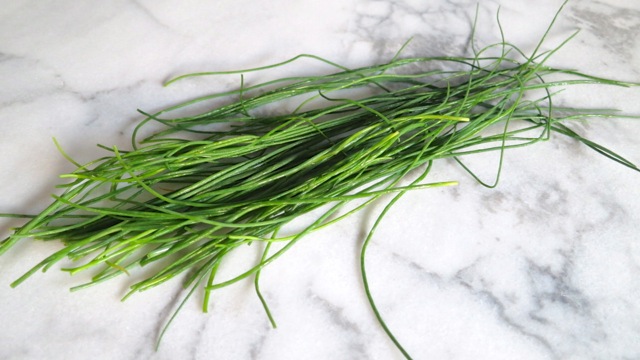
With this unbelievable weather you’d think that all the herbs in the garden would be flourishing.  Unfortunately the chives took a dive.  They’ve been replanted  a few times, moved from their original spot and have always done well.  The Italian parsley has grown into a huge bush and towers over the chives which aren’t getting their share of sunlight.  I was able to collect just enough to use in this recipe I adapted from Serious Eats.

Chive Biscuit DoughIt takes just 30 minutes to make these biscuits.   If you don’t have chives you can substitute tender green scallions.

Baked Chive Biscuits

Biscuits & Butter

Chive Biscuits 

Makes 12 Biscuits

Ingredients

2 cups flour

1 cup cake flour

3 teaspoons baking powder

2 teaspoons sugar

3/4 teaspoon salt

1/2 teaspoon baking soda

1/4 teaspoon pepper

1 stick Earth Balance Buttery Sticks cut into small cubes

1/4 cup minced chives or more if you prefer

12 ounces Green Valley lactose free plain yogurt plus 4 tablespoons lactose free milk to measure 1 3/4 cups total

Preparation

Preheat oven to 425 degrees

In a large bowl sift flour, cake flour, baking powder, sugar, salt and baking soda.  Whisk in pepper.

Add cold cubes of Buttery Sticks to flour mixture.  Use a pastry blender to combine butter with dry ingredients until the texture resembles coarse meal.  Alternately place dry ingredients in a food processor, add Buttery Sticks and pulse until a coarse meal texture forms.

Add chives and yogurt mixture to dry ingredients and stir until combined.  Turn dough onto a floured surface and knead up to 6 times.  Pat dough into a 1 inch round.  Use floured biscuit cutter to stamp out 12 biscuits and place on a large cookie sheet or jelly roll pan.

Bake for 12 -15 minutes, turning the pan once half way through the baking time.  Transfer the pan to a cooling rack.  Serve right away while still warm.  These biscuits are really good split and toasted until crispy and brown served alongside poached or fried eggs and crispy bacon.

***Feel free to use regular butter, yogurt and milk in place of lactose free products

Japanese, Reviews

Sushi Paradise ~ Maui

January 4, 2013

Spicy SalmonChef Watanabe-san at Sushi Paradise makes the finest sushi on Maui.  Sushi Paradise is  a tiny restaurant with just a few tables in the dining room and few seats at the sushi bar.  He is a one-man operation.  On the night we dined there, a couple who didn’t have a reservation strolled in and luckily found two seats at the sushi bar.  The server let them know they would be waiting at least a half hour before their sushi order arrived. They placed their order left to do some shopping at the stores in the complex and promptly returned in time for their sushi order to be placed in front of them!  Now that’s what I call making good use of your time.

EdamameEdamame is always a tasty way to start the evening.  Place your sushi order and nibble on these salty pods with your cold beer or sake.

California RollCalifornia Roll.

ToroToro. Sublime!

Shrimp Tempura Roll Shrimp tempura roll.

Seared SalmonSeared salmon lightly wrapped with a pat of rice and topped with finely grated toppings served with ponzu sauce.

Spicy ScallopSpicy scallop roll.

Maguro & HamachiMaguro and Hamachi.

Veggie RollThis veggie roll is the best I ever tasted.  Crunchy ingredients perfectly wrapped in creamy avocado slices.

Watanabe-san at Sushi Paradise makes some of the best sushi we have ever eaten and he does not compromise by serving mediocre ingredients to his customers. Everything we ordered was fresh and delicious and of the best quality imaginable.  Simple touches such as ground sesame seeds on the takuan pickles makes this place special. If you love sushi, as we do, you will find no finer than at Sushi Paradise!

Japanese, Recipes, Rice Dishes, Side Dishes

Japanese Sushi Rice

December 30, 2012

Sushi RiceThis is a simple variation on sushi rice or Chirashi Sushi which means scattered sushi. Hot rice is mixed with a vinegar sauce (sushi meshi) and colorful toppings are added.  It’s an excellent side dish that goes especially well with grilled teriyaki chicken, beef, fish or tofu.  If you want to make it in advance, I suggest making it the same day you plan to serve it since rice tends to dry out and harden the longer you refrigerate it.

Benriner

Let me introduce you to the Benriner.  It is made in Japan and comes with assorted blades and a small plastic guide.  I’ve had my Benriner for about 20 years.  It is not fancy and as you can see this model has no container attachment for storing vegetables and I like that because it fits in your drawer without taking up too much space.  You can find this at Amazon.com

Carrot & Green Beans

Red GingerPickled Red Ginger.

TakuanTakuan (pickled radish).

Takuan & Pickled Red  GingerTakuan and red ginger.

Japanese Egg PanThis little Japanese rectangular egg pan makes it simple to slice the egg into thin slivers once cooked.

Sushi Rice

Sushi Meshi

2 cups short grain white rice (uncooked and rinsed well)

1/3 cup rice vinegar (not seasoned)

3 tablespoons sugar

1 teaspoon salt

Vegetables

12 green beans – sliced thin

1/2 medium carrot, julienned and cut into 1/3 inch lengths

1 1/2 tablespoons soy sauce

1 tablespoon sugar

1 tablespoon sake or dry sherry

1/2 cup water

1 tablespoon red ginger – finely chopped

1/3 cup takuan, finely diced

1 egg scrambled and fried (do not brown) sliced in thin strips (optional)

White and black roasted sesame seeds

Preparation

Cook 2 cups of short grain white rice. When the rice is done have the vinegar sauce ready and do not open the rice cooker until you are ready to add the sauce.  The rice must be hot.

For the vinegar sauce combine rice vinegar, sugar and salt in a small pot and heat on medium heat until sugar has dissolved, stirring occasionally.  Pour sauce into a small measuring cup and set aside.

While the rice is cooking prepare the vegetables.  Rinse out the pot you used to make the vinegar sauce and combine soy sauce, sugar, sake or sherry and water.  Bring to a simmer on medium heat then add the green beans and carrots.  Turn heat up to high and cook for about a minute  then remove from the heat and set aside.  You want to blanch the beans and carrots and not overcook them.  Once cool enough to handle, drain and squeeze out the excess moisture.  Set aside.

You can use as much or little of the red ginger and takuan that suits you.  The ginger has a little kick to it though once you add it to the rice you will barely notice it.  Takuan is pickled radish and has some sweetness to it.  Drain both the ginger and takuan on paper towels before you chop them.  Start with a smaller amount if you are unsure.  You can always add more.

When the rice is done use a rice paddle and lightly toss the rice so that it is not clumped together.  Quickly put the rice into a large baking dish (Pyrex works well) and slowly add the vinegar sauce drizzling it evenly over the rice tossing gently to mix while fanning madly with a paper fan.  Trying to do this all at once by yourself might seem tricky but there is a good reason to this fanning procedure.  It helps the hot rice soak up the vinegar sauce without the rice becoming mushy.  I don’t have a paper fan so I use a small hairdryer and turn it to low/cool and voilà, it works like a charm.  Bribing a family member to help you is even better.

Add the green beans, carrots, ginger and takuan to the rice and toss gently.  Now’s the time to transfer the rice to your serving bowl.  Top with the sliced egg if using, and sprinkle with sesame seeds before serving.

Dinner, Mexican, Pork, Recipes

Carne Adovada Tamales

December 17, 2012


It’s December and the weather has definitely changed.  It is now pleasantly cool in the mornings and evenings.  This slight change means a lot to those of us who live in Hawaii.  After 6 months of near 90 degree weather we’re ready for a little break in the heat.  With the onset of cooler weather tamales are the perfect dish to share with your friends.  Recently I made slow cooked Carne Adovada.  My plan was to have carne adovada burritos for dinner and freeze the rest for tamale filling.

Making masa dough is very easy.  The recipe contains just a few ingredients and the preparation is not time consuming.

What’s a tamal without sauce and rice?

Carne Adovada Tamales (makes about 20)

Masa Dough recipe adapted from Epicurious

Carne Adovada recipe available here

Ingredients (Dough)

1 cup solid vegetable shortening

1 1/2 teaspoons salt

1 1/2 teaspoons baking powder

3 1/2 cups masa harina (about 17 ounces)

2 1/4 cups warm water

1 1/2 cups (about) chicken broth

Preparation

Fill the bottom of a deep pot with 2 inches of water.  The pot needs to be tall enough for the tamales to stand upright while they steam.  A pot with a steamer insert is ideal however a large vegetable steamer basket works just as well.  If the vegetable steamer basket seems too low, prop it up with a few wads of crumpled foil under the legs so there is space between the water and steamer basket.

Corn Husks

Select the bigger corn husks and rinse them under cold water.  Bring a large pot of water to a boil.  Turn off the heat and submerge the corn husks in the water to soften (for 1 hour).  Place softened corn husks on a kitchen towel and pat dry.  Tear off narrow strips to use as ties for your tamales.

Masa Harina & Filling

Shred your carne adovada, beef or chicken filling and set aside.

Combine masa harina with warm water.

In a large, separate bowl, beat vegetable shortening, salt and baking powder with an electric mixer until fluffy.

Beat in masa harina mixture in 4 additions.  Reduce speed to low and gradually beat in 1 1/4 cups broth forming a soft, tender dough.  If the dough seems firm, add more broth 2 tablespoons at a time until you achieve the right texture.

Spread about 1/4 cup dough in a 4 inch square in the center of each corn husk.  Spoon a heaping tablespoon of filling in a strip down the center of each square.  Fold long sides of husks and dough over filling (gather both ends of husk and bring together so that filling is covered by masa).  Fold up narrow end (bottom) of husk and secure with a strip of corn husk.  With another strip of corn husk gently tie around the tamale, about an inch below the masa filling (leave the top of the tamale open).  Try not to tie too tight, the tamale will expand as it cooks.

Place tamales upright in your prepared steamer.  Bring water to a boil, turn down heat and cover the pot.  Steam the tamales for approximately 1 1/2 – 2 hours, or until the dough is firm to the touch and separates easily from the husk.  You may place a thin kitchen towel between the pot and lid to absorb some of the water from the steam.  Check the water level occasionally adding more as necessary (setting a timer is a good reminder to check the water now and then).

Serve tamales with adovada sauce, rice and black beans.  They freeze well.

Dinner, Japanese, Recipes, Vegan, Vegetarian, Veggies

Cucumber & Carrot Namasu

December 5, 2012

Pickles are addictive.  Crunchy, tangy goodness in every bite.  Namasu is a simple Japanese pickle that’s ready in an hour.  Not only is it quick to make, there are just 6 ingredients.  It can double as a refreshing tangy-sweet salad.

The first 3 ingredients – Cucumber, Ginger & Carrot.

It’s easy to make attractive carrot florets with a knife and steady hand.

Grated ginger adds a refreshing flavor to the vegetables.

Beautiful pickles, Japanese style.

Cucumber & Carrot Namasu (Japanese pickles)

Ingredients

1 large English or 2 Japanese cucumbers

1 medium carrot

1/2 cup unseasoned rice vinegar

1/4 cup sugar

2 teaspoons grated ginger

1/4 teaspoon salt

Preparation

Cut the cucumber in half diagonally and peel thin strips of skin off of each half.  Cut each piece of cucumber in half, lengthwise.  Remove seeds.  Slice the cucumber into 1/4 inch pieces and set aside.

Peel the carrot and cut into thirds.  With a small, thin knife cut narrow lengthwise grooves in the carrot to make a floret shape (about 5 cuts if the carrot is thick, 4 if the carrot is very thin).  Using a mandoline or sharp thin knife slice the carrot into florets.

Peel ginger and finely grate, set aside 2 teaspoons.

Mix 1/2 cup unseasoned rice vinegar with 1/4 cup sugar and 1/4 teaspoon salt until sugar and salt has dissolved.  Add 2 teaspoons grated ginger.

Combine cucumbers, carrots and vinegar mixture in medium size bowl.  Cover and refrigerate for at least 1 hour.  Cucumbers and carrots will become delightfully crispy when chilled.   The pickles will keep well in the refrigerator for a couple of days.  These pickles go well with tofu or grilled teriyaki chicken.

Follow

Get every new post delivered to your Inbox

Join other followers: