Eggs, Recipes, Salad, Side Dishes, Veggies

Super Spinach Salad with Bacon & Eggs

July 19, 2013

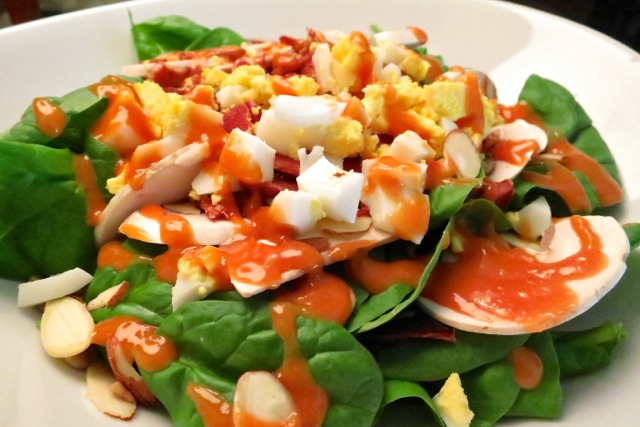
Spinach SaladSmokey, crispy, salty.  Those three words describe one of my favorite foods: bacon.   Served for breakfast alongside poached or fried eggs, stacked on your favorite bread with a big slice of tomato or crumbled over your favorite mac & cheese recipe, it is divine.  A few pieces of crumbled bacon will turn any salad into a scrumptious salad.  I adapted this  recipe found on Epicurious by making a few adjustments to the dressing as well as the salad ingredients.  The 1/4 cup brown sugar made the dressing too sweet and the 1/2 onion was overpowering.  Cutting back these two ingredients as well as adding less oil made a perfectly balanced dressing with a hint of sweetness and tartness from the red wine vinegar.  The dressing is also very good served on iceberg lettuce wedges, with crumbled bacon, of course.
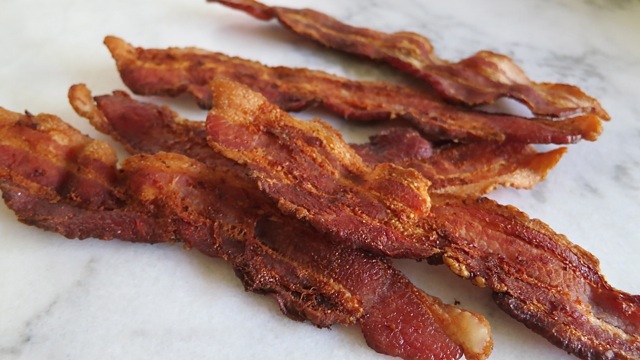
BaconI found a very good applewood smoked bacon at Costco.  It comes in a double packet each weighing 2 pounds. Four pounds is a lot of bacon, especially if you are only cooking for two, however, it’s just too good a deal to pass up.  I wrap up portions and freeze them to use later.

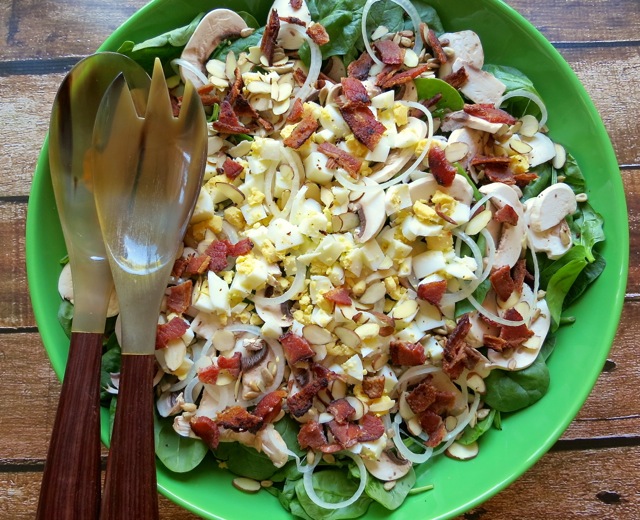
Spinach Salad Bowl

Super Spinach Salad with Bacon & Eggs ~ Serves 6

Adapted from Epicurious

Dressing

2 tablespoons brown sugar

1/4 cup red wine vinegar

2 tablespoons ketchup

1 teaspoon Dijon

1/2 teaspoon dry mustard (Coleman’s)

1 teaspoon Worcestershire sauce

1/4 cup chopped onion

1/3 cup canola or vegetable oil

Puree all ingredients in a blender or food processor until smooth and emulsified.  I use my immersion blender. It works well for small recipes and clean up is quick.  Refrigerate dressing until you are ready to serve the salad.

Salad

8 ounces baby spinach, washed and dried

5 ounces white mushrooms, sliced very thin

thinly sliced Maui or sweet onion – as much as you like

4 thick slices bacon, cooked crispy and crumbled

2 large eggs, hardboiled and chopped

2 tablespoons dry roasted sunflower seeds (optional)

2 tablespoons slivered roasted almonds

Layer salad beginning with spinach followed by mushrooms, onions, bacon, eggs, sunflower seeds if using and almonds.  Drizzle a generous amount of dressing over the salad and toss to coat well.  Serve immediately.


Canning, Mexican, Recipes

Jalapeño & Tomatillo Hot Sauce

July 14, 2013

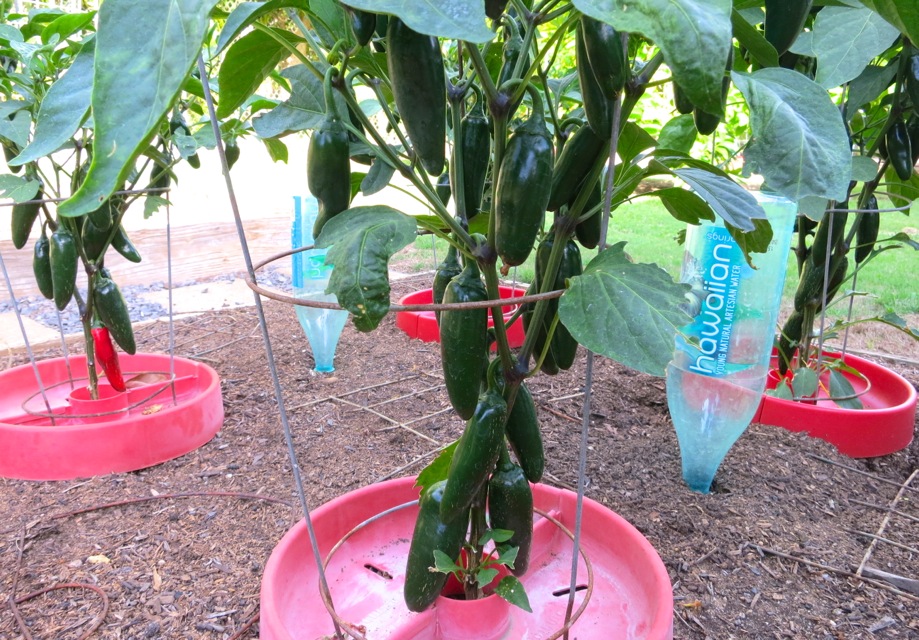
Jalapeno Hot SauceOnce a year, John plants jalapeños in the garden.  This year he tried a new hybrid, Jalafuego and whoa! There were jalapeños coming from every which way. It is very productive, with beautiful fat peppers.  It was time to bring out the canner and make jalapeño-tomatillo hot sauce.  For a very spicy sauce use only jalapeños.

Jalapeno PlantThe little plants produced an amazing amount of jalapeños.

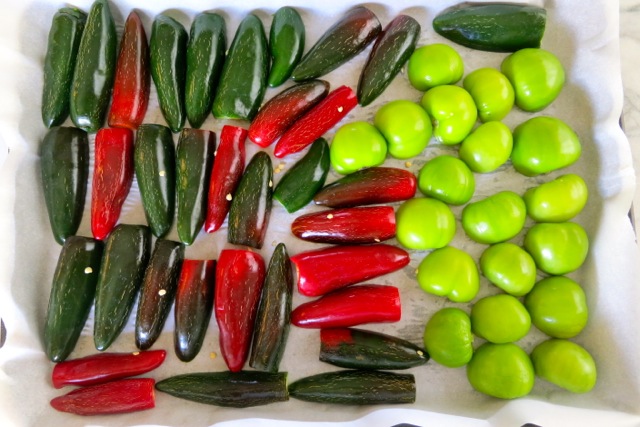
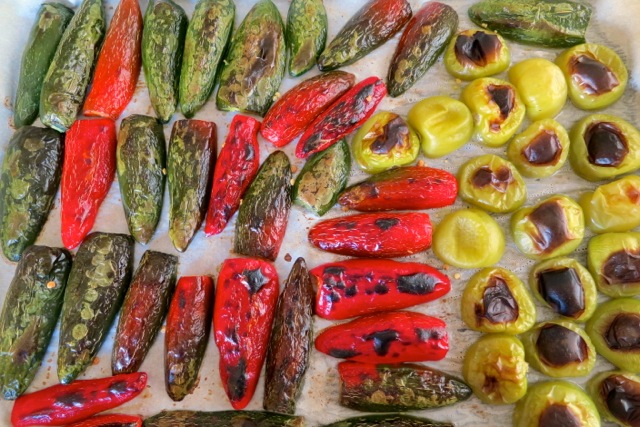
Jalapeno & TomatilloJalapeños and tomatillos are cut into halves then roasted briefly. The sauce can be made with more or less peppers depending on ones tolerance for heat (supermarket peppers vary considerably which is why we grow our own).
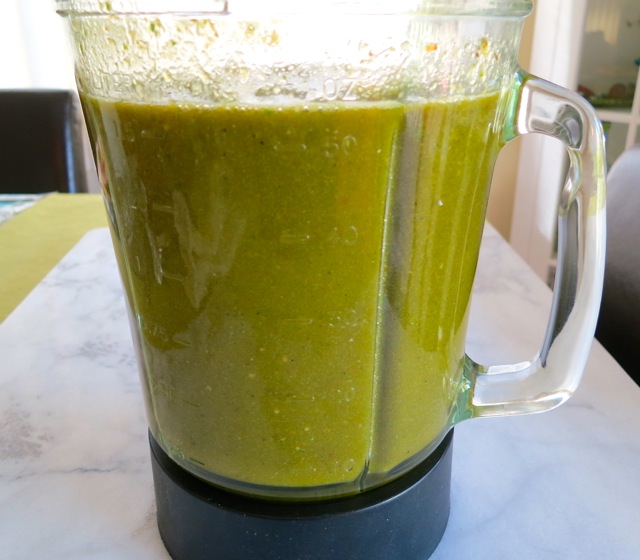
Roasted Jalapeno and TomatilloOnce roasted and charred in a few spots they go into the blender with the other ingredients for a quick whirl.

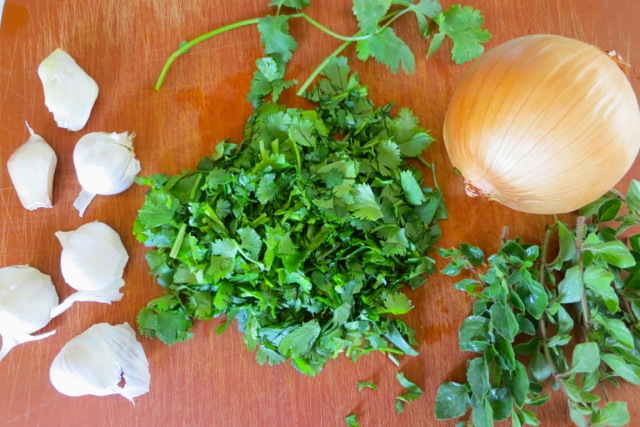
Garlic, Cilantro, Onion, OreganoGarlic, cilantro, onion and fresh oregano all contribute to to the fresh flavor of the jalapeño hot sauce.

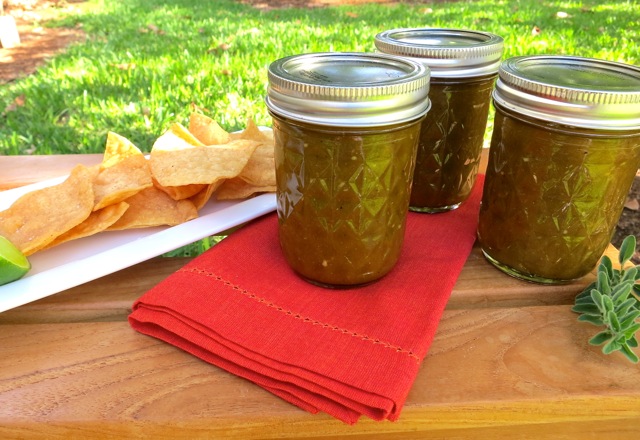
Blended Jalapeno and TomatilloOnce the sauce is processed in the water bath canner it will be shelf stable for up to a year.

8/26/16: Updated

Jalapeño & Tomatillo Hot Sauce

Makes 6 half pint jars

Ingredients

After roasting peppers and tomatillos, total weight should amount to 16 ounces.  If you are a bit short just add a few raw peppers and/or tomatillos to total 16 ounces.

3/4 – 1  pound fresh jalapeños, halved lengthwise (1 1/2 pounds jalapeños if not including tomatillos, for a spicier sauce)

1/2 pound tomatillos, halved

1 cup packed, chopped cilantro, tender stems included

6 large garlic cloves

1 large onion, chopped

6 sprigs fresh oregano about 4 inches each, stems discarded

1 cup fresh lime juice

2 cups white vinegar

1/2 cup filtered water

1 teaspoon pickling salt

2 tablespoons light brown sugar (packed)

Preparation

Turn oven on to broil. Cover a large jelly roll pan or low sided roasting pan with parchment paper.  Place jalapeños and tomatillos cut side down on the pan.  Broil for about 8 – 10 minutes, or until the peppers and tomatillos are well charred.  Remove pan from the oven and set aside.

Combine lime juice, vinegar, water, salt and brown sugar in a medium bowl and whisk to combine.

Place jalapeños, tomatillos, cilantro, garlic, onions, oregano, and lime juice mixture in a blender.  If your blender is unable to accommodate all of the ingredients, hold back some of the liquid and set aside.  Puree all the ingredients in your blender.  Pour the mixture into a large saucepan (add liquid you set aside earlier) and slowly bring to a boil.  Remove pan from heat.

Ladle into prepared canning jars leaving 1/4 inch head space.  Wipe rim.  Center lid on jar.  Screw band down until resistance is met (fingertip tight).  Place in water bath canner and process for 15 minutes.  Turn off heat, let jars rest in canner for 5 more minutes.  Remove to a cooling rack.  Once cool remove canning rings and wipe jars clean before storing.  Be sure to date the jars and use within 18 months.

This hot sauce is delicious with, but not limited to, all Mexican cuisine.  A couple of our favorites are with scrambled eggs and on avocado sandwiches.


Beef, Dinner, Pressure Cooker, Recipes

Best Pressure Cooker Beef Stew

July 7, 2013

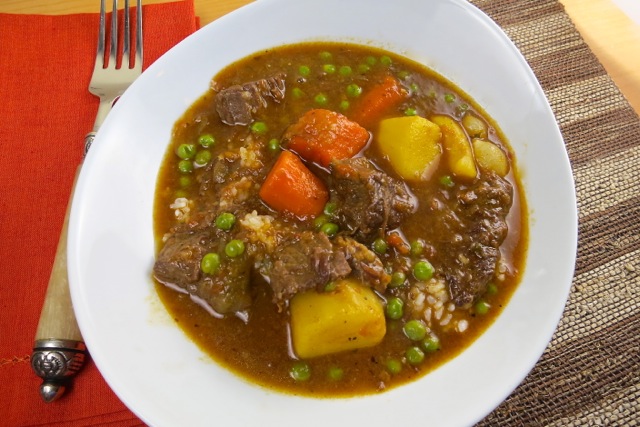
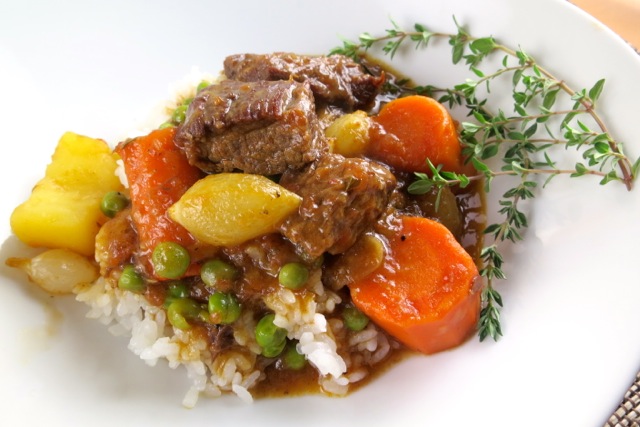
Beef StewAfter contemplating buying a pressure cooker for a long time and reading a recent review in Cook’s Illustrated, John finally hit the “place your order” button on Amazon and in a week we had our new 8 1/2 quart Fissler pressure cooker.  We agreed on beef stew as our first trial recipe. I found a few recipes that I thought would guide me in the right direction and just gave it a go.  The beef stew turned out remarkably good. I was in love with our pressure cooker from that day on.

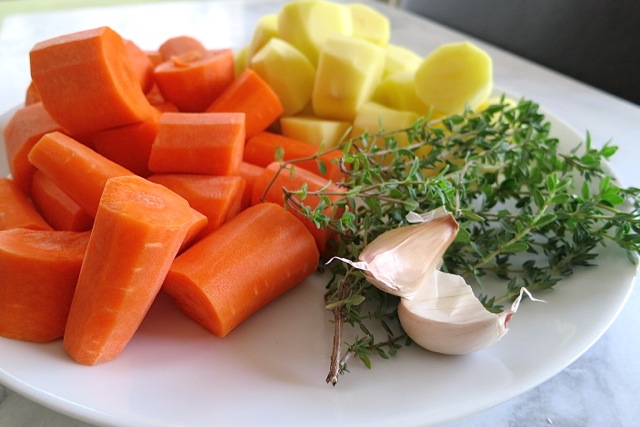
Beef Stew VeggiesI did learn that the vegetables needed less cooking time because they were a bit too soft the first time around so I decreased the cooking time to 5 minutes and they were perfect.

Demi glaceSwanson beef stock works really well in the stew. With the addition of a few tablespoons of veal demi glace, the gravy turns out rich and flavorful just as though you had simmered your stew for hours yet it takes just 25 minutes in the pressure cooker for fork tender beef stew.

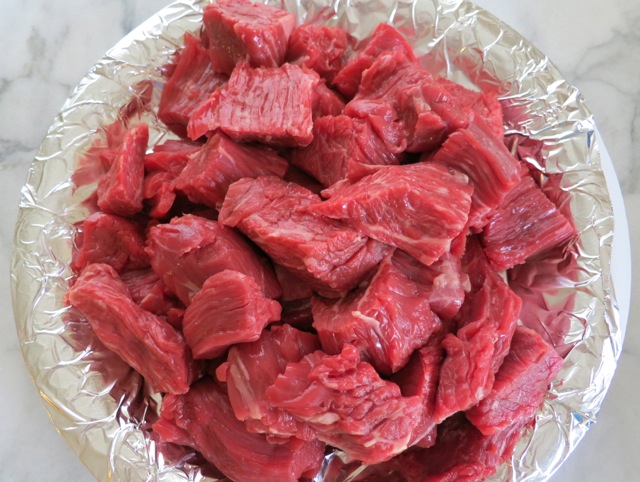
Beef Stew meatI bought a little over 3 pounds of chuck roast and trimmed it really well.  I ended up with 2 1/2 pounds of good looking meat for my stew.  Below is my recipe for perfect pressure cooker beef stew.

Beef Stew 2

Pressure Cooker Beef Stew

Serves 6 – 8

Ingredients

2 1/2 pounds well trimmed chuck roast cut into 2 inch cubes

2 tablespoons flour

2 teaspoons kosher salt

freshly ground pepper

2 tablespoons olive oil

1 26 ounce box Swanson Beef Cooking Stock

2 tablespoons veal demi glace (optional but highly recommended, we use  Williams Sonoma brand)

2 teaspoons Worcestershire sauce

1 tablespoon Dijon mustard

1 large onion, chopped

2 cloves garlic, chopped

1 14 ounce can diced tomatoes with liquid, pureed in a food processor

4 medium carrots, cut into 1 1/2 inch pieces

1 1/4 pound potatoes, peeled and cut into 1 1/2 inch pieces (I used fingerlings, I love the way they keep their shape)

3 teaspoons fresh thyme

1 cup green peas

Preparation

Trim the meat well and cut into large cubes, about 2 inches (they will shrink considerably).  Place meat in a large bowl and season with 2 teaspoons of kosher salt and freshly ground black pepper making sure to coat all sides well.  Sprinkle in the flour and with your hands (I use disposable gloves) mix the seasoned meat with the flour.

Combine the beef stock and demi glace with the Worcestershire and Dijon mustard.  Set aside.

Quickly puree the diced tomatoes in a food processor, just a few pulses does the job.  Set aside.

Heat 1 tablespoon of olive oil in your pressure cooker over medium-high heat.  Add half of the beef to the pan and brown well without moving the pieces then turn over and brown the other side.  (Just an advance warning. Once you add the meat to the hot oil there will be a lot of wild spattering going on so use a spatter screen if you have one). Remove browned pieces to a plate and continue cooking the other pieces adding more olive oil if needed.  Once all the beef has browned, discard any excess fat in the pan.

Turn the heat down to medium and add the onions and garlic and sauté for about 2 minutes just until the onion softens.  Stir in the beef stock mixture and tomatoes and scrape up any browned bits from the bottom of the pan.  Return the beef to the pressure cooker and bring the mixture to a simmer.

Cover the pressure cooker, lock the lid in place and over medium-high heat bring it to full pressure. Once the pressure cooker comes up to pressure, lower the heat to a low burner setting so that it maintains pressure without exceeding it and set the timer for 20 minutes.

Remove the cooker from the heat and release the pressure using the quick release method by pressing the button on the handle or by running cold water over the lid in the sink.  Taste the gravy and season to taste with salt and pepper.  Add the carrots, potatoes and thyme to the pressure cooker.  Cover the cooker once again, lock the lid and bring back to high pressure.   Once the cooker is at full pressure, turn the heat down to low to medium low and cook for 5 minutes.

Remove the cooker from the heat and release the pressure.  To thicken the gravy add a few shakes of Wondra and let the stew simmer for just a few minutes. Stir in the peas before serving.  We like spooning the stew over hot rice that soaks up all the delicious gravy.
***I used an 8 1/2 quart pressure cooker.

Dessert, Recipes

Tart Lemon Squares

July 3, 2013

Tart Lemon Squares & Mango TreeWhew! It’s been awfully hot this summer and we still have 4 more months of this sweltering heat.  A swimming pool would be nice this time of the year.  My step-daughter Jessica lives in Portland where the temperatures soared to 98 degrees so she bought a kiddie pool for her dog but ended up in the pool with her pet!  Here is a cooling treat for those warm summer nights.

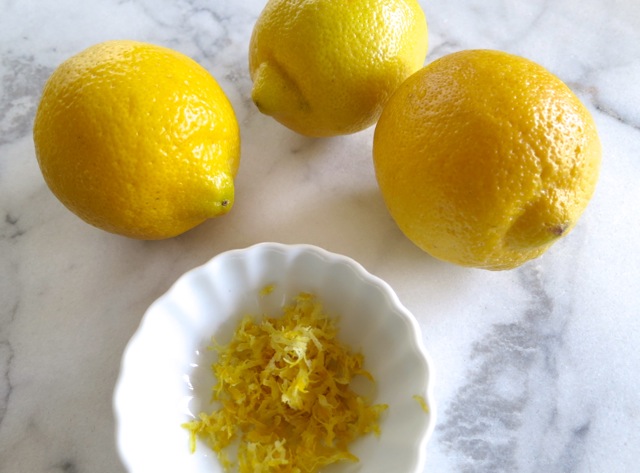
Lemons & Zest for Lemon SquaresIf you’re like me and love citrus desserts that are a snap to make, you’ll love this recipe.  I’ve been making these tart lemon squares from Cooking Light magazine since their March/April 1994 issue was published.

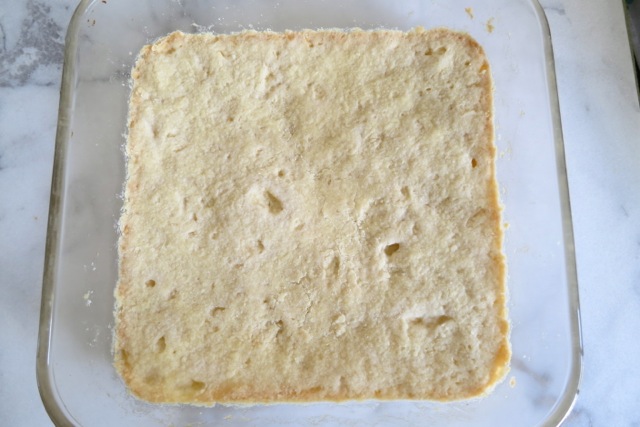
Baked CrustBake the crust until lightly browned then set aside while you mix the lemon filling.  Keep the oven set at 350 degrees.

Tart Lemon Squares 2These lemon squares keep well if made a day in advance.  Store in the refrigerator until ready to serve then cut into squares and dust with powdered sugar.  A scoop of vanilla ice cream is a perfect accompaniment.

Tart Lemon Squares

Adapted from Cooking Light magazine

Ingredients ~ Crust

Preheat oven to 350 degrees.  Butter an 8 x 8 inch Pyrex baking dish.

1 cup flour

1/3 cup powdered sugar

dash of salt

1/4 cup plus 1 tablespoon chilled butter

Preparation

Combine flour, sugar and salt in a bowl.  Cut in the butter with a pastry blender until the mixture resembles coarse meal.  Press firmly and evenly into the baking dish.  Bake 20 minutes or until crust is lightly browned. Set aside while you prepare the lemon filling.

Ingredients ~ Lemon Filling

1 cup sugar

2 tablespoons flour

1 1/2 teaspoons lemon rind

1/2 teaspoon baking powder

1/4 scant teaspoon salt

2 large eggs

2 egg whites

7 tablespoons fresh squeezed lemon juice

2 drops yellow food coloring (for a bright lemon color, optional)

Preparation

Combine sugar, flour, lemon rind, baking powder, salt, whole eggs and egg whites in a medium bowl.  Stir with a wire whisk until blended.  Whisk in lemon juice and food coloring if using. Pour mixture over prepared crust and bake at 350 degrees for 20 – 25 minutes or until set.

Cool on a baking rack then chill for about 3 – 4 hours before cutting into squares.  Sift powdered sugar over the lemon squares before serving.

Dinner, Eggs, Korean, Lactose Free, Recipes, Rice Dishes

Bibimbap with Korean Style Hamburger Patties

June 28, 2013

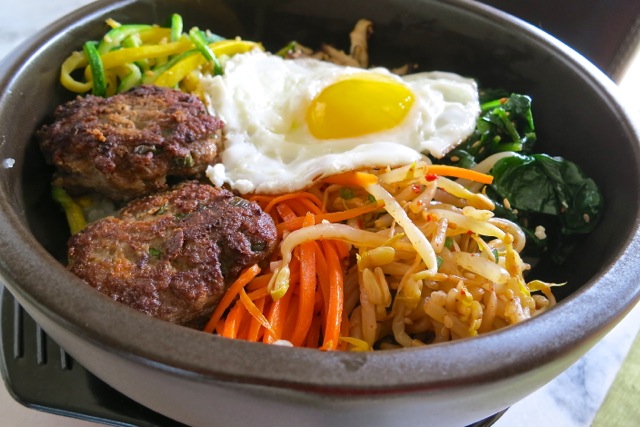
BibimbapLike so many others I am in love with Bibimbap.  It really is the perfect meal.  When heating a stone bowl directly on the stove top the rice on the bottom of the bowl gets crunchy and is utterly delectable.  Along with the colorful vegetables layered over the rice and savory Korean style patties this is beautiful dish.  And any meal with a fried egg is at the top of my list.

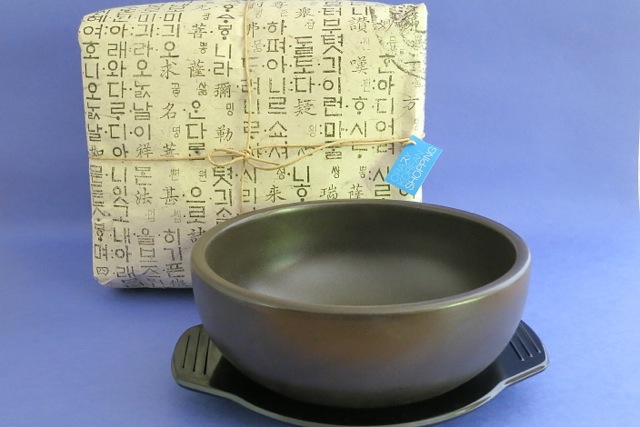
Dolsot BowlI had never eaten Bibimbap until a few months ago when I had lunch with a friend at a local restaurant here on Maui.  We decided to share the Bibimbap and a lemon grass chicken sandwich.  The sandwich was tasty, but the Bibimbap was a revelation! Once that stunning Bibimbap arrived at our table I think we both secretly wished we didn’t have to share it. I did not realize the rice on the bottom of the stone pot would be crispy.  It really made the dish stand out.  It was a real dilemma when we had to split the fried egg!  We vowed that if we ever shared a serving of Bibimbap again, we would order it with two fried eggs.  So as you can see above, I had to have my own Dolsot stone bowls so that I could make Bibimbap at home.

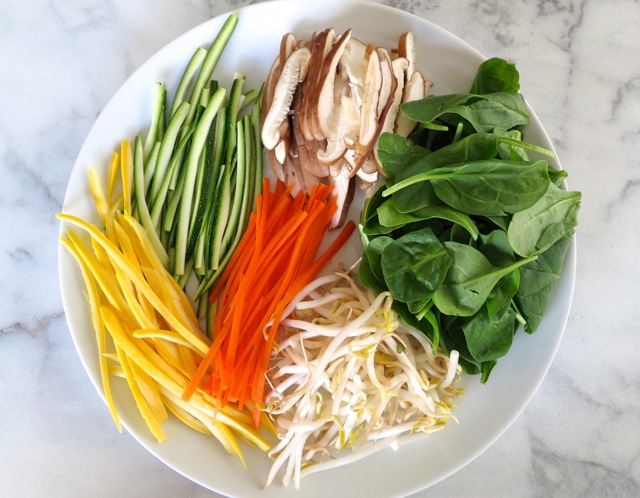
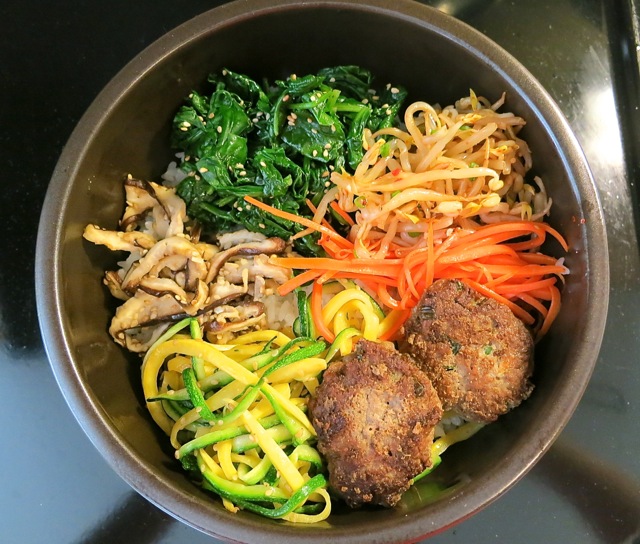
Bibimbap VeggiesColorful vegetables are quickly cooked and seasoned.

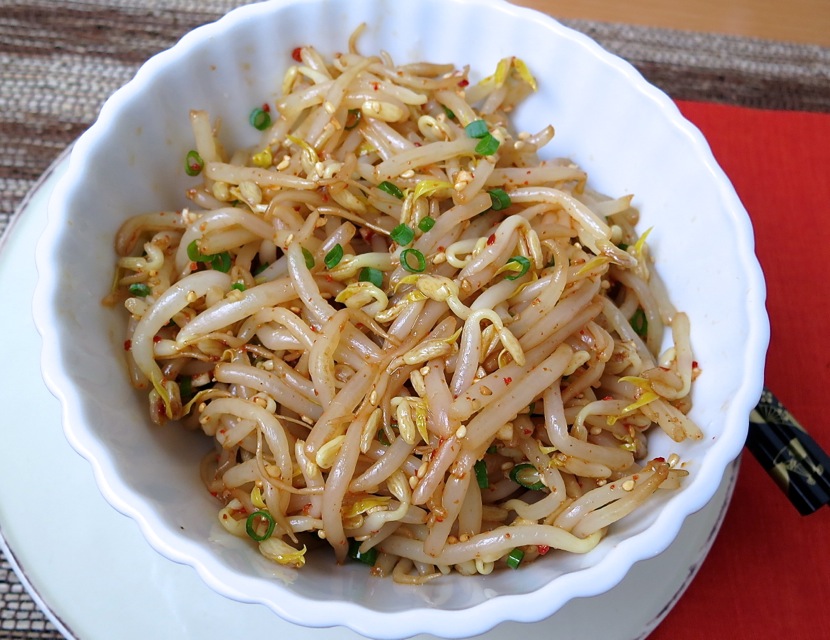
Bibimbap Bean SproutsThese marinated bean sprouts are delicious.

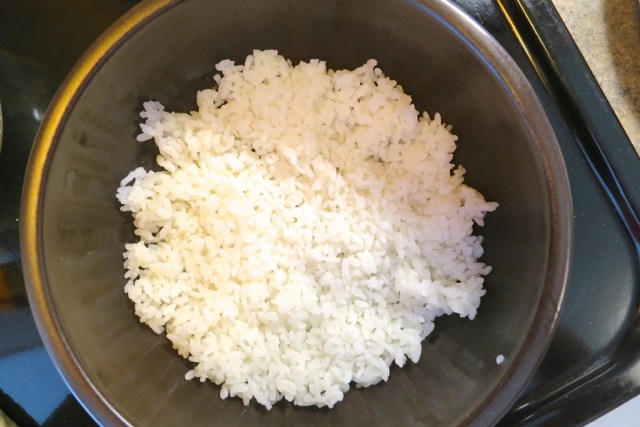
Bibimbap RiceHeat your stone bowl on the stove top, add a bit of oil, swirl and add some rice.  You’ll hear the rice sizzle as it hits the bowl.  Pat the rice gently against the heated bowl. Let it go for a while then add more rice and your prepared vegetables and meat or tofu to warm up.

Bibimbap on Stove

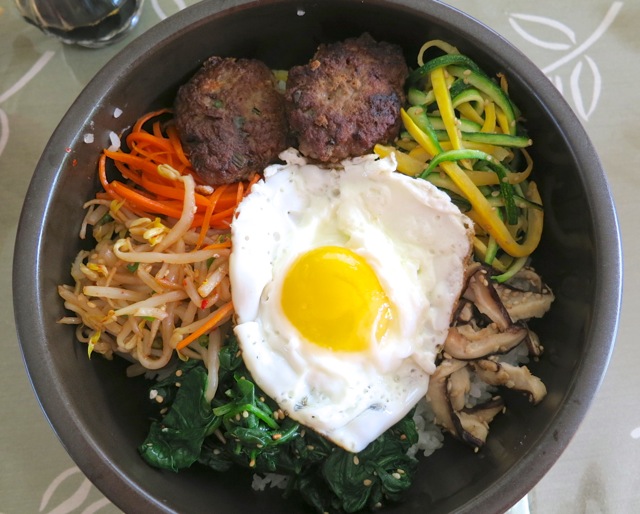
Bibimbap 2Lastly, fry an egg sunny side up and place on top of your heated Bibimbap.  Serve with kimchi on the side. Most recipes call for gochuchang sauce but I love Sriracha so I used it instead.

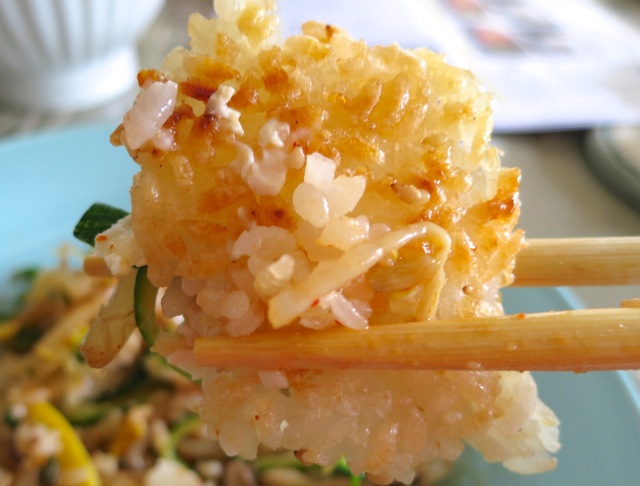
Bibimbap Crunchy RiceThe crunchy rice is addicting!

Bibimbap with Korean Style Hamburger Patties

Serves two as a side dish or one hungry appetite

Ingredients

 1 cup uncooked short grain white rice

Bean Sprouts

1 bag (10 ounces) bean sprouts – rinsed

1/2 teaspoon minced garlic

dash of salt

2 teaspoons soy sauce

1 teaspoon sesame oil

1/2 teaspoon Korean chili flakes (optional)

2 teaspoons roasted sesame seeds

Mushrooms

4 large shiitake mushrooms

1/2 teaspoon minced garlic

1/2 teaspoon sesame oil

1 teaspoon roasted sesame seeds

salt to taste

Zucchini

1/2 medium green zucchini

1/2 medium yellow zucchini

1/2 teaspoon roasted sesame seeds

salt to taste

Spinach

3 ounces fresh spinach

1 teaspoon soy sauce

1 teaspoon sesame oil

1 teaspoon roasted sesame seeds

Carrot

1/2 small carrot

1/2 teaspoon minced garlic

1/2 teaspoons sesame oil

Toppings

1 – 2 large eggs

Korean style hamburger patties (optional)

Preparation

Cook the rice and set aside until ready to use.

In a medium saucepan (3 qt. works well) bring 6 – 7  cups of water to a boil.  Add rinsed bean sprouts and blanch for 3 minutes.  Drain and run under cold water to stop the cooking.  Place sprouts on paper towels or a kitchen towel and press out some of the water.  In a medium bowl add bean sprouts, minced garlic, salt, soy sauce, sesame oil, Korean chili flakes if using and roasted sesame seeds.  Stir to combine.  The sprouts can be made earlier in the day and stored in the refrigerator.

Remove the stems and wipe the mushrooms clean.  Slice into thin strips and sauté in a bit of canola oil until the mushrooms become soft.  Add the garlic, sauté for another minute and remove from the stove top.  Stir in sesame oil and sesame seeds and season with salt.

Julienne the zucchini into long, thin strips using only the outer, colorful portion.  Heat a bit of canola oil in a small skillet and cook for just a minute to slightly soften the strips.  Stir in sesame seeds and season with salt.

In a small skillet blanch the spinach for 1 minute until wilted.  Squeeze out the excess water and stir in the soy sauce, sesame oil and sesame seeds.

Julienne the carrot into long, thin strips.  Briefly sauté with garlic and sesame oil.  Season with salt.

The first time I used the bowl I soaked it in room temperature water for 5 minutes then placed it on the stove on medium heat to warm up.  I slowly adjusted the heat higher (between medium and medium high) and once hot added about 1 teaspoon of canola oil and coated the bottom and lower sides of the bowl.  (Please follow the heating instructions that come with your specific stone bowl).

Add enough rice to the heated bowl to cover the bottom of the bowl.  Press gently with a spatula.  You should hear the rice sizzle on the hot bowl.  Cook the rice for about 5 minutes and check to see if the rice is crunchy by lifting up a portion with a spoon.  The rice should have a light golden toasted color to it.  Once this happens, add more rice and top with vegetables and Korean style patties if using.  Placing the vegetables in alternating colors makes for a gorgeous rice dish.

Fry your egg sunny side up.  Place on top of the heated Bibimbap and serve with kimchi and Sriracha.

***There are so many variations of this dish. You don’t need to stick with specific vegetables or meat and can easily adjust the recipe to your liking.  Make it vegetarian by using tofu instead of meat.


Recipes, Salad, Side Dishes, Vegan, Vegetarian, Veggies

Green & Yellow Bean Salad with Fresh Corn, Tomatoes & Herb Dressing

June 23, 2013

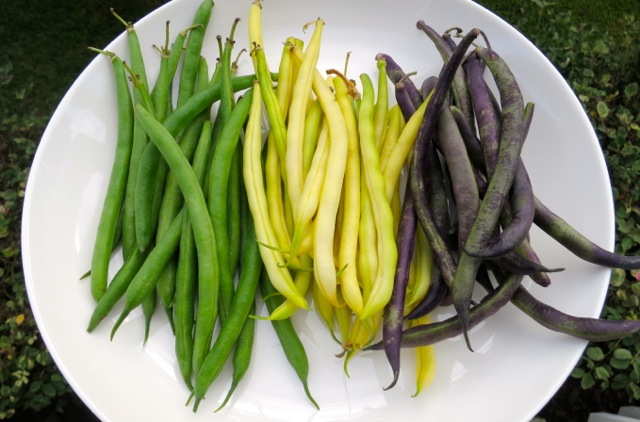
Bean Salad with HerbsI spotted some beautiful beans at Mana Foods a few days ago and immediately thought of a refreshing summer bean salad.  Into the basket went the beans.  I was curious about the purplish string beans that aren’t commonly seen here and thought they would add such a lovely color to the salad.

Fresh Green BeansLittle did I know those purplish string beans wouldn’t retain their color.  As soon as I dropped them into the boiling water the beans turned green.  Oops!

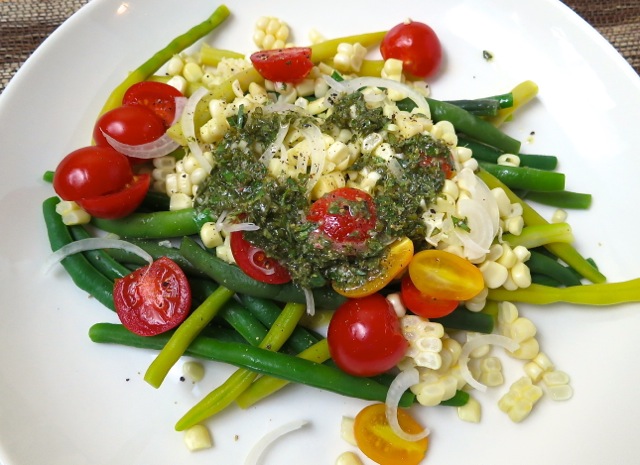
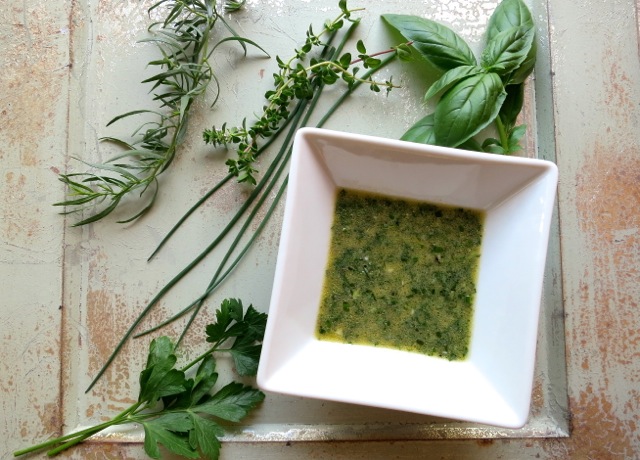
Herb DressingThis simple and delicious recipe for green bean salad with fresh corn and tomatoes comes from the Washington Post.  The dressing calls for lots of herbs and lucky for me they were growing in my garden.

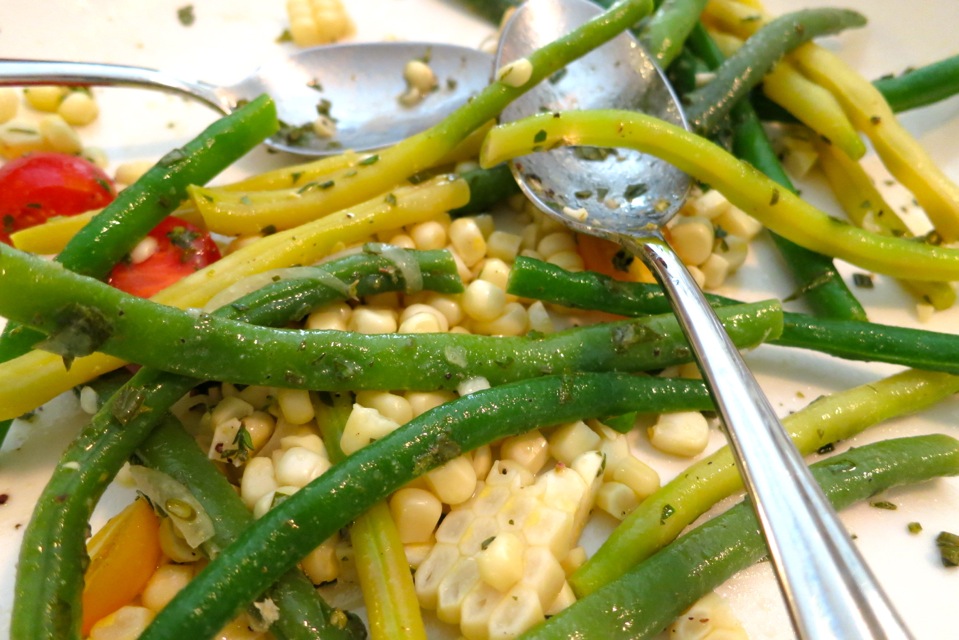
Bean Salad Tossed with HerbsThis salad was a perfect match for the pappardelle, Swiss chard and Italian sausage pasta we prepared for dinner.

Green & Yellow Bean Salad with Fresh Corn, Tomatoes & Herb Dressing

Adapted from the Washington Post

Serves 2 – 3 as a side dish

Ingredients

8 ounces fresh beans – green and yellow

1 large ear fresh corn (about 1/2 cup)

4 ounces cherry or grape tomatoes cut in halves

1/4 cup thinly sliced Maui or red onion

1/4 cup olive oil

3 tablespoons fresh lemon juice

1 teaspoon Dijon

1 teaspoon minced garlic

salt and pepper to taste

2 teaspoons each, finely chopped:

thyme ~ tarragon ~ basil ~ chives ~ Italian parsley

Preparation

Trim beans and either leave whole or cut in halves.  Prepare a bowl of ice water for the beans.  Bring a medium saucepan of water to a boil, add salt and cook beans until just al dente, about 1 – 2 minutes.  Drain and immediately submerge the beans in the ice water to stop the cooking.  Drain cooled beans and place on a kitchen towel.

Rinse corn and with the water still clinging to the corn place on a microwave safe plate (I use a paper plate) and cover loosely with a piece of waxed paper.  Cook on high for 45 seconds, flip corn over and cook for another 30 seconds or so.  Remove corn kernels and set aside.  Alternately, bring a saucepan of water to a boil and cook corn for 30 – 60 seconds.

In a small bowl whisk the lemon juice with Dijon, garlic, salt and pepper.  Continue to whisk while adding the olive oil in a slow, steady stream until well combined. Whisk in the herbs.

Place the beans, corn, tomatoes and onions on a platter and toss with the herb dressing.  It’s also delicious with a bit of crumbled feta cheese.


Follow

Get every new post delivered to your Inbox

Join other followers: