Canning, Recipes, Sandwiches, Vegan, Vegetarian

Whole Grain Mustard

March 8, 2014

Whole Grain Mustard with a Side of Snacks“Southern Living’s” Little Jars, Big Flavors (small batch jams, jellies, pickles, and preserves from the South’s most trusted kitchen) is a real gem.   We’ve made the mixed berry jam and have now ventured on to whole grain mustard.  Both of these recipes are superb.   Neither one is time-consuming nor do they require any hard to find ingredients.  Plain and simple, they are delicious.
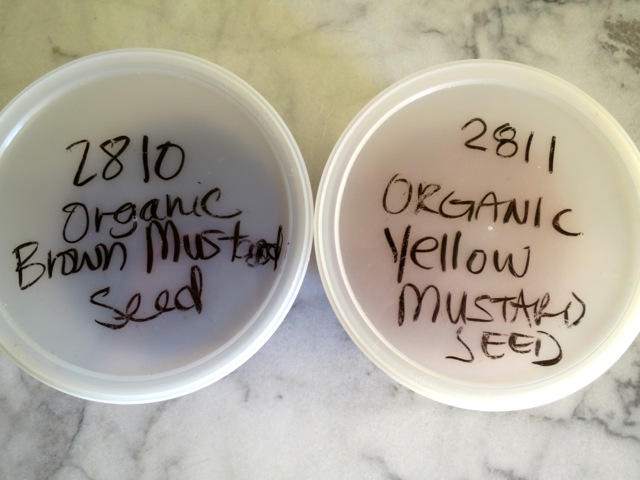
Organic Mustard SeedsThanks go to our daughter Jessica (who brought this recipe to our attention) for sending a “care” package full of mustard seeds and powder as well as some difficult to find whole grain bread ingredients.

Brown Mustard SeedsBrown mustard seeds.

Yellow Mustard SeedsYellow mustard seeds.

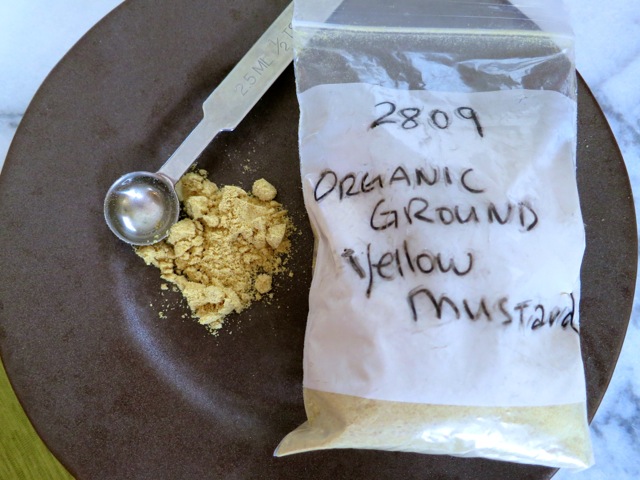
Organic Ground Yellow Mustard

Mustard Seeds and VinegarThis photo shows the first step of making the whole grain mustard.  The seeds and vinegar are placed in a large jar and set aside for 5 days.  The mustard seeds are quite thirsty and soak up much of the vinegar, quickly.
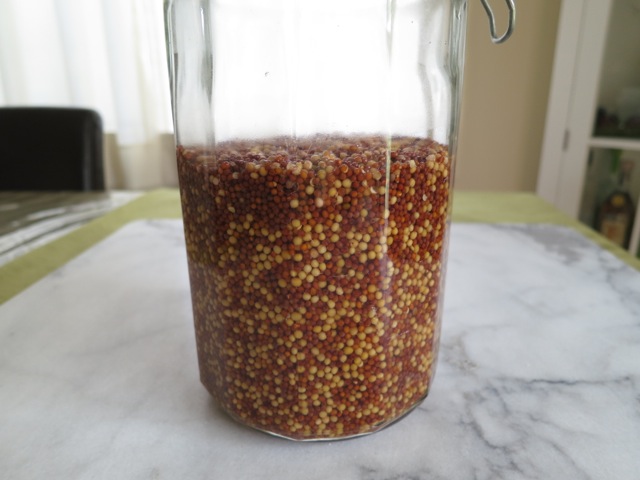
Mustard Seeds & Vinegar 2 Hours LaterAs you see in this picture, it’s only been a couple of hours and much of the vinegar has been absorbed by the seeds.
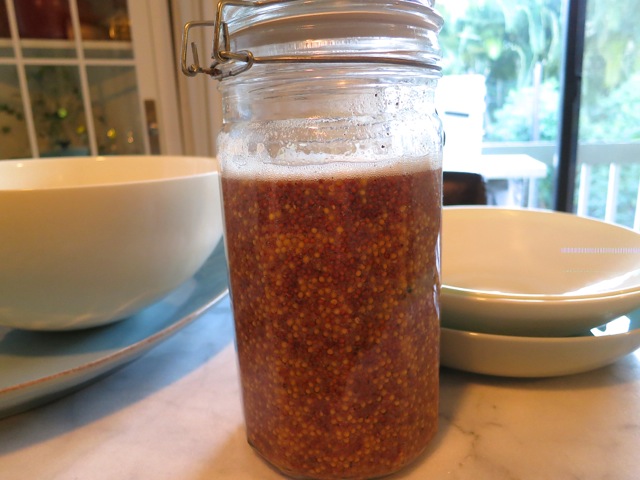
Mustard Day 8Five days later, other ingredients are added to the mixture.  Set the jar aside for another 5 days.  So simple.
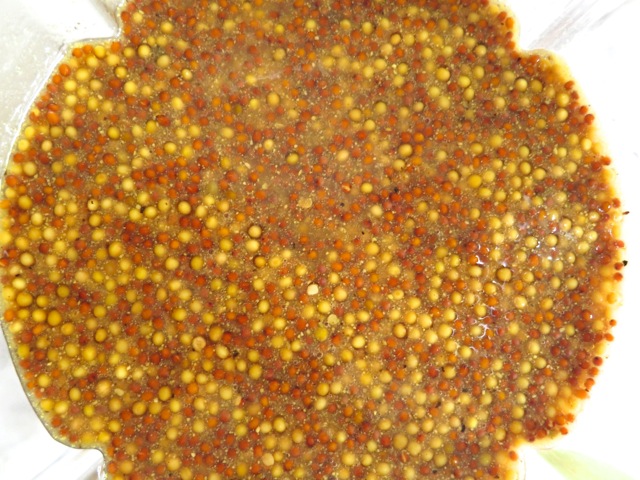
Mustard in BlenderThe mustard is placed in a blender and processed until the desired consistency is met.

Blended MustardWhole grain mustard ready for canning.  It smells so good.
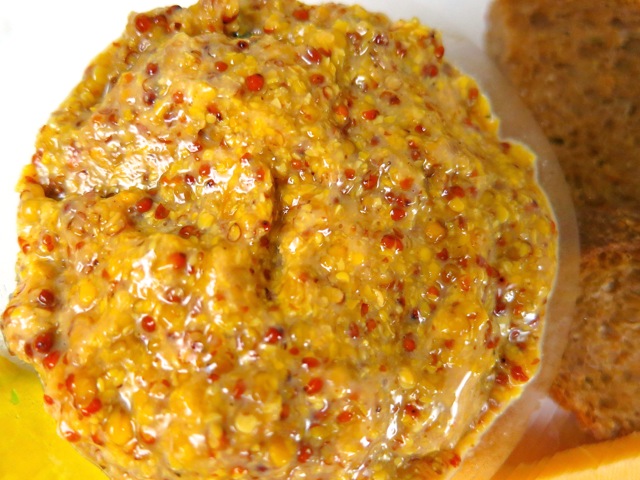
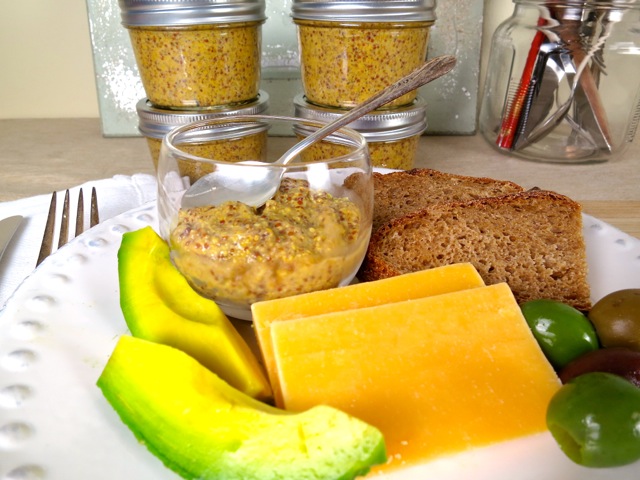
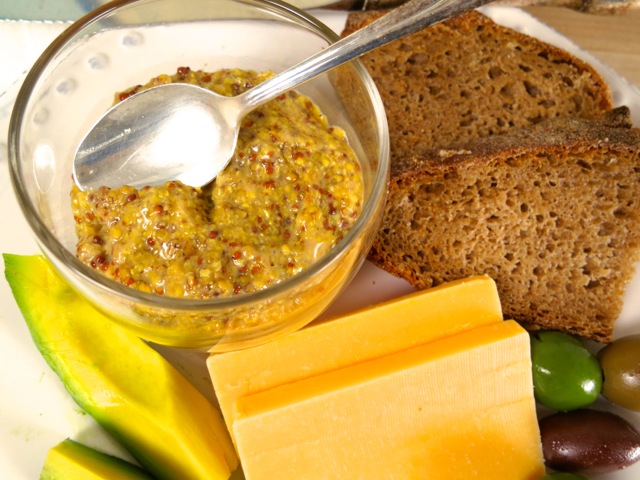
Whole Grain MustardThis whole grain mustard is delicious slathered on good bread with thinly sliced pastrami, ham or in an avocado sandwich.  It makes a wonderful dressing for potato salad.

Potato Salad with Whole Grain Mustard

Whole Grain Mustards

Whole Grain Mustard

Adapted from Southern Living ~ Little Jars Big Flavors

Makes 4 half-pint jars

Ingredients

1 1/4 cups white wine vinegar (5% acidity), divided

1 1/4 cups red wine vinegar (5% acidity), divided

3/4 cup brown mustard seeds

3/4 cup yellow mustard seeds

1/4 cup dry white wine

2 tablespoons honey

3 tablespoons dry mustard

4 teaspoons salt

2 teaspoons freshly ground pepper

Preparation

Stir together 1 cup white wine vinegar, 1 cup red wine vinegar, and brown and yellow mustard seeds in a clean 1-quart jar.  Cover with lid, and let stand at room temperature 5 days, adding more red or white vinegar if seeds look dry.

Stir in remaining 1/4 cup white wine vinegar and 1/4 cup red wine vinegar, white wine, honey, salt and pepper.   Stir in dry mustard.  Cover with lid, let stand at room temperature 5 more days. (Mixture may be slightly bubbly, not a problem)

Process mustard mixture in a blender until desired consistency is reached.  The original recipe calls for using a food processor rather than a blender.  This produces a coarser textured mustard.  I prefer a bit creamier yet still rustic texture that is produced by using a blender.  If the mustard is too thick, its consistency can be adjusted by adding a little water or more vinegar.  The mustard should not be too thick otherwise you may end up with air bubbles in the mustard that will be difficult to remove.

Sterilize jars, and prepare lids for canning:

Wash jars and place them in boiling-water canner.  Fill the jars and canner with water to the top of the jars.  Cover and bring water to a simmer over medium heat, do not boil.  Prepare the two-piece closures.  Wash lids and place in a small saucepan and cover with water.  Heat to just a simmer but do not boil.  Do not heat screw bands.

Lift the canner jar rack and fix into place on the rim of the canner. Remove one jar at a time from canner and empty hot water back into the canner. Place jar on a cutting board and place a canning funnel in the jar.  Ladle mustard into jar leaving 1/2-inch head space.  If you notice any air pockets do your best to remove them with a chopstick or similar utensil. With a clean damp cloth or paper towel wipe jar rim to remove any food residue.  Using a magnetic utensil, lift hot lid from water, center it on the  jar and place screw band on jar.  Tighten screw band evenly and firmly just until resistance is met.  Then increase to fingertip tight.  Do not over tighten.  Return jar to canner rack.  Continue filling jars individually until all jars are filled, lower rack into canner and ensure that all jars are covered by 1 inch of water.  Cover canner and bring water to a full boil over high heat.  Process for 15 minutes, starting timer only when water reaches a full boil.  Any leftover mustard can be refrigerated for immediate use.

Remove jars from water, and let stand,  undisturbed, at room temperature 24 hours.  To check seals, remove the bands, and press down on the center of each lid.  If the lid doesn’t move, the jar is sealed.  If the lid depresses and pops up again, the jar is not sealed.  In the event that a jar does not seal, simply refrigerate it. Store properly sealed jars in a cool, dark place up to 1 year.  Refrigerate after opening.


Dinner, Lactose Free, Recipes, Rice Dishes, Side Dishes, Vegan, Vegetarian

Saffron Rice with Barberries, Pistachio & Herbs

March 2, 2014

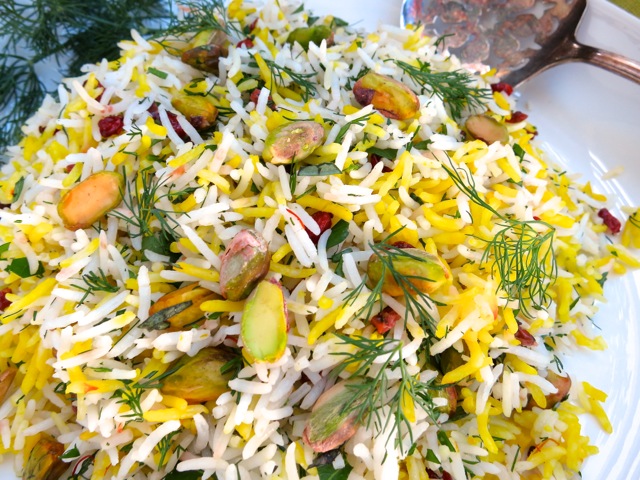
Saffron Rice with Barberries, Pistachio & HerbsUntil quite recently I had never heard of Yotam Ottolenghi, a cookbook author, chef, and owner of four restaurants in the UK. I happened to be looking at recipes on The Guardian’s web site and there I found Yotam’s weekly column and was intrigued by the many vibrant herbs and spices he used in his recipes.  Some of these ingredients cannot be found  on Maui, such as barberries.  Leave it to amazon.com to supply even the most obscure ingredients.

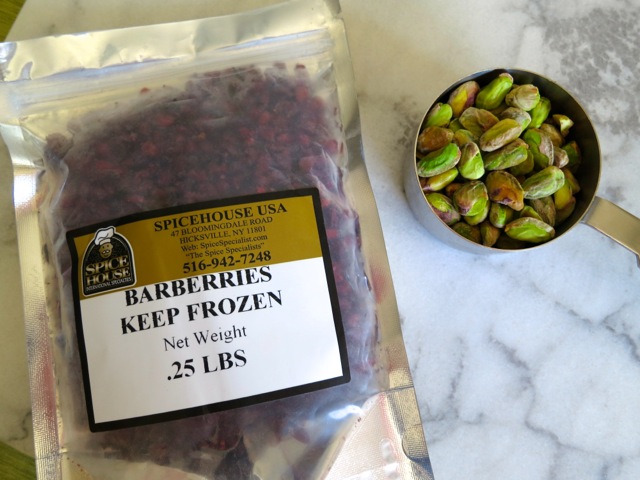
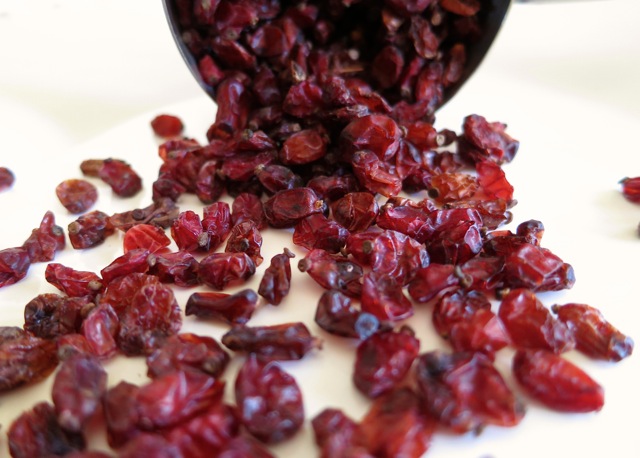
Barberries & PistachiosMy friend Shanna at Curls & Carrots surprised me with a gift of Yotam Ottolenghi & Sami Tamimi’s Jerusalem A Cookbook.  I came home from work one day to find a package sitting on my doorstep.  I can’t think of a better gift than a cookbook filled with interesting, flavorful, recipes and gorgeous photos.  Thank you Shanna.

BarberriesSweet-tart Iranian barberries.

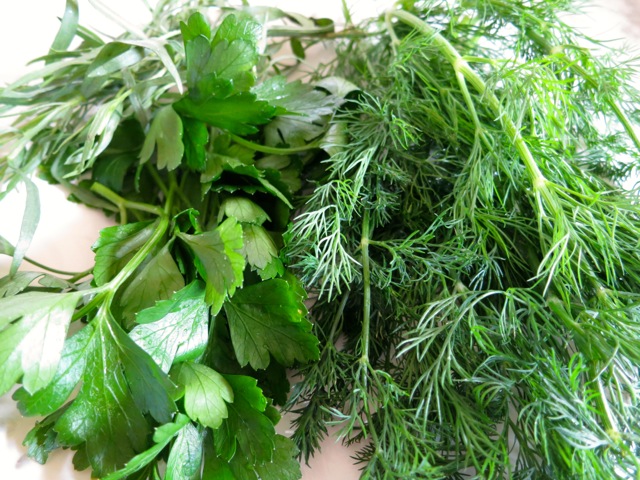
Tarragon, Parsley, DillI substituted Italian parsley for the chervil which I can never find here on Maui.  I would love to grow chervil however I hear it thrives best in cool climates (not Kihei, Maui).

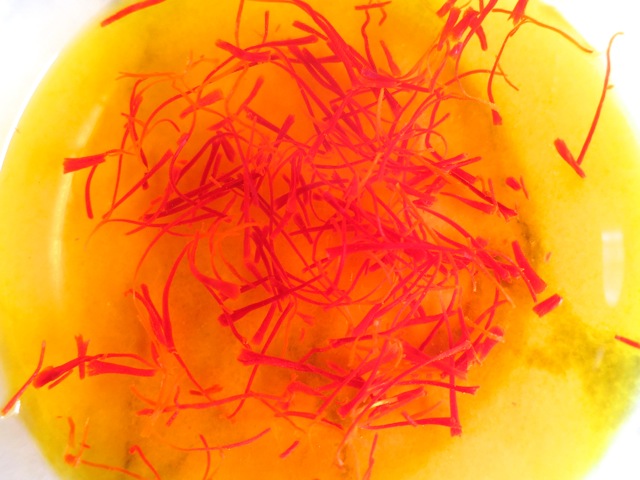
Saffron WaterSaffron water is poured over a portion of the cooked rice and will later be gently mixed in with the white rice, herbs, barberries and pistachios.

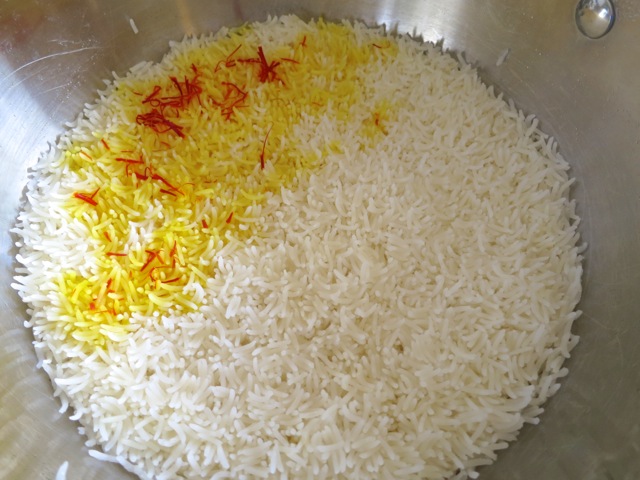
Saffron Water on Basmati Rice

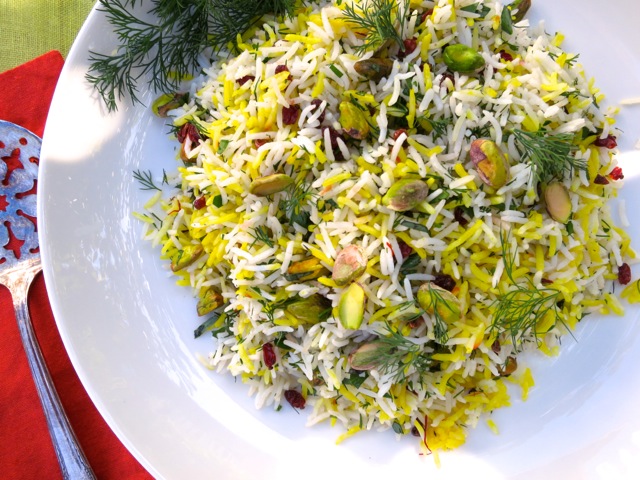
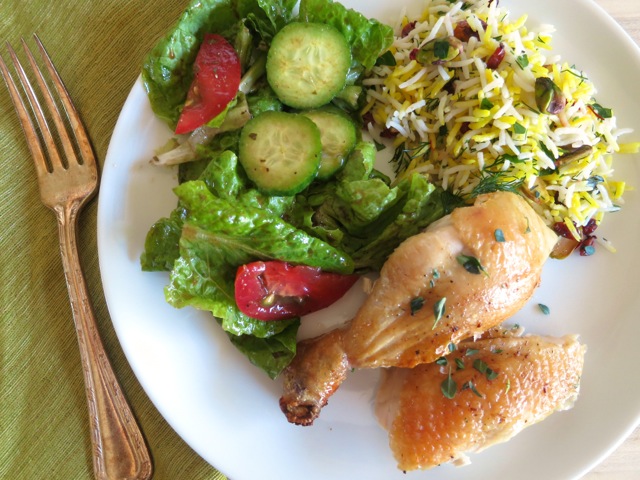
Saffron Rice with Barberries, Pistachio & HerbsSaffron rice is the perfect side dish for roasted chicken and a garden salad.

Saffron Rice with Roasted Chicken & Garden Salad

Saffron Rice with Barberries, Pistachio & Herbs

Adapted from Jerusalem A Cookbook

Serves 6

Ingredients

2 1/2 tablespoons unsalted butter (I used Earth Balance Buttery Sticks)

2 cups white basmati rice, rinsed under cold water and drained well

2 1/3 cups boiling water

1 teaspoon saffron threads, soaked in 3 tablespoons boiling water for 30 minutes

1/4 cup dried barberries, soaked for a few minutes in boiling water with a pinch of sugar

1 ounce dill, coarsely chopped

2/3 ounce chervil, or Italian parsley coarsely chopped

1/3 ounce tarragon, coarsely chopped

1/2 cup slivered or crushed pistachios, lightly toasted (salted or unsalted)

salt and freshly ground white pepper

Preparation

Melt the butter in a medium saucepan and stir in the rice, making sure the grains are well coated in butter.  Add the boiling water, 1 teaspoon salt and some white pepper.  Mix well, cover with a tightly fitting lid, and cook over very low heat for 15 minutes.  Don’t be tempted to uncover the pan, the rice needs to steam properly.

Remove the rice pan from the heat.  All the water will have even absorbed by the rice.  Pour saffron water over one side of the rice, covering about one-quarter of the surface and leaving the majority of it white.  Cover the pan immediately with a tea towel and reseal tightly with the lid.  Set aside for 5 – 10 minutes.

Use a large spoon to remove the white part of the rice into a large mixing bowl and fluff it up with a fork.  Drain the barberries and stir them in, followed by the herbs and most of the pistachios, leaving a few to garnish.  Mix well.  Fluff the saffron rice with a fork and gently fold it into the white rice.  Don’t over mix, you don’t want the white grains to be stained by the yellow.  Taste and adjust the seasoning.  Transfer the rice to a shallow serving bowl and scatter the remaining pistachios on top.  Serve warm or at room temperature.
*I found the pistachios can soften once mixed into the rice.  Add the pistachios just before serving the rice.

Appetizers, Mexican, Recipes, Vegetarian, Veggies

Tomatillo Salsa with Avocado

February 24, 2014

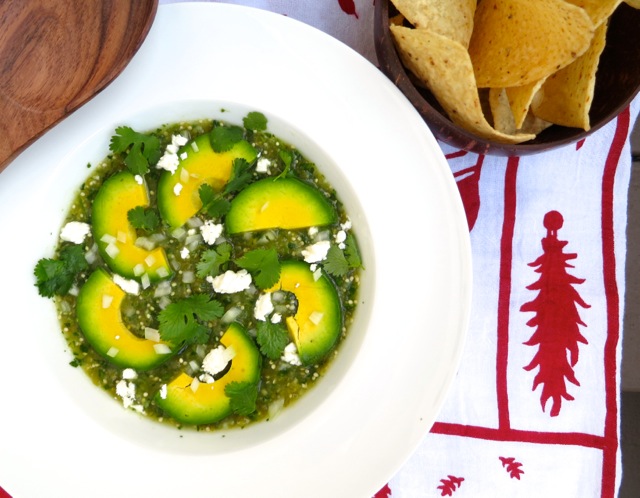
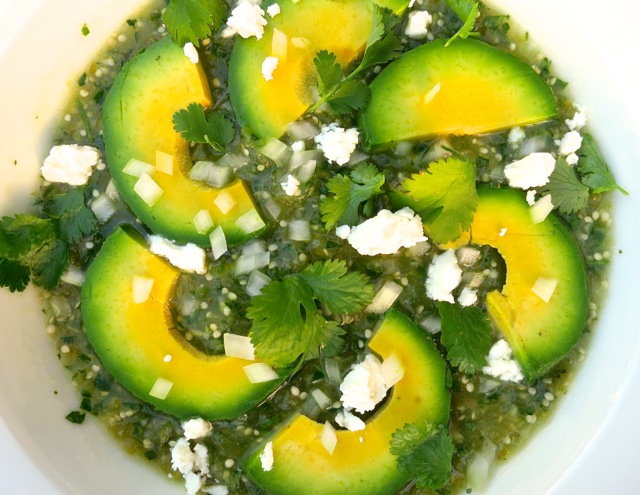
Tomatillo Salsa with Avocado & FetaI’m still sifting through the recipes in the “Mexico” Issue of Saveur magazine. This is one of my all time favorite Saveur publications.  Equally excellent is the Everything You Need To Know About Filet Mignon issue (that is another story altogether).

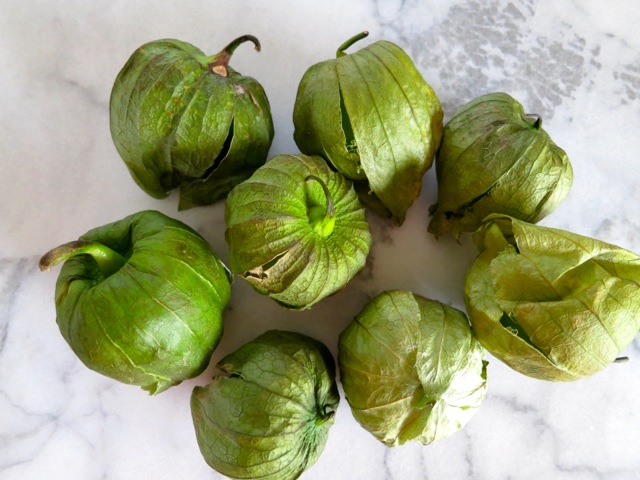
Fresh TomatillosDiana Kennedy, originally from the UK moved to Mexico in 1957 with her husband Paul Kennedy. Often referred to as the Julia Child of Mexico, Diana is considered the leading researcher, teacher, and writer on the regional foods of Mexico, and for good reason.  Here  I adapted her simple, delicious, salsa recipe that anyone can make at home with ingredients that are easy to find at your market.

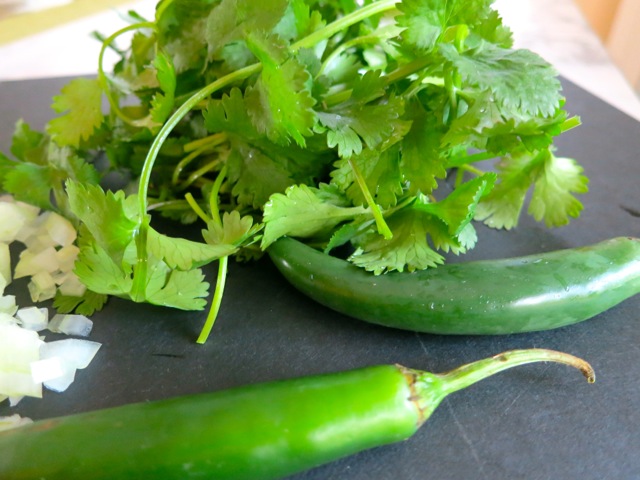
Serranos, Onion, Cilantro

Tomatillo Salsa with Avocado & Feta

Tomatillo Salsa with Avocado ~ Salsa de Albañil

Adapted from Saveur Magazine – The Mexico Issue

Serves 4

Ingredients

8 oz. tomatillos, husks removed, rinsed

1/3 cup roughly chopped cilantro

1/4 cup minced, white onion

2 serrano chiles, stemmed, seeded, and finely chopped

1 clove garlic, minced

Kosher salt to taste

2 oz. feta cheese, crumbled (or queso fresco)

1 avocado, halved, pitted, peeled and cut into slices

tortilla chips or warm tortillas for serving

Preparation

Bring tomatillos and 4 cups water to a boil in a 4-quart saucepan; cook until tomatillos are just soft, 4 – 5 minutes.  Drain and set aside to cool.

Place tomatillos, 1/3 cup cilantro, 2 tablespoons onion, chiles, garlic and salt in a blender or food processor, pulse until slightly chunky.  Pour salsa into a serving dish and layer avocado slices over salsa.  Sprinkle on feta and remaining cilantro and onion.  Serve with tortilla chips, warm tortillas, quesadillas or burritos.


Fish, Fruit, Recipes

Slow-Roasted Salmon with Blood Oranges, Lemon, Fennel & Dill

February 18, 2014

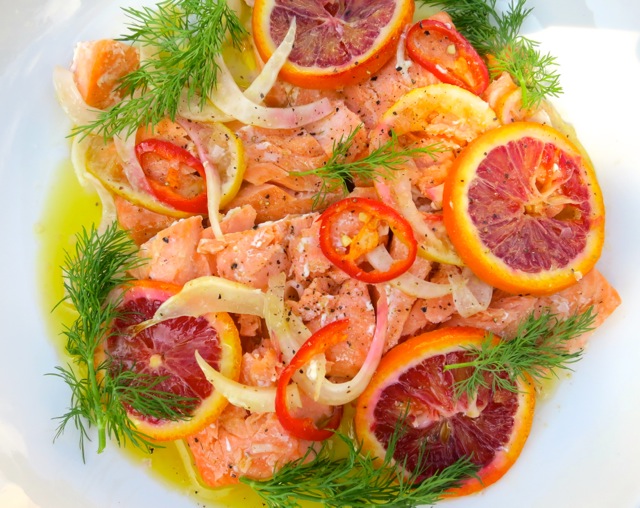
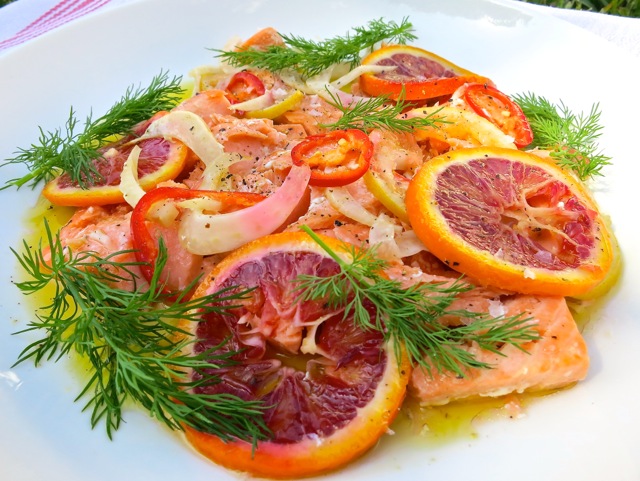
Slow Roasted SalmonI’ll be honest.  Salmon is not one of my favorite foods.  Occasionally I enjoy chunky smoked salmon on John’s hearty 9-grain bread, toasted and slathered with mayonnaise and lots of capers or salmon grilled with Granny’s Teriyaki sauce.  Other than those two preparations, I will usually take a pass on salmon, that is, until I received the January issue of Bon Appétit.  A beautiful dish of slow-roasted salmon with fennel, blood oranges, lemon and chiles caught my attention immediately.

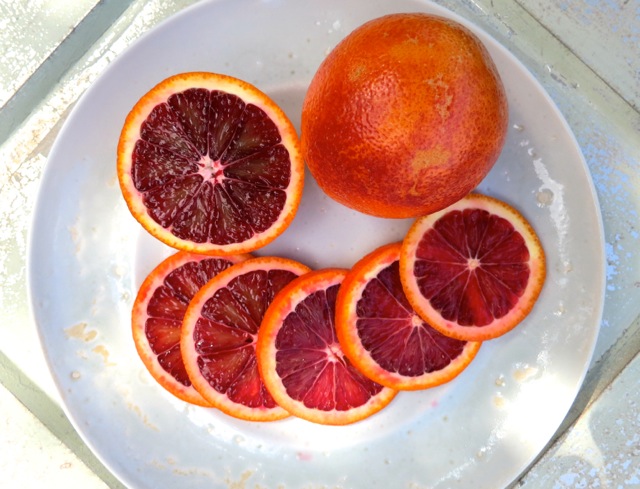
Blood OrangeThe beautiful crimson color of a blood orange.

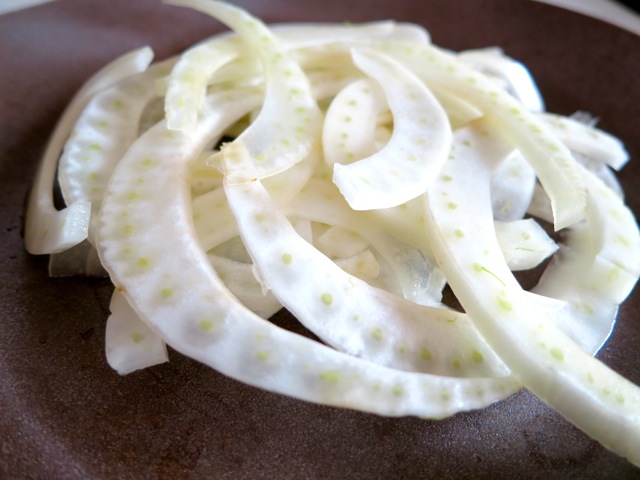
FennelThinly sliced fennel slow-roasted with the salmon and citrus imparts a lightly sweet,  springtime flavor to the dish.

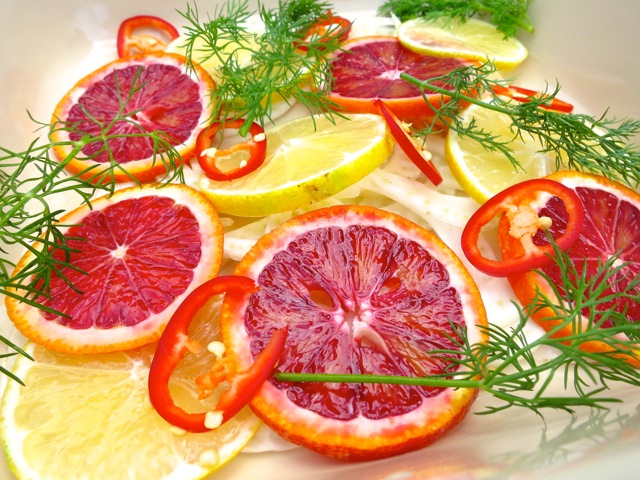
Blood Oranges, Lemon and Dill

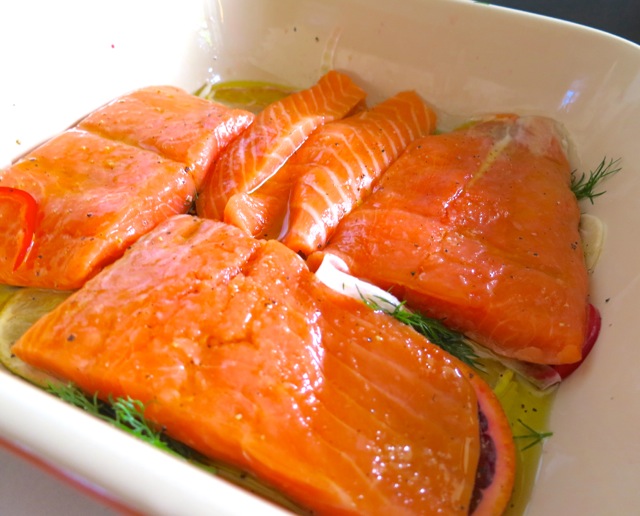
Salmon Filets on Blood Oranges, Lemon, Fennel and DillThe salmon sits on the fennel, citrus, chile and dill and olive oil is poured over.  Into the oven it goes, for 30 minutes.

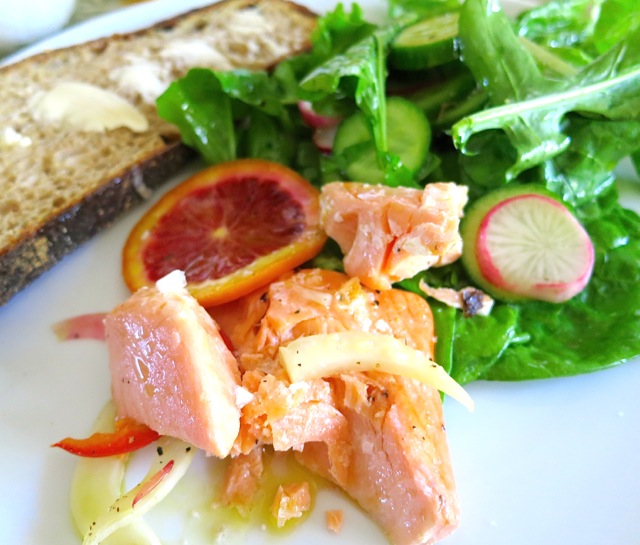
Slow Roasted SalmonWe sopped up some of the flavorful olive oil on pieces of bread.  The fennel still had a bit of crunch to it and the oranges and lemon were meltingly soft and sweet.  It was divine.  My opinion of salmon may need adjusting!

Slow Roasted Salmon Plate

Slow-Roasted Salmon with Fennel, Citrus, and Chiles

Adapted from Bon Appetit ~ January 2014

Serves 4

Ingredients

1 small fennel bulb, thinly sliced

1 blood or navel orange, very thinly sliced, seeds removed

1 Meyer or regular lemon, very thinly sliced, seeds removed

1 red Fresno chile or jalapeño, with seeds, thinly sliced

4 sprigs dill, plus more for serving

Kosher salt and coarsely ground black pepper

1 1/2 pounds skinless salmon fillet, preferably center-cut

3/4 cup olive oil

Flaky sea salt (such as Maldon)

Preparation

Preheat oven to 275°.

Toss fennel, orange slices, lemon slices, chile and 4 dill sprigs in a shallow 3-quart baking dish.  Season with kosher salt and pepper.  Season salmon with kosher salt and place on top of fennel mixture.  Pour oil over.

Roast until salmon is just cooked through (the tip of a knife will slide through easily and flesh will be slightly opaque), 30 – 40 minutes.

Transfer salmon to a platter, breaking it into large pieces as you go.  Spoon fennel mixture and oil from baking dish over; discard dill sprigs.  Season with flaky sea salt and pepper and top with fresh dill sprigs.

***I highly recommend Maldon sea salt.  Their soft and flaky crystals are unlike any other salt.

Canning, Fruit, Jams & Jellies, Recipes

Mixed Berry Jam

February 12, 2014

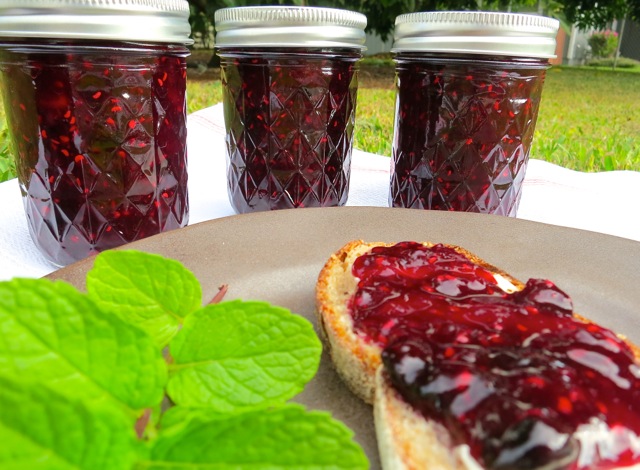
Mixed Berry Jam on ToastMango season is over and, alas, we have no lilikoi either. We love making jams and jellies from our own fruit, but when these fruits are out of season we look to other sources.

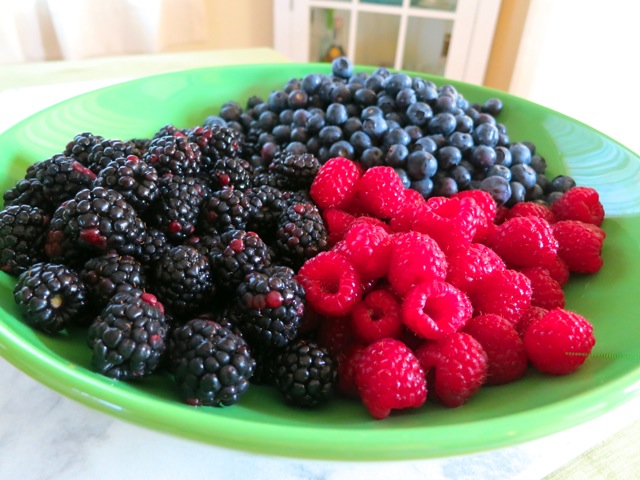
Blackberries, Blueberries, RaspberriesA mixed berry jam came to mind when John received his copy of Little Jars, Big Flavors published by Southern Living.  The book was on the Serious Eats list of  best Christmas gift books for 2013.  The recipes consist of small-batch jams, jellies, pickles, and preserves.  We were making our weekly trip to Costco and discovered that their selection of blackberries, raspberries and blueberries were all in perfect condition.  Buying various types of berries can be tricky.  I’ve purchased a container of blackberries that looked fine, however the next morning when I opened the container, to my dismay they were moldy. Aargh!
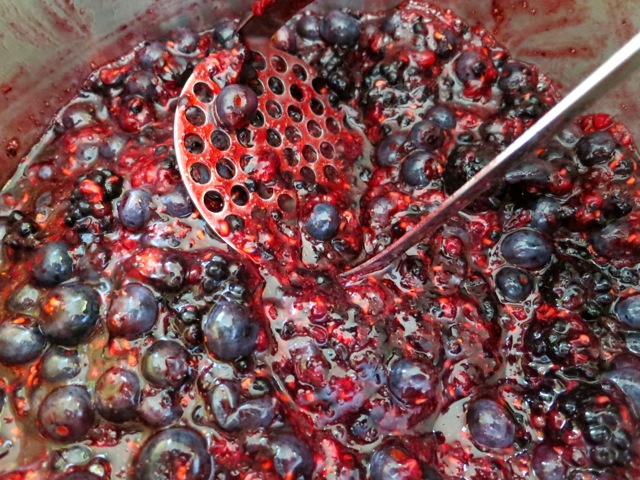
Crush Mixed BerriesThough the recipes in the book are “small-batch” we doubled the recipe because  we had bought so many good-looking berries.  Why not?

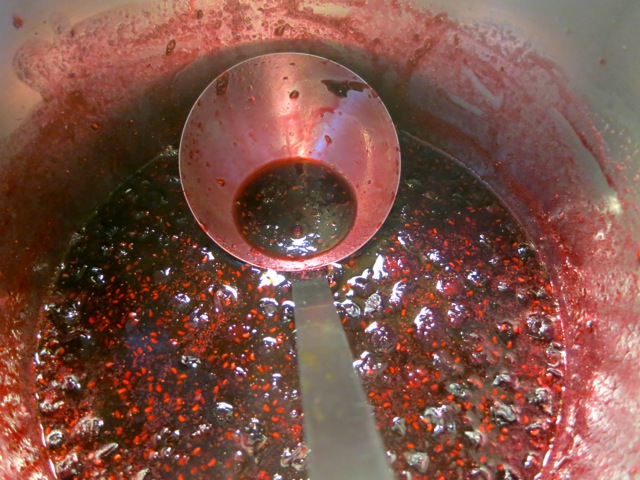
Cooked BerriesThis was a very simple recipe that produced the most delicious berry jam.  No pectin required.  We expected to have 8 half-pint jars of jam but ended up with 9 jars.  Since we only prepared 8 jars for canning we refrigerated the 9th jar and it was gone in a week! Have you ever had peanut butter and jam on toast for dessert? Scrumdiddlyumptious.

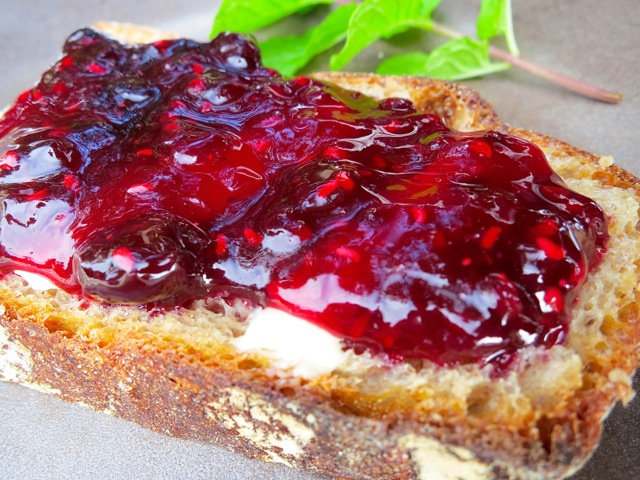
Mixed Berry Jam and Toast

Mixed Berry Jam

Southern Living ~ Little Jars, Big Flavors

Makes 9 half pint jars

Ingredients:

24 ounces (5 cups) blackberries

12 ounces (3 cups) raspberries

24 ounces (4 cups) blueberries

38 ounces sugar (6 cups)

2 tablespoons lime juice

Preparation

Rinse berries thoroughly under cold running water.  Remove and discard stems and any blemished berries.  Drain well.  Mash with a potato masher until evenly crushed.  Most of the blueberries will remain whole but that’s OK, they will soften once cooked and add a nice chunky texture to the jam.

Wash jars and place them in boiling-water canner.  Fill the jars and canner with water to the top of the jars.  Cover and bring water to a simmer over medium heat, do not boil.  Prepare the two piece closures.  Wash lids and place in a small saucepan and cover with water.  Heat to just a simmer but do not boil.  Do not heat screw bands.

While jars are simmering, bring crushed berries, lime juice and sugar to a rolling boil in an 8-quart stainless steel sauce pan or enameled Dutch oven over medium-high heat, stirring occasionally, until sugar dissolves.  Continue cooking, stirring often,  until it reaches 220 degrees on a digital thermometer (about 7 minutes).  Remove from heat and let foam settle (about 1 minute).  Skim off and discard any foam.

Lift the canner jar rack and fix into place on the rim of the canner. Remove one jar at a time from canner and empty hot water back into the canner. Place jar on a cutting board and place a canning funnel in the jar.  Ladle hot jam into jar leaving 1/4 inch head space.  With a clean damp cloth or paper towel wipe jar rim to remove any food residue.  Using a magnetic utensil, lift hot lid from water, center it on the  jar and place screw band on jar.  Tighten screw band evenly and firmly just until resistance is met.  Then increase to finger tip tight.  Do not over tighten.  Return jar to canner rack.  Continue filling jars individually until all jars are filled, then lower rack into canner and ensure that all jars are covered by 1 inch of water.  Cover canner and bring water to a full boil over high heat.  Process for 5 minutes, starting timer only when water reaches a full boil.

Remove jars from water, and let stand, undisturbed, at room temperature 24 hours.  You will hear the seals pop rather quickly once the jars are removed from the water.  If any of the lids do not seal, refrigerate the jam and enjoy right away.  Properly sealed jars will keep in your cupboard for up to one year, but why wait? Share them with your family and friends.  They will be delighted to receive a precious jar of homemade jam.

***We write the date the jam was made on the bottom of the jar with a Sharpie pen.

Breakfast, Dessert, Lactose Free, Recipes

Simply Sensational Cinnamon Rolls

February 6, 2014

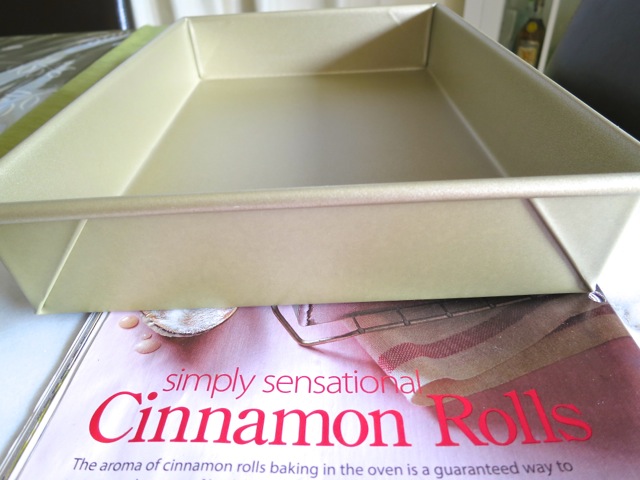
Simply Sensational Cinnamon RollsCook’s Illustrated magazine regularly rates kitchen tools and appliances.  The January/February 2014 issue rated 9 x 13-inch baking pans.  They put the pans through several tests to determine how well they performed and for durability.  I was in the market for a new pan and was ready to switch out the less than mediocre pans I purchased from who knows where.  They highly recommended the Williams-Sonoma Goldtouch pan and according to them, it produced the most evenly cooked, professional baked goods of all the pans they tested.  I ordered one right away.  I also bought a Goldtouch 8 x 8-inch pan, jelly roll pan, and two muffin pans. One thing leads to another…

Disclaimer: I couldn’t wait to taste one of these cinnamon rolls, hence the one missing from the introductory photo.

Williams-Sonoma Goldtouch Baking PanBesides using the pan for cakes and foggies, I was determined to finally try out a cinnamon roll recipe that I had been obsessed with for some time but had never tried.  The recipe comes from the September/October 2012 issue of Cuisine at Home magazine.

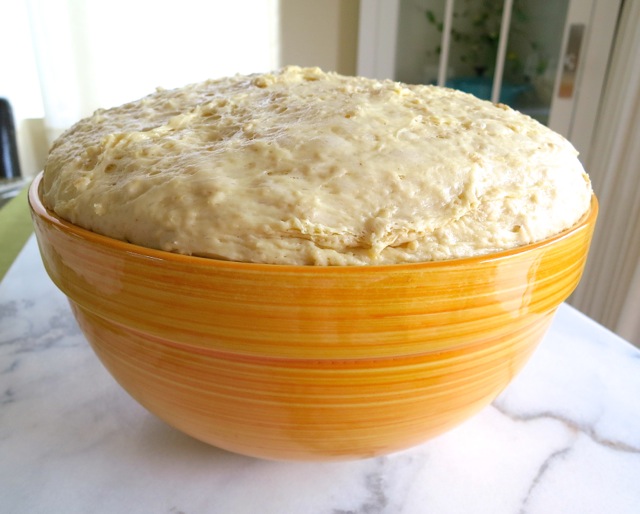
Rising Dough Let the dough rise. Note to self: Use larger bowl next time around.

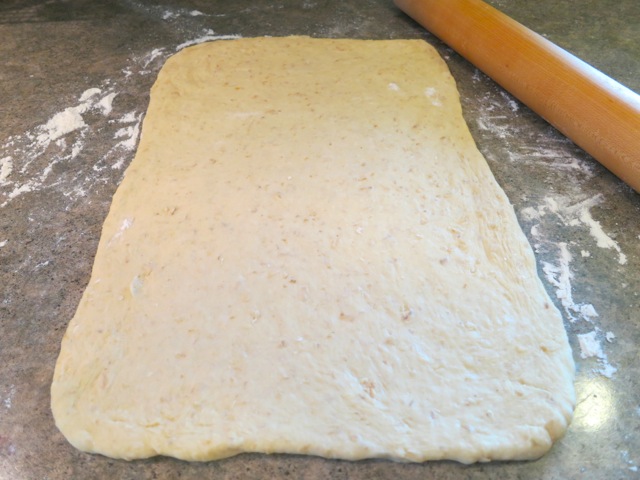
Rolling Out DoughI was quite skeptical about the 1 cup of old-fashioned rolled oats in the recipe.   You can see the oats in the dough pictured above.  It just seemed a bit weird: oats in my cinnamon rolls!   According to Cuisine at Home, the oats add an earthy, nutty flavor to the rolls.  In the end, I was rewarded with the best cinnamon rolls imaginable and they included some healthy whole grain oats.

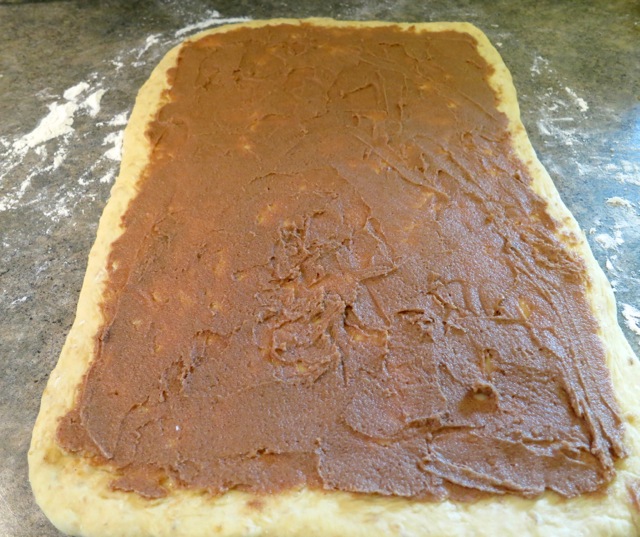
Rolled Out Dough with Butter, Cinnamon and SugarThe dough is divided in half and a sugar, butter and cinnamon mixture is spread on the dough before rolling up.

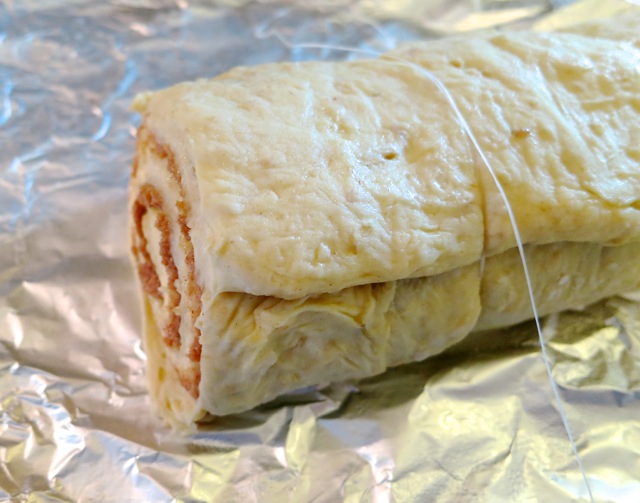
Rolling Up Dough

Cutting Cinnamon RollsThe logs are trimmed and cut with dental floss.  Ingenious!  The floss cut through the soft dough flawlessly.

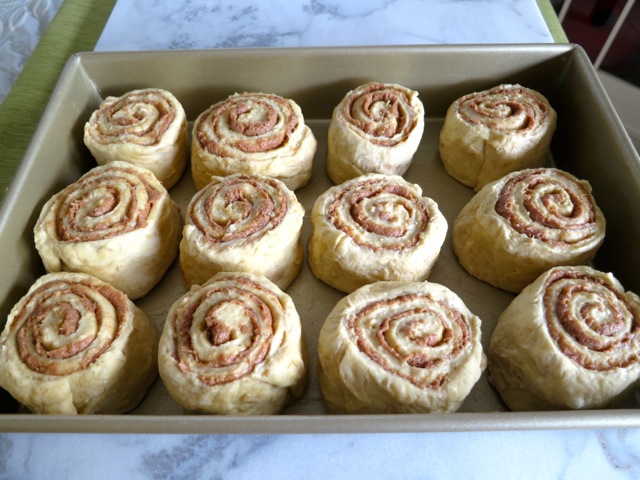
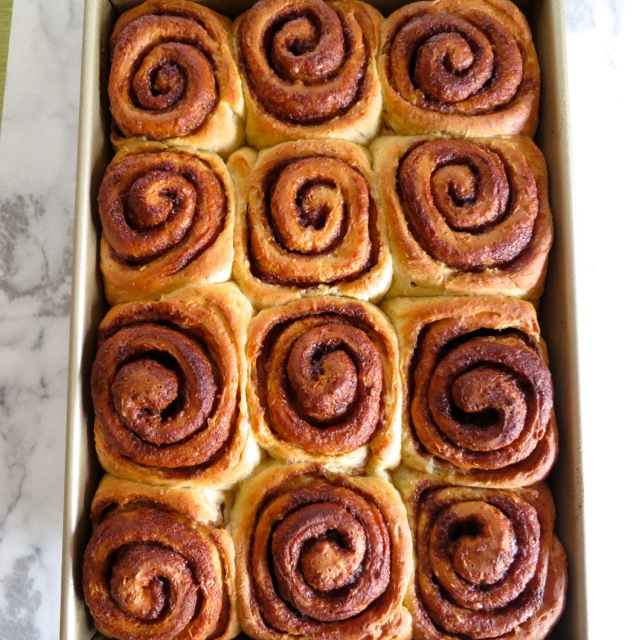
Cinnamon Rolls RisingRising time was about 1 hour.  Into the oven they went and once baked out came 12 beautiful cinnamon rolls waiting to be frosted.  The scent of cinnamon was intoxicating.
Baked Cinnamon Rolls

Frosted Cinnamon RollBy the way my new Goldtouch pan is, like the cinnamon rolls, simply sensational.

Cinnamon Roll Plate

Simply Sensational Cinnamon Rolls

Updated 12/06/15

Adapted from Cuisine at Home

Makes 12 rolls

Ingredients

Dough:

1 1/4 cups whole milk (I used lactose free whole milk)

1/2 cup vegetable shortening (preferably trans fat free)

1/4 cup packed brown sugar

1 pkg. active dry yeast (2 1/4 teaspoons)
1 cup old-fashioned rolled oats

1/2 cup hot water

4 cups all-purpose flour

2 eggs

1 teaspoon salt

Filling:

1 1/2 sticks Earth Balance Buttery Sticks. softened (or unsalted butter)
1 cup packed brown sugar

2 tablespoons ground cinnamon

1/4 teaspoon salt (1/2 teaspoon if using unsalted butter)

Frosting:

4 tablespoons unsalted butter, softened (I used Earth Balance Buttery Sticks)

8 ounces powdered sugar (2 cups)

2 – 3 tablespoons whole milk (I used lactose free whole milk)

1 1/2 teaspoons vanilla

1/8 teaspoon salt

Preparation

For the dough:

Heat 1 1/4 cups milk, shortening and 1/4 cup brown sugar in a small saucepan over medium-low until shortening is melted.  Transfer to a bowl of a stand mixer.  Let mixture cool to 100 – 110° (about 30 minutes, the Thermapen is my best friend) then whisk in yeast and proof until foamy, about 5 minutes.

Soak oats in hot water until all water is absorbed.

Add 2 cups flour and eggs to the yeast mixture and mix on low with a paddle attachment until combined.  Switch to the dough hook and add remaining 2 cups flour, oats, and 1 teaspoon salt.   Mix on low speed until incorporated, then increase speed to medium and mix until dough pulls away from the side of the bowl, about 7 minutes.

Transfer dough to a large bowl coated with nonstick spray, cover with plastic wrap, let rise in a warm place until dough doubles in size, about 2 hours.  Lift edges of dough away from bowl and press air bubbles out with your hands.

For the filling:

Combine 1 1/2 sticks butter, 1 cup brown sugar, cinnamon and 1/4 teaspoon salt.

Coat a 9 x 13-inch baking pan with butter.  Transfer dough to a floured surface and gently press to remove air bubbles.  Divide dough into two pieces (a kitchen scale comes in handy) and roll one piece into a 10 x 16-inch rectangle.

Spread half the filling over dough, leaving a 1/2-inch border.  Starting at the short end, roll dough, jelly roll-style, into a log.  Repeat filling and rolling with the second dough half.  Place logs on aluminum foil, loosely cover with plastic wrap and place in freezer for 10 minutes to firm up.

Trim off the ends of the logs with dental floss and discard, then cut each log into six equal pieces with dental floss (place floss  under the log, bring ends up and cross them to cut perfectly neat pieces).  Arrange rolls in the prepared pan spacing them equally to allow for rising.  Cover rolls with a kitchen towel and let rise until puffy, about 1 hour.

Preheat oven to 375°.

For the frosting, beat 4 tablespoons butter, powdered sugar, 2 tablespoons milk, vanilla and salt with a hand mixer.  If the frosting seems too firm, beat in a teaspoon of milk at a time.

Bake rolls until brown, about 30 minutes.  Test for doneness at the 25 minute mark so there is no chance of over baking.  Cool rolls in the pan before frosting.


Follow

Get every new post delivered to your Inbox

Join other followers: