Search results for

sriracha

Breakfast, Dinner, Eggs, Kimchi, Korean, Lactose Free, Pork, Recipes, Rice Dishes

Kimchi & Spam Fried Rice

June 7, 2016

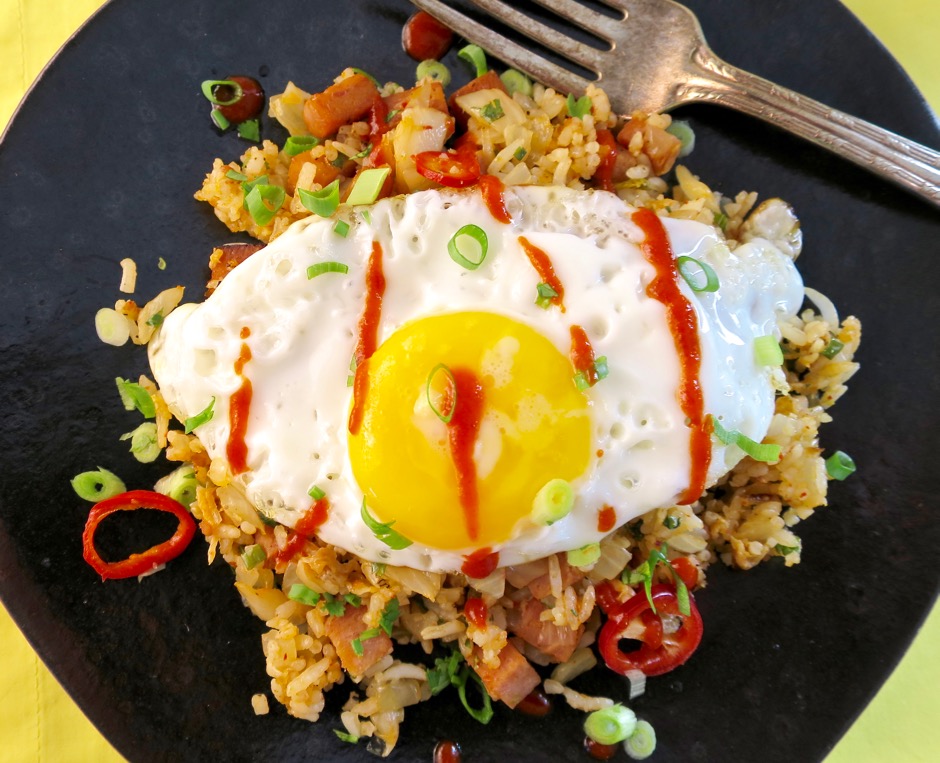
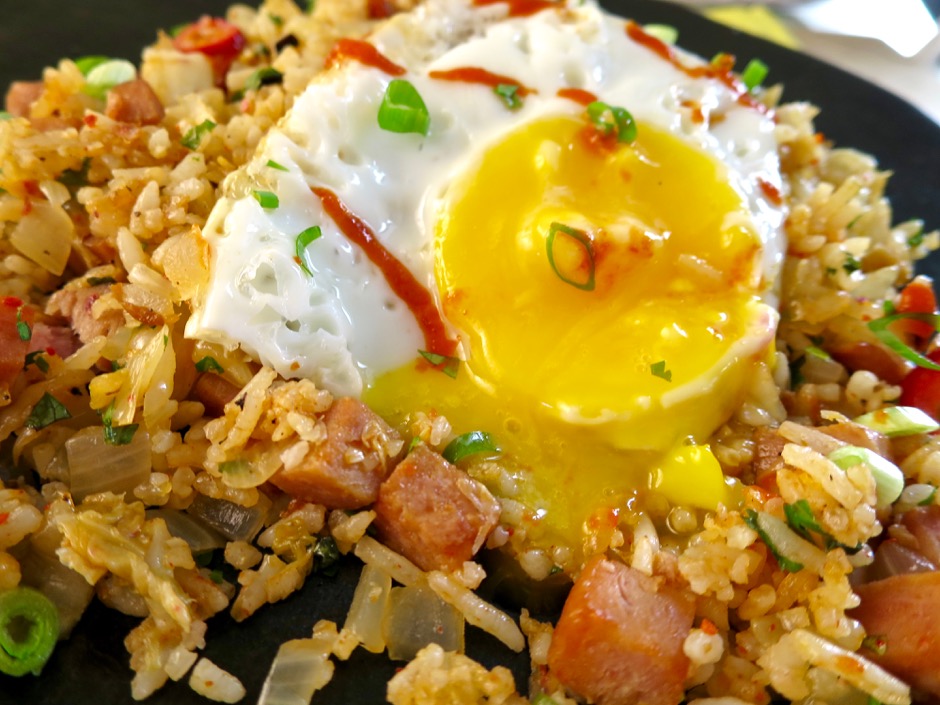
Kimchi & Spam Fried Rice Kimchi and Spam are staples in many households here in Hawaii.  Crunchy, pungent, spicy, kimchi pairs perfectly with a bowl of steaming rice and Korean hamburger patties.  And Spam?  Well, there are lovers and haters, just as there are for cilantro, Marmite, and anchovies…. Everyone I know loves a bowl of homemade fried rice and most would not turn down this version with kimchi, Spam and a perfectly  fried egg.  Spam may look unappealing straight out of the can, but once fried up into crispy little Spam croutons, it pairs perfectly with rice of any kind.  You ought to give it a try!
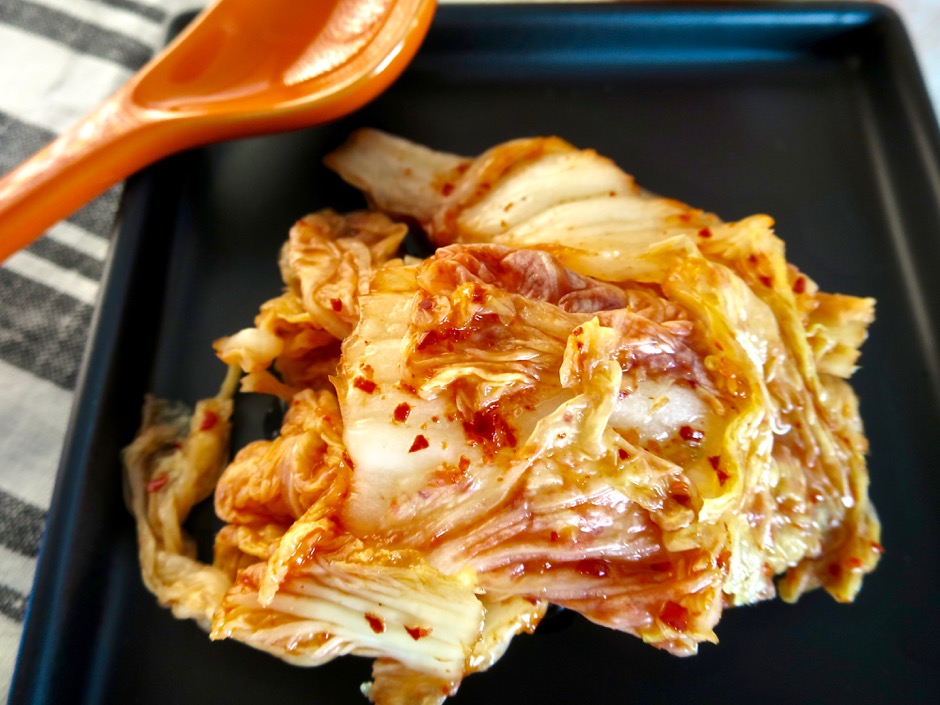
KimchiThere is an abundance of kimchi choices at the markets.  Use your favorite brand, but choose one that has a medium heat level rather than mild.

Glorious SPAM!Glorious SPAM!  I always chuckle when I see this little guy on the can.
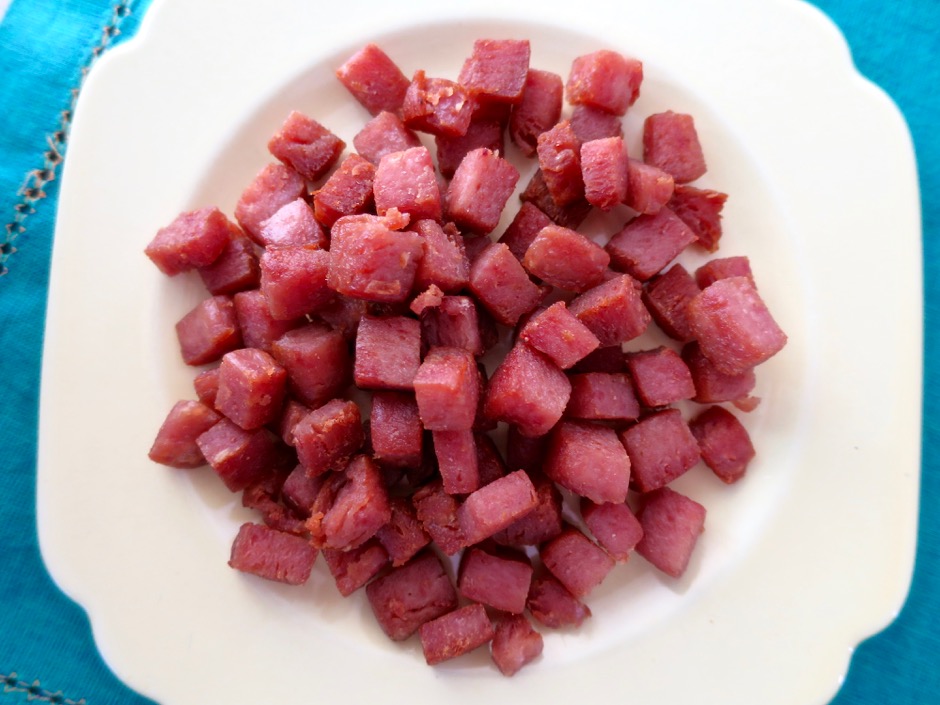
Crispy Fried SpamFrying the Spam until each piece is perfectly crisp makes all the difference.  You won’t be able to avoid nibbling on them before they make it into the fried rice.

Kimchi & Spam Fried Rice

Kimchi & Spam Fried Rice
 
Adapted from Kenji's Serious Eats recipe.
Author:
Serves: 6
Ingredients
  • 5 cups cooked jasmine rice (I use my rice cooker and the measuring cup that came with it - 2 cups uncooked rice)
  • 1½ cups finely chopped kimchi, about 325g (kimchi drained with 3 tablespoons liquid reserved)
  • canola oil
  • 1 12-ounce can Spam, cut into ½-inch dice
  • 2 cups finely diced onion
  • 2 medium garlic cloves, minced
  • ⅓ cup + 1 tablespoon thinly sliced scallions
  • freshly ground black pepper
  • 1 teaspoon sesame oil
  • 1 teaspoon fish sauce
  • ⅓ cup chopped cilantro (optional)
  • fried eggs, for serving
  • 1 Fresno chili thinly sliced (optional)
  • Sriracha hot sauce, for serving
Preparation
  1. Cook rice and let cool completely. I cook my rice in the morning and store in the refrigerator until ready to use. For this dish it is better to use day old rice.
  2. Place kimchi in a mesh strainer set over a bowl. Squeeze out excess liquid (reserve 3 tablespoons liquid). Finely chop kimchi.
  3. Heat a few teaspoons of canola oil in a wok over medium-high heat. Add Spam cubes and cook, tossing frequently, until well browned and crisp, about 8 minutes. Drain on paper towels. Wipe out wok.
  4. Add 2 teaspoons canola oil over medium heat and sauté onions until slightly softened, about 3 minutes. Add garlic and stir fry for 1 minute.Transfer to a bowl and set aside.
  5. Add ½ tablespoon canola oil to wok. Increase heat to medium high and heat until oil just begins to smoke. Add the rice and cook, stirring and tossing, until rice is warmed. Press rice against the sides of the wok to crisp up (like bibimbap and tag dig). Add onion and garlic mixture, kimchi, Spam, and ⅓ cup scallions tossing with rice to combine. Pour in reserved kimchi juice and season generously with black pepper. Add sesame oil, fish sauce and cilantro. Toss to combine.
  6. Serve fried rice in ceramic bowls, topped with a fried egg, reserved 1 tablespoon scallions, Fresno peppers and sriracha sauce.

 

Dinner, Recipes, Sandwiches, Tofu, Vegan, Vegetarian

Lemongrass Tofu Banh Mi

August 26, 2013

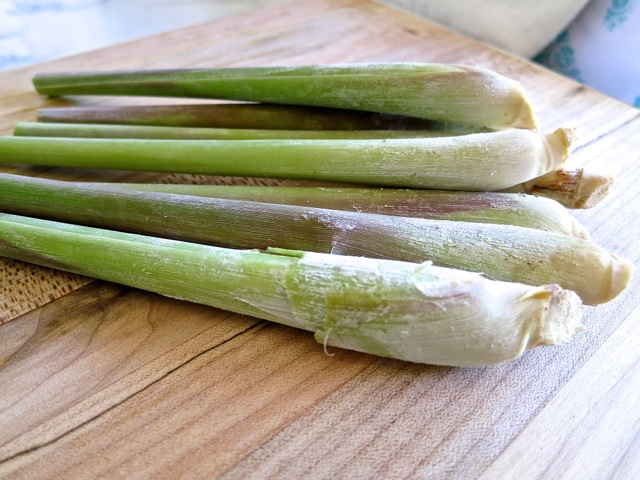
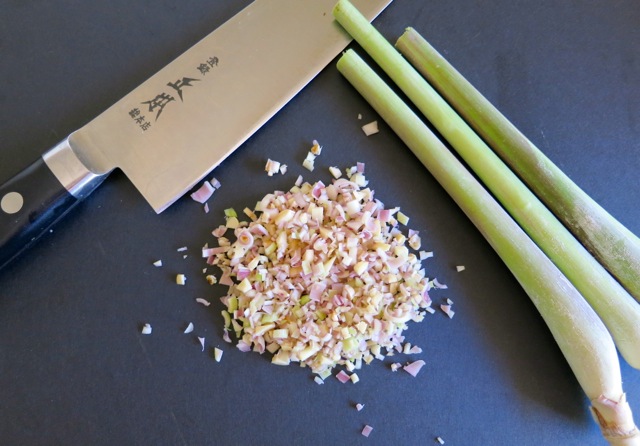
Lemon Grass stalks My friend Terence gave me a 3 lemongrass shoots that he wanted to find a home for.  John planted them in the garden and sure enough, they rooted and are now flourishing in the warm Maui weather.  I never cooked with lemongrass before.  Not until John pointed out that we had some in our yard!Chopped LemongrassIt’s a very nondescript type of grass with razor-sharp leaves, but don’t let that fool you. The lemongrass stalks have a wonderful fragrant citrus scent and can be used in all types of recipes.  It works perfectly in this tofu recipe for banh mi.

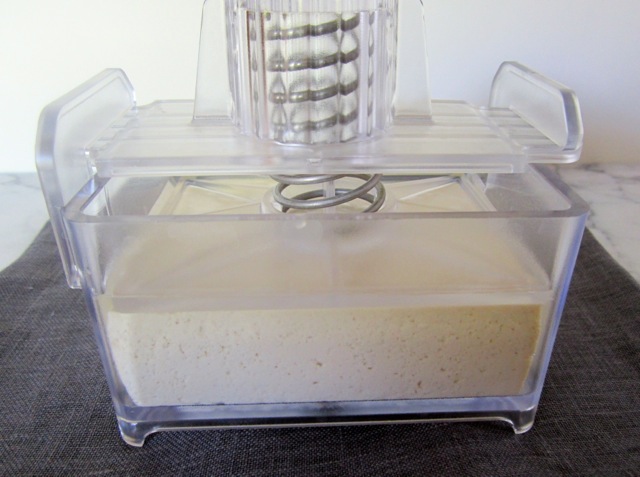
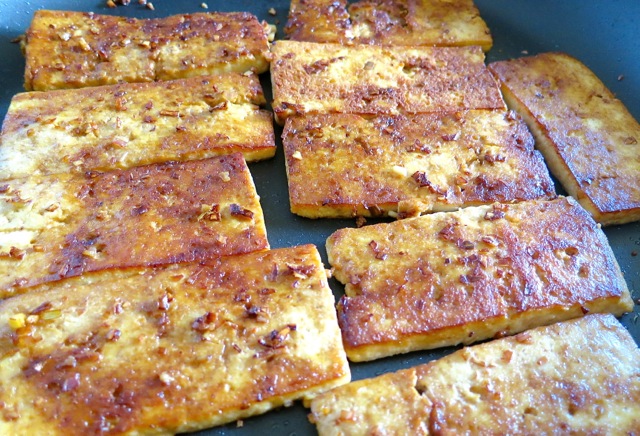
Tofu XpressThis handy tofu press saves you from wasting paper towels.  The TofuXpress is one of the best little kitchen gadgets I’ve bought in the last few years.  Pan Fried TofuTofu is quickly marinated and pan-fried until crispy on both sides.  The scent of the lemongrass, garlic, soy sauce and sesame oil is mouth-watering.

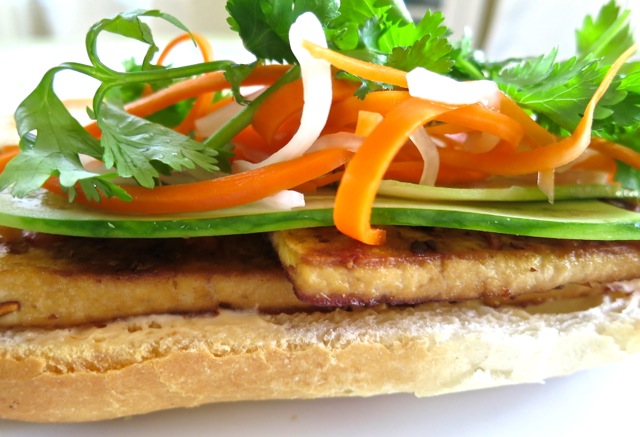
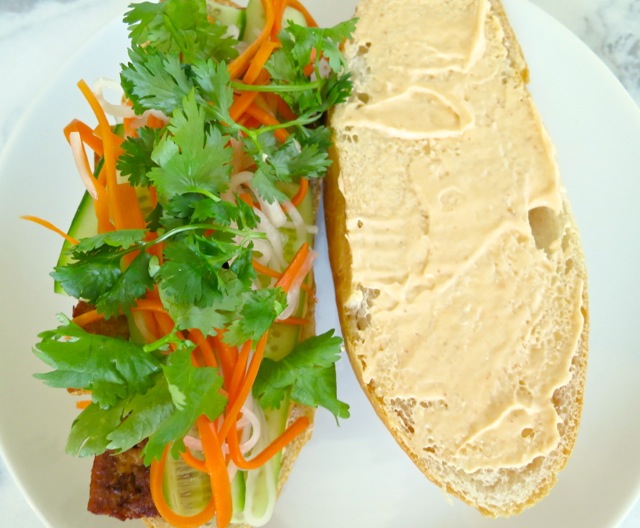
Lemongrass Tofu Banh MiLight and crunchy baguette with lemongrass tofu, thinly sliced cucumber, carrot and daikon pickles (do chua) and lots of cilantro. It’s one of my favorite sandwiches.  Do chua can be made in advance and stored in the refrigerator.  I picked up two fresh baguettes at our local Vietnamese restaurant/bakery.  John’s next experiment, homemade bahn mi.
Lemongrass Tofu Banh Mi

Tofu Banh Mi Close

Lemongrass Tofu Banh Mi

Adapted from theKitchn blog

Serves 2

Ingredients

14 ounce package extra firm tofu, pressed and cut into 10 slices (Wildwood Organic is a good brand to use.  House Foods extra firm is not firm enough).

3 tablespoons soy sauce

2 1/2  teaspoons sesame oil

1 tablespoon canola oil

2 tablespoons minced lemongrass (about 3 bulbs)

2 medium cloves garlic, minced

2 baguettes

cilantro

do chua pickles

sliced cucumbers, Japanese or English hothouse or other types with fewer seeds  (for very thin slices I use my Benriner and slice lengthwise to make long narrow strips)

Spread

2 tablespoons mayonnaise

1 teaspoon sriracha hot sauce

Preparation

Combine soy sauce, sesame oil, canola oil, lemongrass and garlic in a small bowl.

In a shallow dish place tofu slices in a single layer.  Pour sauce over tofu, turning pieces to coat well.  Let tofu absorb all of the marinade, turning and patting the lemongrass and garlic on each slice.  Cook tofu in a skillet over medium heat until brown and crisp on each side (about 8 minutes on the first side and 5 minutes or longer on the second side).

Prepare your banh mi.  Mix 2 tablespoons mayonnaise with 1 teaspoon sriracha.  Slather on both sides of the baguette.  Layer with tofu, sliced cucumber, do chua pickles, cilantro. Drizzle sriracha sauce on the tofu if you want to add a little extra spiciness to the sandwich, or add thinly sliced jalapeños.

***For vegan version use Vegenaise mayonnaise.


Dinner, Eggs, Korean, Lactose Free, Recipes, Rice Dishes

Bibimbap with Korean Style Hamburger Patties

June 28, 2013

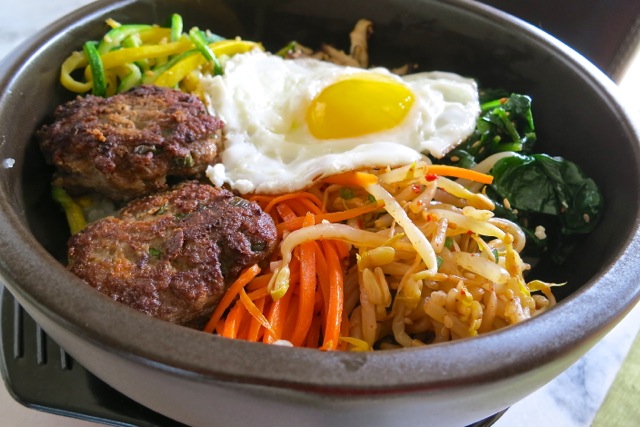
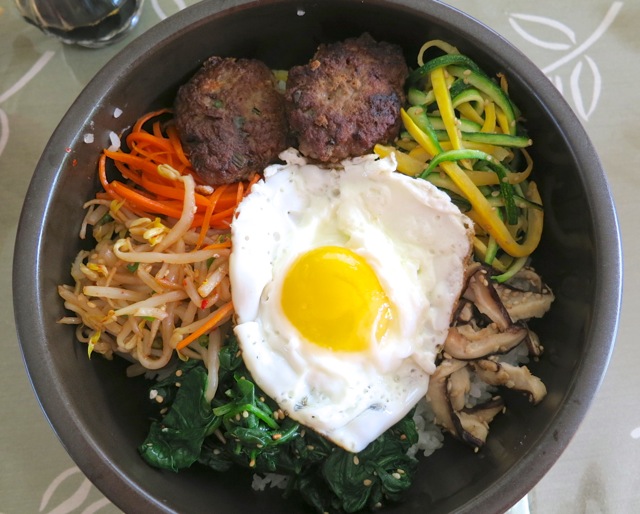
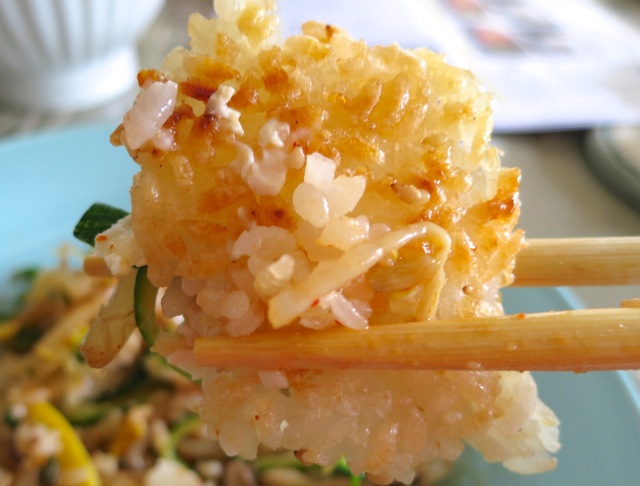
BibimbapLike so many others I am in love with Bibimbap.  It really is the perfect meal.  When heating a stone bowl directly on the stove top the rice on the bottom of the bowl gets crunchy and is utterly delectable.  Along with the colorful vegetables layered over the rice and savory Korean style patties this is beautiful dish.  And any meal with a fried egg is at the top of my list.

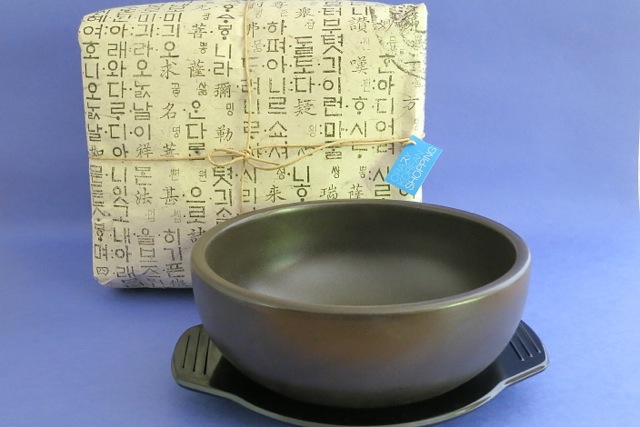
Dolsot BowlI had never eaten Bibimbap until a few months ago when I had lunch with a friend at a local restaurant here on Maui.  We decided to share the Bibimbap and a lemon grass chicken sandwich.  The sandwich was tasty, but the Bibimbap was a revelation! Once that stunning Bibimbap arrived at our table I think we both secretly wished we didn’t have to share it. I did not realize the rice on the bottom of the stone pot would be crispy.  It really made the dish stand out.  It was a real dilemma when we had to split the fried egg!  We vowed that if we ever shared a serving of Bibimbap again, we would order it with two fried eggs.  So as you can see above, I had to have my own Dolsot stone bowls so that I could make Bibimbap at home.

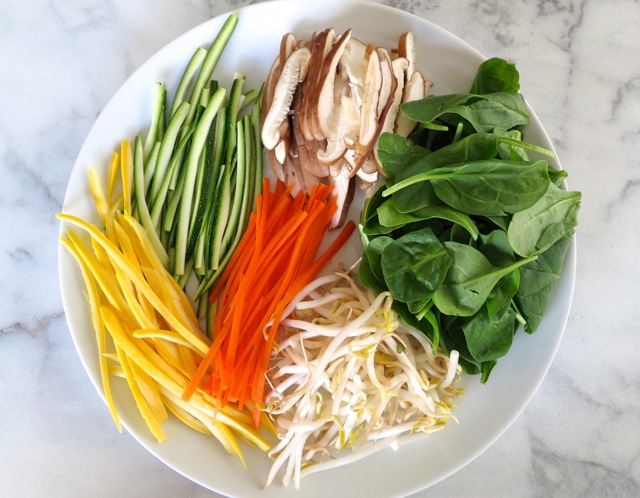
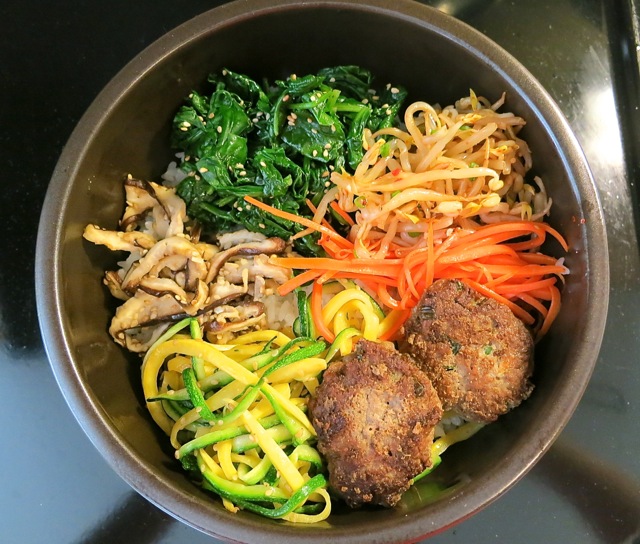
Bibimbap VeggiesColorful vegetables are quickly cooked and seasoned.

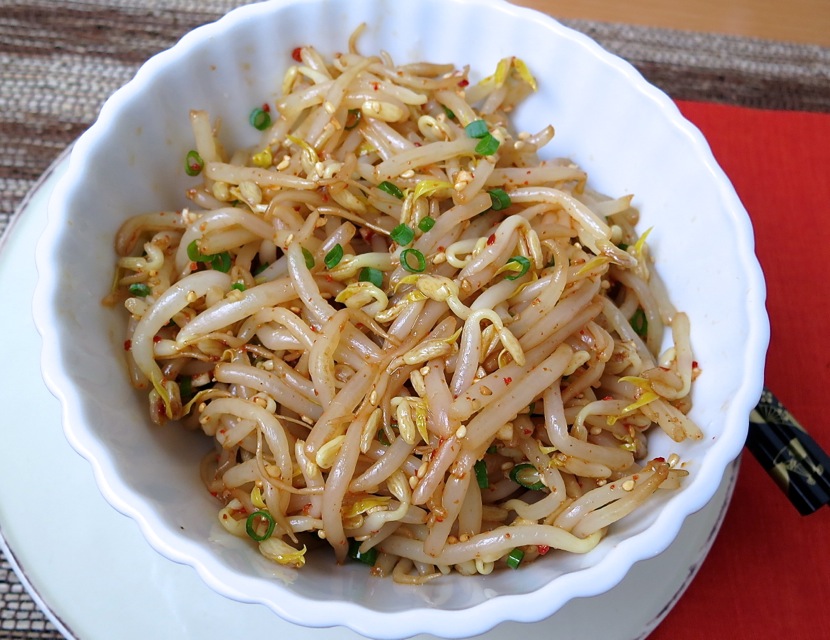
Bibimbap Bean SproutsThese marinated bean sprouts are delicious.

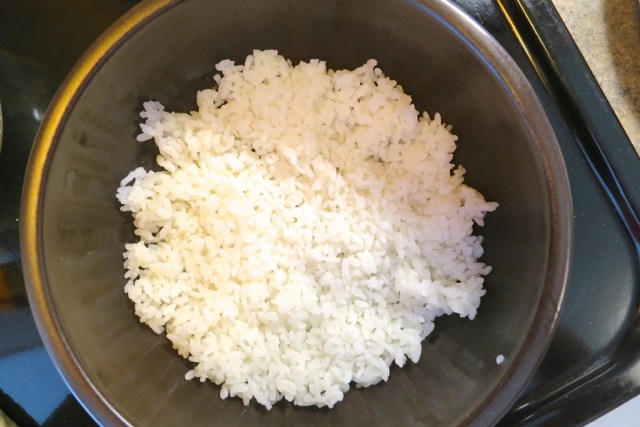
Bibimbap RiceHeat your stone bowl on the stove top, add a bit of oil, swirl and add some rice.  You’ll hear the rice sizzle as it hits the bowl.  Pat the rice gently against the heated bowl. Let it go for a while then add more rice and your prepared vegetables and meat or tofu to warm up.

Bibimbap on Stove

Bibimbap 2Lastly, fry an egg sunny side up and place on top of your heated Bibimbap.  Serve with kimchi on the side. Most recipes call for gochuchang sauce but I love Sriracha so I used it instead.

Bibimbap Crunchy RiceThe crunchy rice is addicting!

Bibimbap with Korean Style Hamburger Patties

Serves two as a side dish or one hungry appetite

Ingredients

 1 cup uncooked short grain white rice

Bean Sprouts

1 bag (10 ounces) bean sprouts – rinsed

1/2 teaspoon minced garlic

dash of salt

2 teaspoons soy sauce

1 teaspoon sesame oil

1/2 teaspoon Korean chili flakes (optional)

2 teaspoons roasted sesame seeds

Mushrooms

4 large shiitake mushrooms

1/2 teaspoon minced garlic

1/2 teaspoon sesame oil

1 teaspoon roasted sesame seeds

salt to taste

Zucchini

1/2 medium green zucchini

1/2 medium yellow zucchini

1/2 teaspoon roasted sesame seeds

salt to taste

Spinach

3 ounces fresh spinach

1 teaspoon soy sauce

1 teaspoon sesame oil

1 teaspoon roasted sesame seeds

Carrot

1/2 small carrot

1/2 teaspoon minced garlic

1/2 teaspoons sesame oil

Toppings

1 – 2 large eggs

Korean style hamburger patties (optional)

Preparation

Cook the rice and set aside until ready to use.

In a medium saucepan (3 qt. works well) bring 6 – 7  cups of water to a boil.  Add rinsed bean sprouts and blanch for 3 minutes.  Drain and run under cold water to stop the cooking.  Place sprouts on paper towels or a kitchen towel and press out some of the water.  In a medium bowl add bean sprouts, minced garlic, salt, soy sauce, sesame oil, Korean chili flakes if using and roasted sesame seeds.  Stir to combine.  The sprouts can be made earlier in the day and stored in the refrigerator.

Remove the stems and wipe the mushrooms clean.  Slice into thin strips and sauté in a bit of canola oil until the mushrooms become soft.  Add the garlic, sauté for another minute and remove from the stove top.  Stir in sesame oil and sesame seeds and season with salt.

Julienne the zucchini into long, thin strips using only the outer, colorful portion.  Heat a bit of canola oil in a small skillet and cook for just a minute to slightly soften the strips.  Stir in sesame seeds and season with salt.

In a small skillet blanch the spinach for 1 minute until wilted.  Squeeze out the excess water and stir in the soy sauce, sesame oil and sesame seeds.

Julienne the carrot into long, thin strips.  Briefly sauté with garlic and sesame oil.  Season with salt.

The first time I used the bowl I soaked it in room temperature water for 5 minutes then placed it on the stove on medium heat to warm up.  I slowly adjusted the heat higher (between medium and medium high) and once hot added about 1 teaspoon of canola oil and coated the bottom and lower sides of the bowl.  (Please follow the heating instructions that come with your specific stone bowl).

Add enough rice to the heated bowl to cover the bottom of the bowl.  Press gently with a spatula.  You should hear the rice sizzle on the hot bowl.  Cook the rice for about 5 minutes and check to see if the rice is crunchy by lifting up a portion with a spoon.  The rice should have a light golden toasted color to it.  Once this happens, add more rice and top with vegetables and Korean style patties if using.  Placing the vegetables in alternating colors makes for a gorgeous rice dish.

Fry your egg sunny side up.  Place on top of the heated Bibimbap and serve with kimchi and Sriracha.

***There are so many variations of this dish. You don’t need to stick with specific vegetables or meat and can easily adjust the recipe to your liking.  Make it vegetarian by using tofu instead of meat.


Dinner, Recipes, Salad, Side Dishes, Veggies

Iceberg Lettuce Wedges with Thousand Island Dressing

June 5, 2013

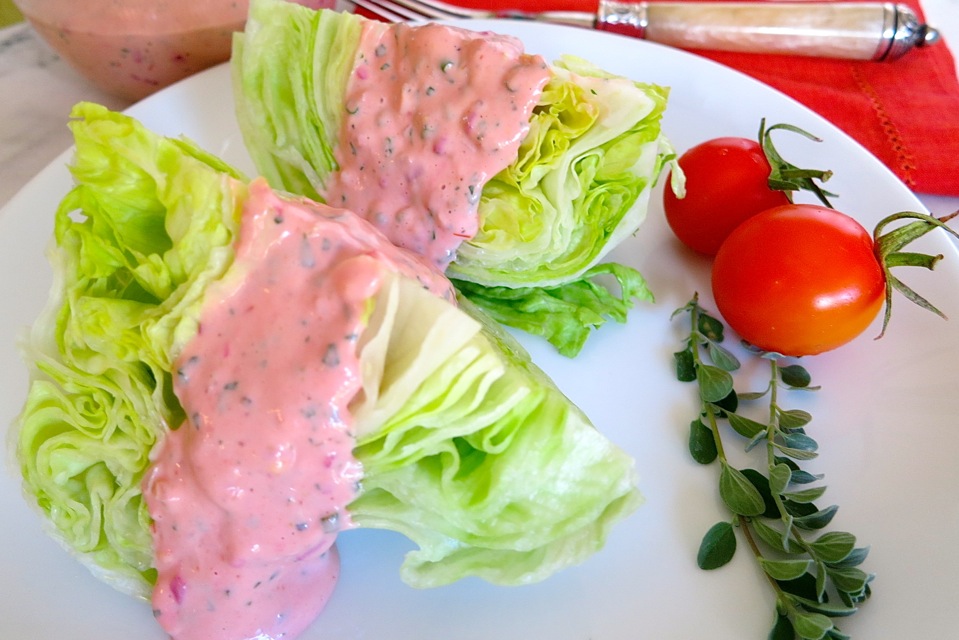
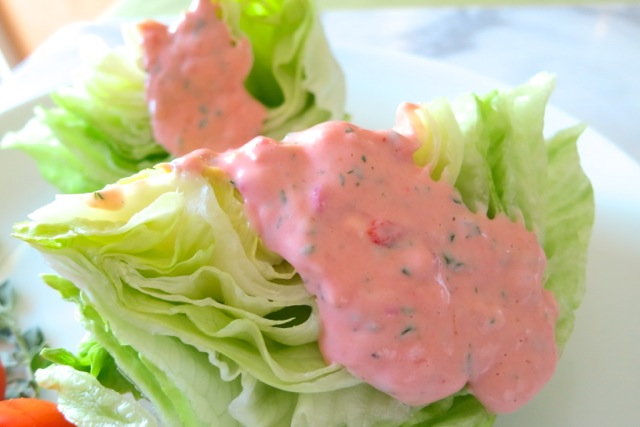
Iceberg Lettuce with Thousand Island Dressing#2This recipe comes from my favorite magazine, Saveur.  I saved it in my recipe folder where it remained for quite some time.  One day I was sifting through my magazine rack and I came across this folder, stuffed with recipes I had every intention of trying but somehow had been forgotten about, until today.

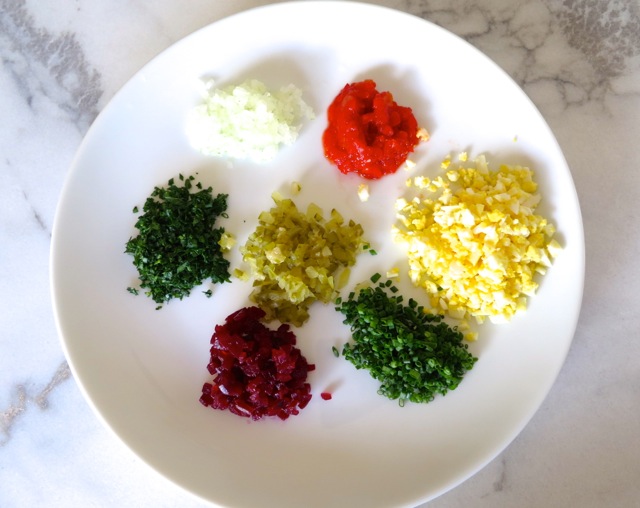
Dressing IngredientsThe ingredients were intriguing.  Thousand Island dressing with finely chopped beets? According to Saveur this particular recipe is based on one used at the now defunct Filene’s Restaurant in Boston.  Does anyone remember Filene’s Basement?  My sister used to live in Boston and the one time I visited her more than 40 years ago, she took me to Filene’s Basement. What a revelation! Filene’s sold designer clothing at discounted prices. There was no time to think about whether or not you wanted an item. If you didn’t grab it you were out of luck.  There was no time to wait in line for a dressing room, you just tried on the item on the spot! I found the most gorgeous pink sandals and brought them home with me.

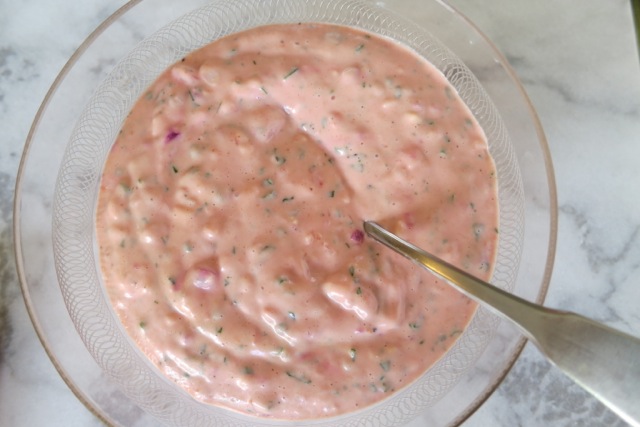
Thousand Island DressingOddly enough, I had all the ingredients  except for the chili sauce which was easily found at my local grocery store.  I rarely buy pimiento but had a small jar that I was planning to use for pimento cheese spread (more on this later).  I added Sriracha sauce which gave the dressing a subtle zing to it.  I found this on-line:

In the early 1920s Filene’s department store in Boston issued a 38-page booklet called “A Few Favorite Dishes from The Filene Restaurant.” This salad dressing was included, as were chop suey, chicken a la king, and maple layer pie. Be prepared to mince.

Iceberg Lettuce with Thousand Island Dressing#3

Iceberg Lettuce with Thousand Island Dressing

Adapted from Saveur Magazine

Makes about 1 1/2 cups

Ingredients

1 cup mayonnaise (I used 1/2 cup regular and 1/2 cup light)

2 tablespoons chili sauce

1 tablespoon each, finely chopped:

white onion

dill pickle

cooked beets

pimiento

chives

flat leaf parsley

1/2 finely chopped hard-cooked egg

1/2 teaspoon Worcestershire sauce

1 teaspoon Sriracha sauce (optional)

salt and freshly ground black pepper

wedges of iceberg lettuce

Preparation

Fold mayonnaise, chili sauce, onion, dill pickle, beets, pimiento, chives, parsley, egg, Worcestershire sauce and Sriracha sauce if using in a bowl with a rubber spatula.  Season to taste with salt and pepper.  Serve over wedges of chilled iceberg lettuce.

***If you plan to have leftover dressing be aware the beets will change the color if not used right away.  You can leave them out or love the pink tint they give the dressing.

Chicken, Dinner, Japanese, Recipes

Chicken Karaage

January 21, 2013

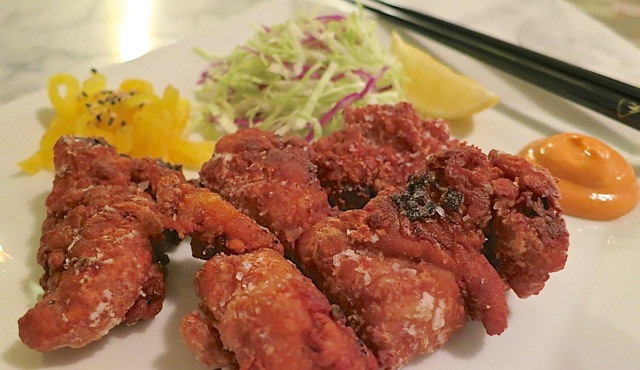
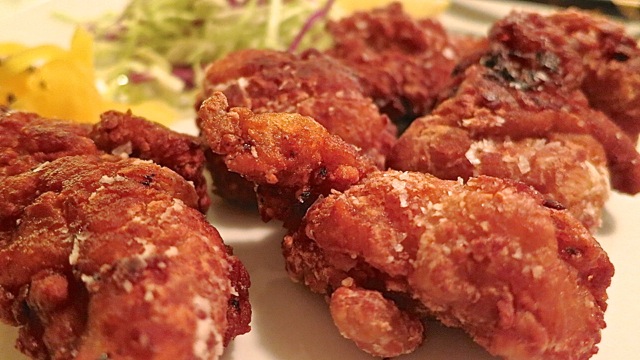
Chicken KaraageChicken karaage or Japanese fried chicken is a quick and delicious meal to prepare for your friends and family, a real crowd pleaser.  Because the chicken is boneless and cut into small pieces, it cooks quickly and that means you spend less time standing over your stove.

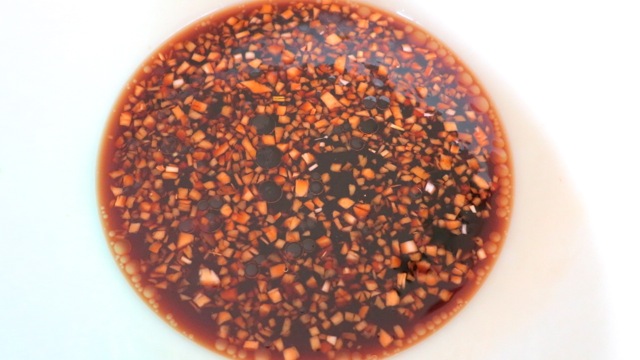
Karaage MarinadeThe marinade for the chicken is flavorful and made with ingredients you’re likely to have in your pantry.  Fresh ginger is the only item you might need to pick up at the market before you make this dish.  Though I only made dinner for two, the marinade will season up to 10 chicken tenders.  Just remember to turn the pieces now and then so each one soaks up the tasty sauce before frying.

Chicken Karaage CoatingLet the marinated chicken absorb the corn starch before frying.

Chicken Karaage - Japanese Fried Chicken

Chicken Karaage

Serves 2

Ingredients

6 chicken tenders – each cut into 3 pieces

1 cup corn starch

canola oil for deep-frying

Marinade

1/4 cup soy sauce

2 tablespoons mirin (sweetened rice wine)

2 tablespoons Sherry (Amontillado if available)

1/4 teaspoon sesame oil

2 medium garlic cloves – minced

1 teaspoon finely minced or grated ginger

Preparation

Combine soy sauce, mirin, sherry, garlic and ginger in a medium bowl large enough to hold the chicken pieces.  Marinate chicken in refrigerator for about 1/2 hour, turning chicken pieces occasionally.

Place corn starch in a pie plate or medium bowl.  Once the chicken is ready to fry, remove pieces from marinade and coat well in cornstarch.  Transfer chicken to a plate and continue with the rest of the chicken.

Let the marinated chicken pieces absorb the corn starch until they turn a light brown color (see photo above).  Now they are ready to cook.

In a wok or sauce pan heat oil over medium high heat – 355 degrees.  Use just enough oil to cover the chicken for deep-frying.

Once the oil is hot, cook chicken in batches.  Try not to over crowd the pan.  This will cause the heat to drop and the chicken will become greasy if the oil is not hot enough. Turn chicken after 1 minute and continue to fry until cooked through, about 1 1/2 minutes more. The chicken should be a deep brown color on both sides.  Remove a piece of chicken from the pan to check for doneness.

Transfer cooked chicken to a paper towel lined plate and sprinkle with coarse salt.  Continue to cook the rest of the chicken.

Place fried chicken on a serving plate with lemon slices or as I prefer, with Sriracha hot sauce on the side.

Follow

Get every new post delivered to your Inbox

Join other followers: