Beef, Dinner, Italian, Pasta, Recipes

Cheesy Beef Stuffed Shells

April 12, 2017

Cheesy Beef Stuffed Shells

These stuffed shells are my new favorite pasta dish.  It has many flavors in common with lasagne bolognese.  Yet unlike bolognese sauce that simmers for a several hours, this meat sauce is ready in less than 30 minutes and is equally delicious.  Another time saver is to use a good store-bought pasta sauce such as Rao’s Basil Tomato Sauce. Because it is particularly tasty, I stock up when it is on sale.
Barilla Jumbo Pasta Shells

Barilla makes beautiful pasta shells that are just the right size for this recipe.  Check the box for broken pieces before purchasing it.  If the box shows signs of being damaged, the shells may be fractured and once cooked can fall apart and be unusable.

Meat Sauce for Shells

Ground sirloin is the perfect choice for the meat sauce.  It is flavorful yet lean.  However if you are unable to find ground sirloin, lean ground beef is a fine substitute.

Cheesy Beef Stuffed Shells

Cheesy Beef Stuffed Shells

I use cottage cheese in the recipe however you may substitute ricotta.  The cottage cheese is light and mild in flavor but adds a creaminess without adding too many calories. I love how it melds together with the meat sauce and becomes a luxurious filling.

Cheesy Beef Stuffed Shells

Cheesy Beef Stuffed Shells
 
Author:
Serves: 6
Ingredients
  • Meat Sauce:
  • 1½ tablespoons extra virgin olive oil
  • 1 cup finely chopped onion
  • 2 garlic cloves, minced
  • 1 pound ground sirloin (or other lean ground beef)
  • kosher salt and freshly ground pepper
  • 2 tablespoons chopped fresh Italian parsley
  • 1 teaspoon dried oregano
  • ½ teaspoon dried marjoram
  • 1 24 ounce jar Rao's Tomato Basil Sauce, divided
  • Pasta Shells:
  • 24 jumbo pasta shells (Barilla Jumbo Shells 12 oz. box)
  • Cheese Mixture:
  • 16 ounces cottage cheese (I use Lactose Free)
  • 6 ounces (2 cups) coarsely shredded yogurt cheese (or mozzarella), divided
  • 3 ounces (1 cup) coarsely shredded sharp cheddar cheese
  • 1 large egg lightly beaten
Preparation
  1. Preheat the oven to 350 degrees. Lightly butter a 9x13" casserole dish.
  2. In a large skillet over medium heat, sauté onion in olive oil until softened, about 5 minutes. Add garlic and sauté for another minute. Add the ground sirloin and cook, breaking it up with a wooden spoon, until meat is no longer pink. Season with ¾ teaspoons kosher salt and freshly ground black pepper. Add fresh parsley, dried oregano and marjoram. Stir to combine. Remove from the heat and mix in 1¼ cups of Rao's sauce. Transfer to a bowl and refrigerate until ready to use. Spread the remaining Rao's sauce in the casserole dish.
  3. Cook shells in boiling, salted water for 10 minutes or until al dente. Rinse under cold water to stop the cooking, drain on paper towels.
  4. Combine cottage cheese, ¾ cup yogurt cheese, and all of the cheddar cheese in a large bowl. Mix in beaten egg. Add beef mixture to the bowl, stir to combine well. Spoon the filling into the pasta shells and arrange over the sauce. Sprinkle the remaining 1¼ cups yogurt cheese over the shells. Bake for 30 minutes or until the filling is thoroughly heated and the cheese is melted and bubbly.

Bread, Breakfast, Lactose Free, Recipes

Cream Cheese Biscuits

April 3, 2017

Cream Cheese BiscuitsGood biscuits are an irresistible accompaniment to any meal.  We particularly enjoy them with breakfast as an alternative to our usual toast. Cook’s Country mentions that cream cheese biscuits are a favorite in Charleston, South Carolina.  After making a few batches of these biscuits I can see why they are so popular.  Light in texture and rich in flavor these biscuits are a snap to make for your weekend brunch.

Cream Cheese Biscuit Dough

The dough is gently rolled into a rectangle then cut into 12 squares.  Baked until lightly browned, they are ready in 12 – 15 minutes.

Cream Cheese Biscuits


Cream Cheese Biscuits
 
Adapted from Cook's Country magazine
Author:
Serves: 12
Ingredients
  • 1½ cups all-purpose flour
  • 1½ cups cake flour
  • 1 tablespoon sugar
  • 1 tablespoon baking powder
  • ¾ teaspoon salt (1 teaspoon if using unsalted butter)
  • ¾ teaspoon baking soda
  • 4 ounces Green Valley lactose free cream cheese (or regular cream cheese) cut into ½-inch pieces and frozen 30 minutes
  • 4 tablespoons Buttery Sticks (or unsalted butter), cut into ½-inch pieces and frozen 30 minutes
  • 1 cup + 1 tablespoon lactose free buttermilk (or regular buttermilk)
  • For lactose free buttermilk: 1 cup minus 1 tablespoon lactose free 2% milk + 2 tablespoons fresh lemon juice. Give it a quick stir and let sit for 5 minutes until thickened.
Preparation
  1. Adjust oven rack to middle position and heat oven to 450 degrees. Line a baking sheet with parchment paper.
  2. Pulse all-purpose flour, cake flour, sugar, baking powder, salt, baking soda, cream cheese, and butter in food processor until mixture resembles coarse meal. Transfer mixture to a large bowl. Stir in buttermilk until combined (dough may appear slightly dry).
  3. Turn dough onto a lightly floured surface and knead briefly until dough comes together. Roll dough into 8x6-inch rectangle, about ¾-inch thick. Cut into 12 squares and transfer to prepared baking sheet. Bake until light brown, 12 - 15 minutes. Transfer to a wire rack and let cool for 5 minutes. Serve warm.


Dinner, Dressing, Fish, Japanese, Lactose Free, Recipes, Rice Dishes

Seared Ahi Rice Bowl

March 20, 2017

Seared Ahi Rice Bowl

Here in the Islands, we love our ahi tuna.  I would be happy to eat this every day. This is the rice bowl of my dreams! Light, fluffy, Japanese rice topped with furikake seared ahi, vegetables and a homemade dressing that is drizzled over everything in the bowl.  I use the dressing in this recipe too.  It’s a zingy sauce made with fresh lime zest, lime juice, soy sauce, and lots of freshly grated ginger.  It’s tasty and versatile.

Seared Ahi Rice Bowl

Jalapeno,Edamame, Carrot, Pickled Ginger, Avocado

I always keep a package of edamame in the freezer. It is easy to prepare and so good in this dish (as well as in salads). Whatever other ingredients you choose to add to your ahi rice bowl, let the fish be the star of the dish. The mild flavors of blanched carrots and creamy avocado cubes are perfect. Try to include the sweet and tangy pickled ginger. It is such a nice accompaniment to the rice and fish.  Scatter thinly sliced jalapeños or pretty, red Fresno peppers over your rice bowl if you want to add some heat.  For a vegetarian rice bowl, substitute your favorite tofu in place of the fish. If you are a fan of nori, scatter thin strips over the rice bowl just before serving it.  And if you can find bubu arare by all means add this too.  They are the little crispy golden rice balls you see in the photos of the ahi bowls that add a crunchy and toasty flavor to each bite.

Lime Zest

Strain Zest Through a Fine Mesh Sieve

Lime zest, lime juice, sugar and water are quickly heated in a pan then poured through a fine mesh strainer.  Just the liquid is used for the dressing.  Once it has cooled the other ingredients are added to complete the dressing.

Seared Ahi

Buy the freshest ahi block you can find. I visit or call my favorite local markets to ensure the fish has been cut that very same day.  If it has been sitting on the shelf for more than a day, I take a pass and try again another time.  Coating the ahi block with furikake creates a light seasoning and crunchy texture (from the sesame seeds) that is perfect for this dish.

Seared Ahi Rice Bowl

Seared Ahi Rice Bowl
 
Author:
Serves: 2 servings
Ingredients
  • For the dressing:
  • 2 teaspoons finely grated lime zest
  • 2 tablespoons fresh squeezed lime juice
  • 2 tablespoons water
  • 1 tablespoon granulated sugar
  • 2 tablespoons + 2 teaspoons soy sauce
  • 2 tablespoons Champagne vinegar (or white wine vinegar)
  • 1 tablespoon + 2 teaspoons finely grated peeled ginger
  • For the rice bowl:
  • Cooked Japanese short grain white rice (I use my rice cooker and measure out 1 cup uncooked rice)
  • 10 ounces fresh ahi block
  • furikake for coating ahi block
  • ½ cup frozen shelled edamame (boil for 4 minutes, drain and cool)
  • ½ small carrot, sliced thin (microwave in water for 45 - 60 seconds to soften slightly)
  • ½ small avocado cut into small cubes
  • pickled ginger
  • slivered nori (optional)
  • bubu arare (optional)
  • thinly sliced red hot pepper such as jalapeño or Fresno (optional)
Preparation
  1. For the dressing:
  2. Combine lime zest, lime juice, water and sugar in a small saucepan. Cook over medium-high heat until sugar has dissolved. This will take just a minute or so. Transfer liquid to a small glass bowl, cover and let cool completely. Strain cooled liquid through a fine-mesh sieve into a small bowl. Whisk in soy sauce, vinegar, and ginger.
  3. For the fish:
  4. Lightly coat all sides of the ahi block with a canola oil. Place the fish on a cutting board or piece of foil and sprinkle furikake on all sides, patting it gently so it adheres to the fish.
  5. Heat a small pan over medium-high heat with a teaspoon of canola oil. When the pan is hot, sear the ahi for 30 - 60 seconds or so on each side. The thickness of your ahi block and how you prefer your ahi cooked will determine how long to fry it. Remove the fish to a plate or cutting board to cool. Slice fish into ⅓" thick slices.
  6. Divide the cooked rice into two bowls. Top with seared ahi, edamame, carrots, avocado, and ginger. Drizzle dressing over the ahi and other ingredients. Sprinkle the nori and bubu arare over the toppings if using and garnish with red pepper slices. Serve the rice bowl with extra dressing on the side.


Breakfast, Dessert, Lactose Free, Recipes

Ina’s Lemon Yogurt Cake

March 7, 2017

Ina's Lemon Yogurt Cake

Whenever I spot a recipe by Ina Garten (she hosted one of my favorite food shows) that sparks my interest, I know that I’m in for a treat.  You can always count on Ina for foolproof recipes that taste delicious.  I discovered her lemony infused cake right when our little tree was full of ripe lemons.  The timing was perfect.

Lactose Free Yogurt

Lucky for me and all of you who are lactose intolerant. There are really great products available to us in the markets these days.  Green Valley makes high quality yogurt, sour cream, butter and cream cheese that are lactose free.

Lemons from the Garden

Our little lemon tree produced so many large, juicy fruits this year.  It was a bit stressful to see so many lemons hanging from the tree’s lanky branches.  We removed some of the green fruit so that the tree wouldn’t topple over.

Ina's Lemon Yogurt Cake

Ina's Lemon Yogurt Cake

This is a moist, spongy, lemony cake. It’s delicious.  I was planning to freeze part of it for later, but I decided to take it to work where we all enjoyed it with our morning coffee.

Ina's Lemon Yogurt Cake

Ina's Lemon Yogurt Cake
 
Adapted from Ina Garten's recipe
Author:
Serves: 1 loaf
Ingredients
  • 1½ cups all-purpose flour
  • 2 teaspoons baking powder
  • ½ teaspoon kosher salt
  • 1 cup lactose free plain whole milk yogurt (or regular yogurt)
  • 1⅓ cups sugar, divided
  • 3 extra-large eggs
  • 2 teaspoons grated lemon zest
  • ½ teaspoon vanilla extract
  • ½ cup canola oil
  • ⅓ cup freshly squeezed lemon juice
  • For the glaze:
  • 1 cup confectioners' sugar
  • 2 tablespoons freshly squeezed lemon juice
Preparation
  1. Preheat the oven to 350 degrees. Grease an 8½ by 4½-inch loaf pan. Line the bottom with parchment paper. Grease and flour the pan.
  2. Sift together the flour, baking powder, and salt into a small bowl. In another bowl, whisk together the yogurt, 1 cup sugar, the eggs, lemon zest, and vanilla. Slowly whisk the dry ingredients into the wet ingredients. With a rubber spatula, fold the canola oil into the batter making sure it is well incorporated. Pour the batter into the prepared pan and bake for about 50 - 55 minutes, or until a cake tester placed in the center of the loaf comes out clean.
  3. Meanwhile, heat the ⅓ cup of lemon juice and remaining ⅓ cup of sugar in a small pan until the sugar dissolves and the mixture is clear. Set aside.
  4. When the cake is done, allow it to cool in the pan for 10 minutes. Carefully remove the cake from the pan and place on a baking rack over a sheet pan. While the cake is still warm, slowly pour the lemon-sugar mixture over the cake and allow it to soak in. Let the cake cool on the rack.
  5. For the glaze, combine the confectioners' sugar and lemon juice and pour over the cake. Slice the cake and serve alone or with fresh berries on the side.


Chicken, Dinner, Lactose Free, Recipes, Sandwiches

Grilled Thai Chicken with Basil & Lemongrass

February 23, 2017


Grilled Thai Chicken with Basil & Lemongrass

Our lemongrass is tucked away in the corner of the garden which means I forget that it’s there most of the time. It thrives with little attention year after year producing the most fragrant stalks.   We love grilled chicken so when  I came across a recipe for grilled chicken breasts with lemongrass in Fine Cooking magazine, I couldn’t resist it.

Lemongrass

Once you peel away the tough outer stalks and cut into the stems, you will find the most fragrant and tender section of the lemongrass that will be used in the marinade.

Coconut Milk Marinade

This is a very easy recipe to put together.  I used my immersion blender to combine the ingredients but a food processor or blender work just as well.  Puree the ingredients until smooth, pour it over the chicken, transfer the bowl to the refrigerator for at least 2 hours before you light up your grill.

Grilled Thai Chicken with Basil & Lemongrass

Jasmine rice and a salad pair perfectly with the grilled chicken.  If you have leftovers slice thin pieces of chicken and serve it over a bowl of cold noodles or use it as a filling in a banh mi.

Grilled Thai Chicken with Basil & Lemongrass

Grilled Thai Chicken with Basil & Lemongrass
 
Adapted from Fine Cooking magazine
Author:
Serves: 4
Ingredients
  • ¾ cup chopped cilantro + more for serving
  • ½ cup coconut milk
  • ¼ cup finely chopped lemongrass (from about 3 stalks)
  • 6 fresh basil leaves
  • 6 jalapeño nacho rings (hot) or 1 fresh jalapeño, or to taste
  • 1 large garlic clove, minced
  • 2 teaspoons kosher salt
  • 1 teaspoon packed light brown sugar
  • ¼ teaspoon freshly ground black pepper
  • ¼ teaspoon ground coriander
  • 4 medium or 3 large boneless, skinless chicken breast halves, trimmed (I pound the chicken breasts to even them out and if using large breasts, cut the pounded pieces in half)
  • 1 lime cut into wedges for serving
Preparation
  1. Combine cilantro, coconut milk, lemongrass, basil, jalapeños, garlic, salt, brown sugar, pepper, and coriander in your immersion blender cup and puree ingredients until smooth. Alternatively you may use a blender or food processor. Arrange chicken breasts in a nonreactive baking dish in a single layer. Pour the marinade over the breasts and turn to coat them well. Cover with plastic wrap and refrigerate for at least 2 hours and up to 6 hours.
  2. Heat a gas grill to medium high or prepare a medium-hot charcoal fire. Grill the chicken until it has good grill marks on the first side, about 4 minutes. Flip chicken and continue to cook until firm to the touch and completely cooked through, 4 minutes more (cooking time depends upon the thickness of your chicken). Transfer to a platter and sprinkle with chopped cilantro. Serve with lime wedges.


Dinner, Recipes, Sandwiches, Vegetarian

Cheese & Nut Loaf + Burgers

February 8, 2017

Cheese & Nut Loaf

During the holidays last year, I wanted to serve a main dish that would appeal to my vegetarian guests, but also be enjoyable for my other guests as well.  This cheese and nut loaf turned out to be the perfect choice.  It bakes into a gorgeous loaf that looks beautiful and tastes delicious.  You can serve it alone or drizzle a vegetarian mushroom gravy or béchamel sauce over the slices before serving. The recipe comes from Deborah Madison’s The Greens cookbook named after the successful Greens Restaurant in San Francisco that still exists today.  Unfortunately I don’t own the cookbook and it seems to be out of print, but after reading all the great comments on line from those who have made it and having made it myself, I can see why everyone loves it.

Cheese & Nut Burger

My husband John had a great idea, and that was to shape the cheese and nut loaf mixture into patties. This turned out to be our favorite way to eat the cheese and nut loaf.  The burgers bake in just 30 minutes or so and they are so tasty nestled in a hamburger bun and topped with all of your favorite burger condiments.  Another thing I’d like to mention is that both the loaf and burgers freeze beautifully and can be microwaved or pan-fried for another excellent meal.

Cremini & Morel Mushrooms

Use whatever mushrooms are available to you.  I used creminis and morels. These gorgeous morels were sent to us by my stepdaughter Katie who hunts for mushrooms in the Pacific Northwest.

Parsley, Marjoram, Thyme

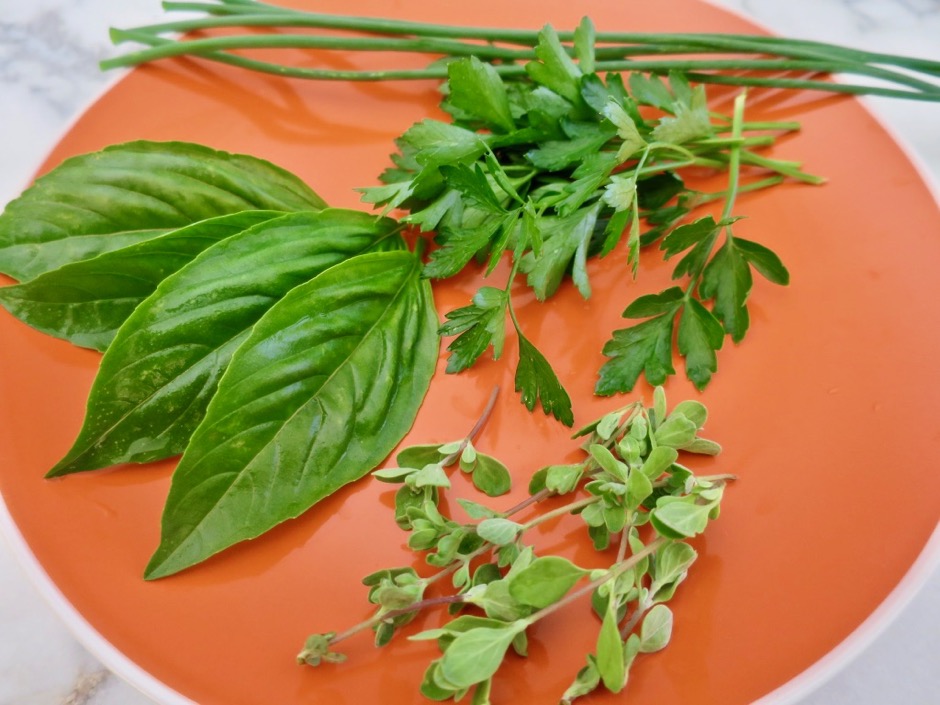
One of the things I love most about our garden are the assorted herbs that we grow. If you don’t have them, most markets carry a nice assortment of herbs these days but you can also use dried herbs as well.

Patties in Cooking Rings

You will need to cook the brown rice in advance. Otherwise all of the other ingredients can be put together as you prepare the recipe. The mixture is gently formed and patted into baking rings that I made of aluminum foil.  This keeps the patties from spreading when baking (they will flatten and become uneven when baking without the rings).

Baked Cheese & Nut Burgers

Cheese & Nut Burgers

And here we have perfectly shaped plump burgers.

Cheese & Nut Burger

Cheese & Nut Loaf

Cheese & Nut Loaf + Burgers
 
Adapted from Deborah Madison's recipe
Author:
Serves: 1 loaf or 10 - 12 burgers
Ingredients
  • 1½ tablespoons butter
  • 1¼ cups finely diced onion
  • 1 cup (packed) mushrooms, chopped fine
  • 1½ cups walnuts, toasted
  • ½ cup raw unsalted cashews, toasted
  • 2½ tablespoons chopped fresh flat leaf parsley
  • 1 teaspoon fresh chopped thyme (or ½ teaspoon dried)
  • 1½ teaspoons fresh chopped marjoram (or ½ teaspoon dried)
  • 1 teaspoon fresh chopped sage (or ½ teaspoon dried)
  • 2 medium garlic cloves, finely minced
  • 1½ cups cooked brown rice
  • 8 ounces grated cheese (I used extra sharp cheddar and yogurt cheese)
  • 1 cup cottage cheese (I used lactose free)
  • 4 large eggs, beaten
  • 1 teaspoon kosher salt
  • freshly ground black pepper
Preparation
  1. Preheat oven to 325 degrees.
  2. Spread walnuts and cashews on a small rimmed baking sheet and toast until very lightly golden brown, about 6 minutes. Transfer nuts to a plate to cool slightly. Chop nuts finely and set aside.
  3. Increase oven temperature to 375 degrees.
  4. For the loaf: Butter a 9" loaf pan and line with parchment paper allowing the paper to overhang on the sides to allow easy removal of the loaf.
  5. Melt butter in a large sauté pan over medium heat. Add onions and cook until they are translucent. Add mushrooms and cook until they are lightly browned, about 5 minutes. Remove from the heat and transfer mixture to a large bowl. Stir in chopped nuts, herbs, garlic, brown rice, cheese, cottage cheese, and eggs. Mix in salt and a few grinds of pepper. Mix until all ingredients are well incorporated. Spoon the mixture into the loaf pan, smoothing the top lightly.
  6. Bake until golden brown and firm to the touch, about 1 hour. Let cool in the pan on a wire rack for at least 15 minutes before transferring loaf to a plate.
  7. For the burgers: Preheat oven to 375 degrees. Line a large rimmed baking pan with parchment paper. The patties will spread and flatten when baking unless you use cooking rings which will keep them uniform in size. I use aluminum foil folded over a few times and stapled the ends together to make sturdy, disposable rings. Coat inside of rings with non-stick cooking spray.
  8. Divide the mixture into 10 - 12 portions. Gently form the patties so they fit snugly in the cooking rings. Bake for 35 minutes, or until the burgers are nicely browned. Remove cooking rings and serve burgers on toasted buns with your favorite accompaniments.
  9. Both the loaf and burgers freeze nicely.
  10. *For 4 - 6 burgers cut the recipe in half. The full recipe will also make an 8x4" loaf plus two burgers.


Follow

Get every new post delivered to your Inbox

Join other followers: