Chicken, Dinner, Lactose Free, Recipes

Peppadew Stuffed Chicken

September 28, 2017

Stuffed Chicken Breasts with Peppadew Peppers, Cheese and Herbs

A recipe in a recent Bon Appetit magazine caught my attention with its beautiful bright red Peppadew peppers scattered over grilled chicken skewers.  I was curious to know more about these mild & sweet peppers. Peppadew peppers are adored by many not only for their delicious flavor and vibrant color, but for their versatility in recipes.  A quick visit to the internet will reveal numerous recipes such as stuffed Peppadew peppers, Peppadew poppers, Peppadew mac & cheese, Peppadew cheese spread, and more.

I ordered a couple of jars of peppers on-line only to find out later that they are available at our local Whole Foods and Foodland Farms markets at their olive bars. Upon receiving my order I was dying to taste a Peppadew. I found  the pepper to be crisp, tangy, sweet, and quite delicious.  I’m always searching for new ways to dress up the common chicken breast.  The idea of the peppers paired with chicken sounded perfect. After a brief search, I stumbled upon this recipe at the Peppadew-USA web site. With just a few ingredients and quick preparation, I had the makings of a tasty dinner.

The recipe doesn’t note what herbs to use so I picked herbs from the garden that I thought would compliment the chicken; basil, chives, parsley, and marjoram.

Tied Chicken Breasts

After stuffing the chicken I thought it would be best to tie the chicken breasts to ensure the filling stayed put, especially the cheese.  Making a small incision in the thickest part of the breast is suggested rather than  slicing a larger incision along one side of the chicken breast which would allow more of the filling to escape while baking.
Peppadews, Herbs, Garlic & Olive Oil

Stuffed Chicken Breasts with Peppadew Peppers, Cheese and Herbs

The chicken can be marinated overnight however if you are running out of time, a few hours will suffice. The stuffed chicken is first browned on the stove top then finishes baking in the oven.  This recipe turned out to be a favorite of ours.

Stuffed Chicken Breasts with Peppadew Peppers, Cheese and Herbs


Peppadew Stuffed Chicken
 
Adapted from Peppadew USA website
Author:
Serves: 2
Ingredients
  • 2½ ounces Peppadew peppers, chopped
  • 1½ tablespoons extra virgin olive oil plus more for the pan
  • 1 garlic clove, crushed
  • 2 tablespoons fresh herbs, chopped (basil, parsley, marjoram, chives)
  • 2 boneless, skinless chicken breasts
  • 2½ ounces yogurt cheese, an ideal substitute for those looking for lactose free cheese (or gouda)
  • kosher salt and freshly ground black pepper
Preparation
  1. Mix half of the chopped Peppadew peppers with the olive oil, crushed garlic, and herbs.
  2. To create a pocket in the chicken breast insert a sharp knife into the thickest part of the breast and make a 2½-inch incision without going through the opposite side. Stuff chicken with the cheese and remaining Peppadew peppers. Sprinkle chicken with kosher salt and freshly ground black pepper. Tie chicken breasts to secure filling.
  3. Transfer chicken breasts to a shallow dish and coat both sides with the marinade. Cover and refrigerate at least 4 hours or overnight.
  4. Preheat oven to 350 degrees.
  5. Heat a tablespoon of olive oil over medium to medium-high heat in a stainless steel pan or one that can be used in the oven. Add the chicken breasts and brown on each side. Transfer the pan to the oven. Bake for about 15 minutes or until the thickest part of the breast registers 165 degrees.
  6. Serve with broccolini, a salad, or other greens and saffron rice or your favorite rice pilaf.


Bread, Breakfast, Dessert, Fruit, Lactose Free

Crisp Sugar Topped Blueberry Muffins

September 9, 2017

Crisp Sugar Topped Blueberry Muffins

One of my favorite uses of the nutritious blueberry is in muffins. They are one of the easiest breakfast (or dessert) snacks to make.  All you need is a bowl for the dry ingredients and a measuring cup for the wet ingredients. Combine the two, fold in the blueberries and your batter is ready.  In less than 20 minutes you’ll have warm, crispy topped muffins with just the right amount of blueberries.  These are delicious split down the center, toasted and served with a pat of butter.

Crisp Sugar Topped Blueberry Muffins

The sparkling sugar ensures the muffins have a perfectly crisp top that is not only a delight to eat but also gives the muffins that certain je ne sais quoi. Bob’s Red Mill decorative sparkling sugar works perfectly.

Blueberries

Muffin Liners

It’s best to use liners in your muffin tin to ensure that the muffins won’t stick to your pan.  Liners also mean easier clean up.

Crisp Sugar Topped Blueberry Muffins

These are beautiful muffins with crackly and crispy tops.  If by chance you have any leftover muffins, store them in the freezer in a heavy-duty plastic bag. They will keep well for more than a month.
Crisp Sugar Topped Blueberry Muffins


Crisp Sugar Topped Blueberry Muffins
 
Author:
Serves: 12
Ingredients
  • 2 cups all purpose-flour
  • 1 cup + 1 tablespoon granulated sugar
  • 2 teaspoons baking powder
  • ½ teaspoon salt
  • ¼ teaspoon cinnamon
  • ½ cup lactose free milk (or regular milk)
  • ¼ cup canola oil
  • 4 tablespoons Earth Balance Buttery Sticks, melted and cooled for 5 minutes (or regular salted butter)
  • 2 large eggs
  • 1 teaspoon vanilla extract
  • 2 cups (8 ounces) fresh blueberries
  • Sparkling sugar such as Bob's Red Mill Simply Sweet Decorative Sparkling Sugar
Preparation
  1. Preheat oven to 400 degrees.
  2. Line muffin tin with muffin/cupcake liners.
  3. In a large bowl whisk to combine the flour, sugar, baking powder, salt, and cinnamon. Set aside.
  4. In a 2 cup measuring cup, measure ½ cup milk. Add ¼ cup canola oil, melted Buttery Sticks, eggs, and vanilla extract. Whisk ingredients together.
  5. Pour wet ingredients into bowl of dry ingredients. Stir to combine. Fold in blueberries. Divide batter between a 12 cup paper-lined muffin tin. Sprinkle each muffin with ½ teaspoon of sparkling sugar.
  6. Bake for 18 - 22 minutes or until a toothpick inserted in the center comes out clean. Cool muffins in the pan for 10 minutes before removing to a rack to cool completely.


Dinner, Fish, Lactose Free, Recipes, Sauces

Pan-Seared Tuna with Avocado, Soy, Ginger & Lime

August 28, 2017

Pan-Seared Tuna with Avocado, Soy, Ginger & Lime

Finding good fresh ahi tuna has been a hit and miss endeavor until I discovered Oki’s Fish Market in the Kahului Foodland market. They always seem to have the freshest fish on a regular basis. So whenever I’m in the area, I’ll stop by to pick up a nice piece of ahi for dinner.  This Tyler Florence recipe caught my attention for a few reasons.  It’s quick, tasty, and uses lots of cilantro and avocado, two of my favorite ingredients.  Now those of you who are cringing about cilantro, don’t give up yet.  You could certainly switch out the cilantro and substitute it with a smaller amount of chives or parsley.

Ahi tuna steaks

I cut the ahi into 1-inch thick steaks but you could certainly cut yours thicker if you prefer to.

Lime, Jalapeno, Cilantro

The original recipe says to use the juice of two limes however that can mean 2 tablespoons or up to 4 tablespoons in my case.  So try the 2 1/2 tablespoons noted in the recipe first, then add more if you want to.

Avocado

Pan-Seared Tuna with Avocado, Soy, Ginger & Lime

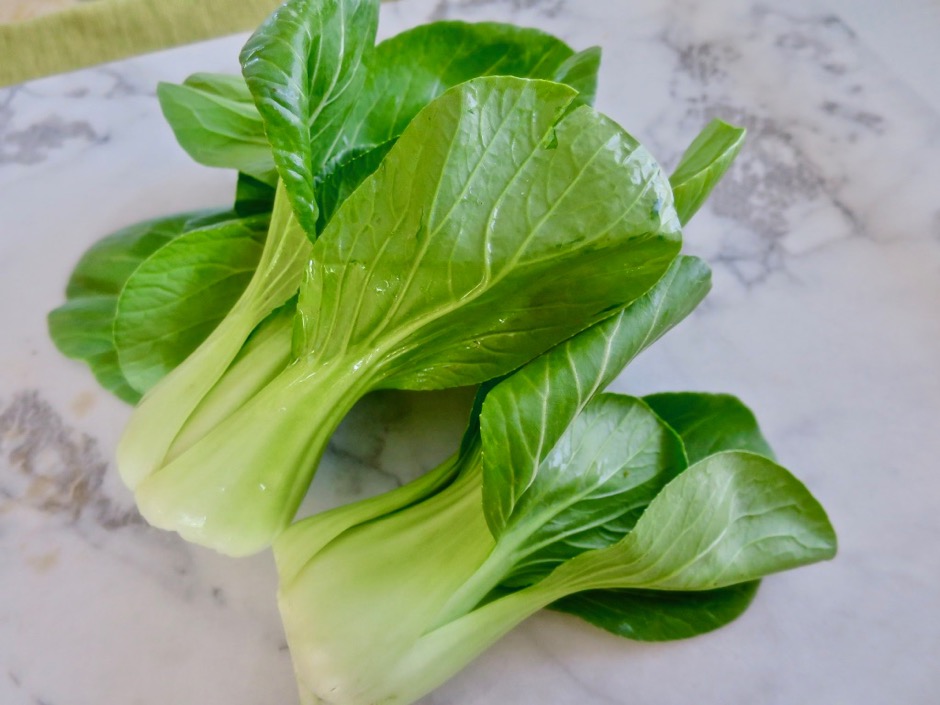
Sometimes I serve steamed bok choy with the ahi, and other times a green salad or baked sweet potatoes and broccoli.  I always have a pot of Japanese white rice to go along with this dish.

If you prefer a little spicier sauce, use a jalapeño instead of the Fresno pepper.  I like the burst of red color from the Fresno however I have seen red jalapeños in the markets on occasion.

Pan-Seared Tuna with Avocado, Soy, Ginger & Lime

Pan-Seared Tuna with Avocado, Soy, Ginger & Lime
 
Adapted from Tyler Florence's recipe
Author:
Serves: 4
Ingredients
  • ¾ cup lightly packed cilantro leaves, finely chopped
  • 1 Fresno pepper, thinly sliced (or ½ jalapeño)
  • 2 teaspoons grated fresh ginger
  • 1 teaspoon grated garlic
  • 2½ tablespoons freshly squeezed lime juice
  • 4 tablespoons soy sauce
  • 2 teaspoons granulated sugar
  • 3 tablespoons extra virgin olive oil, divided
  • 4 ahi (tuna) steaks, about 6 ounces each
  • kosher salt and freshly ground black pepper
  • 2 small or 1 large avocado, peeled, pitted, cut into small chunks
Preparation
  1. Combine the cilantro, Fresno pepper slices, ginger, garlic, lime juice, soy sauce, sugar, and 2 tablespoons of the olive oil in a small bowl. Stir ingredients until well incorporated. Set aside while you prepare the ahi.
  2. Place a skillet over medium-high heat and coat with remaining 1 tablespoon of olive oil. Season ahi steaks generously with kosher salt and black pepper. Sear ahi for about 1 minute on each side to form a light crust. The cooking time will depend on how thick your ahi is cut, and whether you prefer your fish to be medium-rare or more well done. Drizzle a few tablespoons of the sauce over the ahi steaks to coat the fish (once you start searing on side #2). Transfer the ahi to a platter. Top with avocado and drizzle remaining sauce over the fish.


Bread, Dinner, Lactose Free, Recipes, Sandwiches

Persian Flatbread

August 13, 2017

Persian Flatbread - Nan-e barbari

An article in Food and Wine magazine about flatbreads from around the world caught my attention not only because of the beauty of the breads but also the simplicity of making them.  This particular recipe makes two oval flatbreads known as Nan-e Barbari.  This is the Persian version which is known for being one of the thickest flatbreads.  The first time I made this I followed the recipe closely and was very impressed.  I noticed its similarity to focaccia and elected not to stretch the dough so thin next time and the result was fabulous multi-use bread.  Though the dough was very wet, so much so that I worried how it would turn out, it worked out beautifully.

Persian Flatbread/Focaccia

The bread has a wonderful crumb with large air pockets that when sliced in half create the best nooks and crannies for your sandwich spreads.  If you’re not splitting the bread for a sandwich serve it warm with salads, soups, feta & cucumbers, or grilled chicken.

Persian Flatbread/Focaccia

Persian Flatbread dough - Nan-e barbari

At this point the bread has been brushed with the glaze (also known as roomal) which results in a beautiful golden crust.

Persian Flatbread/Focaccia Sandwich

The bread is delicious on its own but makes a fine sandwich.

Persian Flatbread- Nan-e barbari


Persian Flatbread
 
Adapted from Food & Wine magazine
Author:
Serves: 2 loaves
Ingredients
  • Dough:
  • 4 cups bread flour, plus more for kneading
  • 2¼ teaspoons rapid rise yeast (bread machine yeast)
  • 2 teaspoons kosher salt
  • 1⅔ cups water
  • sesame seeds
  • nigella seeds (optional)
  • coarse or flaky sea salt such as fleur de sel or Maldon
  • Glaze:
  • 2 teaspoons all-purpose flour
  • ½ teaspoon sugar
  • ½ teaspoon vegetable oil
  • ⅓ cup water
Preparation
  1. In the bowl of a stand mixer fitted with the dough hook, combine the flour, yeast, salt and water. Mix on medium-low speed until a loose dough forms. (You may also mix the ingredients with your hands or bread machine if you don't have a stand mixer. The dough will be very wet). Increase the speed to medium-high and mix until the dough is supple and smooth, about 5 minutes. If the dough seems too wet, add a teaspoon or so of flour. The dough should be soft and slightly sticky so resist the temptation of adding too much flour. Transfer the dough to a lightly floured work surface and knead for 1 minute. Place the dough in a large oiled bowl. Cover the bowl with lightly oiled plastic wrap and set aside until doubled in volume, about 1 hour.
  2. Gently deflate the dough and divide it into two pieces. Shape each piece into an oval about 9" long. Transfer ovals to a lightly greased baking sheet and cover with a sheet of oiled plastic wrap. Let rise for 30 - 45 minutes.
  3. While the dough is rising, heat the flour, sugar, oil, and water in a small saucepan over medium heat. Cook the flour paste over moderate heat, whisking constantly until slightly thickened, about 2 minutes. The glaze will easily coat the back of a spoon. Set aside to cool.
  4. Place a rack in the lower third of the oven and set a pizza stone on top. Preheat the oven to 450 degrees.
  5. Cover two large cookie sheets with parchment paper and dust very lightly with flour or fine semolina. Working with one piece at a time, gently deflate the dough on the cookie sheet. If making flatbread shape the dough into a 14"x5" rectangle. Using your fingers (floured) press 5 deep, lengthwise ridges into the dough. Brush half of the glaze over the top and sprinkle with sesame seeds, nigella seeds if using, and a little course salt. Slide the dough with the parchment paper on to the pizza stone. If you do not have a pizza stone, bake the bread on the baking sheet on the middle rack of the oven. Bake for about 15 - 18 minutes until the top is golden brown. If you are making focaccia rather than flatbread, shape the dough into a long rectangle that you can later cut into sandwich-sized pieces. (Try not to stretch it too thin). Bake for 15 - 18 minutes. Transfer bread to a wire rack to cool before slicing.


Dessert, Fruit, Lactose Free, Recipes

Mango Strawberry Vanilla Ice Cream Popsicles

July 31, 2017

Mango Strawberry Vanilla Ice Cream Popsicles

Most of us loved eating popsicles as children, a favorite summer treat. Embrace your inner child with these homemade delights. You won’t regret it and neither will your children, grand children, friends, and whoever else is lucky enough to eat one of your homemade creations.  All you need for this recipe is fresh fruit and vanilla ice cream.  Since our mango trees are at their peak summer harvest now they are the major ingredient here.  Strawberries and vanilla ice cream added a beautiful color palette to the bright orange mangos.  If mangos are not available, fresh peaches would be an excellent substitution.

Strawberries

Pirie and Rapoza Mangos

Our Pirie mango tree is 30 years old and is a heavy bearer that produces the sweetest mangos I have ever tasted.  It has a long production period of at least 6 months.  The large and beautiful Rapoza mango is delightfully smooth and sweet with a texture similar to a peach.

Mango Strawberry Vanilla Ice Cream Popsicles

Swirl the ingredients around a bit to make beautiful popsicles that taste delicious especially on a warm summer day.

Mango Strawberry Vanilla Ice Cream Popsicles

There is a myriad of popsicle molds available on-line.  I bought this inexpensive Norpro Frozen Ice Pop Maker and it works like a charm.  The popsicles are just the right size and the entire mold fits nicely in the freezer. Plus, you get 10 popsicles at a time.

Mango Strawberry Vanilla Ice Cream Popsicles


Mango Strawberry Vanilla Ice Cream Popsicles
 
Author:
Serves: 10
Ingredients
  • 6 ounces strawberries, chopped
  • 1¾ cup (heaping) chopped mango
  • ¼ cup + 2 tablespoons sugar
  • 2 tablespoons lime juice
  • 1½ cups lactose free vanilla ice cream slightly softened (or regular vanilla ice cream or non-dairy vanilla ice cream)
Preparation
  1. Mix chopped strawberries with ¼ sugar in a small bowl. Set aside.
  2. Using an immersion blender puree chopped mango, 2 tablespoons sugar and 1 tablespoon lime juice until mixture is smooth. Pour into a 2 cup measuring cup. You should have 1½ cups (or more) mango puree.
  3. Rinse immersion cup and puree strawberries with remaining 1 tablespoon of lime juice. Pour into a 1 cup measuring cup. You should have 1 cup of strawberry puree.
  4. Layer popsicle molds beginning with mango puree, followed by strawberry puree, and ice cream. Continue to layer with fruit purees and ice cream leaving ¼-inch space from the top to allow for expansion. Using a chopstick or wooden skewer, lightly swirl the mixtures together. Place lid on mold and insert sticks. Freeze at least 8 hours or overnight. Run popsicle mold under warm water for easy removal.


Chicken, Dinner, Lactose Free, Recipes

Middle Eastern Herb & Garlic Chicken

July 11, 2017

Middle Eastern Herb & Garlic Chicken

Once upon a time, I thought the only part of the chicken worthy of my attention was the breast.  However, I have since learned that there’s something to be said about chicken thighs and how moist and tender they remain after cooking.  This herby, garlicky grilled chicken is a perfect example.  It doesn’t hurt either, that it marinates in olive oil, lemon juice, garlic and lots of herbs for a few hours rendering it even moister.  It’s a quick and delicious meal, and because the thighs are boneless, they cook quickly on high heat and that gives it a nice char and extra flavor.

Fresh Herbs from the Garden

Our garden has seen tomatoes, cucumbers and peppers come and go with the seasons however the herbs are true blue.  They tolerate the hot weather we have and rarely do they get bothered by disease or pesky insects.

Ground Sumac

The sumac bush grows in the Middle East where the berries are dried and crushed and used in numerous dishes.  It has a lemony tart flavor that goes well in salad dressings, kabobs and rice dishes. It is a main ingredient in one of my favorite spice blends, za’atar.  I had never heard of it until a few years ago but now I see it frequently used both by chefs and home cooks.

Middle Eastern Herb & Garlic Chicken

This recipe comes from Melissa Clark at the New York Times.  She serves the chicken with a yogurt sauce that adds a creamy tanginess and compliments the chicken perfectly.

Middle Eastern Herb & Garlic Chicken Sandwich

Some of the leftover chicken was sliced and used in a sandwich with a little melted cheese.  It’s a good recipe to double so that you have leftovers for the next few days.  Use it in salads, stuffed in pita bread, or in sandwich as I did.

Middle Eastern Herb & Garlic Chicken

Middle Eastern Herb & Garlic Chicken
 
Adapted from Melissa Clark's recipe
Author:
Serves: 4
Ingredients
  • 6 boneless skinless chicken thighs (about 1½ - 1¾ pounds)
  • 4 medium garlic cloves, grated on a Microplane or minced finely, divided (reserve ½ teaspoon for yogurt sauce)
  • juice and zest of 2 lemons (more for the marinade if the lemons are very small and if you prefer a more tangy marinade)
  • 3 tablespoons extra virgin olive oil
  • 2 tablespoons minced fresh parsley
  • 2 tablespoons minced fresh mint
  • 1 tablespoon minced fresh thyme
  • 1 tablespoon minced fresh marjoram (or oregano)
  • 1½ teaspoons kosher salt
  • 1 tablespoon sesame seeds + extra for yogurt sauce
  • ¾ teaspoon sumac (optional)
  • 1 6 ounce container whole milk plain yogurt
Preparation
  1. Trim chicken thighs and combine with garlic (reserve ½ teaspoon for yogurt sauce), zest and juice of 1 lemon, olive oil, parsley, mint, thyme, marjoram, salt, sesame seeds and sumac (I use a Ziploc bag). Marinate the chicken in the refrigerator for 6 - 8 hours.
  2. Heat your grill and cook chicken over high heat until charred in spots, about 4 - 6 minutes. Flip pieces and continue grilling until just cooked through, another 4 minutes or so.
  3. While the chicken is cooking, combine yogurt with ½ teaspoon reserved garlic, lemon zest & juice. Season to taste with salt and freshly ground pepper. Sprinkle sesame seeds over the top. Serve chicken with yogurt sauce on the side.


Follow

Get every new post delivered to your Inbox

Join other followers: