This is a very tasty tofu dish that can be made in an hour. The delicious sauce is quite versatile and can be used in multiple ways. It’s excellent with the crispy tofu but I’m sure it would be just as good with grilled chicken or pork chops if tofu is not your thing. However, it’s a must with this tofu. You will be pleasantly surprised at how yummy it is.

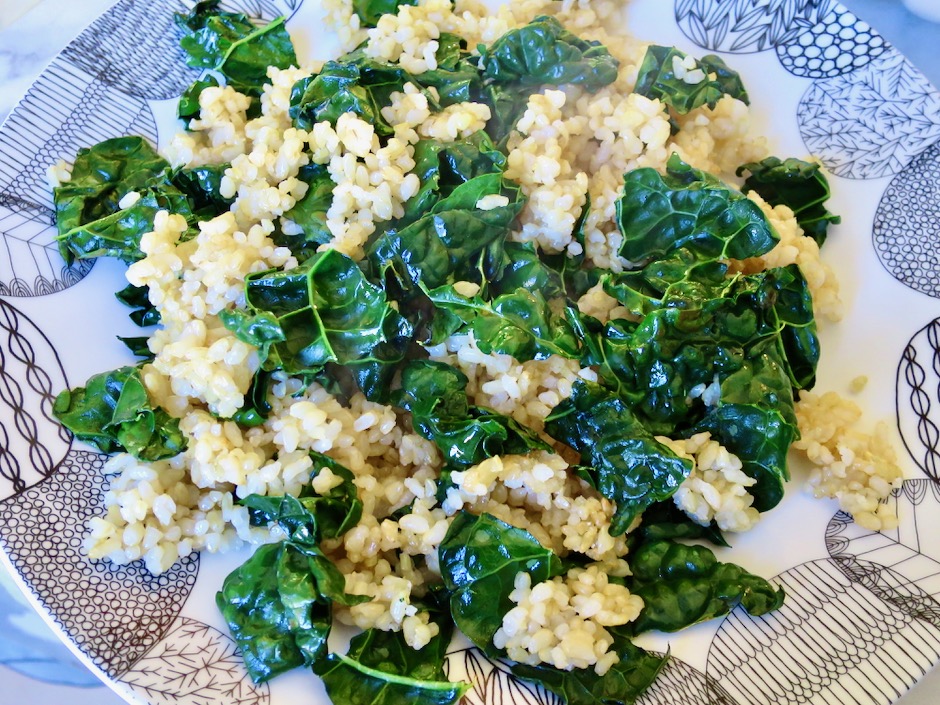
Serve the tofu over white or brown rice along with your favorite greens, and extra sauce on the side.

Use extra firm tofu so it holds its shape once the water is pressed out. Wildwood is my favorite brand. You can find it at Down to Earth here on Maui.

If you are looking for the very best way to press out the water from a tofu block, consider buying the TofuXpress. You will never regret it, especially if you bake tofu often. Pressing tofu with paper towels or a kitchen towel doesn’t hold a candle to this little gadget. I’ve had mine for over 10 years.

The tofu block is cut into 1/2-inch slices, then cut into short sticks.

A little bit of panko added to the cornstarch makes all the difference in giving the tofu a crispy exterior.


The barbecue sauce uses ingredients that are not difficult to find. Better yet, the sauce does not require any cooking.

Glorious homemade barbecue sauce with a twist. The sauce has Asian ingredients such as soy sauce, ginger and sesame oil, but it also has the more typical maple syrup, chili powder and tomato paste that you might find in an American style barbecue sauce. The combination turns out a sauce that’s seriously addicting.

- 14 ounce extra firm tofu, water pressed out
- ½ cup corn starch
- ¼ cup fine panko
- 1½ teaspoons finely grated fresh ginger
- 1 small garlic clove, grated or finely minced (about ¼ teaspoon or up to ½ teaspoon for garlic lovers)
- 2 tablespoons tomato paste
- 2 tablespoons pure maple syrup
- 1 teaspoon mild chili powder
- 2 tablespoons soy sauce (Kikkoman recommended)
- 2 tablespoons lite soy sauce (Kikkoman recommended)
- 2 teaspoons sesame oil
- roasted sesame seeds for serving
- Press water from tofu, preferably with tofu press if available.
- Cut tofu into ½ -inch slices. Cut each slice crosswise to make two pieces, then lengthwise to make 4 pieces (about 28 pieces). Combine corn starch with panko in a pie plate or wide bowl and set aside.
- For the sauce, in a medium bowl, combine ginger, garlic, tomato paste, maple syrup, chili powder, soy sauces and sesame oil. Whisk to combine, set aside.
- Toss tofu pieces in cornstarch panko mixture pressing gently so the coating adheres to the tofu
- Heat canola oil (enough to go up the sides of a pan about ¼-inch) in a large skillet over medium to medium-high heat. Fry tofu until crispy, turning now and then, about 4 minutes or so. Adjust heat as needed so the tofu doesn't burn and is just golden brown. Remove tofu to a paper towel-lined plate.
- To serve, place tofu over rice and spoon barbecue sauce over tofu. Sprinkle sesame seeds over the top. Serve with your favorite greens (broccoli, bok choy, green beans) and extra barbecue sauce on the side.


, Fresno Pepper, Japanese Cucumber, Radish, Edamame")