


This baked feta and tomato pasta dish is one of the easiest and most delicious meals we have been enjoying lately. The recipe went viral on TikTok and for good reason. It’s a hands off recipe that comes together in an hour. The resulting dish is just superb. Serve it with good bread to sop up all of the delicious juices from the tomatoes and olive oil.

It’s not a fancy or complex pasta dish but if I was served this at a restaurant I would be begging the chef for the recipe.


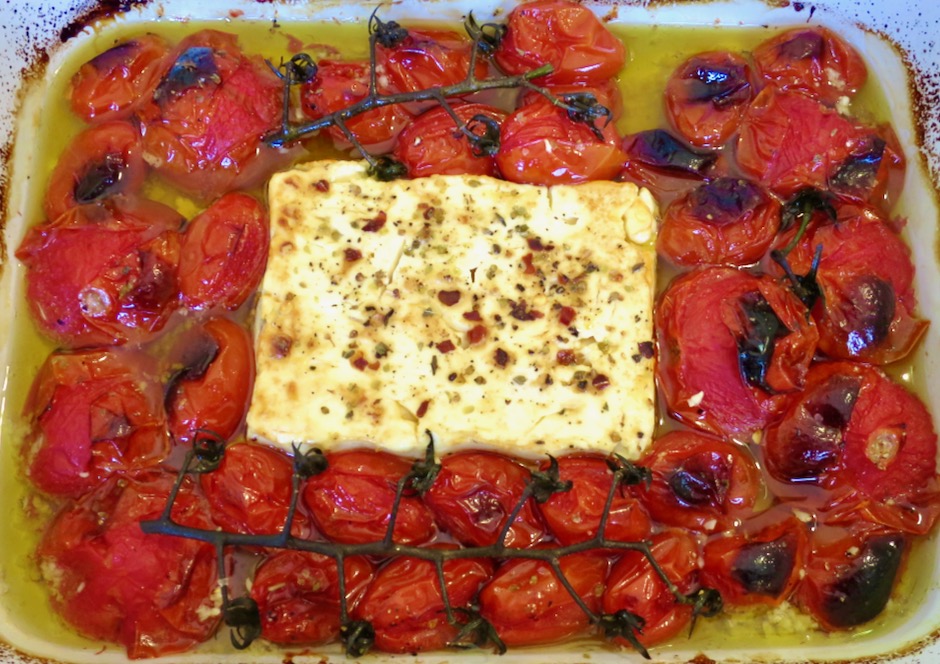
If you can find small tomatoes on the vine it makes for a nice presentation. However, it’s not essential because the tomatoes will be crushed and mixed with the feta and olive oil once it comes out of the oven. A fine quality feta such as Mt. Vikos really makes this dish shine. Mt. Vikos is the best I have found and worth the few extra dollars. It isn’t overly salty, and the flavor is outstanding. This feta is creamier than cow’s milk feta which tends to be saltier and tarter than sheep and goat’s milk feta. Here on Maui, you can find Mt. Vikos feta at Whole Foods and occasionally I see it at Safeway.


Just before you mix everything together, fresh minced garlic gets tossed into the hot dish where it will cook just enough to mellow its sharp raw bite.


Serve the pasta with lightly toasted sourdough bread topped with some of the crushed tomatoes and olive oil.

- 2 pints (20 ounces) ripe grape or cherry tomatoes
- ⅓ cup extra virgin olive oil
- kosher salt and freshly ground black pepper
- red pepper flakes (optional)
- dried oregano (optional)
- 7 - 8 ounce block of feta (Mt. Vikos recommended)
- 10 ounces short pasta (Gemelli, Casarecce, Penne, Fusille)
- 1 medium garlic clove, finely minced
- 3 tablespoons julienned basil
- Preheat oven to 400 degrees
- Place tomatoes in an oven safe baking dish (9x11 works great). Drizzle the olive oil over the tomatoes, followed by ½ teaspoon kosher salt and a few grinds of pepper. Coat the tomatoes evenly with the olive oil by gently tossing together. Place the feta block in the middle of the baking dish. Sprinkle the top with a few pinches of red pepper flakes and dried oregano. Bake uncovered until the tomatoes have burst and the feta has softened, about 30 minutes. Increase the heat to 450 degrees and continue to cook until the tomatoes and feta are golden brown, about 10 minutes more.
- Meanwhile, cook the pasta in generously salted boiling water until al dente. Reserve ¼ cup pasta water.
- As soon as the feta and tomatoes come out of the oven, stir in the minced garlic. Use the back of a wooden spoon to smash the tomatoes and feta into a creamy sauce. Toss in the pasta and half of the basil, mixing until pasta is evenly coated. If the pasta seems dry, add a few tablespoons of pasta water. Serve with remaining basil and freshly ground black pepper.


