Dinner, Fish, Italian, Lactose Free, Recipes

Tuna Spaghetti with Green Olive Pesto

May 26, 2021

Tuna Spaghetti with Green Olive Pesto

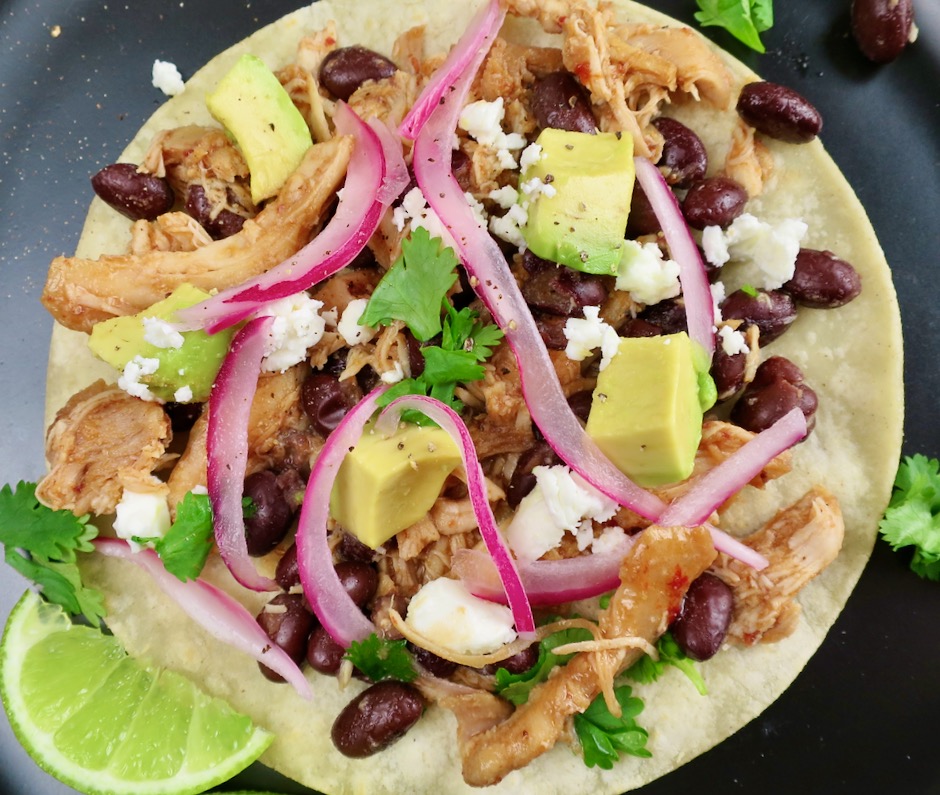
This is a very tasty dish for those who enjoy a different style of pasta.  It is loaded with flavor thanks to the tuna in olive oil and green olive pesto.  It’s very easy to prepare, and you can even make the pesto in advance and freeze it.  This pesto is dairy free which is a plus for those of us who are lactose intolerant.  

Italian Parsley, Lemon, Almonds, Green Olives, Tuna in Olive Oil

Our local Costco now sells Genova tuna in olive oil so we stock up on it because it’s an excellent price to quality ratio.

Green Olive Pesto, Genova Tuna

The pesto ingredients get a quick whirl in the food processor and voila!  You’ll have a tasty olive pesto that is a nice change from a typical basil pesto.  Even if you choose not to use the tuna, the pesto is wonderful on pasta or slathered on grilled bread.   

Green Olive Pesto

Tuna Spaghetti with Green Olive Pesto

I used spaghetti for this recipe however you can use whatever pasta shape that suits you. 
Tuna Spaghetti with Green Olive Pesto

Tuna Spaghetti with Green Olive Pesto
 
Adapted from Genova Seafood Recipe
Author:
Serves: 2 - 4
Ingredients
  • 2 cups lightly packed Italian parsley leaves
  • ½ cup pitted green olives (I use olives from Whole Foods olive bar)
  • ¼ (heaping) cup roasted unsalted or lightly salted almonds
  • ¼ cup + 2 tablespoons extra virgin olive oil
  • 2 teaspoons freshly grated lemon zest (more for serving, optional)
  • 1 small garlic clove
  • ½ teaspoon chili pepper flakes
  • ½ pound dried spaghetti
  • 1 7-ounce can Genova yellowfin tuna in olive oil, drained
Preparation
  1. Pesto: Place the parsley, olives, almonds, olive oil, lemon zest, garlic, chili flakes in a food processor. Process until a chunky paste forms, 15-20 seconds.
  2. Cook pasta in a large pot of salted boiling water according to package directions. Drain and transfer to a serving bowl. Add tuna to pasta. Toss in olive pesto until noodles are well coated. Serve warm or at room temperature with more lemon zest.


Dinner, Italian, Pasta, Recipes, Sauces

Baked Feta Pasta

May 16, 2021

Baked Feta & Tomatoes

This baked feta and tomato pasta dish is one of the easiest and most delicious meals we have been enjoying lately.  The recipe went viral on TikTok and for good reason.  It’s a hands off recipe that comes together in an hour.  The resulting dish is just superb.  Serve it with good bread to sop up all of the delicious juices from the tomatoes and olive oil.

Baked Feta Pasta

It’s not a fancy or complex pasta dish but if I was served this at a restaurant I would be begging the chef for the recipe.

Grape Tomatoes

Tomatoes, Basil, Feta, Casarecce Pasta

If you can find small tomatoes on the vine it makes for a nice presentation.  However, it’s not essential because the tomatoes will be crushed and mixed with the feta and olive oil once it comes out of the oven.  A fine quality feta such as Mt. Vikos really makes this dish shine.  Mt. Vikos is the best I have found and worth the few extra dollars. It isn’t overly salty, and the flavor is outstanding.  This feta is creamier than cow’s milk feta which tends to be saltier and tarter than sheep and goat’s milk feta.  Here on Maui, you can find Mt. Vikos feta at Whole Foods and occasionally I see it at Safeway.
Feta, Tomatoes, Olive Oil

Feta, Tomatoes, Olive Oil

Baked Feta, Tomatoes, Olive Oil

Just before you mix everything together, fresh minced garlic gets tossed into the hot dish where it will cook just enough to mellow its sharp raw bite.

Baked Feta, Tomatoes, Olive Oil, Garlic & Basil

Baked Feta Pasta

Serve the pasta with lightly toasted sourdough bread topped with some of the crushed tomatoes and olive oil.

Baked Feta Pasta

Baked Feta Pasta
 
Adapted from TikTok
Author:
Serves: 6
Ingredients
  • 2 pints (20 ounces) ripe grape or cherry tomatoes
  • ⅓ cup extra virgin olive oil
  • kosher salt and freshly ground black pepper
  • red pepper flakes (optional)
  • dried oregano (optional)
  • 7 - 8 ounce block of feta (Mt. Vikos recommended)
  • 10 ounces short pasta (Gemelli, Casarecce, Penne, Fusille)
  • 1 medium garlic clove, finely minced
  • 3 tablespoons julienned basil
Preparation
  1. Preheat oven to 400 degrees
  2. Place tomatoes in an oven safe baking dish (9x11 works great). Drizzle the olive oil over the tomatoes, followed by ½ teaspoon kosher salt and a few grinds of pepper. Coat the tomatoes evenly with the olive oil by gently tossing together. Place the feta block in the middle of the baking dish. Sprinkle the top with a few pinches of red pepper flakes and dried oregano. Bake uncovered until the tomatoes have burst and the feta has softened, about 30 minutes. Increase the heat to 450 degrees and continue to cook until the tomatoes and feta are golden brown, about 10 minutes more.
  3. Meanwhile, cook the pasta in generously salted boiling water until al dente. Reserve ¼ cup pasta water.
  4. As soon as the feta and tomatoes come out of the oven, stir in the minced garlic. Use the back of a wooden spoon to smash the tomatoes and feta into a creamy sauce. Toss in the pasta and half of the basil, mixing until pasta is evenly coated. If the pasta seems dry, add a few tablespoons of pasta water. Serve with remaining basil and freshly ground black pepper.


Beans, Dinner, Japanese, Lactose Free, Pasta, Recipes, Vegan, Vegetarian, Veggies

Ramen with Charred Scallions, Green Beans & Chile Oil

May 5, 2021

Ramen with Charred Scallions, Green Beans & Chile Oil

Lately I’ve been having fun making all sorts of different ramen dishes. Fresh ramen is best for this dish if you can find it.  Luckily here on Maui, a few select markets sell fresh Sun Noodle ramen.  The original recipe from The NY Times calls for 3-ounce packages of ramen, however, Sun Noodle ramen comes in 5-ounce packages, so that is what I used here.

Green Beans, Ginger, Scallions, Ramen

Anything that calls for fresh ginger gets my attention immediately.  I love the refreshing flavor it brings to various dishes.  There’s no shortage of it here.  It’s used in the chile oil and also stir-fried with the ramen.

Chile Oil Ingredients

Red Pepper Flakes, Kosher Salt, Ginger, Garlic

The chile oil is so easy to prepare and it tastes divine.  Besides using it for this ramen recipe, you might drizzle it over soft cooked eggs served over rice, on tofu, over steamed bok choy or other greens.  

Chile Oil

We used flat green beans that we grew in the garden but you can use regular round green beans as well.  Just make sure your wok or pan is hot so they get a nice char. The flavor of the charred beans adds so much flavor to this dish.

Ramen with Charred Scallions, Green Beans & Chile Oil

Ramen with Charred Scallions, Green Beans & Chile Oil

Ramen with Charred Scallions, Green Beans & Chile Oil
 
Adapted from NY Times Cooking
Author:
Serves: 2
Ingredients
  • Chile Oil:
  • 1 tablespoon red pepper flakes
  • ¾ teaspoon kosher salt
  • ¼ cup grapeseed or canola oil
  • 1 piece ginger (1/2-inch), peeled and finely chopped
  • 1 garlic clove, minced
  • 1 teaspoon roasted white sesame seeds
  • ½ teaspoon sesame oil
  • Noodles:
  • 2 (4-5 ounce) packages fresh ramen (I use Sun Noodle brand)
  • 1 bunch scallions (6 pieces), white and green parts separated and cut into 2-inch pieces
  • 1 tablespoon grapeseed or canola oil
  • 8 ounces green beans, trimmed and cut into 2-inch pieces
  • 1 (1-inch) piece ginger, peeled and julienned
  • ½ tablespoon roasted white sesame seeds
  • salt and pepper
Preparation
  1. Prepare the chile oil: Add the red pepper flakes and salt to a heatproof bowl. Place the oil, ginger and garlic in a small saucepan, and heat over medium until it bubbles, about 1-2 minutes. Remove from the heat and carefully pour the hot oil over the red pepper flakes. Add the sesame seeds and sesame oil, and stir well. Set aside while you make the rest of the dish. (You can make the chile oil a few days in advance, store in an airtight jar in the refrigerator).
  2. Prepare the noodles: Bring a large pot of water to a boil. Add the ramen and cook according to package directions, until just tender. Drain, rinse with cold water and drain well again.
  3. Heat a wok or large deep skillet on high. When smoking hot, add ½ tablespoon oil, toss in the green beans and season with salt. Cook, tossing the beans for 2 - 3 minutes, until charred. Remove beans from the wok and set aside.
  4. Heat the same wok or skillet over high, and when smoking, add 1 tablespoon of oil, along with the scallions, both white and green parts, and the ginger. Allow the scallions and ginger to sizzle for 20 seconds, to release their aromas, then stir-fry for 2 - 3 minutes until the scallions have a nice scorch.
  5. Add the green beans and noodles back to the pan, along with 1 to 1½ tablespoons of chile oil, and season with salt and pepper to taste. Toss well to combine, just until the noodles are heated through (you want to keep the noodles chewy and not overcook them). Divide noodles between two bowls, top with roasted sesame seeds and more chile oil.


Cookies, Japanese, Lactose Free, Recipes, Vegan, Vegetarian

Furikake Animal Crackers

April 26, 2021

Furikake Animal Crackers

My friend Michelle’s mom, Tomoe, always has a treat for me when I stop by to deliver produce from our garden.  Like me, she is always busy making goodies to give away.  Pickled mango, takuan, and mango bread are just a few of the delightful treats she makes. On a recent visit, Tomoe gave me a container of furikake animal crackers.  I shared them with my co-workers and they all raved about how tasty they were.  So here’s another recipe from Tomoe, who by the way is in her 90’s and still having fun in the kitchen.

Animal Crackers

The original recipe calls for 2 pounds of animal crackers (Target sells giant tubs in the cookie aisle).  I cut the recipe in half and used 1 pound of crackers and made my own version (lactose free).

Furikake

There are many variations of furikake available. For this recipe, it’s best to use one that has simple ingredients such as sesame seeds and nori (seaweed).

Furikake

Animal Crackers & Glaze

These couldn’t be simpler to make.  Prepare the sauce, mix it up with the crackers, sprinkle with furikake, toss and bake.
Furikake Animal Crackers

These crackers bake low and slow for about an hour.  You will need to toss them every 15 minutes to ensure they crisp up evenly.  I found that after the 1 hour baking time was up, some of the animal crackers were stuck together.  Just split them apart with a thin spatula before you set them aside to cool.

Furikake Animal Crackers

Nicely glazed with bits of sesame seeds and nori on each cookie, these are a tasty treat.

Furikake Animal Crackers

Furikake Animal Crackers

Furikake Animal Crackers
 
Adapted from Tomoe's recipe
Author:
Serves: 1 pound
Ingredients
  • 1 pound animal crackers
  • ⅓ cup furikake
  • ½ stick (2 ounces) vegan Buttery Sticks (or regular butter)
  • 2 tablespoons + 2 teaspoons granulated sugar
  • 1 scant teaspoon kosher salt
  • 2 tablespoons + 2 teaspoons light corn syrup
  • 2 tablespoons + 2 teaspoons canola oil
Preparation
  1. Heat oven to 250 degrees. Line a rimmed half sheet pan (jelly roll pan) with heavy duty foil.
  2. Pile animal crackers on the foil lined baking sheet. Set aside.
  3. Melt Buttery Stick in a small saucepan over medium-low heat. Add sugar and salt and stir until dissolved. Remove from heat. Add corn syrup and oil. Whisk to combine. Pour syrup over animal crackers. Using disposable gloves, toss crackers with syrup until evenly coated. Sprinkle furikake over crackers and toss again. Bake for 1 hour, stirring every 15 minutes so the crackers bake evenly. Remove pan from oven to cool. If you notice any crackers stuck to one another, split them before they cool completely. The syrup will harden as the crackers cool. Store crackers in tightly sealed containers. I keep mine in the refrigerator.


Dinner, Eggs, Lactose Free, Pasta, Recipes

TikTok Ramen

April 15, 2021

TikTok Ramen

This tasty ramen recipe comes from TikTok, the wildly popular social app that lets users create and share a diverse assortment of short videos.  Since the videos are quick, anywhere from 15 seconds to a minute or so, you have to move fast.  That’s what is so cool about this recipe.  Besides cooking the noodles in a pot, the rest of the dish is made in just one pan which is music to my ears.

TikTok Ramen Ingredients

Not only is this a fast recipe, it is inexpensive to boot.  And adding Everything Bagel seasoning is ingenious!

Instant Ramen

Instant Ramen

Instant ramen is one of the most inexpensive items you will find in the Asian section of your grocery store.  When on sale, they cost a mere 50¢ or less per package.  I always keep a stash of them in my cupboard.  They also star in this crunchy cabbage salad.

Butter, Garlic & Red Pepper Flakes

Butter (lactose free for me) along with garlic and red pepper flakes are stirred together in a pan until the garlic softens a bit.  Soy sauce and brown sugar are added to make a sauce full of our “5th taste,” umami.

TikTok Ramen Sauce

TikTok Ramen

The cooked ramen gets tossed with the sauce before two eggs are added to the pan.

TikTok Ramen with Scrambled Eggs

And as mentioned earlier, this is a one-pan meal.  There’s no need to whisk the eggs in a separate bowl, just add to the pan and scramble alongside the ramen.  

TikTok Ramen with Scrambled Eggs

TikTok Ramen

This ramen dish reminds me of Sam Sato’s dry mein which is similar in that there is no broth, just a very delicious sauce coating the noodles.  Leftovers are still tasty and fresh if you want to save some for a snack later.

TikTok Ramen

TikTok Ramen
 
Adapted from TikTok Ramen
Author:
Serves: 2
Ingredients
  • 2 packages instant ramen (discard seasoning packets)
  • 2 tablespoons vegan butter (or regular butter)
  • 1 teaspoon minced garlic
  • ½ teaspoon red pepper flakes
  • 2 teaspoons brown sugar
  • 2 tablespoons Kikkoman Less Sodium soy sauce
  • 2 large eggs
  • Everything bagel seasoning (you can make your own version with sesame seeds, poppy seeds, dried minced garlic and onion, flaky sea salt)
  • 2 green onions, thinly sliced
Preparation
  1. Cook the ramen 1 minute less than package directions. Drain immediately in a colander and rinse under cool water to stop the cooking. Drain again and set aside.
  2. In a medium pan, heat the butter over medium heat. Add garlic and red pepper flakes. Stir until garlic has softened, about 3 minutes, adjusting heat as needed so the garlic does not burn. Stir in the brown sugar and soy sauce. Add drained noodles to the pan and using tongs toss the noodles with the sauce.
  3. Push the noodles to one side of the pan and turn the heat up a bit. Add the eggs to the pan, opposite of the noodles. Gently scramble the eggs until just set. Toss eggs with noodles. Remove from heat and divide noodles between two bowls. Sprinkle everything bagel seasoning over the noodles along with the sliced green onions. Serve right away.


Dinner, Italian, Lactose Free, Pasta, Recipes, Vegan, Vegetarian

Homemade Busiate Pasta

April 6, 2021

Busiate with Sun Dried Tomato Pesto

Busiate comes from Trapani, located on the west coast of Sicily.  The name is derived from buso, a Mediterranean grass, the stem of which was used to shape this spiraled pasta.  Today’s home cooks rely more on modern metal tools such as a ferretto.  Not having a ferretto, I used a thin wire cut from a metal hanger.  I have even used a thin, long, cake pop stick that worked fine.  It produced a thicker spiral but both are acceptable.

Homemade Busiate

Most recipes call for semolina flour, water and salt.  I tried this but found I preferred to use 00 flour with semolina.  I used a recipe from Thomas McNaughton’s Flour + Water Pasta cookbook.  Thomas is the Executive Chef and co-owner of the highly regarded Flour + Water restaurant in San Francisco.  The 00 flour and semolina along with warm water and kosher salt proved to be the perfect combination for a toothsome yet tender pasta.

Homemade Busiate

If you have a friend or family member available to help, it will shorten the time it takes you to shape the pasta.  This is especially true if you are making pasta for more than two servings.  On a lazy Sunday afternoon, I found that rolling and twisting the pasta dough was quite relaxing.
00 & Semolina Flour

Busiate Dough

The dough will be very dry.  You can spritz it with a bit of water but not too much.  Once you knead the dough (about 10 minutes) it will become smoother and easier to handle.
Kneaded Busiate Dough

After kneading the dough, it is covered with plastic wrap and set aside to rest for 30 minutes.

Busiate Ropes

I made the ropes about the thickness of a standard birthday candle.  The pasta ropes can tighten up a bit so another quick roll before shaping is recommended.

Shaping Busiate

Here I use a metal wire (from a hanger) to shape the pasta into spiral shapes.  

Shaping Busiate

The ropes are twisted on the wire to form a spiral shaped pasta.  It may seem a bit tricky, but after a few attempts you will master the technique. Because it is handmade, each piece will not be exactly uniform as is commercial dried pasta.  It’s rustic and that makes it so charming.

Shaping Busiate

Homemade Busiate

Have a sheet pan sprinkled with semolina ready to hold your shaped pasta.  Once I was done shaping the pasta, I covered the pan loosely with plastic wrap for about 3 hours until I was ready to cook it.  

Busiate with Basil Pesto

My favorite way to serve the busiate is with any type of pesto.  The pesto clings to the nooks and crannies of the spiral pasta making this an ultra delicious meal. 

Busiate with Sun Dried Tomato Pesto

Homemade Busiate Pasta
 
Author:
Serves: 4
Ingredients
  • 180g (1 c) semolina flour
  • 180g (1 c) 00 flour
  • 178g salted warm water (3/4 cup made with 10g (1 tablespoon) kosher salt
Preparation
  1. Special equipment: Metal wire for shaping the pasta
  2. Whisk together the semolina and 00 flour in a medium bowl. Add salted water, stirring with a wooden spoon or stiff spatula to combine ingredients. Place dough onto a clean workspace and knead the dough until smooth, about 10 minutes. You may lightly spritz the dough with water if it seems too dry. Form dough into a ball and cover with plastic wrap to rest for 30 minutes.
  3. Divide dough into 4 pieces. Working with one piece at a time (keep rest of dough covered with plastic wrap), divide each piece into 4 more pieces. Roll each piece into a long, thin rope, about 20-inches long. Cut the rope into four even pieces. Give each piece of rope a quick roll if it springs back a bit before shaping to ensure it measures about 5-inches. Using your thumb and index finger, gently pinch one end of the pasta rope around the top of the wire. Use your other hand to roll the wire on your work surface around the dough, to form a corkscrew shape (not too tight). Gently roll the wire back and forth a few times before sliding the pasta off the wire. If you find the dough sticks to the wire, lightly dust the wire with flour before proceeding with the next piece. Place shaped pasta on semolina dusted sheet pan. Continue until you have used up the dough. Cover the pasta loosely with plastic wrap until you are ready to cook it (I left mine out for 3 hours).
  4. Bring a large pot of salted water to a boil. Add busiate and cook for about 4-5 minutes, until al dente. Drain and serve with your favorite sauce. Pesto is ideal.


Follow

Get every new post delivered to your Inbox

Join other followers: