Most every year John grows a variety of jalapeños which he prepares and cans as nacho rings and hot sauce. We skipped a year and our jalapeño stash ran out. Not good! Especially because we love Mexican dishes and cook them often. I bought a couple of supermarket pickled jalapeños and ended up throwing out two of the three jars, and kept one out of desperation. Their mushy texture was a real let down.
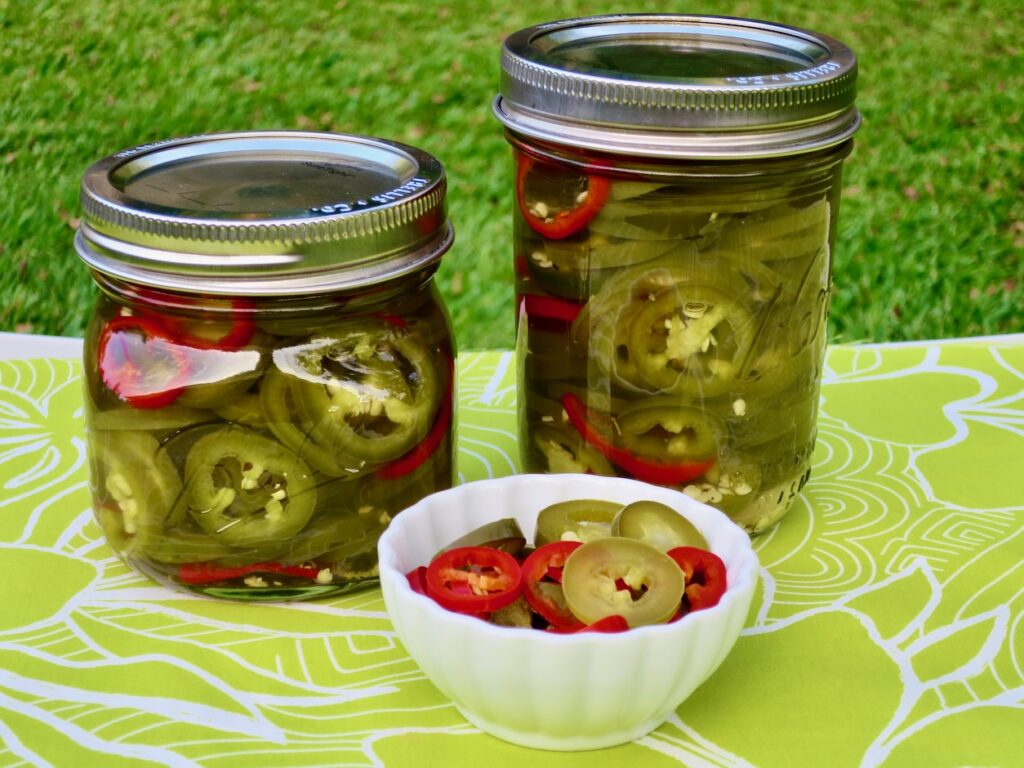
Something had to give, so I bought fresh jalapeños and a few Fresno peppers for their beautiful bright red color and made a batch of quick nacho rings. They turned out to be just what we needed on short notice.
Use green or a combination of green and red peppers for a colorful jar of nacho rings.
We use the jalapeños in quesadillas, tacos, burritos, Mexican cabbage slaw, and nachos. They are crisp, tart and delicious.
Slice jalapeños into rings and set aside while you make the brine.
Combine vinegar, water sugar, salt, garlic and dried oregano in a pot large enough to hold the jalapeños. Bring brine to a boil. Turn off heat and add jalapeños to the brine. Let sit for about 10 minutes then transfer to mason jars. Let cool on a rack for 20 minutes or so, before refrigerating to chill completely. The jalapeños will become delightfully crisp and will keep for about a month.
This ramen dish is one of our new favorites. It has tons of umami flavor that makes this dish a real stand out. The chili crisp adds a nice hint of heat and is used in the sauce and later spooned over the noodles before serving. This happens to be a vegan recipe which means that everyone can try it out. Surprise! The tofu is not bland, watery or tasteless in this dish. Even non-vegans will find it delicious.
I highly recommend the TofuXpress tofu press for those of you who eat and cook tofu often. In fact even if you cook with tofu occasionally, this handy kitchen gadget is a dream come true. You may shy away from buying it because of the price (online from $42.95) but just go for it. I have had mine for more than 10 years and never regret purchasing it. The water is pressed out of the tofu quickly so that your tofu is ready to use in 15-30 minutes. For this dish I suggest using extra firm tofu such as WildWood Organic.
Once the water is pressed out, the tofu is crumbled into small pieces before pan frying until crisp.
I prefer to use fresh ramen noodles, however, I use dried ramen when fresh is not available. If using the dried version such as Ichiban, be sure to undercook the noodles until just al dente since they are quite a bit thinner than fresh noodles.
Shiitake mushrooms are a big star in this recipe. They are chopped finely and pan fried with the diced shallots until nicely browned before being added to the fried tofu.
I purchased three different brands of chili crisp to see which one I liked best. There are hundreds of versions available. Of the three I purchased, my favorite is Zindrew (O.G. Batch jar). It’s on the mild heat side, but it has lots of flavor, is very crunchy, and is the least oily. There’s just a tablespoon of it left in the jar!
The crumbled tofu is pan fried until crisp on both sides. The texture of the fried tofu is pleasantly firm with a bit of chew to it.
Shiitake mushrooms are fried with diced shallots until nicely browned. These mushrooms works so well with this dish because they have a meaty texture and do not have as much water as other types of mushrooms.
The sauce is added to the tofu and mushroom mixture and quickly heated before serving. The original recipe from Bon Appetit calls this dish Saucy Tofu Noodles with Cucumbers and Chili Crisp. I found that in order to keep this “saucy” the sauce should be heated separately otherwise the tofu and mushroom mixture absorbs the sauce very quickly. Either way, it’s just delicious.
Thinly sliced quick cucumber pickles are the topping for this ramen dish. Their tartness and crisp texture are a perfect accompaniment to the savory tofu ramen.
1 14-ounce block extra-firm tofu, water pressed out
2 tablespoons cornstarch
4 tablespoons vegetable oil, divided
6 ounces shiitake mushrooms, stems removed and finely chopped
1 shallot (2 tablespoons) finely chopped
1 1-inch piece ginger, peeled and finely chopped
2 medium or 1 large garlic clove, finely chopped
10 ounces fresh ramen (12 ounces for 4 servings)
Preparation
Whisk soy sauce, brown sugar, tahini, sesame oil, black vinegar, 1 tablespoon chili crisp, and ½ cup water in a small bowl until sugar is dissolved. Set aside.
Toss cucumbers with rice vinegar and 1 teaspoon Diamond Crystal or ¾ teaspoon Morton salt in a medium bowl. Let sit, stirring occasionally until cucumbers have slightly softened, about 30 minutes. Drain and set aside in a small bowl.
Meanwhile, press water from tofu using TofuXpress or wrap in a clean kitchen towel (gather ends together) and squeeze with your hands over the sink to extract as much liquid as possible. Crumble drained tofu into a medium bowl (it should resemble cooked ground meat with some larger pieces). Sprinkle with cornstarch and 1 teaspoon Diamond Crystal or ½ Morton salt. Toss with your hands to evenly coat tofu.
Heat 2 tablespoons oil in a large (12-inch) non-stick skillet over medium high heat. Arrange tofu crumbles in a single layer, reserve bowl. Cook tofu undisturbed until golden brown underneath, about 4 minutes. Toss and continue cooking until tofu is golden brown and crisp all over, about 3-4 minutes more. Transfer tofu back to reserved bowl.
Add remaining 2 tablespoons oil to same skillet and heat to medium high. Add mushrooms and shallot, and cook, stirring occasionally until mushrooms are browned and shallot is translucent, about 4 minutes. Add ginger and garlic and cook, stirring often, until fragrant, about 1 minute. Reduce heat to medium and return tofu to the pan. Add reserved sauce and heat for about 30-60 seconds. Remove from heat. For saucier version, heat sauce in a separate skillet over medium until just slightly reduced.
Cook noodles in a large pot of boiling water according to package directions. Drain and divide among bowls. Ladle tofu over noodles and top with reserved pickled cucumbers and more chili crisp. If sauce has been heated separately, pour sauce over tofu right before serving.
These crispy, spice scented cookies are now one of our favorite desserts. They have a crunchy exterior and centers that are a bit softer. I love how the sugar coating gives them even more texture. This is a simple recipe for those who want a quick sweet treat.
Most of the ingredients are probably already in your pantry. There’s nothing fancy about the recipe yet it turns out delicious, rustic little cookies that are hard to resist. I used Miyoko’s vegan butter for a lactose free cookie, however, you may use regular butter or coconut oil.
The dough is chilled for 30 minutes or so. Depending on your weather it may take longer than 30 minutes. Here on Maui the weather is always warm so I find that chilling the dough for an hour is best. The original recipe calls for rolling the cookie dough balls into granulated sugar. This works great but if you happen to have coarse sparkling sugar it will bump up the crispy texture once the cookies are baked and cooled.
I had a bit of white chocolate hanging around so I melted it in my homemade double boiler. I quickly spread it over the top of some of the cookies then sprinkled mini hearts confetti on the white chocolate. I placed the frosted cookies in the refrigerator uncovered for a few minutes to set the white chocolate. A perfect little treat to share with friends for Valentine’s Day.
4 tablespoons (57g) Miyoko's vegan butter, at room temperature (substitute with regular butter or ¼ cup (53g) coconut oil
½ cup (92g) vegetable shortening
1 cup (198g) granulated sugar
¼ cup (85g) molasses (I used Brer Rabbit mild)
1 large egg
2 cups (240g) unbleached all-purpose flour
1 teaspoon baking powder
½ teaspoon baking soda
½ teaspoon salt
1 teaspoon ground cinnamon
1 teaspoon ground ginger
½ teaspoons cloves
Coating: Granulated sugar, coarse sparkling sugar (optional), melted white chocolate and sprinkles (optional)
Preparation
In a medium bowl, beat together the butter, shortening, and sugar until smooth. Stir in molasses and egg.
In a separate bowl, whisk together the flour, baking powder, baking soda, salt, and spices. Add to wet ingredients and mix until smooth. Cover and refrigerate for 30-60 minutes.
Preheat oven to 350 degrees. Line 2 baking sheets with parchment paper.
Scoop dough with a tablespoon scoop and roll into 1-inch balls. Roll the balls in sugar and place on the baking sheet, leaving 1½-inch space between them.
Bake for about 10 minutes. Tap pan on rack to flatten cookies. Bake an additional 1-2 minutes until cookies are cracked on top and not yet browned at the edges. Remove from the oven and let cool on the pan for 5 minutes before transferring to a rack to finish cooling.
If your climate is cool, store in an airtight container for up to one day. I prefer to store in an airtight container with waxed paper layers, in the freezer.
Optional: Decorate some of the cookies with white chocolate and sprinkles.
Recently I started making homemade kimchi and have been in love with it ever since. I’ve always enjoyed kimchi but the store-bought brands available here are not particularly exciting. Homemade kimchi tastes so fresh and has the perfect spiciness level that I crave. Kimchi is wonderful as a side dish that compliments many meals. A regular bowl of rice, kimchi and a fried egg suits me just fine. So this recipe from NY Times Cooking just hits the spot. The surprise ingredient (grated cheddar) makes this dish “out of this world” delicious. Add a sunny side up egg and you will have a truly satisfying meal. Even though you may not make kimchi at home, a good kimchi with a nice level of spiciness will work well.
I love the gorgeous color and flavor of the Korean gochugaru pepper flakes. It adds a subtle heat and a slightly smoky flavor to dishes and is the star of kimchi and other Korean dishes.
This is a relatively simple recipe with very inexpensive ingredients (= the bomb!). We use our homemade sriracha in the sauce but the popular Huy Fong sriracha will work well too.
Kimchi, scallions, garlic and sesame seeds are quickly sautéed before adding the sauce and the cooked ramen.
Using dried instant ramen noodles is very appealing as they are readily available, shelf stable, and cheap. For this recipe you will want cook the ramen for half the time instructed on the package. This will ensure they are not overcooked for the final dish.
Yum! Homemade kimchi will keep well in the refrigerator for months.
Noodles: 7 ounces dried instant noodles such as Sapporo Ichiban instant ramen (2 packets, 3.5 ounce each, discard seasoning packets)
1½ tablespoons canola oil
2 eggs
5 green onions, thinly sliced on the diagonal (reserve 1 tablespoon for garnish)
½ cup packed kimchi, sliced into thin strips or chopped
1 large garlic clove, peeled and finely chopped
1 tablespoon black or white roasted sesame seeds, plus more for serving
½ cup finely grated cheddar cheese
Sauce: 1 tablespoon sriracha (more if you prefer extra spicy and if kimchi is not very spicy)
2 tablespoons low sodium soy sauce
1 tablespoon sesame oil
1 tablespoon water
1 tablespoon medium dry sherry or shaoxing wine
Preparation
Bring a medium saucepan of water to a boil over high heat. Add the noodles and cook until tender but springy. I cooked the Sapporo Ichiban noodles for 1½ minutes instead of 3 minutes. Drain and rinse under cold water right away to stop the cooking. You may toss the noodles with a splash of canola oil to prevent sticking, or just give them a quick rinse to loosen the noodles before adding back to the pan.
Meanwhile, prepare the sauce: In a small bowl whisk the sriracha, soy sauce, sesame oil, water and sherry or shaoxing wine. Set aside
Set a medium nonstick skillet over medium-high heat. Add ½ tablespoon canola oil and, once shimmering, crack in the eggs. Reduce heat to medium or medium low and cook until the whites are done and the edges are browned, 2 to 3 minutes. You can cover the pan for 30 seconds or so to help the whites set but only for a short time or the yolks will become cloudy and loose their beautiful bright yellow color. Transfer eggs to a plate.
In the same skillet, heat the remaining 1 tablespoon canola oil over medium heat. Add the green onions, kimchi, garlic and sesame seeds and cook for 1 minute stirring frequently. Turn heat up to medium-high and add the drained noodles and most of the sauce. Toss to combine using tongs, for 30 seconds (any longer and the noodles will become too soft). Add more sauce if needed. Stir in the grated cheese until it melts. This will take just a few seconds. Turn off heat. Transfer noodles to serving bowls, top with fried eggs (salt and pepper eggs) and garnish with reserved green onions and extra sesame seeds. Serve immediately.
I posted this pork tenderloin recipe in 2015 and it’s been one of our favorites ever since. In that recipe, the pork was cut into medallions and grilled then served with a side of asparagus and potatoes or spinach and frites. We always had enough leftover pork to use in a sandwich which turned out to be a real winner. We finally realized that this pork tenderloin recipe was worthy of making just for sandwiches alone. It is delicious sliced and served with the tangy dressing on a kaiser roll or sourdough, and topped with lots of peppery arugula.
Most markets carry thinly sliced prosciutto which works best for this recipe. I bought this packet at Whole Foods.
The fresh herbs, lemon, garlic and red pepper flakes combined with olive oil make a delicious marinade and dressing for the pork.
The pork tenderloin is seasoned with the marinade then wrapped with prosciutto. It’s best to tie the tenderloin so the prosciutto stays in place as you cook the pork.
It doesn’t take long for the pork to cook as it is a small cut of meat that should be cooked to just the right temperature (145F degrees).
The prosciutto becomes crispy once grilled. It adds a flavorful punch that enhances the pork tenderloin.
Cut thin slices of the pork tenderloin and drizzle some of the reserved dressing over it then stack it on your favorite bread. Arugula is a really nice addition for this sandwich, however, if you are not a fan of arugula any other greens such as romaine or butter lettuce would be a good substitute.
This is a delightful sandwich that is easy to prepare. Pork tenderloin is lean and the prosciutto adds a little umami flavor that is most welcome.
1 tablespoon + 1 teaspoon freshly squeezed lemon juice
2 teaspoons lemon zest
2 scant teaspoons minced fresh rosemary
1 tablespoon finely chopped fresh sage
2 teaspoons minced garlic
½ teaspoon kosher salt
½ teaspoon red pepper flakes
For the pork:
1¼ pound pork tenderloin, trimmed well
kosher salt
black pepper
2 ounces thinly sliced prosciutto
To serve:
Rolls or bread of your choice, mayonnaise, Dijon mustard, Swiss cheese (optional), arugula
Preparation
Combine sauce ingredients in a small bowl. Set aside
Lightly season pork tenderloin with kosher salt and pepper. Rub some of the sauce onto the tenderloin coating well. Reserve the rest of the sauce for serving. Wrap the prosciutto slices around the pork tenderloin. Tie the tenderloin so the prosciutto stays in place while cooking.
Preheat gas grill or prepare charcoal grill to medium-high heat. Clean grill grates and brush well with oil.
Grill the tenderloin covered, turning occasionally to ensure the prosciutto is browned and crisp. Check for doneness with an instant read thermometer. The internal temperature should register 145 degrees.
Let pork cool before slicing into thin pieces. This will make it easier to slice the pork. You may refrigerate the pork and cut it once it has chilled a bit. Serve on your favorite roll or bread with mayonnaise, Dijon mustard, reserved dressing, arugula and Swiss cheese if you like.
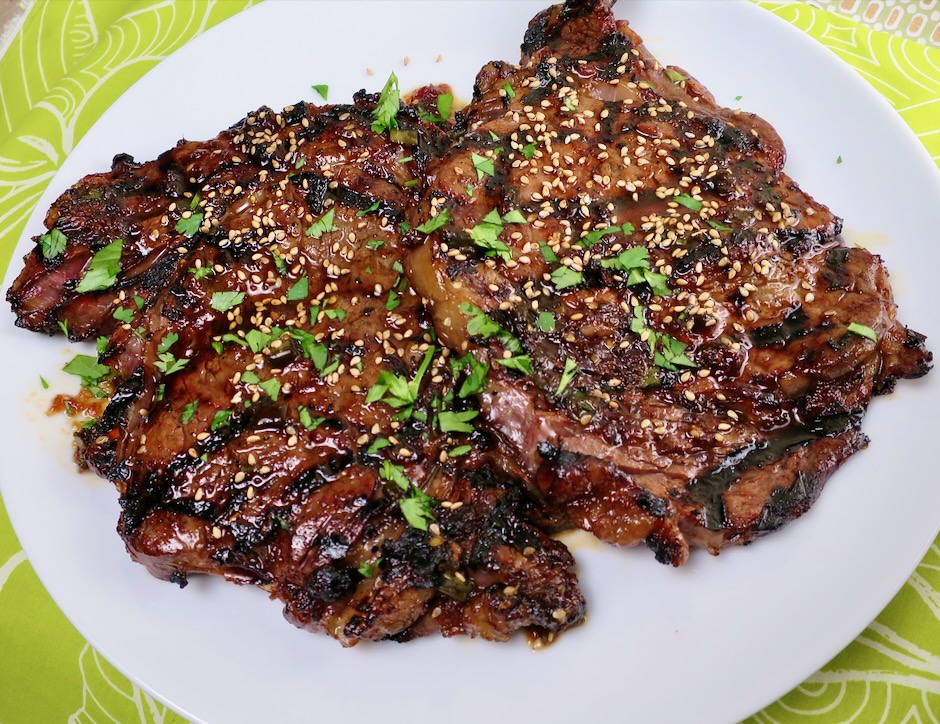
Korean kalbi ribs are a local island favorite in Hawaii. It is most common to use flanken-style short ribs for this recipe. It is sometimes difficult to find this cut of meat, however, your butcher should be able to accommodate your request. Though this is the most common cut of meat used for kalbi, I found that using a boneless ribeye is superb. The ribeye is tender and so flavorful.
I bought a thick cut ribeye from Whole Foods and asked the butcher to slice it into two thinner pieces. It worked out perfectly for kalbi.
The marinade is easy to prepare with ingredients you most likely have on hand.
The main ingredients for the marinade are garlic, ginger, green onion, sesame seeds and onion. Though it may seem very ordinary, these common ingredients come together to make the best marinade.
I mix up the marinade early in the morning and let the steaks soak up the tasty sauce for about 10 hours.
The end result is a delicious kalbi-style ribeye steak that is perfectly seasoned and grilled to perfection. Sometimes we serve the kalbi with mac salad and homemade kimchi, other times with charred green beans. Rice is always a part of the meal.
1 thick cut ribeye steak (about 1 pound, cut into two ¾-inch thick each pieces)
Marinade:
¼ cup soy sauce
¼ cup mirin
¼ cup sesame oil
¼ cup packed dark or light brown sugar
2 tablespoons water
1 tablespoon finely grated onion
1 tablespoon finely grated garlic (A Microplane works great for the garlic and ginger)
2 teaspoons finely grated ginger
5 green onions finely sliced
¾ teaspoon red pepper flakes
2 teaspoons roasted sesame seeds
freshly ground black pepper
Preparation
Whisk together the marinade ingredients in 2-cup glass measuring cup or medium sized bowl. Reserve ¼ cup of marinade.
Place the steaks in a single layer in a ziplock bag. Pour marinade over top and bottom of steaks making sure each steak is coated well. Place bag in the refrigerator for 8 - 10 hours, turning the bag occasionally.
For gas grill: Turn all burners to high, cover and heat grill until very hot, about 15 minutes. Clean and oil grates liberally once grill is hot. Grill steaks for about 5 minutes total, brushing reserved marinade over the steaks and turning several times for an even char. Check temperature with Thermapen or other digital thermometer. Remove when internal temperature reaches 140 degrees.
***The steaks can also be cooked over a hot charcoal grill.