There’s still time to bake a batch of crispy gingerbread cookies to give away this holiday season. If you’re pressed for time as I was this year, cut the recipe in half. This way you won’t feel overwhelmed having 50+ cookies staring at you begging to be decorated one by one. I made 22 cookies which turned out to be the perfect amount this year.

I used meringue powder for the royal icing instead of pasteurized egg whites. About 5 years ago, Foodland sold pasteurized eggs by the dozen but discontinued carrying them. I could not find them anywhere else so I began to pasteurize my own eggs with our sous vide machine. As I was reading different royal icing recipes, I noticed that meringue powder is often used in place of egg whites. What did I learn after using it for the first time? It is incredibly easy to whip up a bowl of royal icing in just 3 minutes or so using a handheld mixer with a whisk attachment. The icing is smooth and sets perfectly. I’m now sold on using meringue powder for all future recipes that include royal icing. It saves me a lot of time not having to pasteurize eggs. You can find meringue powder online or at Walmart.
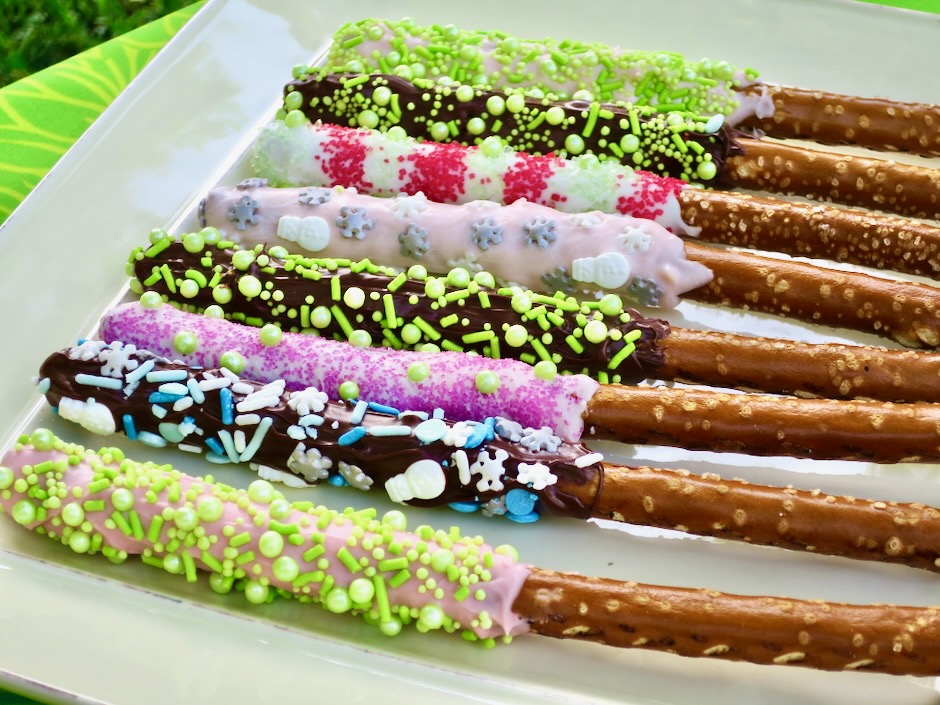
These chocolate covered pretzel rods are a lot of fun to make. I am not posting a recipe because you really don’t need one. Gather your ingredients: semisweet or dark chocolate chips, white chocolate chips, assorted sprinkles, red food coloring (for pink frosting), and pretzel rods. A small butter knife helps to spread and smooth the chocolate on the pretzel. Have everything ready to go before you melt the chocolate. Start with 1 cup of chocolate chips and microwave in a medium bowl on 50% power for 30 seconds. It won’t look like the chips have melted but give it a stir then repeat for another 30 seconds (always use 50% power or the chocolate may burn). Stir again, and repeat once more. By now, most of the chips will have melted. Stir the chocolate so all the remaining chips melt. Now you are ready to decorate your pretzel rods with your assorted sprinkles. If the chocolate hardens and is difficult to use, microwave on 50% power for 20 seconds or so to soften it. Sprinkles seem to go every which way when you use them. To keep things a bit tidy, use a sheet pan when decorating the pretzels. The sprinkles will (mostly!) be contained in the pan and not end up on the floor. Another tip is to line a small tray or pan with parchment or wax paper and place it in the refrigerator. Each time you decorate a pretzel, place it on the pan. The cool temperature helps to set the chocolate quickly so that there is less chance of drooping chocolate. You can buy pretzel rod packages online. They make for a nice presentation when giving these away as gifts. These cute pretzel rods can be made for all types of occasions, such as Christmas, New Year’s, Valentine’s Day, or any other celebratory occasion. I found that Walmart has the widest variety of sprinkles, however, they may be low on stock since Christmas is just around the corner. Lee Bear in Kahului also has a nice selection of sprinkles and assorted bags for packaging your sweets. I decorate the pretzels up to 2 weeks in advance and freeze them in an airtight container then package them before giving away.

Happy holidays from my kitchen to yours!