Browsing Category

Veggies

Breakfast, Dinner, Eggs, Lactose Free, Recipes, Rice Dishes, Side Dishes, Veggies

Kale Fried Rice

March 8, 2021

Kale Fried Rice

There are countless versions of fried rice.  It can be a stand-alone meal or a splendid side dish. Some of my favorites are ramen fried rice and kimchi and Spam fried rice.  Quick and inexpensive, this particular version couldn’t be easier to make.  Leftover brown rice with wilted kale makes for a healthy meal.  I make it regularly and I don’t think I’ll ever tire of it.

Kale, Brown Rice, Turmeric, Eggs, Lime, Garlic, Ginger, Green Onions

Don’t skip the turmeric.  It’s what gives this dish a slightly earthy flavor and a gorgeous color.

Sliced Garlic, Kale, Light Green Onions, Ginger, Green Onions

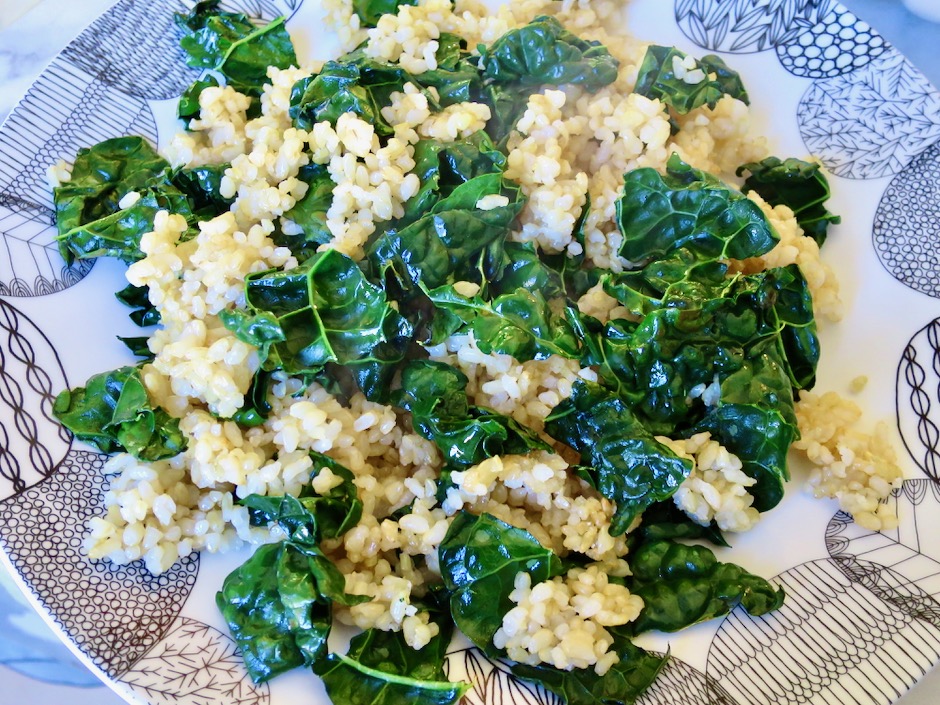
Once the rice is warmed and crisped, handfuls of kale get tossed into the pan until wilted.  If your pan is hot enough, some of the kale will get a bit charred.  This adds another level of flavor to the fried rice.

Garlic, Green Onions, Ginger

The garlic is cut into thin slices then lightly browned until the edges are crisp.  Fresh ginger and green onions are stir-fried with the garlic before adding the turmeric and eggs.

Kale Fried Rice

You’ll end up with a gorgeous pan of fried rice that is healthy and delicious.  

Kale Fried Rice

Kale Fried Rice

I like to serve the fried rice with sriracha sauce which adds the perfect kick to this meal.  Sprinkle sliced green onions and squeeze fresh lime juice over the rice just before serving.

Kale Fried Rice
 
Adapted from Bon Appetit
Author:
Serves: 2
Ingredients
  • 6 green onions, thinly sliced (set aside a tablespoon for serving)
  • 2 tablespoons grapeseed oil, divided (or another mild flavored oil such as canola)
  • 2 cups cooked short grain brown rice (day old is best)
  • 1 small bunch Tuscan kale, ribs and stems removed, leaves torn (about 2-3 ounces)
  • 2 small garlic cloves, thinly sliced
  • 1 tablespoon finely chopped peeled ginger
  • ¾ teaspoon ground turmeric
  • 2 large eggs
  • lime wedges for serving
Preparation
  1. Heat 1 tablespoon of oil in a large nonstick skillet over medium heat. Add rice, breaking up any lumps. Pat down into an even layer and cook, undisturbed until beginning to crisp, about 3 minutes. Toss and continue to cook, adding kale by the handfuls and letting wilt slightly before adding more. Toss occasionally, until rice is heated through and all the kale is wilted, about 3 minutes. Season with salt and transfer to a plate.
  2. Heat remaining 1 tablespoon oil in same skillet over medium-low heat. Add garlic, ginger, and green onions, stirring often until garlic is lightly browned (careful not to burn) around the edges, about 1-2 minutes. Turn heat up to medium sprinkle turmeric over, then stir in eggs. Using a pair of chopsticks or a heatproof spatula, blend whites and yolks with garlic, ginger, and green onions until the eggs are barely set. Return rice and kale to the skillet, tossing occasionally until hot, adjusting heat as necessary. Divide fried rice between two plates and top with reserved green onions. Serve with sriracha sauce.


Dinner, Korean, Lactose Free, Recipes, Tofu, Vegetarian, Veggies

Green Tea Noodle Salad

March 2, 2021

Korean Green Tea Noodle Salad

On my recent trip to Oahu I visited H Mart, a terrific Korean market in Kakaako.  I had so much fun checking out all of the items on the shelves, slowly making my way down each aisle being careful not to miss anything.  There are dozens of types of nori, instant noodle bowls, rice, snacks and more. They also have a nice selection of meat and produce.  I always bring back some Chinese broccoli if they have it.  This time I was able to squeeze a large package of fresh green tea noodles in my small cooler bag.  When I returned to Maui I decided that I should create a dish that would feature these noodles in a refreshing salad. 

Korean Green Tea Noodles

Korean Green Tea Noodles

These noodles are similar in shape to the fresh Sun Noodle udon I buy at Island Grocery (a good substitute for this dish).

Cilantro, (mint for garnish)
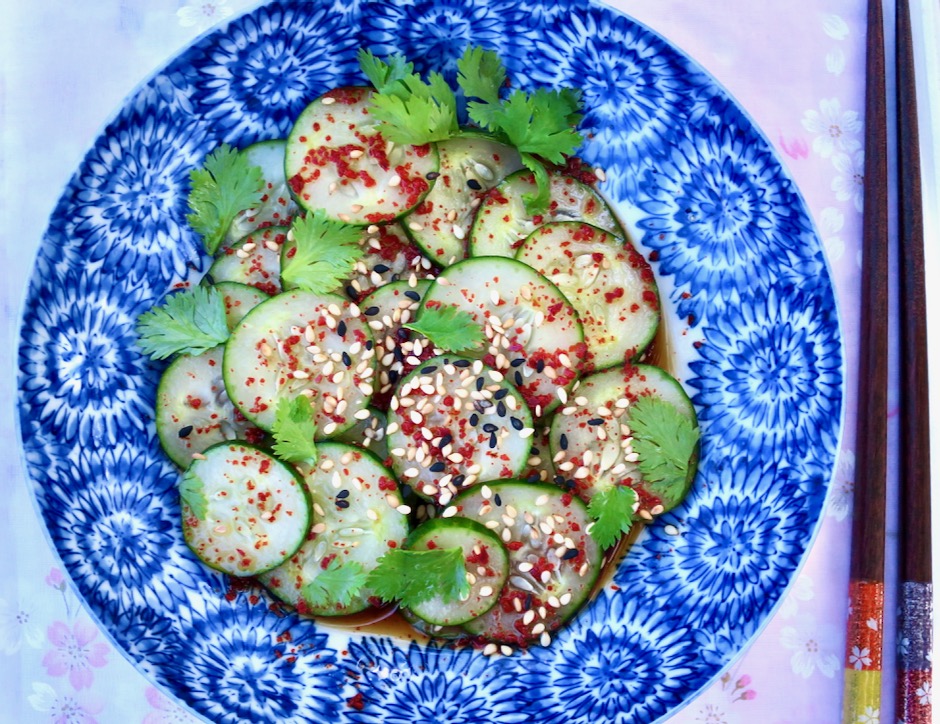
, Fresno Pepper, Japanese Cucumber, Radish, Edamame

I love the bright green colors in this salad which consists of cucumbers, edamame and lots of fresh cilantro.  For a pop of color and crunch, I included sliced radishes that I cut as thin as possible and placed in an ice bath for 5 minutes to get them super crispy.  Use whatever you have on hand, such as julienned carrots, lettuce, watercress and avocado.  

Homemade Sriracha Sauce

Sriracha is a key ingredient in the dressing.  We use our homemade sriracha but the “Rooster Sauce” works very well.

Salad Dressing

The dressing can be used on any cold noodle salad, drizzled over tofu, or as a dressing for a crispy iceberg salad.

Korean Green Tea Noodle Salad

Korean Green Tea Noodle Salad
 
Author:
Serves: 2
Ingredients
  • 8 ounces fresh green tea noodles (substitute fresh udon or your favorite noodles)
  • ½ cup cooked edamame
  • ½ Japanese cucumber, julienned
  • 1 small radish, sliced thin and chilled in ice bath for 5 minutes
  • chopped cilantro
  • chopped green onions
  • sliced Fresno pepper (optional)
  • Dressing:
  • 3 tablespoons rice vinegar (not seasoned)
  • 1½ tablespoons sesame oil
  • 1 tablespoon honey
  • 2 teaspoons soy sauce
  • 2 tablespoons light miso
  • 1 teaspoon gochugaru
  • 3 teaspoons sriracha (less or more depending on your preference)
  • 2 teaspoons finely ground roasted sesame seeds
Preparation
  1. Boil the noodles according to the package directions. Immediately transfer to a colander and rinse under cold water to stop the cooking. Set aside to drain.
  2. Whisk all of the dressing ingredients in a medium bowl until well combined.
  3. Divide noodles between two bowls. Drizzle some of the dressing over the noodles. Top noodles with vegetables, cilantro, green onions and Fresno pepper if using. Serve extra sauce on the side to drizzle over the vegetables.


Breakfast, Dessert, Fruit, Lactose Free, Recipes, Vegetarian, Veggies

Mango Galette

February 14, 2021

Fresh Mango Galette

I had every intention of posting this in August when mangos were abundant, yet here it is, February….  It looks as though it will be a good mango season this year.  All the trees in the neighborhood are full of flowers and keiki fruits right now. So when the time comes and you have a few pounds of mangos and want an easy to assemble dessert, this mango galette is the perfect choice.  It is a beautiful dessert to bring to the table after dinner or to serve with your morning coffee.

Pirie Mango Slices

Between the two types of mango trees we have, the White Pirie is the one I use most often for making jams and preserves as well as for baking.  With its sweet, intense, mango flavor and relatively firm texture, it holds up well when chopped or sliced for recipes such as mango bread, cake, streusel muffins, and this galette.

Arranging Mangos on Galette Dough

Mango Galette Ready to Bake

The wonderful thing about a galette is its free-form shape.  Roll it out, add your ingredients then tuck up the sides.  You will use the entire piece of pie dough since there’s no need to trim the edges of the crust.

Fresh Mango Galette

Serve a slice all by itself, or top it with a scoop of vanilla ice cream or a dollop of whipped cream.

Fresh Mango Galette with Vanilla Ice Cream

Mango Galette
 
Pastry adapted from Dorie Greenspan
Author:
Serves: 8
Ingredients
  • Crust:
  • 1½ cups (204g) all-purpose flour
  • 2 tablespoons sugar
  • ¼ teaspoon fine sea salt
  • 1 stick (8 tablespoons, 4 ounces, 113g) frozen Earth Balance Buttery Sticks cut into about 16 pieces (if using regular unsalted butter increase salt to ½ teaspoon)
  • ¼ cup ice water
  • Filling:
  • ⅓ cup (heaping) granulated sugar
  • 2 tablespoons corn starch
  • ¼ teaspoon ground cinnamon
  • 3 cups (about 2½ pounds) mangos, peeled, seeded, and cut into ⅓-1/2-inch-thick slices
  • mango jam for glaze (can substitute with apricot jam)
Preparation
  1. Dough: Put the flour, sugar and salt in a food processor and pulse a few times to blend. Scatter the pieces of butter over the dry ingredients and pulse until the butter is cut into the flour. The mixture will look like coarse meal. Continue to pulse until you get small flake-size pieces and some larger pea-size pieces. Add a little of the ice water and pulse, add some more, pulse and continue until all of the water is in. Now work in longer pulses, stopping to scrape the sides and bottom of the bowl if needed, until you have a dough that forms nice bumpy curds that hold together when you pinch them. Heads up. Just before you reach this clumpy stage, the sound of the machine working the dough will change.
  2. Gather the dough into a ball, flatten it into a disk and put it between two large pieces of parchment paper. Roll the dough into a circle about 12 inches in diameter. Don’t worry about getting the exact size or about having the edges be perfect.
  3. Slide the rolled-out dough, still between the parchment papers onto a baking sheet and freeze for about 15 minutes or refrigerate for 2 hours.
  4. Preheat oven to 375 degrees. Remove chilled dough from freezer or refrigerator while you prepare the fruit. The dough should still be cold but pliable and not prone to cracking.
  5. Filling: Place sliced mangos in a large, wide bowl. Combine sugar, corn starch, and cinnamon in a small bowl. Sprinkle sugar mixture over mangos and toss gently with a wide spatula.
  6. Remove top layer of parchment paper from dough round. Starting 1½ to 2-inches from the edge of the round, arrange the mangoes in a single layer in concentric circles, creating overlapping folds as you work around the perimeter. If your mangos are extra juicy, leave the extra juice in the bowl so the filling does note overflow in the oven. Gently lift the border of the dough up and around the filling, making pleats as you go. Brush the border with half & half or milk. Sprinkle with turbinado or coarse sparkling sugar. This is optional but makes for an attractive and crispy crust.
  7. Bake on the parchment lined baking sheet for 45 - 50 minutes, or until the crust is golden and the filling is bubbling. Remove the galette from the oven and brush the fruit with warmed mango jam. Let cool on the baking sheet on a wire rack. Cut into wedges and serve warm or at room temperature.


Dinner, Korean, Lactose Free, Recipes, Side Dishes, Vegan, Vegetarian, Veggies

Asian Cucumber Salad

January 24, 2021

Asian Cucumber Salad

This is a quick (10 minutes max) cucumber dish that is perfect to serve alongside teriyaki meat sticks, lemon grass tofu, and Korean hamburger patties.  It’s a very refreshing salad that everyone will enjoy.

Japanese Cucumber, Cilantro & Gochugaru

Japanese cucumbers are the best choice for this salad.  They are super crispy with tender skins and have very few seeds.  I always have a big jar of gochugaru (Korean chili flakes) on hand.  The chili flakes add a subtle heat and beautiful pop of color to salads like this one.

Asian Cucumber Salad

We have some beautiful cilantro growing in the garden so I added a few tender leaves to the salad.  If you’re not a fan of cilantro, use thinly sliced green onions or chives.  If you are not planning to eat the salad right away, store cucumbers and dressing separately until ready to serve.

Asian Cucumber Salad with Tofu & Rice

Asian Cucumber Salad
 
Author:
Serves: 2
Ingredients
  • 1 Japanese cucumber (about 5 ounces)
  • 1 tablespoon soy sauce (Kikkoman recommended)
  • 2 tablespoons rice vinegar (unseasoned)
  • 2 teaspoons sugar
  • ½ teaspoon gochugaru (Korean red chili flakes)
  • ¼ - ½ teaspoon roasted sesame seeds
  • few sprigs of fresh cilantro torn into pieces (may substitute thinly sliced green onions or chives)
Preparation
  1. Slice the cucumbers into thin rounds, about ⅛th-inch thick.
  2. Combine the soy sauce, rice vinegar, and sugar in a small bowl. Mix well until sugar has dissolved. Mix in gochugaru and and most of the sesame seeds.
  3. Place cucumbers in a low sided bowl. Spoon sauce over the cucumbers. Sprinkle remaining sesame seeds over the top followed by the cilantro.


Dinner, Japanese, Lactose Free, Recipes, Side Dishes, Vegan, Vegetarian, Veggies

Miso Butter Onions

January 17, 2021

Miso Butter Onions

With just three ingredients, onions, butter and miso (+ water), you might wonder how this dish from Yotam Ottolenghi, can turn out so gorgeous and flavorful.  Of course these three ingredients are among the most delectable in the world of cuisine.  Serve the onions alongside grilled steak or chicken, or simply over a bowl of steaming rice.

Maui Onions & Cipollini Red Onions

The recipe calls for very small onions, or very large shallots.  Both can be difficult to find.  The best option I found was to use Maui onions which tend to be on the small side.  I threw in a couple of red cipollini (Italian for small onions) that I had bought at Whole Foods.

Halved Maui Onions

The onions are sliced lengthwise with ends trimmed ever so slightly in order to keep the onion halves intact while baking.

White Miso & Miyoko's Vegan Butter

My version of the recipe is vegan as I switched out the butter for Miyoko’s vegan butter. It works great in this dish and all baking recipes if you are looking for a lactose free substitute for regular unsalted butter.

Miso & Melted Vegan Butter

Light miso paste is whisked together with the melted vegan butter and warm water.  This simple mixture eventually turns into a luscious sauce that coats the onions and gives them a rich, savory flavor.

Maui Onions & Red Cipollini Onions

Maui Onions & Red Cipollini Onions with Miso-Butter Water

The first time I made this dish, I was surprised at how much liquid there was.  It crossed my mind that this might not work out!  But eventually, the pale liquid reduces to a thick, flavorful sauce.

Miso Butter Onions

Beautifully glazed onions ready to serve alongside your favorite dinner entree.

Miso Butter Onions

Miso Butter Onions
 
Adapted from Yotam Ottolenghi's recipe
Author:
Serves: 4
Ingredients
  • 1¾ pounds very small onions
  • 3½ tablespoons Miyoko's unsalted vegan butter (or regular unsalted butter)
  • 3 tablespoons + 1 teaspoon white miso
  • 1½ cups warm water
Preparation
  1. Special equipment needed: Heavy baking dish safe for 500 degree oven
  2. Preheat oven to 500 degrees
  3. Halve the onions lengthwise, discarding the papery skin as well as the layer beneath it if it's tough or dry. Trim the tops and a bit off the bottom (not too much, you want to ensure the onion halves stay held together at the base). Place onions halves, cut-side down slightly spaced apart, in a 9x13-inch baking dish or one that fits your onion halves.
  4. In a medium bowl, whisk together the melted butter and miso paste. Whisk in the warm water. Pour mixture over the onions. Cover the pan tightly with heavy duty aluminum foil. Bake for 35 minutes. Remove foil and turn the onions over so they are cut-side up. Baste onions very well, then return to the oven, uncovered for another 40-45 minutes, basting every 10 minutes, until the onions are very soft and deeply browned on the tops. The sauce should be reduced to a gravy consistency.
  5. Transfer onions to a platter, pouring the sauce over and around them before serving. Any leftovers can be refrigerated for up to 2 days. Reheat before serving.


Dinner, Dressing, Lactose Free, Recipes, Salad, Side Dishes, Vegetarian, Veggies

Champagne Vinegar & Dijon Vinaigrette

November 11, 2020

Champagne Vinegar & Dijon Vinaigrette Dressed Salad

I love tangy vinaigrettes that have nearly equal parts of acid to oil.  Lettuces, arugula, tomatoes, cucumbers and so many other greens really benefit from a vibrant dressing.  If there is too much oil and not enough acid, the salad can taste bland and heavy.  Add a few grinds of black pepper and a sprinkling of kosher salt just before serving for the perfect finishing touch.

Champagne Vinegar & Dijon Vinaigrette Ingredients

Champagne vinegar is at the top of my list when it comes to making salad dressings.  It has a crisp yet light flavor and seems less acidic than other white wine vinegars. It makes a beautiful dressing especially when combined with Dijon mustard and olive oil.  Not all brands of champagne vinegar are alike. I’ve tried a few that were not as smooth and flavorful as the brand I now use exclusively, O Champagne Vinegar found at Whole Foods.  It may be bit more expensive than white wine vinegars, but it is definitely worth the price.  A good dressing brings together a salad by complimenting all of the fresh vegetables in your bowl.  On another note, the little twirl whisk pictured above is my favorite kitchen utensil for mixing up dressings.  It whisks up the ingredients thoroughly and quickly.

Champagne Vinegar & Dijon Vinaigrette

This dressing will keep well in the refrigerator for about 1 week.

Champagne Vinegar & Dijon Vinaigrette Tomato Salad

Champagne Vinegar & Dijon Mustard Vinaigrette Dressed Salad

Champagne Vinegar & Dijon Vinaigrette
 
Author:
Serves: ¾ cup
Ingredients
  • 2 tablespoons Dijon mustard
  • 1 tablespoon honey
  • ¼ cup + 1 tablespoon champagne vinegar (O Champagne Vinegar recommended)
  • ¼ cup extra virgin olive oil
  • ¼ teaspoon kosher salt + more for serving
  • few grinds of freshly ground black pepper + more for serving
  • 1 teaspoon finely minced shallot, optional
Preparation
  1. Whisk Dijon mustard, honey, minced shallot if using, salt and pepper in a small bowl. Whisk in champagne vinegar. Slowly add olive oil and whisk until vinaigrette is fully emulsified. Chill until ready to serve.
  2. Place salad ingredients in a large bowl and toss with some of the vinaigrette. Transfer salad to individual serving bowls or plates, sprinkle a bit of kosher salt and black pepper over each salad (optional). Dressing will keep for 1 week refrigerated.


Follow

Get every new post delivered to your Inbox

Join other followers: