Browsing Category

Veggies

Bread, Breakfast, Dinner, Lactose Free, Recipes, Veggies

Bacon & Cheddar Zucchini Bread

September 25, 2016

Bacon & Cheddar Zucchini Bread

Bacon and cheddar cheese are a perfect match.  This savory zucchini bread, which incorporates that perfect match, does not require any rising, kneading, or special care.  Mix all of the ingredients together and bake it in a loaf pan.  Then, wait patiently while it cools before you cut a thick slice and toast it until the edges are pleasingly crisp.  This recipe is adapted from Carolyn over at Food Gal.  The recipe comes from Katie Sullivan Morford’s new cookbook Rise & Shine. Katie uses kalamata olives and green onions but I wanted to use bacon, because…bacon!  I also used chives from the garden in place of the green onions.  As Carolyn mentions, this savory bread is not just for breakfast.  I toast slices and serve it with roasted meat or grilled chicken.  It is reminiscent of cornbread in many ways.  Serve it with a pat of butter.  Yum!

Toasted Zucchini Bread with Butter

Grated Zucchini

I haven’t grown zucchini but I hear that they are prolific producers and many home gardeners end up with more than they know what to do with.  I also read a few stories that gave me a good laugh: people will leave bags of excess zucchini in unattended cars or on strangers doorsteps. Fortunately, this recipe doesn’t require that much zucchini.

Fresh Eggs

I love the beautiful speckled brown eggs my neighbor Judy shares with us.

Extra Sharp Cheddar, Bacon, Chives

Use extra sharp cheddar and fairly lean bacon for the best flavor and texture.  This rustic bacon and cheddar zucchini bread turns out perfectly each time you bake it.

Bacon & Cheddar Zucchini Bread with Butter & Mango Pepper Jam

Bacon & Cheddar Zucchini Bread


Bacon & Cheddar Zucchini Bread
 
Adapted from Food Gal
Author:
Serves: 1 large loaf
Ingredients
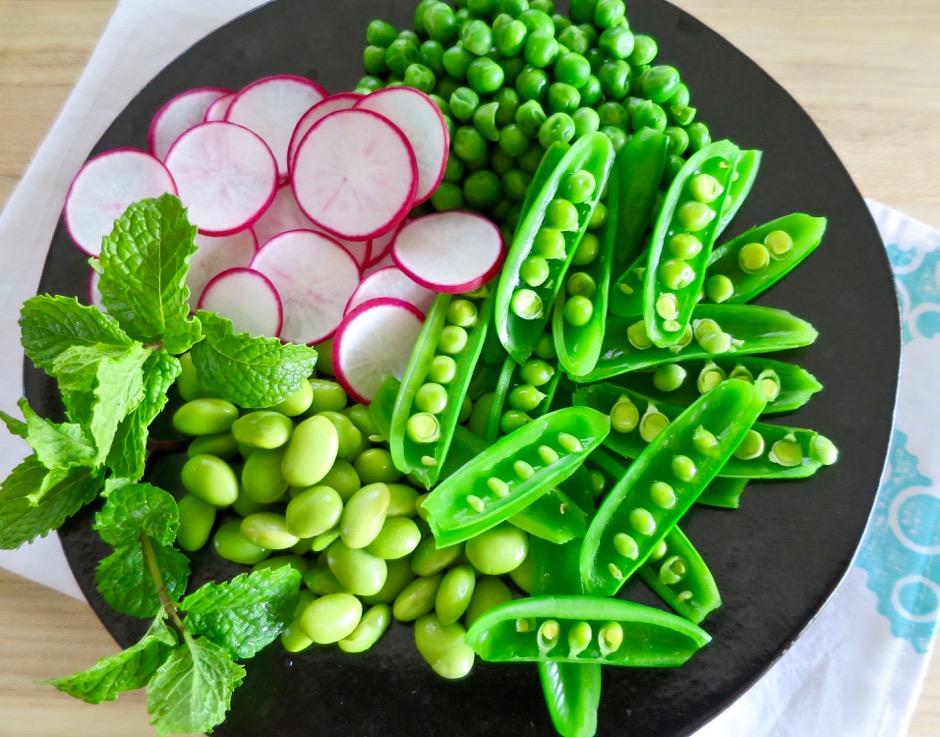
  • 2 cups coarsely grated zucchini (about 2 medium zucchini)
  • 1½ teaspoons kosher salt, divided
  • 1½ cups white whole wheat flour (spooned and leveled)
  • 1 cup all-purpose flour (spooned and leveled)
  • 2 teaspoons baking powder
  • ½ teaspoon baking soda
  • ¼ teaspoon freshly ground black pepper
  • 2 large eggs
  • ⅓ cup extra virgin olive oil
  • ½ cup plain lactose free yogurt (Green Valley lactose free or regular yogurt)
  • ½ cup lactose free milk (or regular milk)
  • 2 tablespoons chopped chives
  • ½ cup chopped cooked bacon
  • 6 ounces extra sharp cheddar cheese, cut into ⅓-inch cubes
Preparation
  1. Preheat oven to 350 degrees. Generously grease a 9x5-inch loaf pan with oil or nonstick cooking spray and set aside.
  2. Place grated zucchini into a colander set in the sink or over a bowl. Sprinkle with 1 teaspoon of the salt and toss together. Leave zucchini in the colander to allow the salt to draw out some of the liquid.
  3. Meanwhile, in a large bowl, whisk together the white whole wheat and all-purpose flour along with the baking powder, baking soda, black pepper, and remaining ½ teaspoon salt.
  4. In a medium bowl, whisk together the eggs, olive oil, yogurt, and milk until combined.
  5. Squeeze out the liquid from the zucchini, removing as much of the moisture as possible, The zucchini will remain moist but should not be wet. Add the zucchini to the egg mixture along with the scallions and bacon. Mix to combine.
  6. Add the egg mixture to the flour mixture and stir gently with a spoon or rubber spatula, just until the streaks of flour disappear. Add the cheese and stir just enough to distribute it throughout the dough.
  7. Transfer dough to the prepared loaf pan and using your spatula, smooth the top. The dough will be rough and craggy.
  8. Bake for about 50 - 55 minutes, or until the loaf is golden and a wooden skewer inserted into the center comes out clean. Transfer pan to a cooling rack for 15 minutes. Run a knife around the edge of the bread, tip the pan over, and gently dislodge the bread onto the cooling rack. Allow bread to cool for 30 minutes or so, before serving.


Appetizers, Dressing, Eggs, Lactose Free, Recipes, Salad, Sauces, Vegetarian, Veggies

Nobis Dressing

August 17, 2016

Nobis Dressing

San Francisco is a city that offers superb dining options.  We look forward to returning to our favorite restaurants year after year. While always visiting our favorite places, we enjoy trying new restaurants as well. On our last visit we tried Volta, a French restaurant with Scandinavian influences.  We went for lunch, and it was just divine so we changed our plans for that night and returned to Volta for dinner.  It’s a gorgeous restaurant with a menu that features many appealing dishes.  I chose an endive & watercress salad with nobis dressing as my starter.  The nobis dressing was absolutely delicious: so much so, I contacted the owner Umberto Gibin and asked for the recipe.  He was gracious enough to have his chef pare down the ingredients for me.

Soft Boiled Egg

The ingredient that makes this recipe stand out is the egg.  Poached or soft boiled, either preparation works well.  The egg adds depth and richness to the dressing, along with the tangy mustard, vinegar, lemon juice, chives, and a hint of garlic.  It reminds me of a Caesar salad dressing but without the cheese and anchovies. It’s so good I can eat it right out of the jar.

Poached Egg

Endive Salad with Nobis Dressing

Nobis dressing on endive salad with watercress and radishes.

Grilled Artichokes with Nobis Dressing

Nobis dressing for dipping grilled artichokes.  It’s also delicious drizzled over steamed asparagus.

Nobis Dressing
 
Adapted from Volta restaurant recipe
Author:
Serves: ¾ cup
Ingredients
  • 1 soft boiled or poached egg
  • 1 tablespoon Dijon mustard
  • 1 tablespoon + 1 teaspoon red wine vinegar
  • 1 tablespoon fresh lemon juice
  • ⅛ teaspoon garlic (use a microplane)
  • ⅓ cup + 1 tablespoon canola oil
  • 1 tablespoon chopped chives
  • ¼ teaspoon kosher salt
  • freshly ground white or black pepper
Preparation
  1. Place soft boiled egg in a 1-pint mason jar or comparable sized container that your immersion blender fits snugly in.
  2. Add the other ingredients and blend with an immersion blender until dressing is thick and creamy, about 30 seconds. If you don't have an immersion blender use a small food processor or blender.
  3. Serve as a salad dressing, dipping sauce for artichokes, or drizzled over asparagus. I bet it would be delicious as a sauce for grilled or pan fried fish, or chicken.


Recipes, Salad, Vegetarian, Veggies

Pea Salad with Feta, Mint & Lemon-Dijon Dressing

July 15, 2016


Pea Salad with Feta, Mint & Lemon-Dijon Dressing

This light and refreshing salad is ideal for those days when you want a change from your typical bowl of mixed greens.  Sweet and crisp sugar snap peas are the perfect companion to the slightly peppery radishes, lemony dressing and feta cheese.  Scatter some fresh torn mint leaves over the salad just before serving.  It’s a beautiful side dish to serve at a small dinner gathering this summer.

Thinly Sliced Radish

I’ve been appreciating radishes more and more these days.  They are especially good in salads or served on top of tuna tartare with avocado.  A quick soak in ice water and the radish slices become delightfully crunchy.

Radish Slices in Ice Bath

Hydroponic Watercress

Hydroponic watercress works very well in this salad because of its mild flavor, delicate leaves and stems.  If you are on Maui, our local Whole Foods store regularly carries this item.

Pea Salad with Radishes & Feta - 1 (2)

The sugar snap peas are blanched for 30 seconds then transferred to an ice bath.  Once cool, they are sliced in half to reveal the tender peas within.

Pea Salad with Feta, Mint & Lemon-Dijon Dressing

Pea Salad with Feta, Mint & Lemon-Dijon Dressing
 
Author:
Serves: 2
Ingredients
  • Dressing
  • 2 teaspoons Dijon mustard
  • ½ teaspoon honey
  • 1 tablespoon fresh lemon juice
  • 1 tablespoon extra virgin olive oil
  • salt & pepper
  • Salad
  • ½ cup green peas, defrosted if frozen or blanched for a minute if using fresh
  • ½ cup shelled edamame, boiled for 5 minutes, cooled in ice water
  • 1 small bunch hydroponic watercress, washed and stems trimmed - optional
  • 3 ounces sugar snap peas, blanched for 30 seconds, cooled in ice water and sliced in half lengthwise
  • 2 small radishes, sliced very thin, soaked in ice water for 15 minutes
  • 1 ounce crumbled feta
  • handful of fresh mint leaves
  • *Drain and place blanched and chilled vegetables on paper towels, carefully pat dry before using.
Preparation
  1. Whisk together Dijon, honey, lemon juice, and olive oil. Season to taste with salt and pepper. Set aside. Dressing can be made a day in advance.
  2. In a medium wide salad bowl, gently mix together the green peas, edamame and watercress.
  3. Scatter sliced sugar snap peas and radishes over the top of the salad.
  4. Sprinkle salad with feta and fresh torn mint leaves (tear the mint leaves right before serving as they can turn brown if torn in advance).
  5. Drizzle salad with dressing just before serving.


Japanese, Lactose Free, Recipes, Salad, Vegan, Vegetarian, Veggies

Miso Turmeric Dressing

May 26, 2016

Miso Turmeric DressingThis is a beautiful and versatile dressing.  It’s delicious with chopped iceberg lettuce and cucumbers, or drizzled over a crisp watercress salad.   It’s the perfect match for a cool summer soba salad with finely shredded red cabbage and pan-fried tofu.

White MisoThis Hawaiian Style Mellow White Miso is perfect for this dressing.  It has a semi-sweet flavor that compliments the rest of the ingredients.

White Miso

Ground Turmeric

Shredded Ginger & CarrotThe dressing can be prepared in less than 10 minutes.  All the ingredients are whisked together in a small bowl.  That’s it!  It will keep nicely in the refrigerator for 3 – 4 days.

Miso Turmeric Dressing with Soba Salad

Miso Turmeric Dressing
 
Adapted from Bon Appetit Magazine
Author:
Serves: about 1 cup
Ingredients
  • ⅓ cup unseasoned rice vinegar
  • ¼ cup mirin
  • ¼ cup vegetable oil
  • 2½ tablespoons finely grated carrot
  • 2 tablespoons white miso
  • 2 teaspoons finely grated peeled ginger
  • ½ teaspoon ground turmeric
  • 1 teaspoon roasted sesame oil
  • ½ teaspoon soy sauce
  • 2 teaspoons roasted sesame seeds
Preparation
  1. Whisk together all ingredients in a small bowl. Serve over crisp salad greens such as iceberg lettuce, watercress, chopped cabbage or use as a dressing for soba salad.


Dinner, Japanese, Lactose Free, Recipes, Salad, Side Dishes, Vegetarian, Veggies

Crunchy Cabbage & Ramen Noodle Salad

May 15, 2016


Crunchy Cabbage & Ramen Noodle Salad

This is the perfect salad to take on a summer picnic or potluck party.  Everything can be prepared in advance and put together in one bowl just before serving.  I love the crunchy texture of the cabbage, ramen and almonds.  Sometimes I’ll add leftover shredded rotisserie chicken to the salad.  You could also add baked or pan-fried tofu for a tasty vegetarian lunch.  This is a salad, with its refreshing ingredients and delicious dressing, that I will never get tired of eating.

Ramen Noodles

Though the ramen is already baked, I prefer to enhance it just a bit to make it very crisp. I toast the crushed ramen in my toaster oven for 4 minutes before adding it to the salad.

Slaw Mix

Crunchy Cabbage & Ramen Noodle Salad


Crunchy Cabbage & Ramen Noodle Salad
 
Adapted from the kitchn blog recipe
Author:
Serves: 4
Ingredients
  • 3 cups shredded green cabbage (about 7 ounces)
  • 1 cup shredded red cabbage (about 3 ounces)
  • 1 cup shredded carrot (about 3 ounces)
  • ¼ cup shelled edamame
  • ¼ cup seasoned rice vinegar
  • 2 tablespoons roasted sesame oil (Kadoya brand recommended)
  • 2 tablespoons canola oil
  • 2 teaspoons honey
  • 2 teaspoons roasted sesame seeds, white, black or a combination of both
  • 1 (3-ounce) package ramen noodles, crushed and toasted (discard seasoning packet)
  • ¼ cup thinly sliced green onions
  • ¼ cup sliced almonds, toasted
Preparation
  1. Place shredded cabbage, carrot and edamame in a large bowl.
  2. Combine seasoned rice vinegar, sesame oil, canola oil, honey, and sesame seeds in a jar. Shake to combine ingredients.
  3. Preheat toaster oven (or oven) to 325 degrees. Spread crushed ramen noodles on a foil lined baking sheet and toast for about 4 minutes. Watch closely so it doesn't burn.
  4. Toast sliced almonds for 4 -5 minutes. If you use your oven, you'll have enough space to toast the ramen and almonds at the same time (on separate pans). The ramen and almonds should be slightly toasted with just a hint of golden color.
  5. Add dressing to the cabbage mixture by the spoonful. Toss, then fold in ramen, green onions and almonds. Toss again and serve right away.


Dinner, Lactose Free, Recipes, Side Dishes, Veggies

The Best Green Bean Casserole

February 9, 2016

The Best Green Bean CasseroleIt all started out with the purchase of Williams-Sonoma’s Crispy Onions.  I was sold once I read the label on the package: The ultimate crunchy topping for savory casseroles.  A green bean casserole was the first thing that came to mind, but not the usual canned-ingredient variety.  The only mistake I made was not to buy more than one bag of these delightful onions.

Fresh Green BeansKimberly of the  Daring Gourmet posted a recipe  that sounded perfect.  Besides the onions and green beans, the recipe calls for bacon, an ingredient that for me, seals the deal.

Hempler's BaconHempler’s bacon is top-notch.  It is thick, lean, and smokey.  I used the pepper coated bacon in the green bean casserole but you can use regular thick cut bacon instead.  You can find Hempler’s at Safeway.

Hempler's Bacon

Fresh MushroomsIt may seem there are way too many mushrooms in the recipe, but as they sauté, they shrink up quite a bit and they are essential in making this casserole so tasty (along with the bacon!).

Williams-Sonoma Crispy OnionsI was able to make two green bean casseroles from the one package of crispy onions I bought. These crispy onions are far superior to the supermarket brands.  They would be delicious sprinkled over slow baked cannellini beans or any dish that would be enhanced by a crunchy topping.

The Best Green Bean Casserole

The Best Green Bean Casserole
 
Adapted from The Daring Gourmet
Author:
Serves: 6 - 8
Ingredients
  • 4 slices thick-cut bacon, diced
  • ½ cup finely chopped sweet onion
  • 2 medium cloves garlic, minced
  • 12 ounces button mushrooms, chopped
  • 3 tablespoons Earth Balance Buttery Sticks (or regular butter)
  • 3 tablespoons all-purpose flour
  • 1 cup half and half (I make this with Organic Valley Lactose Free Half and Half)
  • 1¼ cups chicken broth
  • ½ teaspoon kosher salt
  • ¼ teaspoon freshly ground black pepper
  • 1 pound fresh green beans, trimmed, cut into 1½" pieces and blanched (boil for 5 minutes, place beans in ice water for a few minutes, drain well)
  • 3 ounces crispy onions
Preparation
  1. Preheat oven to 350 degrees.
  2. Lightly butter 9x13" casserole dish and set aside.
  3. Fry bacon in a large skillet over medium-high heat until crispy. Reduce heat to medium. Add onions and cook until soft and translucent, about 4 minutes. Add garlic and mushrooms, cook for another 4 minutes or so, until mushrooms are soft. Transfer mixture to a bowl.
  4. Melt 3 tablespoons Buttery Sticks in the same skillet and whisk in flour. Continue whisking for another minute until the mixture has slightly deepened in color. Add the half and half and chicken broth while constantly whisking to prevent lumps. Once slightly thickened, add the mushrooms and bacon mixture along with the salt and pepper. Add green beans and stir to combine.
  5. Pour mixture into a 9x13" casserole dish and sprinkle with crispy onions, covering the top of the casserole. Bake uncovered for 30 minutes.
  6. ***You may prepare the casserole a few hours in advance except for adding the onions (they will become soggy if you add them in advance). Remove the casserole from the refrigerator 30 minutes prior to baking. Sprinkle onions over the top and bake.


Follow

Get every new post delivered to your Inbox

Join other followers: