Browsing Category

Vegetarian

Dinner, Recipes, Sandwiches, Vegetarian

Cheese & Nut Loaf + Burgers

February 8, 2017

Cheese & Nut Loaf

During the holidays last year, I wanted to serve a main dish that would appeal to my vegetarian guests, but also be enjoyable for my other guests as well.  This cheese and nut loaf turned out to be the perfect choice.  It bakes into a gorgeous loaf that looks beautiful and tastes delicious.  You can serve it alone or drizzle a vegetarian mushroom gravy or béchamel sauce over the slices before serving. The recipe comes from Deborah Madison’s The Greens cookbook named after the successful Greens Restaurant in San Francisco that still exists today.  Unfortunately I don’t own the cookbook and it seems to be out of print, but after reading all the great comments on line from those who have made it and having made it myself, I can see why everyone loves it.
Cheese & Nut Burger

My husband John had a great idea, and that was to shape the cheese and nut loaf mixture into patties. This turned out to be our favorite way to eat the cheese and nut loaf.  The burgers bake in just 30 minutes or so and they are so tasty nestled in a hamburger bun and topped with all of your favorite burger condiments.  Another thing I’d like to mention is that both the loaf and burgers freeze beautifully and can be microwaved or pan-fried for another excellent meal.

Cremini & Morel Mushrooms

Use whatever mushrooms are available to you.  I used creminis and morels. These gorgeous morels were sent to us by my stepdaughter Katie who hunts for mushrooms in the Pacific Northwest.

Parsley, Marjoram, Thyme

One of the things I love most about our garden are the assorted herbs that we grow. If you don’t have them, most markets carry a nice assortment of herbs these days but you can also use dried herbs as well.

Patties in Cooking Rings

You will need to cook the brown rice in advance. Otherwise all of the other ingredients can be put together as you prepare the recipe. The mixture is gently formed and patted into baking rings that I made of aluminum foil.  This keeps the patties from spreading when baking (they will flatten and become uneven when baking without the rings).

Baked Cheese & Nut Burgers

Cheese & Nut Burgers

And here we have perfectly shaped plump burgers.

Cheese & Nut Burger

Cheese & Nut Loaf

Cheese & Nut Loaf + Burgers
 
Adapted from Deborah Madison's recipe
Author:
Serves: 1 loaf or 10 - 12 burgers
Ingredients
  • 1½ tablespoons butter
  • 1¼ cups finely diced onion
  • 1 cup (packed) mushrooms, chopped fine
  • 1½ cups walnuts, toasted
  • ½ cup raw unsalted cashews, toasted
  • 2½ tablespoons chopped fresh flat leaf parsley
  • 1 teaspoon fresh chopped thyme (or ½ teaspoon dried)
  • 1½ teaspoons fresh chopped marjoram (or ½ teaspoon dried)
  • 1 teaspoon fresh chopped sage (or ½ teaspoon dried)
  • 2 medium garlic cloves, finely minced
  • 1½ cups cooked brown rice
  • 8 ounces grated cheese (I used extra sharp cheddar and yogurt cheese)
  • 1 cup cottage cheese (I used lactose free)
  • 4 large eggs, beaten
  • 1 teaspoon kosher salt
  • freshly ground black pepper
Preparation
  1. Preheat oven to 325 degrees.
  2. Spread walnuts and cashews on a small rimmed baking sheet and toast until very lightly golden brown, about 6 minutes. Transfer nuts to a plate to cool slightly. Chop nuts finely and set aside.
  3. Increase oven temperature to 375 degrees.
  4. For the loaf: Butter a 9" loaf pan and line with parchment paper allowing the paper to overhang on the sides to allow easy removal of the loaf.
  5. Melt butter in a large sauté pan over medium heat. Add onions and cook until they are translucent. Add mushrooms and cook until they are lightly browned, about 5 minutes. Remove from the heat and transfer mixture to a large bowl. Stir in chopped nuts, herbs, garlic, brown rice, cheese, cottage cheese, and eggs. Mix in salt and a few grinds of pepper. Mix until all ingredients are well incorporated. Spoon the mixture into the loaf pan, smoothing the top lightly.
  6. Bake until golden brown and firm to the touch, about 1 hour. Let cool in the pan on a wire rack for at least 15 minutes before transferring loaf to a plate.
  7. For the burgers: Preheat oven to 375 degrees. Line a large rimmed baking pan with parchment paper. The patties will spread and flatten when baking unless you use cooking rings which will keep them uniform in size. I use aluminum foil folded over a few times and stapled the ends together to make sturdy, disposable rings. Coat inside of rings with non-stick cooking spray.
  8. Divide the mixture into 10 - 12 portions. Gently form the patties so they fit snugly in the cooking rings. Bake for 35 minutes, or until the burgers are nicely browned. Remove cooking rings and serve burgers on toasted buns with your favorite accompaniments.
  9. Both the loaf and burgers freeze nicely.
  10. *For 4 - 6 burgers cut the recipe in half. The full recipe will also make an 8x4" loaf plus two burgers.


Dinner, Korean, Lactose Free, Pasta, Recipes, Salad, Side Dishes, Vegan, Vegetarian, Veggies

Chilled Somen with Spicy Cucumbers

December 7, 2016

Chilled Somen with Spicy Cucumbers

Cold noodles tossed with crisp vegetables are one of my favorite lunch dishes.  I often make a big bowl of Aunty Ruby’s Somen Salad and take it to work to share with my friends.  This recipe calls for perciatelli or bucatini pasta but I couldn’t resist using delicate somen noodles.  They cook up in 3 minutes and are the perfect partner for the spicy cucumbers.  I found this delightful recipe in Martha Stewart Living magazine. The subject of this particular article was Korean Barbecue and a talented Korean cook, Mrs. Pai.  This is one of her original side dishes.

Somen Noodles

Keiki Cukes

These beautiful “Keiki Cukes” are grown on the Big Island of Hawaii.  Big Island Produce is a hydroponic farm that produces cucumbers all year long.  They are super crunchy and don’t have any seeds.  We use them to make dill pickles, bread & butter pickles, and add them to all types of salads.

Chopped Scallions

Korean Chili Flakes

Korean chili flakes or gochugaru (not to be confused with red pepper powder), has a unique balance of sweet and smoky flavors with medium heat.  I have heard that hotter varieties are available but the one I buy from Whole Spice tends to be just the right heat for me.

Spicy Cucumbers

The cucumbers are mixed with Korean chili flakes, scallions, garlic, and sesame oil before being tossed with cold noodles.

somen-1-2

Chilled Somen with Spicy Cucumbers

Chilled Somen with Spicy Cucumbers
 
Adapted from Martha Stewart Living Magazine
Author:
Serves: 2 as a main dish, 4 as a side dish
Ingredients
  • 10 ounces thinly sliced small cucumbers (Keiki, Japanese, Persian)
  • ½ teaspoon salt
  • 1½ tablespoons Korean chili flakes
  • 2 teaspoons granulated sugar
  • 3 tablespoons thinly sliced scallions
  • 1 small clove garlic, crushed in a garlic press
  • 4 tablespoons roasted sesame oil, divided (Kadoya brand recommended)
  • 1 tablespoon unseasoned rice vinegar
  • 1 package (3 bundles - 8 oz.) somen noodles
  • 4 teaspoons soy sauce
  • salt for seasoning
Preparation
  1. Toss cucumbers with ½ teaspoon salt, and let sit for 30 minutes. Transfer cucumbers to a clean dish towel and wring to remove excess liquid from cucumbers. Transfer to a large bowl. Add Korean chili flakes, sugar, scallions, garlic, 2 tablespoons sesame oil, and the vinegar. Mix seasonings into cucumbers; let sit for 10 minutes.
  2. Meanwhile, cook somen noodles according to package instructions. Shirakiku brand cooks for just 3 minutes. Immediately drain, rinse under cold water and place noodles in an ice bath until well chilled. Drain noodles well and add to cucumbers, tossing to combine. Add remaining 2 tablespoons of sesame oil and the soy sauce. Season with salt and additional Korean chili flakes before serving. Leftovers are delicious the following day.
 

Appetizers, Dinner, Italian, Recipes, Side Dishes, Vegetarian, Veggies

Puff Pastry Tomato Tarts

November 14, 2016

Tomato Tart

These tasty tomato tarts are so easy to make when using ready-made frozen puff pastry.  Of course if you have time you could make your own, but using already prepared puff pastry reduces your prep time. The key to a delicious tart is to use really good tomatoes.  You want tomatoes that are meaty with few seeds so that the crust doesn’t get soggy.  Our tomato plants underproduced this summer, however, we were lucky to have a handful of really nice tomatoes that I used for tomato sauce, salsa, Mexican rice, salads, and these tarts.

Homegrown Tomatoes

Peeled Tomatoes

I didn’t peel the tomatoes the first time I made the tart but did so the next time around.  The tomato skins don’t soften much or break down when baked so peeling them ensures that when you take a bite of the tart you’re not left with the tomato skin pulling away from the rest of the slice.

Unbaked Tomato Tart with Feta & Thyme

You can make one large tart or divide the puff pastry into two equal portions and make two tarts.  Below I made one with pesto and another with feta cheese.  It was nice to have a variety of flavors.  These little tarts  make perfect appetizers for a small party.  You can make them a couple of hours in advance and still count on the crust being flaky and crisp.

Pesto & Feta Tomato Tarts

Tomato Tart with Thyme

The tomatoes above were not peeled.  You may notice the skins did not cook down much which means that when you take a bite of the tomato tart the skin may come off in one piece.  It’s definitely OK to leave the skins on though if this isn’t bothersome to you.

Tomato Tart with Feta & Thyme

Puff Pastry Tomato Tarts
 
Adapted from Canal House Cooks Every Day
Author:
Serves: 6 - 8 as an appetizer
Ingredients
  • 1 frozen ready-to-bake puff pastry sheet such as Pepperidge Farm
  • 2 - 3 tomatoes, peeled, cored, and sliced (about ⅓-inch thick)
  • 3 branches fresh thyme
  • crumbled feta (optional)
  • basil pesto (optional)
  • extra virgin olive oil
  • pepper
  • Maldon or other crunchy sea salt
Preparation
  1. Preheat oven to 375 degrees.
  2. Cut a sheet of parchment paper to fit a large baking sheet pan. Place parchment paper on counter. Remove puff pastry sheet from the freezer and place it on the parchment paper. Let puff pastry defrost for 20 minutes.
  3. Roll out puff pastry on the parchment paper to measure 9½ x 12 inch rectangle. If making two tarts divide the pastry in half. Once rolled out, transfer puff pastry (on parchment paper) to your baking sheet. Using the tip of a small paring knife, lightly score a border about ½ inch from the edge of the pastry. Pierce the dough inside the border all over with the tines of a fork to prevent the central area from puffing up too much during baking.
  4. If using only tomatoes: Arrange tomatoes over the pastry. Season with pepper. Drizzle or brush a bit of olive oil over the tomatoes. Scatter fresh thyme leaves over the top.
  5. If using pesto: Brush pesto over the pastry (except border). Arrange tomatoes on the pesto and season with pepper. Drizzle or brush a bit of olive oil over the tomatoes.
  6. If using feta: Arrange tomatoes on pastry and season with pepper. Scatter crumbled feta between the tomatoes. Drizzle or brush a bit of olive oil over the tomatoes. Scatter fresh thyme leaves over the top.
  7. Bake tart(s) for 30 - 35 minutes until the pastry is crisp and edges are lightly browned. Season with Maldon salt.


Beans, Dinner, Lactose Free, Pressure Cooker, Recipes, Salad, Side Dishes, Vegan, Vegetarian, Veggies

Flageolet Beans & Wilted Greens

October 31, 2016

Flageolet Beans & Wilted Greens

A few years ago I purchased Christopher Hirsheimer and Melissa Hamilton’s highly regarded Canal House Cooks Every Day cookbook.  The book has gorgeous photos with straightforward, practical instructions and is formatted by the four seasons.  It’s just a lovely book.  I had not consulted it in several years but I won’t neglect it again.  An example of their beautiful cuisine is this simple and delicious meal that lets the beans and greens shine.

Dried Flageolets

The original recipe calls for borlotti beans but they weren’t available at any of the stores I visited.  Instead, I used flageolets, one of my favorite beans.  Beautiful pale green and ivory colored, they cook up nicely, holding their shape.  I used my pressure cooker to save some time but you can certainly cook them in a Dutch oven if you don’t have a pressure cooker.  As with all types of beans, some will break during the cooking process.  A few will be too soft.  Though it may take an extra 5 – 10 minutes, I sort through the beans discarding the broken and soft beans after they have cooked.  Your finished dish will look beautiful and all of the beans will be the perfect texture.

Cooked Flageolets

Flageolet Beans & Wilted Greens

Flageolet Beans & Wilted Greens
 
Adapted from Canal House Cooks Every Day
Author:
Serves: 2 as a main dish or 4 as a side dish
Ingredients
  • 1 cup dried flageolet beans, rinsed (sorted through to remove broken beans)
  • ½ medium onion cut in half
  • 1 bay leaf
  • good extra virgin olive oil
  • 1 clove garlic, thinly sliced
  • 5 ounces baby kale, spinach, or a combination (I used Organic Girl I Love Baby Kale mixture)
  • kosher salt
  • freshly ground black pepper
Preparation
  1. For stove top pressure cooker:
  2. Place beans in pot with 5 cups filtered water, bay leaf and onion. Pressure cook for 25 - 30 minutes. Let pressure release naturally. Check beans for doneness. They should be tender and cooked through but not mushy. If they need a little more time, pressure cook for a few additional minutes or simmer on the stove until done.
  3. For Dutch oven stove top:
  4. Place beans in a Dutch oven or other heavy pot along with the onion and bay leaf and cover with at least 2½ inches of water. Bring the beans to a gentle boil, then turn the heat down so the beans simmer gently. Check on the beans after 50 minutes to see how they are doing. Add more hot water as needed to keep the beans submerged. Continue to monitor the beans until they are completely cooked through but not soft.
  5. If you made your beans in advance remove them from the refrigerator and place them in a pot with a few tablespoons of water and a good splash of olive oil (discard onion and bay leaf). Cover and heat on low until just warm.
  6. Meanwhile, put 1½ tablespoons olive oil and the sliced garlic in a heavy medium skillet over medium heat. Rinse your greens and add it to the pan with the water still clinging to the greens. Sauté the greens, stirring and turning them in the oil, until wilted and tender, about 5 minutes. Season with salt and pepper.
  7. To serve, place beans in a shallow bowl. Drizzle beans with a little olive oil. Top with the wilted greens and season with salt and pepper. I serve this with open-faced ham sandwiches but toasted garlic bread would be a delicious accompaniment as well.


Appetizers, Dressing, Eggs, Lactose Free, Recipes, Salad, Sauces, Vegetarian, Veggies

Nobis Dressing

August 17, 2016

Nobis Dressing

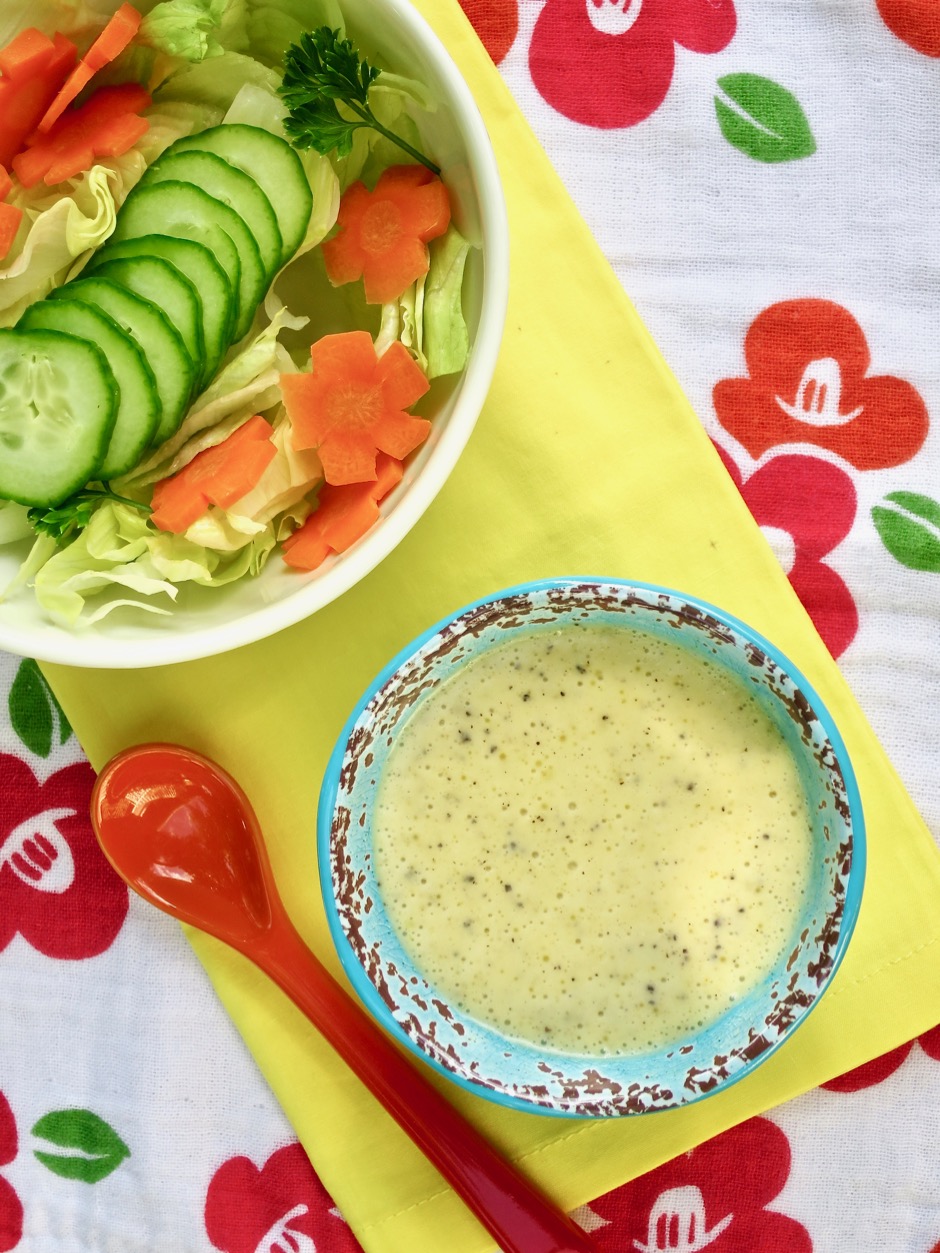
San Francisco is a city that offers superb dining options.  We look forward to returning to our favorite restaurants year after year. While always visiting our favorite places, we enjoy trying new restaurants as well. On our last visit we tried Volta, a French restaurant with Scandinavian influences.  We went for lunch, and it was just divine so we changed our plans for that night and returned to Volta for dinner.  It’s a gorgeous restaurant with a menu that features many appealing dishes.  I chose an endive & watercress salad with nobis dressing as my starter.  The nobis dressing was absolutely delicious: so much so, I contacted the owner Umberto Gibin and asked for the recipe.  He was gracious enough to have his chef pare down the ingredients for me.

Soft Boiled Egg

The ingredient that makes this recipe stand out is the egg.  Poached or soft boiled, either preparation works well.  The egg adds depth and richness to the dressing, along with the tangy mustard, vinegar, lemon juice, chives, and a hint of garlic.  It reminds me of a Caesar salad dressing but without the cheese and anchovies. It’s so good I can eat it right out of the jar.

Poached Egg

Endive Salad with Nobis Dressing

Nobis dressing on endive salad with watercress and radishes.

Grilled Artichokes with Nobis Dressing

Nobis dressing for dipping grilled artichokes.  It’s also delicious drizzled over steamed asparagus.

Nobis Dressing
 
Adapted from Volta restaurant recipe
Author:
Serves: ¾ cup
Ingredients
  • 1 soft boiled or poached egg
  • 1 tablespoon Dijon mustard
  • 1 tablespoon + 1 teaspoon red wine vinegar
  • 1 tablespoon fresh lemon juice
  • ⅛ teaspoon garlic (use a microplane)
  • ⅓ cup + 1 tablespoon canola oil
  • 1 tablespoon chopped chives
  • ¼ teaspoon kosher salt
  • freshly ground white or black pepper
Preparation
  1. Place soft boiled egg in a 1-pint mason jar or comparable sized container that your immersion blender fits snugly in.
  2. Add the other ingredients and blend with an immersion blender until dressing is thick and creamy, about 30 seconds. If you don't have an immersion blender use a small food processor or blender.
  3. Serve as a salad dressing, dipping sauce for artichokes, or drizzled over asparagus. I bet it would be delicious as a sauce for grilled or pan fried fish, or chicken.


Recipes, Salad, Vegetarian, Veggies

Pea Salad with Feta, Mint & Lemon-Dijon Dressing

July 15, 2016


Pea Salad with Feta, Mint & Lemon-Dijon Dressing

This light and refreshing salad is ideal for those days when you want a change from your typical bowl of mixed greens.  Sweet and crisp sugar snap peas are the perfect companion to the slightly peppery radishes, lemony dressing and feta cheese.  Scatter some fresh torn mint leaves over the salad just before serving.  It’s a beautiful side dish to serve at a small dinner gathering this summer.
Thinly Sliced Radish

I’ve been appreciating radishes more and more these days.  They are especially good in salads or served on top of tuna tartare with avocado.  A quick soak in ice water and the radish slices become delightfully crunchy.

Radish Slices in Ice Bath

Hydroponic Watercress

Hydroponic watercress works very well in this salad because of its mild flavor, delicate leaves and stems.  If you are on Maui, our local Whole Foods store regularly carries this item.

Pea Salad with Radishes & Feta - 1 (2)

The sugar snap peas are blanched for 30 seconds then transferred to an ice bath.  Once cool, they are sliced in half to reveal the tender peas within.

Pea Salad with Feta, Mint & Lemon-Dijon Dressing

Pea Salad with Feta, Mint & Lemon-Dijon Dressing
 
Author:
Serves: 2
Ingredients
  • Dressing
  • 2 teaspoons Dijon mustard
  • ½ teaspoon honey
  • 1 tablespoon fresh lemon juice
  • 1 tablespoon extra virgin olive oil
  • salt & pepper
  • Salad
  • ½ cup green peas, defrosted if frozen or blanched for a minute if using fresh
  • ½ cup shelled edamame, boiled for 5 minutes, cooled in ice water
  • 1 small bunch hydroponic watercress, washed and stems trimmed - optional
  • 3 ounces sugar snap peas, blanched for 30 seconds, cooled in ice water and sliced in half lengthwise
  • 2 small radishes, sliced very thin, soaked in ice water for 15 minutes
  • 1 ounce crumbled feta
  • handful of fresh mint leaves
  • *Drain and place blanched and chilled vegetables on paper towels, carefully pat dry before using.
Preparation
  1. Whisk together Dijon, honey, lemon juice, and olive oil. Season to taste with salt and pepper. Set aside. Dressing can be made a day in advance.
  2. In a medium wide salad bowl, gently mix together the green peas, edamame and watercress.
  3. Scatter sliced sugar snap peas and radishes over the top of the salad.
  4. Sprinkle salad with feta and fresh torn mint leaves (tear the mint leaves right before serving as they can turn brown if torn in advance).
  5. Drizzle salad with dressing just before serving.


Follow

Get every new post delivered to your Inbox

Join other followers: