Browsing Category

Vegetarian

Appetizers, Dinner, Japanese, Lactose Free, Recipes, Rice Dishes, Side Dishes, Summertime Meal, Tofu, Vegan, Vegetarian

Inari Sushi

January 21, 2025

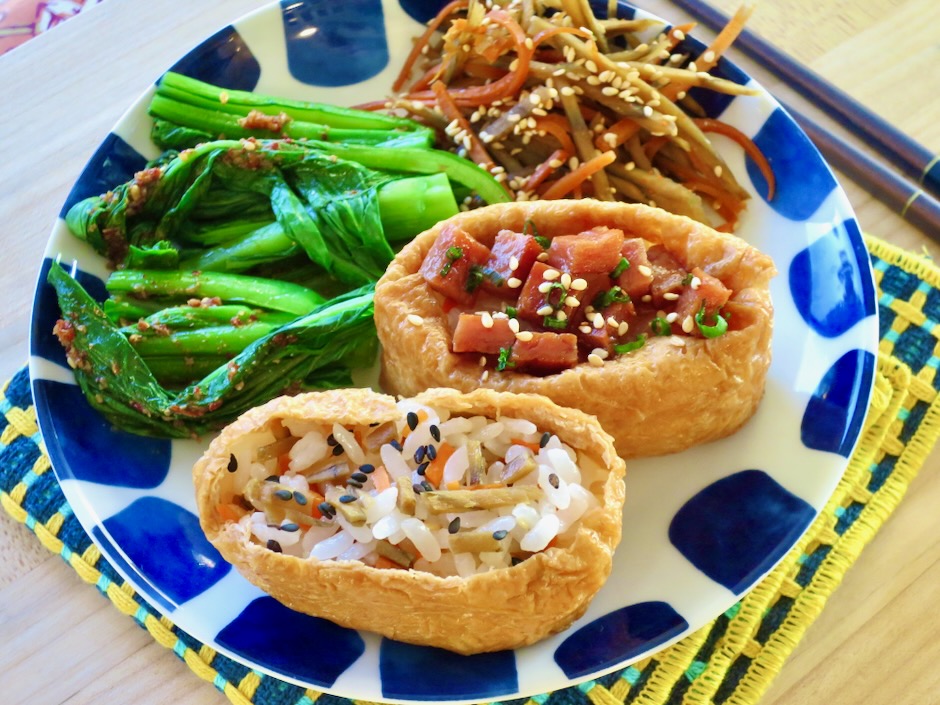
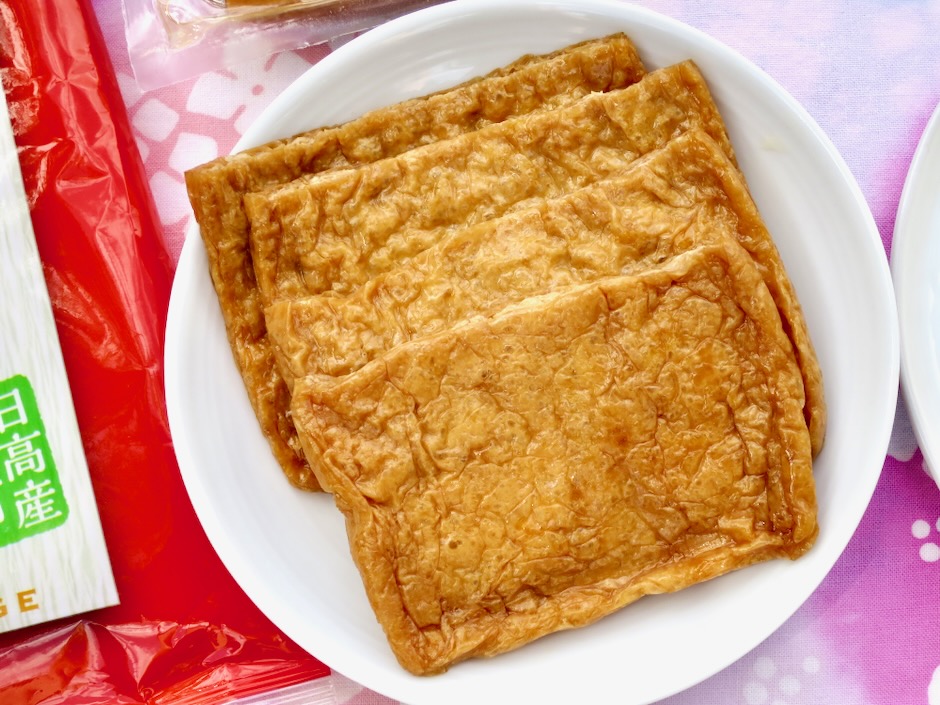
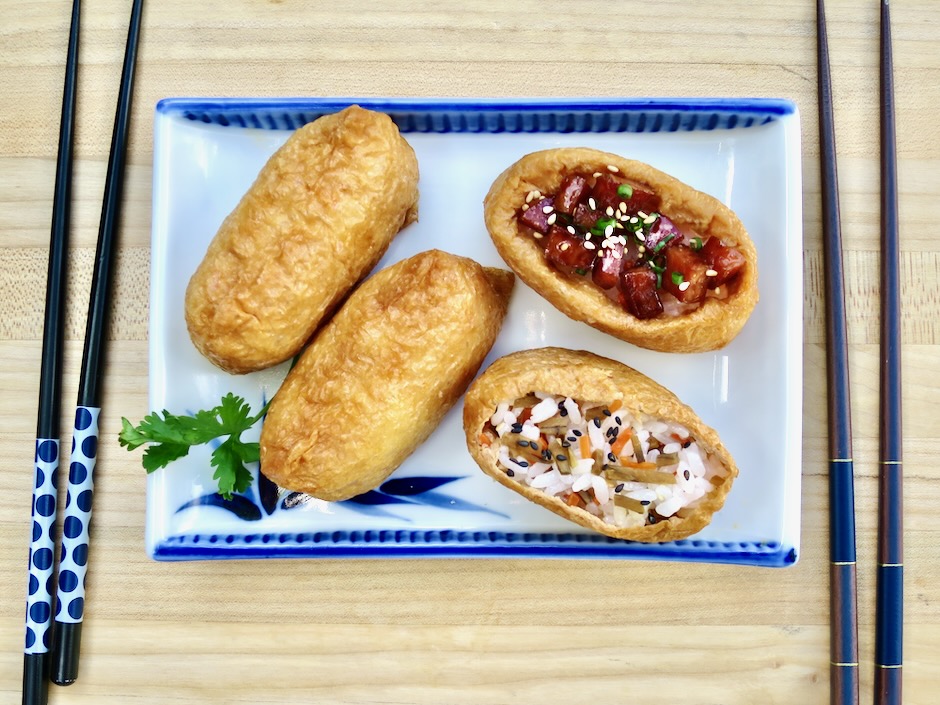
Inari sushi is a local island favorite, known in Hawaii as cone sushi. These compact tofu pouches are filled with seasoned rice and are perfect for sharing with family and friends. The combination of savory, sweet and tender tofu pouches (inari age) along with a tasty vinegared rice makes a delightful snack or side dish for any occasion.

This simple style of sushi is uncomplicated making it especially easy to put together with just a few ingredients. Refrigerated inari sushi holds up quite well if you happen to have any leftovers and can be consumed the following day or two.

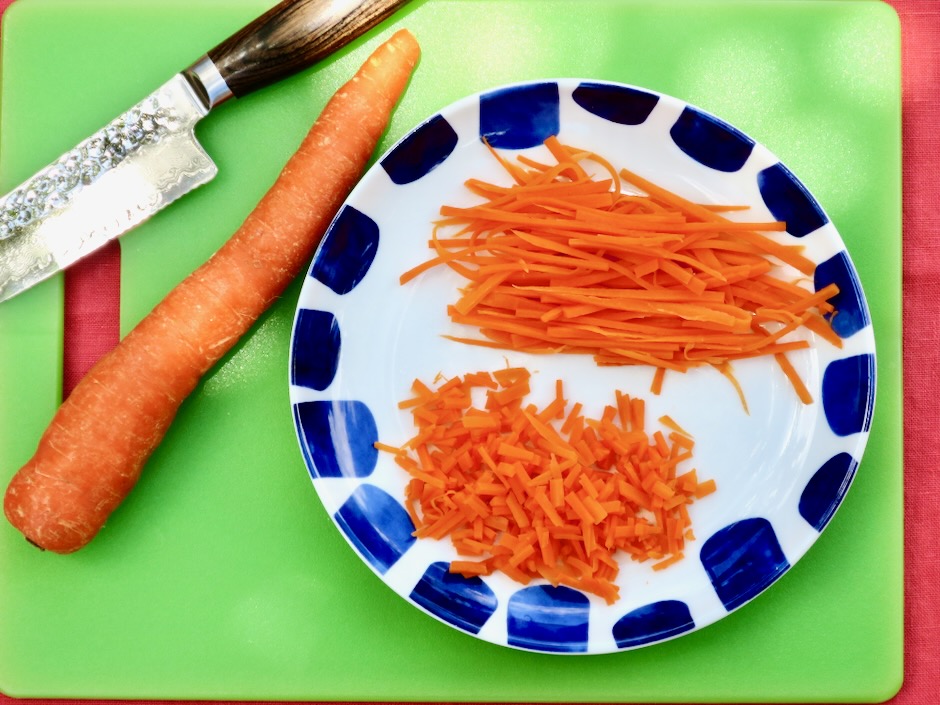
Blanched and lightly seasoned carrots add color and texture to the rice. You may also add toasted sesame seeds which will give the sushi an aromatic aroma and nutty flavor.

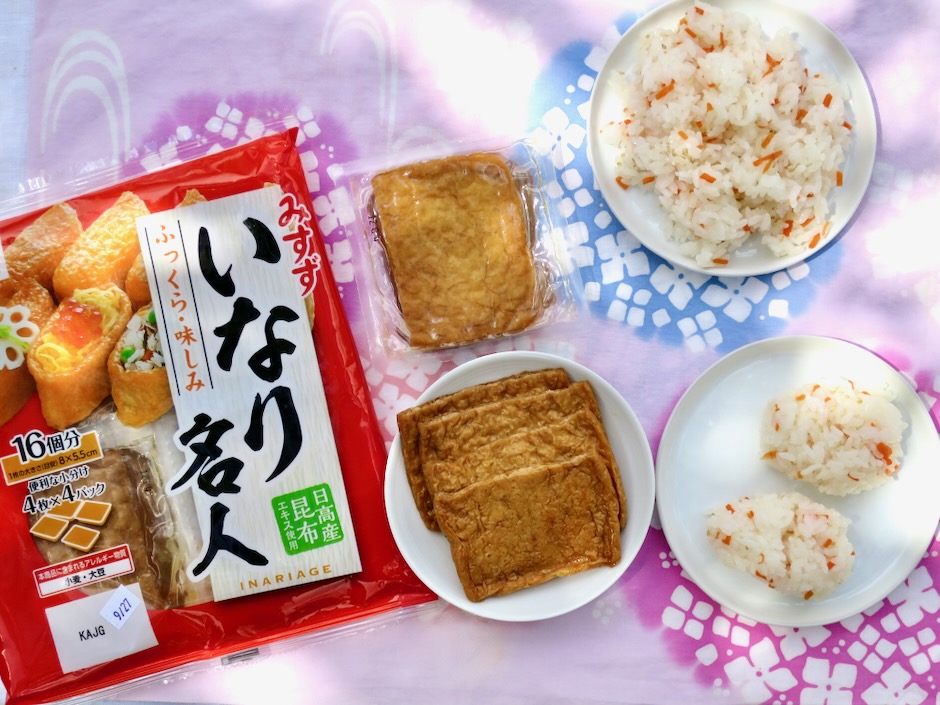
I used seasoned inari age that I purchased at Nijiya market on Oahu. Most markets in Hawaii sell them. If you live elsewhere, check your local Asian markets (refrigerated section). These little tofu pouches can also be frozen which makes it very handy when inari sushi cravings pop up unexpectedly.

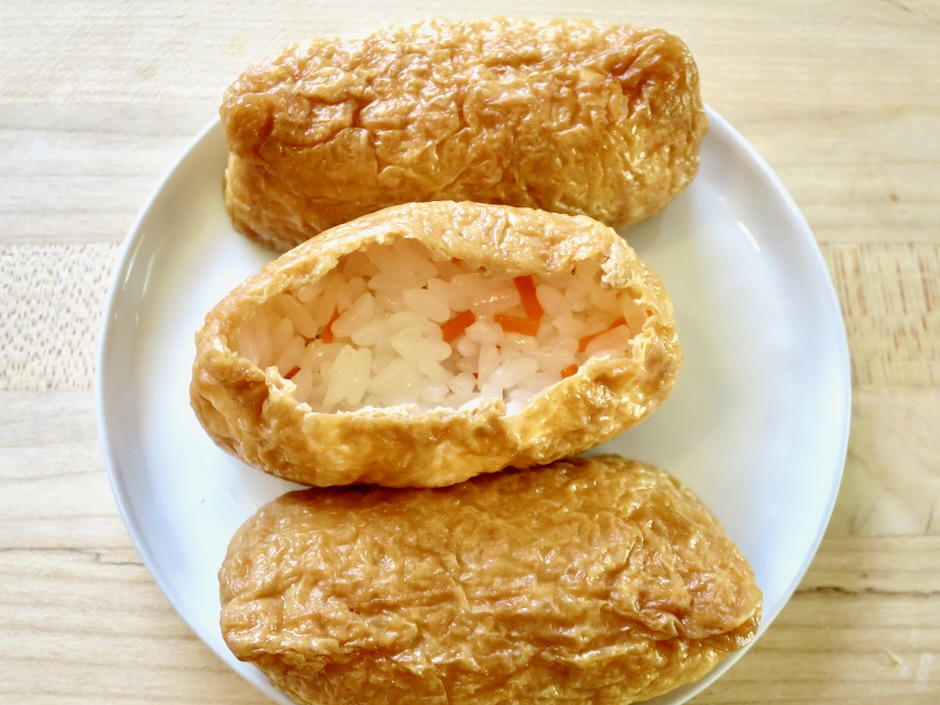
Gently but firmly stuff the tofu pouches with rice, filling them near to the top leaving space to fold the pouches and enclose the rice.

You may also choose to add various toppings leaving the pockets open to show off the tasty fillings.

Inari Sushi

Recipe by Kiyo

12-16

pieces

Easy, delicious homemade sushi!

Ingredients

  • 2 rice cooker cups Japanese short grain white rice

  • 1/3 cup unseasoned rice vinegar

  • 1/3 cup granulated sugar

  • 1 1/2 teaspoons fine sea salt

  • 1 package prepared inari age pouches (12-16)

  • 3 tablespoons finely chopped blanched carrots (optional)

  • 1 – 2 teaspoons roasted white sesame seeds

Directions

  • Cook rice according to rice cooker instructions, preferably the sushi rice setting if available.
  • Meanwhile, combine rice vinegar, sugar and salt in a measuring cup. Give it a quick stir, then microwave for 20 seconds. Remove and stir until the sugar and salt dissolve and the mixture turns clear, about 1 minute or so. Set aside.
  • If using carrots, julienne 1 1/2 ounces of carrots. Bring 1 cup water, 2 teaspoons sugar, a dash of lite soy sauce and 1/2 teaspoon salt to a boil in a small pot. Add carrots and blanch for 1 minute. Drain and chop carrots into small pieces.
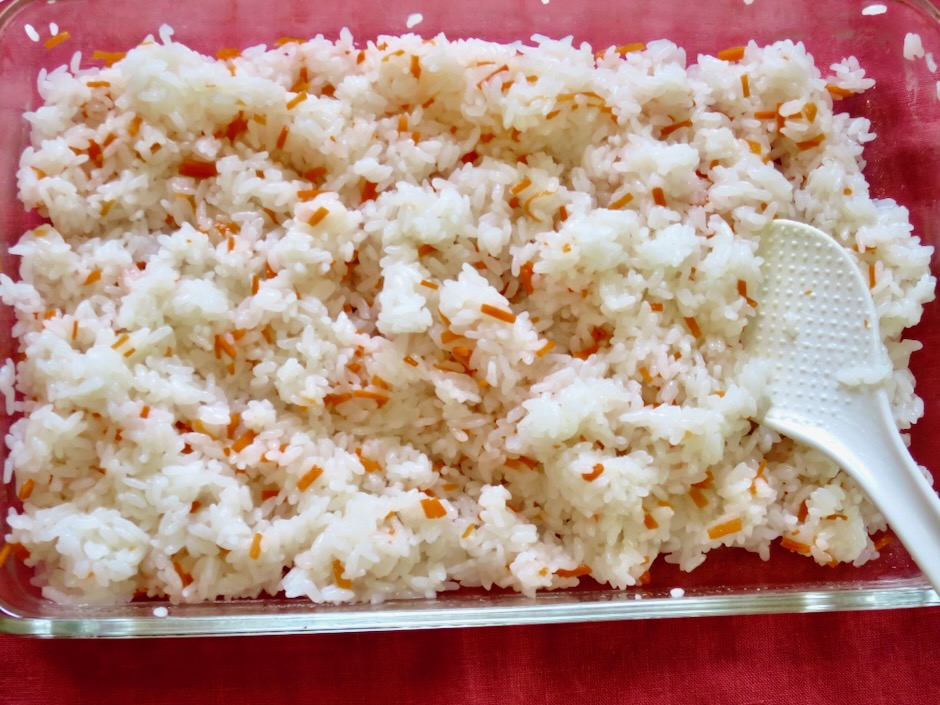
  • Transfer hot cooked rice to a wide shallow bowl (helps the rice cool quickly) rubbed with a bit of water (rice will be less likely to stick to the bowl). Gently break up any large clumps of rice. Add carrots and sesame seeds if using. Drizzle half of the sushi vinegar mixture over the hot rice and using slicing motions fold the rice, flipping the rice between each stroke to incorporate the vinegar mixture. Continue with the remainder of the vinegar mixture. Fan the rice as you mix in the vinegar mixture. If you have a very small table fan place it on the counter and aim it towards the rice bowl or use a hairdryer on the cool/fan setting. This helps the liquid to evaporate quickly and also gives the rice a beautiful sheen. The goal is to coat each grain of rice without mashing the rice. Cover the warm rice with a damp kitchen towel. Use rice within 1 1/2 hours.
  • Gently pat extra moisture off of inari age pouches (I use double layers of paper towels). You may dip your fingers in water or wear disposable gloves to keep rice from sticking to your hands while stuffing the pouches. Gently push rice into tofu pouches starting at the bottom (be sure to push gently into the corners) leaving space at the top to fold over the rice. You may also pre-form ovals of rice to place in the pouches. The rice should be securely tucked into the pouches (not too loosely) so that it holds together when eating. Transfer stuffed pouches to an airtight container and store in the refrigerator until ready to serve.

Notes

  • Leftover inari sushi can be wrapped in plastic wrap and placed in a zip top bag or plastic container. Store in the refrigerator and consume the following day.
Beans, Cheese, Dinner, Recipes, Salad, Side Dishes, Vegetarian, Veggies

Taverna Salad

January 10, 2025

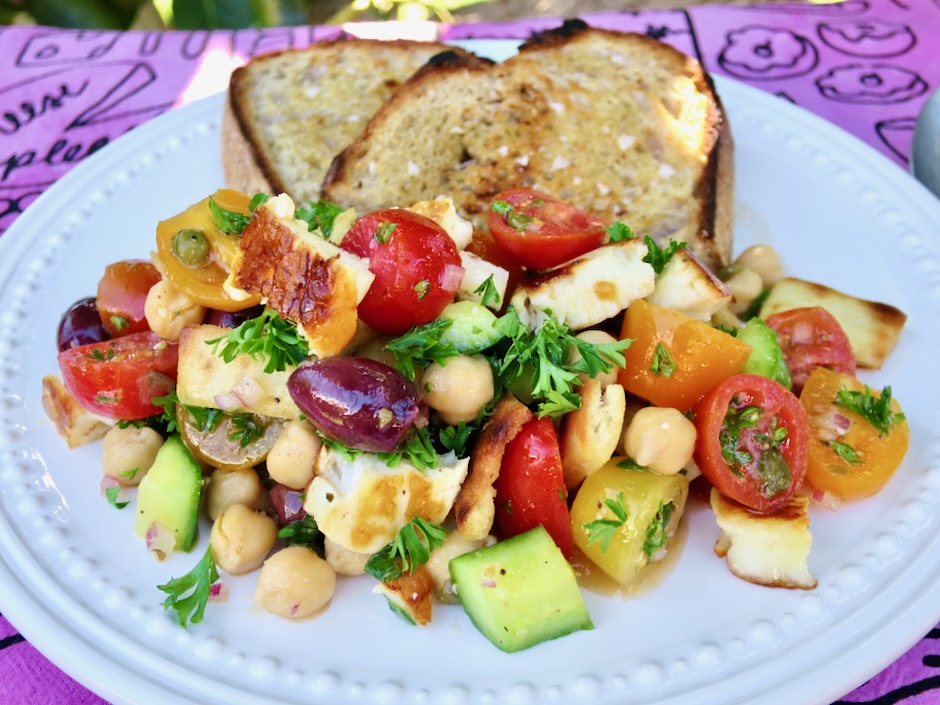
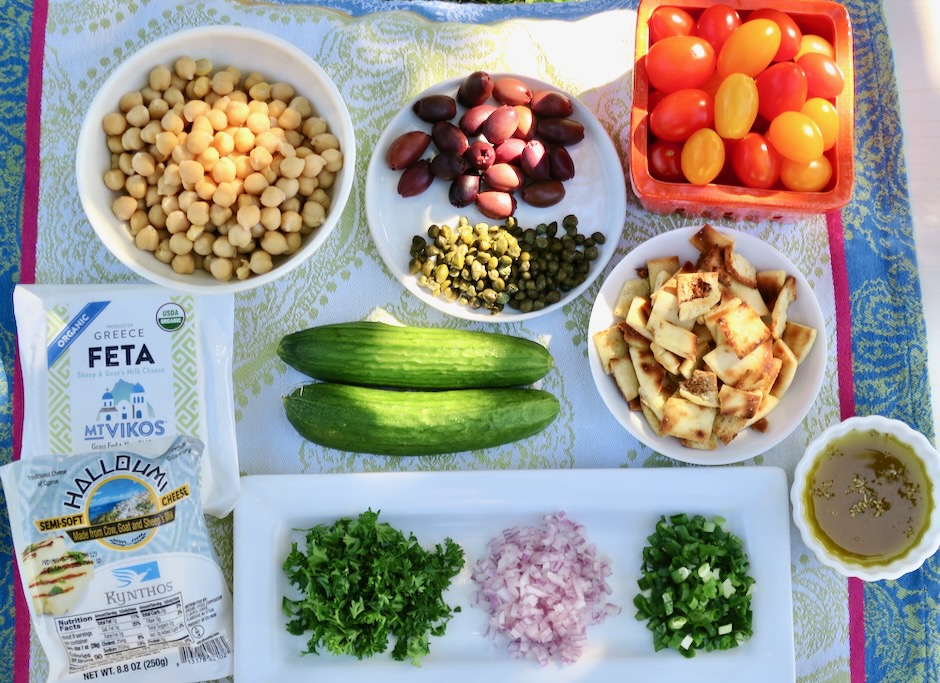
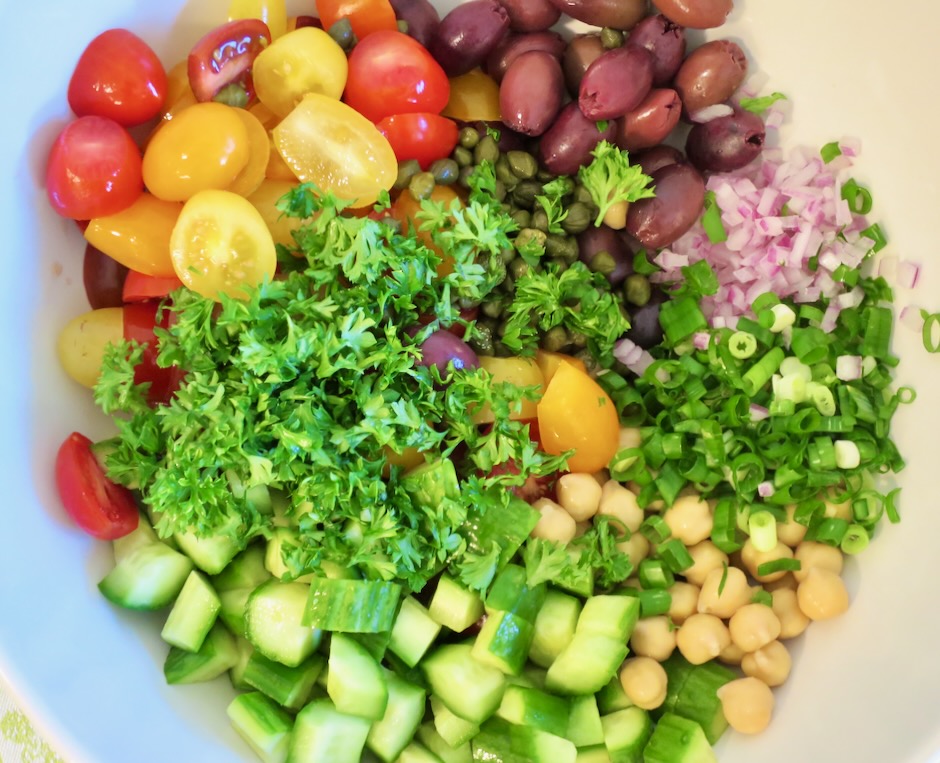
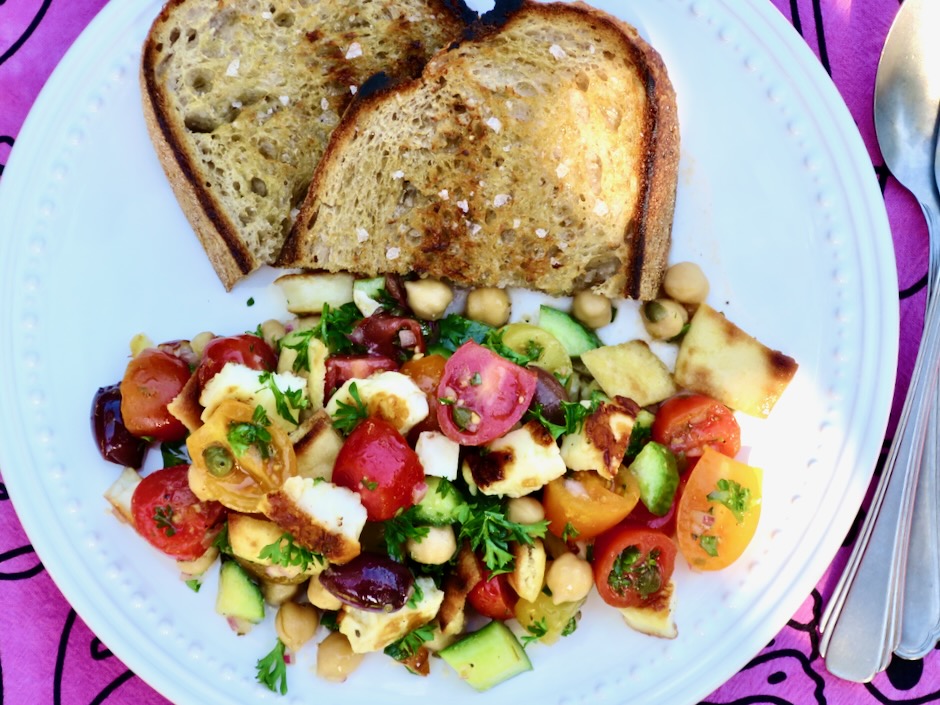
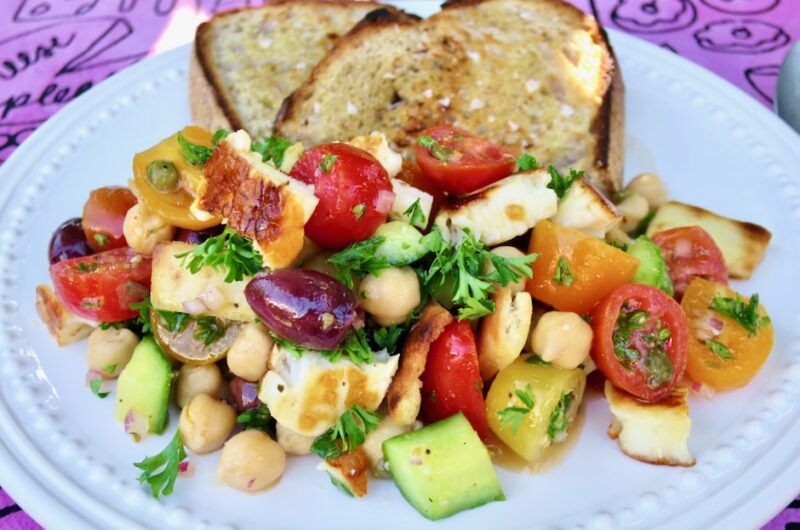
This vibrant salad is all about beautiful colors and textures that make it unique and so delicious. Crisp cucumbers, juicy tomatoes, hearty chickpeas, briny olives, crunchy pita croutons and halloumi cheese all have their place in making this one tasty salad. The recipe comes from Lidey Heuck, recipe contributor to New York Times Cooking. It is a wonderful salad that ought to be served at your next dinner party.

As mentioned in the original recipe, the ingredients list may look a bit long but do not despair! Each and every ingredient contributes to making this one of the best restaurant quality salads that can be made at home.

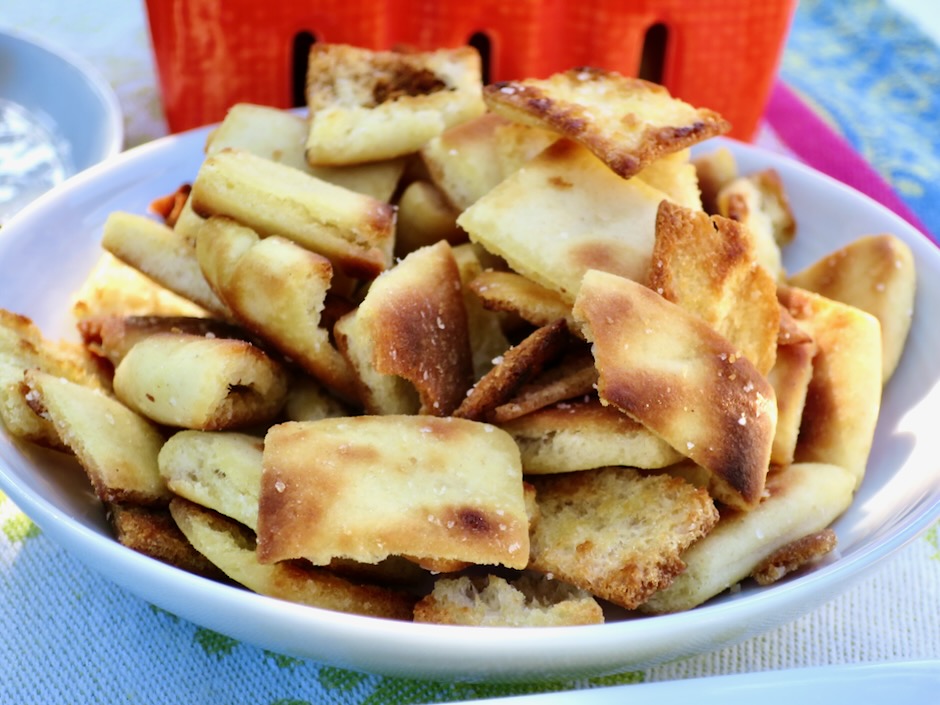
The recipe calls for toasted pita bread but I used leftover yogurt bread which worked great. You can also substitute the pita bread with broken pita chips if you’re short on time. Any of these options will provide that crunch factor that is an integral part of this dish.

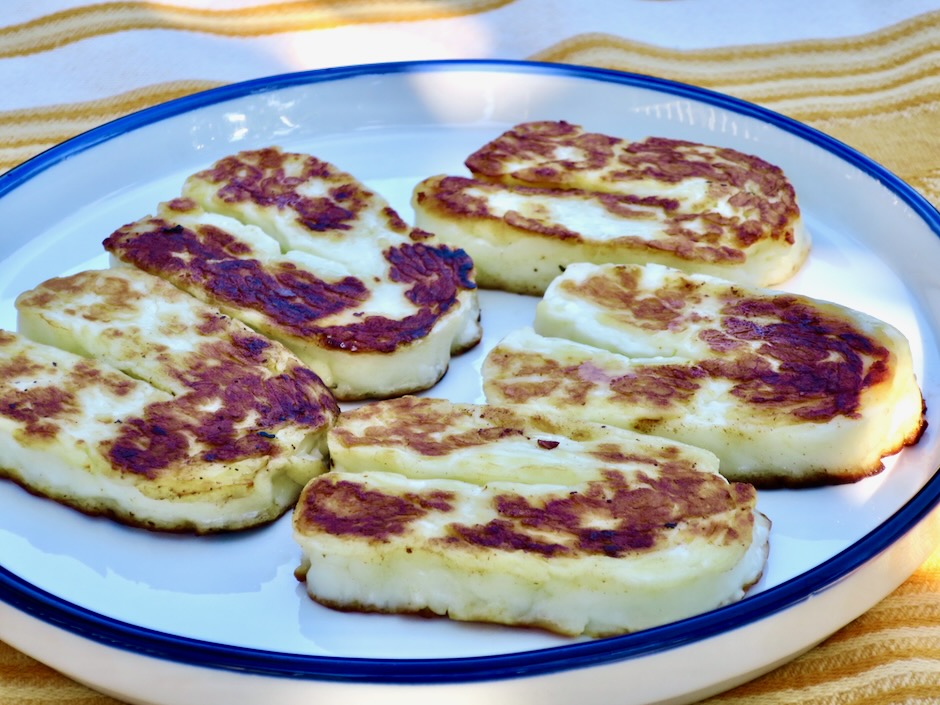
Halloumi cheese (from Cyprus) is a uniquely firm salty cheese that has a chewy texture when eaten cold. It is most enjoyable when fried or grilled, developing a lovely crust or grill marks perfect for salads, mezze platters, kebabs and sandwiches. It is a firm cheese that holds up well to heat without losing its shape. If you are unable to find halloumi, use chopped feta as a substitute.

Pan frying the halloumi cheese just before serving the salad is key to the best texture. Though the cheese will still taste terrific, it can become a bit rubbery once it has cooled to room temperature or refrigerated.

I fell in love with this salad as soon as I tasted it. Serve it with grilled or pan fried sourdough bread for a delightful lunch.

Taverna Salad

Recipe by Kiyo
Servings

4-6

servings

Ingredients

  • Dressing
  • 1/4 cup extra virgin olive oil

  • 1/2 teaspoon Dijon mustard

  • 2 tablespoons red wine vinegar

  • 1 small garlic clove (about 1 teaspoon) minced

  • 1/2 teaspoon dried oregano

  • Salt and pepper

  • Salad
  • 1 yogurt flatbread or 2 (5-6-inch) pita breads or broken pita chips

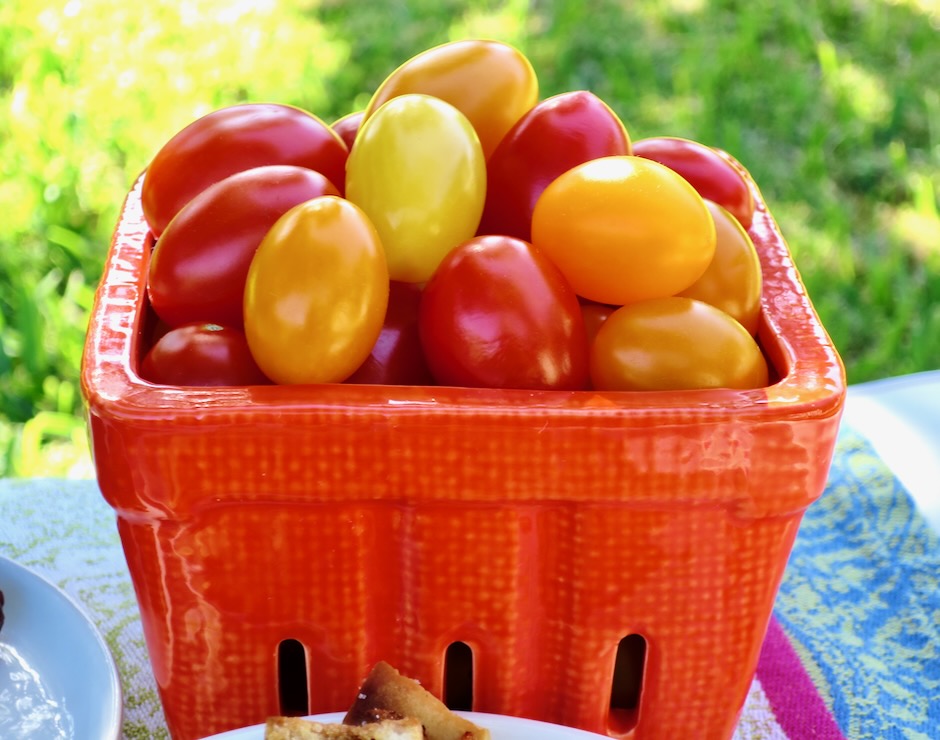
  • 2 1/2 cups cherry tomatoes, halved

  • 1 (15-ounce) can chickpeas, rinsed and drained

  • 2 small Japanese cucumbers or 1/2 medium English cucumber, halved, seeded and diced into 1/2-inch pieces

  • 1/2 cup pitted Kalamata olives

  • 1/4 cup chopped parsley

  • 1/4 cup minced red onion

  • 2 tablespoons capers, drained

  • 2 scallions, thinly sliced

  • 1 (8 ounce) block halloumi cheese, patted dry and cut into 3/4-inch slices (or sub with chopped feta)

Directions

  • In a small bowl, combine the olive oil with the Dijon mustard, vinegar, garlic and oregano. Whisk vigorously to combine. Season with salt and pepper to taste. Set aside.
  • If using broken pita chips skip this step and continue to step #3. Chop the pita or yogurt bread into 1-inch pieces and place them in a small bowl. Drizzle with 1 tablespoon olive oil, sprinkle with a bit of kosher salt and toss to coat. Heat an 8-inch skillet over medium. Add the pita or yogurt bread pieces and cook, tossing often, until toasted and golden brown and crisp, about 5 minutes. Return to the small bowl to cool, reserving the skillet.
  • In a large bowl, combine the tomatoes, chickpeas, cucumber, olives, parsley, red onion, capers and scallions. Pour dressing over the salad and toss well.
  • Place halloumi slices on a small plate and drizzle with 1 tablespoon olive oil. Heat the reserved skillet over medium-high heat (adjust heat as needed if too high) and cook the halloumi until golden brown, 2-3 minutes per side. Transfer to a cutting board and cut into bite-size cubes. Do this just before serving the salad so the halloumi retains its softer texture (halloumi has a firm rubbery texture when eaten cold).
  • Add crisped pita, yogurt bread or broken pita chips and halloumi to the salad. Toss and serve.

Notes

  • You may include a small diced yellow or orange bell pepper in place of some of the tomatoes.
Dinner, Italian, Pasta, Recipes, Vegetarian, Veggies

Pesto Broccoli Pasta

January 3, 2025

Vibrant green basil pesto is such a versatile sauce. It is big on flavor; a little goes a long way. When basil is abundant in our garden, I’ll make a large batch of pesto and freeze it in small containers to use in the upcoming months.

Pesto is delicious tossed with all shapes of pasta. Long and thin, short spirally and twisty pastas are all so good with pesto. I used Mafaldine which is a long ribbon-shaped pasta. But pesto is not limited to only pasta. It’s a tasty addition to pizza, sandwiches, salad dressings, potatoes, chicken and pork loin to name a few.

These days I use cashews or macadamia nuts instead of pine nuts. This is due to an unfortunate pine nut syndrome experience I had some years ago. Everything, including water tasted extremely bitter and metallic. This lasted for 10 days. Ugh!!! I made a promise to myself never to eat a pine nut again and I’m sticking to it.

On another note, I now blanch my basil before proceeding with my pesto recipe. I was always disappointed with the pesto oxidizing when mixed with the pasta. The bright green color turned into a murky greenish-brownish color that looked unappealing. Blanching the basil for just 5 seconds does the trick. This little step deactivates the enzyme that causes the leaves to oxidize and leaves you with beautiful green pesto.

Like spinach, basil leaves shrivel when blanched. Don’t despair. The basil still has that herby aromatic flavor and a gorgeous emerald green color.

The combination of herby pesto and steamed broccoli pair very well together. It’s one of my favorite ways to incorporate more nutrition as well as texture and flavor to this pasta dish.

Pesto broccoli pasta is an easy dish to make. If you don’t have time to make your own pesto, use your favorite store-bought brand. You’ll have a beautiful dish to bring to the table in no time at all.

My favorite way to use leftover pesto broccoli pasta is as a frittata. It becomes a quick and tasty breakfast or lunch. I mix some eggs in a bowl then add the leftover pasta. This mixture is cooked in a skillet over medium-low heat and flipped once before serving it as is, or on good crusty pan-fried sourdough bread with arugula. It is utterly delicious.

Pesto Broccoli Pasta

Recipe by Kiyo
Servings

4

Ingredients

  • Pesto
  • 4 cups basil leaves, gently packed (about 3 ounces)

  • 1/3 cup raw or roasted unsalted cashews (or substitute with macadamia nuts)

  • 1 large garlic clove, minced

  • 1 teaspoon kosher salt

  • 1/2 cup extra virgin olive oil

  • 3 tablespoons Parmigiano Reggiano, finely grated

  • 2 tablespoons Pecorino, finely grated (or substitute with Parmigiano Reggiano)

  • Broccoli
  • 10-12 ounces broccoli florets, cut into equal sized pieces and steamed until very fork tender

  • 8 ounces pasta such as spaghetti, fusilli, mafaldine, bow ties

  • Grated Parmigiano Reggiano for serving

Directions

  • Bring a large pot of water to a boil. Meanwhile, prepare an ice bath for the basil.
  • Once the water is boiling, blanch basil for 5 seconds. Immediately remove basil (reserve pot with water for pasta) and transfer to the ice bath (spider strainer or small metal sieve works well). Transfer cooled basil to a sieve to drain. Squeeze out excess water with clean hands. Set aside.
  • Place cashews or nuts of your choice in a food processor. Pulse a few times until nuts are finely chopped. Add basil, garlic and salt. Pulse until basil is finely chopped. Pour half of the olive oil into the food processor and pulse a few times. Continue adding olive until you reach your desired consistency. If you prefer a thinner pesto add more oil. Taste and adjust seasoning with more salt if needed. Transfer pesto to a bowl and stir in the cheese.
  • Using the reserved pot of water, cook pasta according to package directions.
  • Meanwhile, steam broccoli florets until very fork tender. Remove to a large plate and chop into bite sized pieces. Season with salt and pepper. Set aside.
  • Transfer cooked pasta to a large serving bowl. Mix in 1/2 cup of pesto stirring well. Add more pesto if needed. Toss broccoli with pesto pasta. Sprinkle the top with grated cheese and serve. Leftover pesto can be frozen for a few months.

Notes

  • Leftover pesto can be frozen in small containers for a few months.
Dinner, Japanese, Lactose Free, Pasta, Ramen, Recipes, Salad, Side Dishes, Summertime Meal, Vegan, Vegetarian, Veggies

Aunty Ruby’s Somen Salad

December 21, 2024

Perfect for a New Year’s Eve Potluck or New Year’s Day Lunch

Around a dozen years ago I posted a recipe for this refreshing cold noodle salad. The recipe was created by my aunt Ruby who was a fantastic cook and it is one of my favorite dishes. This noodle dish is eye catching with its layered rainbow of bright colors. Crispy carrots, cucumbers, ham, and slivered scrambled eggs atop delicate somen noodles are tossed with a tangy umami dressing just before serving.

The dressing is a perfectly balanced combination of rice vinegar for tanginess, soy sauce for a salty umami flavor, fragrant sesame oil and neutral canola oil, sugar to balance the salty soy sauce, and ground sesame seeds for a rich nutty flavor. It smells divine as you whisk it up in the bowl.

Long ago I splurged and bought a Zojirushi sesame seed grinder after seeing it being used at a sushi restaurant. I have gotten a lot of good use from this little kitchen gadget. There are many other options for grinding sesame seeds. Small hand held grinders are available online and at some Asian markets. You can also crush the seeds in a mortar and pestle if you have one.

All the toppings should be thinly sliced. If you are using smaller Japanese cucumbers they can be julienned or sliced thinly.

A solid choice in a pinch is this Oscar Mayer ham (available at Times on Maui). It’s very easy to cut into thin strips since it is neatly stacked. Any type of thinly sliced ham will work.

Take care not to overcook the somen noodles. Drain immediately and rinse with cold water and ice cubes or place in a large bowl with ice water. The noodles should retain their springy texture and not be mushy.

Everyone will fall in love with this somen salad, and for good reason. It can be made a day in advance, is perfect for a potluck (New Year’s Eve!), is budget friendly and most of all it is plain delicious.

Tips for making the best somen salad:

*Use a large tall pot to boil the noodles as they have a tendency to foam up so you need that extra space!

*Watch over the stove when boiling the noodles and cook for exactly 3 minutes or according to package directions stirring occasionally. Immediately drain the noodles and run under cold running water with a cup of ice. Swish the noodles around the ice to cool completely. Or drain noodles and quickly place them in a large bowl of ice water. Have the ice cubes or ice bath ready before the noodles are done cooking. The noodles are very thin so any additional time they remain in the hot water means they will continue to cook.

*Slice the vegetables, egg and ham thinly so they are approximately the same size. I used packaged ham because it is so easy to slice since it is already stacked neatly. Any type of thinly sliced ham works.

*For a vegetarian version omit the ham. You can add thinly sliced pan-fried tofu strips to the salad. For a vegan version, omit the eggs and ham and add tofu as mentioned above. Or simply serve the salad with lots of crunchy veggies.

*Crispy vegetables are the key to making this noodle salad so satisfying. Quickly blanched and lightly salted bean sprouts, thinly sliced celery or daikon can be used.

*You may not need all of the dressing so it’s better to add spoonfuls as you toss the salad together.

Aunty Ruby’s Somen Salad

Recipe by Kiyo
Servings

3-4

servings

Ingredients

  • Dressing
  • 1 1/2 tablespoons granulated sugar

  • 4 1/2 tablespoons unseasoned rice vinegar

  • 4 1/2 tablespoons soy sauce

  • 3 tablespoons canola or vegetable oil

  • 1 1/2 tablespoons sesame oil

  • 1 tablespoon ground sesame seeds

  • Salad
  • 1 package somen noodles (3 bundles, 8 ounces) somen noodles

  • 3 cups finely sliced iceberg lettuce

  • 2 medium carrots, julienned

  • 2 small or 1 medium Japanese cucumber, julienned or thinly sliced (seeds removed)

  • 4 ounces thinly sliced ham

  • 2 large eggs, whisked and fried in a thin layer, cooled and sliced into strips (use low heat, cooked eggs should not be browned)

  • Finely sliced green onions (optional)

  • Roasted black sesame seeds for topping salad (optional)

Directions

  • Combine sugar, rice vinegar and soy sauce in a medium bowl. Stir to dissolve the sugar. Add canola or vegetable oil, sesame oil, and sesame seeds. Set aside. The dressing can be made up to 2 days in advance. Store in the refrigerator.
  • Have all the topping ingredients ready to go (vegetables, sliced ham, cooked and sliced egg). This can be done the same morning you are planning to serve the somen salad. Keep refrigerated.
  • Cook the somen for exactly 3 minutes (or even a few seconds less) or according to package directions. Immediately drain and place the noodles in an ice bath or run cold water and ice cubes over the noodles to cool quickly. Drain the somen well in a colander. With a double layer of paper towels in one hand, lift some of the noodles with the other hand and gently dab off excess water that may be dripping from the noodles (don’t leave noodles on towels as they tend to stick). Continue with the rest of the noodles transferring them to a low sided serving bowl as you go. This will ensure there is no excess water in the serving bowl.
  • Layer with toppings: iceberg lettuce, carrots, cucumbers, ham, egg. Sprinkle with green onions and sesame seeds if using. You can chill the salad until ready to serve. The noodles should be very cold, not room temperature. If serving right away, make sure to chill the noodles in an ice bath before continuing with layering the topping ingredients. Spoon some of the dressing over the noodles right before serving. Toss, adding more as needed. The noodles should be well coated with the delicious dressing.
Notes

  • Recipe can be doubled (or more) to feed a larger group of people.
Cheese, Dinner, Italian, Pasta, Recipes, Summertime Meal, Vegetarian, Veggies

Roasted Tomatoes, Fresh Herbs & Feta Pasta

October 25, 2024

This simple yet stunning pasta dish is ready to serve in under an hour. The tomatoes are roasted with olive oil and garlic until they become jammy, allowing their flavor to intensify, yielding spectacularly sweet-tart tomatoes perfect over pasta.
Finely crumbled feta is the perfect cheese for this recipe. Its salty flavor compliments the roasted tomatoes and the addition of fresh herbs adds a bright flavor to the dish.

Using a variety of cherry and grape tomatoes makes the final dish pop with color. If your market sells only red cherry tomatoes, use them! Your dish will be just as delicious.

Use your favorite herbs to sprinkle over the pasta. I used parsley, basil and lots of refreshing mint.

Slicing the tomatoes in half and roasting cut side up allows them to take on a nice color and a bit of caramelization.

Long and delicate pasta or shorter shapes like campanelle or orecchiette pairs well with this dish. If you want to serve the tomatoes as an appetizer, scoop some on grilled sourdough bread and sprinkle with crumbled feta cheese and fresh herbs. Delicious!

Roasted Tomatoes, Fresh Herbs & Feta Pasta

Recipe by Kiyo
Servings

2

servings

Ingredients

  • 1 pound cherry tomatoes or a variety of cherry and grape tomatoes sliced in half

  • 2 1/2 tablespoons extra virgin olive oil

  • 3/4 teaspoon kosher salt

  • 1/4 teaspoon freshly ground black pepper

  • 2 pinches red pepper flakes (optional)

  • 1 medium garlic clove, minced

  • 1/4 cup finely crumbled feta cheese (Mt. Vikos recommended)

  • Handful of fresh herbs, chopped (use your favorites: basil, mint, parsley, chives, tarragon)

  • 4 -5 ounces dried pasta (angel hair, spaghetti, linguine, orecchiette, campanelle)

Directions

  • Preheat oven or large toaster oven to 425 degrees.
  • Place sliced tomatoes in a baking dish large enough to fit them in a single layer. Drizzle 2 1/2 tablespoons extra virgin olive oil over the tomatoes. Season with 1/2 teaspoon kosher salt, 1/4 teaspoon black pepper, and a few pinches of red pepper flakes if using. Toss the tomatoes in the seasoned olive oil. Using small tongs or a spoon, arrange tomatoes cut side up. Roast for 20 minutes. Remove tomatoes from the oven and add the garlic. Turn heat up to 450 degrees and roast for another 5 minutes. Remove the dish from the oven and set aside.
  • While the tomatoes are roasting, cook your pasta according to package directions. Drain and transfer pasta to a low sided serving dish. Give the tomatoes a stir, taste and adjust seasoning with additional salt and pepper. Spoon tomatoes and their juices over the pasta. Sprinkle feta cheese over the top along with the fresh herbs. Serve immediately.

Notes

  • Any leftover pasta can be eaten the following day. For a breakfast dish, discard any liquid from the pasta. Combine the pasta and tomatoes with a few whisked eggs and extra cheese if you like. Cook in a buttered skillet over medium low heat, flipping once. Serve with fresh herbs and hot sauce.

Dinner, Recipes, Side Dishes, Vegetarian, Veggies

Roasted Sweet Potatoes with Parmesan & Thyme

October 8, 2024

These roasted sweet potatoes are a perfect dish for the upcoming holiday season, but equally welcome anytime of the year. The sweet potatoes have tender interiors with slightly crisp edges. A bit of parmesan adds that “je ne sais quoi” to the dish, that pleasing flavor that’s also known as umami.

If you buy sweet potatoes that are not too large/thick you will have room to layer more rows which makes for a stunning dish.

The recipe is pretty straight forward. Peel, slice, mix, arrange and bake the sweet potatoes. If you have a large toaster oven as I do, feel free to use it!

Overlapping the sweet potato slices makes for a gorgeous presentation. A sprinkling of Maldon sea salt and fresh sprigs of thyme are the final touch before bringing the dish to the table.

This recipe serves four people. Double or triple the recipe if you are serving a larger group of guests.

Roasted Sweet Potatoes with Parmesan & Thyme

Recipe by Kiyo
Servings

4

servings

Ingredients

  • 2 medium sweet potatoes (about 1 3/4 pounds) peeled, ends trimmed, sliced into 1/3-inch pieces

  • 1 teaspoon finely minced garlic

  • 1 tablespoon extra virgin olive oil

  • 2 tablespoons salted butter, melted

  • 1/4 cup finely grated parmesan cheese (Parmigiano Reggiano recommended)

  • 3/4 teaspoon kosher salt

  • 1/2 teaspoon freshly ground black pepper

  • 1/2 teaspoon Italian seasoning (or a combination of dried oregano, basil and marjoram if you have it)

  • Fresh thyme sprigs

  • Maldon sea salt (optional)

Directions

  • Preheat oven (or large toaster oven if it will accommodate your baking dish) to 425 degrees. Lightly butter or oil a baking dish that will accommodate the potatoes.
  • Place sliced potatoes, garlic, olive oil, and melted butter in a resealable bag making sure the potatoes are evenly coated. Add the parmesan cheese, salt, pepper, Italian seasoning. Seal the bag and mix the seasonings with the potatoes.
  • Arrange the potatoes (larger pieces around the exterior) overlapping slightly to fill the baking dish. Sprinkle the potatoes with a few torn thyme sprigs.
  • Bake uncovered for 30-35 minutes, or until the potatoes are tender and slightly browned around the edges. If you would like a bit more color on the edges of the potatoes, broil for about 2 minutes. Sprinkle with fresh thyme sprigs and Maldon flaky sea salt before serving.

Notes

  • The sweet potatoes are best served straight out of the oven. Leftovers will keep for a few days and can be reheated in the oven or microwave.
Follow

Get every new post delivered to your Inbox

Join other followers: