Browsing Category

Side Dishes

Dinner, Recipes, Rice Dishes, Side Dishes, Veggies

Fried Rice with Bacon

November 16, 2012

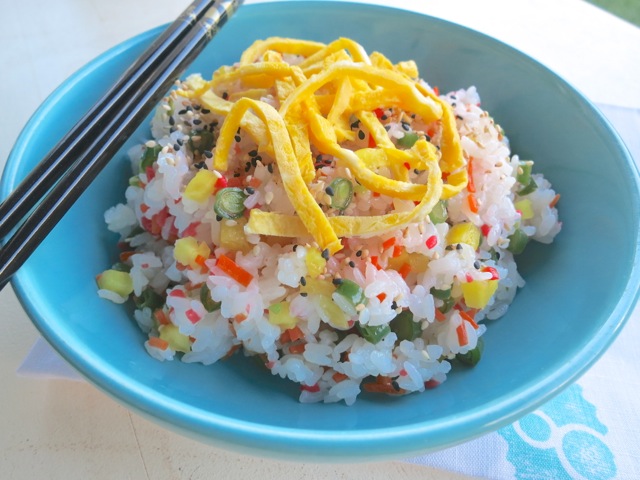
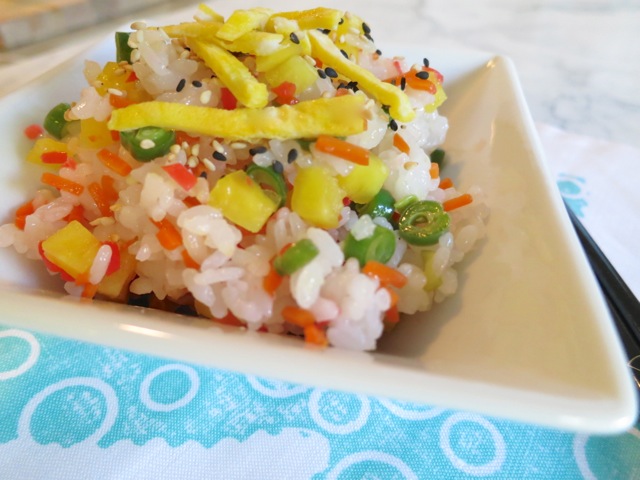
Everyone has their own version of fried rice. It’s a versatile dish because you can add numerous ingredients to it and it always turns out tasty. I prefer jasmine rice and lots of vegetables for my recipe. Chinese peas (snow peas), carrots, cabbage, and green peas add a bit of texture to the velvety rice and bits of egg you get in each spoonful.  And let there be bacon.  Smoky, salty, just plain delicious.

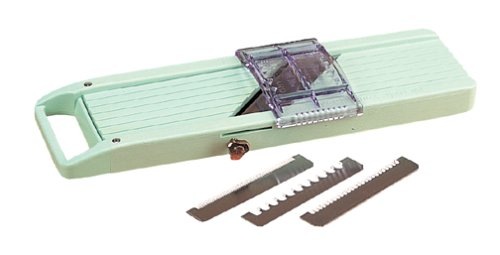
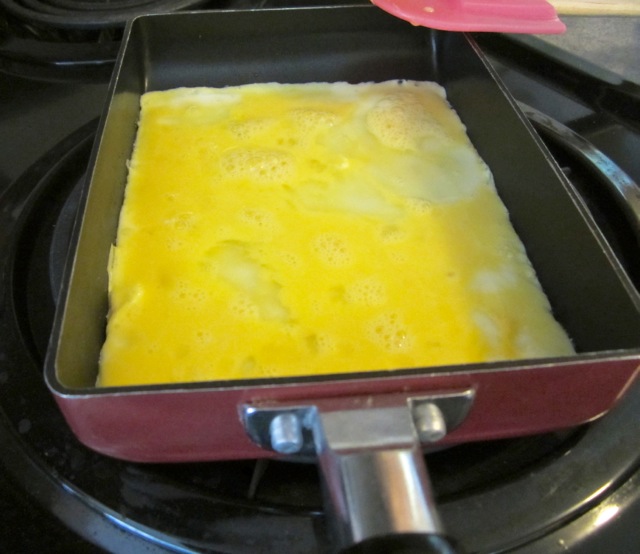
This little Japanese omelet pan has made its way to the stove top often.  Because of its shape, the finished eggs are easily sliced into small pieces perfect for fried rice.  It also comes in handy for somen salad.

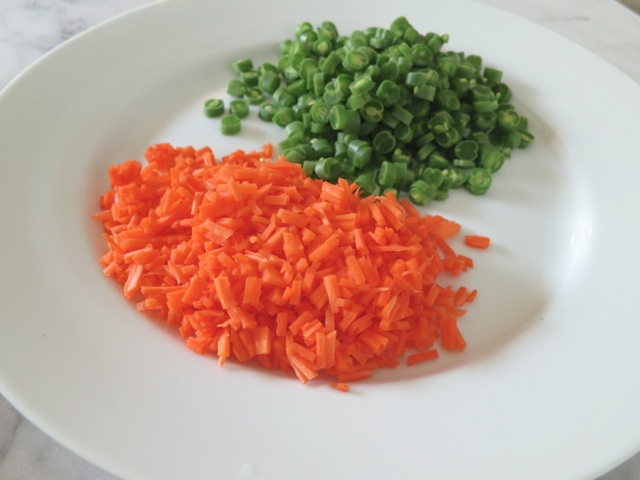
Chinese peas, green peas, cabbage, bacon, carrots, green onions, Maui onion, diced egg.

Fried Rice with Bacon

4 side dish servings

Ingredients

1 cup uncooked jasmine rice

2 tablespoons finely chopped onion

1/4 cup minced carrot

10 Chinese peas finely chopped

1 cup finely chopped cabbage

1/2 cup green peas

1/4 cup sliced green onions

2 large eggs

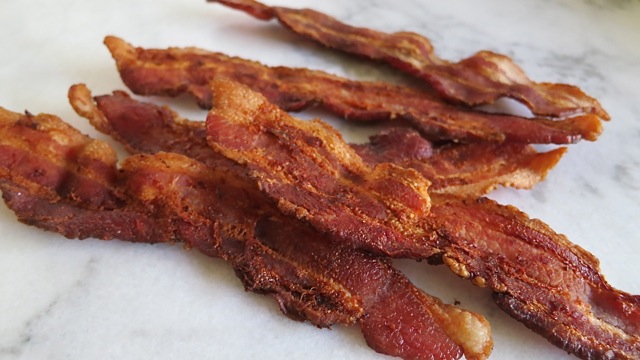
4 slices crispy bacon, crumbled

soy sauce

salt and pepper

oil for stir frying

Preparation

Cook jasmine rice in advance (the morning you make the rice is fine).  Fluff the cooked rice, cool and store in a the refrigerator until ready to use.

Heat 2 – 3 teaspoons of oil in your wok or stir fry pan on medium heat.  Add the onions, carrots and Chinese peas and cook for about 1 minute.  Remove ingredients to a bowl and set aside.   Turn the heat up to medium high and add 1 tablespoon of oil to your pan. Once the oil is very hot add the rice.  Stir fry the rice for 30 seconds or so, just to heat slightly.  Add the reserved onions, carrots and Chinese peas back to the pan along with the cabbage, green peas, green onions, diced egg and bacon.  Drizzle soy sauce on to the rice and vegetables and season to taste with salt and pepper. Give the fried rice a quick stir and adjust the seasoning adding more soy sauce to taste.


Dinner, Pasta, Recipes, Side Dishes, Vegetarian

Martha Stewart’s Creamy Mac-and-Cheese

October 19, 2012

Macaroni and cheese is the ultimate crowd pleaser.  There’s nothing better than noodles smothered in a creamy, cheesy sauce with a crispy crouton topping.  I’ve tried several different recipes such as one incorporating butternut squash and bacon.  It was very good but….I happened to see Martha’s mac-and-cheese recipe on the Smitten Kitchen blog and I immediately thought, this is the one.  How much cheese for one pound of pasta?  Lots!  What was Martha thinking?

This recipe makes a lot of mac-and-cheese so if you’re not feeding a large group of people you may want to cut the recipe in half.  Here is my adaption of Martha’s Mac-and Cheese.

Martha Stewart’s Creamy Mac-and-Cheese

Serves 12

Ingredients

8 tablespoons (1 stick) butter, plus more for casserole

5 slices white bread, crusts removed, cut into 3/4 inch cubes

5 1/2 cups milk (2% or whole, either works fine)

1/2 cup flour

2 teaspoons kosher salt, plus more for the pasta water

1/8 teaspoon ground nutmeg

1/4 teaspoon freshly ground black pepper

1/4 teaspoon cayenne pepper

1 pound grated extra sharp cheddar, about 4 1/2 cups (I use Tillamook yellow, the original recipe calls for sharp white so use which ever you prefer).  Set aside 3 cups of the cheddar for the sauce.  The remaining cheddar will be sprinkled on the top before baking.

4 1/2 ounces grated Pecorino Romano cheese, about 1 1/4 cup (or 8 ounces grated Gruyère, about 2 cups). Set aside 1 cup Pecorino Romano for the sauce (or 1 1/2 cups Gruyère).  The remaining Pecorino Romano (or Gruyère) will be sprinkled on the top before baking.

1 pound elbow macaroni

Preparation:

Preheat oven to 375 degrees.  Butter a 3-quart casserole dish, set aside.  Place bread cubes in a medium bowl.  Melt two tablespoons of butter in a covered microwave dish just  until melted. Pour the melted butter into the bowl with the bread cubes and toss. Set aside.

Bring a large pot of salted water to a boil (large enough to generously cook 1 pound of pasta).  Cook the macaroni until the outside of the pasta is cooked and the inside is  underdone, about 4 minutes.  Drain the pasta in a colander and rinse under cold water.  Drain well and set aside.

Warm the milk in a medium saucepan over medium heat.  Melt the remaining 6 tablespoons of butter in a large high-sided skillet over medium heat (large enough to hold the sauce and pasta). When the butter bubbles, add the flour. Cook, stirring 1 minute.

While whisking, slowly pour in the hot milk a little at a time to keep the mixture smooth.  Continue cooking, whisking constantly until the mixture bubbles and becomes thick, about 10 minutes.

Remove the pan from the heat.  Stir in the salt, nutmeg, black pepper, cayenne pepper, 3 cups of cheddar cheese, 1 cup Pecorino Romano (or 1 1/2 cups Gruyère).  Stir the macaroni into the cheese sauce.

Pour the mixture into your casserole dish.  Sprinkle remaining cheddar and Pecorino Romano (or Gruyère) and bread cubes over the top.  Bake until golden brown, about 30 minutes.  Transfer the dish to a wire rack for 5 minutes; serve.

This is another meal that freezes well.  Chill the leftovers in the casserole and cut into squares and wrap in foil for individual servings.  It’s best to remove the mac-and-cheese from the foil and place in a lightly buttered dish when reheating.  If you have a toaster oven it will crisp up the croutons nicely.

Dinner, Mexican, Recipes, Rice Dishes, Side Dishes

Sopa de Arroz

October 16, 2012

For ages I have searched for a good Mexican rice recipe and I have tried and discarded many.  My search ended with a Saveur magazine recipe.  The staff of Saveur travels to many different countries and seeks out all kinds of wonderful people who share their cuisine with them.  I have to admit that I have found more recipes that I love in Saveur than in any other food magazine.  Saveur articles typically feature extended stories on the cultures and people who share their wonderful recipes.  In this instance the dish was featured in a Quinceaneara feast (all over Latin America a girls 15th birthday is a major celebration).  These are usually rustic dishes that don’t call for ingredients too difficult to find.  So here is a really good Mexican-style rice recipe from Saveur.

Pulse in your food processor.

Cook rice with tomato puree.

Add broth and cook, undisturbed until liquid barely covers the rice.  In this photo the rice is almost at that stage with just  a few more minutes to go.

Sopa de Arroz

Serves 8

Adapted from Saveur magazine

Ingredients

2 cups long grain rice

About 3 small, ripe and juicy tomatoes – skin and seeds removed, coarsely chopped

1/2 cup onion – coarsely chopped

2 small or 1 large garlic clove

3 tablespoons canola oil

3 cups chicken broth

1 teaspoon salt

1 teaspoon mild chili powder – optional (I use Hatch mild chile powder from New Mexico. It doesn’t add any heat to the rice however it does give a nice color).

Preparation

Rinse rice well in a fine mesh colander until water runs clear.  Drain well, set colander on paper towels to absorb excess water.  Set aside

Place tomatoes, onion and garlic in a small food processor. Pulse until ingredients are pureed.  You’ll want about 1 cup of tomato/onion/garlic puree. Set aside.

Heat oil in a large, wide heavy-bottomed pot that has a tight-fitting lid over medium-high heat.  I have a Cuisinart 5.5 quart pot I use.  It’s wide and not too deep.  This is preferable to a narrow, deep pot as the rice has more surface area to cook. Once the oil is hot add the rice and cook, stirring constantly with a wooden spoon until the rice is lightly golden, about 5 minutes or so.  Be sure to keep stirring and don’t leave the rice unattended, it may burn.

Remove the pot from the burner and add the tomato puree mixture.  Turn the heat down to medium low.  Place the rice back on the burner and continue to stir for about 2 minutes.  Add the chicken broth and turn the heat up to high.  Add salt (and chile powder if using).  Give the rice one more stir and once the broth comes to a boil turn the heat down to medium – medium high (the broth should be bubbling).  Cook the rice undisturbed and uncovered for about 7 minutes or until the liquid barely covers the rice and craters appear on the surface.  Reduce the heat to low and cover the pot.  Set your timer for 20 minutes.

Once the rice is done, turn off the heat and leave undisturbed (do not open the lid) for at least 15 minutes.  Take off the lid and fluff the rice with a fork.

If you have leftovers, the rice freezes beautifully.

Japanese, Recipes, Side Dishes, Vegan, Vegetarian, Veggies

Kobocha No Toroni

October 7, 2012

Kabocha No Toroni (Japanese squash simmered in rice wine and soy sauce) is a simple side dish that is healthy and delicious. Some cooks prefer to create a marbled effect (above) by paring off patches of the  skin.  Although this is not necessary, it makes for a beautiful design.  This is easily done with a vegetable peeler.  The skin of the squash seems very hard, however, as the squash simmers the skin softens and becomes tender and edible.

Kabocha No Toroni

Serves four as a side dish

Adapted from Japanese Vegetarian Cooking by Patricia Richfield

Ingredients

About 1 pound Kabocha (Japanese squash)

2  cups water

1 tablespoon super fine sugar

1/4 cup mirin (sweet rice wine)

1/4 cup soy sauce

Cut the squash in half and remove seeds.  You can double the recipe if you want to use the entire squash.  The squash I purchased weighed about 2 1/2 pounds so I saved the other half for later use.  Peel off patches of skin to create a marbled effect if desired.  Cut into 2 inch cubes.

In a 3 – 4 quart sauce pan add water, sugar, mirin and soy sauce.  Bring to a boil.  Add squash and return to a boil then turn down the heat and simmer until just tender (al dente) for approximately 10 minutes (cooking time depends upon the size of the cubed squash).  Check doneness with a thin knife, don’t over cook!

Remove the squash to a serving bowl, reduce the sauce a bit then drizzle it on the kabocha just before serving and sprinkle with roasted sesame seeds.

Potato Salad, Recipes, Salad, Side Dishes

Dilly Potato Salad with Whole Grain Mustard

September 17, 2012

Recently Bay Area Bites posted a recipe for potato salad and mentioned how this old favorite sometimes gets a bad rap because all too often it can be laden with mayonnaise. Stephanie Hua was inspired to make her own potato salad after she tasted one in New Orleans which didn’t seem too rich thanks to the generous amount of mustard used in the recipe.  In my version of her recipe I use Yukon Gold potatoes rather than red-skinned potatoes, less dill, and added chopped hard-boiled eggs to my salad.

With just a few simple ingredients you can quickly put together a really delicious potato salad in less than an hour.

Mayonnaise, Dijon, whole grain mustard.

Cut potatoes into 1 inch cubes.

Once the potatoes are cooked, mix them with some of the dressing, add diced hard-boiled eggs and more dressing.

Dilly Potato Salad with Whole Grain Mustard 

Adapted from Bay Area Bites ~ 6 servings

Ingredients

2 pounds Yukon Gold potatoes, peeled and cut into 1 inch cubes

2 eggs, hard-boiled and finely chopped

2 teaspoons white wine vinegar

3 scallions or 6 chives, finely chopped

2 + teaspoons of  finely chopped fresh dill or to taste

1/3 cup mayonnaise

1 1/2 tablespoons Dijon mustard

1 1/2 tablespoons whole grain mustard

Kosher salt and pepper to taste

Preparation

Place the eggs in a small pot and cover with water.  Bring to a boil over high heat then turn the heat down to medium.  Set your timer for 10 minutes and let the eggs simmer.  Drain the eggs and run under cold water.  Once cool enough to handle, peel and finely chop the eggs.  Set aside.

Place potatoes in a large pot of cold water and bring to a boil.  Turn the heat down to medium – medium high and cook the potatoes until they are tender when pierced with a fork, about 5 – 8 minutes. Drain the potatoes and place in a large  bowl.  Sprinkle the vinegar over the potatoes while still hot.  Sprinkle salt and pepper on the potatoes and toss gently.

Combine the mayonnaise and mustards and chop the dill and scallions or chives.  Once the potatoes are cool, add some of the dressing and all the herbs and toss with a spatula.  Add the chopped eggs, more dressing and mix gently.  If you prefer, you may add more mayonnaise and mustard to the potato salad.  Season to taste with salt and pepper.

Serve immediately or chill in the refrigerator for a few hours or overnight.

Pasta, Recipes, Side Dishes

End of Summer Pasta Salad

September 3, 2012

I’m not sure why I chose the title “End of Summer Pasta Salad.”  Maybe it’s because the stores are selling school supplies up and down the aisles and the beaches seem to be a bit less crowded.  It’s certainly not because there’s much change in the weather here in Hawaii.  Here is our nightly weather forecast: “Expect mostly sunny days with a few passing showers in the mauka (mountain) areas, high temperatures in the mid 80s.”  Maybe I should call it Endless Summer Pasta Salad.

In the past I bought the crumbled feta you commonly find in most refrigerated grocery shelves not knowing any better until I read Cook’s Illustrated review on feta cheese.  Mt. Vikos was rated well and I was able to find it at our local health food store.  What a difference.  This feta is made from sheep and goat’s milk and is not overly salty yet very flavorful.

All kinds of ingredients can be added to a pasta salad.  Sometimes I’ll use small white beans, marinated artichoke hearts, broccoli florets or fresh corn.  Today I used conchiglie pasta (shells), grape tomatoes, olives, lite salami, feta, spinach and basil.  Other pasta shapes work well such as farfalle (bow tie), fusilli (corkscrew), rotini (spirals).  The shells are rather attractive, the olives and tomatoes are nearly the same size as the pasta and all the tasty ingredients find their way into the nooks and crannies of the pasta. Those beautiful green olives are Castelvetrano Sicilian olives that are buttery and assertive without being bitter.  They add a distinctive flavor to the pasta salad.  You can find them at the olive bar at Whole Foods, pitted or not.

After you drain your pasta, place a couple of paper towels in a large, wide bowl and pour the pasta in the bowl.  Let it sit for a couple of minutes and the paper towels will soak up the excess water.  Giving it a shake or two also helps to dry the pasta.

Toss your pasta ingredients in a large bowl with fresh herb vinaigrette.  Add the spinach just before serving the salad.

End of Summer Pasta Salad

The measurements for the pasta, tomatoes and olives can be adjusted to your liking.  If you want to prepare a smaller portion use just two cups of uncooked pasta and fewer tomatoes and olives.  The fresh basil, feta and herb vinaigrette really add that je ne sais quoi to the salad.

Ingredients

3 cups uncooked pasta

20 grape tomatoes, halved

3/4 cup olives, halved

salami cut into thin strips

feta cheese, crumbled

fresh basil, julienned

baby spinach leaves

fresh herb vinaigrette

Preparation

Cook the pasta in a large pot of boiling salted water for the suggested cooking time noted on the box.

Drain pasta, run under cool water to stop the cooking.  Place a few paper towels on the bottom of a large, wide bowl.  Pour your well-drained pasta into the bowl and let the paper towels absorb the excess water.  Set aside while you prepare the salad ingredients.

Slice the tomatoes and olives in half and cut the salami into thin strips, about 1 inch in length.  Crumble the feta cheese and julienne the basil leaves.

Remove the paper towels from the bowl and season the pasta well with salt and freshly ground pepper.  Add the tomatoes, olives, salami, feta and basil.  Give everything a quick stir, then add your vinaigrette by the tablespoonful until the salad is nicely dressed.  Just before serving, toss in the spinach leaves and give the salad one more quick stir adding more salt and pepper if necessary.

Leftover pasta salad keeps well in the refrigerator for a day or so.  The pasta will absorb most of the dressing so you might choose to add just a little more the next day.  If I’m not serving the entire salad at one time, I’ll add just enough spinach for that  portion and add more as I eat my way through the entire bowl.  Molto delizioso!

Follow

Get every new post delivered to your Inbox

Join other followers: