Browsing Category

Side Dishes

Japanese, Lactose Free, Potato Salad, Recipes, Salad, Side Dishes

Japanese Potato Salad

April 23, 2016

Japanese Potato SaladJapanese potato salad has much in common with the American version however it does have a few unique twists.  The potatoes are crushed instead of cubed, and an assortment of vegetables are added such as cucumbers, carrots, onions, corn. Finely chopped ham and hardboiled eggs can also be combined in this wonderful potato salad.  Occasionally I will add a handful of green peas.  Many recipes call for Japanese Kewpie mayonnaise however my personal preference is to use regular mayonnaise. Either way, this is a delicious salad that everyone loves.

Japanese Cucumber

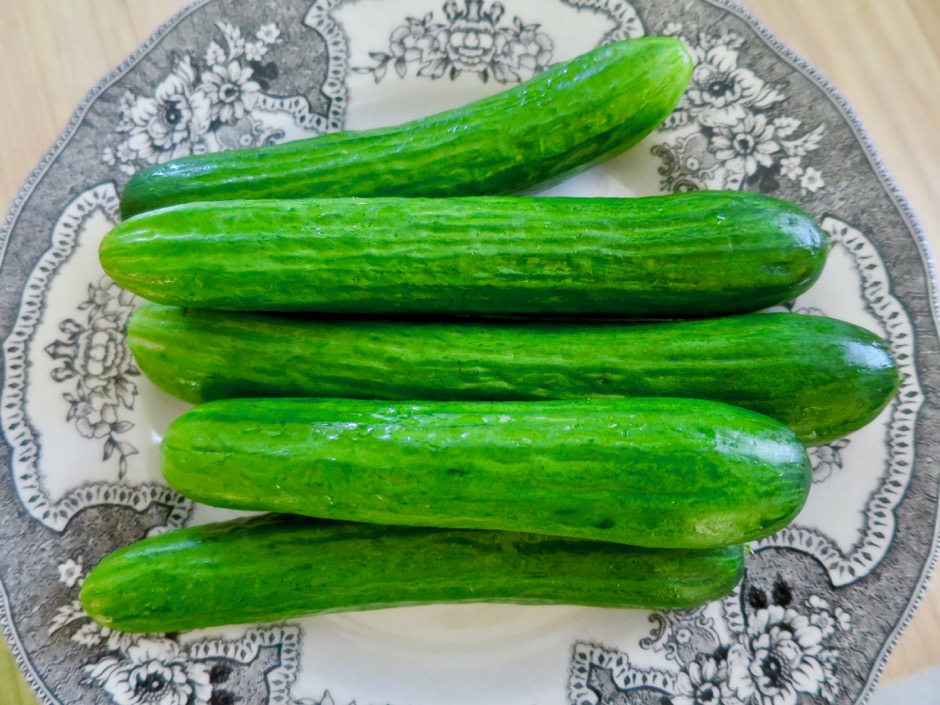
Japanese cucumbers are readily available at our local markets in Hawaii, however, if you don’t have access to them, any small, seedless cucumber works.  Slice them very thin. I use my favorite Benriner mandoline.

Japanese Cucumber & Onion

I have made this salad without ham (top photo) and with ham below. Both are equally delicious.

Japanese Potato Salad

Japanese Potato Salad


Japanese Potato Salad
 
Author:
Serves: 6 - 8
Ingredients
  • 2 pounds Yukon Gold potatoes, peeled and cut into 2" cubes
  • 1 small carrot, peeled, cut in half lengthwise, and sliced into thin half moons (about 1 cup)
  • 1 medium Japanese or other seedless cucumber very thinly sliced (about 1 cup)
  • ⅓ cup thinly sliced sweet onion
  • ½ teaspoon kosher salt
  • 2 hardboiled eggs, finely chopped
  • ½ cup thinly sliced ham, optional
  • ¼ cup green peas, optional
  • 2 teaspoons sugar
  • 2 tablespoons rice vinegar
  • ½ cup mayonnaise
  • salt and pepper
Preparation
  1. Put the potatoes in a saucepan of cold, salted water and bring to a boil. Turn the heat down to maintain a gentle simmer and cook until the potatoes are soft, and easily pierced with a fork, 10 - 15 minutes. Drain potatoes in a colander.
  2. Meanwhile, toss the thinly sliced cucumber and onion with ½ teaspoon kosher salt. Set aside for 10 minutes, then rinse gently and press out the liquid using a clean dish cloth or paper towels. This is an important step that will prevent your potato salad from becoming soggy.
  3. Blanch carrots in boiling water for just a minute or two. The carrots should be al dente and still have a slight crunch. You may microwave the carrots in water if you prefer. Drain, pat dry and set aside.
  4. Whisk rice vinegar with the sugar until it dissolves. Whisk in mayonnaise.
  5. Place potatoes in a large, wide bowl and crush with a wooden spoon leaving a few small chunks for texture. Season potatoes with salt and pepper. Add mayonnaise mixture, vegetables, chopped egg, ham, and peas if using. Stir gently to combine all ingredients. Chill for an hour before serving.


Dinner, Lactose Free, Recipes, Side Dishes, Veggies

The Best Green Bean Casserole

February 9, 2016

The Best Green Bean CasseroleIt all started out with the purchase of Williams-Sonoma’s Crispy Onions.  I was sold once I read the label on the package: The ultimate crunchy topping for savory casseroles.  A green bean casserole was the first thing that came to mind, but not the usual canned-ingredient variety.  The only mistake I made was not to buy more than one bag of these delightful onions.

Fresh Green BeansKimberly of the  Daring Gourmet posted a recipe  that sounded perfect.  Besides the onions and green beans, the recipe calls for bacon, an ingredient that for me, seals the deal.

Hempler's BaconHempler’s bacon is top-notch.  It is thick, lean, and smokey.  I used the pepper coated bacon in the green bean casserole but you can use regular thick cut bacon instead.  You can find Hempler’s at Safeway.

Hempler's Bacon

Fresh MushroomsIt may seem there are way too many mushrooms in the recipe, but as they sauté, they shrink up quite a bit and they are essential in making this casserole so tasty (along with the bacon!).

Williams-Sonoma Crispy OnionsI was able to make two green bean casseroles from the one package of crispy onions I bought. These crispy onions are far superior to the supermarket brands.  They would be delicious sprinkled over slow baked cannellini beans or any dish that would be enhanced by a crunchy topping.

The Best Green Bean Casserole

The Best Green Bean Casserole
 
Adapted from The Daring Gourmet
Author:
Serves: 6 - 8
Ingredients
  • 4 slices thick-cut bacon, diced
  • ½ cup finely chopped sweet onion
  • 2 medium cloves garlic, minced
  • 12 ounces button mushrooms, chopped
  • 3 tablespoons Earth Balance Buttery Sticks (or regular butter)
  • 3 tablespoons all-purpose flour
  • 1 cup half and half (I make this with Organic Valley Lactose Free Half and Half)
  • 1¼ cups chicken broth
  • ½ teaspoon kosher salt
  • ¼ teaspoon freshly ground black pepper
  • 1 pound fresh green beans, trimmed, cut into 1½" pieces and blanched (boil for 5 minutes, place beans in ice water for a few minutes, drain well)
  • 3 ounces crispy onions
Preparation
  1. Preheat oven to 350 degrees.
  2. Lightly butter 9x13" casserole dish and set aside.
  3. Fry bacon in a large skillet over medium-high heat until crispy. Reduce heat to medium. Add onions and cook until soft and translucent, about 4 minutes. Add garlic and mushrooms, cook for another 4 minutes or so, until mushrooms are soft. Transfer mixture to a bowl.
  4. Melt 3 tablespoons Buttery Sticks in the same skillet and whisk in flour. Continue whisking for another minute until the mixture has slightly deepened in color. Add the half and half and chicken broth while constantly whisking to prevent lumps. Once slightly thickened, add the mushrooms and bacon mixture along with the salt and pepper. Add green beans and stir to combine.
  5. Pour mixture into a 9x13" casserole dish and sprinkle with crispy onions, covering the top of the casserole. Bake uncovered for 30 minutes.
  6. ***You may prepare the casserole a few hours in advance except for adding the onions (they will become soggy if you add them in advance). Remove the casserole from the refrigerator 30 minutes prior to baking. Sprinkle onions over the top and bake.


Appetizers, Pickles, Recipes, Side Dishes, Vegan, Vegetarian, Veggies

Quick Aleppo Dill Pickles

February 2, 2016

Quick Aleppo Dill PicklesIn earlier posts, I’ve mentioned that we love virtually all forms of pickles.  These refrigerator dill pickles are scrumptious.  Crunchy with a little heat from the Aleppo pepper flakes, they are ready to eat in just an hour. John, always on the lookout for different pickles, found the recipe in my Bon Appetit magazine and quickly ordered Aleppo pepper from Amazon knowing we wouldn’t be able to find it here on Maui.  Featuring large flakes with a beautiful deep red color and medium heat, it is widely used in Middle Eastern cooking. This is our new favorite savory pickle.

Aleppo Pepper

Keiki CukesThe original recipe called for Persian cucumbers which are difficult to find here on Maui. These beautiful Keiki Cukes are readily available at our local Costco and they are perfect for pickles.

Cukes & Dill

Quick Aleppo Dill PicklesIf you are in the mood for pickles, go ahead and make a batch of these crunchy dills.  Once you taste them you will want to have  a jar in your refrigerator at all times.  Sprinkle on za’atar for a delicious finishing touch just before serving the pickles.

Quick Aleppo Dill Pickles

Quick Aleppo Dill Pickles
 
Updated 2/07/16: I reduced the salt from the original recipe.
Author:
Ingredients
  • 8 Keiki Cukes or Persian cucumbers (about 1¼ pound) quartered lengthwise
  • ¼ cup coarsely chopped fresh dill
  • 2⅓ cups distilled white vinegar
  • ⅓ cup sugar
  • 1 medium garlic clove, finely grated
  • 1 tablespoon Aleppo pepper
  • 1 tablespoon fresh lemon juice
  • 2 teaspoons kosher salt
  • 1 teaspoon red pepper flakes
  • 1 teaspoon freshly ground black pepper
  • Za'atar and flaky sea salt (for serving)
Preparation
  1. Pack cucumber spears and dill into a large heatproof jar.
  2. Bring vinegar, sugar, garlic, Aleppo pepper, lemon juice, kosher salt, red pepper flakes, and black pepper to a boil in a medium saucepan, stirring to dissolve sugar. Let cool slightly, then pour brine over cucumbers to submerge. Seal jar and chill at least 30 minutes.
  3. To serve, remove cucumber spears from brine, lightly shaking off excess liquid but leaving on any seasonings. Sprinkle with za'atar and sea salt.
Dinner, Recipes, Side Dishes, Veggies

Summer Tomato Pie

October 15, 2015

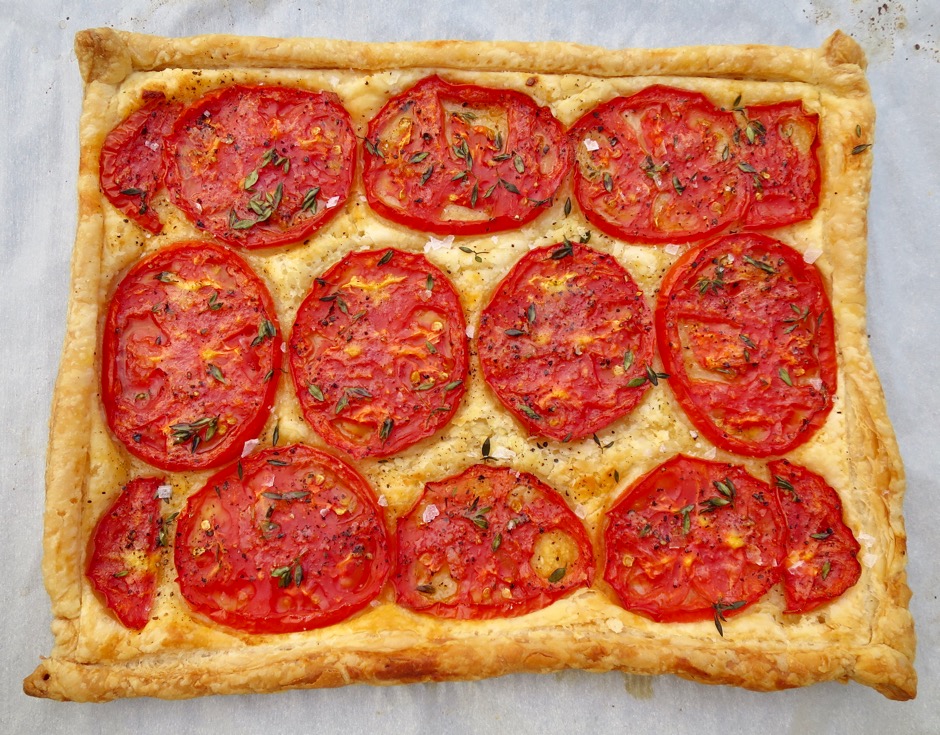
Summer Tomato PieI’m a bit late on posting this since it’s now October and summer is over, but if you’re  able to find good tomatoes at your local farmers market (or in your back yard) you’ll love this recipe from Cook’s Country.  Not only are there just a handful of ingredients, most of which you probably have in your pantry and refrigerator, the pie is quite stunning and most of all simply delicious.

Summer Tomato PieThe original recipe says to use Cook’s Country pie dough recipe, your own recipe, or store-bought dough.  I am sold on this pie crust recipe.  It’s the only one I use these days.  I use 2 tablespoons of vodka in place of 2 of the 5 tablespoons of water called for. From Cook’s Illustrated: “Since water bonds with flour to form gluten, too much of it makes a crust tough. But rolling out dry dough is difficult. For a pie dough recipe that baked up tender and flaky and rolled out easily every time, we found a magic ingredient: vodka. Using vodka, which is just 60 percent water, gave us an easy-to-roll crust recipe with less gluten and no alcohol flavor, since the alcohol vaporizes in the oven.”

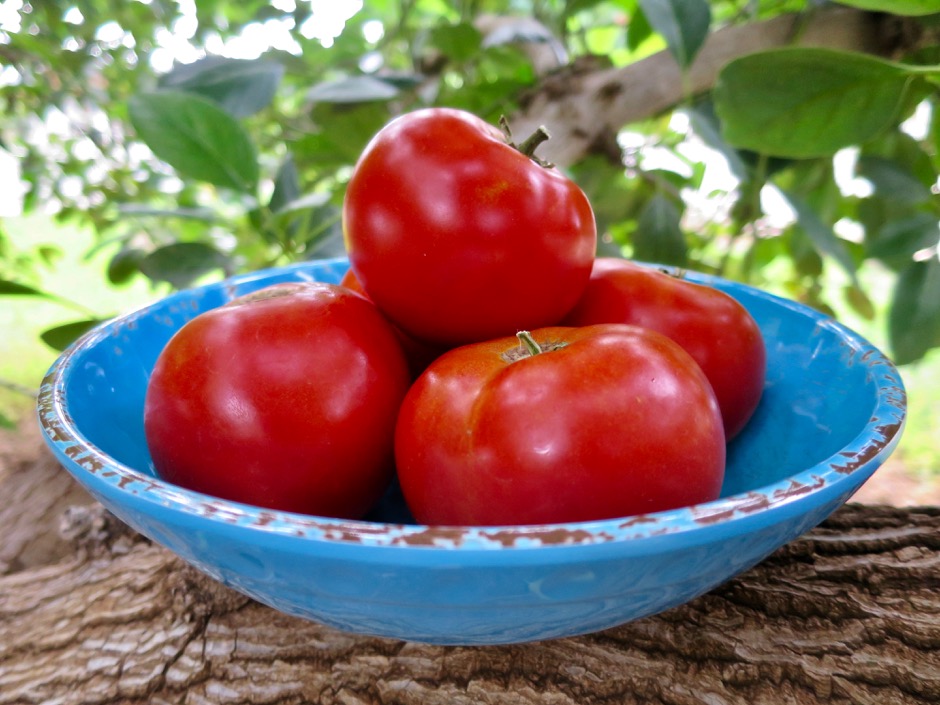
Homegrown Big Beef TomatoesThese gorgeous Big Beef tomatoes did fairly well in our garden even though we had the hottest, most humid summer ever.  They are meaty tomatoes with few seeds.  Just perfect for this recipe.

Extra Sharp Cheddar

Preparing Tomatoes for PieThinly sliced tomatoes are salted and left alone for 30 minutes to draw out their moisture. This procedure ensures the crust will not be too doughy and wet once the tomatoes are layered on the crust.

Preparing Summer Tomato PieThe original recipe doesn’t call for bacon, but I couldn’t resist adding some.

Preparing Summer Tomato Pie

Summer Tomato Pie

Summer Tomato Pie
 
Author:
Ingredients
  • 2 (9-inch) pie dough rounds (see Best Ever Pie Crust link above)
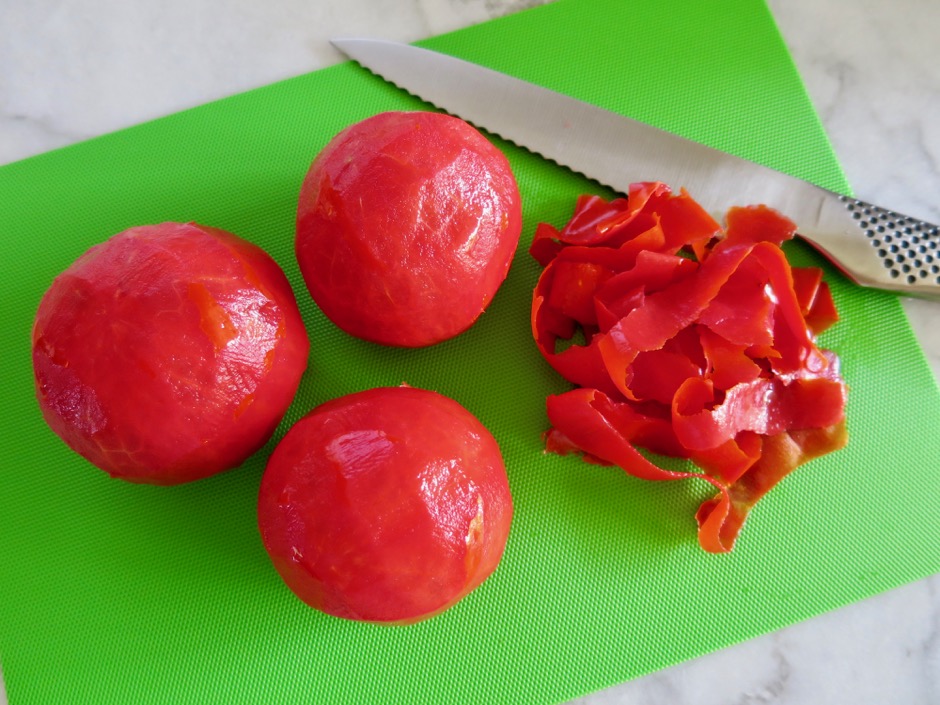
  • 2 pounds ripe beefsteak tomatoes, cored and cut into ¼-inch slices. I prefer to peel the tomatoes but this is optional.
  • ½ teaspoon salt
  • ¼ cup mayonnaise
  • 4 teaspoons cornstarch
  • 1½ cups grated sharp cheddar cheese (I used extra sharp white cheddar)
  • 4 scallions sliced thin
  • 5 pieces cooked and crumbled bacon, about ½ cup (optional)
Preparation
  1. Arrange tomato slices on paper towel-lined baking sheet and sprinkle with salt. Let drain for about 30 minutes, then press tomatoes with additional paper towels until very dry.
  2. On a lightly floured surface, roll 1 dough round into 12-inch circle. Transfer to 9-inch pie plate, letting excess hang over edge. Cover with plastic and refrigerate 30 minutes. Roll second round into 12-inch circle and refrigerate for 30 minutes (I placed mine on waxed paper lined cutting board and covered with plastic).
  3. Adjust oven rack to the second placement from the bottom (about 5" from the bottom of the oven floor) and heat oven to 450 degrees. Mix mayonnaise, cornstarch and 1 cup cheese in bowl until well combined. Sprinkle remaining cheese over bottom of dough-lined pie plate. Arrange a third of tomatoes over cheese. Spread half of the mayonnaise mixture over the tomatoes and sprinkle with half of the scallions. Sprinkle half of the bacon bits over the top if using. Layer another third of tomatoes, remaining mayonnaise mixture and scallions, and bacon if using. Top with remaining tomatoes.
  4. Arrange top crust on pie. Press crusts together, then trim, fold, and crimp edges. Cut four 2-by1-inch oval vent holes in top. Place pie on rimmed baking sheet, bake for 10 minutes, then lower oven temperature to 325 degrees and bake until crust is golden brown, about 55 minutes. Cool on a wire rack at least 3 hours. Serve at room temperature.


Lactose Free, Potato Salad, Recipes, Side Dishes

Crispy Potatoes with Lemon & Lots of Oregano

September 5, 2015

Crispy Potatoes with Lemon & Lots of OreganoIt’s not very often that I choose a dried herb over a fresh one, but oregano is one of those few. Dried oregano is one of the most versatile herbs and a staple in my kitchen. A dash of oregano in tomato sauce, salad dressing, chimichurri sauce, baked herb tofu, and sprinkled over homemade pizza adds a delightful note. Rub it between your fingers before adding it to any dish to release its aromatic flavor.

Mini Gold PotatoesMini Golds I found at Safeway are the perfect size for these pan-fried potatoes.

Zesty Lemon DressingI love a dressing with a bright citrus flavor.  Fresh lemon juice and lemon rind makes this dressing a perfect match for the potatoes and oregano.

Crushed PotatoesBoiled until just tender, cooled slightly and crushed to maximize contact in the skillet.  This creates lots of crispy edges and crevices for that delicious dressing.

Crispy Potatoes with Lemon & Lots of Oregano

Crispy Potatoes with Lemon & Lots of Oregano
 
Crispy pan-fried potatoes with a zesty lemon dressing makes the perfect side dish for any meal.
Author:
Ingredients
  • 1½ pounds baby yellow potatoes (about 2-inch), washed well
  • kosher salt
  • 2 tablespoons sherry vinegar
  • 2 tablespoons fresh lemon juice
  • 2 teaspoons lemon zest
  • 1 tablespoon Dijon mustard
  • 1 teaspoon honey
  • ⅓ cup extra virgin olive oil
  • freshly ground black pepper
  • 1 tablespoon dried oregano
Preparation
  1. In a 6-quart pot, combine potatoes and enough cold water to cover by 2 inches. Add 2 teaspoons kosher salt, bring to a boil, reduce to a simmer, and cook until tender enough to be easily pierced with a metal skewer, about 12 - 20 minutes. Cooking time will depend upon the size of your potatoes.
  2. Meanwhile, in a small bowl, whisk the vinegar, lemon juice and zest, mustard, and honey. Slowly whisk in the ⅓ cup olive oil until the dressing is emulsified. Season to taste with salt and pepper.
  3. Drain the potatoes well and let them cool on a large plate for a few minutes. Place a piece of plastic wrap around the bottom of a small bowl and flatten potatoes to about ½-inch thick.
  4. Heat 2 tablespoons of oil in a 12-inch heavy-duty skillet over medium heat. Cook the potatoes in batches, flipping once about halfway through, until golden and crispy on both sides, about 10 minutes total. Transfer to a platter and repeat, adding additional oil as needed.
  5. Season potatoes with a little kosher salt and pepper. Coat the potatoes well with dressing (pass the rest at the table). Crush the oregano between your fingers and sprinkle it over the potatoes. Serve warm or hot.


Dinner, Lactose Free, Recipes, Rice Dishes, Salad, Side Dishes, Tofu, Vegan, Vegetarian, Veggies

Glory Bowl Salad

July 18, 2015

Glory Bowl SaladI bumped into a friend of ours, Lisa Tamaki, with whom I have a shared interest in cooking as well as home canning.  She told me about a new salad recipe she thought I would enjoy.  The dressing has nutritional yeast in it, one of my favorite foods. Lisa’s enthusiasm about the “Glory Bowl Salad” (named for a top ski bowl in Canada) made me eager to try it out right away. Thank you, thank you!

Cucumber, Carrot, Edamame, Snap Peas, Red CabbageThe original recipe comes from Shelley Adams who once owned Whitewater Ski Resort in Canada.  This salad is one of her most requested recipes.  Rachel also posted Sami’s version of this delicious salad.  I followed her suggestion of seasoning the tofu with sesame oil and soy sauce before baking and it adds a wonderful flavor to the tofu. You can use almost any vegetables you want to in this salad.  I opted for colorful red cabbage, crunchy snap peas, cucumbers, carrots and edamame.  Don’t skip the toasted almonds.  They are super in this salad.  The dressing has a fantastic umami flavor due to the generous amount of nutritional yeast and soy sauce, so good you’ll be looking for things to pour it on once your salad is long gone.

TofuXpressI use my TofuXpress often.  It presses out the water quickly.   No more wasting paper towels!

Extra Firm Tofu

Baked TofuIt’s best to serve the baked tofu once cooled, however, you may bake it in advance and refrigerate it until ready to use.  The texture won’t be quite the same (it softens once refrigerated) but it will still taste delicious. Just bring it to room temperature before serving.

Glory Bowl Salad

Glory Bowl Salad

Adapted from Whitewater Cooks & The Conscious Dietician blog

Two generous salad bowl servings and 1 cup dressing

Ingredients

Salad Bowl:

1 cup short or medium grain brown rice

1/3 cup toasted slivered almonds (bake in toaster oven at 300° for about 5 minutes – watch so they do not burn)

1 package (14 ounce) extra firm tofu (Wildwood recommended) water pressed out

2 teaspoons sesame oil

2 tablespoons soy sauce

2 ounces sliced cucumber

1 ounce shredded carrot

1/3 cup cooked edamame

3 ounces snap peas

1 ounce shredded red cabbage

roasted black sesame seeds – optional

Dressing:

1/4 cup + 2 tablespoons nutritional yeast

3 tablespoons water

3 tablespoons soy sauce

3 tablespoons apple cider vinegar

1 clove garlic, crushed

1 1/2 tablespoons tahini paste

1/4 cup extra virgin olive oil

1/4 cup canola oil

freshly ground black pepper

Cook brown rice according to package directions.  Set aside.

Toast slivered almonds for a few minutes to crisp up.

Press out water from tofu using the TofuXpress or a clean dish towel or paper towels (weighted down).  Cut tofu into rectangles about 1/2 inch thick.  Combine sesame oil and soy sauce in a small bowl. Brush mixture over tofu slices, or toss to coat well.  Place tofu on a foil lined baking sheet and bake at 350°F for 25 minutes (I use my toaster oven).

Using an immersion blender combine nutritional yeast, water, soy sauce, apple cider vinegar, garlic, tahini paste, extra virgin olive oil, and canola oil.  Or whisk by hand until all of the ingredients are well incorporated. Season to taste with freshly ground black pepper.

Assemble your salad by placing the rice on the bottom of your bowl, adding the vegetables and tofu over the rice. Drizzle a generous amount of the dressing over the salad.  Sprinkle toasted almonds and roasted sesame seeds over the top and serve with extra dressing.


Follow

Get every new post delivered to your Inbox

Join other followers: