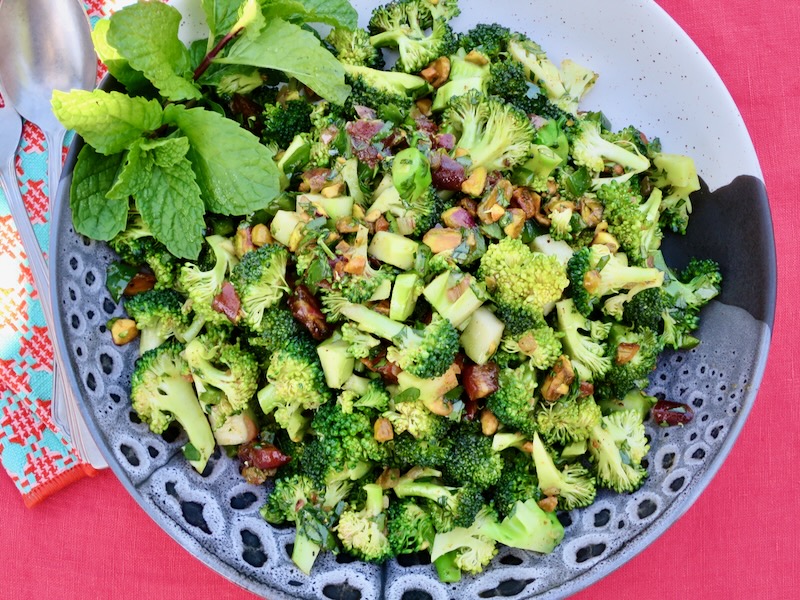
DinnerDressingLactose FreeRecipesSaladSide DishesVegetarianVeggiesBroccoli Spoon SaladCruciferous vegetables are tasty, versatile, and healthy. They can be eaten raw or cooked. A list of my favorites would... Read More
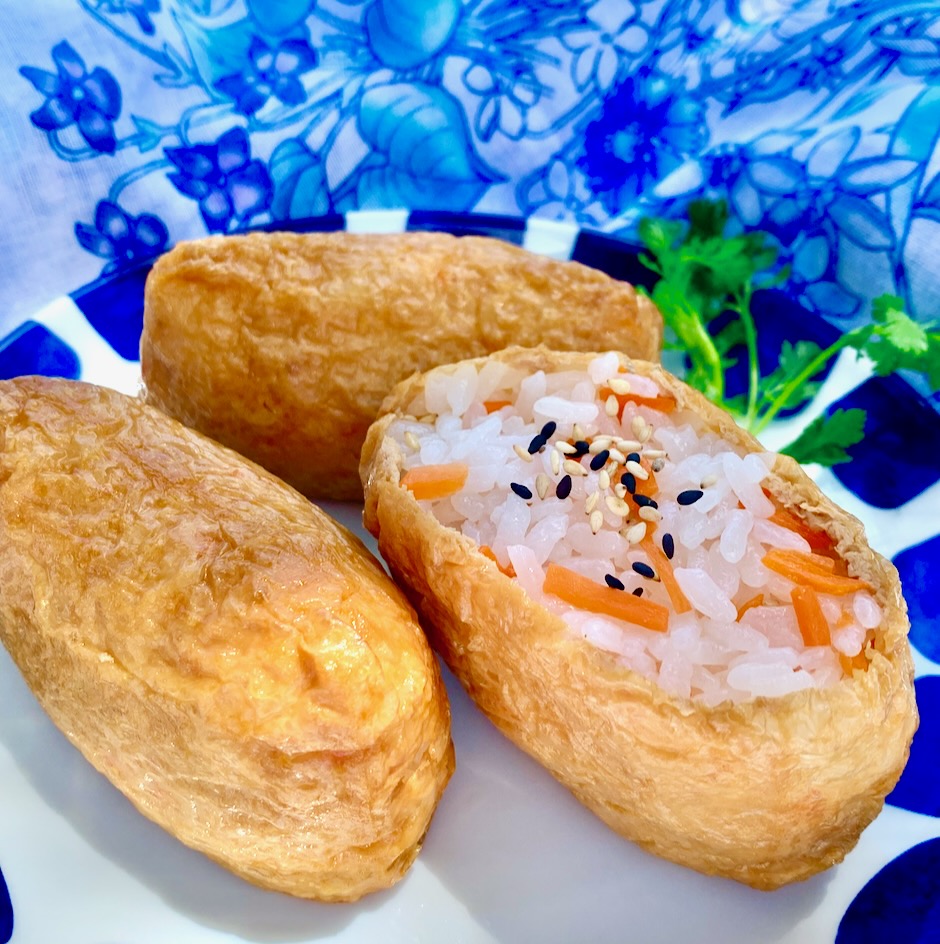
AppetizersDinnerJapaneseLactose FreeRecipesRice DishesSide DishesSummertime MealTofuVeganVegetarianInari SushiInari sushi is a local island favorite, known in Hawaii as cone sushi. These compact tofu pouches are filled with... Read More
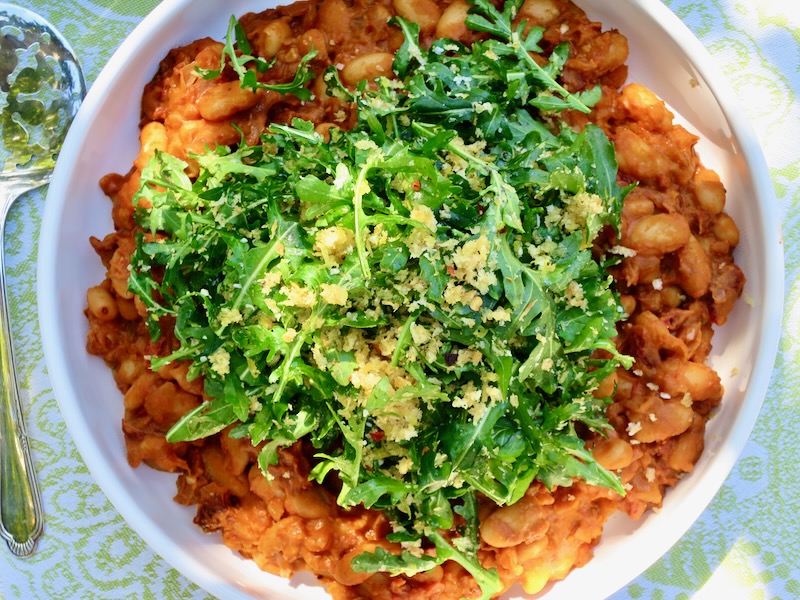
BeansDinnerRecipesSide DishesVegetarianCreamy Spicy Beans and GreensThis tasty bowl of simmered beans hits all the right notes for the perfect lunch or dinner. Served with a... Read More
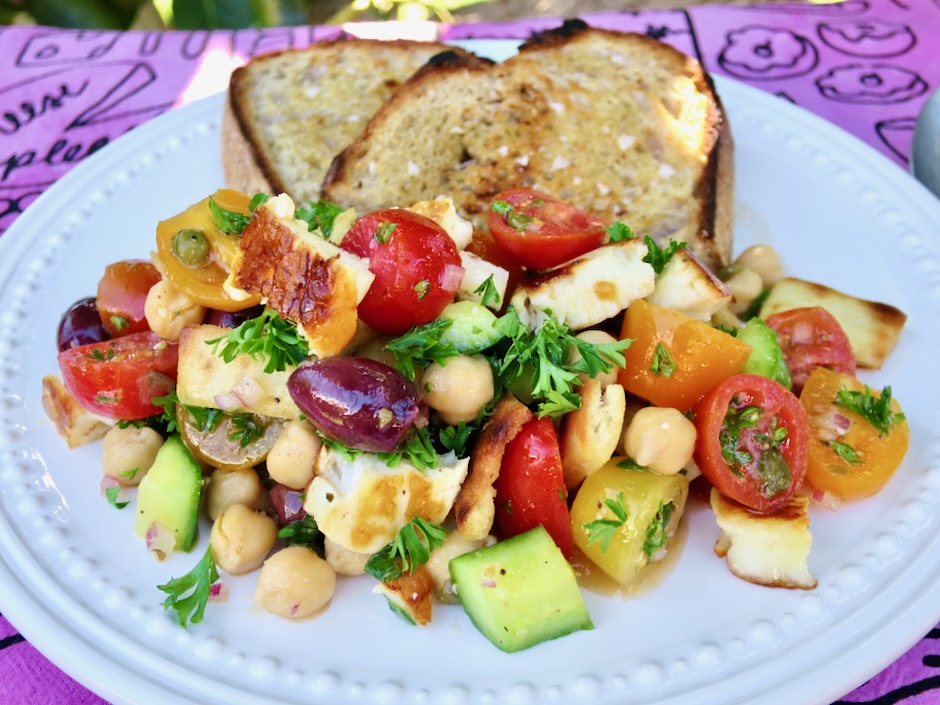
BeansCheeseDinnerRecipesSaladSide DishesVegetarianVeggiesTaverna SaladThis vibrant salad is all about beautiful colors and textures that make it unique and so delicious. Crisp cucumbers, juicy... Read More
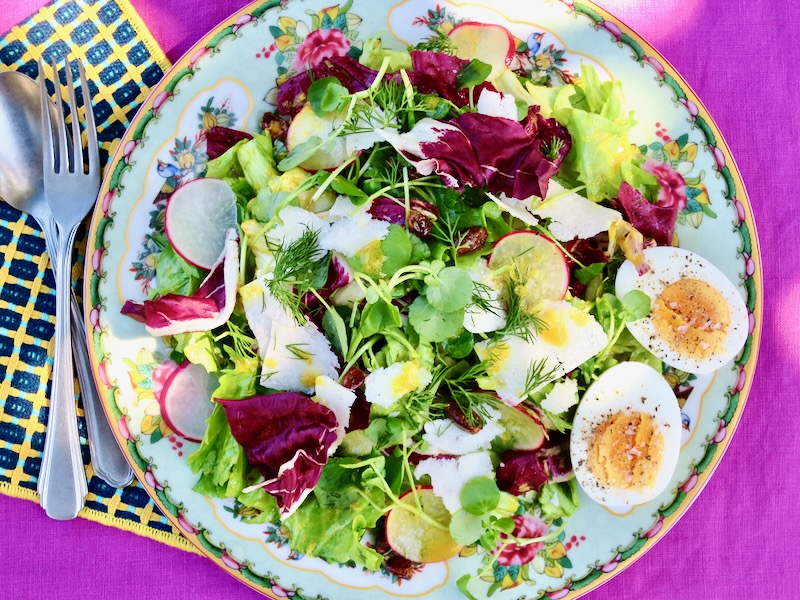
RecipesSaladSide DishesVegetarianVeggiesLeafy Greens with Turmeric DressingBitter greens are one of my favorite salad ingredients. The peppery flavor of arugula, watercress, radicchio or escarole combined with... Read More
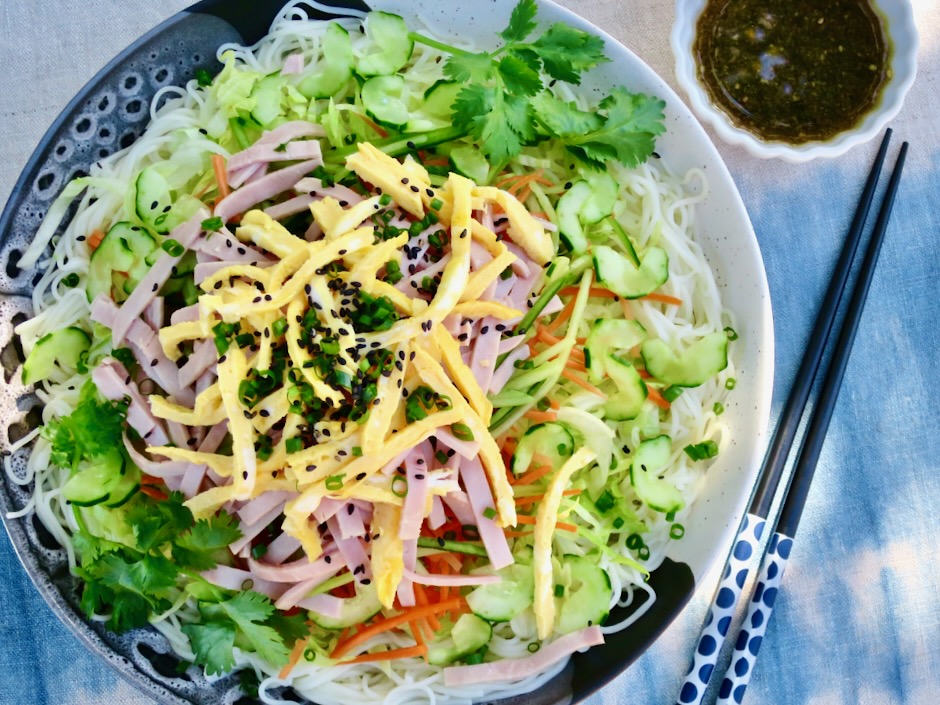
DinnerJapaneseLactose FreePastaRamenRecipesSaladSide DishesSummertime MealVeganVegetarianVeggiesAunty Ruby’s Somen SaladPerfect for a New Year’s Eve Potluck or New Year’s Day Lunch Around a dozen years ago I posted a... Read More