Browsing Category

Sauces

Canning, Dinner, Gardening, Italian, Lactose Free, Pasta, Recipes, Sauces, Vegan, Vegetarian

Water Bath Safe Canned Roasted Tomato Sauce

May 24, 2020

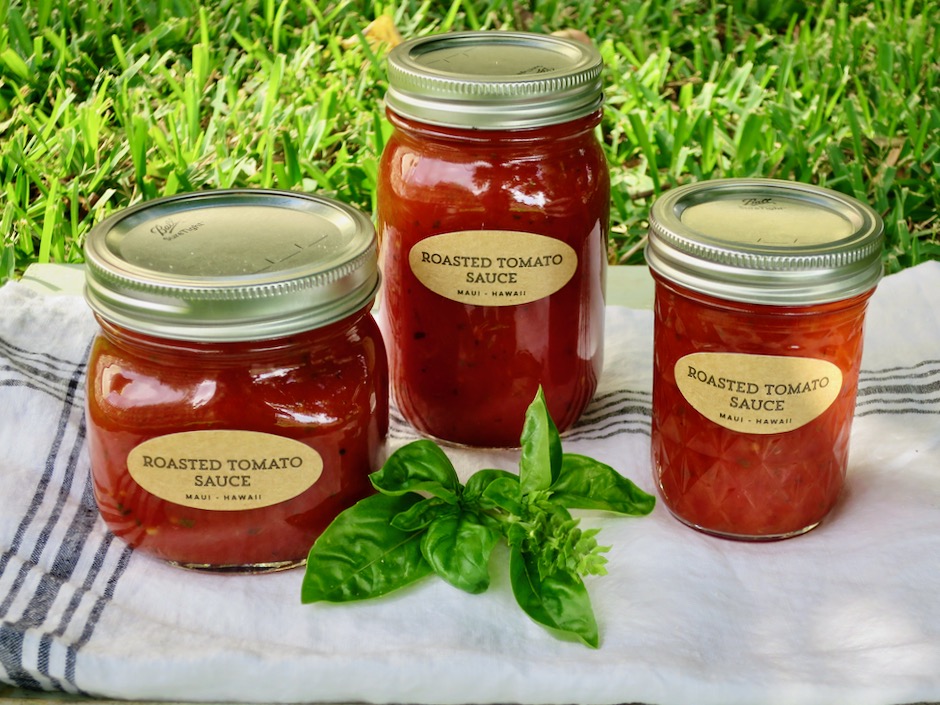
Water Bath Canned Roasted Tomato Sauce

Last summer we had an incredibly large tomato harvest from just two Early Girl plants.  The fruit kept coming and soon they were piled high in baskets on our dining table.  Having made fresh sauce and freezing it on many occasions, our freezer was already maxed out with other foods with little room for more.  I was very happy to come across a water bath safe canned tomato sauce recipe.  This recipe is adapted from Jami Boys of An Oregon Cottage.  It is a great recipe and we are so happy to have found it.

Water Bath Safe Canned Roasted Tomato Sauce

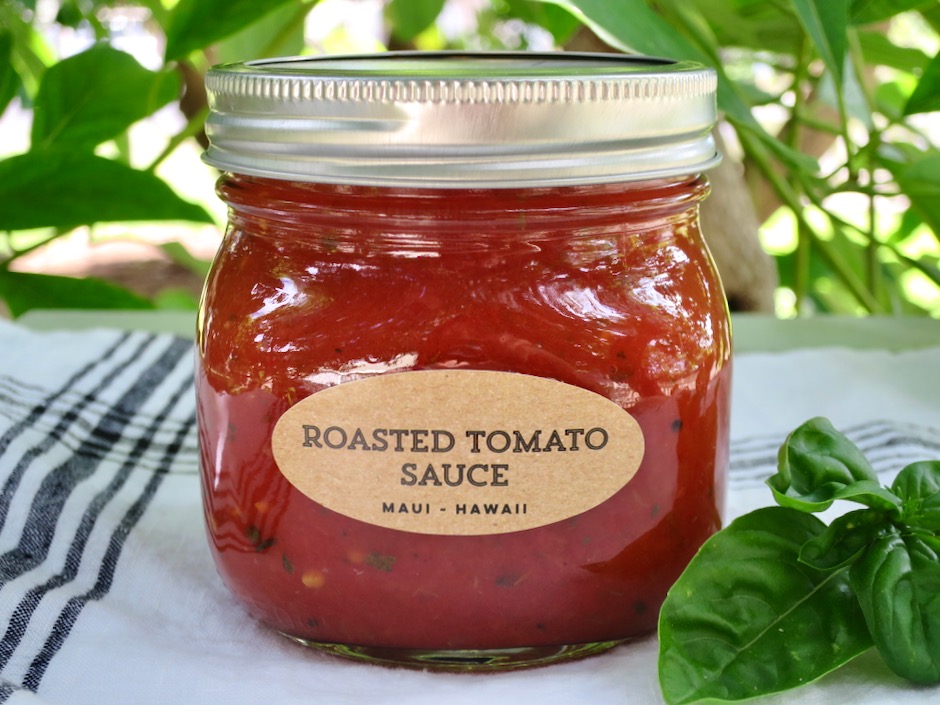
Roasting the tomatoes gives the sauce a wonderful flavor and gorgeous color.  And being able to keep the jars shelf stable for 18 months is absolutely the way to go.  We regularly send care packages with homemade jams, peppers and pickles to our children.  We have increased our product selection with this terrific sauce.

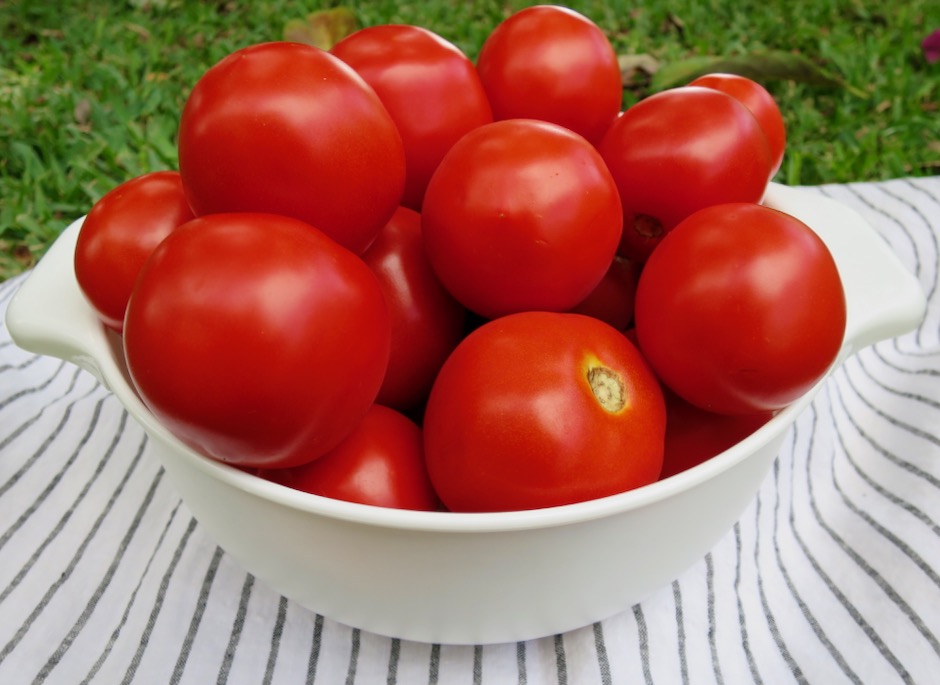
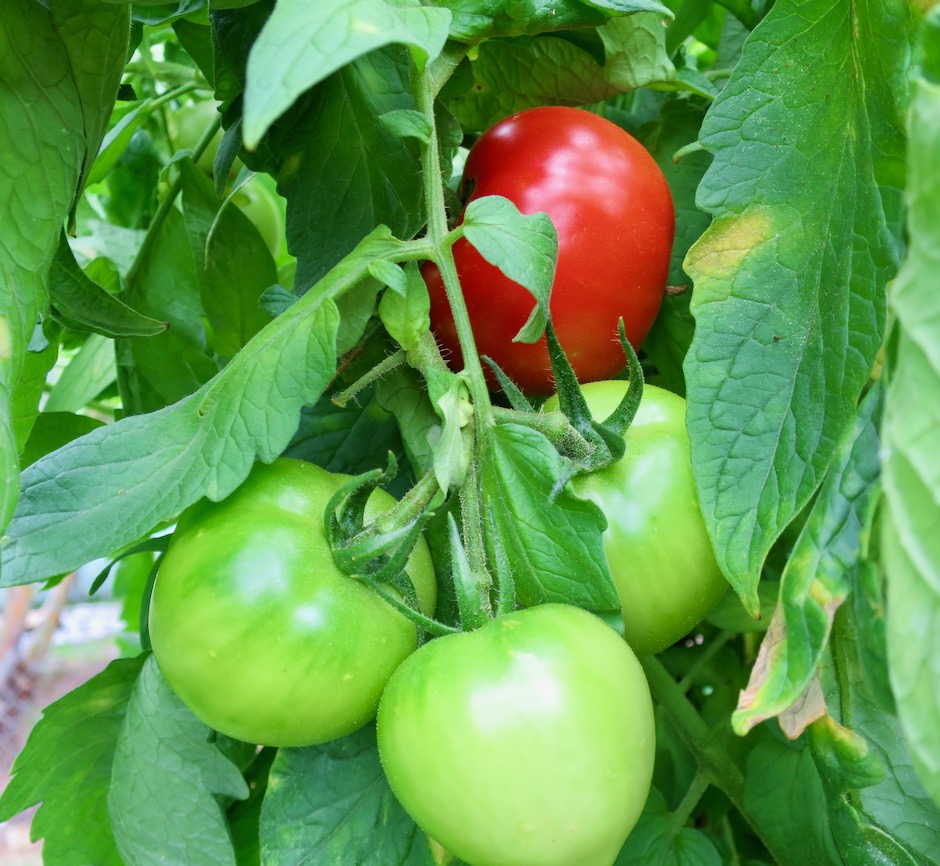
Early Girl Tomatoes

Early Girls are amazing tomatoes.  They are juicy, meaty, and have a particularly deep red color.

Katana Beefsteak Tomatoes

This time we also harvested and used these beautiful Katana beefsteak tomatoes.

Katana Beefsteak Tomatoes in the Garden

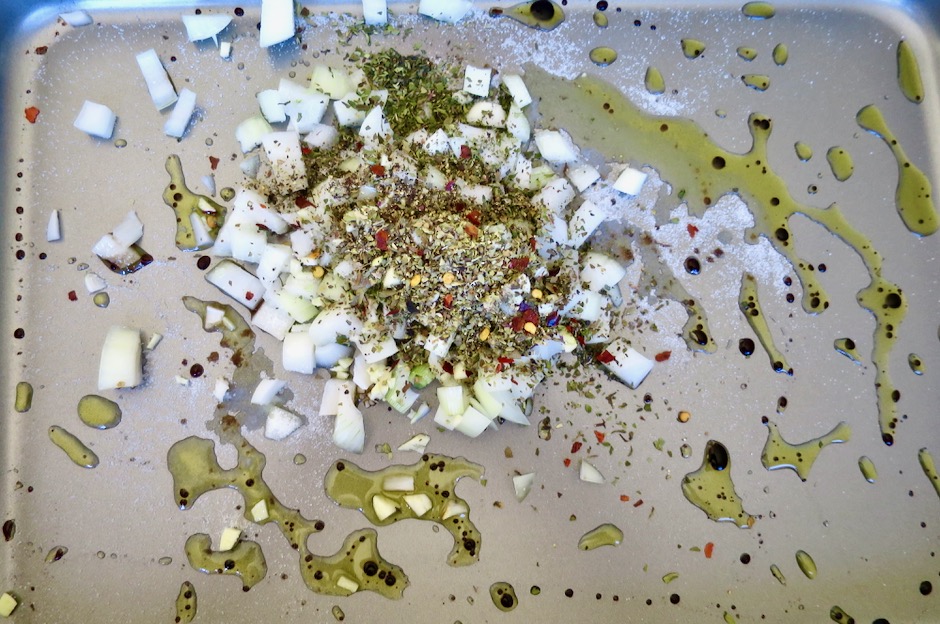
Olive Oil, Balsamic Vinegar, Onion, Garlic & Dried Herbs

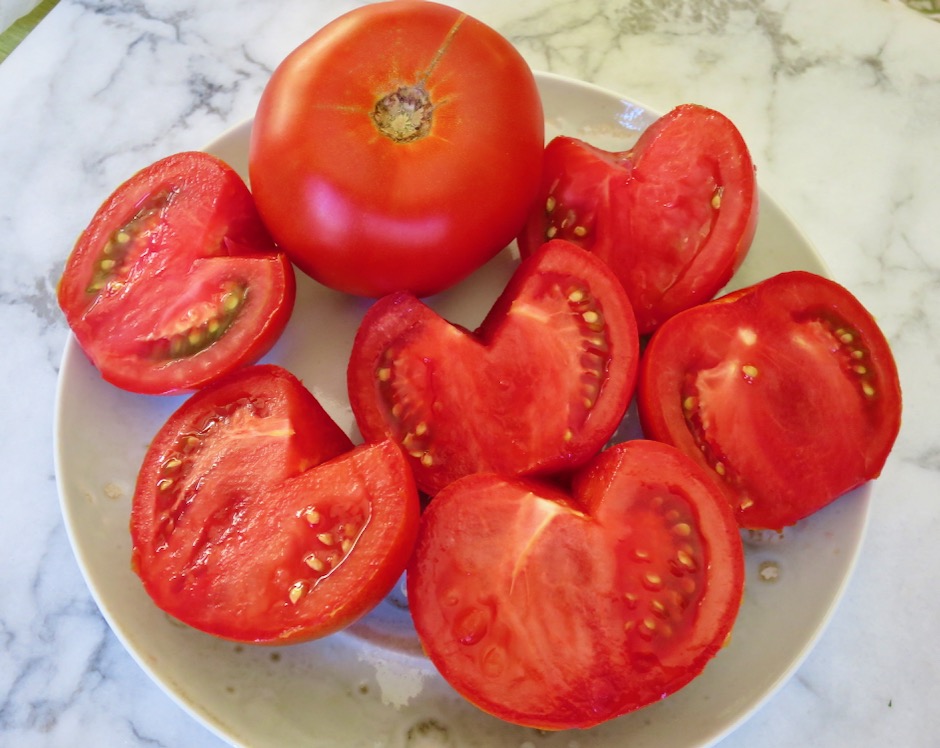
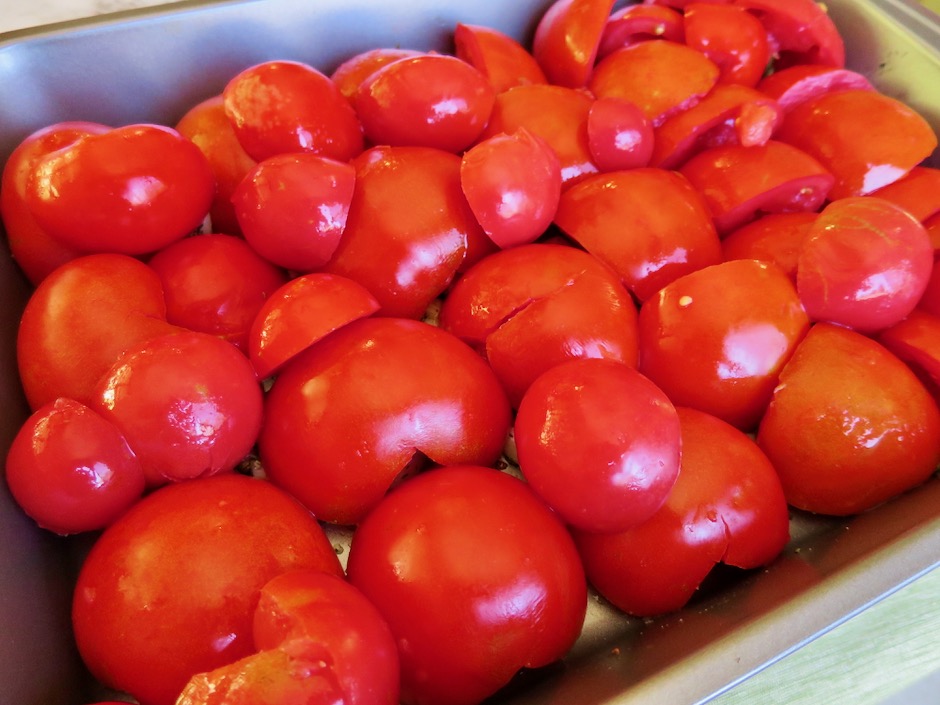
The halved and seeded tomatoes are placed in a pan with a bit of olive oil, dash of balsamic vinegar, onions, garlic, dried herbs and seasoning (salt & pepper) and roasted for about 40 minutes.

Halved and Seeded Tomatoes

I recommend using meaty tomatoes for a luscious, thick sauce.  If the tomatoes are more on the watery side, you may end up with mostly tomato skins once they have roasted.

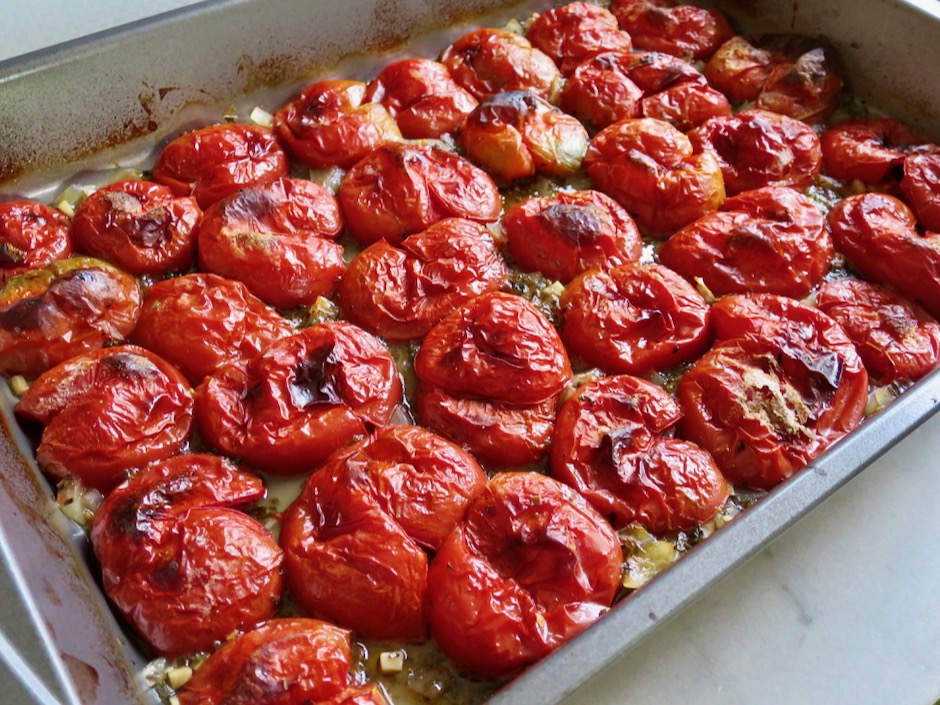
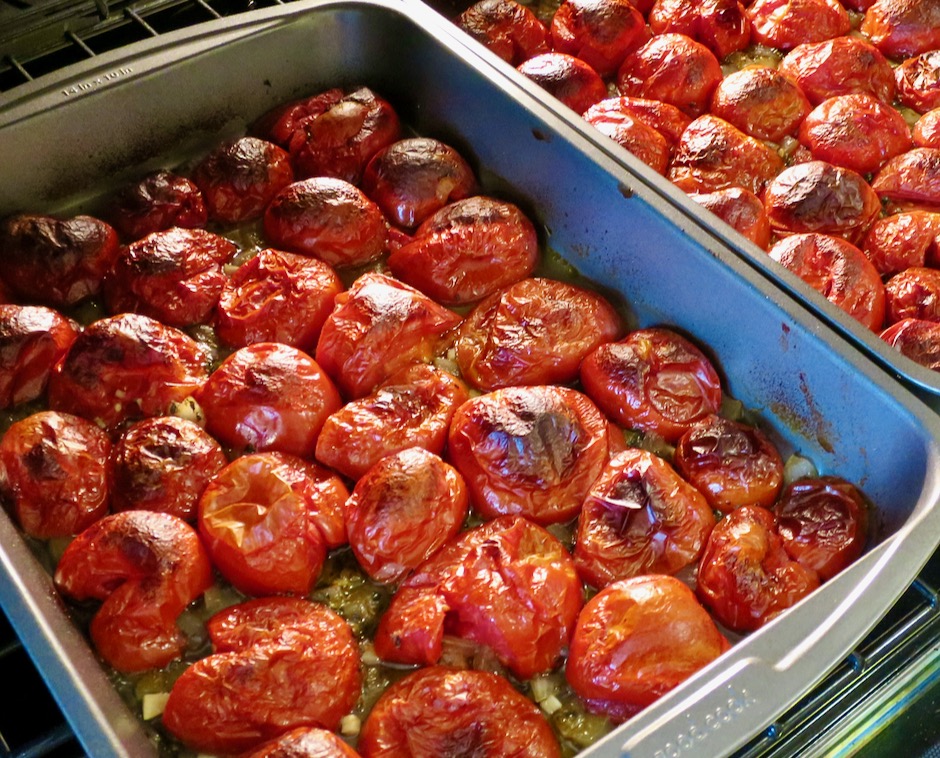
Roasted Tomatoes

Roasted Tomatoes

The onions and herbs smell divine as the tomatoes roast.

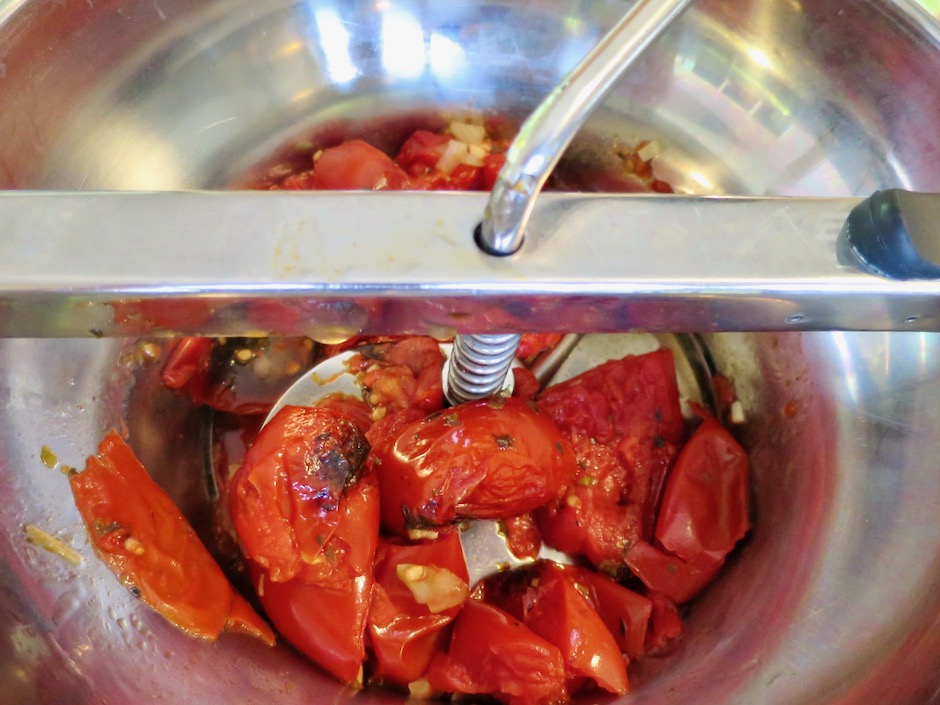
Food Milling Tomatoes

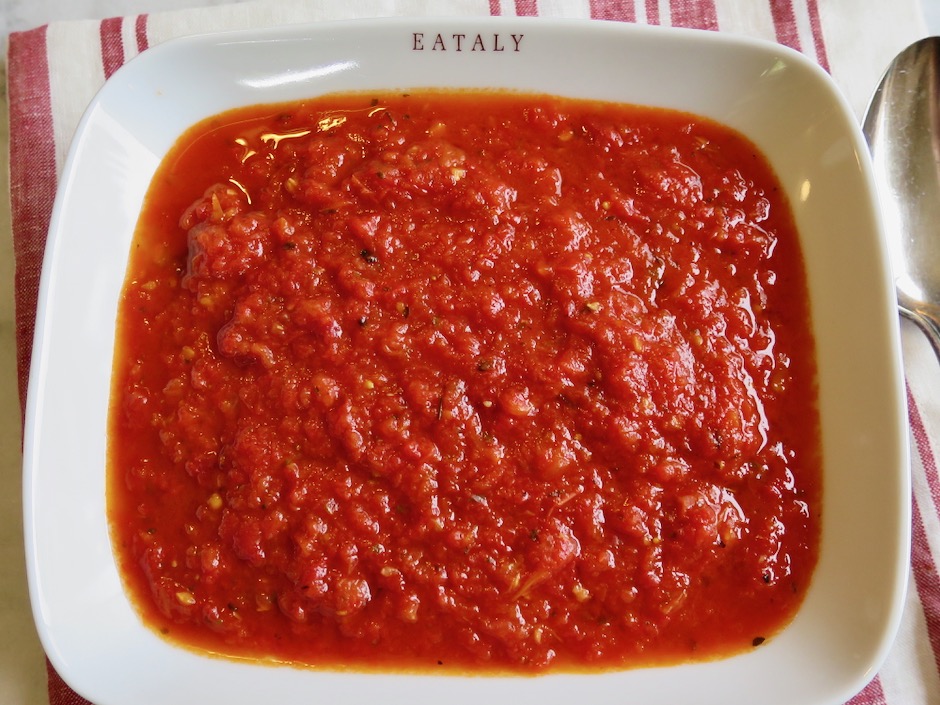
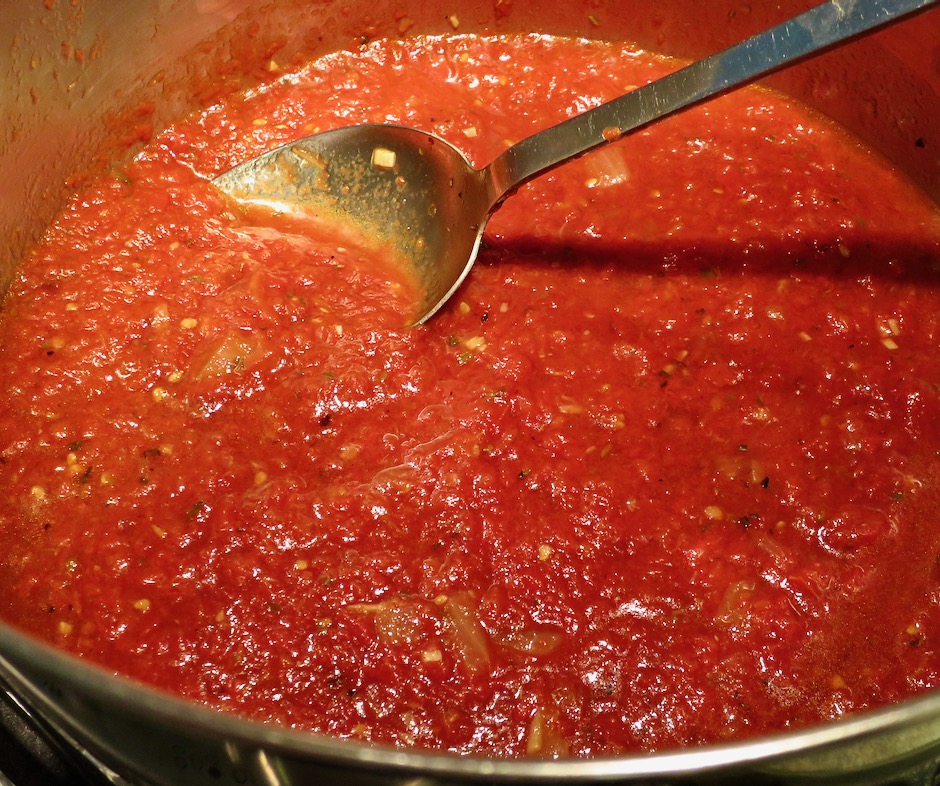
The fastest and easiest way to remove the tomato skins is with a food mill.  Place a large pot under the food mill and process the tomatoes in batches.  If you don’t have a food mill, pinch off the skins then pulse the tomatoes a few times in a food processor.  Try to keep the sauce a little on the chunky side.  If you process the tomatoes too much, you will end up having to reduce the sauce quite a bit as it will be much thinner.
Water Bath Safe Canned Roasted Tomato Sauce

Water Bath Canned Roasted Tomato Sauce

Water Bath Safe Canned Roasted Tomato Sauce
 
Adapted from Jami Boys recipe
Author:
Serves: About 10 cups
Ingredients
  • 10 pounds meaty tomatoes (I used what we had growing in our garden; Early Girl and Katana)
  • 1½ cups diced onions
  • 2 - 3 large garlic cloves, finely chopped
  • 2 tablespoons extra virgin olive oil
  • 1 - 2 teaspoons balsamic vinegar (optional)
  • 3 teaspoons canning salt (or fine sea salt)
  • 2½ teaspoons dried oregano
  • 2 teaspoons dried basil
  • 1 teaspoon dried marjoram
  • ½ teaspoon freshly ground black pepper
  • citric acid (essential for canning safety): ¼ teaspoon per 16 ounce (pint) jar, ⅛ teaspoon per 8 ounce (1/2 pint) jar
Preparation
  1. Special equipment: Water bath canner, pint and/or half pint jars, lids and rings, 2 large roasting pans 14x10-inches, food mill for removing tomato skins, food processor or immersion blender.
  2. Preheat the oven to 425 degrees. Have 2 large 14x10-inch baking pans ready.
  3. Halving all ingredients to work in two batches, divide olive oil, balsamic vinegar, onions, garlic, dry herbs, salt and pepper between the two pans.
  4. Wash tomatoes and remove the cores. Cut each tomato in half, or if very large, cut into fourths. Gently squeeze the tomatoes to remove as many of the seeds as possible. Place seeded tomatoes cut side down on top of the ingredients in the prepared pans.
  5. Roast for 35-40 minutes, until most of the skins are a bit puffed and browned. Remove pans from the oven and let cool a bit. Transfer the tomatoes in batches to your food mill with a large pot underneath collecting the tomatoes and their juices. Using the large hole disk, process the tomatoes so the skins are left behind. Continue with all of the roasted tomatoes. Be sure to add all of the remaining pan juices and solids as well.
  6. You may keep the sauce chunky or pulse a few times with a food processor or an immersion blender to get to your desired consistency. If you do not have a food mill, pinch off the skins once the tomatoes are cool enough and pulse tomatoes in a food processor (just a few times for a nice thick sauce). Taste and adjust seasonings, adding more dried herbs or salt if needed. If the sauce is very thick, you may not need to reduce it. If you prefer a thicker sauce, bring sauce to a boil over medium-high heat, then lower the heat and simmer until sauce thickens. This could take anywhere from 20 - 45 minutes depending upon the type of tomatoes used. The tomato sauce must be hot before ladling into the jars.
  7. Prepare a water bath canner, wash jars and lids. Place clean jars into canner and bring to a simmer. Important safety step: Once jars are hot, remove all jars from the canner and add citric acid to each jar before continuing. Ladle hot tomato sauce into the hot jars one at a time, leaving ½-inch headspace.
  8. Wipe rims, attach lids and secure rings just finger tight. Place all jars back into the canner. Cover and bring to a boil. Once water is boiling process for 35 minutes. At the end of 35 minutes, turn off heat and let jars sit for 5 more minutes. Then remove jars to a cooling rack or towel-lined surface and let cool for 24 hours. Remove rings, check seals, label and store for 18 months. (The newer version of lids are good for 18 months). ***Do not replace dried herbs with fresh herbs. Using fresh herbs will change the pH (acidity)
 

Beef, Dinner, Pork, Recipes, Sauces, Smoker

Smoked Cheesy Barbecue Meatballs

February 18, 2019

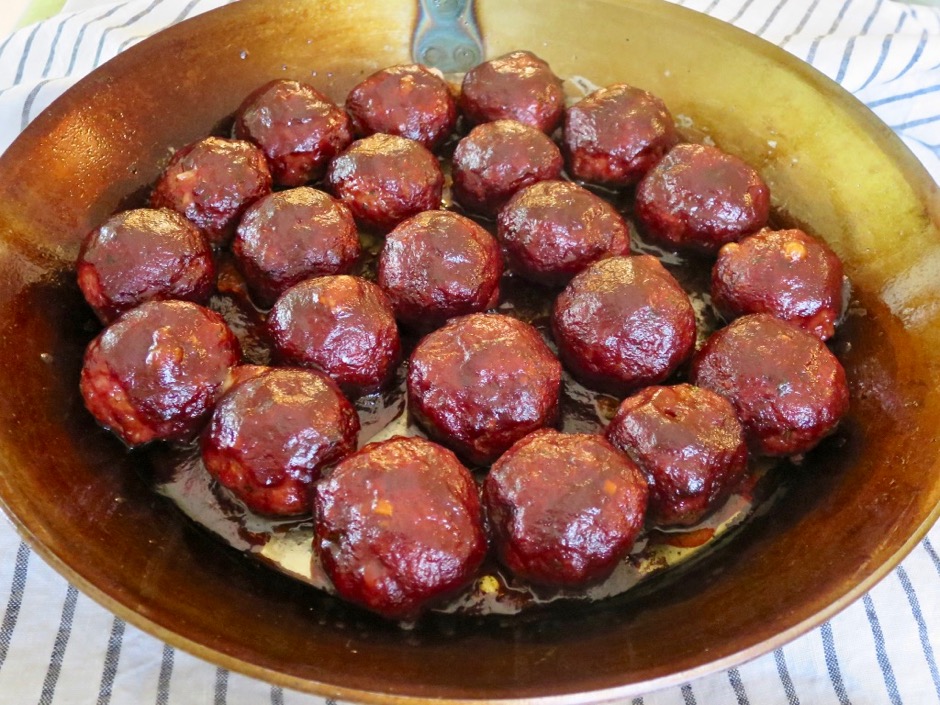
Smoked Cheesy Barbecue Meatballs

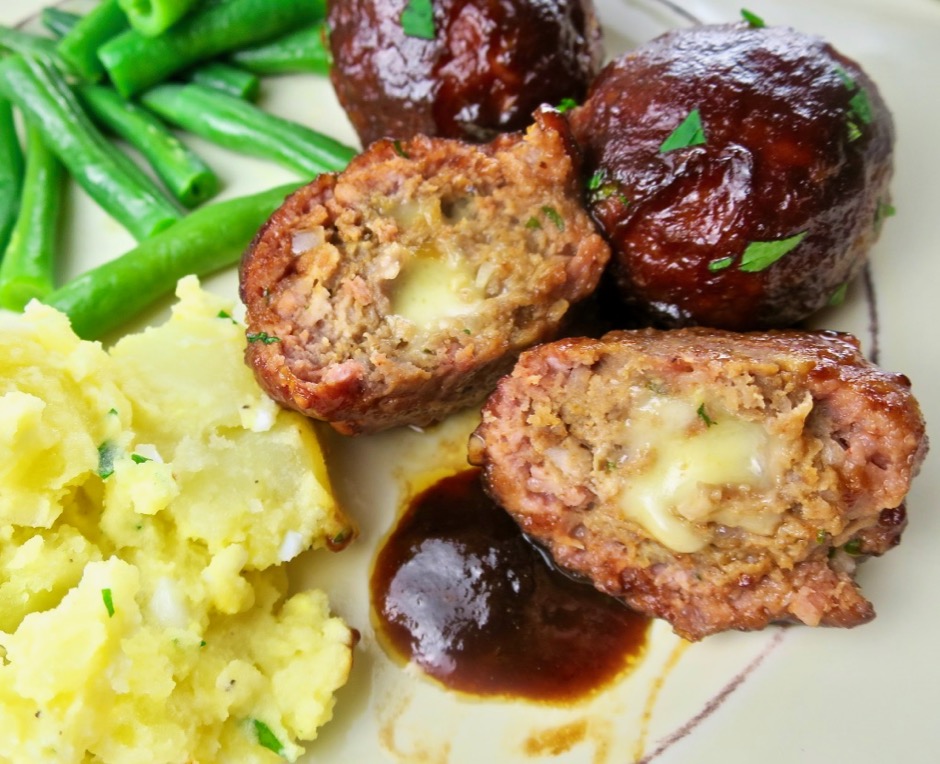
To say we love meatballs would be an understatement.  Whether tinkering with old recipes or trying new ones, meatballs are always a treat.  This recipe falls in the middle: old and new together.  I adapted this recipe from Vindulge.  I have made smoked meatballs before with great success.  But these smoked barbecue meatballs are more complex.  The centers are filled with just the right amount of pepper jack cheese that makes for a wonderful surprise when you cut into them.  They are delicious served with a side of potato salad or mac and cheese. I can imagine they would also be excellent served with grilled polenta or piled on top of a garlic toasted baguette.

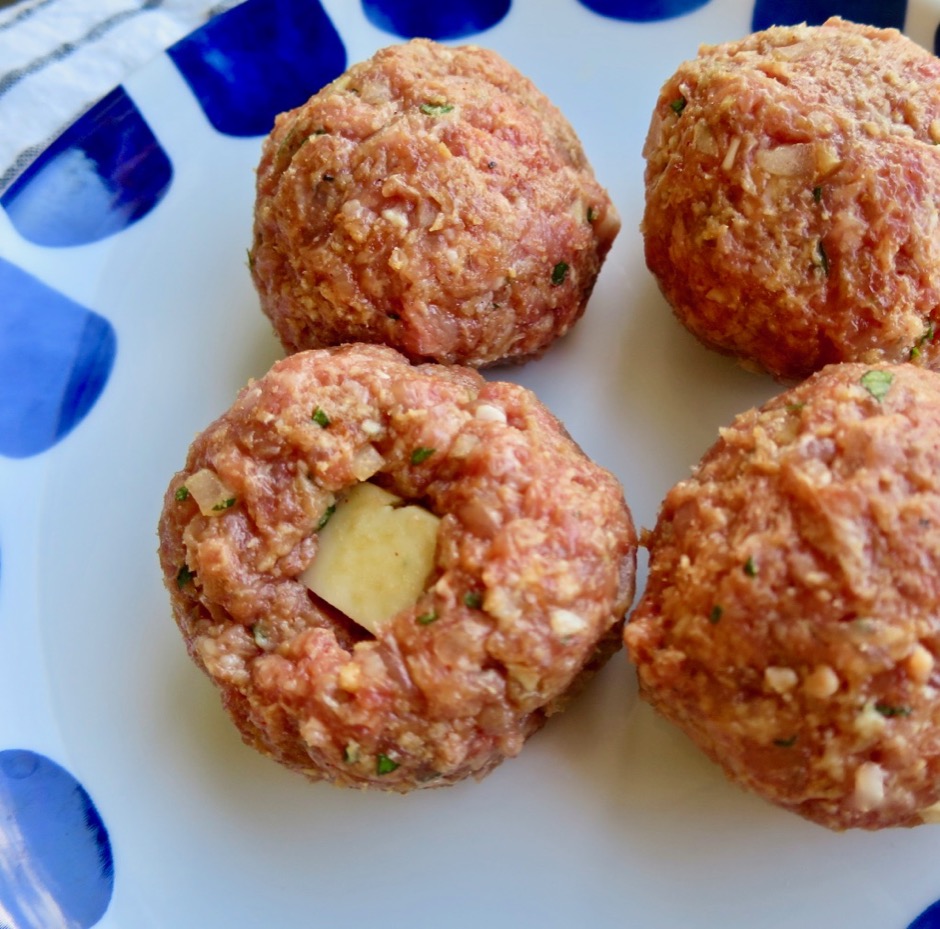
Stuffed with Pepper Jack Cheese & Rolled Into Balls

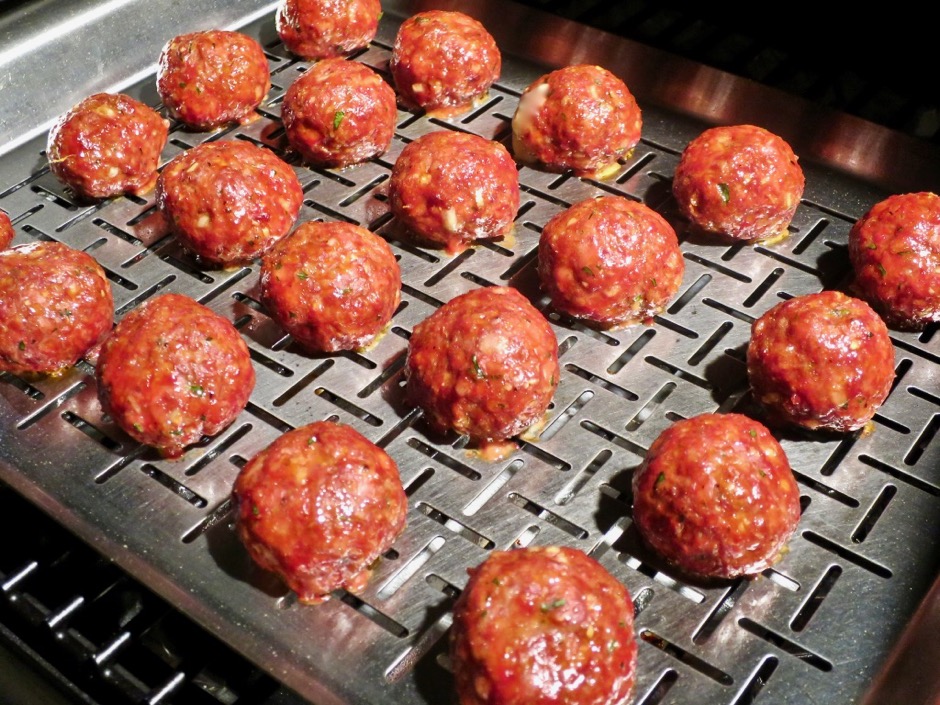
Once you have your meatballs prepped, there is little left to do but patiently wait for them to smoke, which takes about 2 hours.  These meatballs are particularly tender and flavorful due to the little bit of cheese in the center.  Use any good quality cheese that melts nicely.  Pepper jack is my first choice, but mozzarella or cheddar would also be tasty.

Smoking the Meatballs

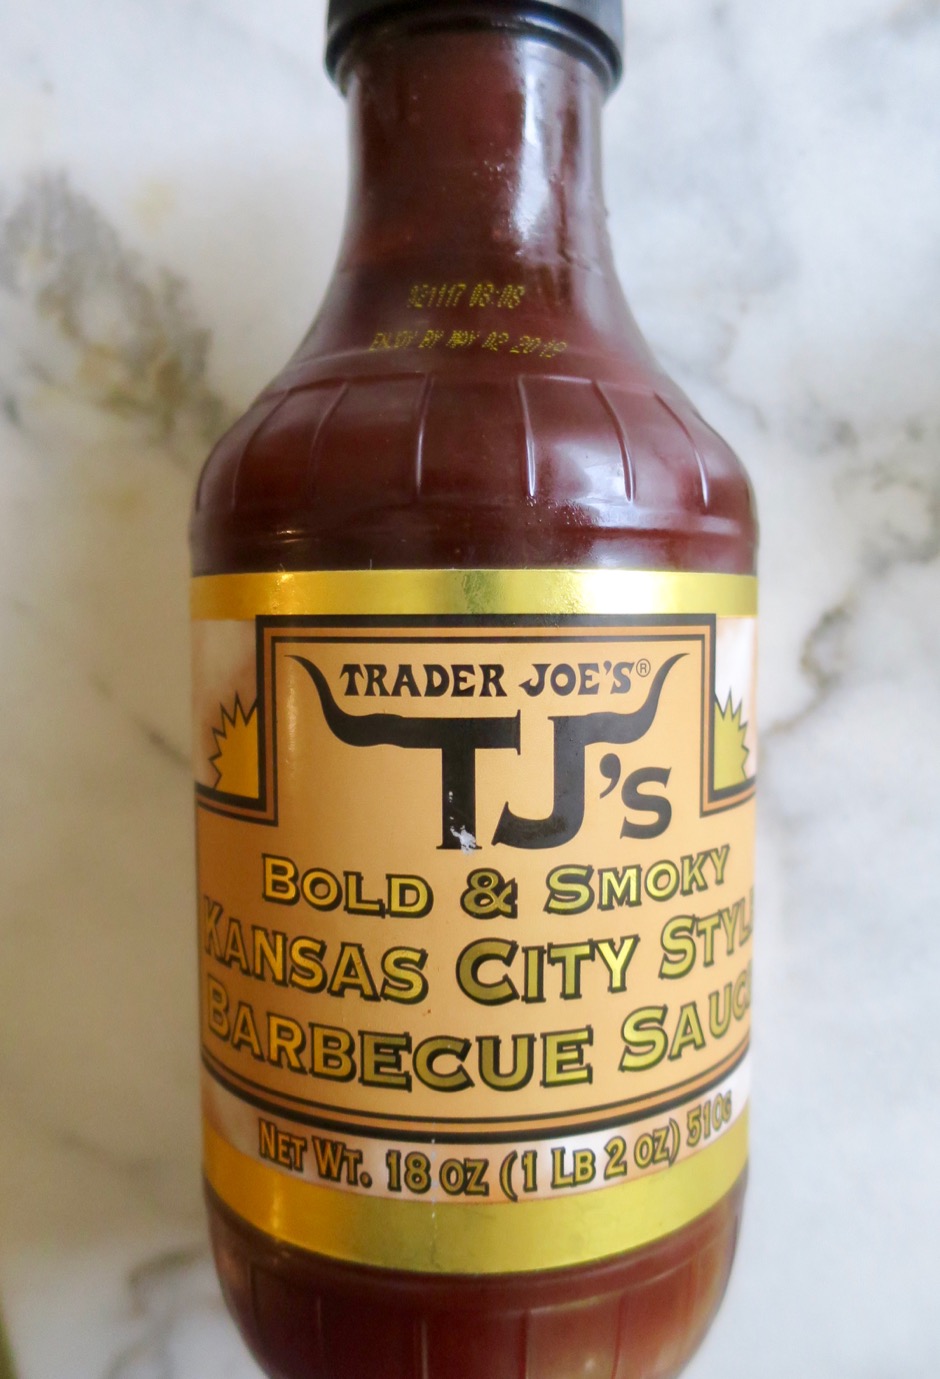
Tasty Barbecue Sauce

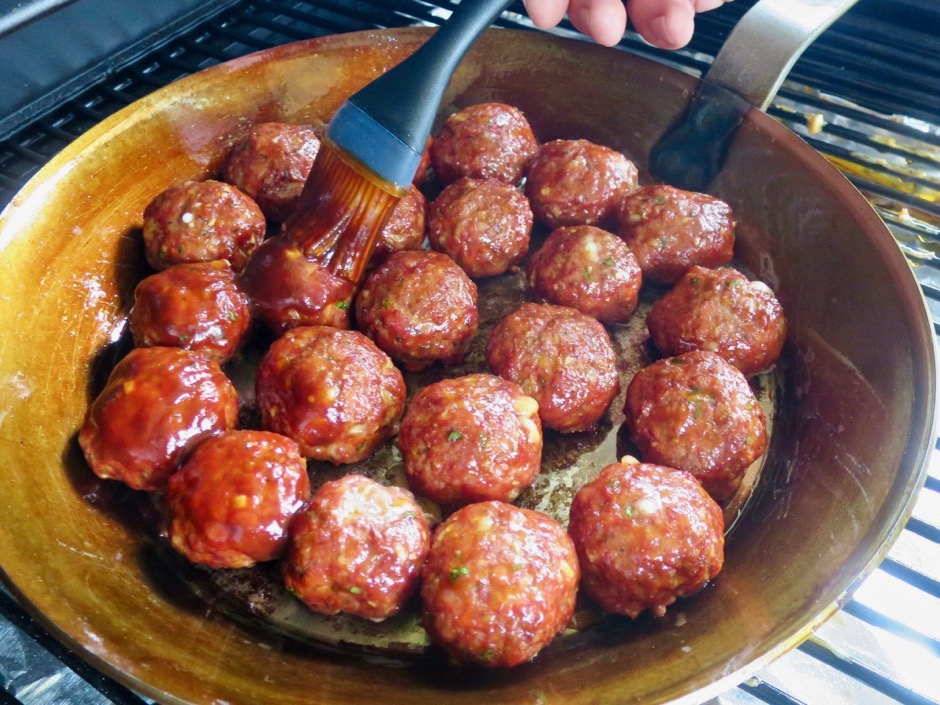
We don’t have TJ’s in Hawaii so whenever I’m in San Francisco I pick up a few items to bring back home with me.  I love the flavor of their Bold & Smoky Kansas City Style barbecue sauce.  Brush or drizzle the sauce over the smoked meatballs then send them back to the smoker for another 30 minutes.  You could also warm up the sauce and brush it on the meatballs once they are done smoking.


Brushing Barbecue Sauce on Smoked Meatballs


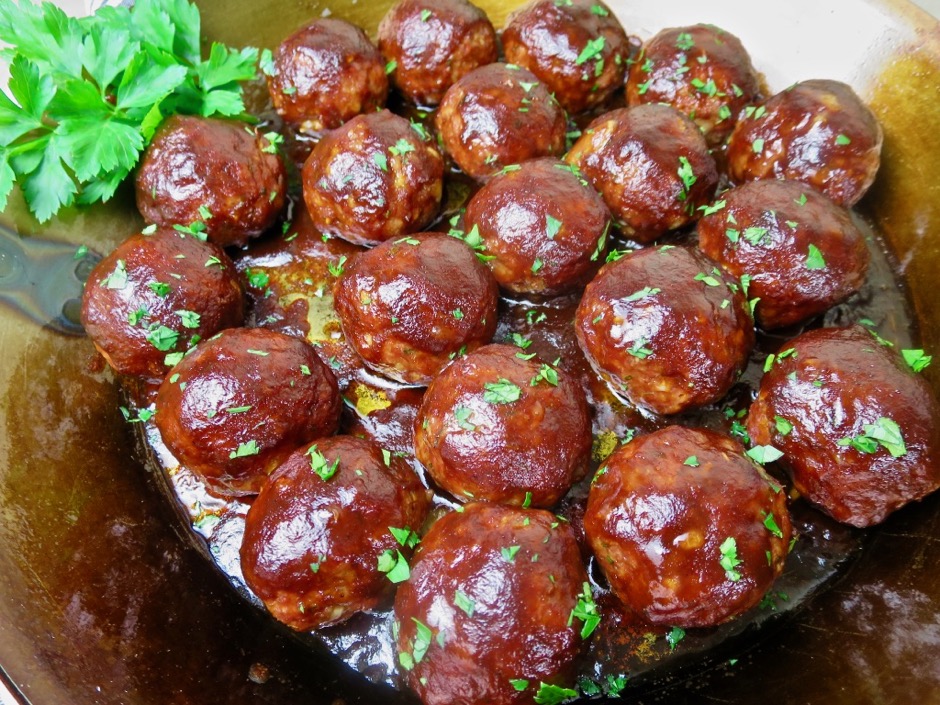
Smoked Cheesy Barbecue Meatballs

Very tender and flavorful meatballs served with eggy potato salad and green beans.

Smoked Cheesy Barbecue Meatballs


Smoked Cheesy Barbecue Meatballs
 
Cook time
Total time
 
Recipe adapted from Vindulge blog
Author:
Serves: 22-24 meatballs
Ingredients
  • 1 pound ground chuck
  • ⅓ pound ground pork
  • ¼ cup fine panko
  • ¼ scant cup milk
  • 1 tablespoon of your favorite dry rub or see below*
  • 1 teaspoon kosher salt
  • ½ teaspoon dried thyme
  • 2 heaping teaspoons finely chopped parsley
  • ¼ cup finely chopped onion
  • 2 garlic cloves, minced
  • 1 tablespoon Worcestershire sauce
  • 1 large egg, lightly beaten
  • 5 pepper jack cheese sticks, cut into 5 even pieces
  • 1 cup barbecue sauce
  • *dry rub ingredients (save the leftovers for more meatballs or grilled chicken)
  • ½ cup brown sugar
  • ¼ cup paprika
  • 2 teaspoons freshly ground coarse black pepper
  • 2 teaspoons mild chili powder
  • 1½ teaspoons onion powder
  • 1½ teaspoons garlic powder
  • ¼ - ½ teaspoon cayenne pepper
  • 1 tablespoon kosher salt
Preparation
  1. Preheat your smoker to 225 degrees.
  2. Combine panko with milk in a small bowl. Stir and set aside.
  3. In a large bowl mix ground chuck and ground pork together with two large forks. I find this keeps the meat from getting dense and tough. Add softened panko and all the other ingredients to the bowl except the cheese and barbecue sauce. Mix gently to ensure all ingredients are well distributed.
  4. Divide the meat into golf ball sized portions. You should end up with 22-24 pieces. Gently form each piece into a ball and make a small indentation in the center for the cheese. Pinch the meat together around the cheese and gently re-roll into a ball if needed. Do your best to make a tight seal around the cheese. Some of the cheese may seep out as the meatballs smoke but don't worry, they will be just fine.
  5. Place meatballs on a smoker tray or rack. Smoke for about 1½ hours, or until the internal temperature reads 155 degrees. Once they are 155 degrees, remove the meatballs to a heat proof pan (cast iron, stainless steel, or carbon steel pans work great). Pour or brush barbecue sauce over the meatballs and return to the smoker. Raise the temperature up to 275 degrees. The meatballs are done when they reach 165 degrees. Total time in the smoker is about 2 hours. Serve right away with your favorite side dishes.


Appetizers, Breakfast, Eggs, Recipes, Sandwiches, Sauces, Veggies

Pimento Cheese

July 2, 2018

Pimento Cheese Appetizer

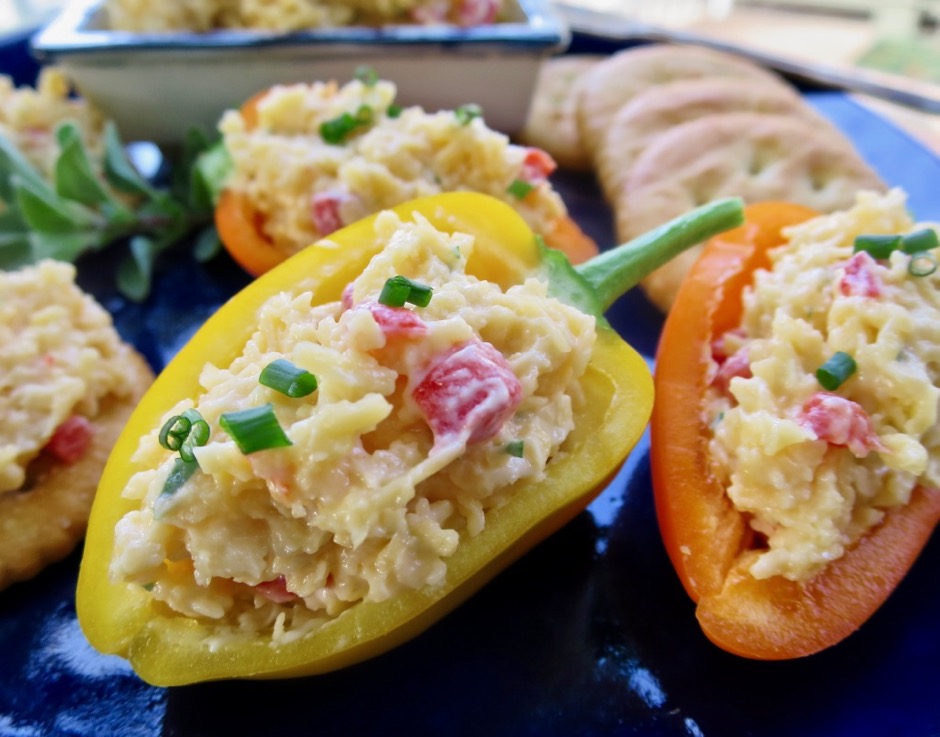
Pimento cheese is a divine dish, known in the American South as Carolina caviar, Southern pâté or caviar of the South.  There are numerous ways to enjoy it whether it’s right out of the bowl spread on crackers and crunchy vegetables, or melted and drizzled over scrambled eggs or nachos.  Pimento cheese makes a wonderful grilled cheese sandwich and I can’t imagine a better spread on a warm, buttery biscuit or over a grilled burger.

Pimentos

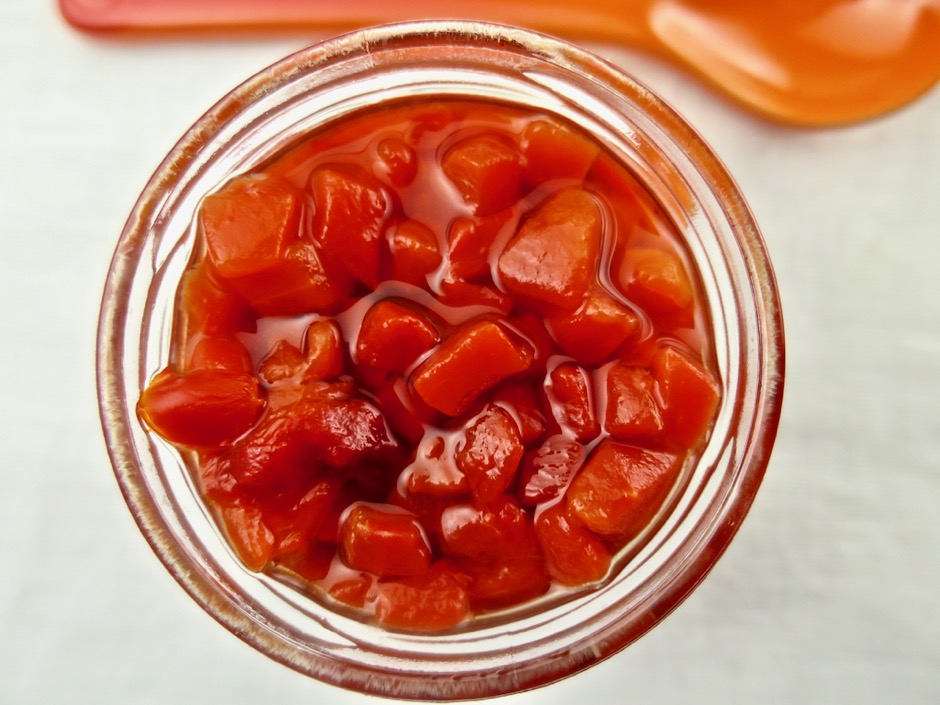
Jarred pimentos are mild, sweet and vibrantly red.

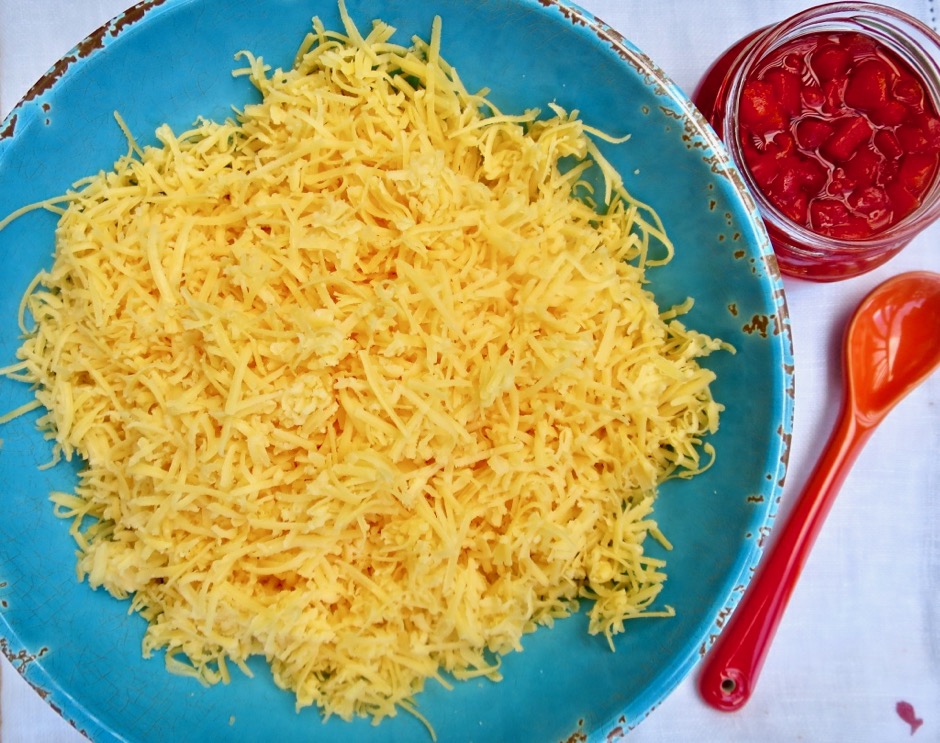
Grated Sharp Cheddar

Cheddar cheese, mayonnaise, and pimentos are the three main ingredients.  To add a little depth to my pimento cheese, I add a bit of Dijon mustard and Worcestershire, and sometimes a dash of cayenne pepper.  Louisiana-style hot sauce is another common addition. Next time I will add some of our homemade pickled jalapeños. Freshly grated cheese is a must for this recipe.  Pre-grated cheese has added ingredients to prevent it from clumping and getting moldy.  These ingredients greatly affect its melting quality and taste.  So get out your grater, it will take just a few minutes if that, to grate a block of cheese.

Pimento Cheese Eggs Benedict

Melted pimento cheese makes a fabulous sauce for Eggs Benedict.  I also like to drizzle it over soft scrambled eggs.

Pimento Cheese Nachos

Nachos!  I came across the idea to use pimento cheese on nachos from South Carolina’s curiously named “Garden & Gun” web site (named after a 1970s Charleston disco called the Garden & Gun Club).  This turned out to be the best cheese sauce for nachos.  Once melted, it is easy to drizzle over the corn chips and other toppings.

Pimento Cheese Stuffed Baby Bell Peppers

Pimento Cheese
 
Author:
Ingredients
  • ½ cup mayonnaise (not light)
  • 1 teaspoon dry mustard, such as Coleman's
  • 1 teaspoon Dijon mustard
  • ½ teaspoon Worcestershire sauce
  • 2 tablespoons diced pimentos
  • 1½ teaspoons finely chopped parsley
  • 8 ounce block of sharp cheddar, finely shredded
Preparation
  1. Combine mayonnaise, dry mustard, Dijon, Worcestershire sauce, pimentos and parsley in a medium bowl. Stir in shredded cheddar cheese. Refrigerate pimento cheese in an airtight container until ready to use.
  2. Spread on crackers and vegetables such as cucumbers and bright peppers for a lively and delicious party appetizer. To use over eggs or nachos, heat pimento cheese in a small saucepan over low heat, whisking constantly so that the mixture does not separate.
  3. Pimento cheese will keep for 5 days or so.


Dinner, Italian, Lactose Free, Pork, Recipes, Sauces

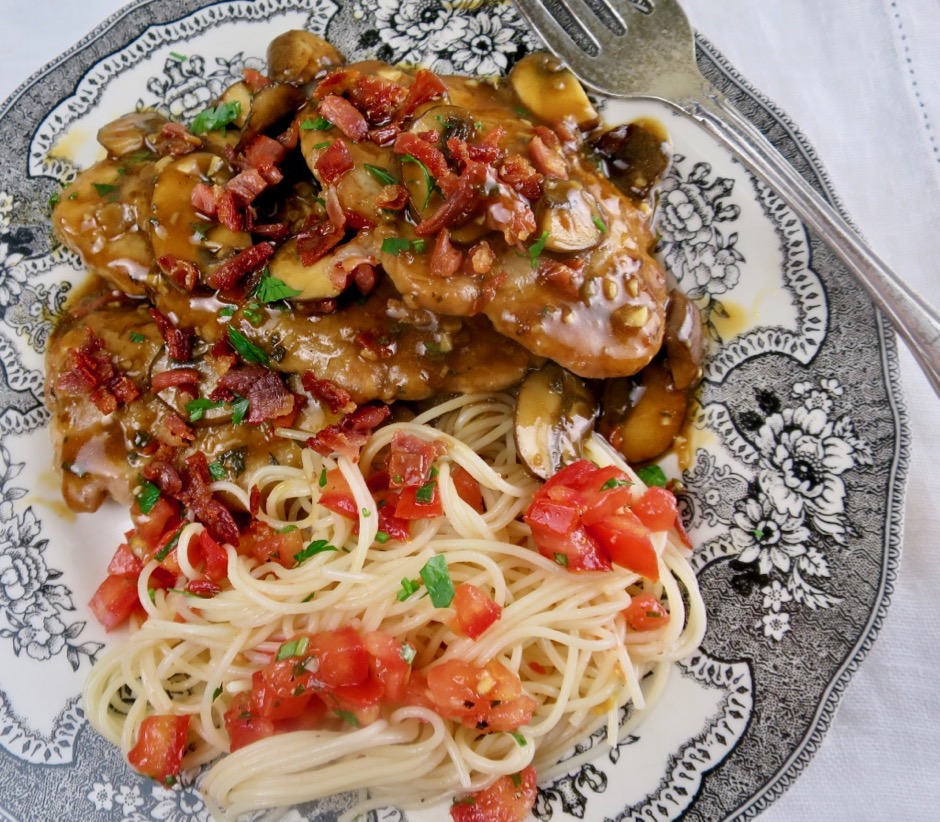
Pork Tenderloin Saltimbocca

May 27, 2018

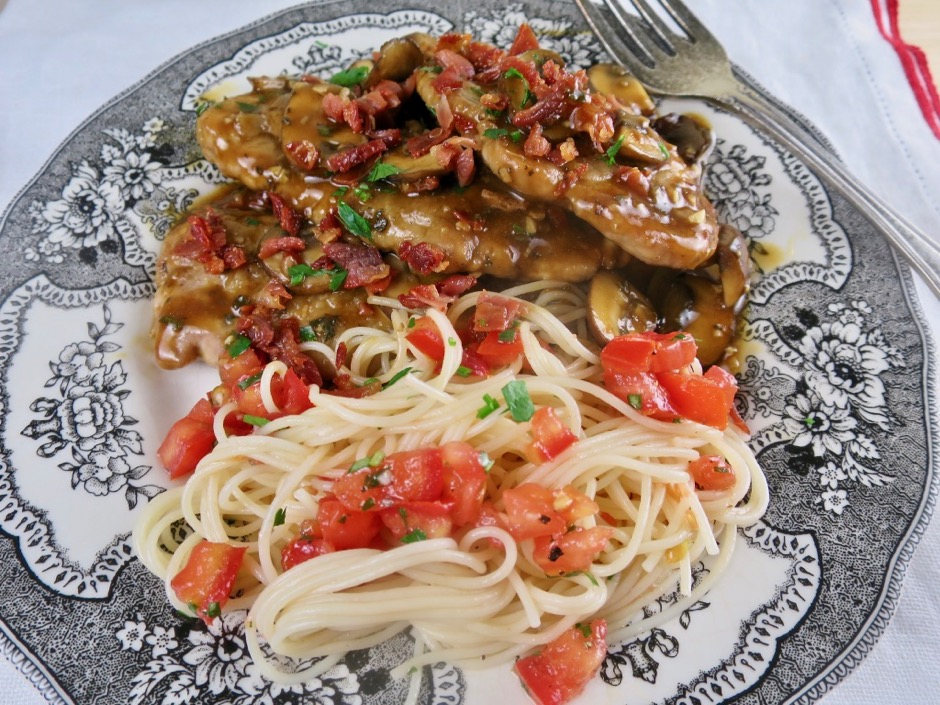
Pork Tenderloin Saltimbocca

Saltimbocca is typically made with veal, however, pork tenderloin (and chicken breasts) is easier to find, especially here on Maui.  Pork tenderloin is our choice for this “deconstructed” version of the dish as it is lean, tender, and lends itself well to flavorful sauces such as this one with sherry, aromatic sage, garlic, and a crispy, salty prosciutto topping.  A simple fresh tomato pasta pairs well with the saltimbocca though roasted potatoes or rice pilaf would be equally delicious.

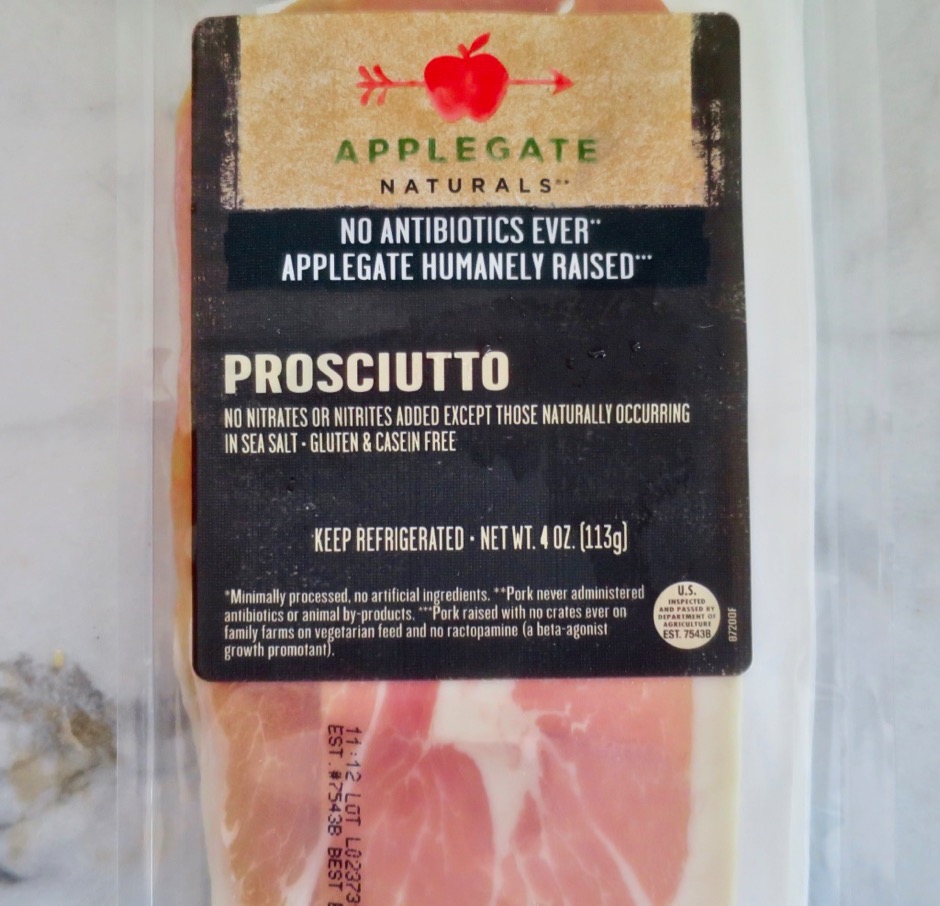
Prosciutto

Pre-cut packaged prosciutto is easy to work with and fries up nice and crispy.  If you prefer to order from your deli counter, ask them to cut the prosciutto into thin slices.  If the prosciutto is cut too thick, it won’t be very crispy once fried.  Note: don’t skimp on the crispy prosciutto!

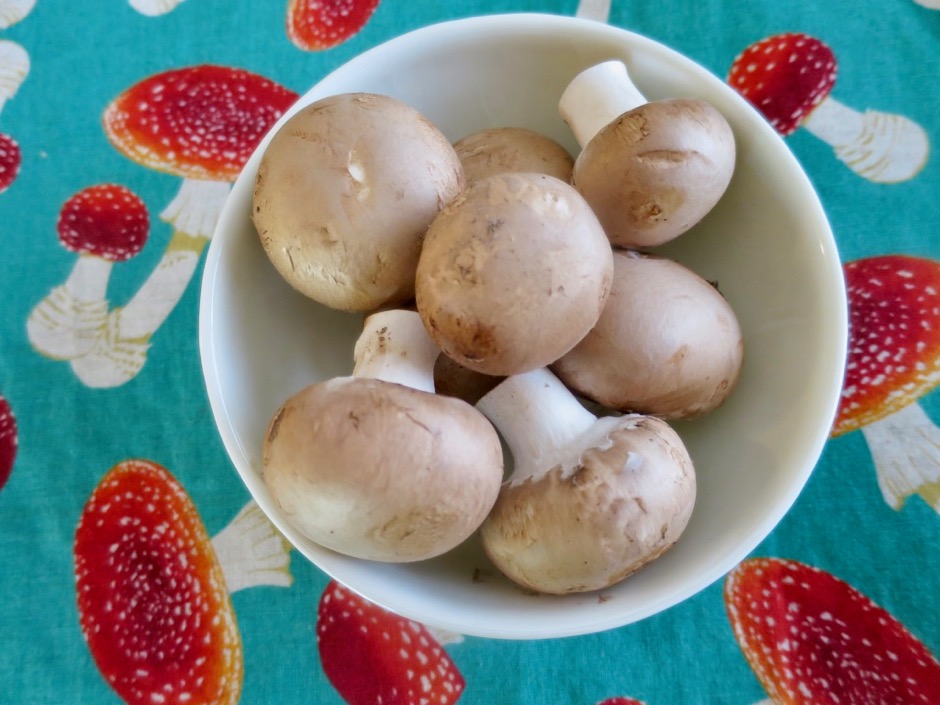
Cremini Mushrooms

Creminis are one of my favorite mushrooms. They are flavorful, meaty and do not expel much liquid once they are cooked.  White button mushrooms can be substituted if you are unable to find creminis.

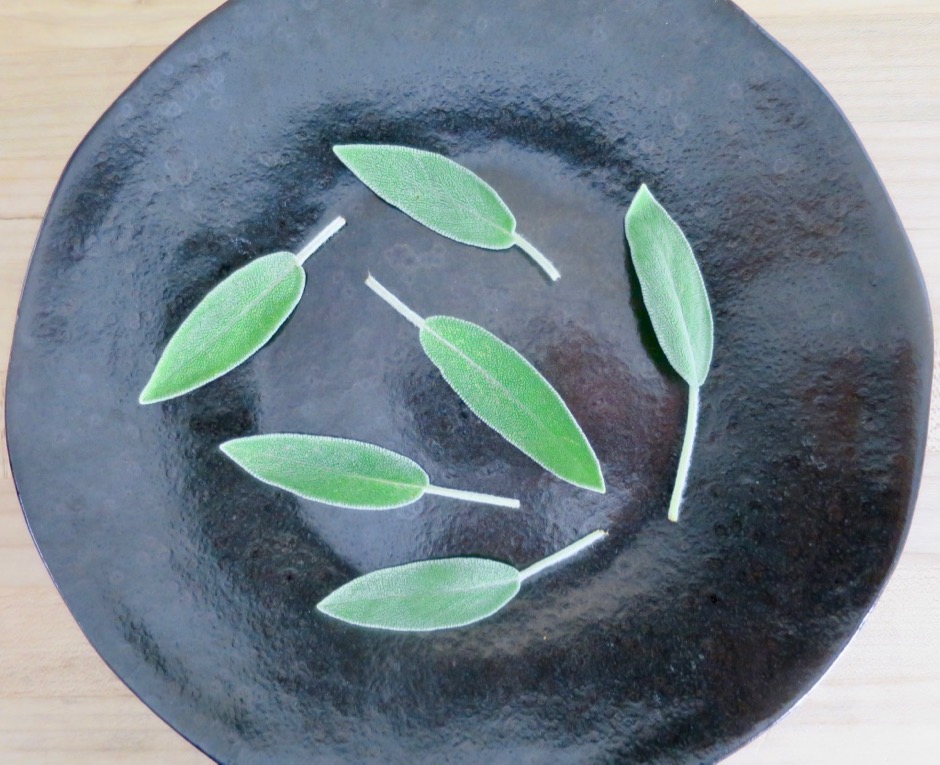
Fresh Sage Leaves

Use fresh sage leaves for this recipe.  Most markets sell sage in small bags year round.

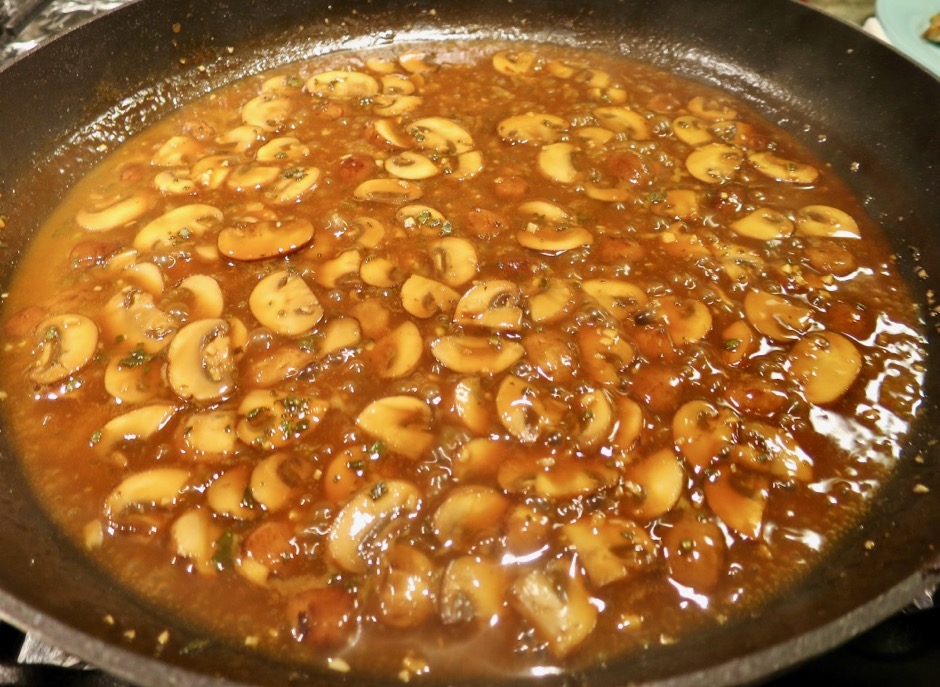
Sherry & Mushroom Sauce

The secret ingredient to this luxurious sauce, or any brown sauce for that matter, is demi-glace.  I always have a jar on hand from Williams Sonoma. Once I open the jar, I divvy it up into mini plastic containers then freeze them to use as needed.  The demi-glace is essential for making this sauce especially rich and flavorful.

Pork Tenderloin Saltimbocca

Pork Tenderloin Saltimbocca
 
Author:
Recipe type: Adapted from Cuisine at Home
Serves: 2
Ingredients
  • 12 ounces pork tenderloin, trimmed
  • kosher salt
  • freshly ground black pepper
  • all-purpose flour
  • 2 tablespoons extra virgin olive oil, divided
  • 1½ ounces prosciutto, diced
  • 8 ounces cremini mushrooms, sliced
  • 1 tablespoon minced fresh garlic
  • 1 tablespoon veal or beef demi glace (whisked with a few tablespoons of the chicken broth then added back to the remainder of the broth)
  • ½ cup dry sherry (or Marsala)
  • ½ cup chicken broth
  • 1 tablespoon Earth Balance Buttery Sticks (or unsalted butter)
  • 1 tablespoon minced fresh sage
Preparation
  1. Slice pork tenderloin into ¾-inch thick pieces. Pound each piece into ⅓-inch thick medallions. Season with salt and pepper and dredge in flour. Set aside.
  2. In a large skillet heat a teaspoon of olive oil over medium heat. Add prosciutto and cook until crisp, about 4 minutes; transfer to a paper-towel-lined plate. Add a tablespoon of olive oil to the pan and cook pork medallions until browned, about 2 minutes per side, or until the internal temperature reads 145 degrees with an instant read thermometer. Transfer to a plate and cover with foil to keep warm.
  3. Add 2 teaspoons olive oil to the pan and sauté mushrooms until they are nicely browned, about 5 minutes. Add garlic; cook 1 minute.
  4. Deglaze pan with sherry and broth mixture, scraping up any browned bits; bring to a boil. Turn heat down to medium-heat (a good simmer) and cook sauce until the liquid is reduced by half, about 4-5 minutes.
  5. Stir in butter and sage. Return pork medallions to the sauce and warm gently. Transfer pork and sauce to a serving dish and top with crispy prosciutto.


Dinner, Fish, Lactose Free, Recipes, Sauces

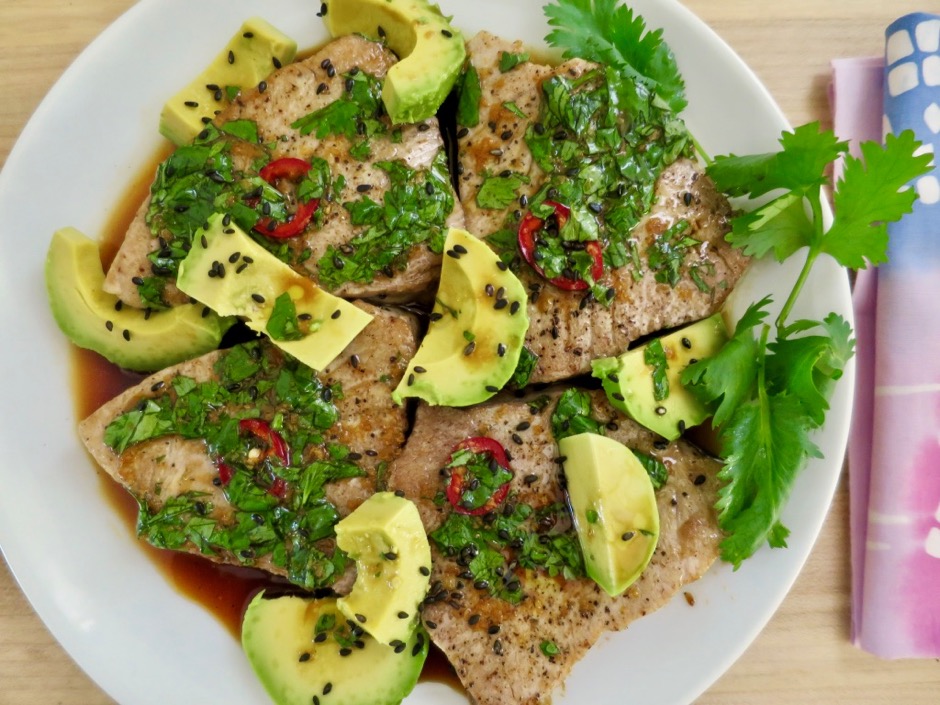
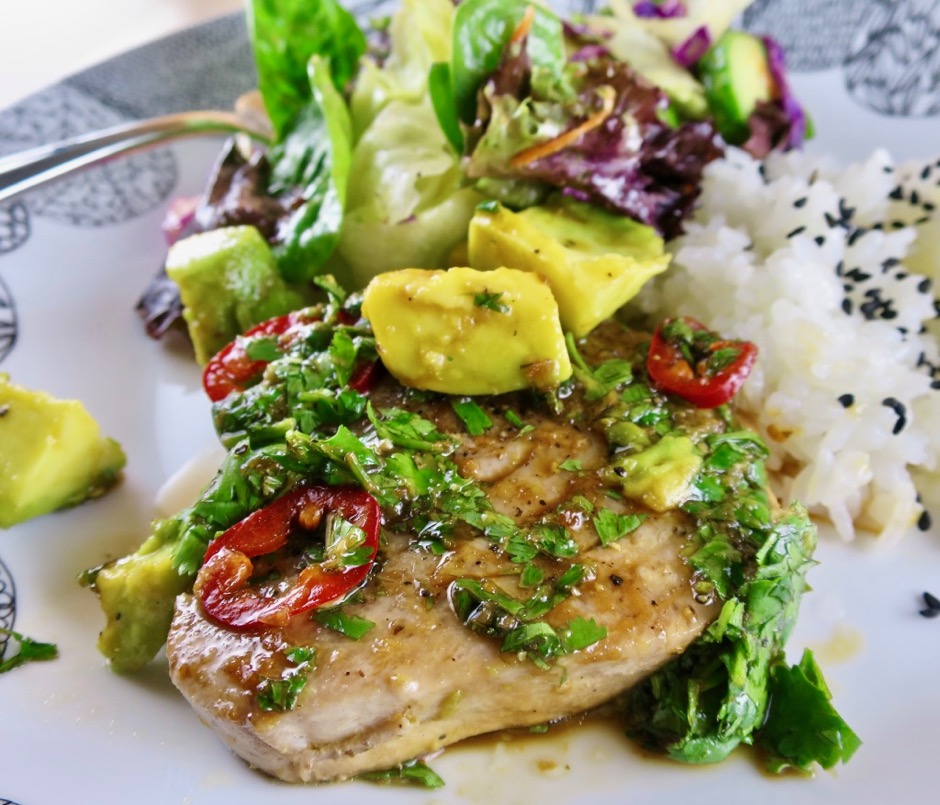
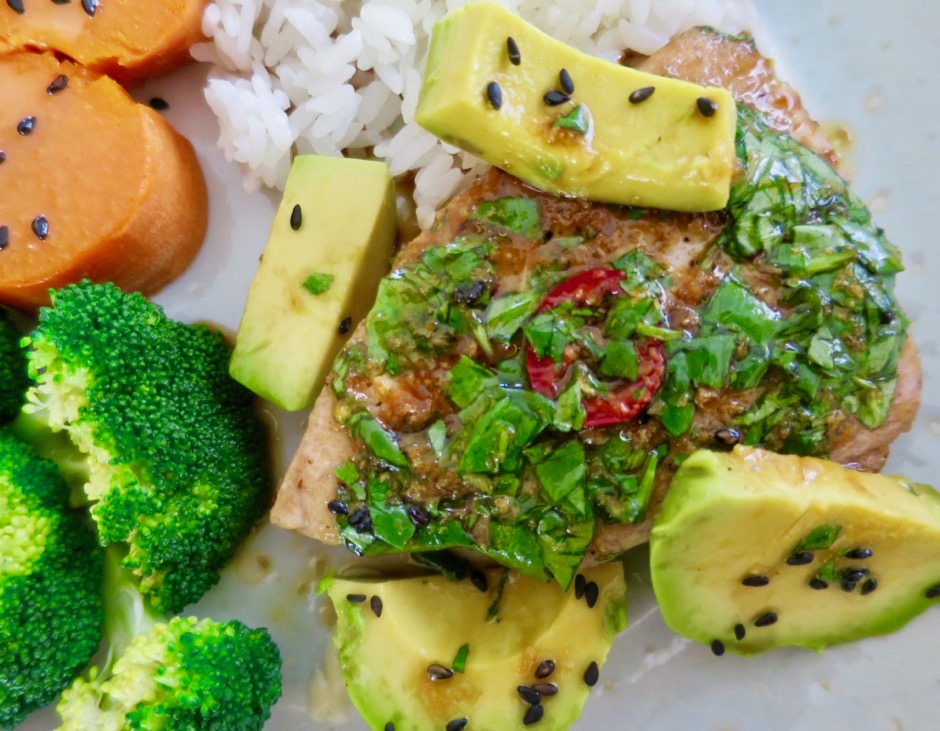
Pan-Seared Tuna with Avocado, Soy, Ginger & Lime

August 28, 2017

Pan-Seared Tuna with Avocado, Soy, Ginger & Lime

Finding good fresh ahi tuna has been a hit and miss endeavor until I discovered Oki’s Fish Market in the Kahului Foodland market. They always seem to have the freshest fish on a regular basis. So whenever I’m in the area, I’ll stop by to pick up a nice piece of ahi for dinner.  This Tyler Florence recipe caught my attention for a few reasons.  It’s quick, tasty, and uses lots of cilantro and avocado, two of my favorite ingredients.  Now those of you who are cringing about cilantro, don’t give up yet.  You could certainly switch out the cilantro and substitute it with a smaller amount of chives or parsley.

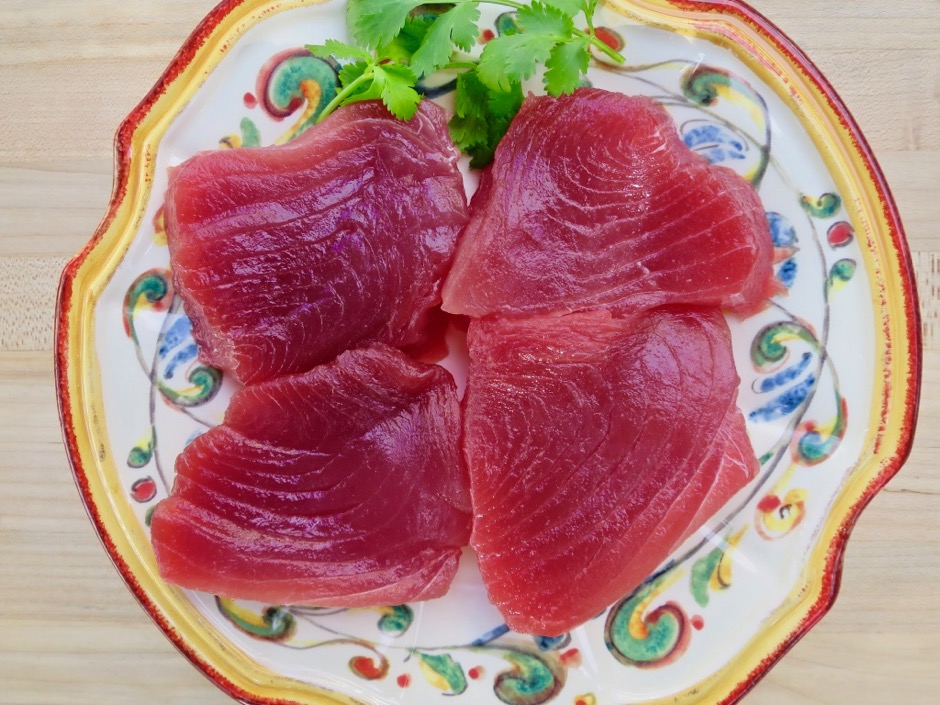
Ahi tuna steaks

I cut the ahi into 1-inch thick steaks but you could certainly cut yours thicker if you prefer to.

Lime, Jalapeno, Cilantro

The original recipe says to use the juice of two limes however that can mean 2 tablespoons or up to 4 tablespoons in my case.  So try the 2 1/2 tablespoons noted in the recipe first, then add more if you want to.

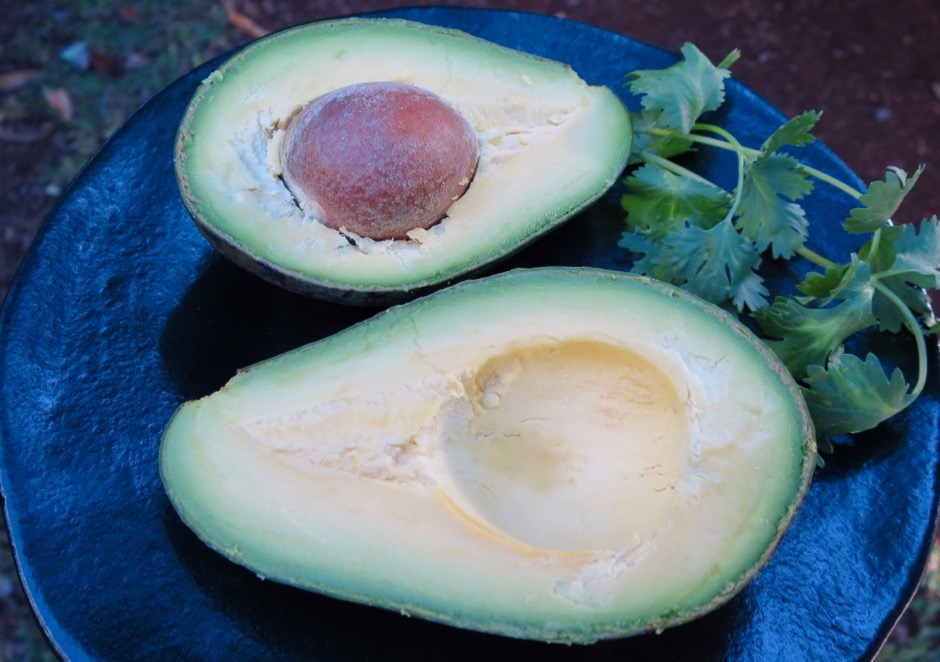
Avocado

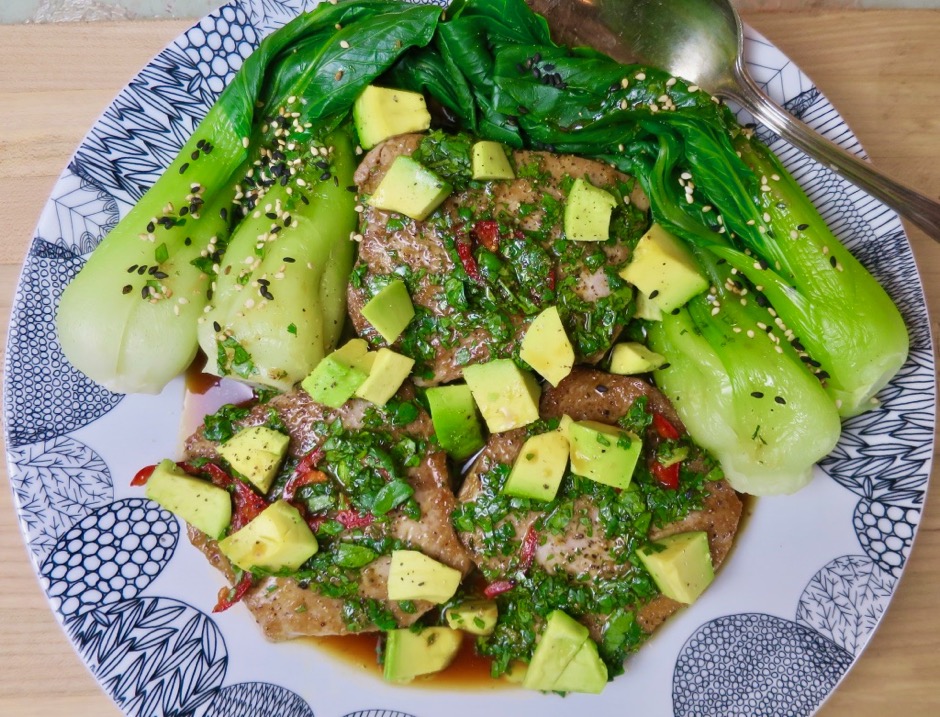
Pan-Seared Tuna with Avocado, Soy, Ginger & Lime

Sometimes I serve steamed bok choy with the ahi, and other times a green salad or baked sweet potatoes and broccoli.  I always have a pot of Japanese white rice to go along with this dish.

If you prefer a little spicier sauce, use a jalapeño instead of the Fresno pepper.  I like the burst of red color from the Fresno however I have seen red jalapeños in the markets on occasion.

Pan-Seared Tuna with Avocado, Soy, Ginger & Lime

Pan-Seared Tuna with Avocado, Soy, Ginger & Lime
 
Adapted from Tyler Florence's recipe
Author:
Serves: 4
Ingredients
  • ¾ cup lightly packed cilantro leaves, finely chopped
  • 1 Fresno pepper, thinly sliced (or ½ jalapeño)
  • 2 teaspoons grated fresh ginger
  • 1 teaspoon grated garlic
  • 2½ tablespoons freshly squeezed lime juice
  • 4 tablespoons soy sauce
  • 2 teaspoons granulated sugar
  • 3 tablespoons extra virgin olive oil, divided
  • 4 ahi (tuna) steaks, about 6 ounces each
  • kosher salt and freshly ground black pepper
  • 2 small or 1 large avocado, peeled, pitted, cut into small chunks
Preparation
  1. Combine the cilantro, Fresno pepper slices, ginger, garlic, lime juice, soy sauce, sugar, and 2 tablespoons of the olive oil in a small bowl. Stir ingredients until well incorporated. Set aside while you prepare the ahi.
  2. Place a skillet over medium-high heat and coat with remaining 1 tablespoon of olive oil. Season ahi steaks generously with kosher salt and black pepper. Sear ahi for about 1 minute on each side to form a light crust. The cooking time will depend on how thick your ahi is cut, and whether you prefer your fish to be medium-rare or more well done. Drizzle a few tablespoons of the sauce over the ahi steaks to coat the fish (once you start searing on side #2). Transfer the ahi to a platter. Top with avocado and drizzle remaining sauce over the fish.


Appetizers, Dressing, Eggs, Lactose Free, Recipes, Salad, Sauces, Vegetarian, Veggies

Nobis Dressing

August 17, 2016

Nobis Dressing

San Francisco is a city that offers superb dining options.  We look forward to returning to our favorite restaurants year after year. While always visiting our favorite places, we enjoy trying new restaurants as well. On our last visit we tried Volta, a French restaurant with Scandinavian influences.  We went for lunch, and it was just divine so we changed our plans for that night and returned to Volta for dinner.  It’s a gorgeous restaurant with a menu that features many appealing dishes.  I chose an endive & watercress salad with nobis dressing as my starter.  The nobis dressing was absolutely delicious: so much so, I contacted the owner Umberto Gibin and asked for the recipe.  He was gracious enough to have his chef pare down the ingredients for me.

Soft Boiled Egg

The ingredient that makes this recipe stand out is the egg.  Poached or soft boiled, either preparation works well.  The egg adds depth and richness to the dressing, along with the tangy mustard, vinegar, lemon juice, chives, and a hint of garlic.  It reminds me of a Caesar salad dressing but without the cheese and anchovies. It’s so good I can eat it right out of the jar.

Poached Egg

Endive Salad with Nobis Dressing

Nobis dressing on endive salad with watercress and radishes.

Grilled Artichokes with Nobis Dressing

Nobis dressing for dipping grilled artichokes.  It’s also delicious drizzled over steamed asparagus.

Nobis Dressing
 
Adapted from Volta restaurant recipe
Author:
Serves: ¾ cup
Ingredients
  • 1 soft boiled or poached egg
  • 1 tablespoon Dijon mustard
  • 1 tablespoon + 1 teaspoon red wine vinegar
  • 1 tablespoon fresh lemon juice
  • ⅛ teaspoon garlic (use a microplane)
  • ⅓ cup + 1 tablespoon canola oil
  • 1 tablespoon chopped chives
  • ¼ teaspoon kosher salt
  • freshly ground white or black pepper
Preparation
  1. Place soft boiled egg in a 1-pint mason jar or comparable sized container that your immersion blender fits snugly in.
  2. Add the other ingredients and blend with an immersion blender until dressing is thick and creamy, about 30 seconds. If you don't have an immersion blender use a small food processor or blender.
  3. Serve as a salad dressing, dipping sauce for artichokes, or drizzled over asparagus. I bet it would be delicious as a sauce for grilled or pan fried fish, or chicken.


Follow

Get every new post delivered to your Inbox

Join other followers: