Browsing Category

Rice Dishes

Dinner, Lactose Free, Recipes, Rice Dishes, Side Dishes, Vegan, Vegetarian

Saffron Rice with Barberries, Pistachio & Herbs

March 2, 2014

Saffron Rice with Barberries, Pistachio & HerbsUntil quite recently I had never heard of Yotam Ottolenghi, a cookbook author, chef, and owner of four restaurants in the UK. I happened to be looking at recipes on The Guardian’s web site and there I found Yotam’s weekly column and was intrigued by the many vibrant herbs and spices he used in his recipes.  Some of these ingredients cannot be found  on Maui, such as barberries.  Leave it to amazon.com to supply even the most obscure ingredients.

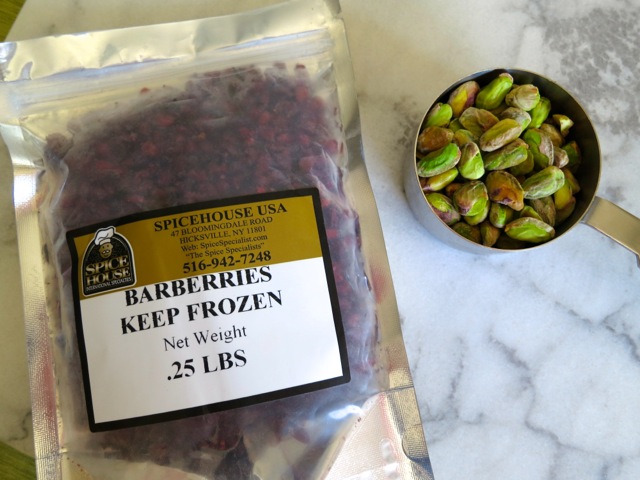
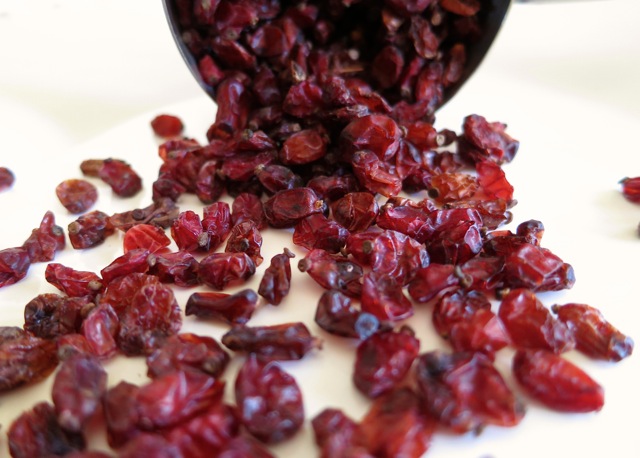
Barberries & PistachiosMy friend Shanna at Curls & Carrots surprised me with a gift of Yotam Ottolenghi & Sami Tamimi’s Jerusalem A Cookbook.  I came home from work one day to find a package sitting on my doorstep.  I can’t think of a better gift than a cookbook filled with interesting, flavorful, recipes and gorgeous photos.  Thank you Shanna.

BarberriesSweet-tart Iranian barberries.

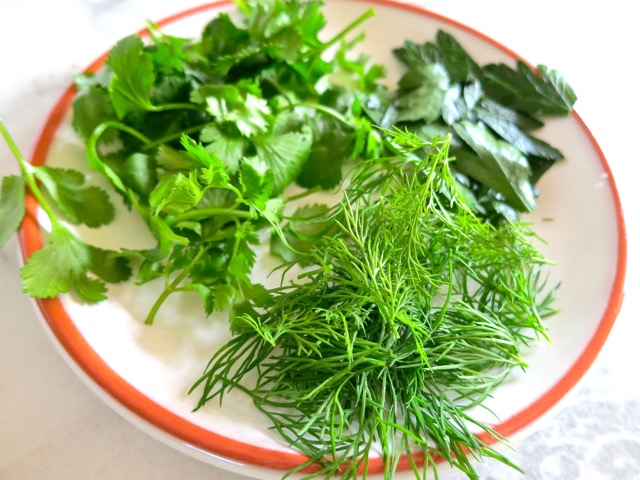
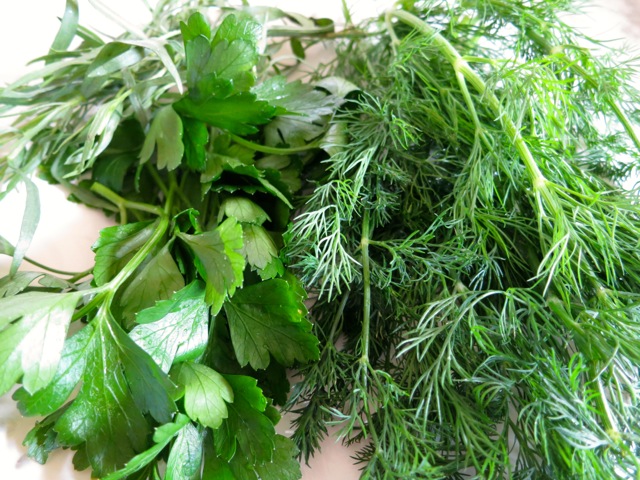
Tarragon, Parsley, DillI substituted Italian parsley for the chervil which I can never find here on Maui.  I would love to grow chervil however I hear it thrives best in cool climates (not Kihei, Maui).

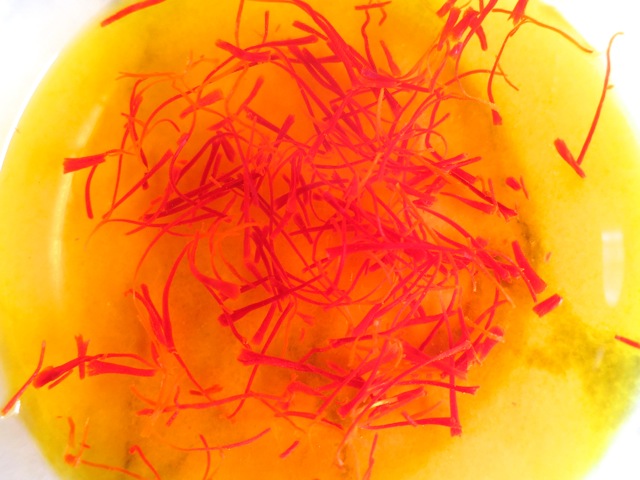
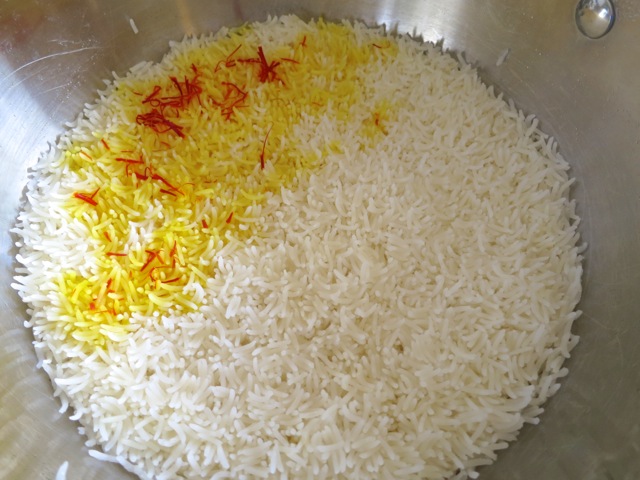
Saffron WaterSaffron water is poured over a portion of the cooked rice and will later be gently mixed in with the white rice, herbs, barberries and pistachios.

Saffron Water on Basmati Rice

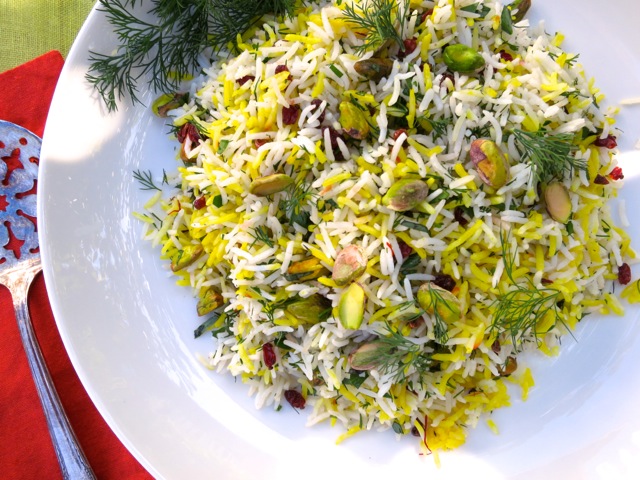
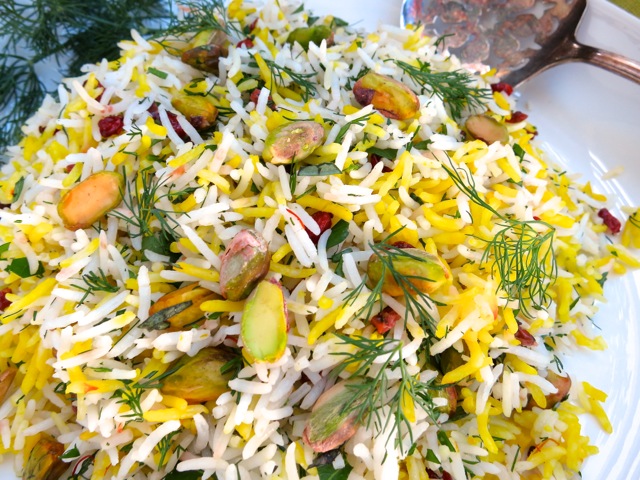
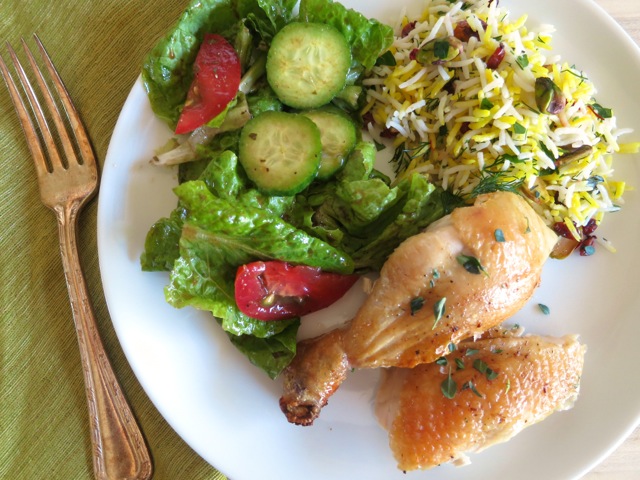
Saffron Rice with Barberries, Pistachio & HerbsSaffron rice is the perfect side dish for roasted chicken and a garden salad.

Saffron Rice with Roasted Chicken & Garden Salad

Saffron Rice with Barberries, Pistachio & Herbs

Adapted from Jerusalem A Cookbook

Serves 6

Ingredients

2 1/2 tablespoons unsalted butter (I used Earth Balance Buttery Sticks)

2 cups white basmati rice, rinsed under cold water and drained well

2 1/3 cups boiling water

1 teaspoon saffron threads, soaked in 3 tablespoons boiling water for 30 minutes

1/4 cup dried barberries, soaked for a few minutes in boiling water with a pinch of sugar

1 ounce dill, coarsely chopped

2/3 ounce chervil, or Italian parsley coarsely chopped

1/3 ounce tarragon, coarsely chopped

1/2 cup slivered or crushed pistachios, lightly toasted (salted or unsalted)

salt and freshly ground white pepper

Preparation

Melt the butter in a medium saucepan and stir in the rice, making sure the grains are well coated in butter.  Add the boiling water, 1 teaspoon salt and some white pepper.  Mix well, cover with a tightly fitting lid, and cook over very low heat for 15 minutes.  Don’t be tempted to uncover the pan, the rice needs to steam properly.

Remove the rice pan from the heat.  All the water will have even absorbed by the rice.  Pour saffron water over one side of the rice, covering about one-quarter of the surface and leaving the majority of it white.  Cover the pan immediately with a tea towel and reseal tightly with the lid.  Set aside for 5 – 10 minutes.

Use a large spoon to remove the white part of the rice into a large mixing bowl and fluff it up with a fork.  Drain the barberries and stir them in, followed by the herbs and most of the pistachios, leaving a few to garnish.  Mix well.  Fluff the saffron rice with a fork and gently fold it into the white rice.  Don’t over mix, you don’t want the white grains to be stained by the yellow.  Taste and adjust the seasoning.  Transfer the rice to a shallow serving bowl and scatter the remaining pistachios on top.  Serve warm or at room temperature.

*I found the pistachios can soften once mixed into the rice.  Add the pistachios just before serving the rice.

Dinner, Recipes, Rice Dishes, Side Dishes

Beautiful Tah Dig ~ Persian Rice

December 1, 2013

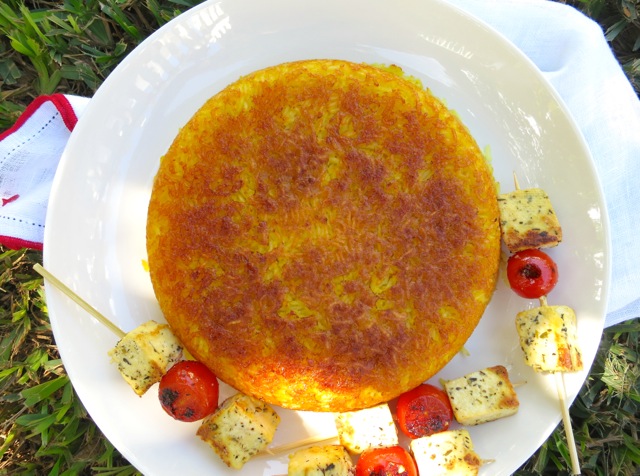
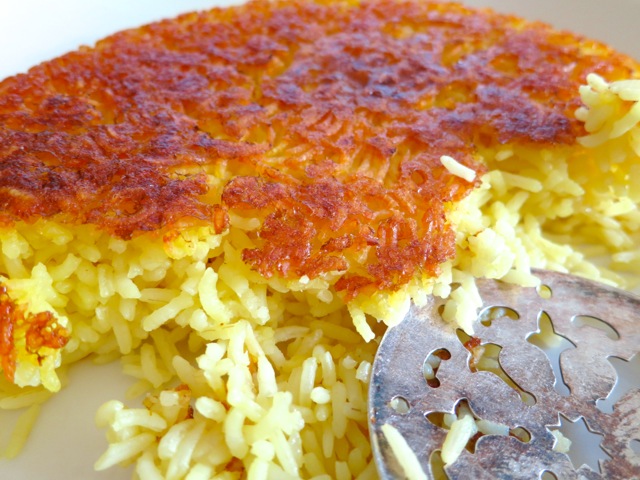
Tah DigI love rice.  Brown, white, short, medium and long grain, basmati, jasmine, arborio, wild rice (not technically rice).  Some of my favorite recipes are Sopa de Arroz, Japanese sushi rice, Korean bibimbap and now Tah Dig.  I found a recipe on the internet for Persian Jeweled Rice.  It was mesmerizing.  This colorful, gorgeous rice dish was added to my list of must try recipes.  This also led me to a rice recipe I had never heard of before, Tah Dig.  Shanna over at Curls & Carrots inquired about the stone bowls used in my bibimbap recipe.  She mentioned she had a Persian rice cooker that produces a crispy crust of rice just as the stone bowls do.  Persian rice cooker?  I had never heard of it before.

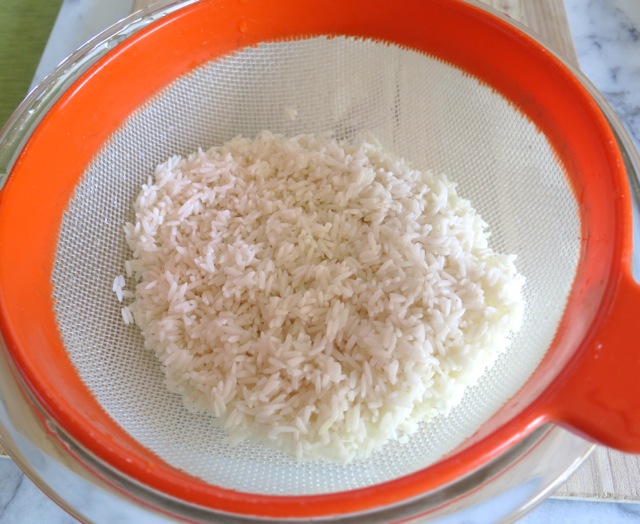
Basmati RiceMany thanks to Shanna for posting her Easy Shabbat Tah Dig recipe.  I could barely wait to try it.

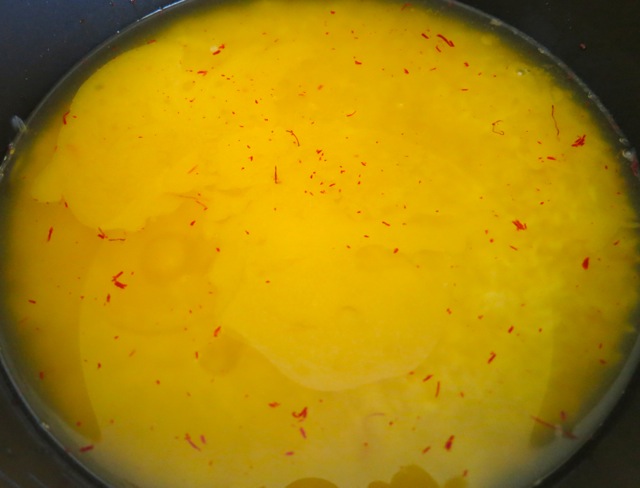
Rice Pot Tah DigThe golden color of the rice comes from a pinch of turmeric and beautiful saffron.

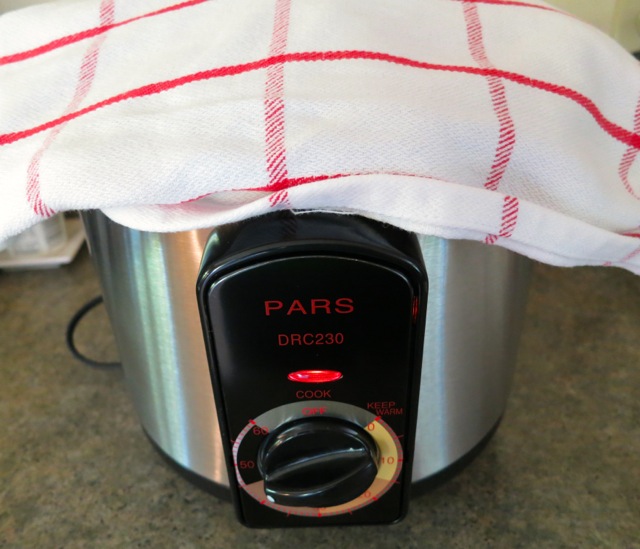
Persian Rice CookerI purchased my Pars Persian rice cooker on-line from Kalamala.  Their shipping fees are reasonable and they have excellent customer service.  Now to find space for another appliance….

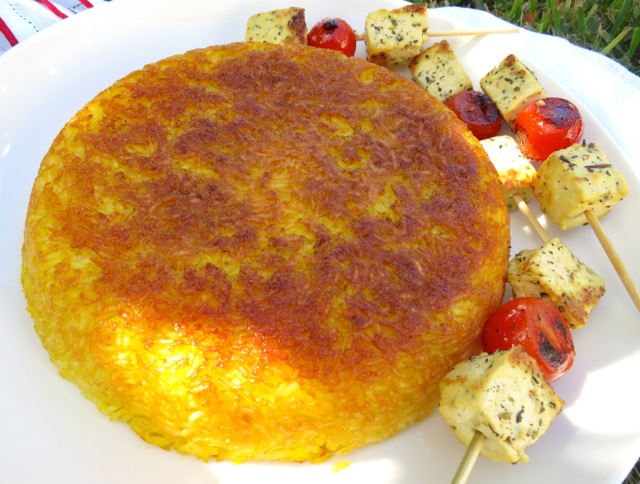
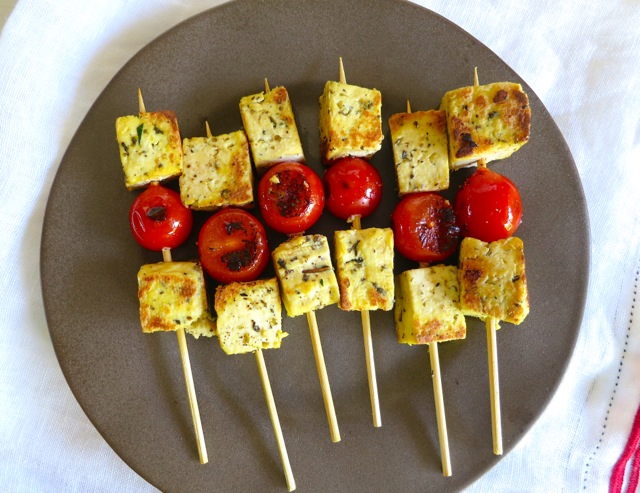
Tofu KebabI had some herb tofu in my refrigerator and quickly assembled the tofu on skewers with cherry tomatoes then briefly browned them in my grill pan.  Tofu kebabs!

Tah Dig with Kebobs

Tah Dig

Tah Dig ~ Persian Rice

Adapted from Shanna’s recipe at Curls & Carrots (Mahalo Shanna!)

Ingredients

1 1/2 cups white basmati rice

1 14.5 ounce can chicken broth

1 tablespoon Earth Balance butter, melted  (or real butter for those who are not lactose intolerant)

1/2 teaspoon salt

a pinch of turmeric

a few pinches of saffron, crumbled

Preparation

Soak rice in a bowl of water for 1 hour.  Rinse the rice until the water runs clear, drain well.

Place the rice, chicken broth, butter, salt, turmeric and saffron in a Persian, non-stick rice cooker.  Give the ingredients a stir.

Place the cover on the rice cooker and cover it with a kitchen towel.  Cook the rice for 45 minutes.

Turn off the rice cooker and let rice sit, undisturbed for at 15 minutes.  Invert rice on a platter and serve.
Dinner, Eggs, Korean, Lactose Free, Recipes, Rice Dishes

Bibimbap with Korean Style Hamburger Patties

June 28, 2013

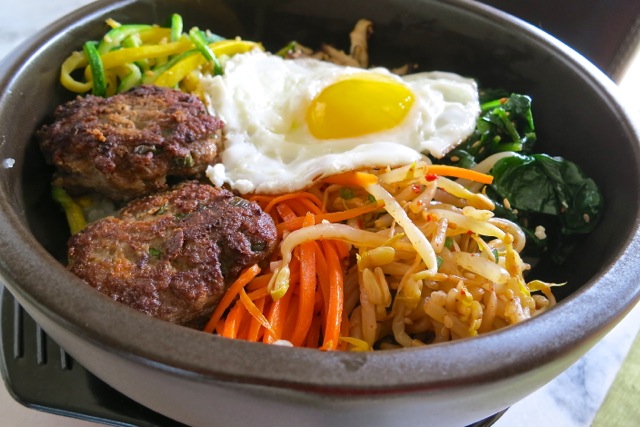
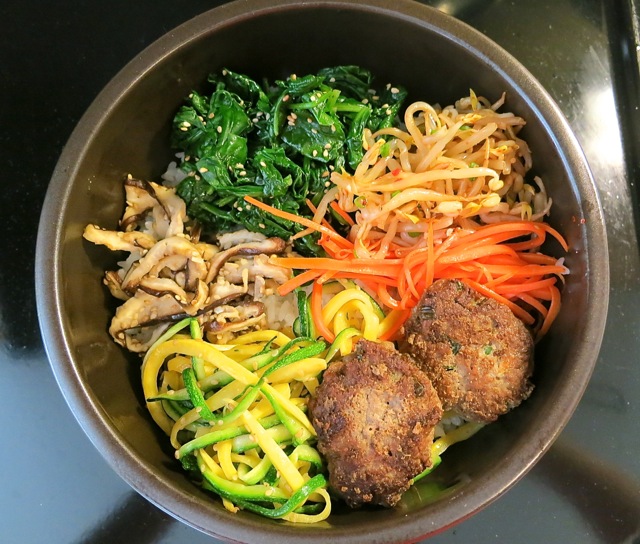
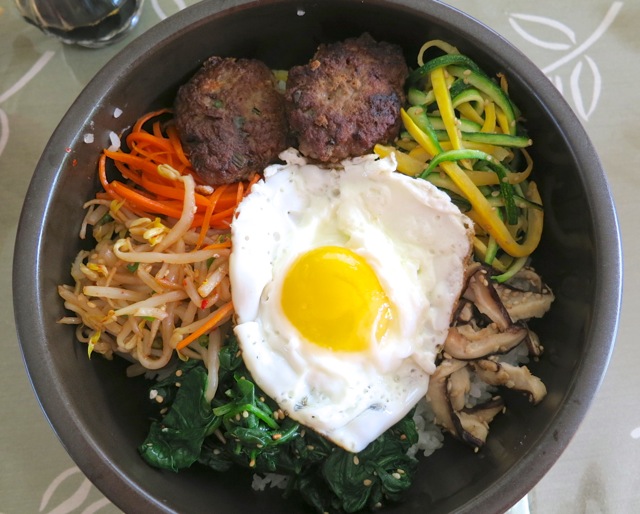
BibimbapLike so many others I am in love with Bibimbap.  It really is the perfect meal.  When heating a stone bowl directly on the stove top the rice on the bottom of the bowl gets crunchy and is utterly delectable.  Along with the colorful vegetables layered over the rice and savory Korean style patties this is beautiful dish.  And any meal with a fried egg is at the top of my list.
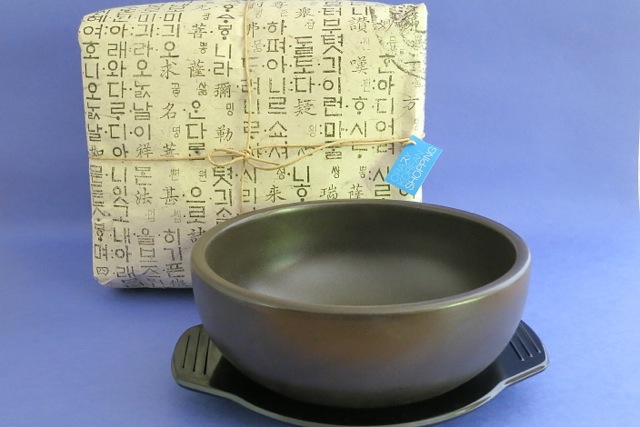
Dolsot BowlI had never eaten Bibimbap until a few months ago when I had lunch with a friend at a local restaurant here on Maui.  We decided to share the Bibimbap and a lemon grass chicken sandwich.  The sandwich was tasty, but the Bibimbap was a revelation! Once that stunning Bibimbap arrived at our table I think we both secretly wished we didn’t have to share it. I did not realize the rice on the bottom of the stone pot would be crispy.  It really made the dish stand out.  It was a real dilemma when we had to split the fried egg!  We vowed that if we ever shared a serving of Bibimbap again, we would order it with two fried eggs.  So as you can see above, I had to have my own Dolsot stone bowls so that I could make Bibimbap at home.

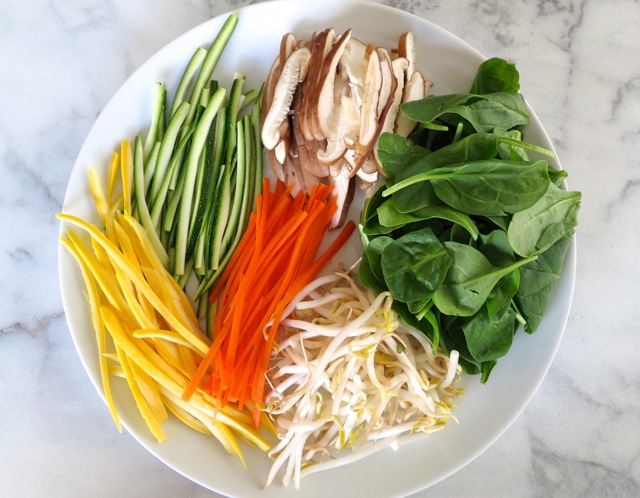
Bibimbap VeggiesColorful vegetables are quickly cooked and seasoned.

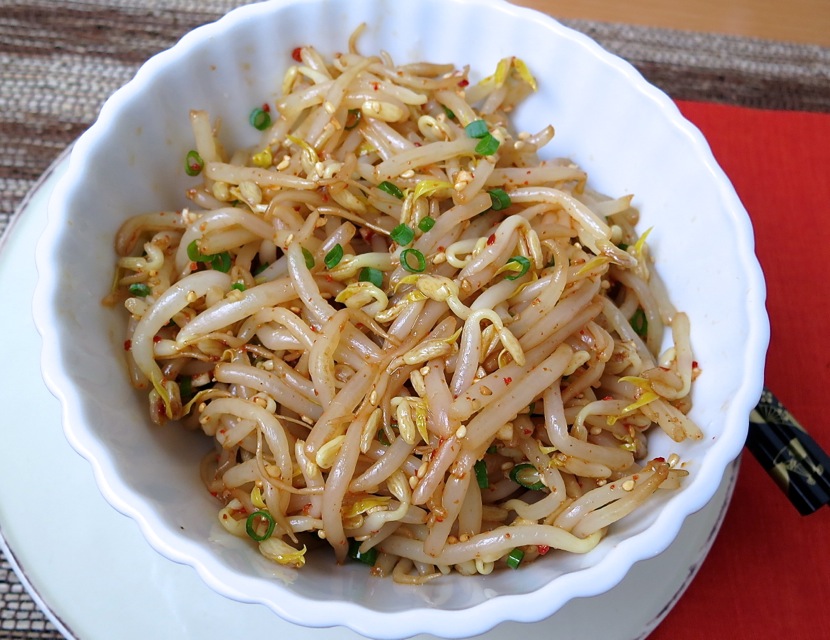
Bibimbap Bean SproutsThese marinated bean sprouts are delicious.

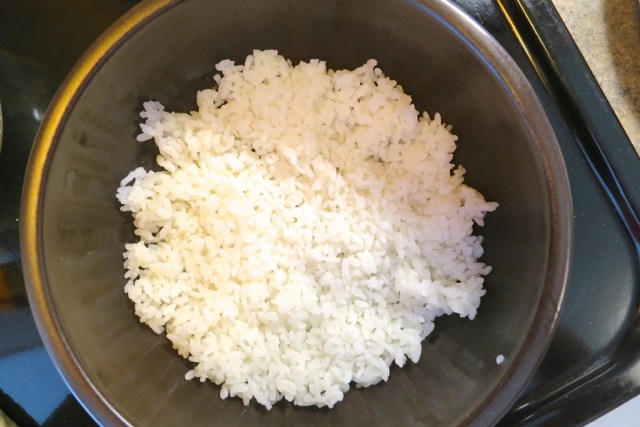
Bibimbap RiceHeat your stone bowl on the stove top, add a bit of oil, swirl and add some rice.  You’ll hear the rice sizzle as it hits the bowl.  Pat the rice gently against the heated bowl. Let it go for a while then add more rice and your prepared vegetables and meat or tofu to warm up.

Bibimbap on Stove

Bibimbap 2Lastly, fry an egg sunny side up and place on top of your heated Bibimbap.  Serve with kimchi on the side. Most recipes call for gochuchang sauce but I love Sriracha so I used it instead.

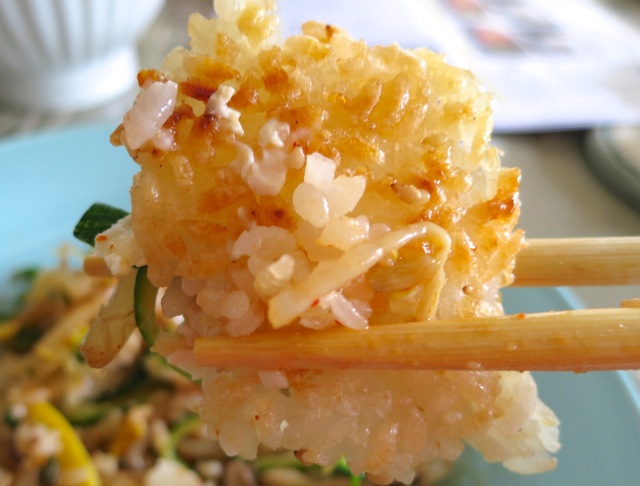
Bibimbap Crunchy RiceThe crunchy rice is addicting!

Bibimbap with Korean Style Hamburger Patties

Serves two as a side dish or one hungry appetite

Ingredients

 1 cup uncooked short grain white rice

Bean Sprouts

1 bag (10 ounces) bean sprouts – rinsed

1/2 teaspoon minced garlic

dash of salt

2 teaspoons soy sauce

1 teaspoon sesame oil

1/2 teaspoon Korean chili flakes (optional)

2 teaspoons roasted sesame seeds

Mushrooms

4 large shiitake mushrooms

1/2 teaspoon minced garlic

1/2 teaspoon sesame oil

1 teaspoon roasted sesame seeds

salt to taste

Zucchini

1/2 medium green zucchini

1/2 medium yellow zucchini

1/2 teaspoon roasted sesame seeds

salt to taste

Spinach

3 ounces fresh spinach

1 teaspoon soy sauce

1 teaspoon sesame oil

1 teaspoon roasted sesame seeds

Carrot

1/2 small carrot

1/2 teaspoon minced garlic

1/2 teaspoons sesame oil

Toppings

1 – 2 large eggs

Korean style hamburger patties (optional)

Preparation

Cook the rice and set aside until ready to use.

In a medium saucepan (3 qt. works well) bring 6 – 7  cups of water to a boil.  Add rinsed bean sprouts and blanch for 3 minutes.  Drain and run under cold water to stop the cooking.  Place sprouts on paper towels or a kitchen towel and press out some of the water.  In a medium bowl add bean sprouts, minced garlic, salt, soy sauce, sesame oil, Korean chili flakes if using and roasted sesame seeds.  Stir to combine.  The sprouts can be made earlier in the day and stored in the refrigerator.

Remove the stems and wipe the mushrooms clean.  Slice into thin strips and sauté in a bit of canola oil until the mushrooms become soft.  Add the garlic, sauté for another minute and remove from the stove top.  Stir in sesame oil and sesame seeds and season with salt.

Julienne the zucchini into long, thin strips using only the outer, colorful portion.  Heat a bit of canola oil in a small skillet and cook for just a minute to slightly soften the strips.  Stir in sesame seeds and season with salt.

In a small skillet blanch the spinach for 1 minute until wilted.  Squeeze out the excess water and stir in the soy sauce, sesame oil and sesame seeds.

Julienne the carrot into long, thin strips.  Briefly sauté with garlic and sesame oil.  Season with salt.

The first time I used the bowl I soaked it in room temperature water for 5 minutes then placed it on the stove on medium heat to warm up.  I slowly adjusted the heat higher (between medium and medium high) and once hot added about 1 teaspoon of canola oil and coated the bottom and lower sides of the bowl.  (Please follow the heating instructions that come with your specific stone bowl).

Add enough rice to the heated bowl to cover the bottom of the bowl.  Press gently with a spatula.  You should hear the rice sizzle on the hot bowl.  Cook the rice for about 5 minutes and check to see if the rice is crunchy by lifting up a portion with a spoon.  The rice should have a light golden toasted color to it.  Once this happens, add more rice and top with vegetables and Korean style patties if using.  Placing the vegetables in alternating colors makes for a gorgeous rice dish.

Fry your egg sunny side up.  Place on top of the heated Bibimbap and serve with kimchi and Sriracha.

***There are so many variations of this dish. You don’t need to stick with specific vegetables or meat and can easily adjust the recipe to your liking.  Make it vegetarian by using tofu instead of meat.


Japanese, Recipes, Rice Dishes, Side Dishes

Japanese Sushi Rice

December 30, 2012

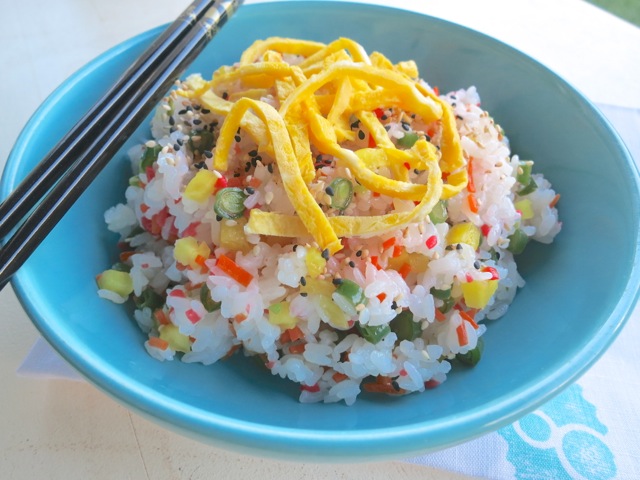
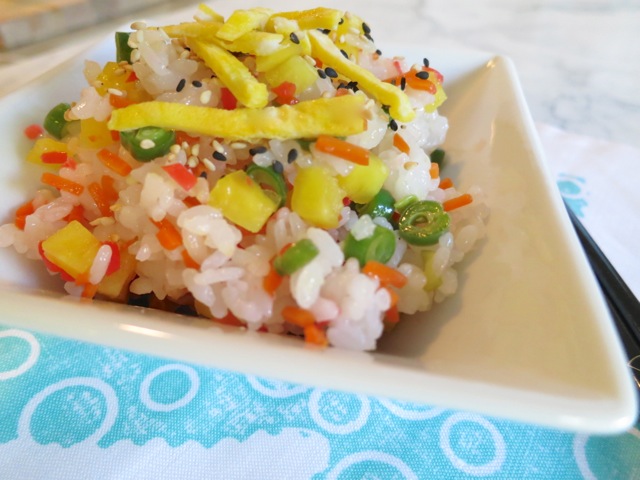
Sushi RiceThis is a simple variation on sushi rice or Chirashi Sushi which means scattered sushi. Hot rice is mixed with a vinegar sauce (sushi meshi) and colorful toppings are added.  It’s an excellent side dish that goes especially well with grilled teriyaki chicken, beef, fish or tofu.  If you want to make it in advance, I suggest making it the same day you plan to serve it since rice tends to dry out and harden the longer you refrigerate it.

Benriner

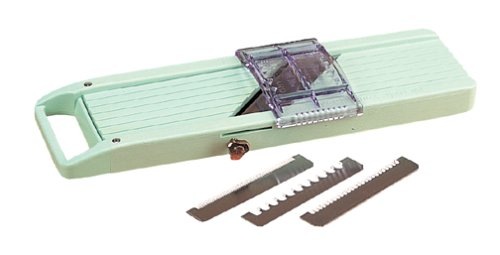
Let me introduce you to the Benriner.  It is made in Japan and comes with assorted blades and a small plastic guide.  I’ve had my Benriner for about 20 years.  It is not fancy and as you can see this model has no container attachment for storing vegetables and I like that because it fits in your drawer without taking up too much space.  You can find this at Amazon.com

Carrot & Green Beans

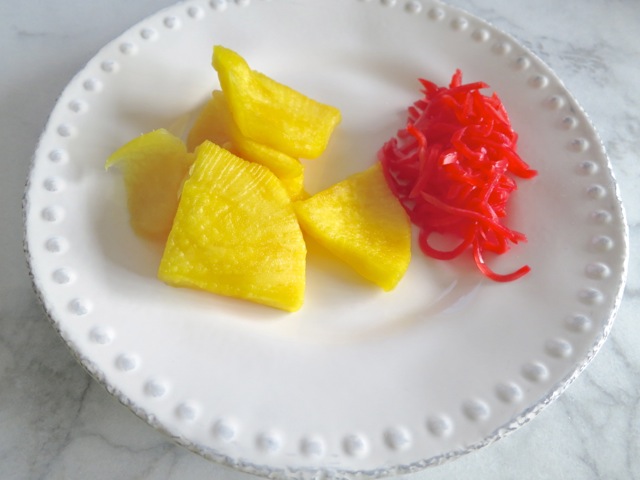
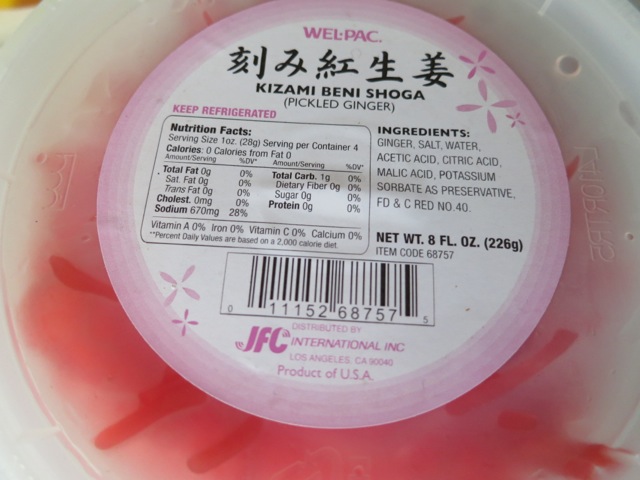
Red GingerPickled Red Ginger.

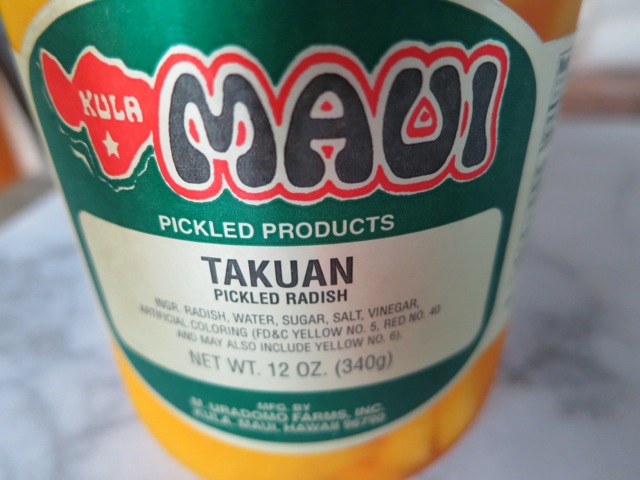
TakuanTakuan (pickled radish).

Takuan & Pickled Red  GingerTakuan and red ginger.

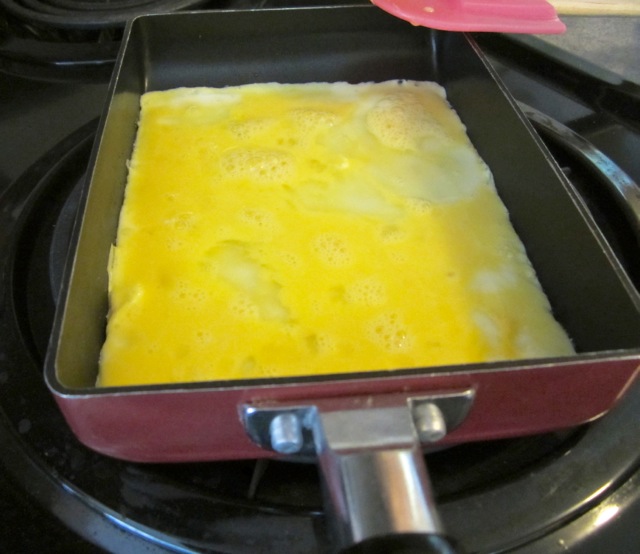
Japanese Egg PanThis little Japanese rectangular egg pan makes it simple to slice the egg into thin slivers once cooked.

Sushi Rice

Sushi Meshi

2 cups short grain white rice (uncooked and rinsed well)

1/3 cup rice vinegar (not seasoned)

3 tablespoons sugar

1 teaspoon salt

Vegetables

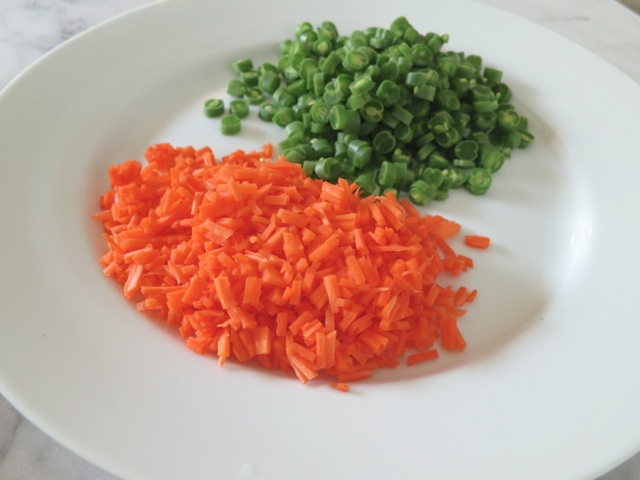
12 green beans – sliced thin

1/2 medium carrot, julienned and cut into 1/3 inch lengths

1 1/2 tablespoons soy sauce

1 tablespoon sugar

1 tablespoon sake or dry sherry

1/2 cup water

1 tablespoon red ginger – finely chopped

1/3 cup takuan, finely diced

1 egg scrambled and fried (do not brown) sliced in thin strips (optional)

White and black roasted sesame seeds

Preparation

Cook 2 cups of short grain white rice. When the rice is done have the vinegar sauce ready and do not open the rice cooker until you are ready to add the sauce.  The rice must be hot.

For the vinegar sauce combine rice vinegar, sugar and salt in a small pot and heat on medium heat until sugar has dissolved, stirring occasionally.  Pour sauce into a small measuring cup and set aside.

While the rice is cooking prepare the vegetables.  Rinse out the pot you used to make the vinegar sauce and combine soy sauce, sugar, sake or sherry and water.  Bring to a simmer on medium heat then add the green beans and carrots.  Turn heat up to high and cook for about a minute  then remove from the heat and set aside.  You want to blanch the beans and carrots and not overcook them.  Once cool enough to handle, drain and squeeze out the excess moisture.  Set aside.

You can use as much or little of the red ginger and takuan that suits you.  The ginger has a little kick to it though once you add it to the rice you will barely notice it.  Takuan is pickled radish and has some sweetness to it.  Drain both the ginger and takuan on paper towels before you chop them.  Start with a smaller amount if you are unsure.  You can always add more.

When the rice is done use a rice paddle and lightly toss the rice so that it is not clumped together.  Quickly put the rice into a large baking dish (Pyrex works well) and slowly add the vinegar sauce drizzling it evenly over the rice tossing gently to mix while fanning madly with a paper fan.  Trying to do this all at once by yourself might seem tricky but there is a good reason to this fanning procedure.  It helps the hot rice soak up the vinegar sauce without the rice becoming mushy.  I don’t have a paper fan so I use a small hairdryer and turn it to low/cool and voilà, it works like a charm.  Bribing a family member to help you is even better.

Add the green beans, carrots, ginger and takuan to the rice and toss gently.  Now’s the time to transfer the rice to your serving bowl.  Top with the sliced egg if using, and sprinkle with sesame seeds before serving.

Dinner, Recipes, Rice Dishes, Side Dishes, Veggies

Fried Rice with Bacon

November 16, 2012

Everyone has their own version of fried rice. It’s a versatile dish because you can add numerous ingredients to it and it always turns out tasty. I prefer jasmine rice and lots of vegetables for my recipe. Chinese peas (snow peas), carrots, cabbage, and green peas add a bit of texture to the velvety rice and bits of egg you get in each spoonful.  And let there be bacon.  Smoky, salty, just plain delicious.

This little Japanese omelet pan has made its way to the stove top often.  Because of its shape, the finished eggs are easily sliced into small pieces perfect for fried rice.  It also comes in handy for somen salad.

Chinese peas, green peas, cabbage, bacon, carrots, green onions, Maui onion, diced egg.

Fried Rice with Bacon

4 side dish servings

Ingredients

1 cup uncooked jasmine rice

2 tablespoons finely chopped onion

1/4 cup minced carrot

10 Chinese peas finely chopped

1 cup finely chopped cabbage

1/2 cup green peas

1/4 cup sliced green onions

2 large eggs

4 slices crispy bacon, crumbled

soy sauce

salt and pepper

oil for stir frying

Preparation

Cook jasmine rice in advance (the morning you make the rice is fine).  Fluff the cooked rice, cool and store in a the refrigerator until ready to use.

Heat 2 – 3 teaspoons of oil in your wok or stir fry pan on medium heat.  Add the onions, carrots and Chinese peas and cook for about 1 minute.  Remove ingredients to a bowl and set aside.   Turn the heat up to medium high and add 1 tablespoon of oil to your pan. Once the oil is very hot add the rice.  Stir fry the rice for 30 seconds or so, just to heat slightly.  Add the reserved onions, carrots and Chinese peas back to the pan along with the cabbage, green peas, green onions, diced egg and bacon.  Drizzle soy sauce on to the rice and vegetables and season to taste with salt and pepper. Give the fried rice a quick stir and adjust the seasoning adding more soy sauce to taste.


Dinner, Mexican, Recipes, Rice Dishes, Side Dishes

Sopa de Arroz

October 16, 2012

For ages I have searched for a good Mexican rice recipe and I have tried and discarded many.  My search ended with a Saveur magazine recipe.  The staff of Saveur travels to many different countries and seeks out all kinds of wonderful people who share their cuisine with them.  I have to admit that I have found more recipes that I love in Saveur than in any other food magazine.  Saveur articles typically feature extended stories on the cultures and people who share their wonderful recipes.  In this instance the dish was featured in a Quinceaneara feast (all over Latin America a girls 15th birthday is a major celebration).  These are usually rustic dishes that don’t call for ingredients too difficult to find.  So here is a really good Mexican-style rice recipe from Saveur.

Pulse in your food processor.

Cook rice with tomato puree.

Add broth and cook, undisturbed until liquid barely covers the rice.  In this photo the rice is almost at that stage with just  a few more minutes to go.

Sopa de Arroz

Serves 8

Adapted from Saveur magazine

Ingredients

2 cups long grain rice

About 3 small, ripe and juicy tomatoes – skin and seeds removed, coarsely chopped

1/2 cup onion – coarsely chopped

2 small or 1 large garlic clove

3 tablespoons canola oil

3 cups chicken broth

1 teaspoon salt

1 teaspoon mild chili powder – optional (I use Hatch mild chile powder from New Mexico. It doesn’t add any heat to the rice however it does give a nice color).

Preparation

Rinse rice well in a fine mesh colander until water runs clear.  Drain well, set colander on paper towels to absorb excess water.  Set aside

Place tomatoes, onion and garlic in a small food processor. Pulse until ingredients are pureed.  You’ll want about 1 cup of tomato/onion/garlic puree. Set aside.

Heat oil in a large, wide heavy-bottomed pot that has a tight-fitting lid over medium-high heat.  I have a Cuisinart 5.5 quart pot I use.  It’s wide and not too deep.  This is preferable to a narrow, deep pot as the rice has more surface area to cook. Once the oil is hot add the rice and cook, stirring constantly with a wooden spoon until the rice is lightly golden, about 5 minutes or so.  Be sure to keep stirring and don’t leave the rice unattended, it may burn.

Remove the pot from the burner and add the tomato puree mixture.  Turn the heat down to medium low.  Place the rice back on the burner and continue to stir for about 2 minutes.  Add the chicken broth and turn the heat up to high.  Add salt (and chile powder if using).  Give the rice one more stir and once the broth comes to a boil turn the heat down to medium – medium high (the broth should be bubbling).  Cook the rice undisturbed and uncovered for about 7 minutes or until the liquid barely covers the rice and craters appear on the surface.  Reduce the heat to low and cover the pot.  Set your timer for 20 minutes.

Once the rice is done, turn off the heat and leave undisturbed (do not open the lid) for at least 15 minutes.  Take off the lid and fluff the rice with a fork.

If you have leftovers, the rice freezes beautifully.

Follow

Get every new post delivered to your Inbox

Join other followers: