Browsing Category

Rice Dishes

Dinner, Dressing, Lactose Free, Recipes, Rice Dishes, Salad, Side Dishes, Summertime Meal, Vegan, Vegetarian, Veggies

Refreshing Rice Noodle Salad

May 10, 2024

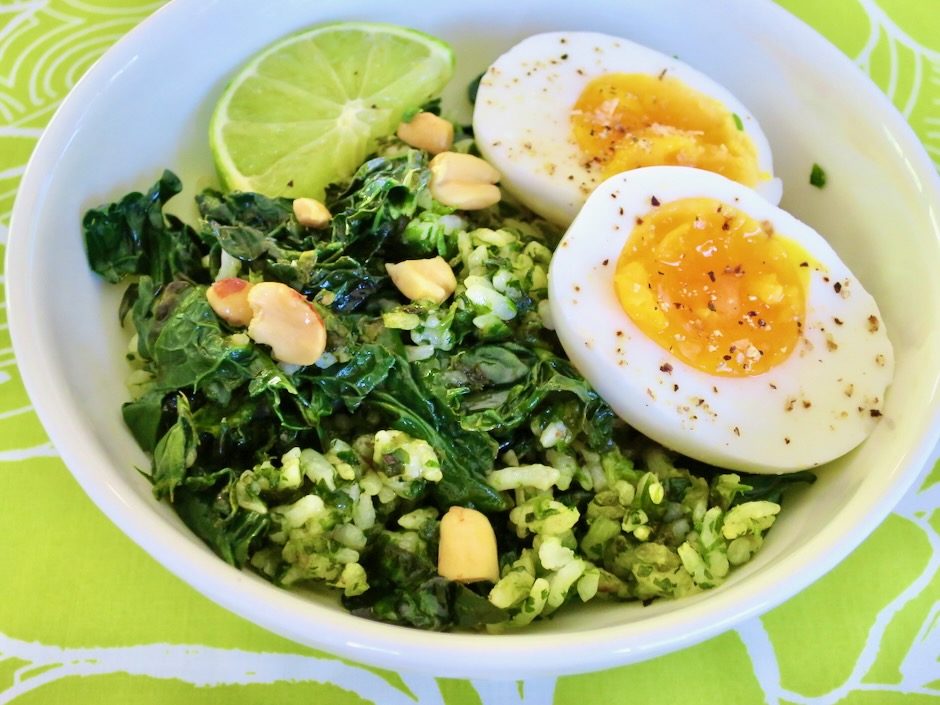
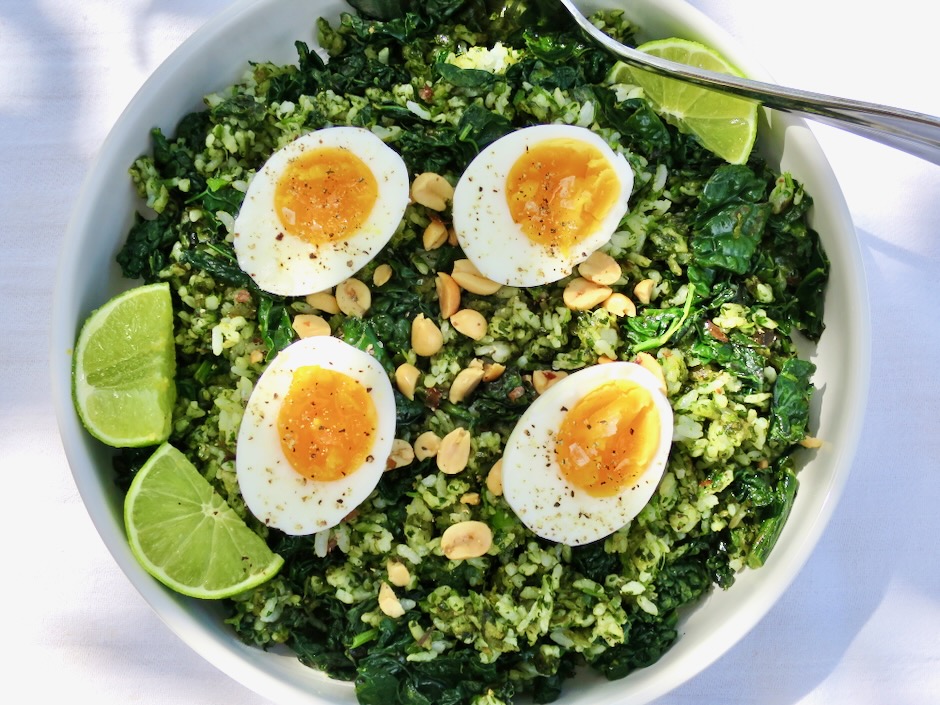
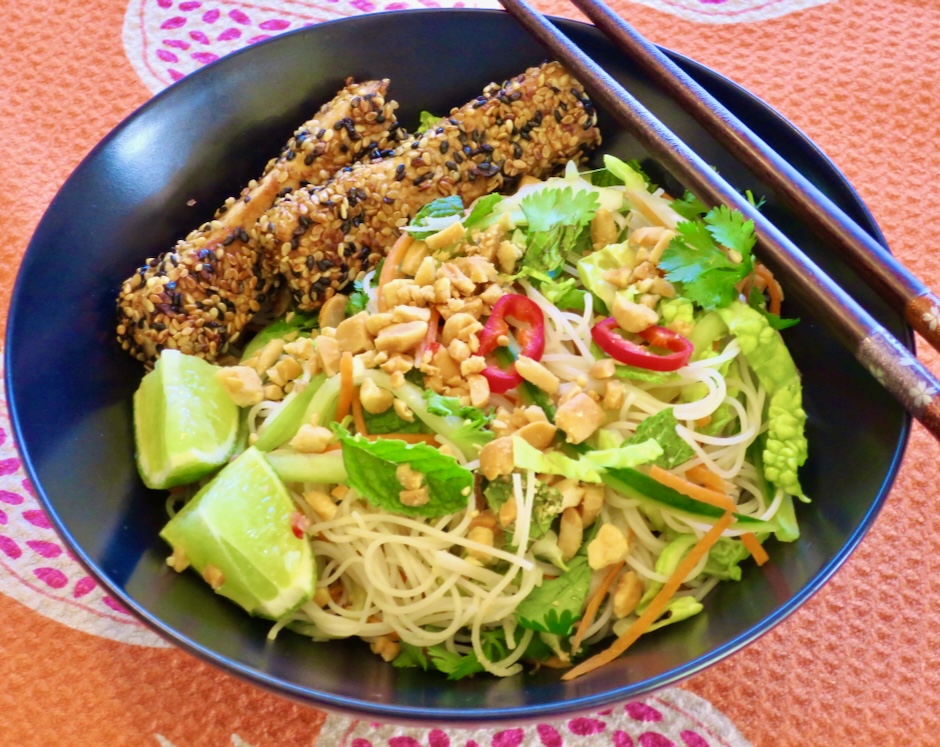
This refreshing, crunchy, rice noodle salad covers all the bases. It’s the perfect meal for those warm days when cooking over a hot stove is out of the question. A tangle of rice noodles and crispy vegetables makes a delightful summer salad.

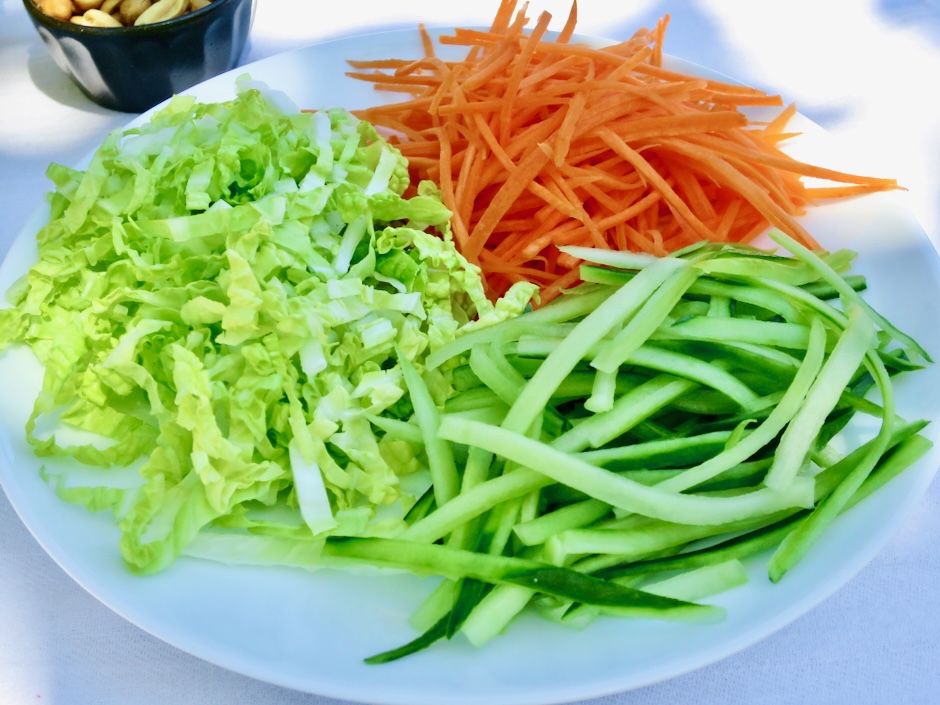
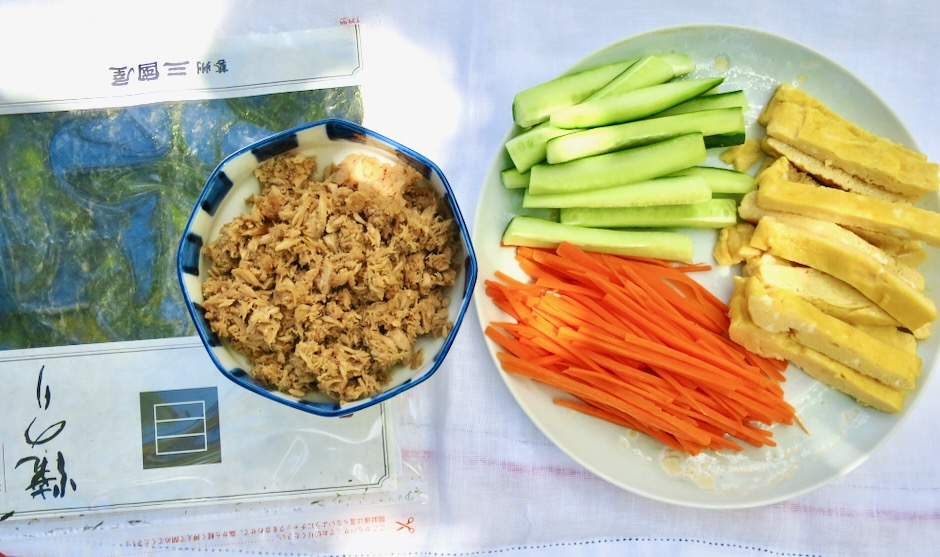
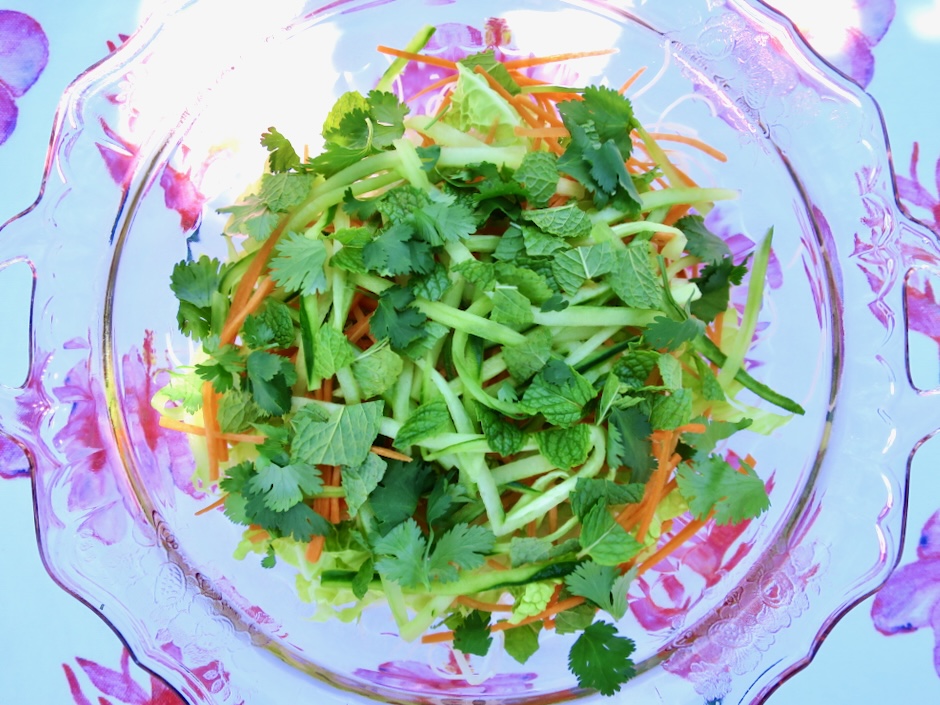
A mandoline comes in handy for cutting the cucumber and carrot into thin strips. Not to worry if you don’t have one. A good chef’s knife can do exactly the same task.

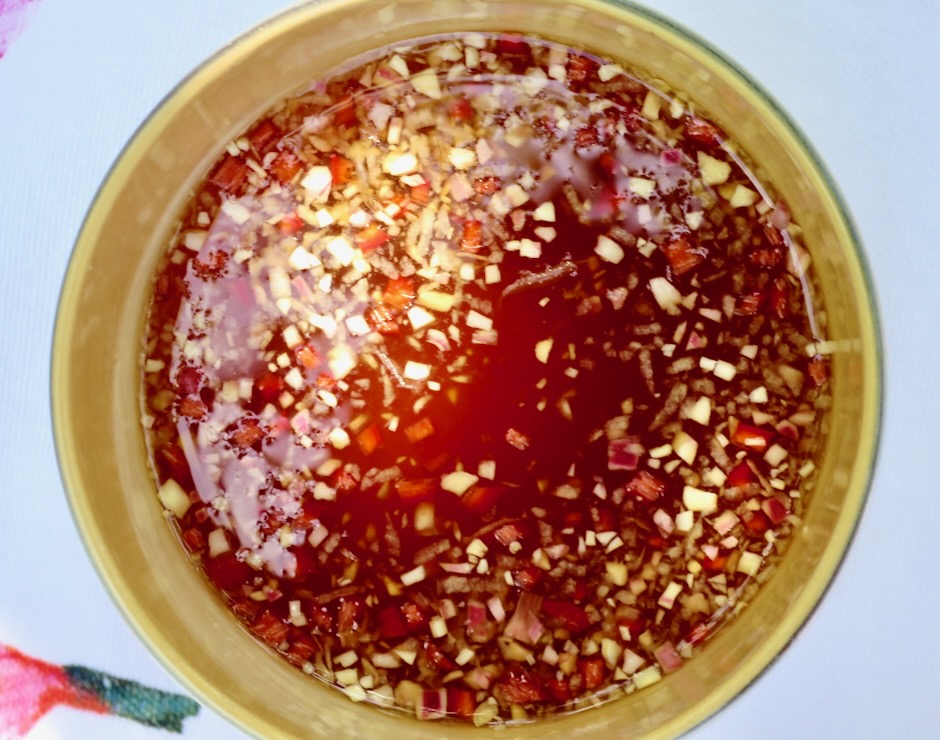
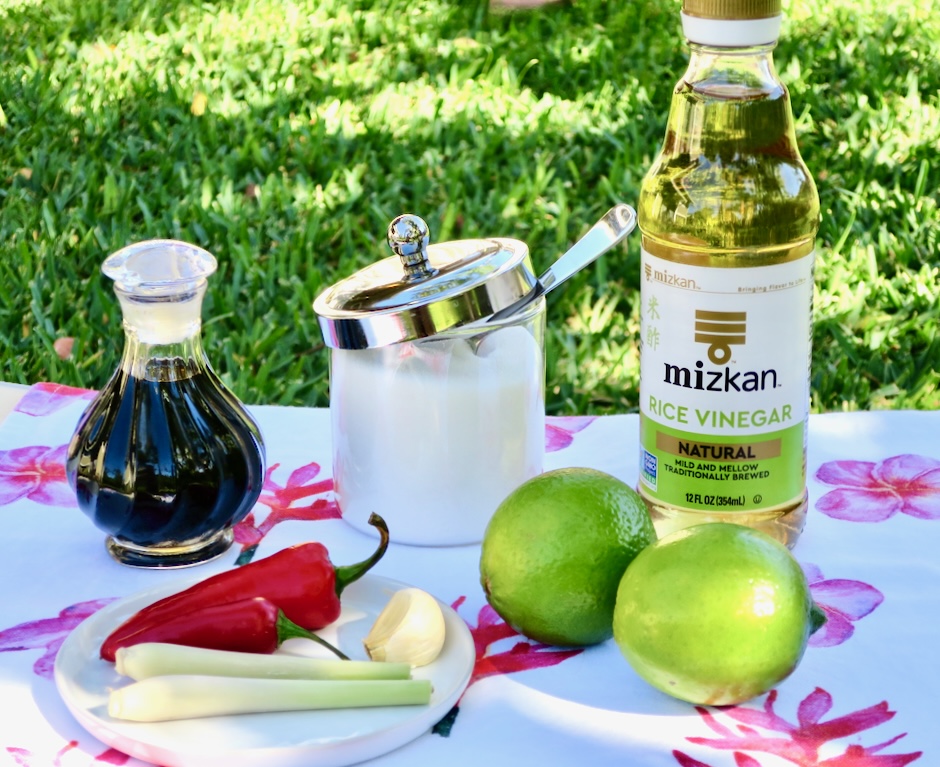
The dressing is zesty from the fresh lime juice with a hint of sweetness and punch from the Fresno pepper and lemongrass. It’s perfect for springy rice noodles and crispy vegetables showered with lots of fresh herbs.

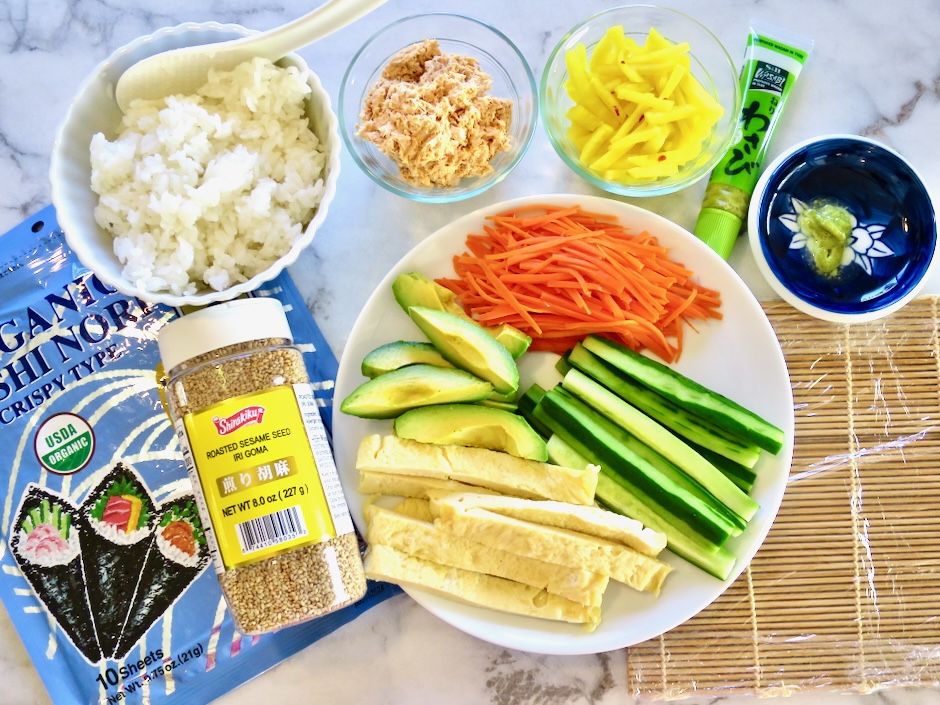
I serve the salad with sesame tofu. It is one of my favorite summertime meals and because both the salad and tofu can be prepared in advance, it’s a breeze to make for a crowd.

Refreshing Rice Noodle Salad

Recipe by Kiyo
Servings

4

servings

Ingredients

  • Salad
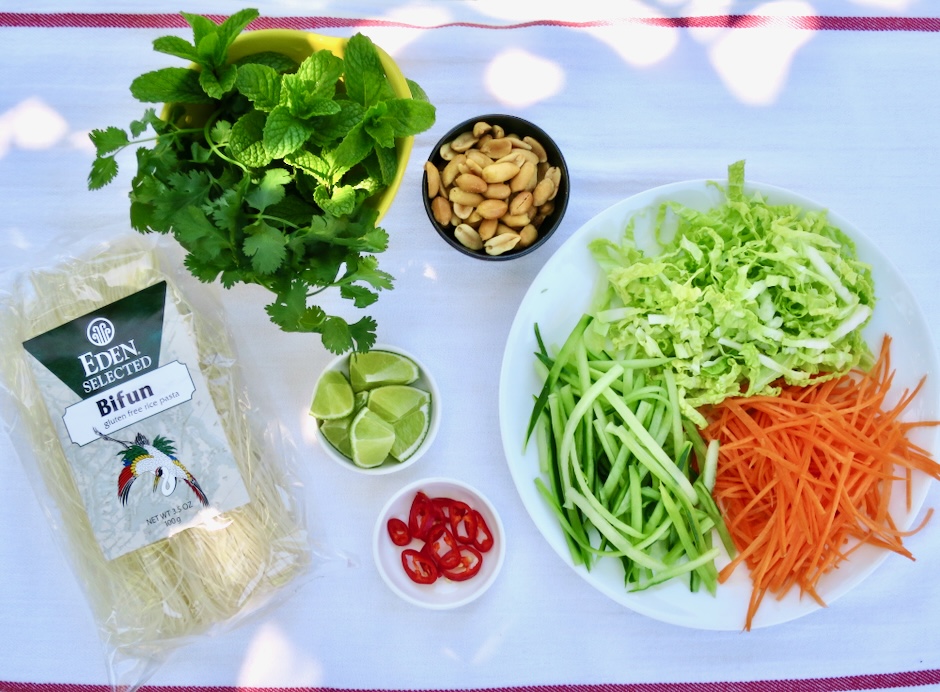
  • 7 ounces rice noodles (such as Eden Bifun)

  • 1 large Japanese cucumber with soft core and seeds removed, cut into thin strips (use a mandoline if you have one)

  • 1 medium carrot, julienned

  • 2 cups Napa cabbage, thinly sliced

  • 1/3 cup + 2 tablespoons fresh mint leaves

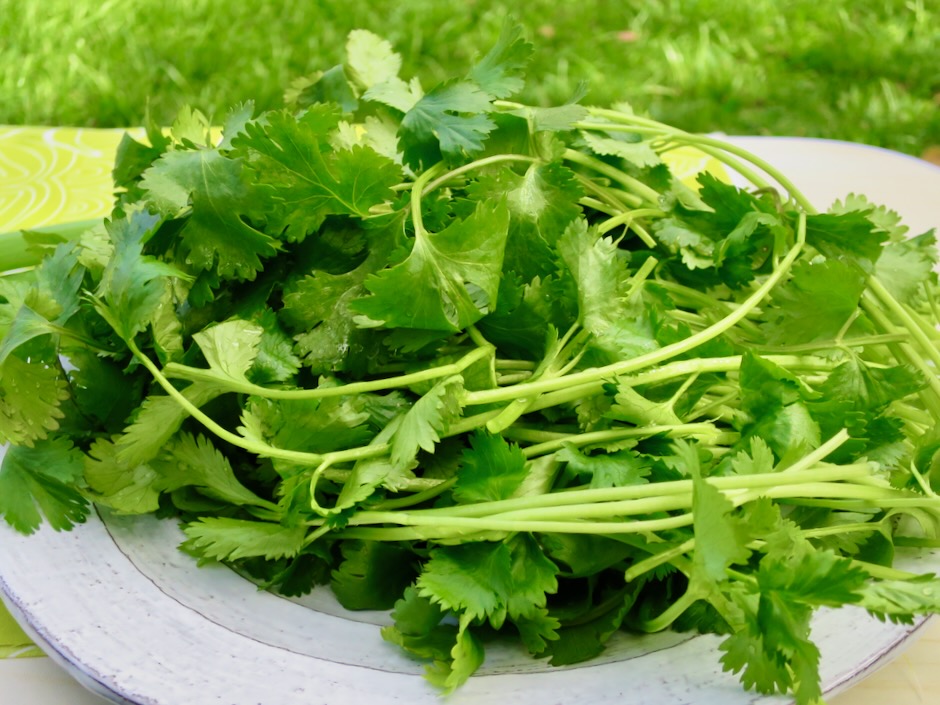
  • 1/3 cup + 2 tablespoons cilantro leaves

  • 1/3 cup salted roasted peanuts, chopped

  • Fresno pepper rings for serving

  • Lime wedges for serving

  • Dressing
  • 1/4 cup unseasoned rice vinegar

  • 1/2 cup fresh squeezed lime juice

  • 4 teaspoons soy sauce

  • 2 tablespoons + 1 teaspoon granulated sugar

  • 1/2 teaspoon garlic, finely grated

  • 4 teaspoons lemongrass, finely minced

  • 2 teaspoons Fresno pepper, finely minced (cut the rest of the pepper into thin slices to garnish noodles)

Directions

  • Soften rice noodles according to package directions. Drain well and place in a low-sided serving bowl. Cover and chill.
  • Stir all of the dressing ingredients together in a small bowl until sugar has dissolved. Dressing can be made a day in advance and stored in the refrigerator.
  • Toss cabbage, carrot and cucumber strips and 1/3 cup each of torn herbs together. Place vegetables on chilled rice noodles. Drizzle some of the dressing over the noodles and vegetables and mix together gently with two forks or tongs, just enough to coat the noodles. Sprinkle peanuts over the top of the salad along with reserved 2 tablespoons each of torn mint and cilantro. Place lime wedges and Fresno pepper slices around the rim of the dish. Serve with extra dressing on the side.
Appetizers, Dinner, Fish, Japanese, Lactose Free, Pickles, Recipes, Rice Dishes, Vegetarian, Veggies

Maki Sushi Rolls

April 28, 2024

Fresh homemade sushi is hard to beat and not as difficult to make as you might think. It’s pretty cool to be able to customize your rolls by using your favorite ingredients. Once your sushi ingredients are ready to go, the rolling happens quickly. Before you know it, you’ll have tasty maki sushi rolls ready for lunch or dinner.

There’s really no rule when it comes to the ingredients you can use in Maui-style maki sushi. Common ones include spicy tuna (canned), avocado, cucumber, sushi grade tuna, crab, salmon, tamago (egg) and other vegetables such as watercress, carrots, takuan (pickled radish). Shown above are tuna, smoked salmon, and takuan hosomaki (thinner rolls).

If you don’t have a tamagoyaki pan like the one above, use a small non-stick fry pan to cook the eggs.

Prepare the fillings for the sushi while the rice is cooking then refrigerate until ready to use. Wrap your sushi mat in plastic wrap. The mat will stay clean and won’t pick up any scents or oil from the sushi ingredients.

On most occasions I make spicy tuna but sometimes I make a sweet/salty version with soy sauce. This is the type you might find at local okazuya and bento stores. Besides adding flavor, crispy cucumbers, carrots and tamago add color and texture.

The first step is to place a sheet of nori shiny side down on your sushi mat. Spread rice over the nori leaving a 1-inch border free of rice. The amount of rice you use will determine the size of your roll and the amount of rolls you can make with the 2 cups of rice that you cook. My rolls are medium-sized since I don’t use too much rice. I usually end up with 3 medium rolls and 2 thinner (hosomaki) rolls. If you’re using wasabi paste dab it on the rice before adding the other ingredients.

Shaping the rolls will take a little practice but you’ll get the hang of it after your first roll. And it won’t matter much if the first few rolls don’t turn out perfectly. They will still be delicious.

Layer on your ingredients then begin rolling them up. You can choose your own fillings and make vegetarian rolls if you prefer.

Once you have the ingredients tucked into the roll, continue to roll while lifting the top portion of the mat up as you roll.

I packed a sushi bento for a friend and delivered it to his work place for a surprise snack.

I thought I would try an inside-out roll with avocado. To my surprise I didn’t botch the roll! We have lots of avocados now so I’ll give this another go very soon.

Maki Sushi Rolls

Recipe by Kiyo
Servings

4

servings

Depending on the amount of rice you use in each roll, this recipe will make 3 medium and 2 small rolls (hosomaki) or 4 medium rolls

Ingredients

  • Sushi Rice
  • 2 rice cooker cups short grain white rice

  • 1/4 cup unseasoned rice vinegar

  • 2 1/2 tablespoons granulated sugar

  • 1 1/2 teaspoons fine sea salt

  • Filling Ingredients
  • 1 small carrot, julienned (blanch 1 minute in 1 cup water mixed with 2 teaspoons sugar, 1 teaspoon mirin, and 1/2 teaspoon salt)

  • 1 small Japanese cucumber, cut into wide strips (remove any seeds with your knife)

  • 1 avocado, sliced

  • 1 (5 ounce) can tuna in water, drained (mixed with 3 tablespoons mayonnaise and 1 1/2 tablespoons sriracha + 1/4 teaspoon of shichimi togarashi, optional)

  • 3 eggs, whisked (mixed with 1 teaspoon sugar, 1 teaspoon mirin, 1/2 teaspoon light soy sauce) cooked over medium-low heat in a small pan to form a thick layer and sliced into 1/2-inch wide strips

  • 3/4 cup takuan (pickled radish) thinly sliced

  • wasabi paste

  • roasted sesame seeds

  • 5 sheets sushi nori

Directions

  • Cook rice according to rice cooker directions for sushi rice. While rice is cooking, combine rice vinegar, sugar and salt in a 1-cup glass measuring cup and give it a stir. Microwave for 20-25 seconds. Remove and stir until the mixture turns clear, about 2 minutes. Set aside until ready to use.
  • Place hot rice in a large shallow bowl or dish, such as a 9×13 glass baking dish. Immediately drizzle the prepared sushi vinegar over the warm rice and fold in gently to evenly season the rice. Using swift cutting motions gently break up the rice while fanning as you go (do not stir the rice or it will become clumpy and mushy). Fanning the rice helps to remove excess moisture and also gives the rice a shiny appearance. Cover rice with a damp kitchen towel or plastic wrap and allow to come to room temperature before using, about 1 hour. (Rice should not be left out for more than 2 hours for food safety reasons. Refrigerate sushi rolls if not eating within 2 hours).
  • Cover sushi mat with plastic wrap. Place a piece of nori shiny side down on the mat. Distribute rice evenly over the nori leaving 1-inch free of rice at the bottom portion. Begin placing your fillings onto the rice (upper third area). Lift the bottom edge (closest to you) of the sushi mat while also holding the fillings in place with your fingers and quickly fold over securing them in the first fold tucking in any ingredients that may have fallen out. Continue rolling the sushi away from you gently squeezing the mat to form a uniform sushi roll while lifting and moving the mat forward until the entire sheet of nori is rolled up. Slice and serve rolls with wasabi and soy sauce.

Notes

  • Though the rice may not be quite as soft, leftover sushi rolls can be refrigerated and eaten the following day. Double wrap them in plastic wrap then place in a freezer zip top bag. Remove from the refrigerator 1 hour prior to slicing and serving.
Dinner, Eggs, Japanese, Kimchi, Korean, Lactose Free, Pork, Recipes, Rice Dishes, Side Dishes

Kimchi Spam Musubi

March 17, 2024

I’ve been on a kimchi kick for a while now. It’s fun to incorporate this Korean staple into all sorts of dishes that not long ago I would have never considered. One of the best accompaniments for kimchi is rice. The soft and chewy grains of white rice show off the spicy and garlicky kimchi perfectly. Add some Spam and you’ve got yourself the best snack ever.

If you don’t make your own kimchi, pick up your favorite brand at the market. I always have a couple of cans of Spam tucked away in the cupboard. Sometimes I use it for Spam musubi, other times I fry pieces until super crispy and eat it with fried eggs and rice. Ono!

Spam straight out of the can is not exactly appetizing. A quick crisping up in a frying pan remedies that. For this recipe the Spam is fried then coated with a mixture of soy sauce and brown sugar. It’s the perfect seasoning for the salty Spam and works great for making kimchi musubi.

The kimchi is cooked with eggs and green onions then cut into pieces to fit the musubi mold.

The first layer is rice and a sprinkling of furikake.

The Spam goes on next, followed by the kimchi omelet.

One more shake of furikake over the kimchi omelet.

A little more rice on the kimchi omelet before pressing together and folding with the nori.

Sriracha mayo is the perfect dip for this snack.

This is one of the best snacks I know of. I made Spam musubi for my grandson to take on the plane when he traveled back to the mainland. He adores Spam musubi and said to his mom “I just want to hug it!”

Kimchi Spam Musubi

Recipe by Kiyo
Servings

8

servings

Special equipment: Spam musubi mold

Ingredients

  • 3 rice cooker cups short or medium grain white rice, cooked according to rice cooker directions

  • 1 can original Spam, sliced into 8 pieces

  • 3 tablespoons light brown sugar

  • 3 tablespoons low sodium soy sauce

  • 4 large eggs, whisked

  • 1/2 cup chopped kimchi, drained and roughly chopped

  • 2 green onions, thinly sliced

  • 4 sheets sushi nori cut in half (on the long side) to make 8 pieces

  • nori-sesame furikake

  • Sriracha mayo (optional)

Directions

  • Once rice is done cooking remove to a bowl, cover and cool to room temperature.
  • Mix together the brown sugar and soy sauce. Set aside.
  • Fry Spam slices over medium heat until lightly browned. Turn heat down to low, add brown sugar and soy sauce mixture. Turn Spam pieces over to coat well. Let sauce thicken a bit (turn heat up if needed) before transferring Spam to a plate to cool.
  • Combine whisked eggs, kimchi and green onions in a small bowl. Place tamagoyaki (Japanese omelet pan) or small fry pan over low heat. Coat the pan well with canola or vegetable oil. Pour egg mixture in the pan and cook on low heat, flipping once to cook both sides evenly, trying not to let the egg brown (adjust heat if needed). Transfer to a cutting board. Cut into 8 rectangular pieces.
  • To assemble musubi, place musubi mold over center of nori (shiny side face down). Spoon a little rice in the mold then press firmly with the musubi mold press. Sprinkle furikake over rice. Place 1 piece of Spam over the rice followed by a piece of kimchi egg. Sprinkle a little furikake over the egg. Add more rice then press firmly. Remove musubi mold and wrap nori around rice tightly (be careful not to tear nori). Trim excess nori. Continue making the rest of the musubi. Serve with sriracha mayo.

Notes

  • I use a small piece of plastic wrap to cover the top portion (the press) of the musubi mold so the rice doesn’t stick to it when pressing down.
  • Musubi is best eaten right away or within a few hours. If you have leftovers, wrap each one in plastic wrap and store them in a freezer ziplock bag in the refrigerator for up to a day. To refresh musubi, remove plastic wrap and place musubi on a microwavable plate. Microwave for 15 seconds, flip over and microwave for another 10 seconds or until just warm.
Dinner, Lactose Free, Mexican, Recipes, Rice Dishes

Easy Salsa Rice

February 21, 2024

If you happen to have a bit of leftover salsa and are wondering how you might use it (other than finishing off those last corn chips in the bag), give this easy salsa rice recipe a try. It’s similar to my Sopa de Arroz recipe but saves time by incorporating prepared salsa. It is my favorite accompaniment to any Mexican meal.

If the salsa you are using is very chunky, give it a few pulses in a food processor or an immersion blender if you have one.

Any red salsa will work whether mild or spicy. Let your own taste be the guide.

It’s essential to rinse and dry the rice well. This quick step will remove excess starch which can make rice clumpy and overly sticky. You want fluffy, separate grains for this recipe.

Once the oil is hot, stir in the rice and continue stirring until the rice takes on a very light golden color.

The salsa is added to the rice and continuously stirred to coat each grain. Watch the bottom of the pan to avoid burning the salsa.

Finally, the broth, salt, and chile powder are added to the rice.

Left uncovered, the broth is absorbed by the rice until nearly gone. Small holes will appear on the surface of the rice. Now it’s time to put the lid on and cook the rice for 20 minutes. Absolutely no peeking. The lid must stay on for the duration of the cooking time as well as after the timer goes off.

The rice has rested in the covered pot for 20 minutes. Now it is ready to be fluffed and served.

The salsa rice is delicious in a burrito or served with your favorite Mexican dishes. Warm the rice up for breakfast with cheesy scrambled eggs and corn tortillas.

Easy Salsa Rice

Recipe by Kiyo
Servings

6

servings

Ingredients

  • 2 cups long grain rice

  • 1 tablespoon canola or vegetable oil

  • 1/2 cup + 1 tablespoon tomato salsa of your choice (if very chunky give it a few pulses in a food processor)

  • 3 cups chicken broth

  • 3/4 teaspoon kosher salt or 1/2 teaspoon fine sea salt

  • 1 teaspoon mild pure chile powder such as Hatch Mild Red Chile Powder from The Chile Shop online store) optional

Directions

  • Rinse rice in a sieve to remove excess starch. Drain very well, tapping the bottom of the sieve to remove any water collected on the bottom. Place the sieve on a clean kitchen towel to drain further while you heat your pan. This step is essential for giving your rice a fluffy texture and grains that remain separate.
  • Heat 1 tablespoon canola or vegetable oil in a large multi-purpose pot with lid or Dutch oven (wider bottom works better than narrow and tall pot) over medium-high heat. Once oil is hot, turn heat to medium and add drained rice. Coat rice with oil and stir constantly until rice takes on a very light golden color, about 5 minutes.
  • Turn heat down to low and add salsa. Stir continuously for a minute or two with a wooden spoon, coating the rice and scraping the bottom of the pan to avoid burning the salsa. Mix in 3 cups of chicken broth, salt and chile powder if using. Turn heat to medium-high and allow liquid to evaporate for about 6-7 minutes or until there is barely any liquid covering the rice and small holes appear on the surface of the rice. Turn heat to low and cover pot. Set your timer for 20 minutes. Do not open the lid while the rice is cooking.
  • Once the timer goes off, turn off the heat. Do not open the lid. Allow rice to sit, covered, for 20 minutes. Remove lid (be careful of the condensation on the inside of lid) and fluff rice with a fork before serving.

Notes

  • Leftover rices can be frozen for a few months.
Dinner, Fish, Japanese, Korean, Lactose Free, Recipes, Rice Dishes

Tuna, Rice & Nori Lunch

December 11, 2023

Tuna and rice wrapped in crispy and savory nori is one of my favorite combos to make for lunch. It doesn’t sound like anything special but once you try it you’ll understand why I love it so much. Think of it as an improvised hand roll. It couldn’t be simpler to whip up on short notice. When I was working, I would share it with a small group of friends at lunchtime. We all sat around the table and oohed and aahed as we ate our little tuna nori wraps.

Savory and tangy Kewpie mayonnaise replaces the usual Best Foods mayonnaise I use for tuna sandwiches. The velvety texture and rich flavor is perfect for this recipe.

With a plethora of canned tuna available these days it’s easy to find a good brand. Wild Planet does not have added water or broth which means it’s not going to be a mushy mess when you open the can.

A side of crispy cucumbers with chili crisp, kimchi or takuan and fresh fruit are the perfect pairing to complete your lunch. A drizzle of sriracha mayo over the tuna adds a nice kick to the nori wraps.

Tuna, Rice & Nori Lunch

Recipe by Kiyo
Servings

2

servings

Easy and delicious nori wraps are quick to prepare!

Ingredients

  • 1 rice cooker cup short or medium grain rice, cooked according to manufacturer’s instructions

  • 1 (5 ounce) can tuna in sea salt, such as Wild Planet)

  • Kewpie mayonnaise

  • 2-3 teaspoons finely chopped celery

  • 2 teaspoons finely chopped sweet onion

  • 2 teaspoons finely grated carrot

  • 2 teaspoons thinly sliced green onion

  • 1 teaspoon roasted sesame seeds

  • 1-2 packets Korean-style seaweed snacks, depending on size

Directions

  • Once rice has cooked, transfer to a bowl and gently mix in roasted sesame seeds. Cover with plastic wrap and set aside allowing rice to cool to room temperature.
  • In a medium bowl, flake the tuna with a fork. Mix in Kewpie mayonnaise (enough to moisten tuna generously, tuna should not look dry), celery, onion, and carrot. Transfer to a smaller bowl for serving.
  • Set out nori (just before serving to keep crisp), tuna salad, and rice. Make mini nori wraps by placing a small amount of rice on the nori, followed by tuna. Top with sriracha mayonnaise if using, and green onions. It’s best to make the nori wraps as you eat them so the nori stays crispy. Serve with your favorite side dishes such as potato salad, fresh fruit, kimchi and takuan pickles.
Dinner, Eggs, Lactose Free, Recipes, Rice Dishes, Salad

Green Rice & Jammy Eggs

July 9, 2022

This herby rice bowl is tasty, satisfying and beautiful. It’s loaded with fresh herbs and a smidgen of jalapeño which adds just the right amount of heat. The jammy eggs are scrumptious sprinkled with freshly ground pepper and flaky Maldon salt. I am happy to eat eggs and rice anytime, no matter what the preparation might be.

The principal herb for this dish is cilantro. I know there are many of you who cringe when you hear the word. Don’t give up yet! You can substitute parsley if cilantro is not to your liking. But if you’re willing to try cilantro just one more time (hint), use half cilantro and half parsley.

Torn kale is wilted and charred before adding it to the rice. The charred edges of the leaves add lots of flavor to this dish.

The finely chopped herbs are mixed in with the rice before heading to the fry pan.

The rice is then crisped up over medium-high heat. The same technique is used when making bibimbap. The crispy pieces of rice are yummy!

Green Rice & Jammy Eggs

Recipe by Kiyo
Servings

4

servings

Adapted from Food52, this beautiful rice bowl hits all the right notes

Ingredients

  • 1/2 large bunch cilantro, leaves and tender stems (about 3 ounces)
    4 green onions, white and green parts

  • 1/4 jalapeno, seeds removed (more if you want a spicier rice)

  • 1 small garlic clove, smashed

  • 3 cups cooked and cooled medium grain white rice

  • kosher salt and freshly ground black pepper

  • 4 large eggs

  • 4 tablespoons extra virgin olive oil

  • 1 bunch lacinato kale (dinosaur, tuscan) about 3/4 pound, leaves stripped from stems and torn into pieces

  • 1 lime

  • roasted salted peanuts

Directions

  • Roughly chop the cilantro (or parsley) and green onions, then place in the bowl of a food processor along with the jalapeño and garlic. Pulse a few times, until the mixture is very finely chopped but not a paste (alternatively, finely chop everything by hand). Scrape all but 2 tablespoons of the mixture into a large bowl. Add the cooked rice and season with a big pinch of salt and lots of black pepper. Toss well to combine and set aside.
  • Bring a small pot of water to a boil over high heat. Carefully lower the eggs into the pot, lower the heat slightly, and boil for 7-8 minutes. Transfer the eggs to a bowl of ice water to stop the cooking, remove after a few minutes and set aside.
  • Heat 2 tablespoons of the oil in a large nonstick or well-seasoned cast iron skillet over medium-high heat until the oil shimmers and you see a few wisps of smoke. Add half of the kale and season with salt and pepper and quickly toss to coat. Let char, undisturbed, for 3-4 minutes. Stir in the remaining kale and cook for another 3-4 minutes, until mostly wilted and charred in some places. Season with additional salt and pepper to taste. Remove from the heat and transfer to a plate.
  • Heat remaining 2 tablespoons of oil in the same skillet over medium-high heat. Scrape the rice mixture into the pan and press it down firmly with a spatula. Reduce the heat to medium and cook until the rice starts to crisp on the bottom, about 5 minutes. Toss and cook for another 4-6 minutes, until warmed through and slightly crisped. Return to the large bowl, then toss in charred kale.
  • Using a Microplane or fine grater, zest the lime into the rice mixture. Halve the lime and juice half over the rice. Stir in the reserved raw herb mixture. Peel and halve the eggs, season with Maldon salt (or other flaky sea salt) and freshly ground black pepper. Divide the rice between bowls, top each with two egg halves. Serve with chopped peanuts and lime wedges.
Follow

Get every new post delivered to your Inbox

Join other followers: