Browsing Category

Recipes

Dinner, Japanese, Lactose Free, Pasta, Pork, Recipes

Pork and Asparagus Soba

May 18, 2023

We’re starting to harvest our homegrown asparagus spears which is one of the reasons I was drawn to this recipe. The other reason is that I love soba. Though dried soba cannot compare to fresh, it works well enough for this dish which turns out to be a real winner.

There’s not much to it, in terms of the amount of ingredients called for. However, you may need to make a quick trip to the market if you don’t have tahini or chili crisp in your refrigerator. There is a multitude of chili crisp/crunch options available these days. You can find it at Costco, the Asian food section of your local markets, or online. My current favorite is Zindrew O.G Batch from Amazon. They offer a much spicier version as well (X Batch). Though the jar says chili oil, I consider it to be a chili crisp since it has lots of crunchy bits of garlic and does not contain an excess amount of oil.

Tahini adds a rich and creamy note to the sauce. Mixed with soy sauce, rice vinegar and chili crisp, the flavor is an umami rich seasoning for the noodles and pork.

The soba is cooked briefly before adding the asparagus. It’s a one pot deal. Not having to blanch the asparagus separately saves time and dishes.

The sauce is added to the cooked pork before getting mixed in with the soba and asparagus. It’s so delicious.

Everything goes back into the pot with some of the reserved soba cooking water. A quick stir to warm everything up and it’s ready to be served with extra chili crisp or sriracha.

Pork and Asparagus Soba

Recipe by Kiyo
Servings

4

servings

Recipe adapted from Bon Appetit magazine

Ingredients

  • 1/4 cup chili crisp (1/3 cup if you want it spicier) + more for serving

  • 1/3 cup tahini, well stirred

  • 3 tablespoons + 1 teaspoon soy sauced divided

  • 3 tablespoons unseasoned rice vinegar

  • 9.5 ounces dried soba noodles (1 package Hakubaku soba, or about 10 ounces of your favorite dried soba)

  • 1 bunch (10-12 ounces) asparagus, trimmed, cut into 2-inch pieces (thinner spears work well in this dish)

  • 1 1/2 tablespoons vegetable oil

  • 1 pound ground pork

  • Thinly sliced green onions (for serving)

  • Roasted sesame seeds (for serving)

Directions

  • Whisk chili crisp, tahini, 3 tablespoons soy sauce, and vinegar in a small bowl. Taste and add a few extra teaspoons of chili crisp if you want it spicier. Set aside.
  • Cook noodles in a large pot of boiling water for half the time noted on the package directions. For Hakubaku brand soba, cook for 1 1/2 minutes (no longer). Add asparagus to noodles and cook for 45-60 seconds. Reserve 1 cup of cooking liquid just before the 45-60 seconds is up, then immediately drain noodles and asparagus in a colander and run under cool water to stop the cooking; reserve pot.
  • Heat oil in a medium skillet over medium-high heat. Cook pork in an even layer undisturbed, until nicely browned, about 5 minutes. Continue to cook, stirring and breaking up with a wooden spoon, until cooked through, about 3 minutes (adjust heat as needed if too hot). Add reserved sauce and cook, scraping up browned bits, 1 minute.
  • Transfer pork, noodles, and asparagus to reserved pot. Drizzle a teaspoon of soy sauce (or a few pinches of kosher salt) plus 2/3 cup reserved cooking liquid into the pot and cook over medium heat, stirring gently with a spoon adding more cooking liquid if needed, until noodles and meat are warm and well coated with sauce but not watery, about 1 minute (leaving the soba on the heat much longer can cause the soba to be over cooked). Taste and adjust with more soy sauce or kosher salt if necessary.
  • Transfer pork and asparagus to a large, shallow serving bowl. Sprinkle with green onions and sesame seeds. Serve with extra chili crisp or sriracha.

Notes

  • If you want to make this for two people, use half of the soba, asparagus and cooking liquid called for. I recommend making the full recipe for the pork and reserving half for the next day. It’s delicious with ramen (the dried wavy type) cooked al dente and warmed in a bit of vegetable oil seasoned with soy sauce. Mix it all together to warm up and shower with lots of green onions, roasted sesame seeds and sriracha sauce. Serve with crunchy bok choy on the side.
Breakfast, Dessert, Lactose Free, Recipes, Summertime Meal

Blueberry Pie Bars

May 9, 2023

Looking for an irresistible summer dessert? Search no more. These blueberry pie bars from Trisha Yearwood will meet all of your requirements. Fresh, juicy blueberries tucked between a tender crust and crisp, buttery topping are the perfect combination.

To make this recipe lactose free, I used vegan butter and lactose free sour cream. I use both of these indispensable products in many of my recipes.

The dough for the crust is pressed into the foil-lined baking pan.

The filling for this recipe is what distinguishes these from other blueberry bars. A mixture of sour cream, egg, sugar, cinnamon and a generous amount of lemon juice are combined with a portion of the blueberries which are then poured over the crust. Trisha refers to the filling as a custard.

A handful of reserved blueberries are scattered over the filling before adding the crust topping.

The topping emerges from the oven beautifully browned and the blueberries beneath are delightfully jammy.

These blueberry pie bars are irresistible. I love everything about them. Eat them while they are slightly warm or at room temperature.

Blueberry Pie Bars

Recipe by Kiyo
Servings

16

servings

Recipe adapted from Food Network-Trisha Yearwood

Ingredients

  • Crust
  • 1/2 cup (113g) Buttery Sticks, chilled (or unsalted butter)

  • 3/4 cup (150g) granulated sugar

  • 1 1/2 cups (180g) all-purpose flour

  • 1/2 teaspoon ground cinnamon

  • Pinch of kosher salt

  • Filling
  • 1 large egg

  • 1/2 heaping cup (125g) Green Valley lactose free sour cream (or regular sour cream)

  • 1/3 cup (67g) granulated sugar

  • 2 tablespoons fresh squeezed lemon juice

  • 1 tablespoon all-purpose flour

  • 4 teaspoon cornstarch

  • 2 teaspoons vanilla extract

  • 1/2 teaspoon ground cinnamon

  • 2 cups (296g) fresh blueberries, rinsed and drained well

Directions

  • Preheat oven to 350 degrees. Line an 8×8-inch baking pan with foil that reaches the top sides of the pan.
  • In a bowl of a food processor, combine the Buttery Sticks, sugar, flour, cinnamon and salt. Process until the mixture begins to clump together, 40-60 seconds or so. Remove 1 cup and reserve; press the remaining crust mixture evenly into the prepared baking pan. Set aside.
  • In a medium bowl, whisk together the egg, sour cream, sugar, lemon juice, flour, cornstarch, vanilla extract and cinnamon until smooth. Mix in 1 cup of the blueberries. Pour filling mixture over the crust, shaking the pan gently to settle the custard and berries. Scatter remaining 1 cup blueberries over the top, spreading them evenly.
  • Sprinkle the reserved crust mixture over the berries. Squeeze mixture with hands to encourage large lumps.
  • Bake 1 hour. Let cool on wire rack. Lift foil from pan and transfer to a cutting board. Slice blueberry pie bars into 16 squares, or larger pieces if you prefer.

Notes

  • Leftover blueberry pie bars can be stored in a sealed container in the refrigerator for 3-4 days. Freezing is not recommended as the filling can become a bit soggy when defrosted.
Dinner, Lactose Free, Recipes, Salad, Side Dishes, Vegan, Vegetarian, Veggies

Cucumber Salad with Roasted Peanuts and Chile

April 29, 2023

This easy to make crispy cucumber salad has a lot going for it. Not only is it very simple to put together, it is an uncommon but tasty combination of ingredients.

Cucumbers with minimum amount of seeds and tender skins are best for this salad. You really want that “crunch” in each bite you take. Japanese cucumbers work well if you can find them.

The addition of nuts adds so much flavor and texture to salads. Including a small amount each day in your diet is very nutritious. The salad also has red pepper flakes for a bit of spice and cilantro for its unique je ne sais quoi. Of course if you don’t care for cilantro, switch it out with fresh mint or parsley.

The peanuts, cilantro, and chile flakes are chopped up together. I found that this is best done close to the time you are serving the salad. If you want to chop these ingredients in advance, it’s best to separate the cilantro from the peanuts and chile flakes as the moisture from the cilantro can affect the texture of the peanuts.

Once you have everything ready to go, toss the cucumbers with the dressing then sprinkle it with the peanut topping. A drizzle of your favorite chile crunch is the icing on the cake.

Cucumber Salad with Roasted Peanuts and Chile

Recipe by Kiyo
Servings

2-4

servings

Recipe adapted from NYT Cooking

Ingredients

  • 6 Japanese or Persian cucumbers (about 1 pound), cut lengthwise into thin spears, then cut crosswise into 2-inch pieces

  • Kosher salt

  • 1/4 cup salted, roasted peanuts

  • 1/4 cup cilantro leaves (or substitute with fresh mint or parsley)

  • 1/2 teaspoon chili flakes

  • 2 tablespoons soy sauce

  • 2 tablespoons unseasoned rice vinegar

  • 1 1/4 teaspoons granulated sugar

  • 1 small garlic clove, grated

  • Chile crisp or chile oil (optional but recommended)

Directions

  • Toss sliced cucumbers with 1/2 teaspoon kosher salt in a colander. Set aside to drain.
  • Chop peanuts, cilantro and red pepper flakes together until very fine. If you are not serving the salad within an hour, chop cilantro separately and combine with peanuts and chili flakes before serving. This will prevent the peanuts from taking on moisture from the chopped cilantro.
  • In a large bowl, whisk together soy sauce, rice vinegar, sugar and garlic. Transfer salted cucumbers to the bowl and toss to coat.
  • To serve, place half the cucumber salad on a plate, sprinkle with half the peanut mixture. Repeat with the remaining cucumbers and peanut mixture. Drizzle with chile crisp or chile oil if using. Serve immediately.

Notes

  • Leftovers will keep for a day stored in the refrigerator. Note that the peanuts may lose their crunch from being stored with the cucumbers and dressing.
Dessert, Lactose Free, Recipes

Black Magic Cake

April 20, 2023

This is an exceptionally delicious and easy to make chocolate cake. You can make it in a fluted tube pan, two 9-inch round cake pans as I did, or a 13x9x2-inch baking pan. The cake is very tender and moist and has just the right amount of sweetness. When you serve this cake, everyone will secretly be hoping you’ll send them home with a slice for the road. It’s not at all surprising this cake recipe from hersheyland.com gets rave reviews and a 5* rating.

No fancy ingredients are required for this recipe. If you don’t have buttermilk on hand, an acceptable substitution is to make your own by adding a tablespoon of white vinegar to a liquid measuring cup and filling with milk to reach the 1-cup marker. Stir to combine, and let milk sit for 5-10 minutes before using in your recipe.

The cakes baked in round pans are done in 30-35 minutes (up to 50 minutes for fluted tube pan). Let cool in the pan for 15 minutes before transferring to a wire rack to cool completely before frosting.

Once again, no fancy ingredients required for the chocolate frosting. I used Earth Balance Buttery Sticks for my lactose free version, however, go ahead and use regular butter when making your frosting.

Frosting the cake adds the final touch to what has become my favorite chocolate cake. I used Hershey’s Perfectly Chocolate” Chocolate Frosting (recipe on the back of Hershey’s Cocoa box). If you choose to use a tube pan or make one layer in a 13x9x2-inch pan, frosting the cake is not required. You can simply choose to dust powdered sugar over the top before serving with a scoop of vanilla ice cream or whipped cream.

A slice of Magic Cake.

Black Magic Cake

Recipe by Kiyo
Servings

12-14

servings

The best chocolate cake! Adapted from hersheyland.com.

Ingredients

  • Cake: 2 layers, 9-inch cakes
  • 2 cups (396g) granulated sugar

  • 1 3/4 cups (210g) all-purpose flour

  • 3/4 cup (63g) Hershey’s cocoa

  • 2 teaspoons baking soda

  • 1 teaspoon baking powder

  • 1 teaspoon salt

  • 2 large eggs

  • 1 cup (227g) buttermilk or sour milk (sour milk: add 1 tablespoon white vinegar to a liquid measuring cup and add lactose free or regular milk to reach 1-cup marker. Stir and let sit for 5-10 minutes before using in recipe.)

  • 1 cup (227g) strong black coffee or 2 teaspoons powdered instant coffee plus 1 cup boiling water

  • 1/2 cup (99g) vegetable or canola oil

  • 1 teaspoon vanilla extract

  • Frosting
  • 1/2 cup (113g, 1 stick) Earth Balance Buttery Sticks (or regular butter)

  • 2/3 cup (56g) Hershey’s cocoa

  • 3 cups (340g) powdered sugar

  • 1/3 cup (76g) lactose free or regular milk

  • 1 teaspoon vanilla extract

Directions

  • Heat oven to 350 degrees. Place parchment rounds in pan then grease and flour pans including the sides.
  • Stir together sugar, flour, cocoa, baking soda, baking powder and salt in a large bowl. Add eggs, buttermilk or sour milk, coffee, oil and vanilla; beat on medium speed with a hand mixer for 2 minutes (batter will be thin). Pour batter evenly into prepared pans.
  • Bake 30-35 minutes or until a toothpick inserted in the center comes out clean. Cool 15 minutes. Remove cakes from pan and transfer to 2 wire racks that comfortably hold each cake. I found it easiest to place a piece of plastic wrap over the top of the cake pan followed by a flat cutting board and turn the cake out then place a wire rack over the bottom of each cake and flip right side up. Cool completely.
  • Meanwhile, in a large bowl, melt Buttery Stick or regular butter in microwave just until most of the butter has melted. Stir to melt the remaining bits of butter. Whisk in cocoa. Alternately add powdered sugar and milk, beating to spreading consistency. Add a small amount of additional milk if needed. Stir in vanilla.
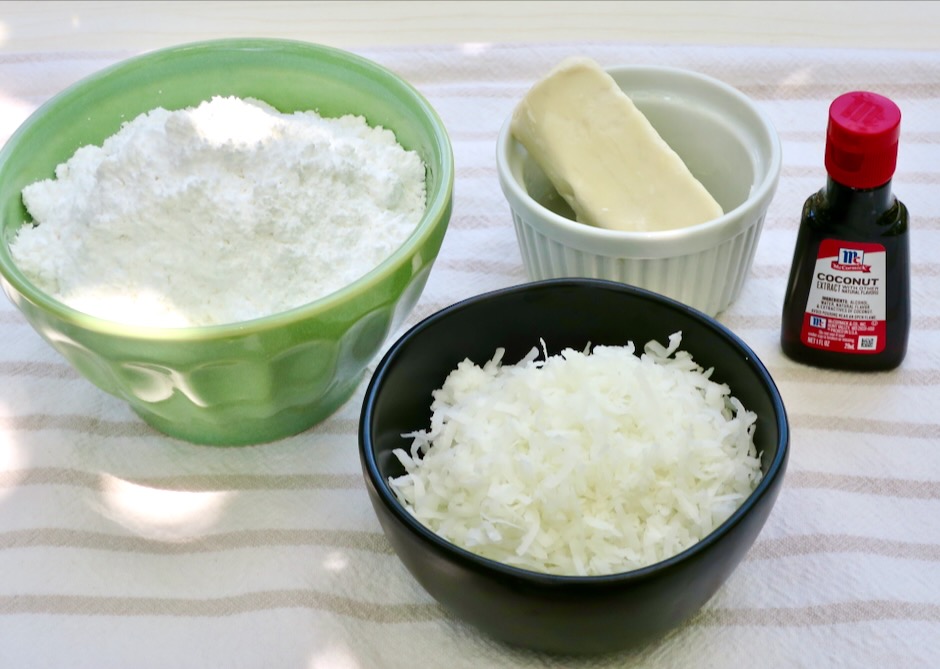
  • To assemble, place one of the cakes flat side up on a serving platter or cake board. Using an offset spatula, frost the top of the cake with 1/3 of the frosting. Place second cake rounded side up on top of the first layer. Frost the top and sides of the cake with the remaining frosting.
Notes

  • You may chill the cake in the refrigerator if made earlier in the day using a cake cover or by tenting foil over the cake being sure to secure the foil to the edge of the platter so that the cake does not dry out. Remove cake an hour before serving. Leftover cake can be frozen for a few months.
Dinner, Fish, Kimchi, Korean, Lactose Free, Recipes

Kimchi Tuna Salad

April 9, 2023

From the first time I made this kimchi tuna salad I knew it would become a regular on our lunch menu. Making kimchi has inspired me to use the spicy and crunchy Korean side dish in all types of recipes. Dishes such as fried rice, kimchi soup and cheesy kimchi ramen illustrate the versatility of this fiery fermented vegetable. In this dish it is paired up with tuna, fresh ginger, sesame oil, rice vinegar, and celery (for added crunch). You can have it as is, however, my favorite way to serve it is over soba or with rice.

A short list of ingredients make up this recipe adapted from NYT Cooking. Tuna in olive oil makes this extra luxurious but a good brand of tuna in water will work fine.

If homemade kimchi is not something you have in your refrigerator, use your favorite store-bought brand. There are so many to choose from these days, from mild to spicy (go spicy!).

Serve the kimchi tuna salad over rice or make onigiri (rice balls) to accompany the salad. A drizzle of sriracha adds extra spice.

Kimchi Tuna Salad

Recipe by Kiyo
Servings

2

servings

Adapted from NYT Cooking

Ingredients

  • 8 ounces kimchi + 2 1/2 tablespoons kimchi juice

  • 1 tablespoon unseasoned rice vinegar

  • 1 1/2 teaspoons toasted sesame oil

  • 5 to 7 ounce canned tuna (preferably oil-packed), drained

  • 1 celery stalk, thinly sliced

  • 1 (1-inch) piece fresh ginger, peeled and sliced into 1/8-inch matchsticks

  • 2 1/2 tablespoons mayonnaise

  • 2 teaspoons roasted sesame seeds

  • 1-2 tablespoons thinly sliced green onions

  • Nori furikake (optional)

  • Sriracha sauce (optional)

  • Cooked soba noodles or rice

Directions

  • Cook soba noodles or rice according to package directions. If serving salad with onigiri (rice balls), make these once the rice is cool enough to handle and wrap in plastic wrap until ready to serve. Set aside.
  • Place kimchi in a small colander set over a bowl and drain the kimchi. Reserve the kimchi juice. Coarsely chop the kimchi (you should have about 1 cup)
  • In a medium bowl, whisk together 2 1/2 tablespoons of the reserved kimchi juice, rice vinegar, sesame oil and mayonnaise. If you prefer a thicker sauce, add another 1/2 tablespoon mayonnaise. Gently stir in the drained tuna and celery, breaking up the tuna into large chunks.
  • Add the chopped kimchi and ginger, and gently stir to combine. Because kimchi batches taste different, adjust seasonings as needed by adding a bit more vinegar if the salad needs more tang or a few extra drops of sesame oil if you prefer a toasty flavor.
  • Serve over soba noodles or rice or alongside onigiri. Sprinkle salad with green onions, roasted sesame seeds, furikake, and sriracha sauce.
Notes

  • Kimchi tuna salad is best eaten the day it is made, however, any leftovers can be stored in the refrigerator for a few days.
Cookies, Dessert, Lactose Free, Recipes

Chocolate Chip Oatmeal Cookies

March 26, 2023

These excellent cookies come from King Arthur’s Test Kitchen and were crowned the winner of their 2015 recipe of the year. They described the cookies as being “soft and chewy packed with chips.” Though I won’t turn down a soft and chewy homemade cookie, a crispy cookie is my favorite. It was the “packed with chips” that convinced me to try this recipe. I’m not sure why my cookies turned out crispy but I was thrilled with the outcome. They are crispy throughout (not just the edges) and not too thick or too thin. With that said, they are my new favorite cookie.

The original recipe calls for a small amount of oats. I tested a few batches using old fashioned rolled oats and quick cooking oats and found that the latter produced a chocolate chip cookie in which the oatmeal was barely detectable. If you prefer the oatmeal to be more pronounced, use old fashioned oats.

There is no shortage of chocolate chips in this recipe. That’s what makes these cookies so good.

A quick chill in the refrigerator or freezer helps to firm up the dough which makes it much easier to portion out.

Allow the cookies to set on the sheet pan for a few minutes once they are out of the oven before transferring to a cooling rack. Once cooled, wrap and give some to your family and neighbors. I keep a few stashed in the freezer for an after dinner snack, sometimes eating them before they have time to defrost.

Crispy throughout with lots of chocolate = the perfect cookie.

Chocolate Chip Oatmeal Cookies

Recipe by Kiyo
Servings

30

cookies

Adapted from King Arthur Baking Company

Ingredients

  • 8 tablespoons (113g) Earth Balance Buttery Sticks for lactose free cookies, or unsalted butter, at room temperature

  • 1/2 cup (107g) light brown sugar, firmly packed

  • 1/4 cup (50g) granulated sugar

  • 1 large egg, at room temperature

  • 1 1/2 teaspoons vanilla extract

  • 1 cup (120g) unbleached all-purpose flour (King Arthur recommended)

  • 1/2 cup (45g) quick cooking or old fashioned oats

  • 1/2 teaspoon baking powder

  • 1/2 teaspoon baking soda

  • 1/2 teaspoon (scant if using Earth Balance Buttery Sticks) kosher salt

  • 1 1/2 cups (255g) semisweet or dark chocolate chips

Directions

  • Preheat oven to 325 degrees. Line two cookie sheets with parchment paper.
  • In a large bowl, using a hand mixer, beat together the butter and sugars until smooth. Beat in egg and vanilla.
  • In a small bowl, whisk together the flour, oats, baking powder, baking soda, and salt, and add to the butter mixture. Mix until everything is thoroughly incorporated. Scrape the bottom and sides of the bowl, and mix briefly. Stir in the chocolate chips.
  • Cover the bowl and place in the freezer for about 15 minutes to firm up or place in the refrigerator for about 1 hour.
  • For medium sized cookies, scoop 1 heaping tablespoon onto cookie sheet (12 balls fit nicely on a cookie sheet allowing for some spreading as cookies bakes).
  • Bake cookies for 13-16 minutes, until they are light golden brown, with slightly darker edges.
  • Remove the cookies from the oven, let cool on baking sheet for 3 minutes or until they are set enough to handle. Transfer cookies to a cooling rack. Continue baking with the remaining dough alternating with cooled cookie sheets.

Notes

  • Cookies may be frozen for a few months.
Follow

Get every new post delivered to your Inbox

Join other followers: