Cruciferous vegetables are tasty, versatile, and healthy. They can be eaten raw or cooked. A list of my favorites would include arugula, cabbage, watercress, broccoli and bok choy among others.
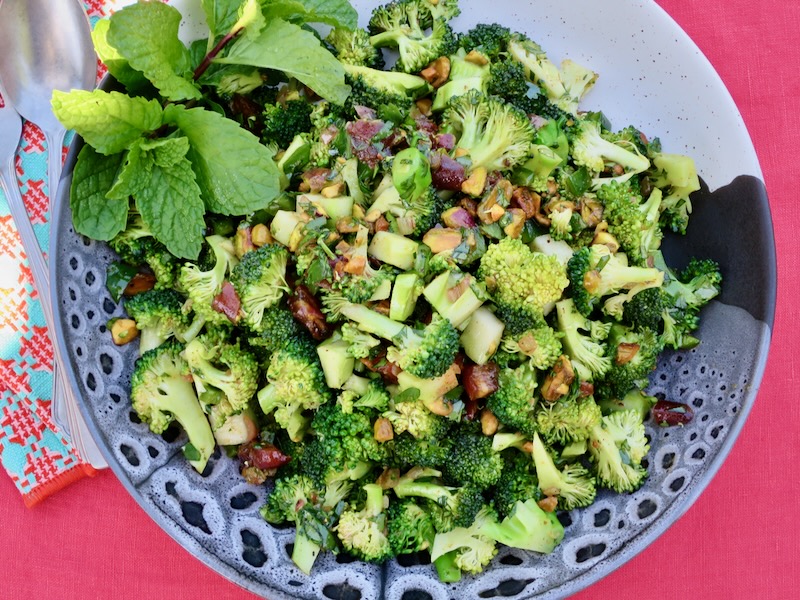
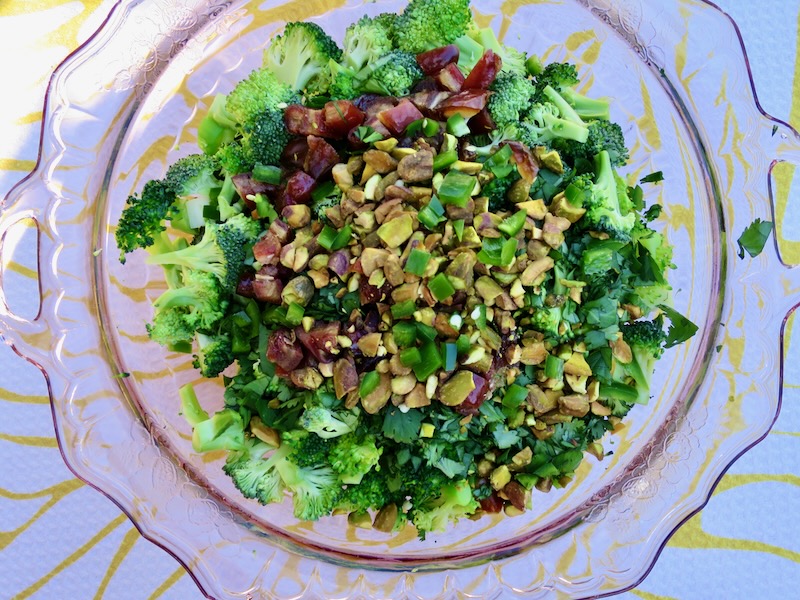
The star of this dish is crunchy broccoli. You can use raw broccoli florets or quickly steam them, it’s up to you. Combined with a few other flavorful ingredients, this salad is perfect to make ahead and enjoy for the next few days.
The ingredients make for a unique salad that pops with flavor in every bite. Fresh tart lemon dressing along with crispy pistachios, spicy jalapeño, sweet dates and a Ras El Hanout spice mix harmonize together making it a superb choice for your next gathering.
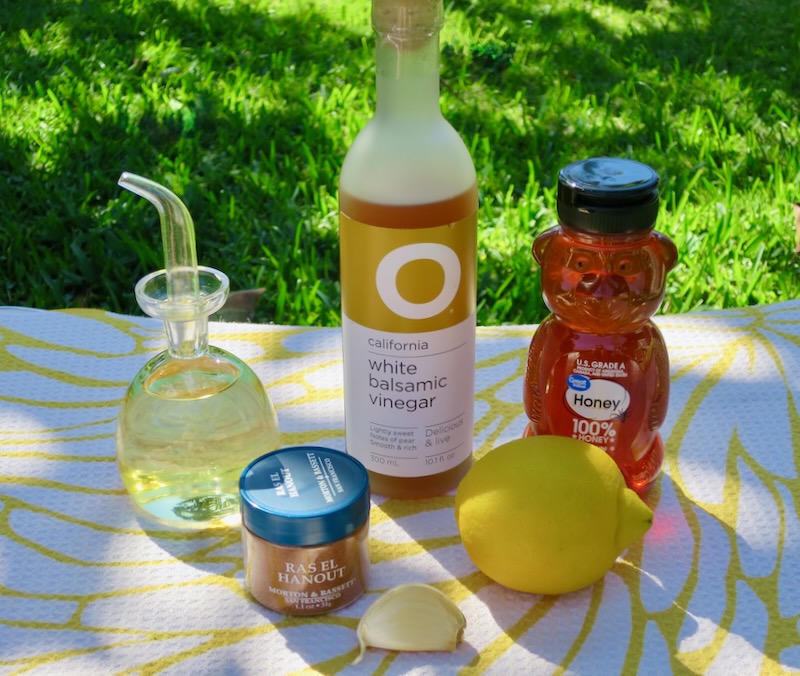
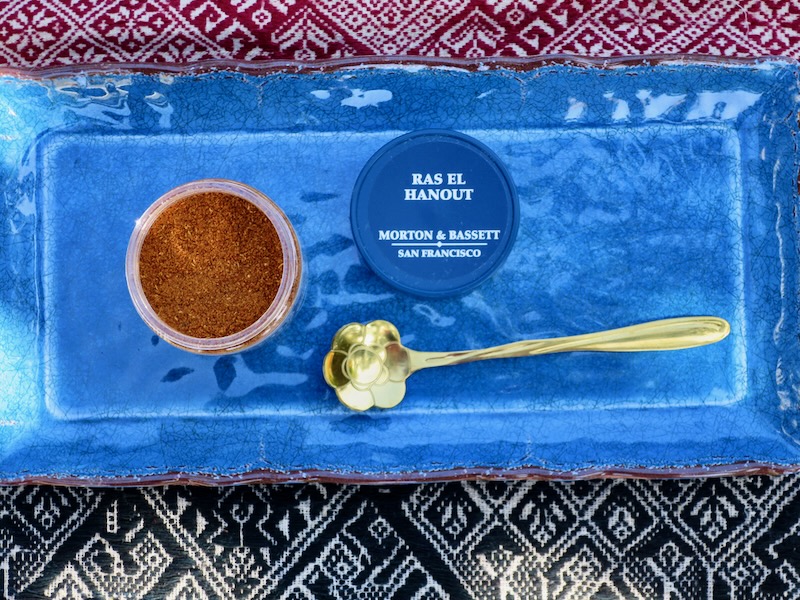
Ras El Hanout is a vibrant spice blend that lends a warm, savory flavor to food. It has a beautiful fragrance and instantly adds incredible flavor to whatever you use it in. Every brand has their own version though common ingredients include cumin, cardamom, cinnamon, ginger and cloves. Ras El Hanout means “head of the shop” in Arabic which suggests that it is the most prized spice blend from the merchant’s shop.
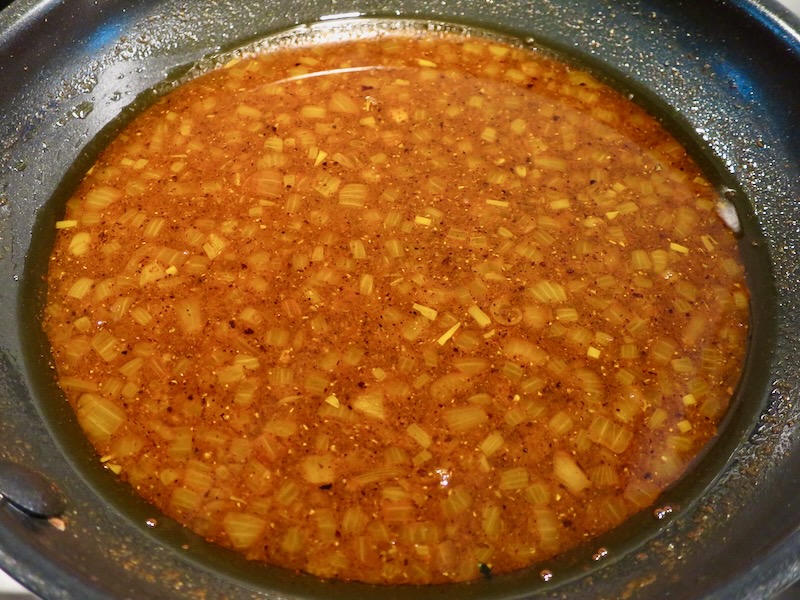
The vinaigrette for this salad is a combination of Ras El Hanout, neutral oil, lemon juice, white balsamic vinegar, honey, shallots, and garlic. The flavor is warm and earthy and compliments the other ingredients.
This hearty salad would pair well with grilled lemony herb chicken and yogurt flatbread, deviled fried chicken or balsamic-soy tofu.
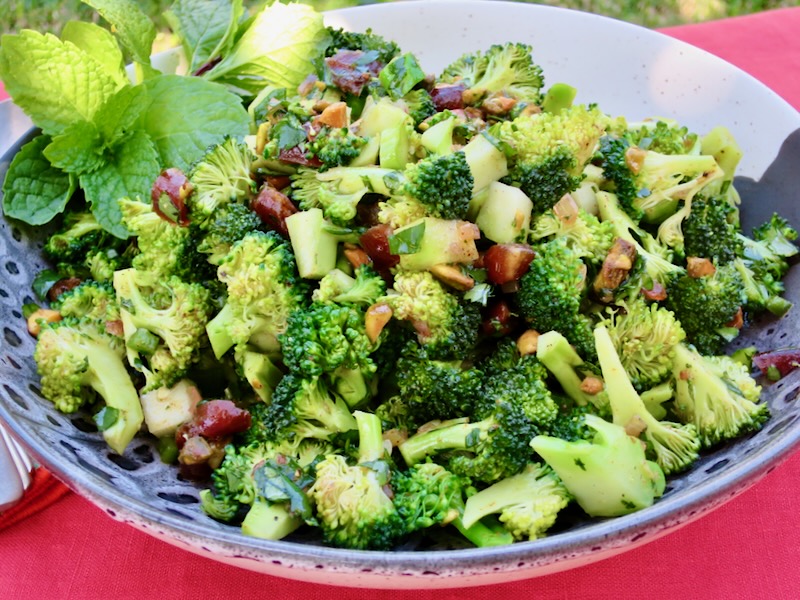
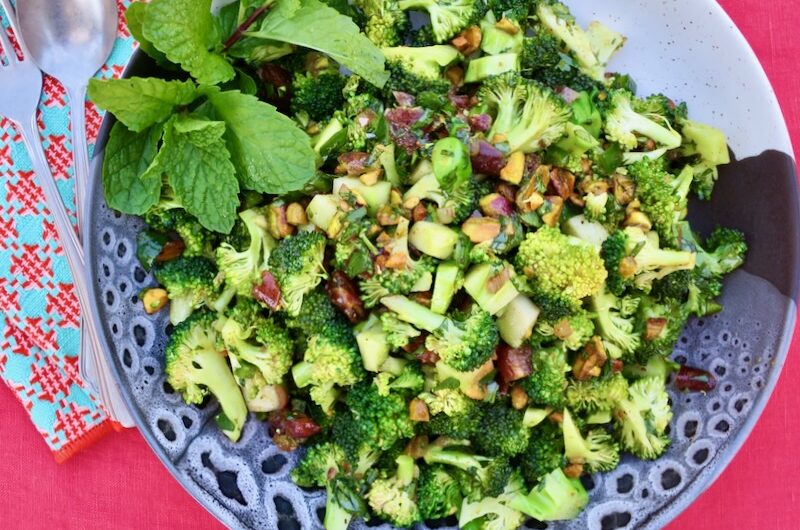
Broccoli Spoon Salad
4
servingsAdapted from Bon Appetit magazine
Ingredients
6 tablespoons grapeseed, canola, or other neutral oil
2 teaspoons ras el hanout
1 garlic clove, finely grated
1 small shallot, finely chopped
2 tablespoons fresh lemon juice
2 tablespoons white balsamic vinegar or white wine vinegar
1/2 – 1 tablespoon honey
Kosher salt, freshly ground pepper
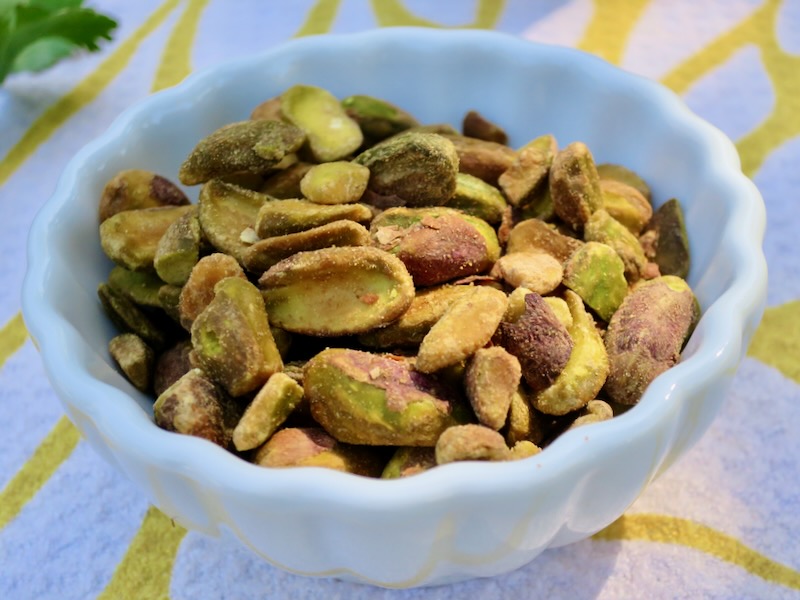
1/4 cup pistachios raw or roasted, unsalted or salted
1 medium jalapeño, finely chopped (add as much or little as you want, depending on how spicy your jalapeño is)
6 cups finely chopped broccoli florets and peeled tender stems (about 1 pound), raw or steamed for 1 minute then placed in ice bath and patted dry
1 cup finely chopped cilantro
1/3 cup finely chopped pitted dates
2 tablespoons torn mint, optional
Directions
- Heat 6 tablespoons of neutral oil, 2 teaspoons ras el hanout, 1 finely grated garlic clove and 1 finely chopped shallot in a small saucepan over medium-high heat until fragrant, about 2 minutes. Remove from the heat and whisk in 2 tablespoons lemon juice, 2 tablespoons white balsamic vinegar or white wine vinegar, and 1 tablespoon honey (for a slightly less sweet dressing, start with 1/2 T honey and taste before adding more). Season vinaigrette with kosher salt and freshly ground pepper. Set aside.
- Toast pistachios in a small skillet over medium-low heat until golden brown, about 4 minutes. If using roasted pistachios toast for just a couple of minutes to crisp up the nuts. Transfer to a cutting board, let cool; finely chop.
- Toss pistachios, finely chopped jalapeño (taste first to check heat level and add as much as you want), broccoli florets and stems, cilantro, and dates in a medium bowl. Drizzle some of the reserved vinaigrette over and toss to coat well. You may not need all of the dressing. Taste and season with more salt and pepper if needed. Sprinkle torn mint over the top if using.
Notes
- If making the salad in advance (up to 1 day): Add pistachios just before serving so they retain their crunchy texture.