Browsing Category

Pork

Mexican, Pork, Pressure Cooker, Recipes

Pressure Cooker Carnitas

October 28, 2013

Carnitas with Avocado & CheeseEver since we bought a pressure cooker we’ve been having so much fun trying out new recipes. We also experiment with old braising recipes that once took hours to cook but now cook in a short time but taste every bit as delicious. If you don’t have a pressure cooker, consider buying one. You won’t regret it.
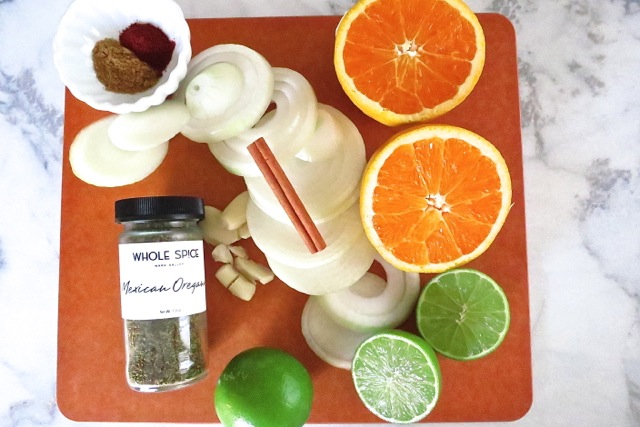
Carnitas Seasoning IngredientsMexican cuisine is notable for its variety as well as its bold, zesty flavors.  These carnitas are no exception. We came across this recipe in an article on pressure cookers in Cuisine At Home magazine.  I found it interesting that the liquid consisted entirely of citrus juice. I was very hesitant to try the recipe but with a bit of coaxing off I went to the market to pick up all the ingredients.
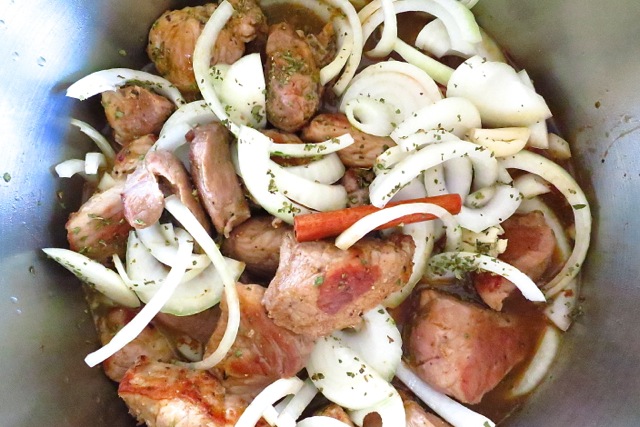
Carnitas in Pressure Cooker Once the pork has browned, all the ingredients get thrown into the pressure cooker and  in no time at all,  you’ll be feasting on some of the best carnitas imaginable.
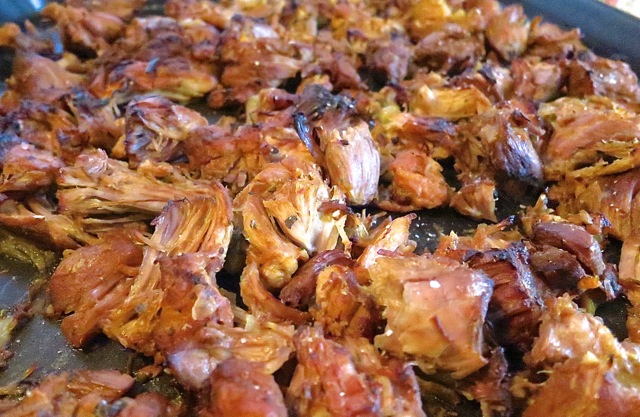
Carnitas with Crispy EdgesThe cooked pork is then finished in the oven until it begins to crisp around the edges.
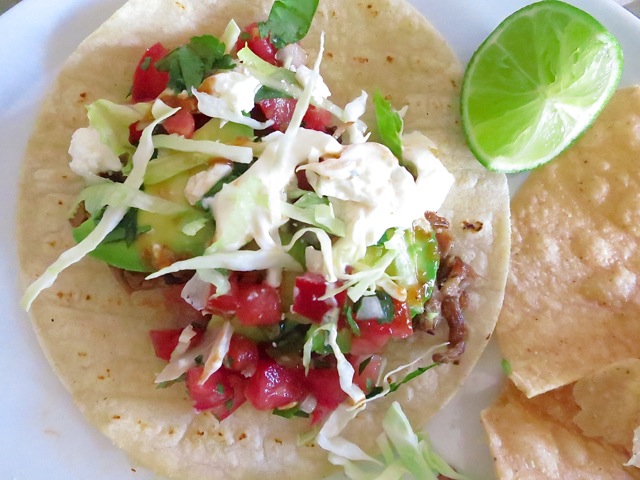
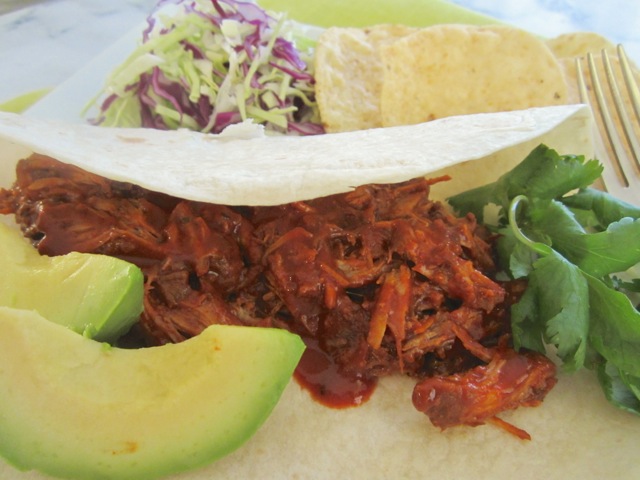
Carnitas with Avocado, Salsa, Cabbage & Sour CreamAccompaniments include avocado, sour cream, salsa fresca, shredded cabbage, cilantro a bit of feta cheese and a dash of hot sauce all wrapped in corn tortillas warmed on a cast iron skillet.

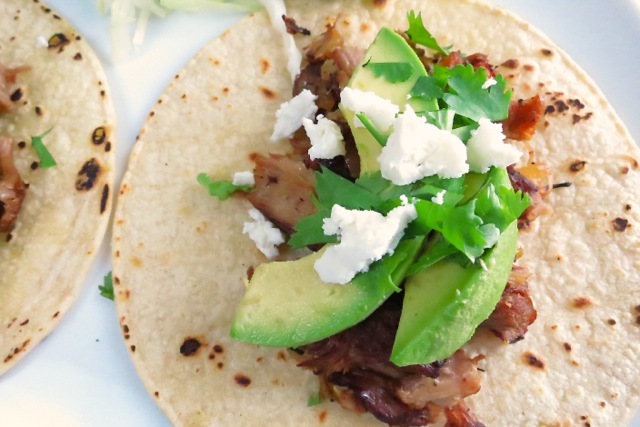
Carnitas with Avocado & Feta

Pressure Cooker Carnitas

Adapted from Cuisine At Home

Ingredients

2 tablespoons olive oil

3 teaspoons kosher salt

1 1/2 teaspoons cumin

1 1/4 teaspoons chile powder (I use Hatch pure mild chile powder and 1/4 teaspoon chipotle chile powder)

1/2 teaspoon black pepper

3 pounds boneless pork shoulder (pork butt) cut into 2 inch chunks (I buy at least 4 pounds and trim the pork very well, ending up with about 3 pounds)

1 onion, sliced

3 cloves garlic, crushed

2 teaspoons dried oregano

1 cinnamon stick (3-inch)

1 1/2 cups strained fresh orange juice (about 4 – 5 large oranges)

1/2 cup strained fresh lime juice (about 4 – 5 juicy limes)

Preparation

Whisk together oil, salt, cumin, chile powder, and pepper.

Toss the pork in the oil-spice mixture.  Brown the pork in the pressure cooker in two separate batches over medium-high heat. Return first batch of pork to the pressure cooker.

Stir in the onion, garlic, oregano, and cinnamon stick.  Add the orange and lime juices.

Cover the pressure cooker, lock on the lid, and bring to high pressure over medium-high heat.  Once the pressure cooker comes up to pressure, lower the heat to a low burner setting so that it maintains pressure without exceeding it. Cook pork for 25 minutes.  Remove cooker from the heat and allow pressure to release naturally.  Remove the lid and transfer pork to a baking sheet (I use my jelly roll pan).

Preheat the broiler to high with the rack 6 inches from the element.

Degrease liquids from the cooker in a fat separator and discard fat (I trimmed my pork really well and was able to skip this step).  Shred pork with two forks on baking sheet.  Pour 1 cup strained cooking liquid over the pork.

Broil until the pork starts to crisp, about 7 minutes.  Stir and broil another 5 minutes more, watching carefully so the pork doesn’t burn.  Serve with warm corn tortillas and your favorite accompaniments.

***I froze the leftovers but it wasn’t long before we pulled it out from the freezer and devoured the rest of the carnitas.

 

Italian, Pork, Recipes

Pork Milanese

February 28, 2013

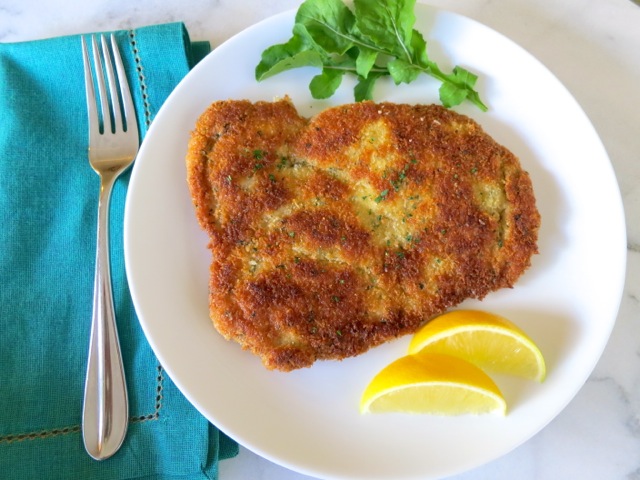
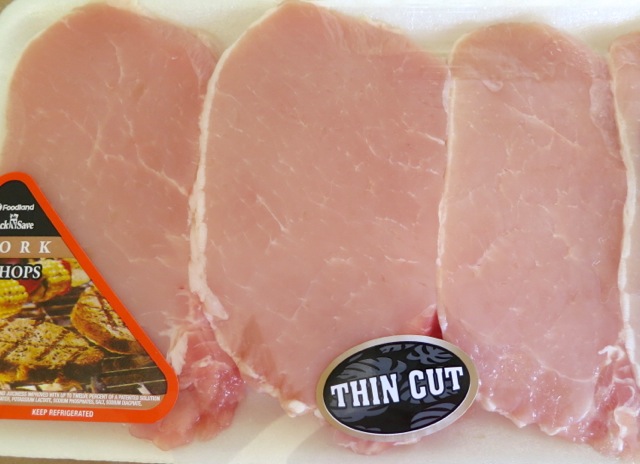
Pork Milanese with LemonIt’s amazing what you can do with inexpensive boneless pork loin chops.  For under $7.00 you can prepare an impressive dinner for four people.  I wasn’t sure what to call this dish.  Milanese, schnitzel, pork cutlet, cotoletta?

Pork CutletsI found this description of Milanese on-line:

“Milanese” is a preparation in which a meat chop (it can be pork or veal, but flattened chicken breasts can also be cooked “milanese”) is dipped in egg wash, then bread crumbs, and then shallow-fried in oil. It’s basically the same preparation as Wiener schnitzel (made with veal cutlet, pounded thin) and in some parts of Germany that dish is called “schnitzel milanese”.  It’s called Wiener schnitzel in Austria – the schnitzel of Wien (Vienna), but it may have originated in northern Italy and migrated to Austria from there. The Milanese cut is probably named after the dish, a thin cut suited to that sort of frying.  The chops in my grocery store are already cut pretty thin, but if your chops are thick you can pound them with a meat mallet.  (Wiener schnitzel is always pounded very thin, and in Vienna a cut always covers an entire large plate.  It’s very dramatic.)

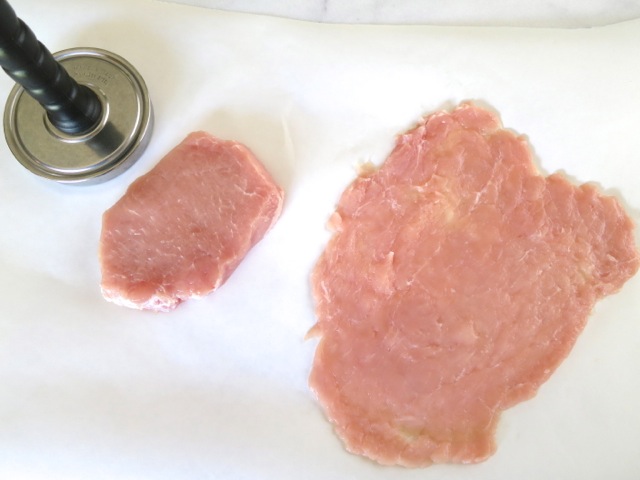
Pounded Pork CutletPound each slice of pork very thin being careful not to tear it.

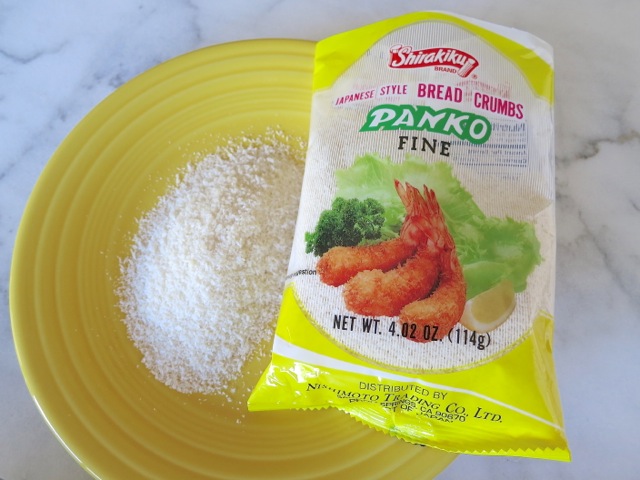
PankoPanko bread crumbs provide and extra crispy coating.

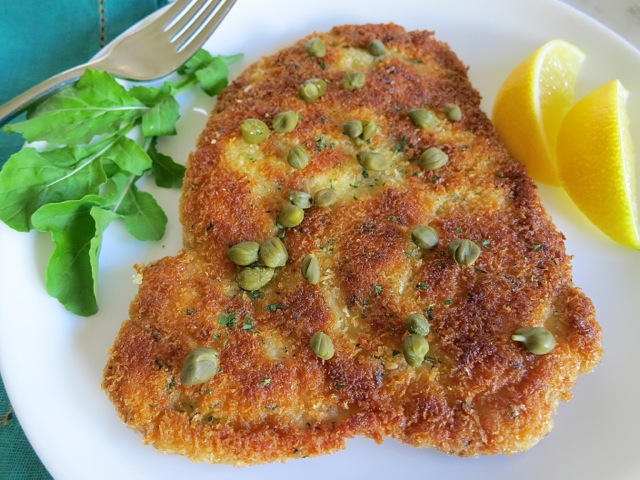
Pork Milanese with CapersPork Milanese with capers and lemon.

Pork Milanese

Ingredients

1 pound thin cut boneless pork loin chops (4 pieces) pounded thin

3/4 cup flour

3 large eggs, lightly beaten

1 1/2 c fine panko bread crumbs

1/2 cup finely grated Parmigiano Reggiano

1/2 teaspoon dried oregano

1/4 teaspoon dried thyme

1 teaspoon finely chopped fresh parsley

Salt and pepper

Capers (not traditional, but I like them with this dish)

Fresh lemon wedges

Olive oil for frying

Preparation

Pound the cutlets very thin, about 3 times the original size (cut one side of a Ziplock bag open and place pork between the two layers then pound until thin.  This works better than plastic wrap which can tear).  You can do this prior to cooking the pork Milanese, just place waxed paper between each piece, cover with plastic wrap and store in the refrigerator.

In a shallow bowl, mix the panko with the cheese and herbs.

Put the flour and eggs in two shallow bowls.

Once you’re ready to cook the pork, generously season each piece on both sides with salt and pepper.

Dredge the pork in flour, tapping off the excess then dip in the eggs, making sure to coat well letting the excess egg drip back into the bowl.

Place the pork in the panko mixture and coat well, patting the panko mixture on each side.  Continue the same process with the other pieces of pork.

Heat 3 – 4 tablespoons of olive oil over medium high heat in a large sauté pan. I fry one piece at a time since the pork is pounded so thin and takes up the entire pan however go ahead and use two pans if you want to. Once the oil is hot add the pork and fry until nicely browned and crispy, about 3 minutes. Turn the pork over and fry for another 2 – 3 minutes.  It shouldn’t take much longer, the pork is very thin and cooks quickly. Add more oil as needed when frying the remaining pork.

Place the pork Milanese on a large serving platter and sprinkle with capers (optional), minced parsley and lemon wedges.  Fresh tomato sauce with spaghetti is a good accompaniment.

Buon appetito!


Dinner, Pork, Recipes

Grilled Pork Tenderloin with Herbs and Pancetta

February 9, 2013

Pork Tenderloin with Demi GlaceNow that the weekend has finally arrived I’ll have some time to tackle some chores I’ve neglected for a while. One of which might be to sift through all of the food magazines I have stacked on the book shelves and toss a few.  It’s rare that I go back to past issues once I move them from the living room to the book shelf in the back of the house.  The exception to that would be Cooks Illustrated.  I like to keep my back issues as reference. Their in depth analysis of every recipe is quite valuable. Speaking of weekends and food magazines, I found this recipe in the August issue of Bon Appetit (this particular one never found its way to the book shelf). I finally made this dish last Sunday.  All I can say is that it’s delicious, easy to prepare, great for a dinner party.  If you happen to have leftovers it makes a tasty sandwich.

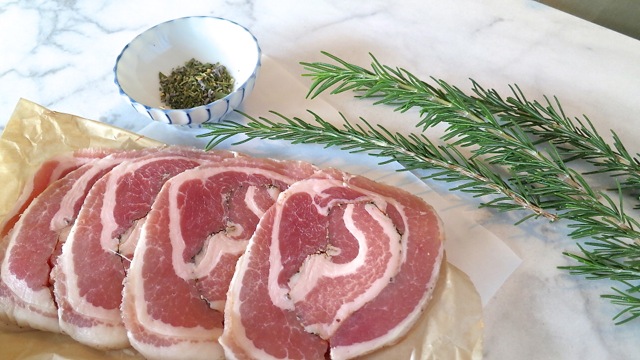
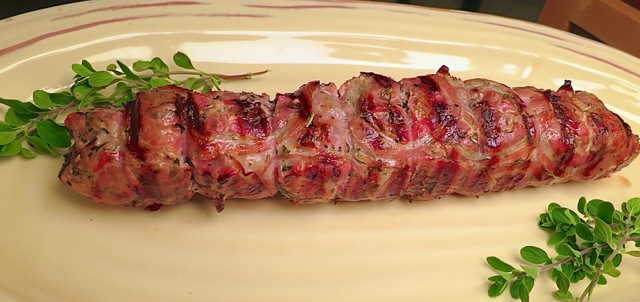
Pancetta & HerbsHerbes de Provence and fresh rosemary are rubbed on the pork tenderloin and pancetta is wrapped and tied over the herbs.

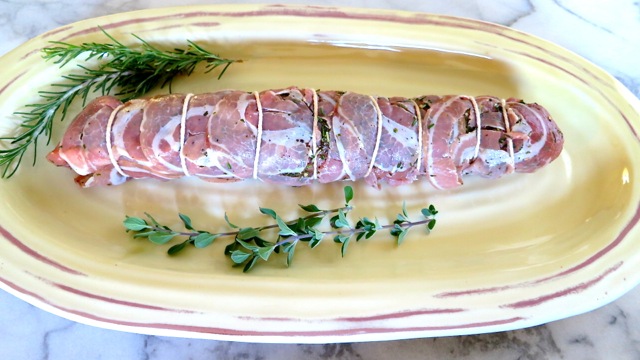
Pancetta Wrapped Tenderloin

Grilled Pork Tenderloin

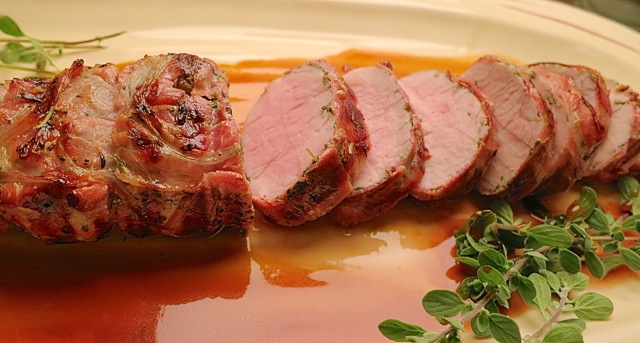
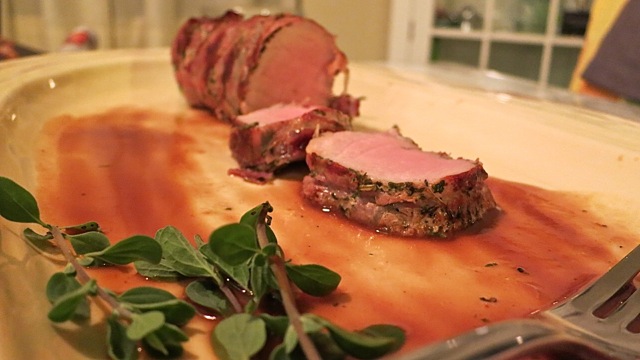
Sliced Pork Tenderloin

Grilled Pork Tenderloin with Herbs & Pancetta

Adapted from Bon Appetit

Serves 6

Ingredients

1 1/2 tablespoons minced fresh rosemary

4 teaspoons herbes de Provence

4 teaspoons extra virgin olive oil

2 pork tenderloins (about 2 pounds total)

kosher salt and freshly ground pepper

16 thin slices pancetta (about 8 ounces)

Preparation

Mix rosemary, herbes de Provence and oil in a small bowl.  Rub the herb mixture over the pork.  Season the pork with salt and pepper.

Wrap pancetta slices around the pork and tie at 2 inch intervals with kitchen twine.

Gas Grill Instructions:

Heat all but one burner to high.  Grill tenderloins over the hot part of the grill, turning frequently, until a crisp brown crust forms on all sides, 8 – 10 minutes.  Turn heat down to medium and move tenderloins to cooler part of the grill to gently cook through. Close grill (if your grill has a built-in thermometer, aim for a temperature of about 350 degrees F.) and cook until an instant-read thermometer inserted into the middle of each tenderloin registers 145 degrees, 15 – 20 minutes longer.

Transfer tenderloins to a cutting board and let rest for 5 minutes.  Slice and serve with demi-glace sauce or the plum chutney suggested in Bon Appetit.

***If using a charcoal grill, build a medium hot fire; push coals over to 1 side of the grill and continue with the gas grilling instructions above.

Dinner, Mexican, Pork, Recipes

Carne Adovada Tamales

December 17, 2012


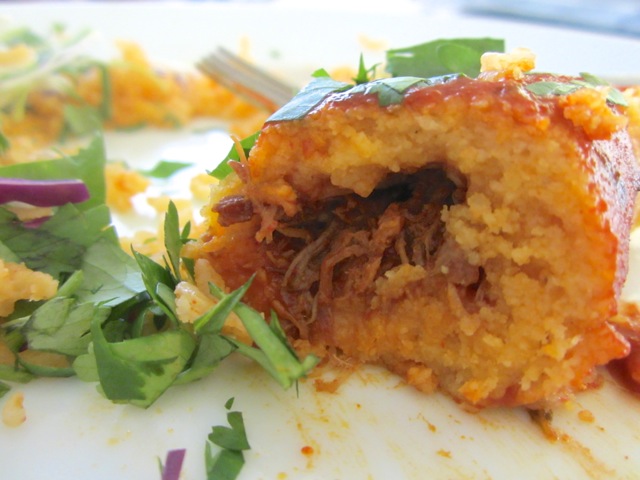
It’s December and the weather has definitely changed.  It is now pleasantly cool in the mornings and evenings.  This slight change means a lot to those of us who live in Hawaii.  After 6 months of near 90 degree weather we’re ready for a little break in the heat.  With the onset of cooler weather tamales are the perfect dish to share with your friends.  Recently I made slow cooked Carne Adovada.  My plan was to have carne adovada burritos for dinner and freeze the rest for tamale filling.

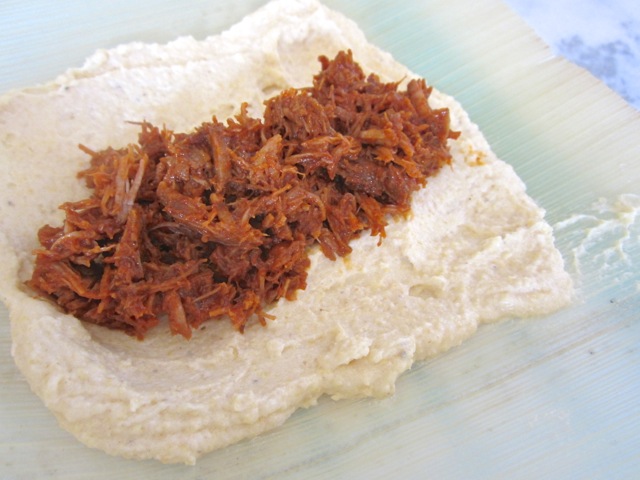
Making masa dough is very easy.  The recipe contains just a few ingredients and the preparation is not time consuming.

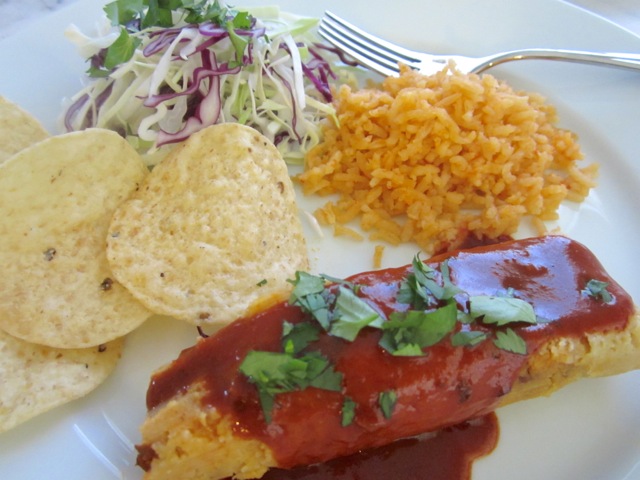
What’s a tamal without sauce and rice?

Carne Adovada Tamales (makes about 20)

Masa Dough recipe adapted from Epicurious

Carne Adovada recipe available here

Ingredients (Dough)

1 cup solid vegetable shortening

1 1/2 teaspoons salt

1 1/2 teaspoons baking powder

3 1/2 cups masa harina (about 17 ounces)

2 1/4 cups warm water

1 1/2 cups (about) chicken broth

Preparation

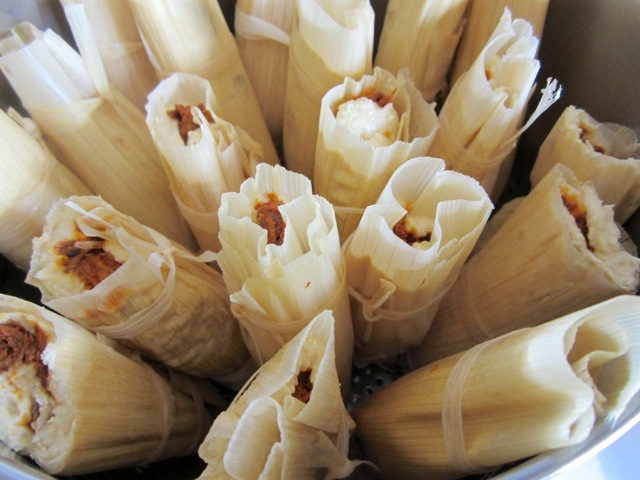
Fill the bottom of a deep pot with 2 inches of water.  The pot needs to be tall enough for the tamales to stand upright while they steam.  A pot with a steamer insert is ideal however a large vegetable steamer basket works just as well.  If the vegetable steamer basket seems too low, prop it up with a few wads of crumpled foil under the legs so there is space between the water and steamer basket.

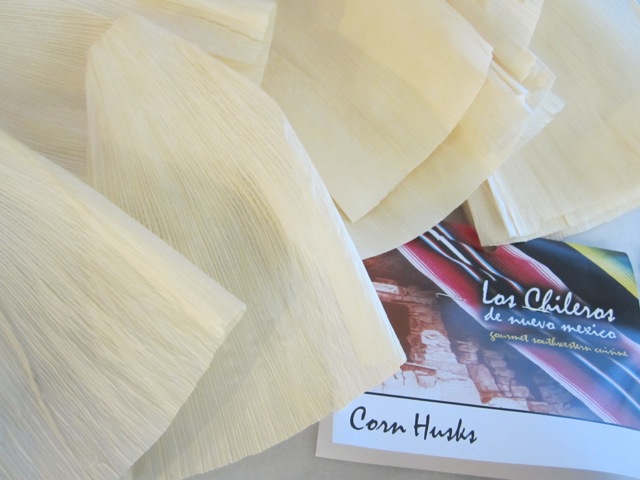
Corn Husks

Select the bigger corn husks and rinse them under cold water.  Bring a large pot of water to a boil.  Turn off the heat and submerge the corn husks in the water to soften (for 1 hour).  Place softened corn husks on a kitchen towel and pat dry.  Tear off narrow strips to use as ties for your tamales.

Masa Harina & Filling

Shred your carne adovada, beef or chicken filling and set aside.

Combine masa harina with warm water.

In a large, separate bowl, beat vegetable shortening, salt and baking powder with an electric mixer until fluffy.

Beat in masa harina mixture in 4 additions.  Reduce speed to low and gradually beat in 1 1/4 cups broth forming a soft, tender dough.  If the dough seems firm, add more broth 2 tablespoons at a time until you achieve the right texture.

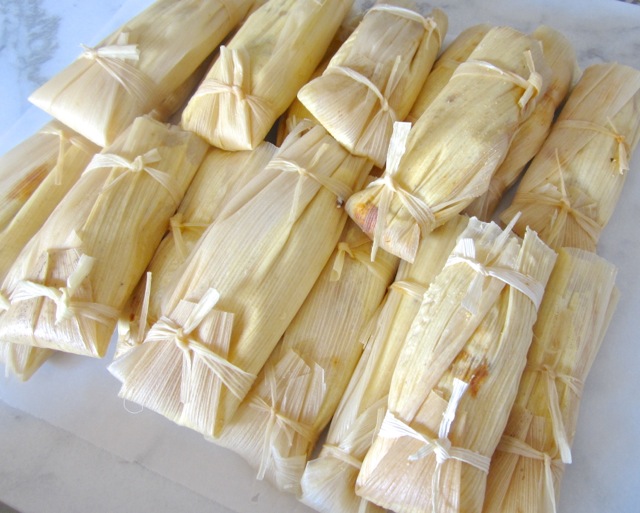
Spread about 1/4 cup dough in a 4 inch square in the center of each corn husk.  Spoon a heaping tablespoon of filling in a strip down the center of each square.  Fold long sides of husks and dough over filling (gather both ends of husk and bring together so that filling is covered by masa).  Fold up narrow end (bottom) of husk and secure with a strip of corn husk.  With another strip of corn husk gently tie around the tamale, about an inch below the masa filling (leave the top of the tamale open).  Try not to tie too tight, the tamale will expand as it cooks.

Place tamales upright in your prepared steamer.  Bring water to a boil, turn down heat and cover the pot.  Steam the tamales for approximately 1 1/2 – 2 hours, or until the dough is firm to the touch and separates easily from the husk.  You may place a thin kitchen towel between the pot and lid to absorb some of the water from the steam.  Check the water level occasionally adding more as necessary (setting a timer is a good reminder to check the water now and then).

Serve tamales with adovada sauce, rice and black beans.  They freeze well.

Dinner, Mexican, Pork, Recipes

Carne Adovada

November 12, 2012


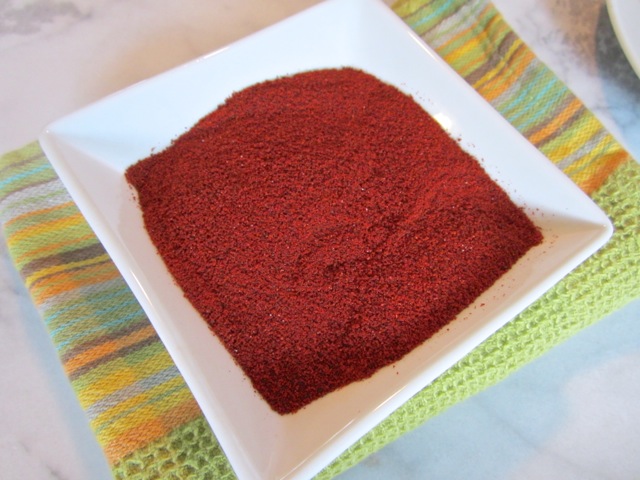
Most carne adovada recipes call for dried chiles which are not often found in most supermarkets.  A simple alternative is to use a good dried chile powder (I like to use Hatch Mild Chile available by mail order from The Chile Shop in Santa Fe, New Mexico). Whenever I have a craving for adovada I can whip up the sauce in a half hour and simmer beef or pork in the sauce until it’s fork tender. Shred the pork and serve with Cuban Style Black Beans and Sopa de Arroz and warm tortillas.  Any leftovers make a delicious filling for tamales.

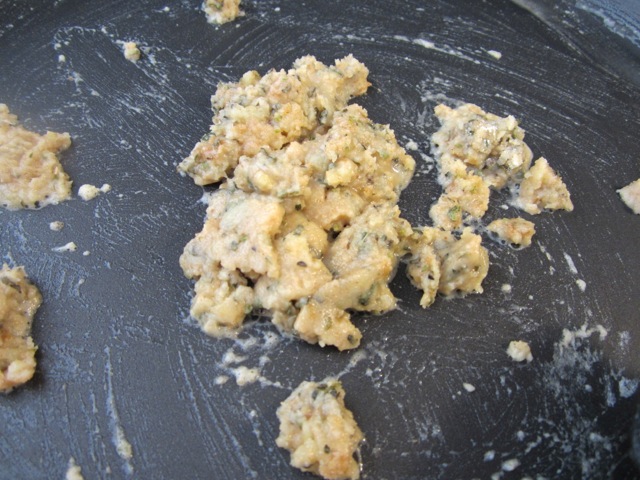
Cook oil, flour, garlic, oregano and cumin.

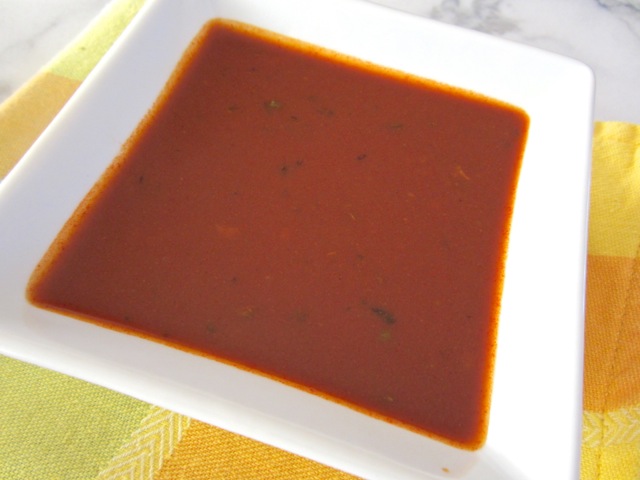
Adovada Sauce.

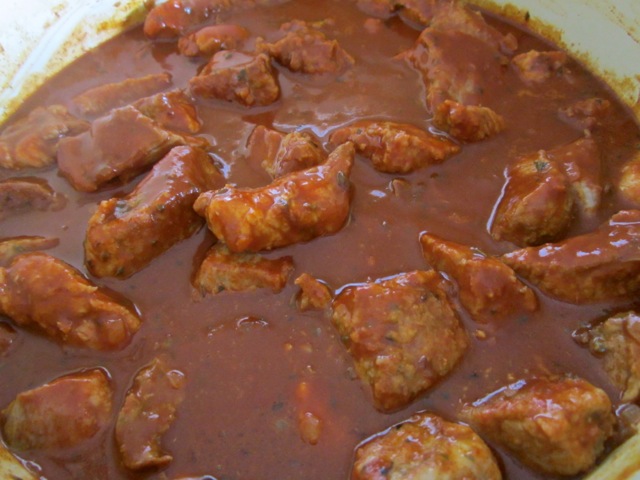
Carne Adovada

Ingredients – Sauce

4 tablespoons oil

3 large garlic cloves, pressed

5 tablespoons flour

1 teaspoon cumin

2 teaspoons dried oregano

2 cans chicken broth (14.5 oz. each)

1 cup water

8 heaping tablespoons (about 3 oz.) mild chile powder such as Hatch Mild, combined with chicken broth and water

1 tablespoon Dixon hot chile powder (optional) combined with chicken broth and water

2 teaspoons kosher salt

Ingredients – Pork

2 1/2 – 3 pounds trimmed pork butt cut into 1 1/2 inch cubes

1 teaspoon kosher salt

1 teaspoon dried oregano

1 teaspoon cumin

1 tablespoon flour

1 small onion finely diced, about 1 cup

Preparation – Sauce

Combine the flour, cumin and oregano in a small bowl and set aside.  Mix the chicken broth, water and chile powder in a large measuring cup or bowl.

Heat 4 tablespoons of canola oil in a large deep skillet over medium heat.  Add the garlic and cook for about 1 minute.  Add the flour, cumin and oregano to the pan mixing with the oil and garlic.  Continue to cook for a few minutes until lightly browned.

Slowly add the chicken broth mixture to the pan, stirring well making sure there are no lumps in the sauce.  Add the salt and simmer, stirring frequently for about 15 minutes on medium to medium-low heat until the sauce thickens up and coats the back of a spoon.  Remove from the heat and set aside.

Preparation – Pork

Place the cubed pork in a large bowl and mix in the salt, oregano and cumin.  Sprinkle on the flour, toss to coat and set aside while you cook the onions.

Heat 1 tablespoon of olive oil in a large, wide pot (I use a 5 1/2 quart Le Creuset Dutch oven) over medium heat.  Add the diced onions and sauté for about 5 minutes until the onions are soft but not browned.  Remove the onions from the pan and set aside.

Add more oil to your pan and once hot, cook the pork in batches until nicely browned.  Add only enough pork so the pieces are in a single layer and don’t touch each other.  Cook the pork, undisturbed, until each piece is well-browned on one side, about 3 – 5 minutes.  Turn and brown on the other side.  Remove pork to a plate and continue to cook all of the pork adding more oil to the pan as needed.  Once all the pork has browned add it back to the pot along with the onions.  Pour enough chile sauce into the pan to cover the pork generously, give it a stir and simmer on low heat for 3 -4 hours until the pork is fork tender and can be shredded easily.  Check the pork each hour to ensure there is enough sauce in the pan, adding more sauce if necessary.

The ingredients are simple, and the finished dish is really, really good making for terrific tacos, burritos, tostadas and tamales.  Any leftover adovada sauce can be frozen for several months.

*I highly recommend Hatch Mild Chile Powder (A Mild New Mexico Red Chile powder great flavor, gentle heat). Using a good quality chile powder will make all the difference in this dish.  You can purchase a 1 pound bag for under $9.00 or a half pound bag for under $6.00 and it will be delivered to your doorstep!


Mexican, Pork, Recipes

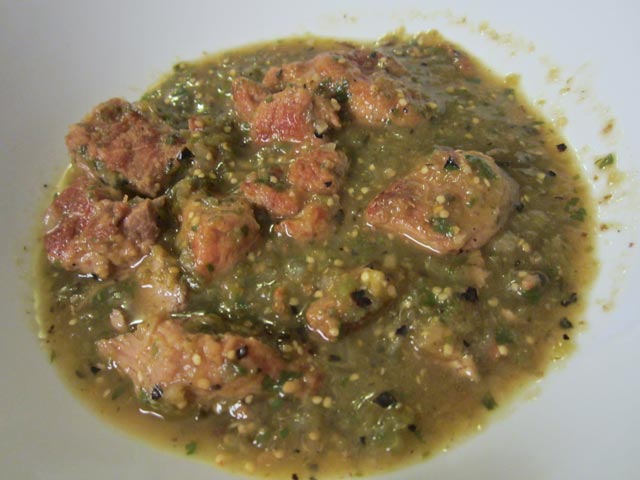
Pork Chile Verde

September 7, 2012

Chile Verde is a dish you want to cook on the weekend when you’re puttering around the house and have a few (5) hours to spare.  It’s not that you’ll be standing over the stove the entire 5 hours.  In fact 4  of the 5 hours is allotted for simmering the green chile stew.  You will be ever so happy that you decided to make it.

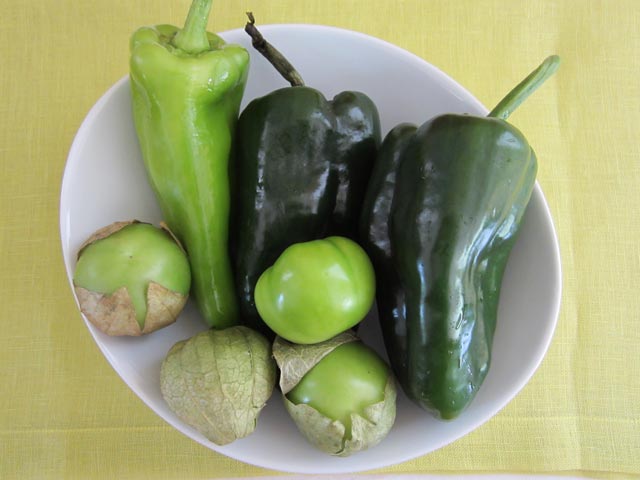
Tomatillos are part of the nightshade family (tomatoes, peppers, eggplant) little green orbs tucked inside papery husks.  I lucked out and was able to find all the ingredients for this dish at one store; Foodland in Kahului.  Mahalo Foodland.

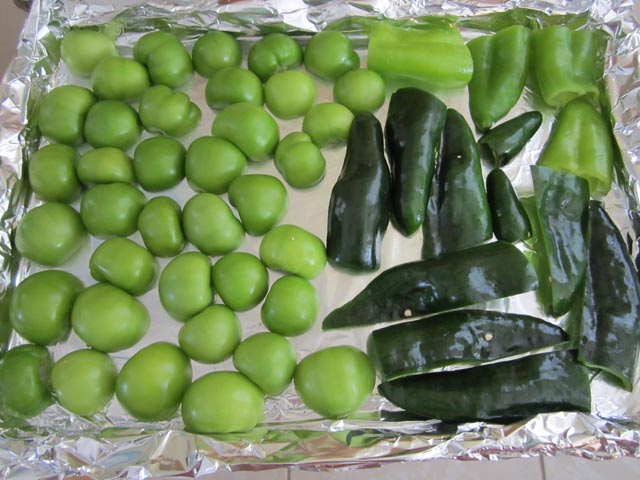
Cut the tomatillos and peppers in half and turn the broiler on.

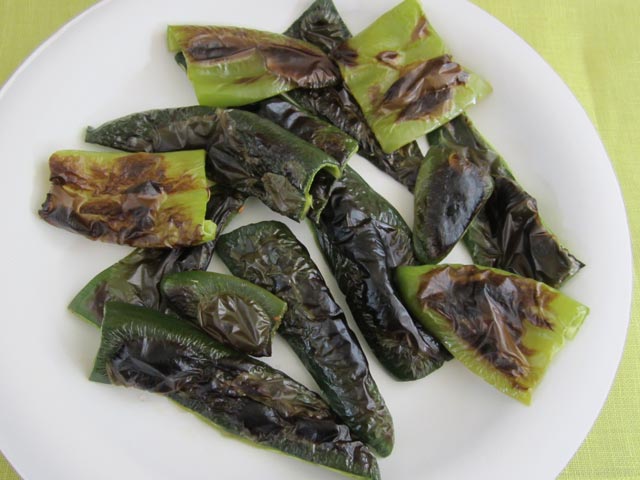
Once the peppers cool peel off their skin.

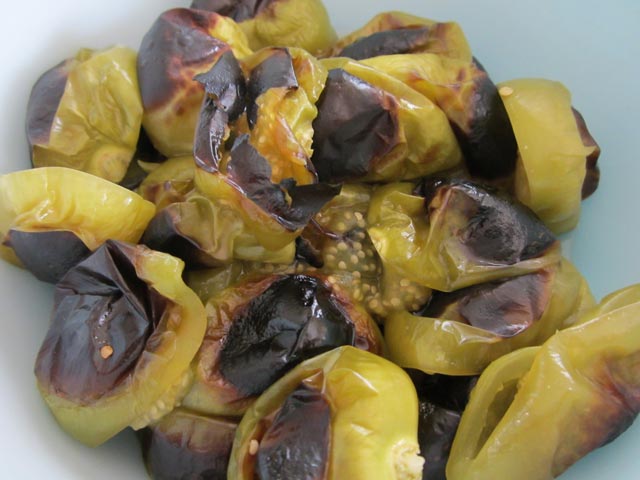
Place roasted tomatillos in a bowl to cool slightly.


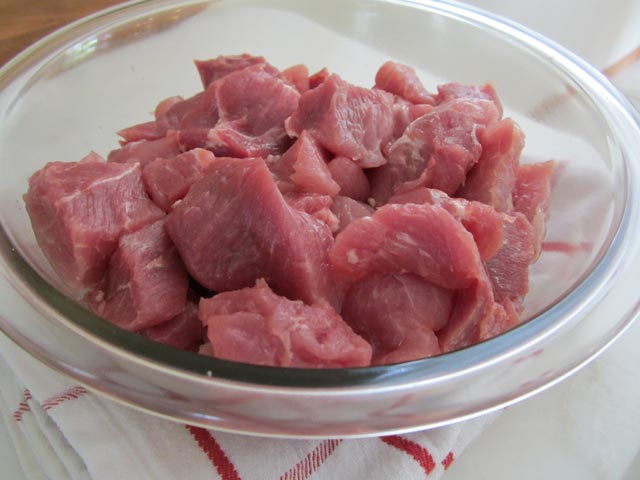
I prefer to trim off as much of the fat as I can which eliminates having to spoon it off later as the stew simmers.

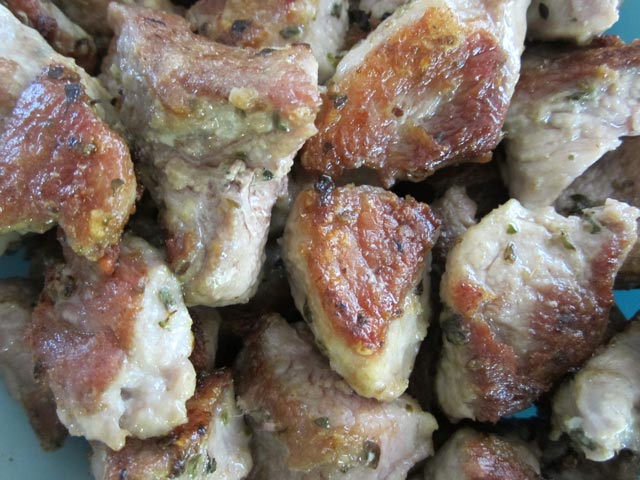
Brown pork in three batches.


Pork Chile Verde

Ingredients

4 1/2 pounds pork butt trimmed well and cut into 1 1/2 inch cubes

2 teaspoons dried oregano

2 teaspoons cumin

2 teaspoons kosher salt

1 tablespoon flour

1 1/2 pounds tomatillos

2 poblano peppers

1 large Anaheim pepper

1 serano or jalapeño pepper

1 large onion (about 2 cups finely diced)

3 garlic cloves minced

2 1/2 cups chicken broth

1/2 cup chopped cilantro

4 oz. can of Ortega diced jalapeños (optional)

Preparation

Trim pork well and cut into 1 1/2 inch cubes.  Place pork in a large bowl and sprinkle on oregano, cumin and salt and mix to coat pieces of pork.  Add flour and mix again distributing seasonings and flour evenly.  Cover and refrigerate until ready to use.

Remove the papery husk from the tomatillos and rinse well.  Slice tomatillos in half and place cut side down on a large baking sheet (line pan with heavy-duty foil for easy clean up).  Wearing disposable gloves cut the peppers in half and remove their seeds.  The poblanos are a bit larger than the other peppers so cut these in quarters.  Place all the peppers cut side down on the baking sheet with the tomatillos.

Place the baking sheet on the highest rack of your oven or about 4 inches below the heating element.  Broil until the tomatillos and peppers are charred.  I find that the tomatillos are ready prior to the peppers so I remove them with tongs and place them in a bowl to cool slightly.  It will typically take about 10 minutes before the peppers are ready, watch closely removing pepper pieces as they become blistered.  Let peppers cool slightly then remove their skin.

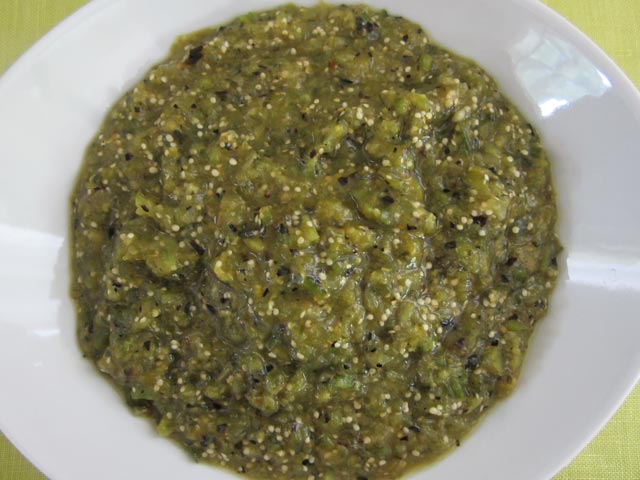
Place tomatillos in a food processor.  Coarsely chop peppers and add to the tomatillos.  Pulse until blended but still a bit chunky. Set aside.

In a large dutch oven (I use a 5 1/2 quart Le Creuset Dutch oven) add a tablespoon of canola oil and heat on medium.  Add diced onions and garlic and sauté until tender, about 8 minutes. Remove the onions and garlic and place in a small bowl.

Add more oil to the pan and sear pork in 3 batches until browned on two sides but not cooked through.  Once you add the pork to your pan, leave it alone for about 5 minutes without turning so that it has time to form a nice crust.  If you attempt to turn the pieces over too early you will notice they will stick to the pan.  Wait a few minutes and when the pork is ready you will be able to easily turn them without resistance.  Remove browned pork to a bowl as you continue with the other batches adding additional oil as needed.

Add broth to the pan and scrape the bottom to release browned bits.  Add pork, onions and garlic, tomatillo and pepper mixture back to the pan.  Cover and simmer for about 2 hours, checking the heat occasionally.  Continue to simmer for approximately one more hour.

Remove the cover from pan and continue to simmer for another 1/2 hour.  Add cilantro and additional salt.  The chile verde is ready when the pork is fork tender.  Total simmering time is approximately 4 hours.

***If  you prefer more heat, roast additional serano or jalapeño peppers.  Sometimes I add a small can of Ortega diced jalapeños to the stew at the same time I am adding the cilantro if I want a little extra kick.

The chile verde is delicious served with rice and beans or in a soft flour tortilla.  Leftovers freeze well for a quick dinner on a busy work day.

Follow

Get every new post delivered to your Inbox

Join other followers: