Browsing Category

Lactose Free

Dinner, Japanese, Lactose Free, Ramen, Recipes

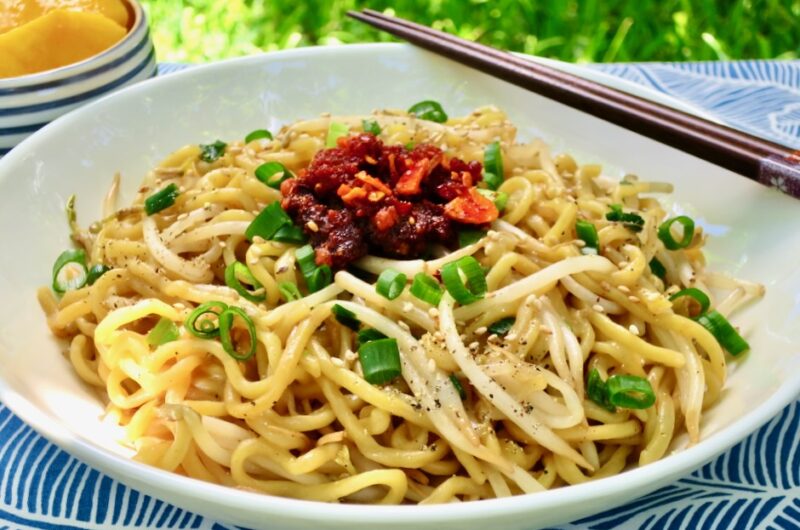
Dry Mein with Crunchy Bean Sprouts & Chili Crisp

January 13, 2024

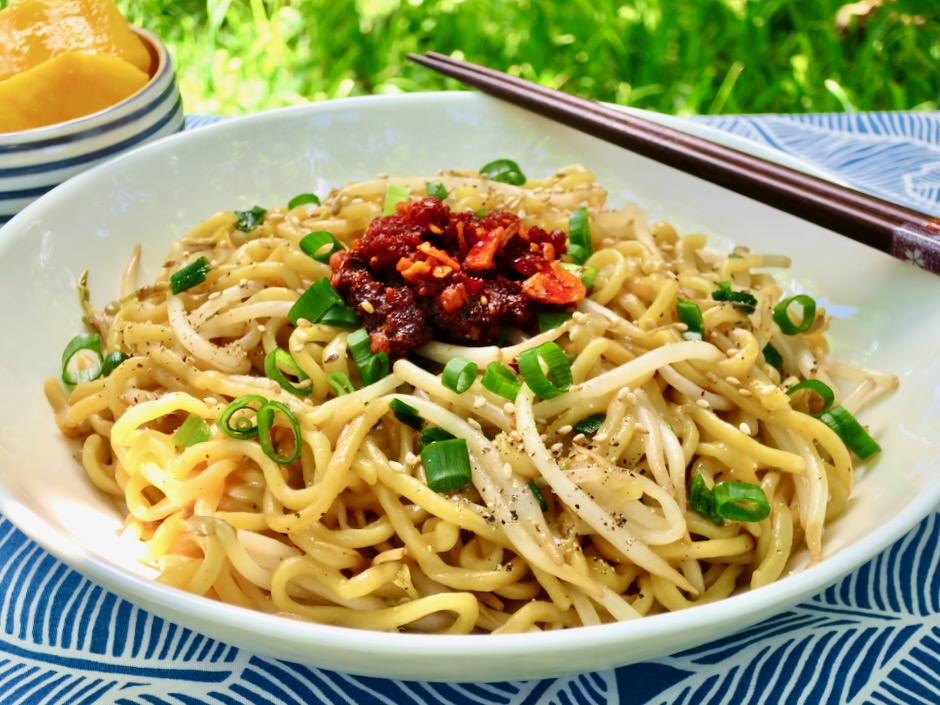
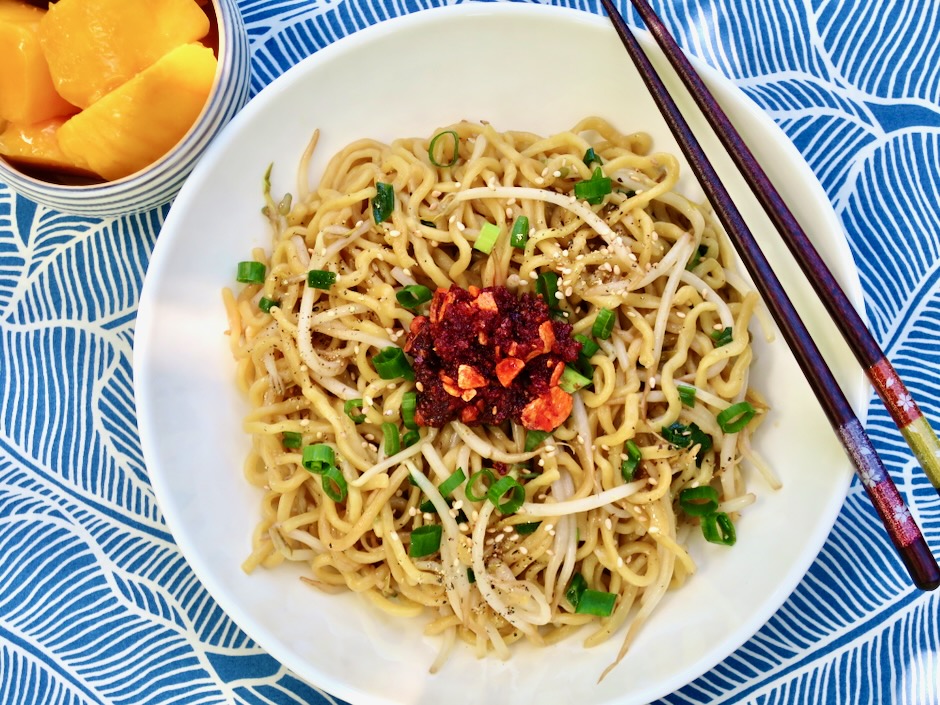
Here on Maui (and beyond), Sam Sato’s is known for their wide variety of local-style menu items (plate lunches). But they are most famous for their dry mein noodles. A bowl of well seasoned thick noodles is particularly delicious when dressed with hot mustard. While dining in at Sam Sato’s is the ideal way to enjoy this unique dish, it’s not always convenient when you have a craving. So with just a few basic ingredients why not whip up a bowl of dry mein at home?

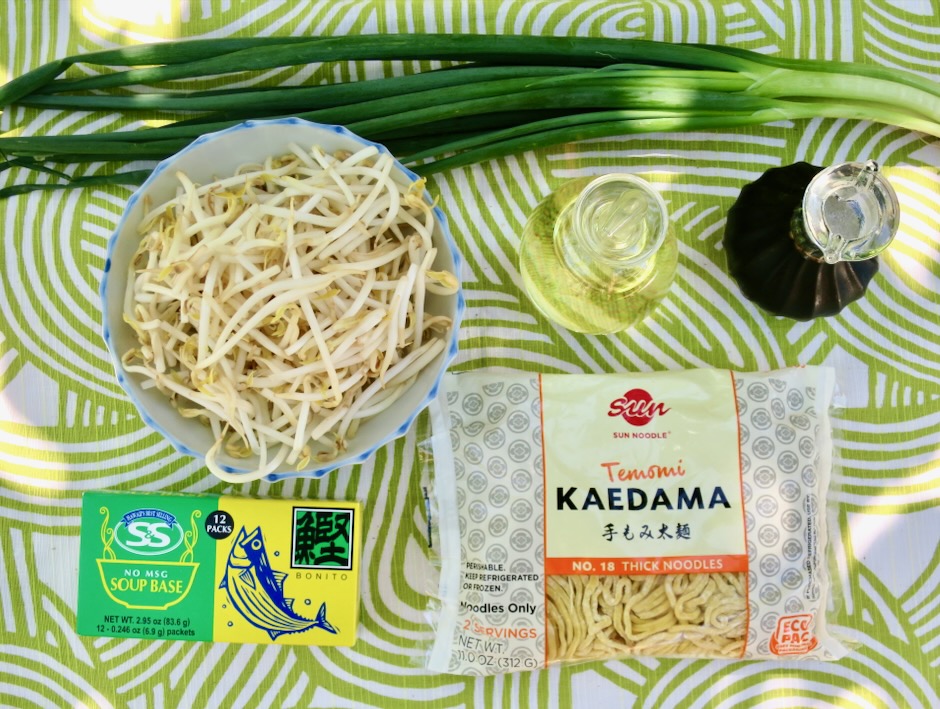
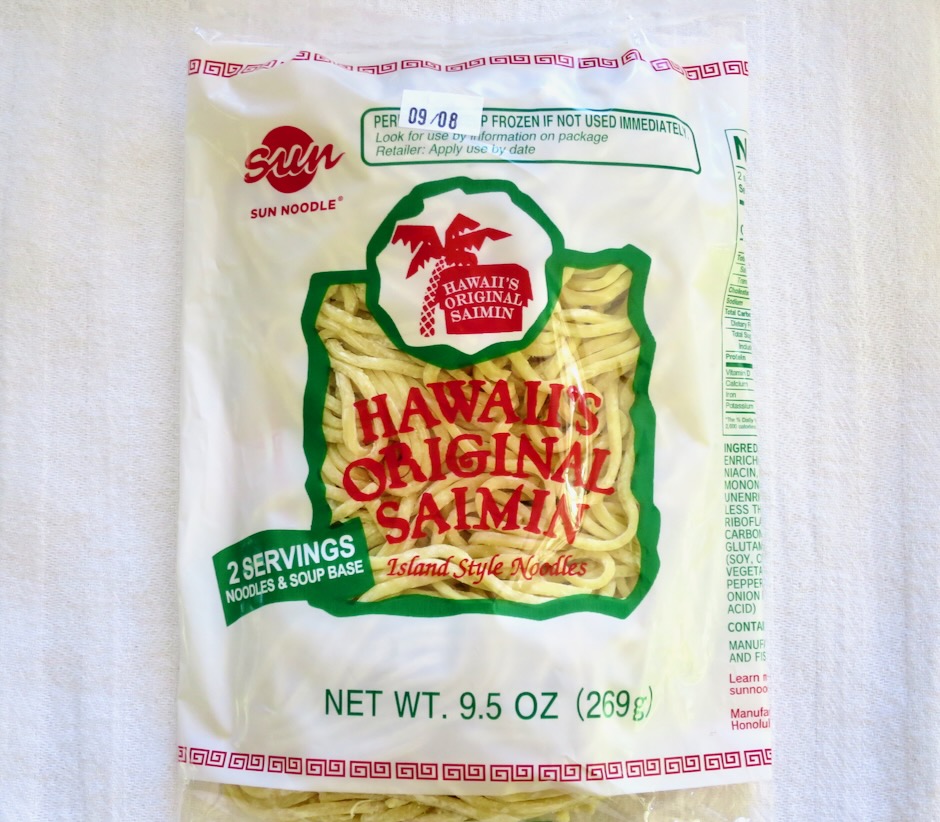
When I’m on Oahu I make a stop at Nijiya, a Japanese market conveniently located at Ala Moana Center. Their shelves are stocked with all kinds of goodies. They sell Sun Noodle’s Kaedama #18 thick noodles so I usually bring a few packages back home with me. I haven’t seen them on Maui, but a good substitute would be Sun Noodle’s saimin noodles which are sold in many markets here in Hawaii (Foodland, Safeway, Times, Island Grocery) or any other fresh, thick ramen.

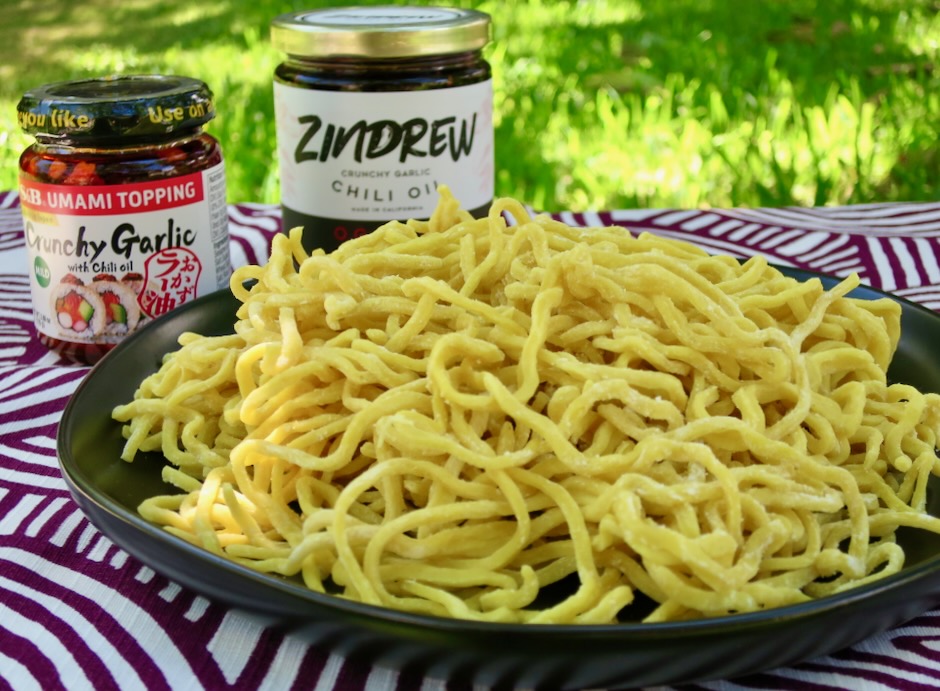
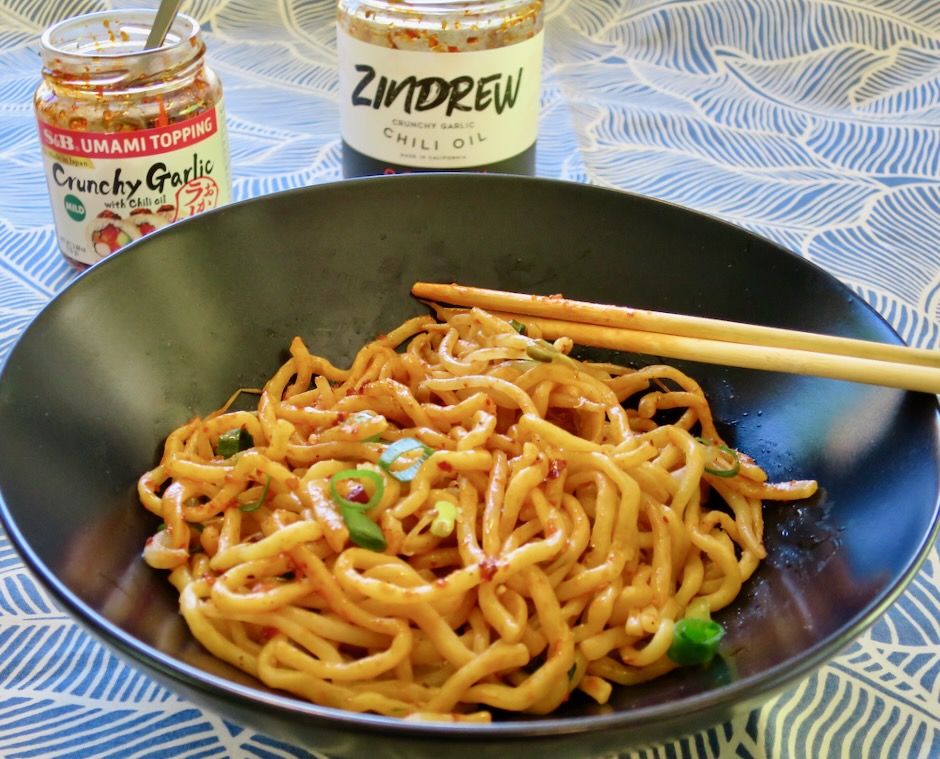
I love a spicy kick when I eat ramen. So adding a dollop of chili crunch on my noodles is a must. My favorite at the moment is Zindrew Crunchy Garlic Chili Oil (O.G. Batch jar). It has the perfect heat level for my taste and the jar has lots of crunchy garlic pieces. Very yummy. They also offer a spicier version (X Batch jar) if that’s your thing. Another option for those who prefer less heat is S&B Crunchy Garlic in Chili Oil. This is a mild chili oil with large pieces of very crispy garlic. As they say on the label, Umami Topping! It is easily found here in Hawaii at Longs, Safeway, Foodland and Times. If you are unable to find it at your local market, it is available online. Other times I use hot mustard powder mixed with a bit of water and soy sauce. This is the typical accompaniment offered at Sam Sato’s.

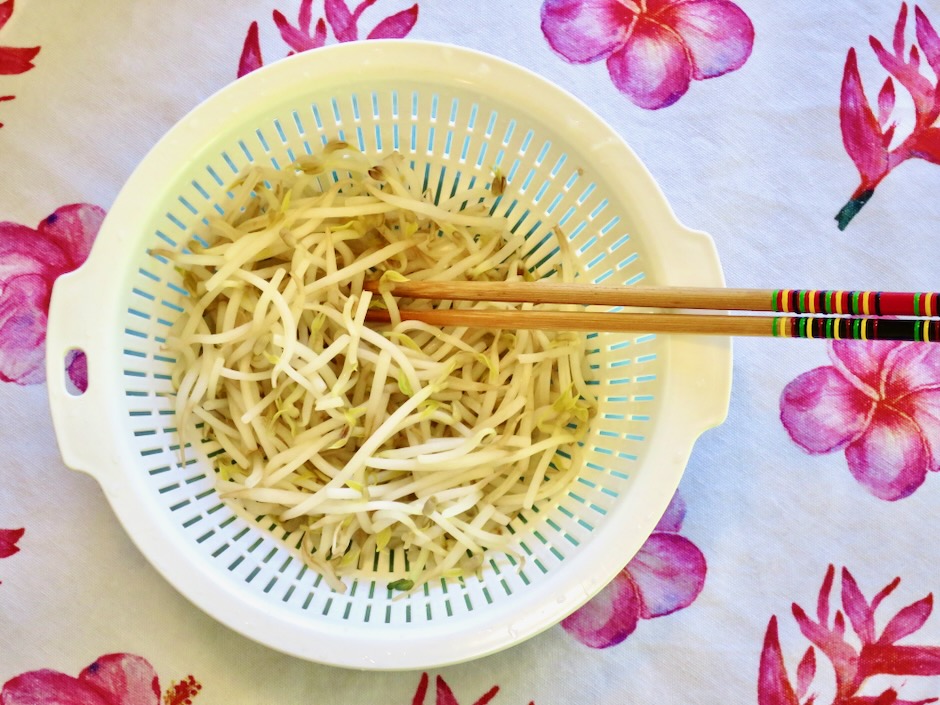
I use a good amount of bean sprouts (6 ounces) in this dish. They add a welcoming crispy texture when mixed in with the fresh ramen.

Making your own dry mein at home allows you to control the amount of oil and salt you use.

If you can’t make up your mind about which chili crunch to use, go ahead and use both as I sometimes do. A little heat and lots of crunchy garlic = noodle bliss.

Dry Mein with Crunchy Bean Sprouts & Chili Crisp

Recipe by Kiyo
Servings

2

servings

Ingredients

  • 9 – 11 ounces fresh thick ramen noodles

  • 6 ounces (about 3 cups) bean sprouts, rinsed

  • 1/3 cup finely chopped green onions (reserve 2 tablespoons for serving)

  • 1/2 teaspoon instant soup base (such as S&S)

  • 2 1/2 teaspoons soy sauce

  • salt and pepper

  • 2-3 teaspoons canola or vegetable oil

  • hot mustard, chili crisp and/or crunchy garlic chili oil for serving (optional but recommend)

Directions

  • In a 1-cup measuring cup, combine 1/2 teaspoon instant soup base such as S&S with 1/4 cup warm water. Stir in 2 1/2 teaspoons soy sauce. Set aside.
  • Bring a large pot of water to a boil. Add bean sprouts and blanch for 1 minute. Using a spider strainer or large slotted spoon, transfer bean sprouts to a colander to drain then to a bowl. Reserve pot with water for ramen.
  • Bring water back to a boil over high heat. Add ramen and cook to al dente, 60 seconds less than package directions. Drain in colander under cool running water to stop the cooking and to remove excess starch. Set aside.
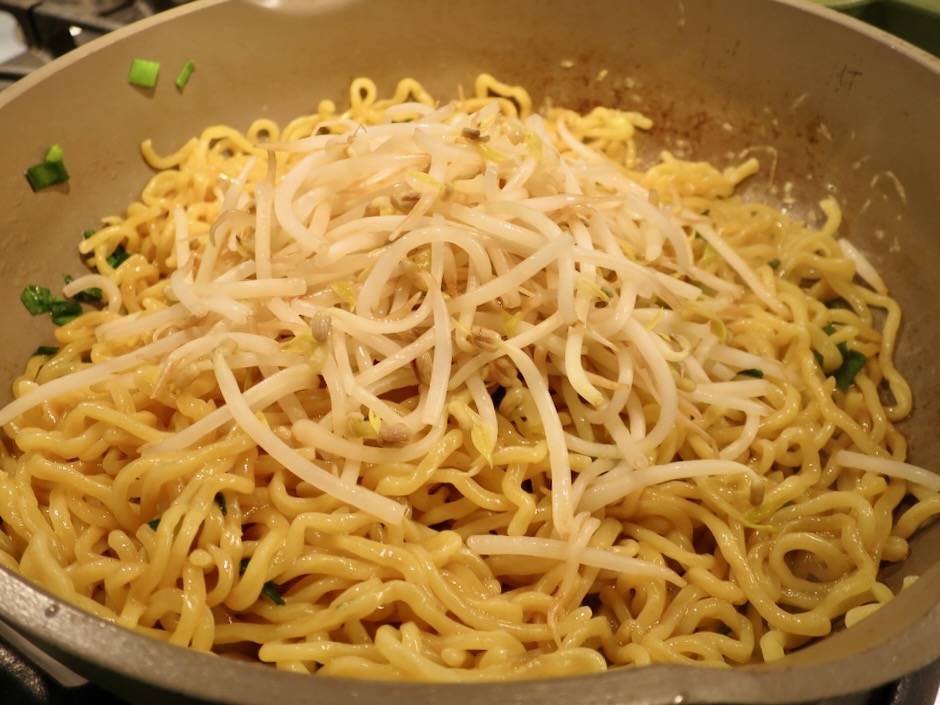
  • In large skillet, preferably one with 2-inch sides, heat 2-3 teaspoons oil (depending on the amount of noodles you use). Add green onions, reserving 2 tablespoons for serving. Toss in oil for 20 seconds. Add ramen to the pan and toss with the oil and green onions. Add 3 tablespoons of the soy sauce seasoning, tossing to coat the noodles (use 2 1/2 tablespoons if using less than 11 ounces of ramen). The noodles should be well coated but not saucy (you will not need all of the sauce). Stir in bean sprouts. Allow sauce to evaporate for 30 seconds. Season with salt and pepper to taste. Divide noodles between two bowls. Top with reserved green onions. Serve with hot mustard mixed with soy sauce, chili crisp and/or crunchy garlic in chili oil.
Bread, Dressing, Lactose Free, Recipes, Sandwiches, Sauces, Vegetarian

Tarragon Aioli

December 29, 2023

I’ve been a fan of fresh tarragon ever since I started making béarnaise sauce for our filet mignon dinners. An aromatic herb with a very subtle and delicate licorice flavor, adding tarragon elevates an assortment of sauces and dishes.

This recipe is a snap to make and it will take your sandwich to the next level. Using prepared mayonnaise means you can whip up this tarragon aioli in less than 10 minutes. Slather it on grilled or toasted sourdough bread and layer on sliced tomatoes, or use it for BLT and chicken sandwiches, sliced hard boiled eggs or a dip for asparagus.

My favorite way to use tarragon aioli is on our homemade sourdough bread topped with juicy tomatoes. Grilling the bread with a bit of olive oil elevates the flavor and makes for a scrumptious open-faced sandwich.

Be generous with the aioli! You want your sandwich to be well seasoned.

Tarragon Aioli

Recipe by Kiyo
Servings

1/2 cup

Ingredients

  • 1/2 cup mayonnaise

  • 1 medium garlic clove, finely grated (microplane works great)

  • 1 1/2 tablespoons finely chopped tarragon

  • 1 1/2 teaspoons fresh squeezed lemon juice

  • 1 teaspoon lemon zest

  • salt and pepper to taste

Directions

  • In a small bowl mix together the mayonnaise, garlic, tarragon, lemon juice and lemon zest. Add a pinch of salt and a few grinds of pepper. Taste and adjust salt and pepper as needed. Serve right away or keep refrigerated for up to 5 days.

Notes

  • Here on Maui tarragon can be found at Whole Foods
Cookies, Dessert, Holiday Treats, Lactose Free, Recipes

Hawaiian-Style Gingerbread Cookies

December 19, 2023

These cuties are a real treat that I make just once a year. Christmas is close, but you still have time to whip up a small (or large) batch of these crunchy gingerbread cookies. Decorating the cookies is a blast! Both children and adults will be delighted to receive a homemade gingerbread cookie this holiday season.

Through the years of making these cookies I have used several different recipes. This recipe makes delicious cookies that are thin and crispy. It’s a large recipe that will make approximately 45 cookies depending on the size of cookie cutter used. This year I tried Sally’s recipe that uses unsalted butter instead of shortening (I used Earth Balance Buttery Sticks to make it lactose free) and a larger amount of spices. It makes just about 22 gingerbread cookies which is exactly what I wanted this year. The cookies turned out great. I rolled them out a bit thinner than the recipe calls for and baked them longer so that my cookies would be crispy all the way through. If you prefer softer cookies roll them out as the original recipe instructs you to. When rolled out a bit thinner, they turned out to be similar in texture to the original recipe I used in the past so either option works great. Just keep in mind that the dough for both recipes needs to be refrigerated overnight to firm up before rolling out. Kudos to Sally for her always reliable recipes!

As mentioned in this post, I used pasteurized egg whites for the icing in the past. Last year I discovered (late in the game) meringue powder. It’s easier to use and can be easily stored for more cookies next year.

I hope you have the chance to make a small batch of these adorable cookies this holiday season.

Mele Kalikimaka from my kitchen to yours.

Hawaiian-Style Gingerbread Cookies

Recipe by Kiyo
Servings

22

servings

Recipes adapted from Sally’s Baking Addiction blog

Ingredients

  • 440g (3 1/2 cups) all-purpose flour (if you do not have a scale use the spoon and level method to measure the flour) + more for rolling

  • 1 teaspoon baking soda

  • 1/2 teaspoon salt (use a scant 1/2 teaspoon if using Earth Balance Buttery Sticks as they contain some salt)

  • 1 tablespoon ground ginger

  • 1 tablespoon ground cinnamon

  • 1/2 teaspoon ground allspice

  • 1/2 teaspoon ground cloves

  • 145g (10 tablespoons) Earth Balance Buttery Sticks or unsalted butter, at room temperature

  • 150g (3/4 cup) packed light or dark brown sugar

  • 200g (2/3 cup) unsulphured molasses such as Brer Rabbit or Grandma’s brand)

  • 1 large egg, at room temperature

  • 1 teaspoon vanilla extract

  • Royal Icing & Decorating
  • 240g (2 cups) powdered sugar

  • 1 1/2 tablespoons meringue powder

  • 5 tablespoons room temperature water

  • Assorted sugar sprinkles

  • Currants for gingerbread cookie eyes

Directions

  • In a large bowl whisk together the flour, baking soda, salt, and all of the spices. Set aside.
  • In a large bowl using a hand mixer or stand mixer fitted with a paddle attachment, beat the Earth Balance Buttery Sticks or unsalted butter on medium speed until completely smooth and creamy, about 1 minute. Add the brown sugar and molasses and beat on medium-high until combined and creamy. Scrape down sides of the bowl as needed. Beat in the egg and vanilla on high speed for a full 2 minutes, scraping down the sides and bottom of the bowl as needed.
  • On low speed, slowly mix the dry ingredients into the wet ingredients. You may use a firm spatula if the dough is too thick for the hand mixer. Once the ingredients are combined, divide the dough (it will be very soft) into 3 even portions and place on separate pieces of plastic wrap and wrap tightly patting gently to form into disk shapes. Transfer disks to a ziplock bag. Chill dough thoroughly for at lest 4 hours and preferably overnight.
  • Preheat oven to 350 degrees. Position racks in the middle and lower third level (just below the middle). Line 2 large baking sheets with parchment paper. Set aside. Meanwhile, place the dough disks in the freezer for 5-10 minutes. This will make rolling and cutting the cookies much easier if you are making thin and crispy cookies or if you live in a warm climate.
  • Place a large piece of parchment paper on the counter and flour it generously. Remove 1 disk from the freezer and place on the parchment paper. Sprinkle a bit of flour on the top of the dough disk as well as the rolling pin. For thin cookies roll dough just under 1/4-inch. For softer cookies roll dough 1/4-inch thick. Cut into shapes and transfer to the baking sheets leaving 2-inches of space between them. Transfer dough scraps to the freezer to firm up.
  • Transfer the cookie sheets to the oven racks (positioned as mentioned above) and bake for 12-14 minutes for crispy cookies (cookies larger than 4-inches), rotating cookie sheets from front to back as well as switching shelves halfway through baking time. For smaller cookies bake for approximately 8-10 minutes. For thinner cookies check doneness after they have baked for 11 minutes as oven temperatures can vary quite a bit. For smaller cookies check after they have baked for 8 minutes. Allow cookies to cool on the pan for 4-5 minutes before transferring to a cooling rack. Continue with the remaining dough. Decorate cookies once they are completely cool. I make my cookies up to 3 weeks in advance and freeze until I am ready to pass them out.
  • Royal Icing & Decorating Cookies
  • Place all ingredients in a medium sized bowl with high sides. Using a hand mixer with a whisk attachment, beat on high speed for 1 1/2-2 minutes. If the icing is too thin, add more sugar and if too thick, add a bit of water. This recipe will make enough icing for 35+ medium sized cookies. If you plan to decorate with minimal icing on your cookies, cut the recipe in half.
  • Transfer icing to a small plastic squeeze bottle for easy application and outlining. Use various colors of sprinkles to make your cookies look fantastic! Allow icing to set completely before transferring cookies to storage containers. Freezing is the best method to keep cookies fresh if not passing out the day they are baked.
Dinner, Fish, Japanese, Korean, Lactose Free, Recipes, Rice Dishes

Tuna, Rice & Nori Lunch

December 11, 2023

Tuna and rice wrapped in crispy and savory nori is one of my favorite combos to make for lunch. It doesn’t sound like anything special but once you try it you’ll understand why I love it so much. Think of it as an improvised hand roll. It couldn’t be simpler to whip up on short notice. When I was working, I would share it with a small group of friends at lunchtime. We all sat around the table and oohed and aahed as we ate our little tuna nori wraps.

Savory and tangy Kewpie mayonnaise replaces the usual Best Foods mayonnaise I use for tuna sandwiches. The velvety texture and rich flavor is perfect for this recipe.

With a plethora of canned tuna available these days it’s easy to find a good brand. Wild Planet does not have added water or broth which means it’s not going to be a mushy mess when you open the can.

A side of crispy cucumbers with chili crisp, kimchi or takuan and fresh fruit are the perfect pairing to complete your lunch. A drizzle of sriracha mayo over the tuna adds a nice kick to the nori wraps.

Tuna, Rice & Nori Lunch

Recipe by Kiyo
Servings

2

servings

Easy and delicious nori wraps are quick to prepare!

Ingredients

  • 1 rice cooker cup short or medium grain rice, cooked according to manufacturer’s instructions

  • 1 (5 ounce) can tuna in sea salt, such as Wild Planet)

  • Kewpie mayonnaise

  • 2-3 teaspoons finely chopped celery

  • 2 teaspoons finely chopped sweet onion

  • 2 teaspoons finely grated carrot

  • 2 teaspoons thinly sliced green onion

  • 1 teaspoon roasted sesame seeds

  • 1-2 packets Korean-style seaweed snacks, depending on size

Directions

  • Once rice has cooked, transfer to a bowl and gently mix in roasted sesame seeds. Cover with plastic wrap and set aside allowing rice to cool to room temperature.
  • In a medium bowl, flake the tuna with a fork. Mix in Kewpie mayonnaise (enough to moisten tuna generously, tuna should not look dry), celery, onion, and carrot. Transfer to a smaller bowl for serving.
  • Set out nori (just before serving to keep crisp), tuna salad, and rice. Make mini nori wraps by placing a small amount of rice on the nori, followed by tuna. Top with sriracha mayonnaise if using, and green onions. It’s best to make the nori wraps as you eat them so the nori stays crispy. Serve with your favorite side dishes such as potato salad, fresh fruit, kimchi and takuan pickles.
Appetizers, Dinner, Eggs, Japanese, Lactose Free, Recipes, Side Dishes

Momofuku’s Soy Sauce Eggs

November 26, 2023

One thing is for sure, I will never get bored with eating eggs. The humble egg is versatile, nutritious, and so tasty. One of my favorite egg preparations is this easy soy sauce recipe. They can be eaten as a snack, in ramen, on rice, on toast with smashed avocado or in a salad. Marinating eggs in a simple sauce for just a few hours transforms them into a delectable treat.

Momofuku’s soy sauce egg recipe calls for sherry vinegar which has a smooth and toasty flavor. A reliable brand is O California which can be found at Safeway and Whole Foods here on Maui. Vinegar lasts more or less indefinitely so it is a good investment. If you are unable to locate sherry vinegar you can substitute it with unseasoned rice vinegar.

Egg yolks vary in color depending on the chicken’s diet. According to an article from America’s Test Kitchen, a paler yolk has the same nutritional value as one with a darker color. With that being said, I’m always delighted when I crack an egg open that has a vibrant yellow-orange color. For soy sauce eggs, you definitely want yolks with a deeper color. Ka Lei Eggs (Hawaii) are a good choice.

You’ll want to have a timer handy when boiling the eggs. To ensure your eggs have that velvety, jammy texture they need to be boiled for exactly 6 minutes and 50 seconds. Once the timer goes off the eggs will immediately go into an ice bath to stop from cooking any further.

I found that using my 4-cup glass measuring cup worked perfectly for marinating the eggs. A clean paper napkin over the top helps to submerge the eggs in the umami rich sauce.

The eggs are ready to eat in just a couple of hours and can be left to marinate for up to 6 hours.

These delicious eggs can be served as an appetizer or snack.

My favorite accompaniment for the eggs is a bowl of rice sprinkled with furikake and served with homemade kimchi or Japanese pickles on the side.

Momofuku’s Soy Sauce Eggs

Recipe by Kiyo
Servings

6

servings

Recipe adapted from Food52

Ingredients

  • 6 tablespoons warm water

  • 1 tablespoon sugar

  • 2 tablespoons sherry vinegar

  • 1/2 cup low-sodium soy sauce

  • 1/4 cup regular soy sauce

  • 6 large eggs

  • Maldon or other flaky salt for serving

  • Freshly ground black pepper for serving

Directions

  • In a medium bowl, whisk together the water and sugar to dissolve the sugar, then stir in the sherry vinegar and soy sauces.
  • Bring a medium pot of water to a boil. Carefully place eggs into the boiling water and cook for exactly 6 minutes and 50 seconds. You may stir slowly for the first minute to distribute the heat evenly. Meanwhile, fill a large bowl with cold water and ice. When the eggs are done, transfer them to the ice bath.
  • Peel the eggs once they are cool. Transfer the eggs to the soy sauce mixture and marinate in the refrigerator for at least 2 hours, and up to 6 hours, making sure they are completely submerged.
  • Remove the eggs from the sauce. You can save the sauce mixture for another round of eggs if you wish.
  • To serve, cut the eggs in half and season with salt and pepper. Any leftover eggs can be stored in an airtight container for 4-5 days.
Beans, Dinner, Lactose Free, Recipes, Vegetarian

Vegetarian Chili with Fritos

November 13, 2023

A hot bowl of vegetarian chili on a cool fall evening can be an ever so satisfying meal. Chipotles in adobo take this recipe to another level. They add a smoky flavor and just the right amount of heat. Salty, crunchy Fritos piled on top are the proverbial icing on the cake.

All of the ingredients are easily found at your local market. I love celery so I added a bit to the chili. You can make this your own by adding other vegetables such as corn, peppers, carrots, and other types of beans. But don’t leave out the chipotles in adobo. They are essential for giving the chili a pleasant, smoky flavor. A little goes a long way. Freeze the leftover chiles in small containers or mini freezer bags for future use.

The onions, celery, and cilantro stems are sautéed for a bit before the other ingredients are added.

A tomato paste mixture is added to the onions and cooked until it turns a brick red color. It smells delightful with the chipotle peppers mixed in.

The chili is simmered for 35 minutes until reduced slightly.

Top the chili with your choice of diced avocado and onions, sour cream, Fritos, cilantro, and dig in.

Vegetarian Chili with Fritos

Recipe by Kiyo
Servings

4-6

servings

Recipe adapted from Bon Appetit magazine

Ingredients

  • 1 large white onion (about 2 cups) diced (reserve 2 tablespoons for serving)

  • 1/2 cup diced celery

  • 6 medium garlic cloves, finely chopped

  • 1/2 bunch cilantro, leaves coarsely chopped (about 1/2 cup) and stems finely chopped (about 1/4 cup, keep separate from leaves), cover and refrigerated cilantro leaves

  • 1 seeded chipotle in adobo, plus 1 teaspoon adobo sauce, finely chopped (transfer to a small bowl)

  • 1/4 cup tomato paste (transfer to a small bowl)

  • 2 15-oz. cans pinto beans, drained and rinsed

  • 1/4 cup extra virgin olive oil

  • 2 teaspoons mild chili powder (I used ancho chili powder)

  • 1 28-oz. can fire-roasted tomatoes

  • 1 1/2 teaspoons Diamond Crystal or 1 1/4 teaspoons Morton kosher salt

  • 2 1/2 cups vegetable broth

  • 1 1/2 cups Fritos or other salty tortilla chips

  • 1 lime, cut in half with one of the halves cut into wedges

  • 1 avocado, diced

  • 1/2 cup lactose free sour cream or regular sour cream

  • freshly ground black pepper

Directions

  • Mix together the chipotle chiles in adobo with tomato paste. (If you prefer milder heat, reserve 1/4 of the chiles for adding in later if more heat is needed).
  • Heat 1/4 cup extra virgin olive oil in a large saucepan or Dutch oven over medium heat. Add onion, celery, garlic, cilantro stems, and 2 teaspoons chili powder and cook, stirring frequently, until onion is starting to soften, 5-6 minutes. Increase heat to medium-high and add tomato paste mixture and cook, stirring frequently, until brick red and starting to stick to the bottom of the pan, 2-3 minutes.
  • Add the fire roasted tomatoes and bring to a simmer. Cook, stirring frequently, until the tomatoes are cooked down and slightly darker in color, 8-10 minutes.
  • Add beans, 1 1/2 teaspoons Diamond Crystal or 1 1/4 teaspoons Morton kosher salt, and 2 1/2 cups vegetable broth. Bring to a boil over high heat, then reduce heat to medium-low and simmer uncovered, stirring occasionally, until chili has reduced slightly and flavors have melded, 30-35 minutes. Taste and adjust seasoning with salt if needed. Stir in juice from reserved 1/2 lime.
  • Divide chili among bowls. Top with sour cream, avocado, reserved cilantro leaves, chopped onion, and Fritos. Season with pepper and serve with reserved lime wedges.
Follow

Get every new post delivered to your Inbox

Join other followers: