Browsing Category

Japanese

Dinner, Dressing, Fish, Japanese, Lactose Free, Recipes, Rice Dishes

Seared Ahi Rice Bowl

March 20, 2017

Seared Ahi Rice Bowl

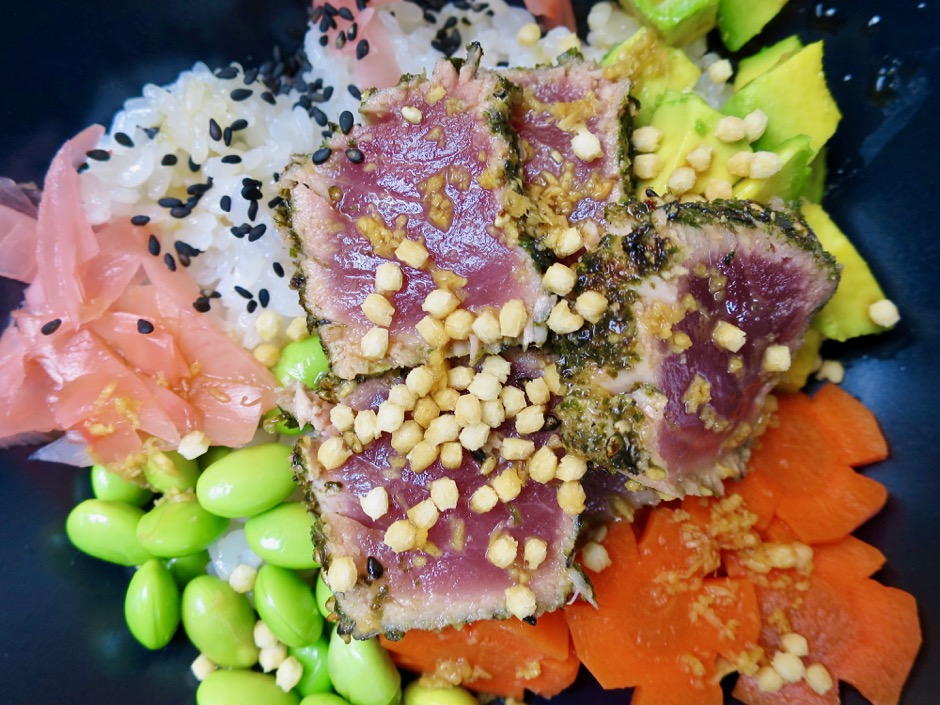
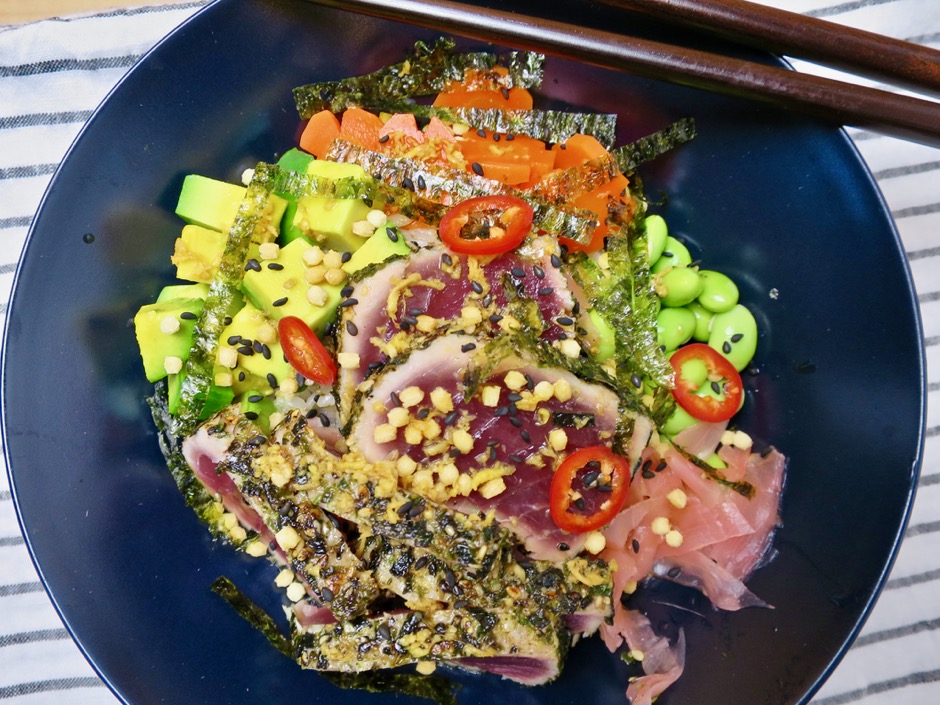
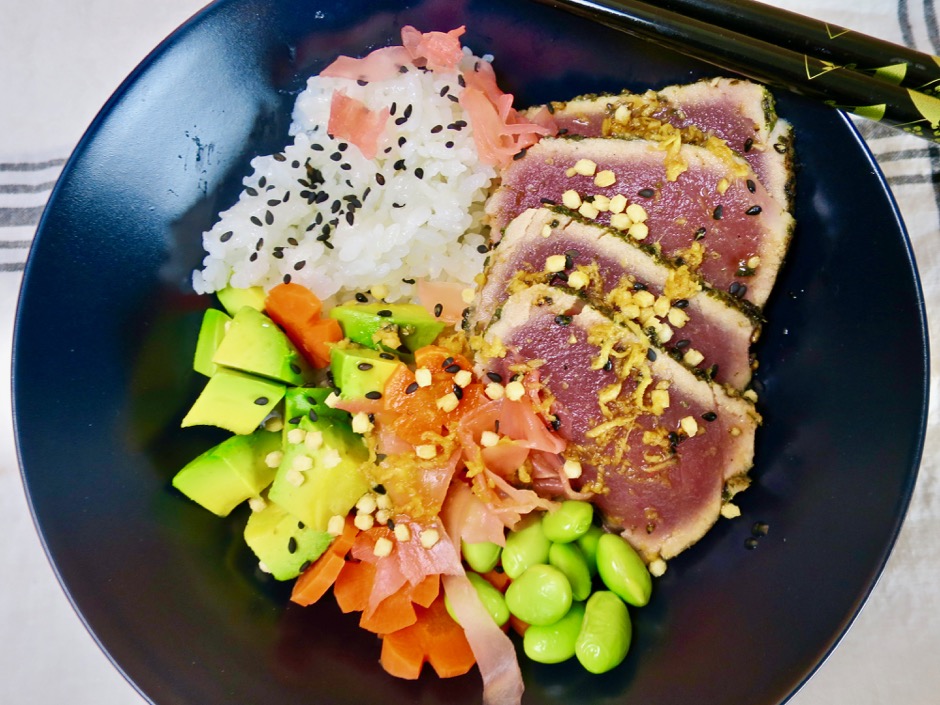
Here in the Islands, we love our ahi tuna.  I would be happy to eat this every day. This is the rice bowl of my dreams! Light, fluffy, Japanese rice topped with furikake seared ahi, vegetables and a homemade dressing that is drizzled over everything in the bowl.  I use the dressing in this recipe too.  It’s a zingy sauce made with fresh lime zest, lime juice, soy sauce, and lots of freshly grated ginger.  It’s tasty and versatile.

Seared Ahi Rice Bowl

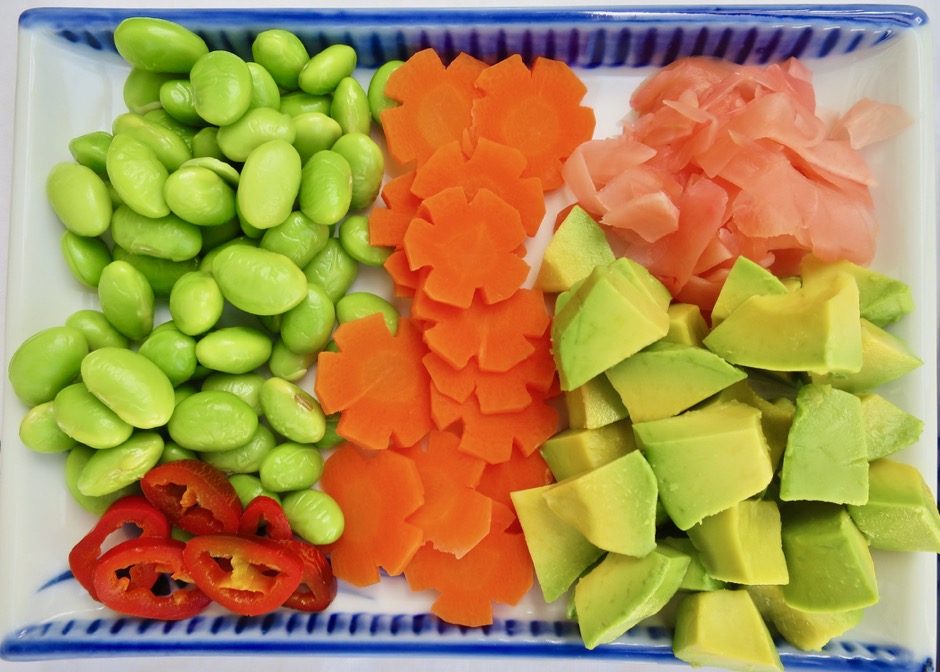
Jalapeno,Edamame, Carrot, Pickled Ginger, Avocado

I always keep a package of edamame in the freezer. It is easy to prepare and so good in this dish (as well as in salads). Whatever other ingredients you choose to add to your ahi rice bowl, let the fish be the star of the dish. The mild flavors of blanched carrots and creamy avocado cubes are perfect. Try to include the sweet and tangy pickled ginger. It is such a nice accompaniment to the rice and fish.  Scatter thinly sliced jalapeños or pretty, red Fresno peppers over your rice bowl if you want to add some heat.  For a vegetarian rice bowl, substitute your favorite tofu in place of the fish. If you are a fan of nori, scatter thin strips over the rice bowl just before serving it.  And if you can find bubu arare by all means add this too.  They are the little crispy golden rice balls you see in the photos of the ahi bowls that add a crunchy and toasty flavor to each bite.

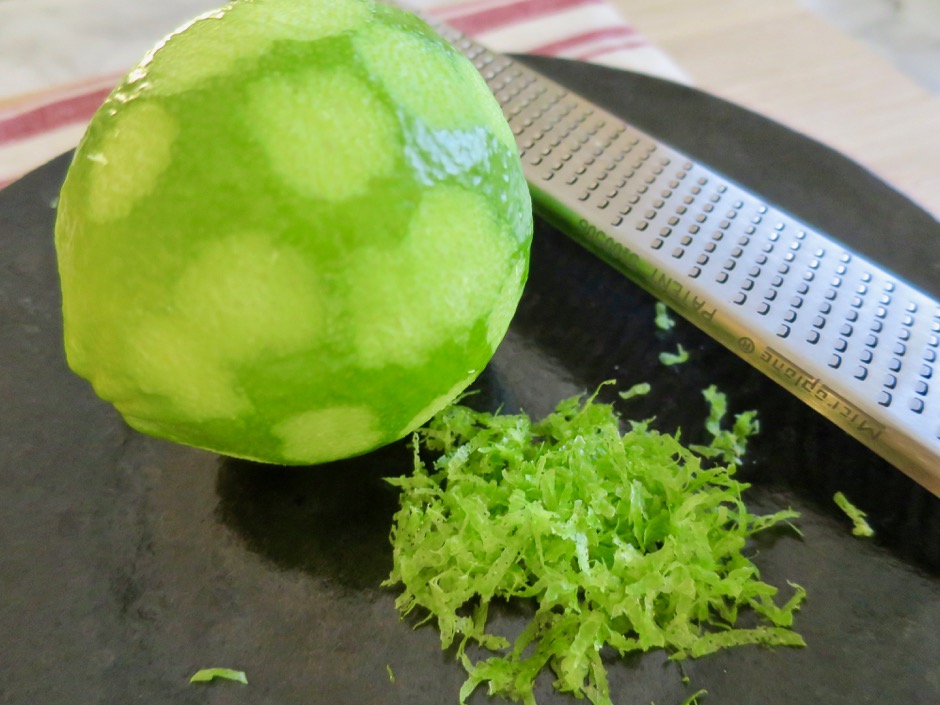
Lime Zest

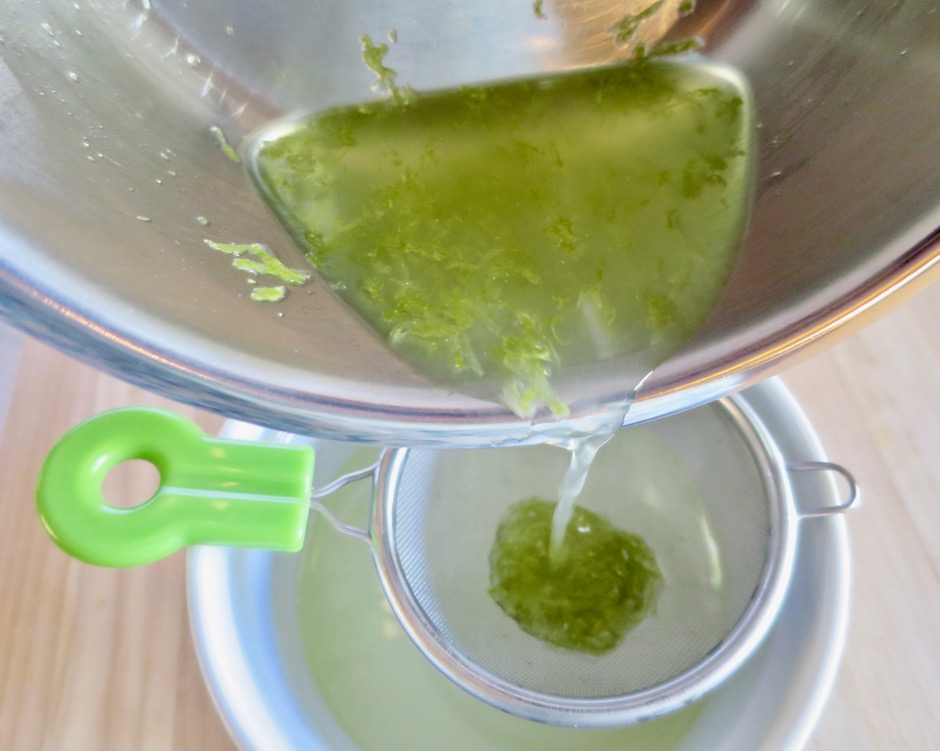
Strain Zest Through a Fine Mesh Sieve

Lime zest, lime juice, sugar and water are quickly heated in a pan then poured through a fine mesh strainer.  Just the liquid is used for the dressing.  Once it has cooled the other ingredients are added to complete the dressing.

Seared Ahi

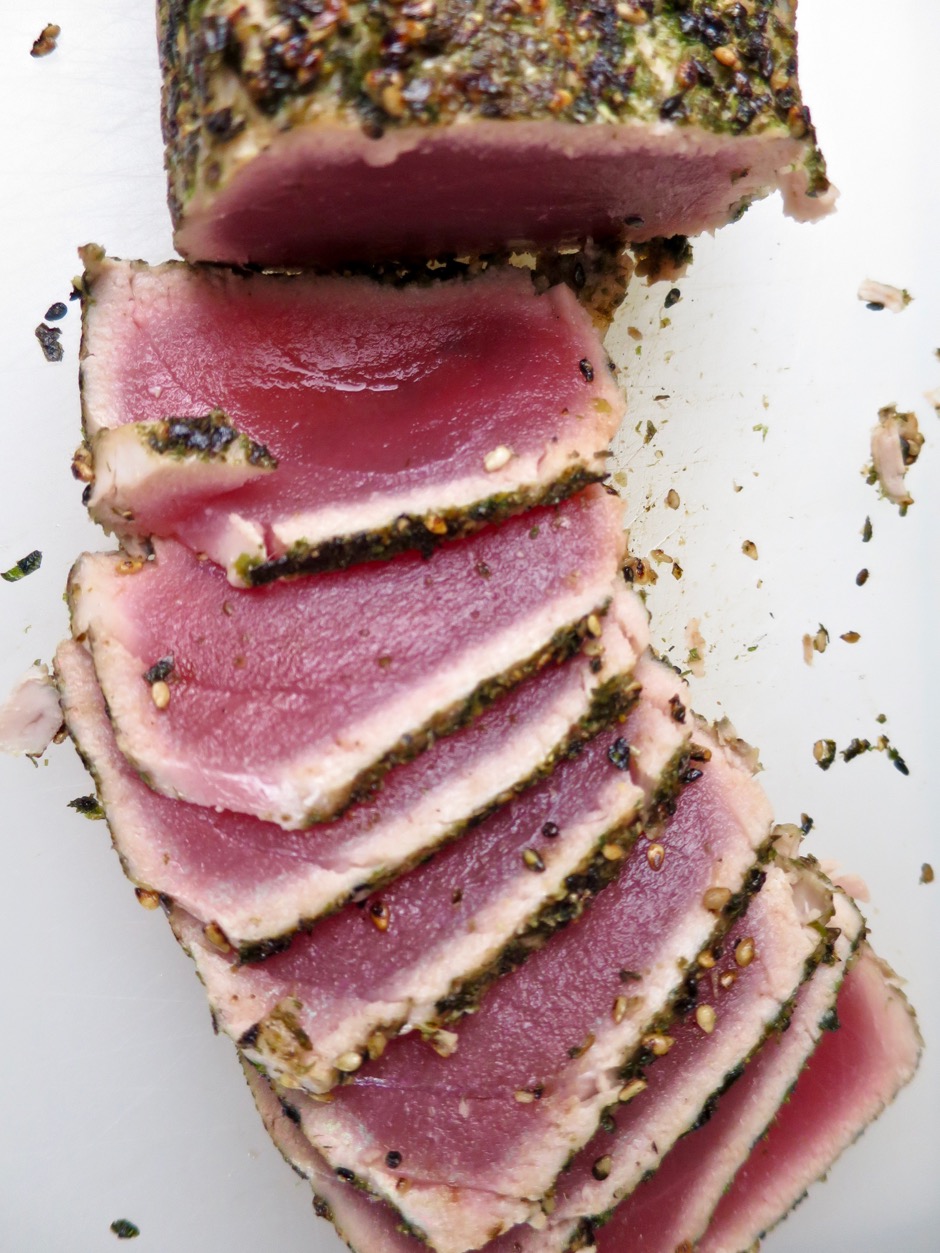
Buy the freshest ahi block you can find. I visit or call my favorite local markets to ensure the fish has been cut that very same day.  If it has been sitting on the shelf for more than a day, I take a pass and try again another time.  Coating the ahi block with furikake creates a light seasoning and crunchy texture (from the sesame seeds) that is perfect for this dish.

Seared Ahi Rice Bowl

Seared Ahi Rice Bowl
 
Author:
Serves: 2 servings
Ingredients
  • For the dressing:
  • 2 teaspoons finely grated lime zest
  • 2 tablespoons fresh squeezed lime juice
  • 2 tablespoons water
  • 1 tablespoon granulated sugar
  • 2 tablespoons + 2 teaspoons soy sauce
  • 2 tablespoons Champagne vinegar (or white wine vinegar)
  • 1 tablespoon + 2 teaspoons finely grated peeled ginger
  • For the rice bowl:
  • Cooked Japanese short grain white rice (I use my rice cooker and measure out 1 cup uncooked rice)
  • 10 ounces fresh ahi block
  • furikake for coating ahi block
  • ½ cup frozen shelled edamame (boil for 4 minutes, drain and cool)
  • ½ small carrot, sliced thin (microwave in water for 45 - 60 seconds to soften slightly)
  • ½ small avocado cut into small cubes
  • pickled ginger
  • slivered nori (optional)
  • bubu arare (optional)
  • thinly sliced red hot pepper such as jalapeño or Fresno (optional)
Preparation
  1. For the dressing:
  2. Combine lime zest, lime juice, water and sugar in a small saucepan. Cook over medium-high heat until sugar has dissolved. This will take just a minute or so. Transfer liquid to a small glass bowl, cover and let cool completely. Strain cooled liquid through a fine-mesh sieve into a small bowl. Whisk in soy sauce, vinegar, and ginger.
  3. For the fish:
  4. Lightly coat all sides of the ahi block with a canola oil. Place the fish on a cutting board or piece of foil and sprinkle furikake on all sides, patting it gently so it adheres to the fish.
  5. Heat a small pan over medium-high heat with a teaspoon of canola oil. When the pan is hot, sear the ahi for 30 - 60 seconds or so on each side. The thickness of your ahi block and how you prefer your ahi cooked will determine how long to fry it. Remove the fish to a plate or cutting board to cool. Slice fish into ⅓" thick slices.
  6. Divide the cooked rice into two bowls. Top with seared ahi, edamame, carrots, avocado, and ginger. Drizzle dressing over the ahi and other ingredients. Sprinkle the nori and bubu arare over the toppings if using and garnish with red pepper slices. Serve the rice bowl with extra dressing on the side.

 

Beef, Dinner, Japanese, Lactose Free, Pork, Recipes, Sandwiches

Japanese Burgers

November 26, 2016

Japanese Burger

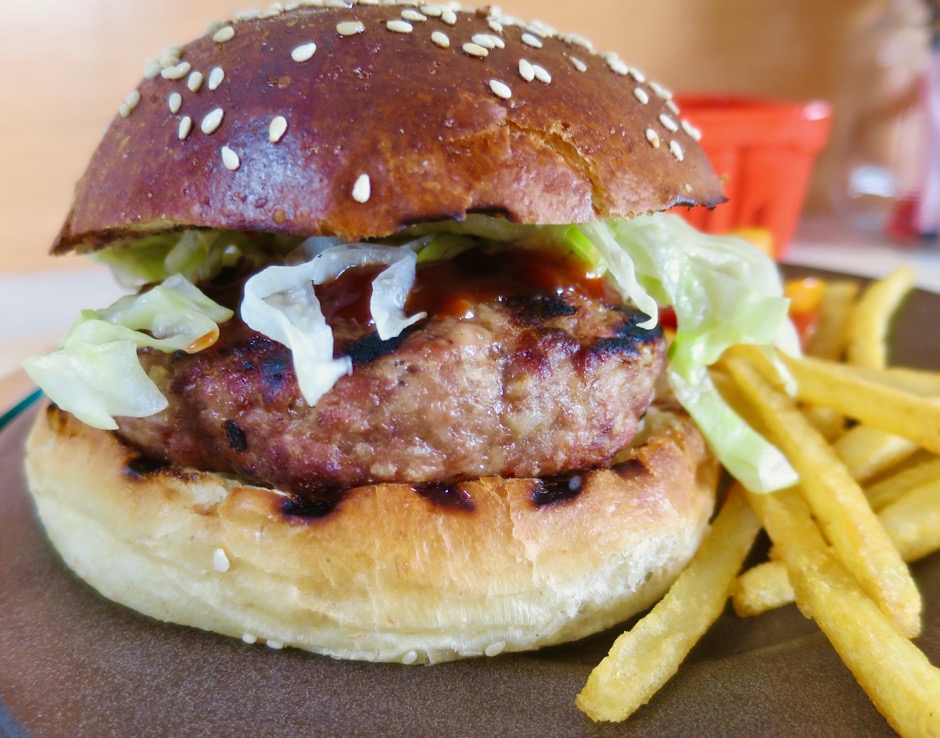
The moment I saw this recipe from the New York Times I knew I wanted to make it right away.  I was curious to know why these were called Japanese burgers.  Upon reading the ingredients, panko bread crumbs, soy sauce, and the combination of ground beef and pork, the answer was clear.  The recipe comes from Tadashi Ono, owner of Matsuri restaurant in New York. Tadashi is Japanese.  The article also lists a recipe for wasabi (Japanese!) ketchup to go along with the burger. In the end, it didn’t matter what they called these burgers.  They are so good I just call them “ono burgers!”

Ground Sirloin & Ground Pork

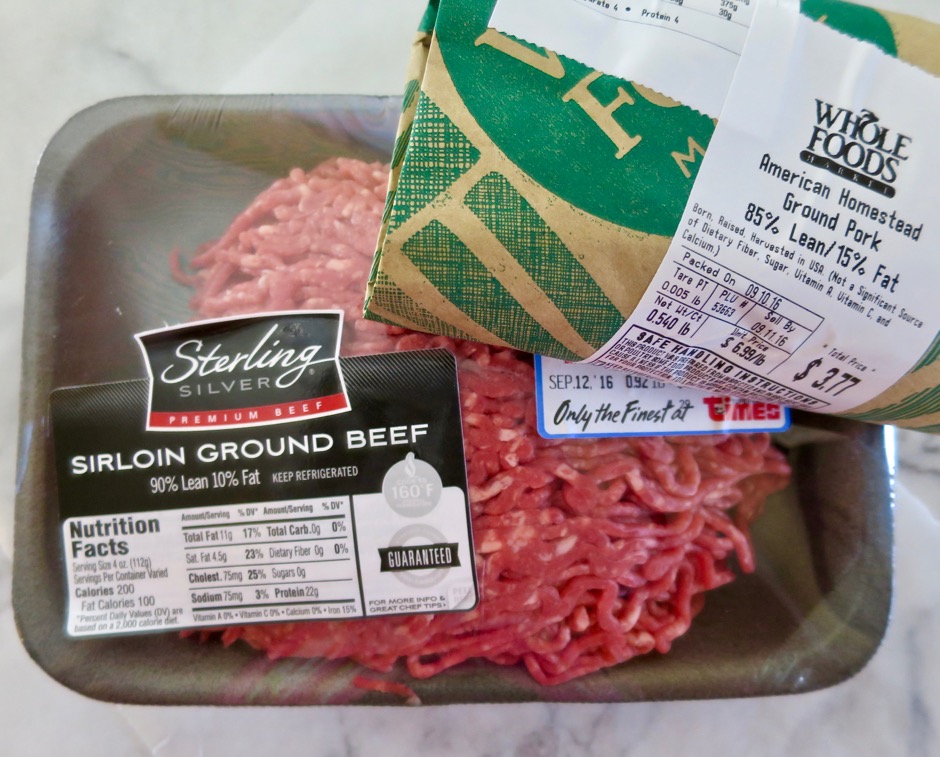
Times market in Kihei sells specific types of excellent ground beef (including sirloin and chuck), rather than the usual generic version. Whole Foods market ground the pork for me while I waited at the counter.

Ground Sirloin & Ground Pork

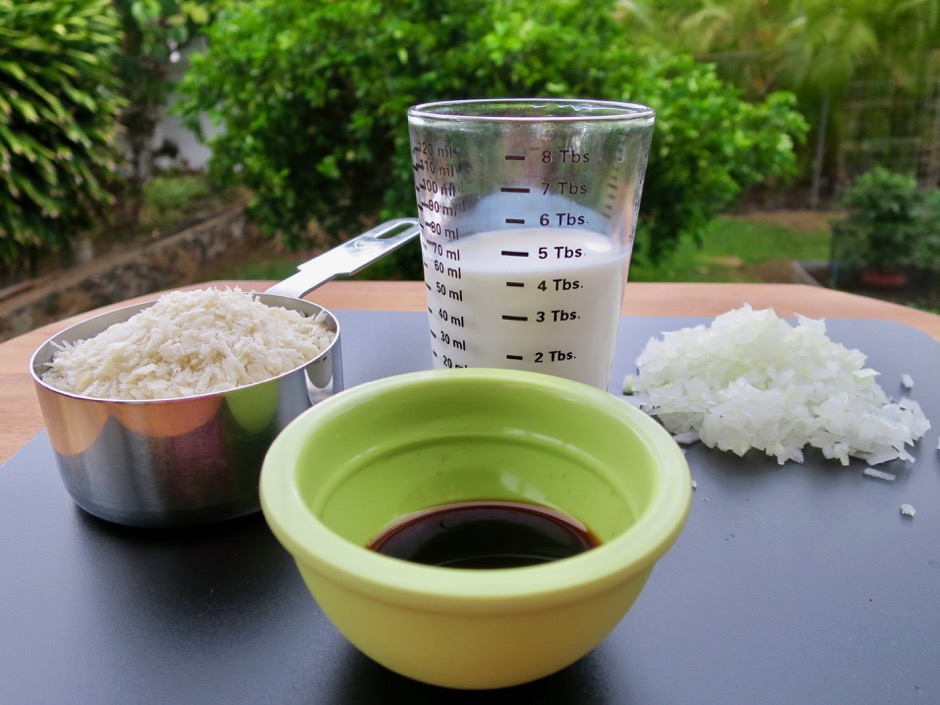
Panko, Milk, Onion, Soy Sauce

A bit of panko and milk moisten the meat.  Very finely minced onion and soy sauce flavor the ground beef and pork along with a little salt and pepper.

Japanese Burger

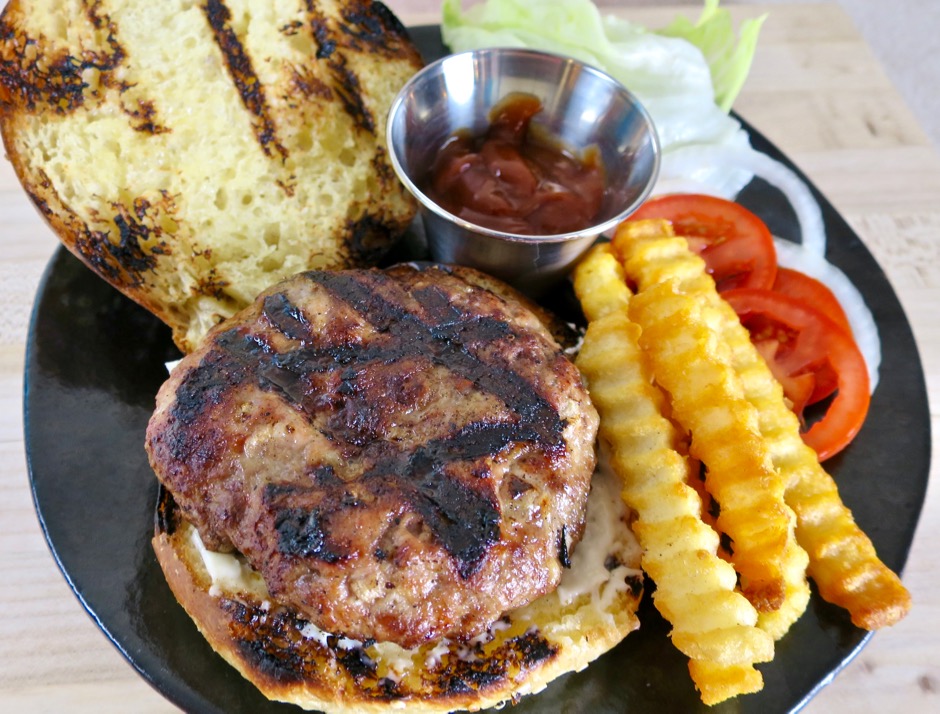
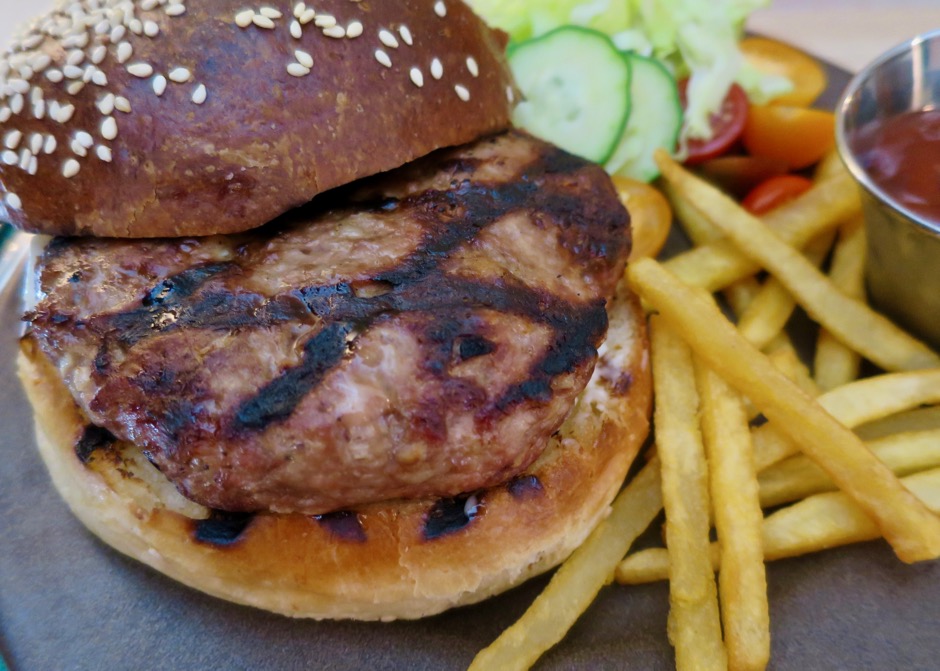
These are juicy, moist burgers.  We heated leftover patties wrapped in foil in the toaster oven the following day and they were equally delicious as they were on the first day.  In place of the wasabi ketchup suggested in the article, we opted to mix up sriracha with ketchup because sriracha enhances nearly every food imaginable (pizza, noodles, eggs, mayonnaise, ketchup).

Japanese Burger

Japanese Burgers
 
Adapted from the New York Times
Author:
Serves: 4
Ingredients
  • ½ cup panko
  • ¼ cup 2% or whole milk
  • 10 ounces ground sirloin
  • 10 ounces ground pork
  • ¼ cup finely chopped white onion
  • 1½ teaspoons soy sauce
  • ½ teaspoon salt
  • ¼ teaspoon pepper
  • sesame oil for coating hands
  • 4 brioche buns for serving
Preparation
  1. In a large mixing bowl, combine the panko bread crumbs and milk and let rest for a few minutes. If the mixture seems too dry add a few extra drops of milk to moisten the bread crumbs.
  2. Add sirloin, pork, onion, soy sauce, salt and pepper. Knead the meat until it becomes sticky and binds together. Divide into 4 equal parts (a scale comes in handy).
  3. Lightly dab your hands with sesame oil. Using your palms, roll each part of the meat into a ball, then pat the ball flat, shifting it from hand to hand to form a ½-inch-thick patty. Make a shallow indentation across the center of the patty to keep it from puffing while it grills.
  4. Grill the burgers, flipping twice, until browned and cooked through with no pink in the middle, about 10 minutes (160 degrees). Serve on buns, topped with spicy ketchup and shredded iceberg lettuce.


Appetizers, Dinner, Fish, Japanese, Lactose Free, Recipes

Tuna Tartare with Avocado & Radish

June 17, 2016

Tuna Tartare with Avocado & Radish

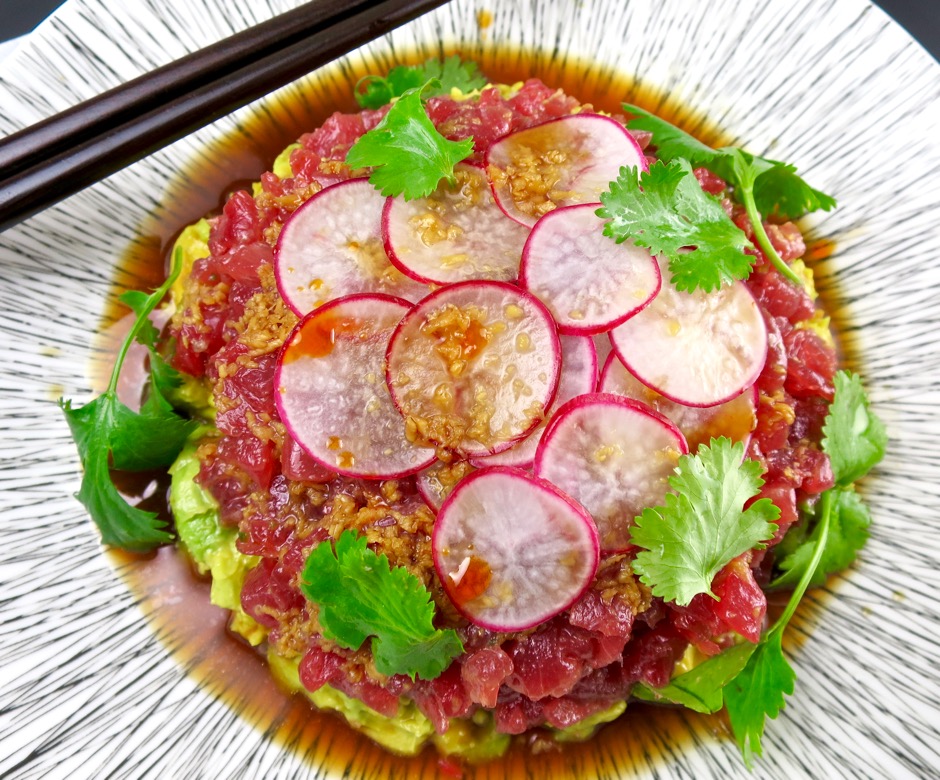
Over the years, we have enjoyed many different versions of tuna tartare.  The best have been at favorite restaurants (those from Plouf in San Francisco and BLT in Honolulu come to mind).  However, with this recipe, we are making a version at home which rivals or even surpasses our previous favorites.  It’s hard not to love this tuna tartare.  There’s something about the rich and creamy avocado, silky fish, and delightful ponzu-like dressing.  It all goes together so very well.  And, it’s really the perfect summer meal for a warm day when cooking over the stove or turning on the oven just seems out of the question.  This dish relies on using the best quality sashimi grade tuna. Fresh, well chilled, and cut just this morning type-of-tuna from a reliable source is what you are looking for.  I can’t wait to make it again.

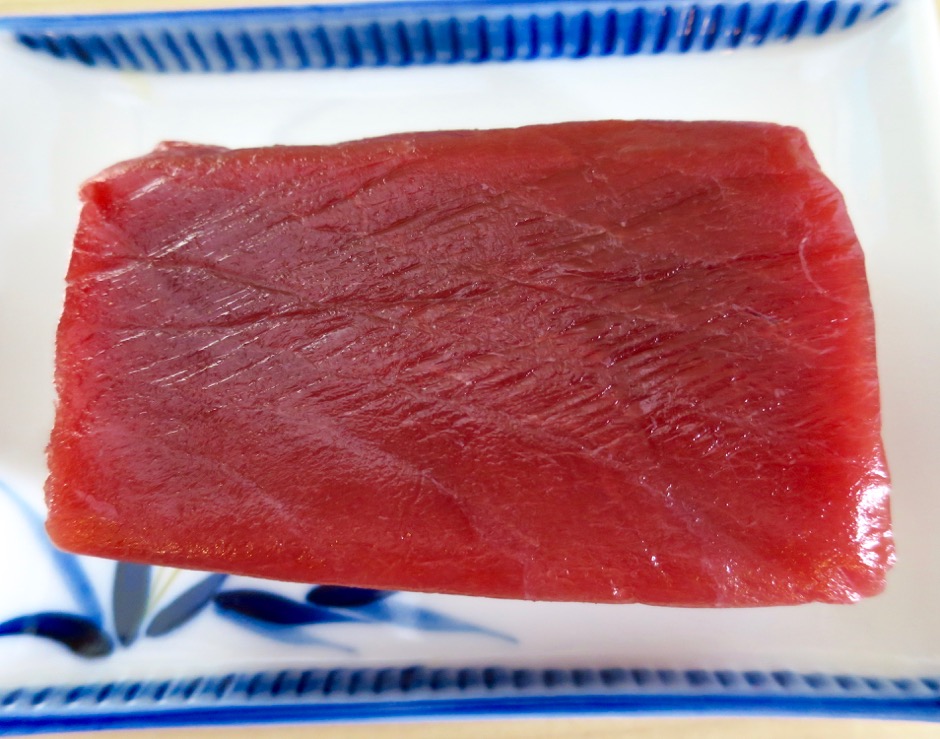
Sashimi Grade Ahi (yellowfin tuna)

Though I usually pay a dear price for the tuna at Whole Foods, I find the quality to be superb.  I always ask the staff at the counter whether the fish was cut that morning.  If it has been sitting around for more than a day, I skip it, and try again the following week. I find it most satisfying when the fish is very well chilled before serving.  Keep the fish in the refrigerator until you are ready to plate and serve the tartare.

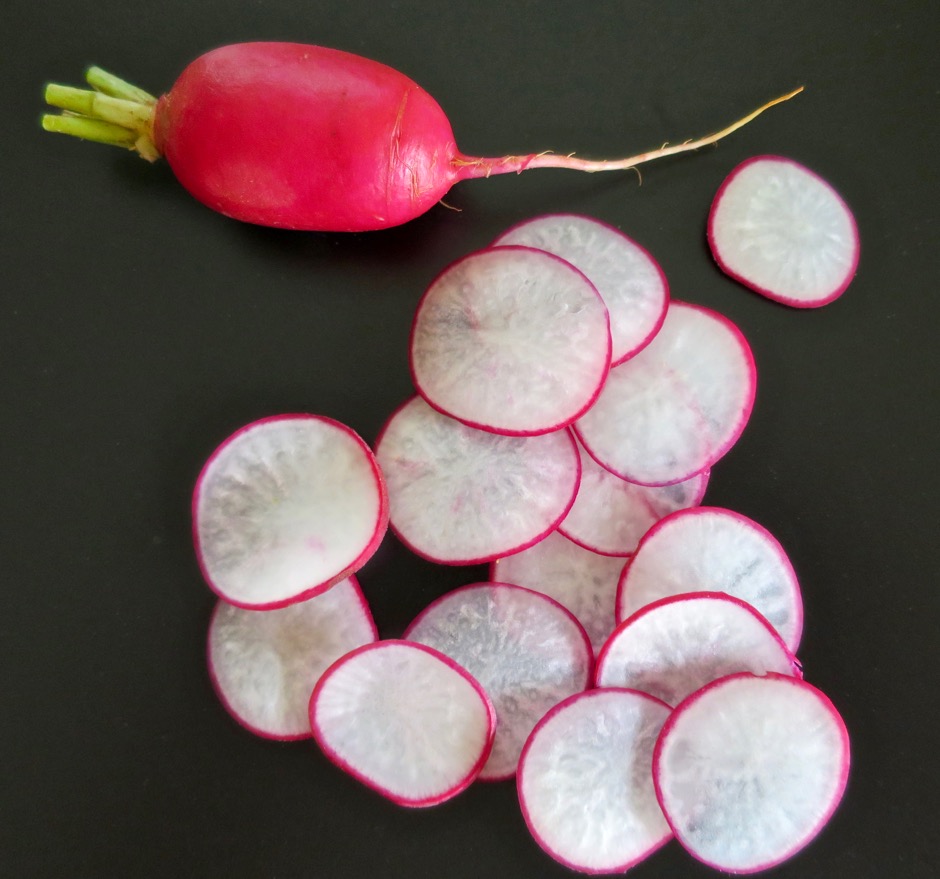
Radish

I didn’t eat radishes when I was a child, except for the long and slender daikon variety that is commonly used to make Japanese pickled takuan.  These days I enjoy these pretty red radishes in salads as well as in this ahi tartare preparation.  The secret is to slice them ever so thinly and soak them in an ice water bath for a half hour to really crisp them up.

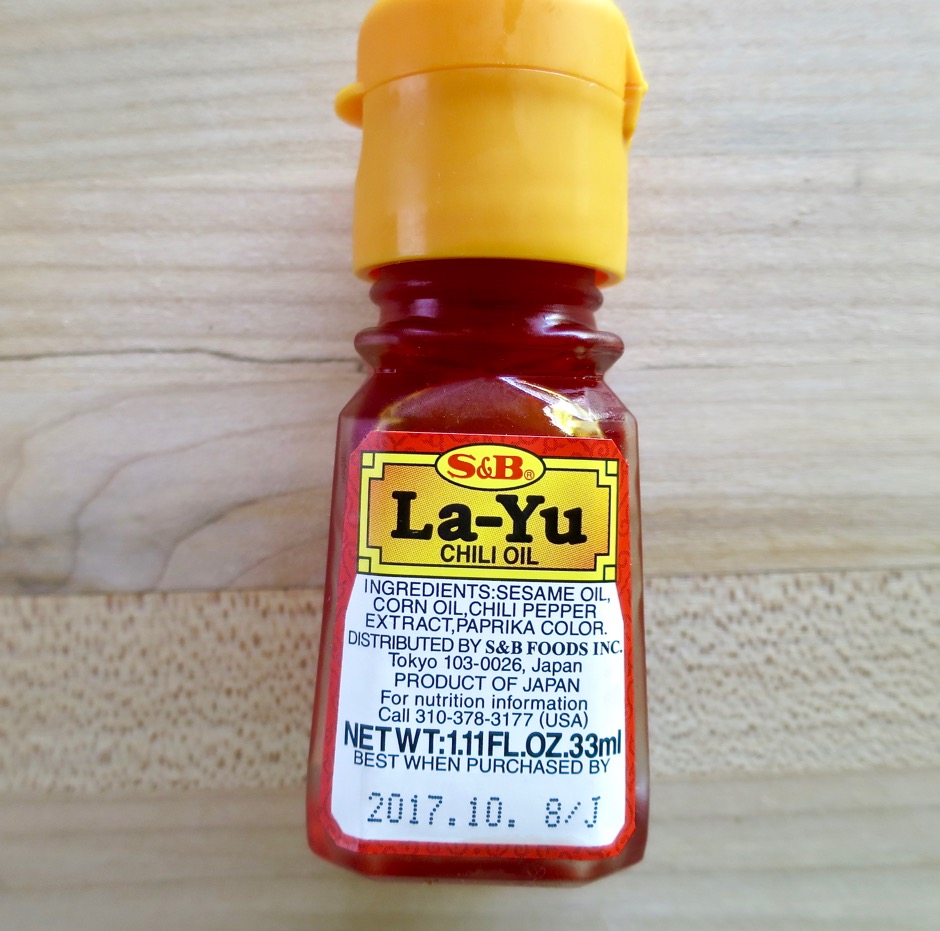
Chili Oil

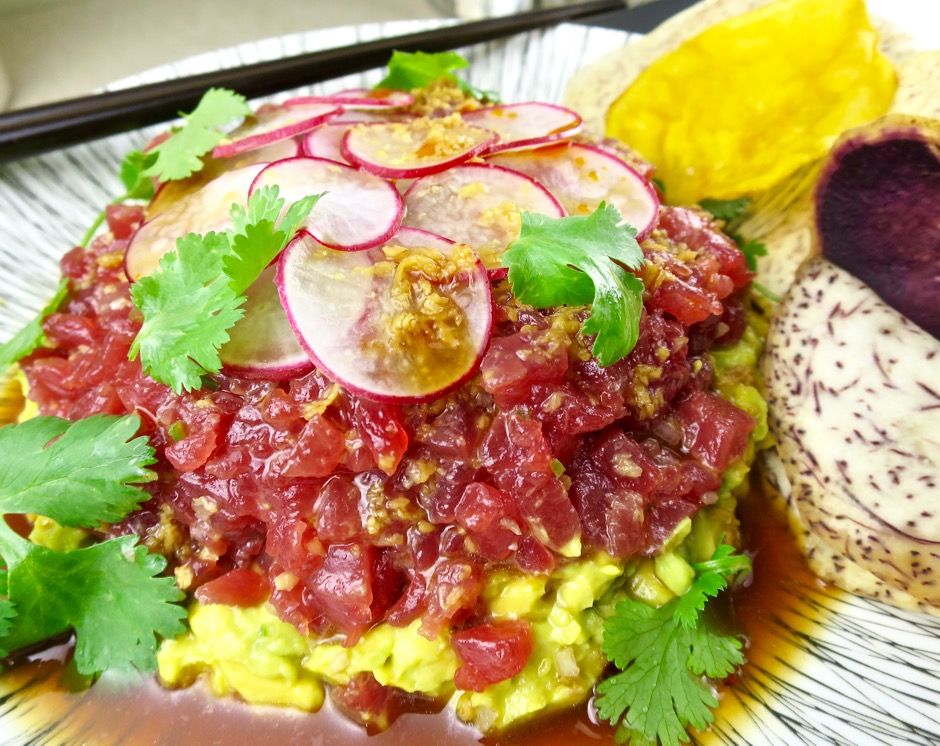
Tuna Tartare with Avocado & Radish + Taro Chips

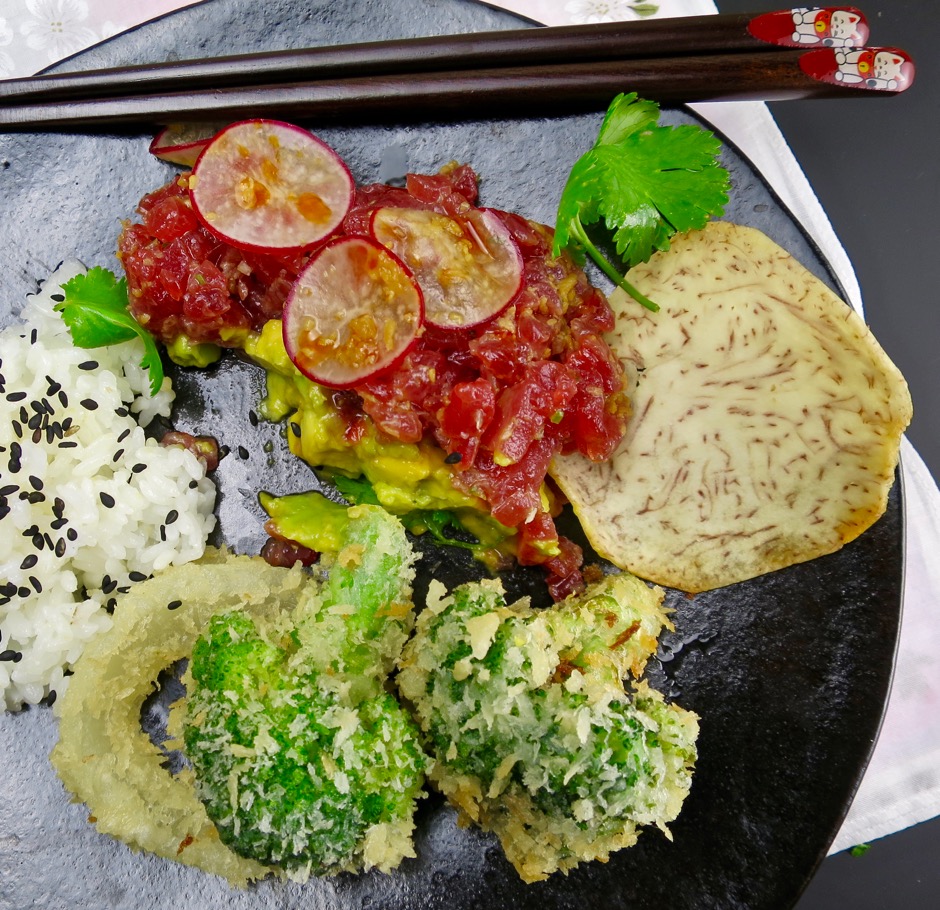
Serve the tartare with taro chips as an appetizer or as an entrée with rice and a side of crispy vegetable tempura.

Tuna Tartare with Rice & Vegetable Tempura

Tuna Tartare with Avocado & Radish
 
A lovely appetizer for a warm summer evening. Adapted from Bon Appetit Magazine.
Author:
Serves: 4 as an appetizer
Ingredients
  • Dressing:
  • 2 teaspoons finely grated lime zest (from two small or one large lime)
  • 2 tablespoons fresh lime juice
  • 1 tablespoon granulated sugar
  • 2 tablespoons + 2 teaspoons soy sauce
  • 2 tablespoons Champagne vinegar or white wine vinegar
  • 1 tablespoon + 2 teaspoons finely grated peeled ginger
  • Tuna:
  • 10 ounces sashimi grade tuna, very finely diced and well chilled
  • 4 teaspoons olive oil, divided
  • 1 teaspoon minced seeded serrano chile
  • 1 teaspoon minced shallot
  • kosher salt
  • 1 large avocado, halved, pitted and finely diced
  • 2 radishes very thinly sliced, chilled in an ice water bath for 30 minutes
  • chili oil
Preparation
  1. Combine lime zest, lime juice, sugar, and 2 tablespoons water in a small saucepan. Bring to a boil (this will happen in no time at all). Transfer liquid to a small glass bowl, cover and let cool completely. Strain cooled liquid through a fine-mesh sieve into a small bowl. Whisk in soy sauce, vinegar, and ginger. The dressing can be made 2 days in advance. Cover and chill.
  2. Toss tuna with 2 teaspoons olive oil in a medium bowl. Add chile and shallot, season lightly with salt.
  3. Mix diced avocado with remaining 2 teaspoons olive oil in a medium bowl. Season with salt.
  4. To assemble the tuna tartare, you may use a round mold or gently shape the avocado with your hands as I do, onto a serving platter. Arrange tuna over the avocado keeping a circular shape. Spoon some of dressing over the tuna and around the avocado. Top with radish slices and more dressing. Drizzle with chili oil. Serve right away.


Japanese, Lactose Free, Recipes, Salad, Vegan, Vegetarian, Veggies

Miso Turmeric Dressing

May 26, 2016

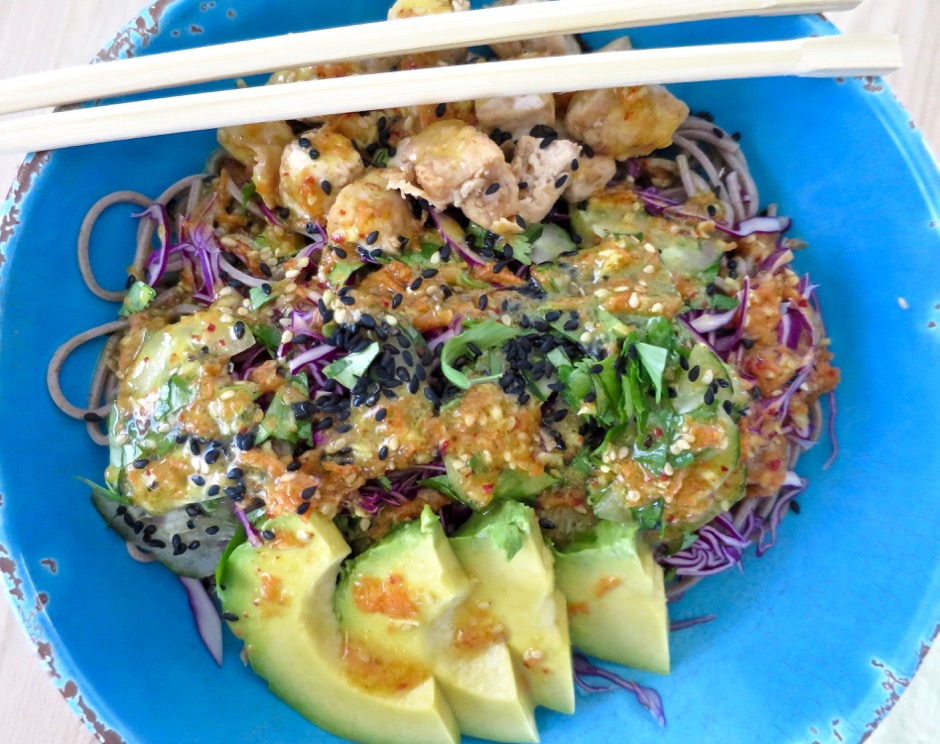
Miso Turmeric DressingThis is a beautiful and versatile dressing.  It’s delicious with chopped iceberg lettuce and cucumbers, or drizzled over a crisp watercress salad.   It’s the perfect match for a cool summer soba salad with finely shredded red cabbage and pan-fried tofu.

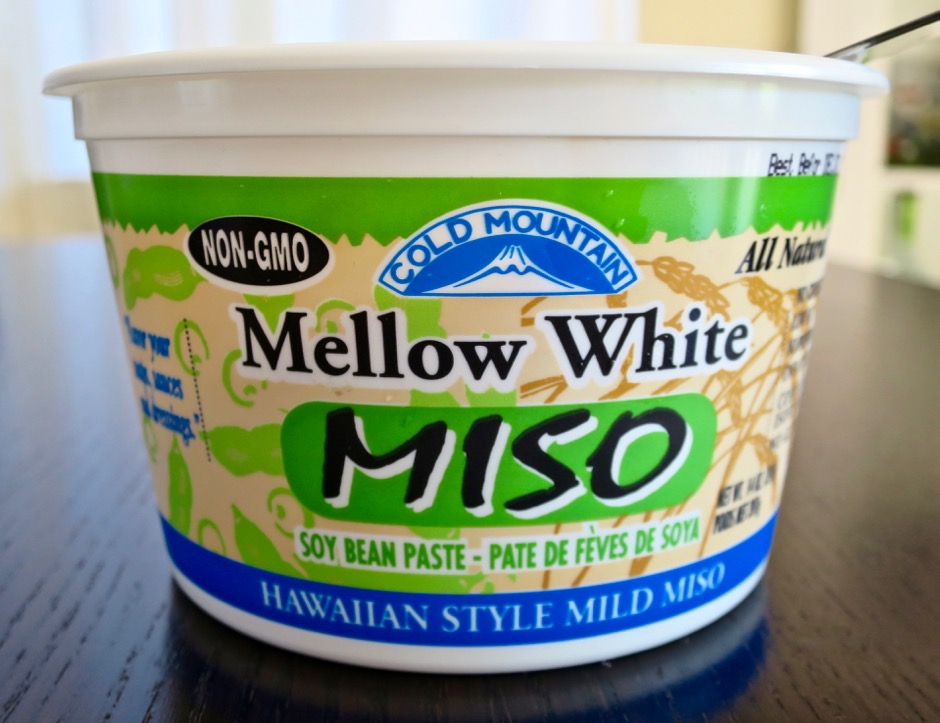
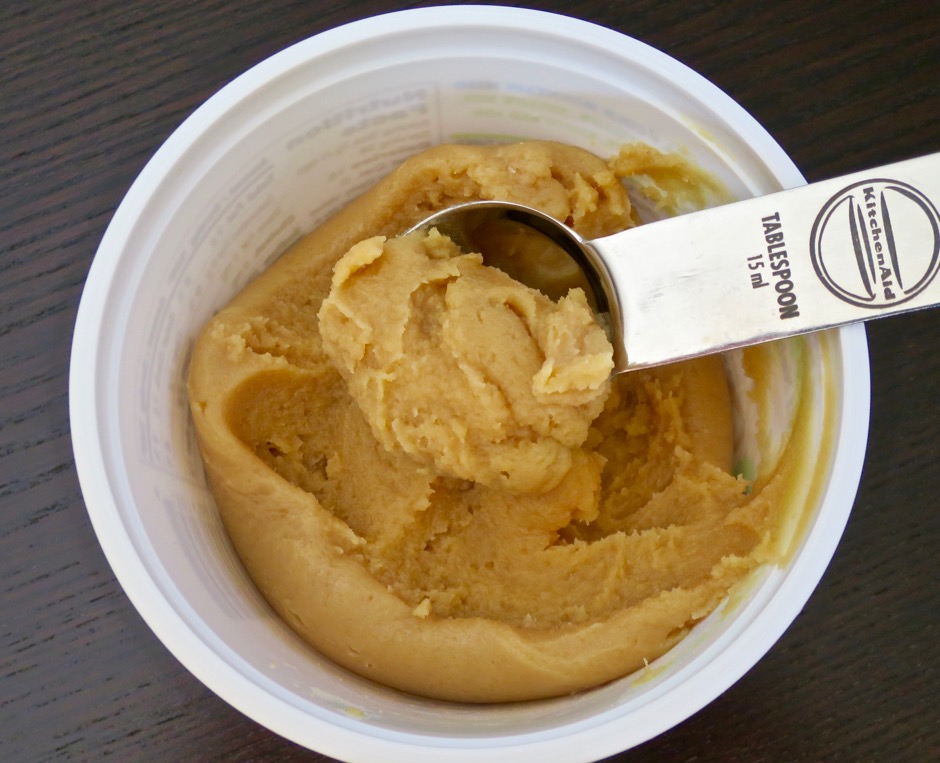
White MisoThis Hawaiian Style Mellow White Miso is perfect for this dressing.  It has a semi-sweet flavor that compliments the rest of the ingredients.

White Miso

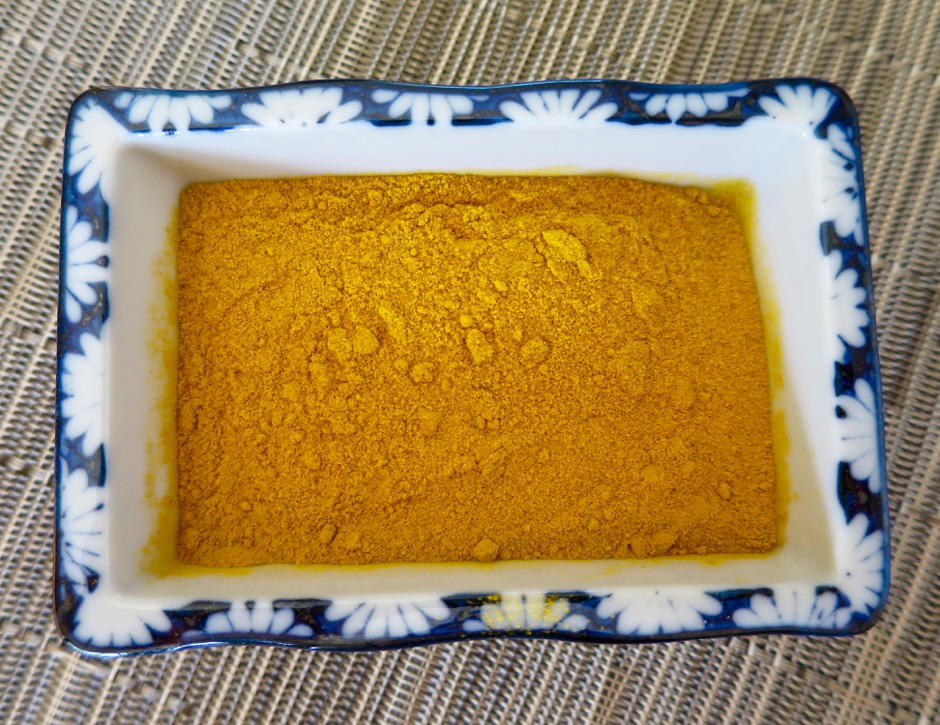
Ground Turmeric

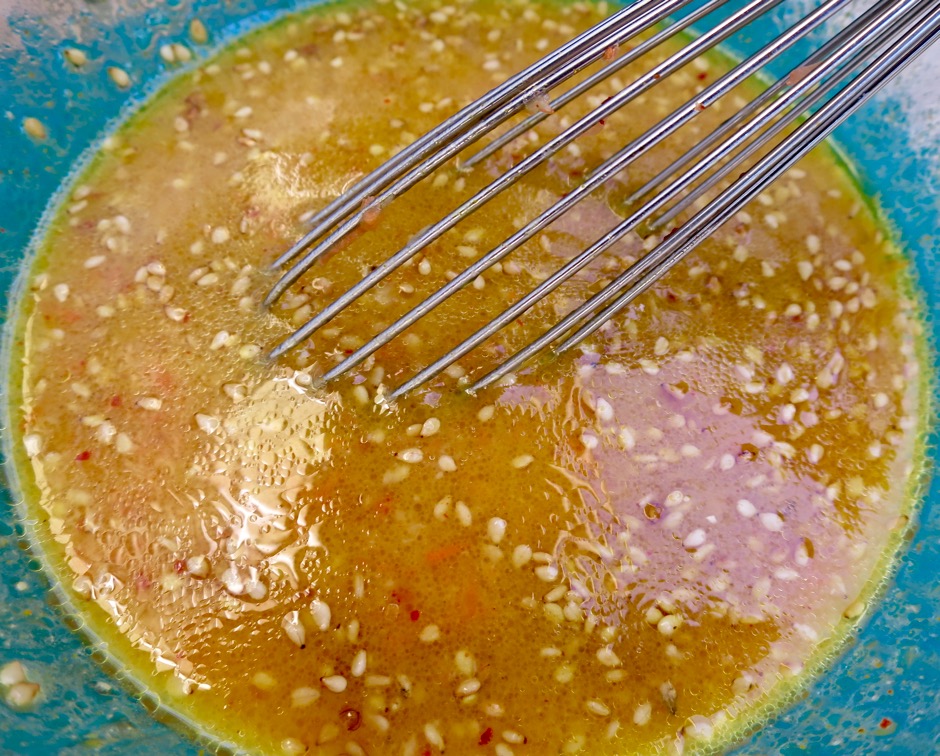
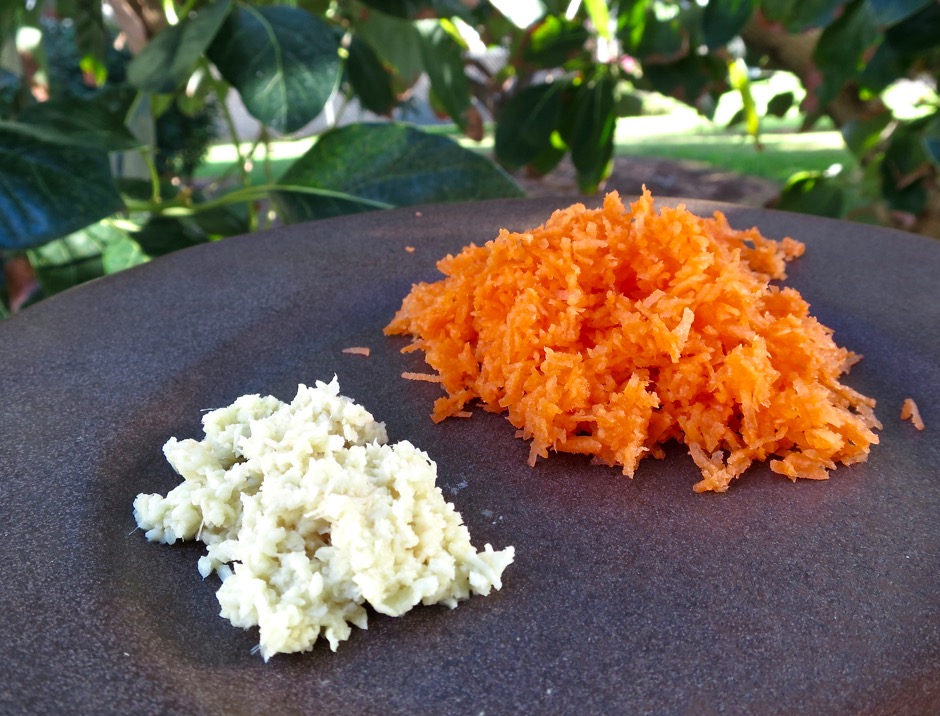
Shredded Ginger & CarrotThe dressing can be prepared in less than 10 minutes.  All the ingredients are whisked together in a small bowl.  That’s it!  It will keep nicely in the refrigerator for 3 – 4 days.

Miso Turmeric Dressing with Soba Salad

Miso Turmeric Dressing
 
Adapted from Bon Appetit Magazine
Author:
Serves: about 1 cup
Ingredients
  • ⅓ cup unseasoned rice vinegar
  • ¼ cup mirin
  • ¼ cup vegetable oil
  • 2½ tablespoons finely grated carrot
  • 2 tablespoons white miso
  • 2 teaspoons finely grated peeled ginger
  • ½ teaspoon ground turmeric
  • 1 teaspoon roasted sesame oil
  • ½ teaspoon soy sauce
  • 2 teaspoons roasted sesame seeds
Preparation
  1. Whisk together all ingredients in a small bowl. Serve over crisp salad greens such as iceberg lettuce, watercress, chopped cabbage or use as a dressing for soba salad.


Dinner, Japanese, Lactose Free, Recipes, Salad, Side Dishes, Vegetarian, Veggies

Crunchy Cabbage & Ramen Noodle Salad

May 15, 2016


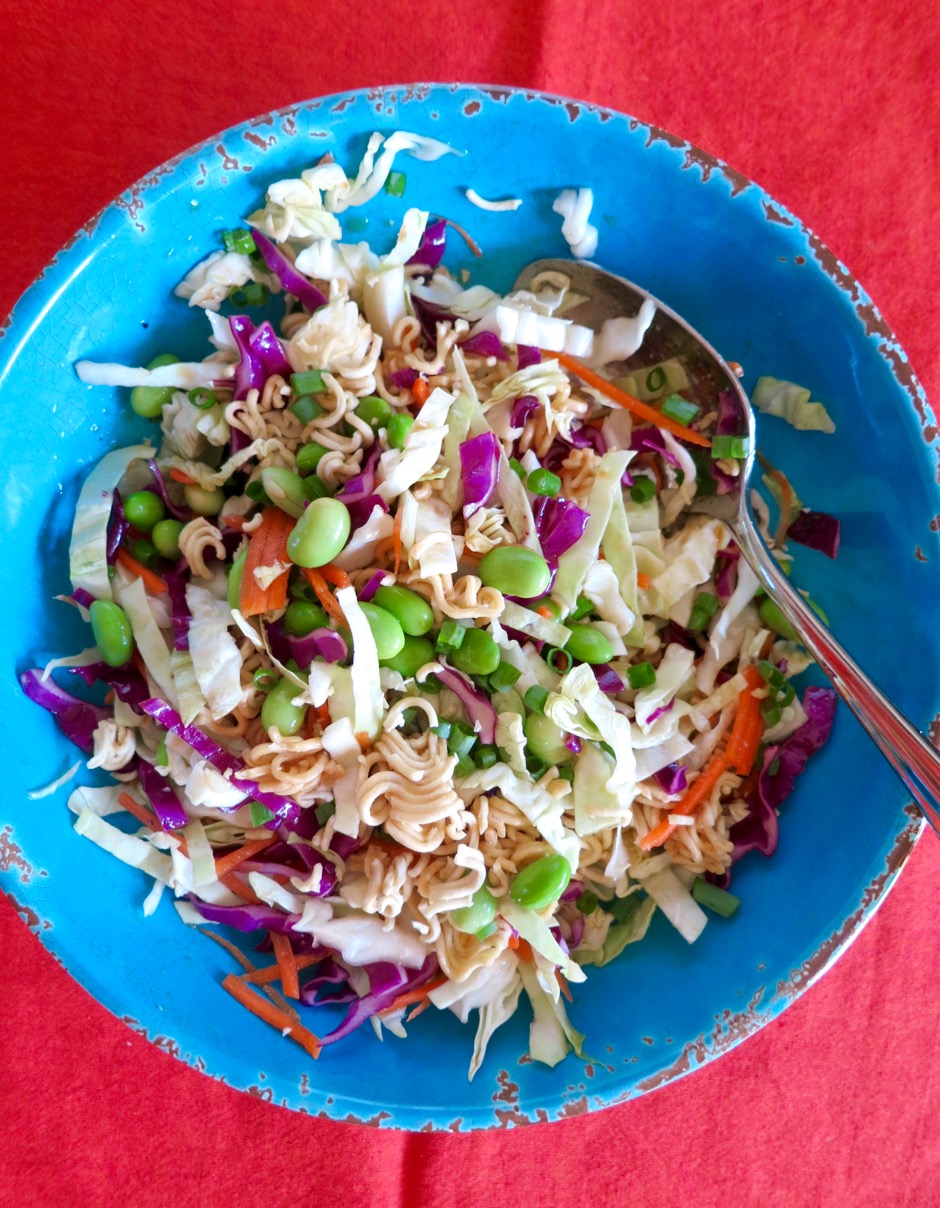
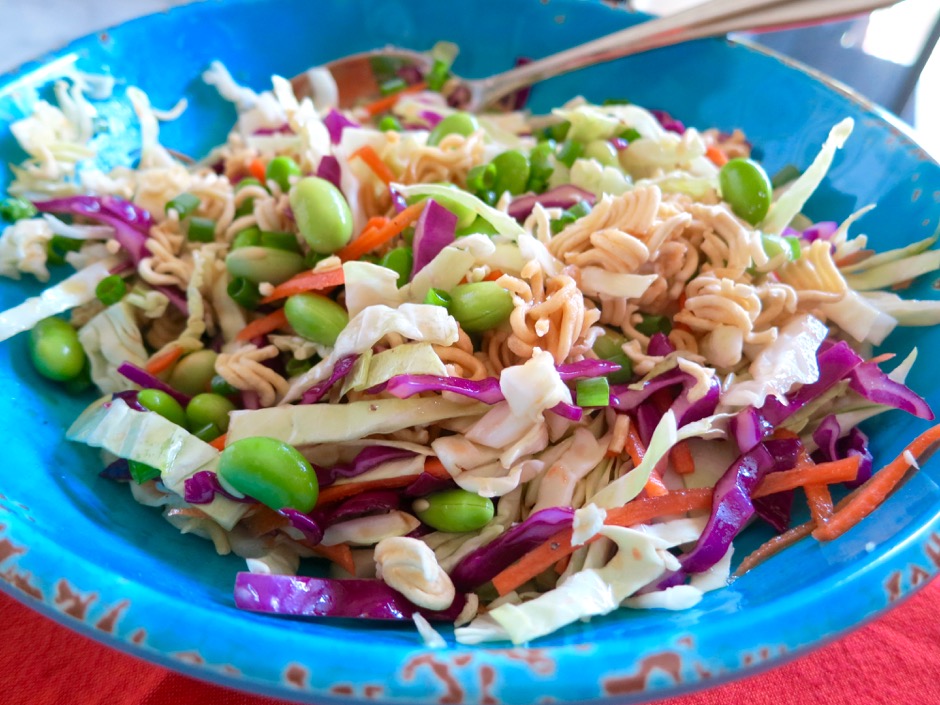
Crunchy Cabbage & Ramen Noodle Salad

This is the perfect salad to take on a summer picnic or potluck party.  Everything can be prepared in advance and put together in one bowl just before serving.  I love the crunchy texture of the cabbage, ramen and almonds.  Sometimes I’ll add leftover shredded rotisserie chicken to the salad.  You could also add baked or pan-fried tofu for a tasty vegetarian lunch.  This is a salad, with its refreshing ingredients and delicious dressing, that I will never get tired of eating.

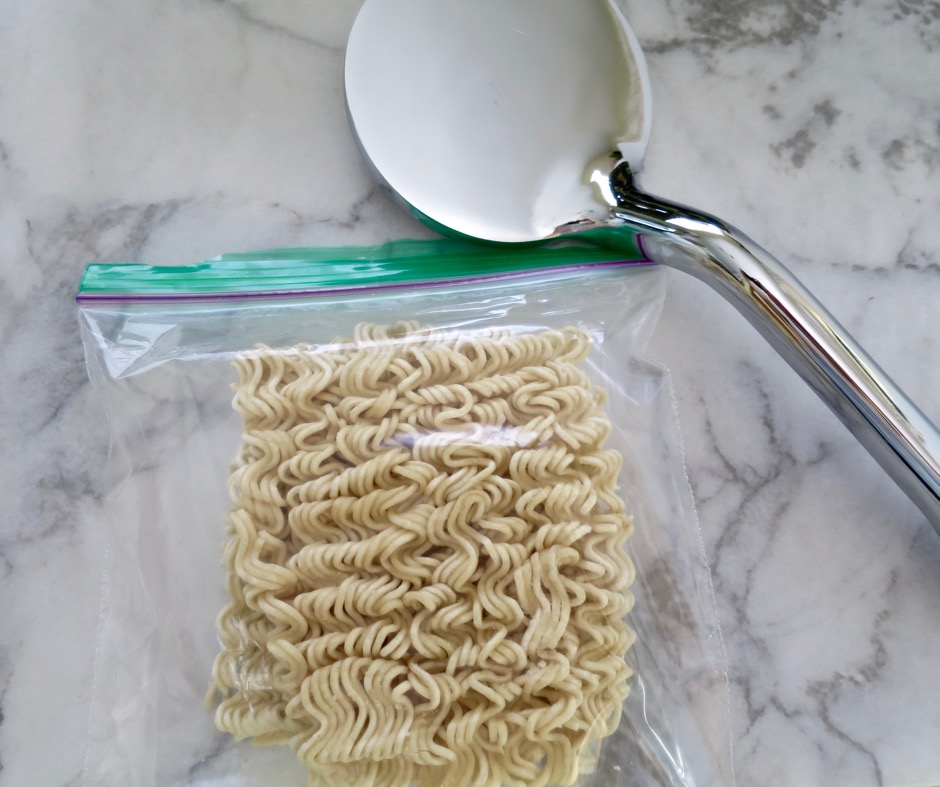
Ramen Noodles

Though the ramen is already baked, I prefer to enhance it just a bit to make it very crisp. I toast the crushed ramen in my toaster oven for 4 minutes before adding it to the salad.

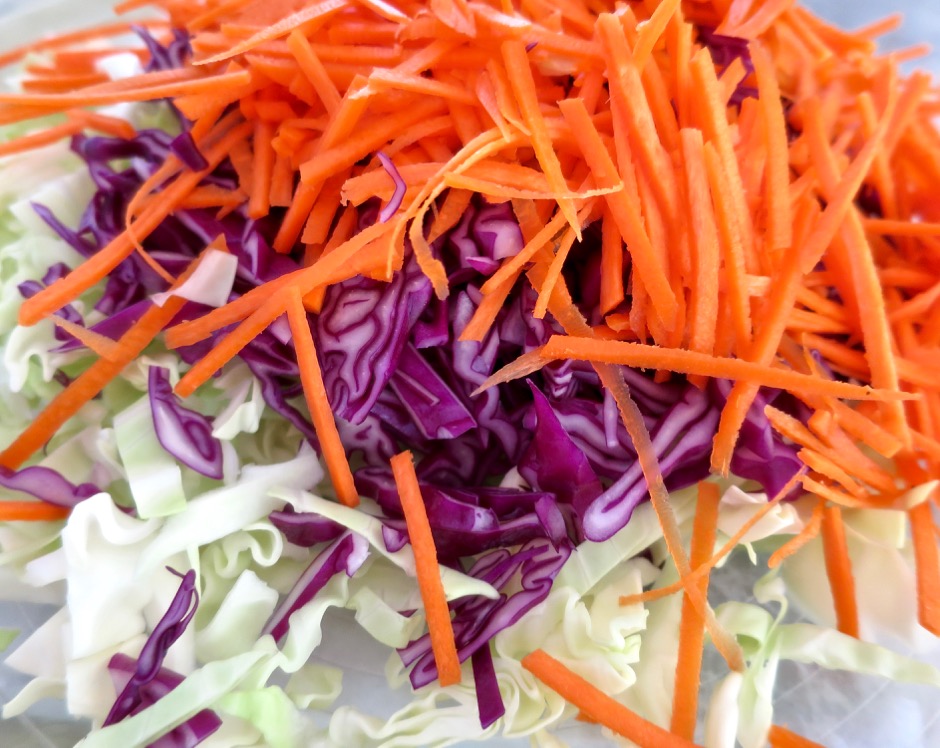
Slaw Mix

Crunchy Cabbage & Ramen Noodle Salad


Crunchy Cabbage & Ramen Noodle Salad
 
Adapted from the kitchn blog recipe
Author:
Serves: 4
Ingredients
  • 3 cups shredded green cabbage (about 7 ounces)
  • 1 cup shredded red cabbage (about 3 ounces)
  • 1 cup shredded carrot (about 3 ounces)
  • ¼ cup shelled edamame
  • ¼ cup seasoned rice vinegar
  • 2 tablespoons roasted sesame oil (Kadoya brand recommended)
  • 2 tablespoons canola oil
  • 2 teaspoons honey
  • 2 teaspoons roasted sesame seeds, white, black or a combination of both
  • 1 (3-ounce) package ramen noodles, crushed and toasted (discard seasoning packet)
  • ¼ cup thinly sliced green onions
  • ¼ cup sliced almonds, toasted
Preparation
  1. Place shredded cabbage, carrot and edamame in a large bowl.
  2. Combine seasoned rice vinegar, sesame oil, canola oil, honey, and sesame seeds in a jar. Shake to combine ingredients.
  3. Preheat toaster oven (or oven) to 325 degrees. Spread crushed ramen noodles on a foil lined baking sheet and toast for about 4 minutes. Watch closely so it doesn't burn.
  4. Toast sliced almonds for 4 -5 minutes. If you use your oven, you'll have enough space to toast the ramen and almonds at the same time (on separate pans). The ramen and almonds should be slightly toasted with just a hint of golden color.
  5. Add dressing to the cabbage mixture by the spoonful. Toss, then fold in ramen, green onions and almonds. Toss again and serve right away.


Dinner, Japanese, Lactose Free, Pork, Recipes, Sauces

Grilled Teriyaki Pork Tenderloin

May 5, 2016

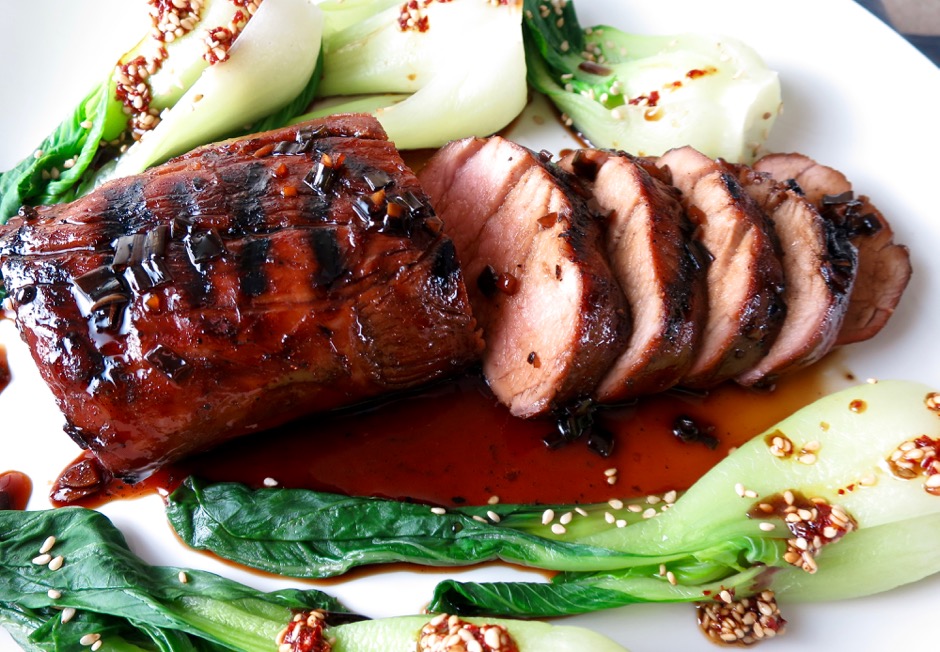
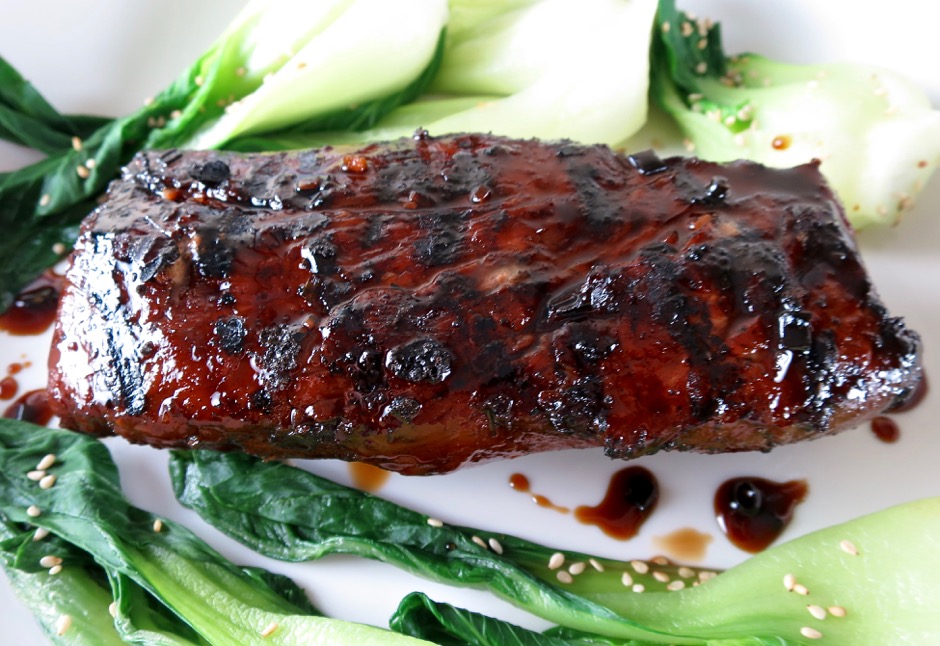
Grilled Teriyaki Pork Tenderloin

Virtually anything grilled with Granny’s teriyaki sauce is terrific.  Sometimes we grill tofu, sometimes chicken, occasionally fish, or in this case for the first time, pork tenderloin.  It’s such an easy meal to whip up on a week night and leftovers are more than welcome the following day.  Pork tenderloin is lean and because of its compact size, it cooks quickly which means dinner is on the table in no time.  A side of Japanese rice and baby bok choy makes the perfect meal.

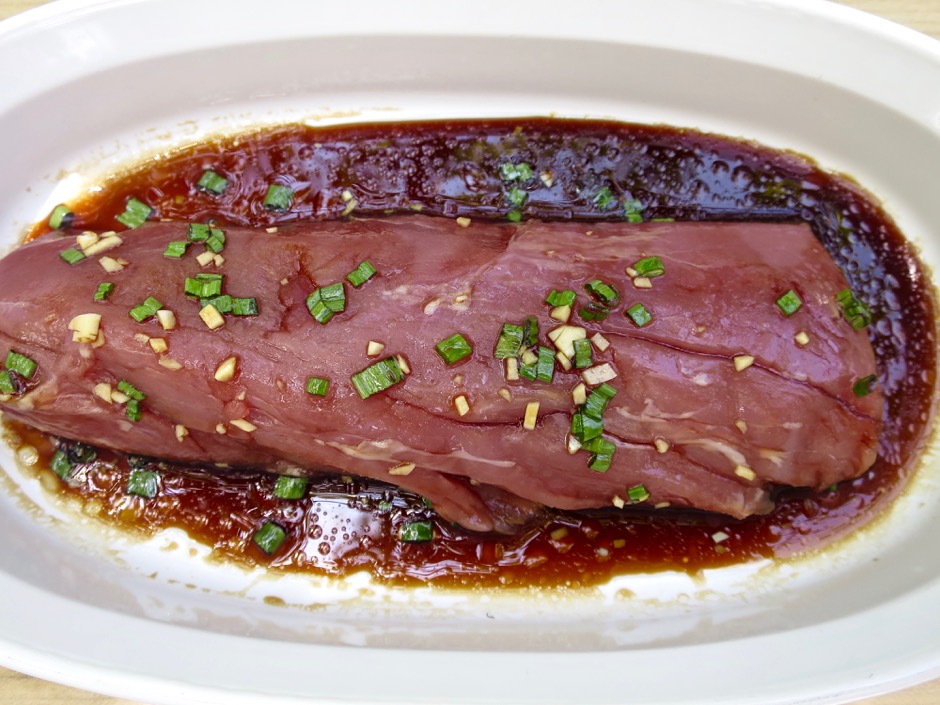
Pork Tenderloin Marinating

Place the sauce and pork in a bowl, or even better, a Ziplock bag.  Refrigerate for a few hours, turning occasionally.

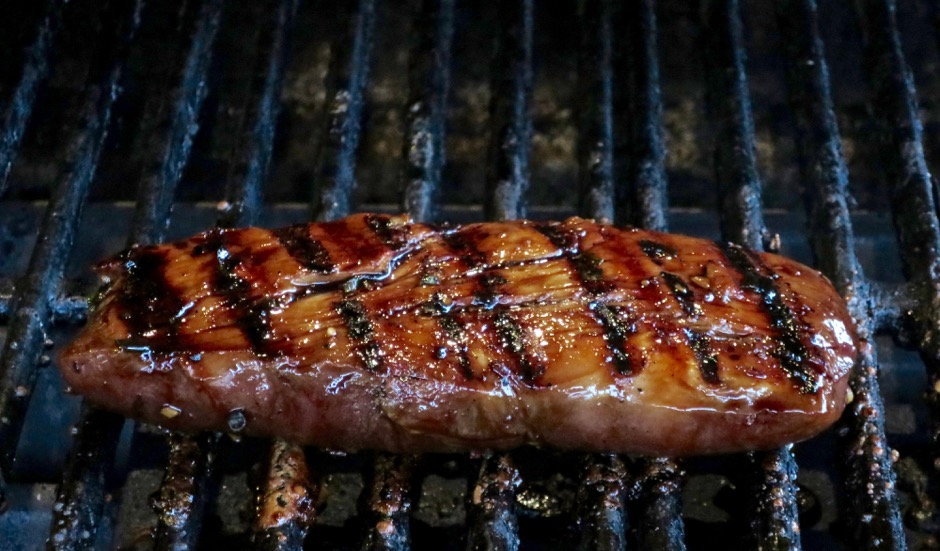
Grilling Teriyaki Pork Tenderloin

Use a gas or charcoal grill.  This time we used our gas grill and started cooking over indirect heat (to about 95 – 100 degrees internal temperature) then finished over direct heat to 145 degrees, basting occasionally with sauce. Our favorite digital thermometer the Thermapen is essential for perfect doneness. This cooking technique is also known as the reverse sear.  The traditional method is to sear the meat first and finish in the oven or on the grill over indirect heat.  The reverse sear method prevents an over done “gray” rind and the meat cooks more evenly with  a consistent  doneness and color from edge to center. Voila!  In less than half an hour our pork tenderloin is ready.

Grilled Teriyaki Pork Tenderloin


Grilled Teriyaki Pork Tenderloin
 
Author:
Serves: 2 generous servings
Ingredients
  • 1 pork tenderloin, about 1 pound
  • Granny's teriyaki sauce
  • Reserve ¼ cup sauce for basting pork
  • Save remainder for finishing as described below
Preparation
  1. Trim pork tenderloin removing any visible fat and silver skin. Trim off the ends if they are very thin so that the pork tenderloin is of uniform size. The trimmings can be frozen for another meal (tacos!).
  2. Place pork tenderloin in a Ziplock bag with ½ cup of teriyaki sauce. Seal bag and place in the refrigerator for 3 - 4 hours. Turn bag occasionally so the pork is well marinated.
  3. When you are ready to grill the pork, remove it from the bag and discard marinade. Grill the pork by reverse sear method, basting occasionally with the reserved ¼ cup sauce, until the internal temperature reads 145 degrees on a digital thermometer.
  4. Meanwhile, simmer the reserved teriyaki sauce in a saucepan over medium-low heat until the sauce becomes a bit thick and syrupy. Set aside.
  5. Let pork rest for 5 minutes then slice into ½ inch pieces. Drizzle with teriyaki sauce and serve with rice and steamed bok choy.


Follow

Get every new post delivered to your Inbox

Join other followers: