Now that the weather has turned a bit cooler, we have been enjoying Manoa and butter lettuce from the garden. During the summer it is impossible to grow lettuce in Kihei, it’s just too hot. We also planted radishes that turned out to be a tasty addition to our salads.
Our new lilikoi (the most fragrant of tropical fruits) are doing well. Their vigorous vines quickly claimed the fence as their home with their tendrils grabbing on to anything within reach. We even caught one reaching up to the sky and fastening itself to a mango branch. Our first season of growing lilikoi yielded a small, healthy, crop of fruit that we quickly used to make the best jelly ever. Lilikoi vinaigrette came to mind when I was picking those tender lettuce leaves from the garden. So with the few fruits left on the vines, the juice was frozen in small containers and will be enjoyed throughout the next few months.
Lilikoi makes everything better.
Press the pulp to extract the precious juice.
Manoa and butter lettuce with cucumbers, tomatoes, radishes, avocado and feta.
I’ll be honest. Salmon is not one of my favorite foods. Occasionally I enjoy chunky smoked salmon on John’s hearty 9-grain bread, toasted and slathered with mayonnaise and lots of capers or salmon grilled with Granny’s Teriyaki sauce. Other than those two preparations, I will usually take a pass on salmon, that is, until I received the January issue of Bon Appétit. A beautiful dish of slow-roasted salmon with fennel, blood oranges, lemon and chiles caught my attention immediately.
Thinly sliced fennel slow-roasted with the salmon and citrus imparts a lightly sweet, springtime flavor to the dish.
The salmon sits on the fennel, citrus, chile and dill and olive oil is poured over. Into the oven it goes, for 30 minutes.
We sopped up some of the flavorful olive oil on pieces of bread. The fennel still had a bit of crunch to it and the oranges and lemon were meltingly soft and sweet. It was divine. My opinion of salmon may need adjusting!
Slow-Roasted Salmon with Fennel, Citrus, and Chiles
Adapted from Bon Appetit ~ January 2014
Serves 4
Ingredients
1 small fennel bulb, thinly sliced
1 blood or navel orange, very thinly sliced, seeds removed
1 Meyer or regular lemon, very thinly sliced, seeds removed
1 red Fresno chile or jalapeño, with seeds, thinly sliced
Toss fennel, orange slices, lemon slices, chile and 4 dill sprigs in a shallow 3-quart baking dish. Season with kosher salt and pepper. Season salmon with kosher salt and place on top of fennel mixture. Pour oil over.
Roast until salmon is just cooked through (the tip of a knife will slide through easily and flesh will be slightly opaque), 30 – 40 minutes.
Transfer salmon to a platter, breaking it into large pieces as you go. Spoon fennel mixture and oil from baking dish over; discard dill sprigs. Season with flaky sea salt and pepper and top with fresh dill sprigs.
***I highly recommend Maldon sea salt. Their soft and flaky crystals are unlike any other salt.
Mango season is over and, alas, we have no lilikoi either. We love making jams and jellies from our own fruit, but when these fruits are out of season we look to other sources.
A mixed berry jam came to mind when John received his copy of Little Jars, Big Flavors published by Southern Living. The book was on the Serious Eats list of best Christmas gift books for 2013. The recipes consist of small-batch jams, jellies, pickles, and preserves. We were making our weekly trip to Costco and discovered that their selection of blackberries, raspberries and blueberries were all in perfect condition. Buying various types of berries can be tricky. I’ve purchased a container of blackberries that looked fine, however the next morning when I opened the container, to my dismay they were moldy. Aargh!
Though the recipes in the book are “small-batch” we doubled the recipe because we had bought so many good-looking berries. Why not?
This was a very simple recipe that produced the most delicious berry jam. No pectin required. We expected to have 8 half-pint jars of jam but ended up with 9 jars. Since we only prepared 8 jars for canning we refrigerated the 9th jar and it was gone in a week! Have you ever had peanut butter and jam on toast for dessert? Scrumdiddlyumptious.
Mixed Berry Jam
Southern Living ~ Little Jars, Big Flavors
Makes 9 half pint jars
Ingredients:
24 ounces (5 cups) blackberries
12 ounces (3 cups) raspberries
24 ounces (4 cups) blueberries
38 ounces sugar (6 cups)
2 tablespoons lime juice
Preparation
Rinse berries thoroughly under cold running water. Remove and discard stems and any blemished berries. Drain well. Mash with a potato masher until evenly crushed. Most of the blueberries will remain whole but that’s OK, they will soften once cooked and add a nice chunky texture to the jam.
Wash jars and place them in boiling-water canner. Fill the jars and canner with water to the top of the jars. Cover and bring water to a simmer over medium heat, do not boil. Prepare the two piece closures. Wash lids and place in a small saucepan and cover with water. Heat to just a simmer but do not boil. Do not heat screw bands.
While jars are simmering, bring crushed berries, lime juice and sugar to a rolling boil in an 8-quart stainless steel sauce pan or enameled Dutch oven over medium-high heat, stirring occasionally, until sugar dissolves. Continue cooking, stirring often, until it reaches 220 degrees on a digital thermometer (about 7 minutes). Remove from heat and let foam settle (about 1 minute). Skim off and discard any foam.
Lift the canner jar rack and fix into place on the rim of the canner. Remove one jar at a time from canner and empty hot water back into the canner. Place jar on a cutting board and place a canning funnel in the jar. Ladle hot jam into jar leaving 1/4 inch head space. With a clean damp cloth or paper towel wipe jar rim to remove any food residue. Using a magnetic utensil, lift hot lid from water, center it on the jar and place screw band on jar. Tighten screw band evenly and firmly just until resistance is met. Then increase to finger tip tight. Do not over tighten. Return jar to canner rack. Continue filling jars individually until all jars are filled, then lower rack into canner and ensure that all jars are covered by 1 inch of water. Cover canner and bring water to a full boil over high heat. Process for 5 minutes, starting timer only when water reaches a full boil.
Remove jars from water, and let stand, undisturbed, at room temperature 24 hours. You will hear the seals pop rather quickly once the jars are removed from the water. If any of the lids do not seal, refrigerate the jam and enjoy right away. Properly sealed jars will keep in your cupboard for up to one year, but why wait? Share them with your family and friends. They will be delighted to receive a precious jar of homemade jam.
***We write the date the jam was made on the bottom of the jar with a Sharpie pen.
Maui Gold pineapples are extra sweet with low acidity. It’s hard to resist perfectly chilled juicy wedges of this gorgeous fruit. Grown right here on the Valley Isle, they are simply delicious.
My step daughters, Katie from Seattle and Jessica from Portland, came to visit recently. We had a birthday “wing ding” for Katie while she was here and Jessica made a scrumptious pineapple upside-down cake for dessert. Jessica is a wonderful cook and we always have such a good time planning out our next meal together.Fresh, sweet slices of pineapple are the star attraction of this cake. This recipe comes from Gourmet magazine. We didn’t have any cardamom at the time so we used cinnamon instead and it was very good however next time I will definitely use cardamom. My friend Shanna over at Curls & Carrots is a big cardamom fan and she recently sent me a bag of this intoxicating, warm, and exotic spice. Mahalo Shanna!
Butter is melted in a 10″ cast iron skillet before adding the brown sugar.
Allow the butter and brown sugar mixture to bubble just a bit before you remove it from the heat.Layer pineapple slices over the melted butter and sugar and pour batter over the pineapple. Smooth the batter with a spatula.
Invert a serving plate over the skillet and invert cake onto the plate.Jessica with her gorgeous Maui Gold Pineapple Upside-Down Cake.
Maui Gold Pineapple Upside-Down Cake
Adapted from Gourmet Magazine
Serves 8 – 10
Ingredients
For Topping:
1/2 medium Maui Gold or other sweet pineapple, peeled, quartered lengthwise, and cored
3/4 stick unsalted butter (I used Earth Balance Buttery Sticks, lactose free and vegan)
3/4 cup packed light brown sugar
For Batter:
1 1/2 cups all purpose flour
2 teaspoons ground cardamom
2 teaspoons baking powder
1/4 teaspoon salt
3/4 stick unsalted butter, softened (I used Earth Balance Buttery Sticks)
1 cup sugar
2 large eggs
1 teaspoon vanilla
1 tablespoon dark rum
1/2 cup unsweetened pineapple juice
1 tablespoon dark rum for sprinkling over cake
Make Topping:
Cut pineapple crosswise into 3/8 inch thick pieces.
Melt butter in skillet. Add brown sugar and simmer over medium heat, stirring, 4 minutes. Remove from heat. Arrange pineapple on top of sugar mixture in concentric circles, overlapping pieces slightly.
Make Batter:
Preheat oven to 350 degrees.
Sift together flour, cardamom, baking powder, and salt.
Beat butter in a large bowl with an electric mixer until light and fluffy, then gradually beat in granulated sugar. Add eggs, one at a time, beating well after each addition. Beat in vanilla and rum. Add half of flour mixture and beat on low speed just until blended. Beat in pineapple juice, then add remaining flour mixture, beating just until blended. (Batter may appear slightly curdled.)
Spoon batter over pineapple topping and spread evenly.
Bake cake in middle of oven until golden and a tester comes out clean, about 35 minutes.
Let cake stand in skillet 5 minutes. Invert a plate over skillet and invert cake onto plate (keeping plate and skillet firmly pressed together). Sprinkle rum over cake and cool on rack. Serve cake just warm or at room temperature.
***Cake is best served the day it is made though it may be made 1 day ahead and chilled, covered. Bring to room temperature before serving.
Summer has come and gone and so have most of the mangoes on our two trees. I haven’t had to buy fruit for months since we’ve had fresh mangoes every day. What a dream! Well we have just a few of those glorious golden orbs left and as it happens they all ripened at the same time. I couldn’t let this opportunity pass: time to break out my mango bread recipe.
I adore these exceptionally sweet mangoes as do my family and friends. They don’t have a very long shelf life, they ripen a day or two after they’re picked. A quick chill in the refrigerator and they are ready to eat.
The White Pirie mango has a deep orange color and is delightfully fragrant.
Though mango is the star of this recipe, the combination of raisins, walnuts, coconut and cinnamon bring it all together to make a moist and luscious cake. Thanks to my friend Tamoe who shared her recipe with me.
Toasting a thick slice of mango bread and serving it with a pat of butter takes it to another level.
Maui Mango Bread
Adapted from Tamoe’s Mango Bread recipe
Makes two loaves
Ingredients
2 cups flour
1 1/4 cups sugar (or up to 1 1/2 cups sugar if your mangoes are not on the sweeter side)
Place flour, sugar, baking soda, cinnamon and salt in a large bowl and mix well. Mix in the oil, beaten eggs and vanilla. Add the mangoes, walnuts, raisins and coconut. Pour into loaf pans and bake for 55 – 60 minutes. If using demerara sugar, bake the bread for 10 minutes then sprinkle the sugar over the tops of each loaf. (If you add the sugar before baking the bread, it will dissolve into the batter). Continue baking for another 45 minutes. Since oven temperatures vary, it’s a good idea to check the bread after it has baked for 53 minutes. If it needs more time, check again every 2 minutes to prevent over baking.
Note: If you are using dark pans the bread will bake quicker than in light pans so check for doneness at 50 minutes.
Mangoes are our favorite fruit. We have two mango trees in our yard, Rapoza and White Pirie. Both provide us with sweet and juicy fruit throughout spring and summer and even occasionally into fall. Apparently we are not the only ones who love mangoes. This year the birds decided they couldn’t wait for the occasional mango that falls to the ground. They have been devouring the mangoes while still on the tree.
The nerve of those birds!
No thanks to those hungry birds, we were still lucky to have enough fruit to make some jam this summer. This time we mixed it up a bit and made mango-strawberry jam. It turned out great.
Strawberries are lightly crushed with a potato masher to soften a bit and release their fragrant flavor.
Mango Strawberry Jam
Makes 7 half pint jars
Ingredients
1 1/2 cups packed crushed strawberries
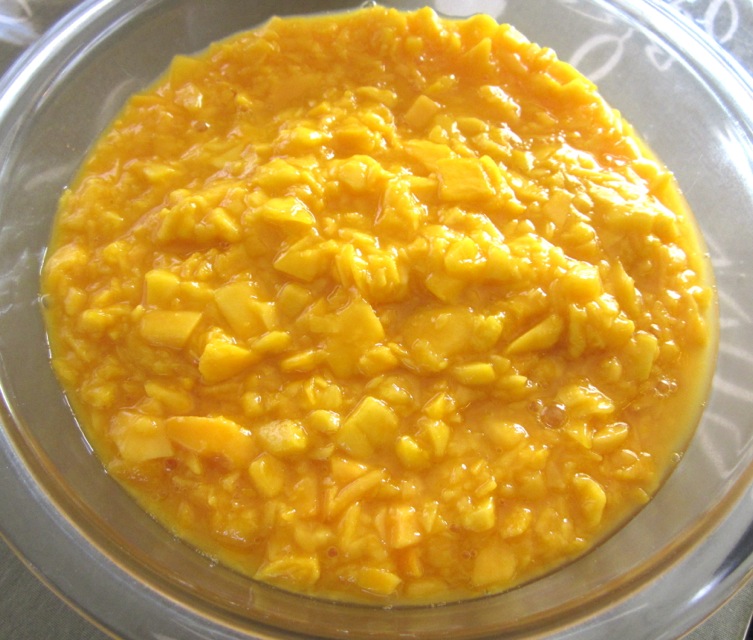
3 1/4 cups diced mango (I cut the mango into small chunks then pulse a few times in the food processor. Be careful not to pulse too much or you will end up with mango purée!)
1/4 cup fresh lemon juice
5 1/2 cups sugar (1038 g)
1 package powdered pectin
Preparation
Place jars in boiling-water canner. Fill the jars and canner with water to the top of the jars. Cover and bring water to a simmer over medium heat, do not boil. Prepare the two piece closures. Place lids in a small saucepan and cover with water. Heat to just a simmer but do not boil. Do not heat screw bands.
Wash and prepare strawberries and dice mangoes. Using a potato masher lightly crush strawberries. Measure out 1 1/2 cups strawberries and 3 cups diced mango. Measure sugar and set aside.
Transfer fruit to a large, deep stainless steel saucepan. Add lemon juice to fruit. Whisk in pectin until it dissolves. Bring to a full rolling boil over high heat, stirring frequently. Add sugar all at once. Stirring constantly, return to a full rolling boil that cannot be stirred down. Boil hard, stirring constantly for 1 minute. Remove from heat and using a large slotted metal spoon skim off any foam.
Fill one jar at a time. Remove jar from canner and empty hot water back into the canner. Place jar on a cutting board and place a canning funnel in it. Ladle hot jam into jar leaving 1/4 inch head space. With a clean damp cloth or paper towel wipe jar rim to remove any food residue. Using a magnetic utensil lift hot lid from water, center it on the jar and place screw band on jar. Tighten screw band evenly and firmly just until resistance is met. Then increase to finger tip tight. Do not over tighten. Return jar to canner rack until all jam is used. When all jars are filled lower rack into canner and ensure that all jars are covered by 1 inch of water. Cover canner and bring water to a full boil over high heat. Process for 10 minutes, starting timer only when water reaches a full boil.
At the end of the processing time, turn the heat off and remove canner lid. Wait 5 minutes then remove jars without tilting. Place jars upright on a rack or towel and let cool undisturbed for 24 hours. After 24 hours check lids for proper seal. Remove screw bands and press down on the lid with your finger. Sealed lids will curve downward and will show no movement when pressed. Jars that haven’t sealed properly must be refrigerated immediately or reprocessed. Wipe jars and store in a cool, dry place. Label and date jars.
***If there is extra jam after filling all of the jars, transfer to a small container and store in the refrigerator.
 Now that the weather has turned a bit cooler, we have been enjoying Manoa and butter lettuce from the garden. During the summer it is impossible to grow lettuce in Kihei, it’s just too hot. We also planted radishes that turned out to be a tasty addition to our salads.
 Our new lilikoi (the most fragrant of tropical fruits) are doing well. Their vigorous vines quickly claimed the fence as their home with their tendrils grabbing on to anything within reach. We even caught one reaching up to the sky and fastening itself to a mango branch. Our first season of growing lilikoi yielded a small, healthy, crop of fruit that we quickly used to make the best jelly ever. Lilikoi vinaigrette came to mind when I was picking those tender lettuce leaves from the garden. So with the few fruits left on the vines, the juice was frozen in small containers and will be enjoyed throughout the next few months.
 Lilikoi makes everything better.
 Press the pulp to extract the precious juice.
 Manoa and butter lettuce with cucumbers, tomatoes, radishes, avocado and feta.