Browsing Category

Fish

Dinner, Fish, Japanese, Lactose Free, Recipes, Rice Dishes

Crispy Rice & Spicy Tuna Bowl

March 24, 2025

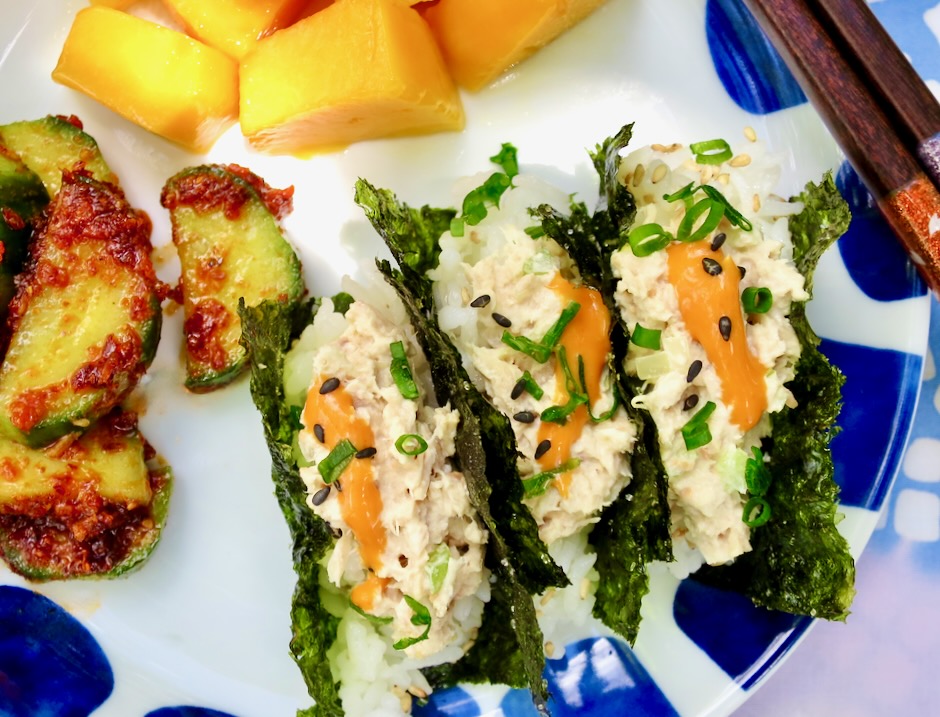
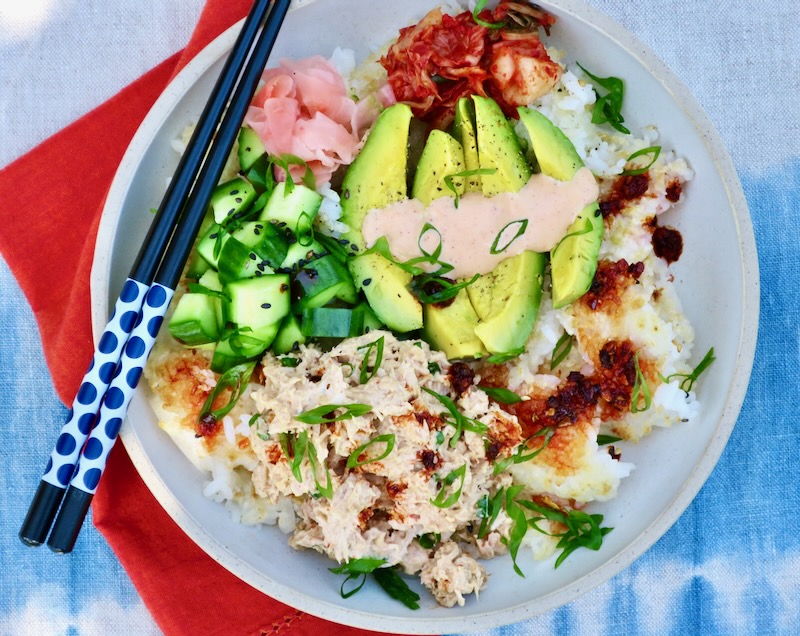
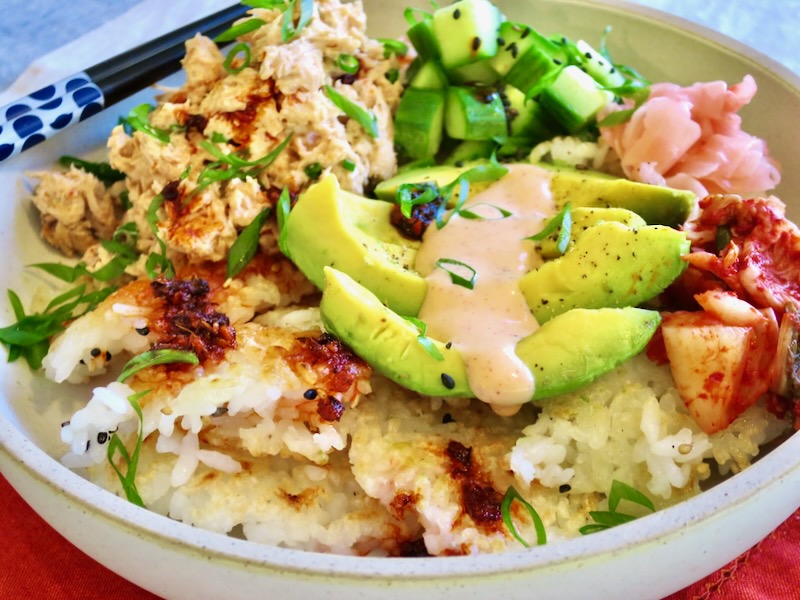
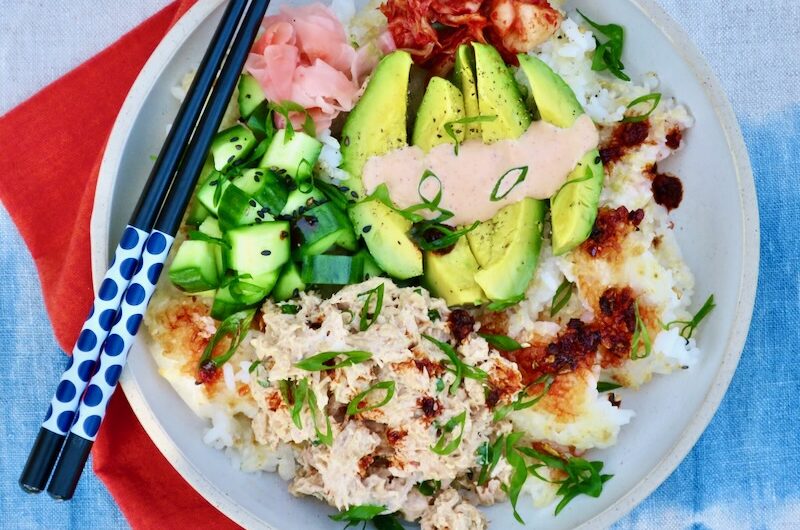
Given that rice is one of my favorite foods, I was keen on putting together a dish combining crispy rice and another favorite food: tuna in olive oil. It turned out to be a delectable meal. The crispy bits of rice are extremely satisfying in both texture and flavor. Served with spicy tuna, silky avocado, crunchy cucumbers and spicy chili crunch, it is one of the best and easiest lunch bowls to whip up when you have a yen for something filling and savory.

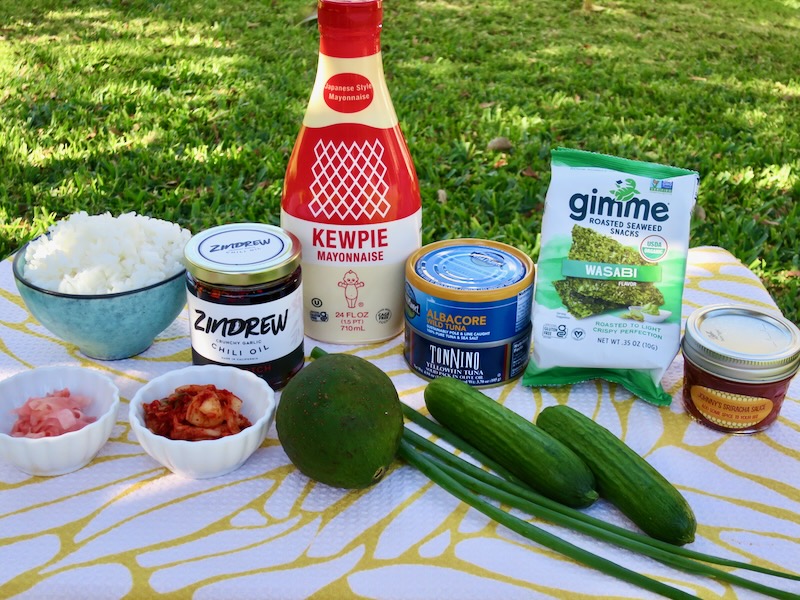
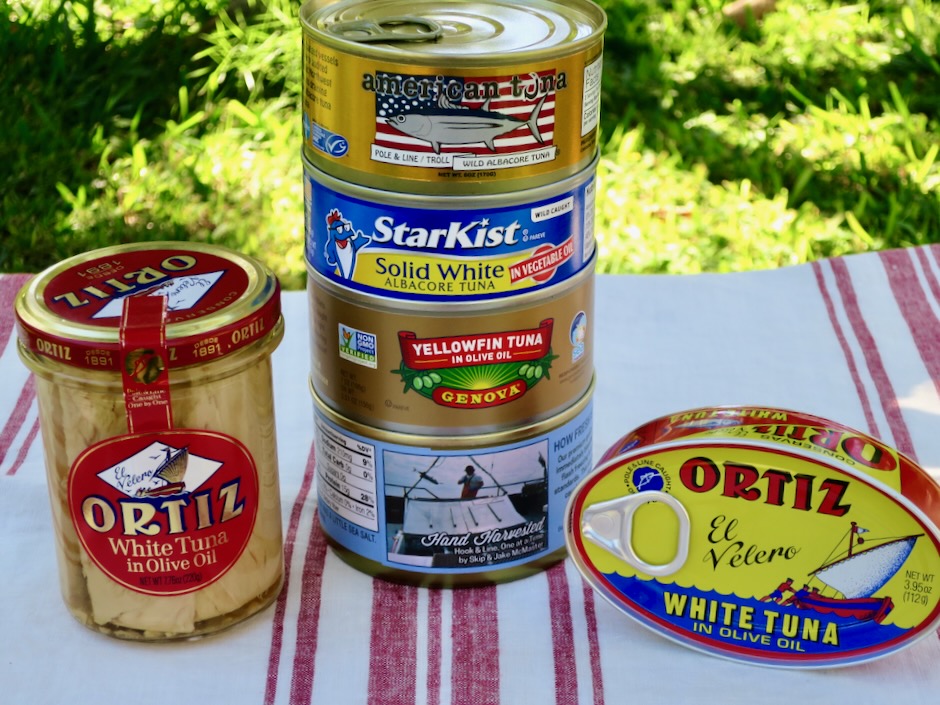
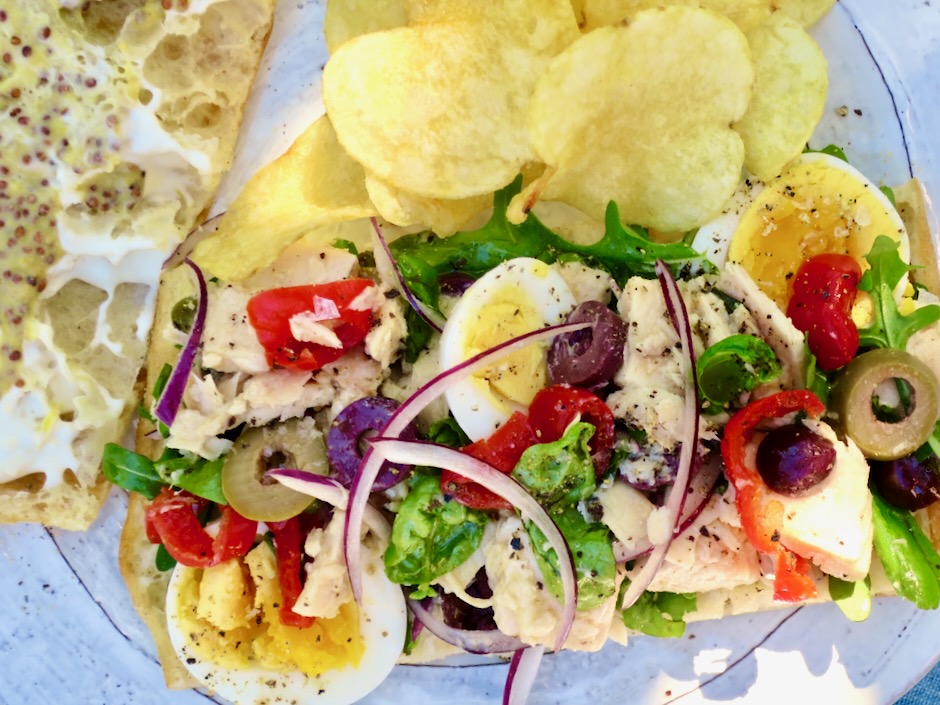
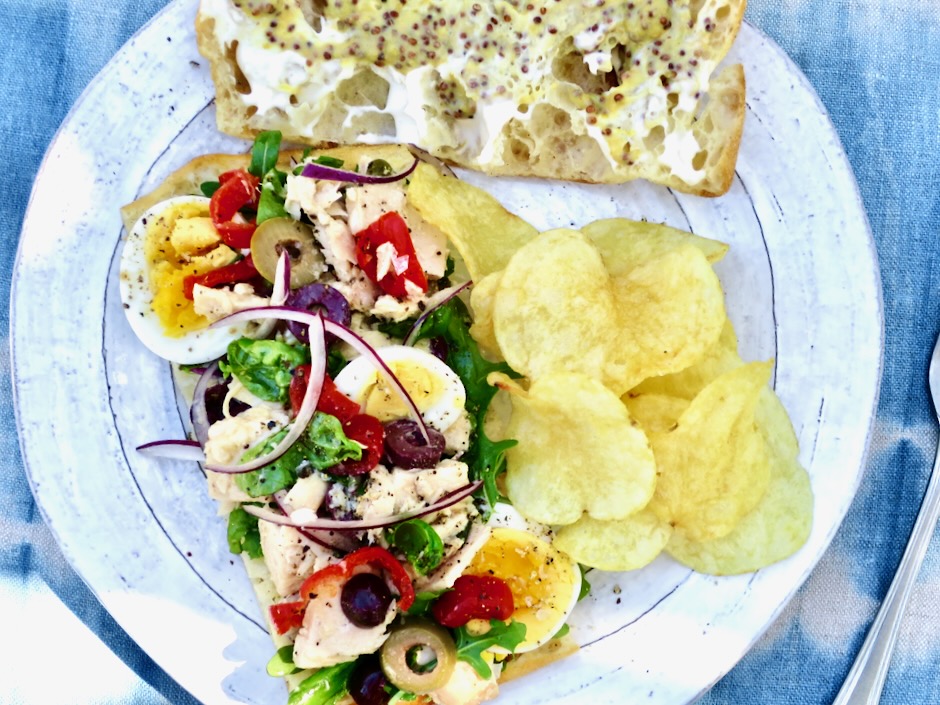
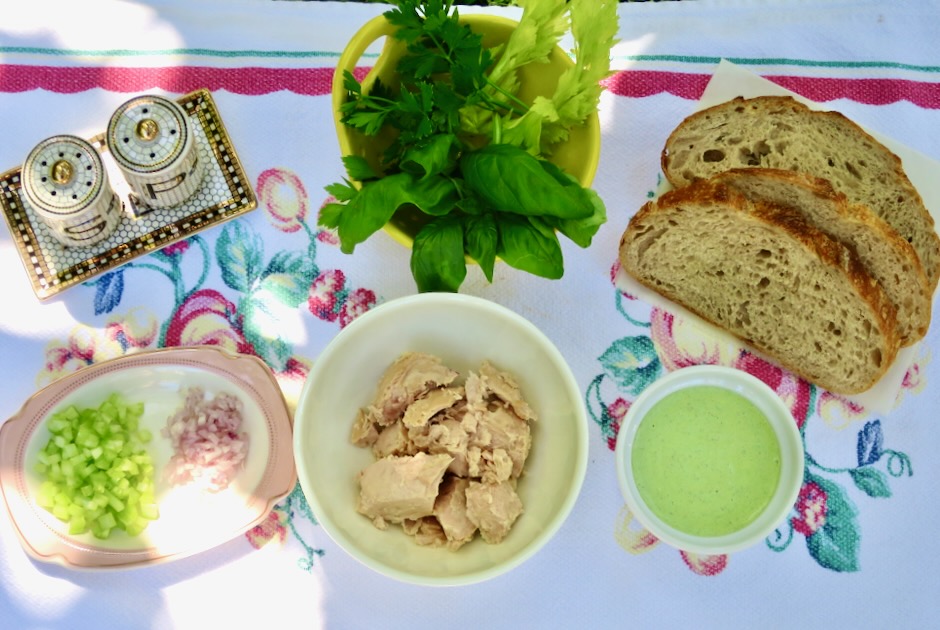
I usually reserve tuna in olive oil for a Nicoise Salad or Pan Bagnat but I thought I might splurge a bit and used the olive oil version for this dish. Wow! The tuna in olive oil is extra decadent with its melt-in-your-mouth texture and rich flavor. If you have it, go for it.

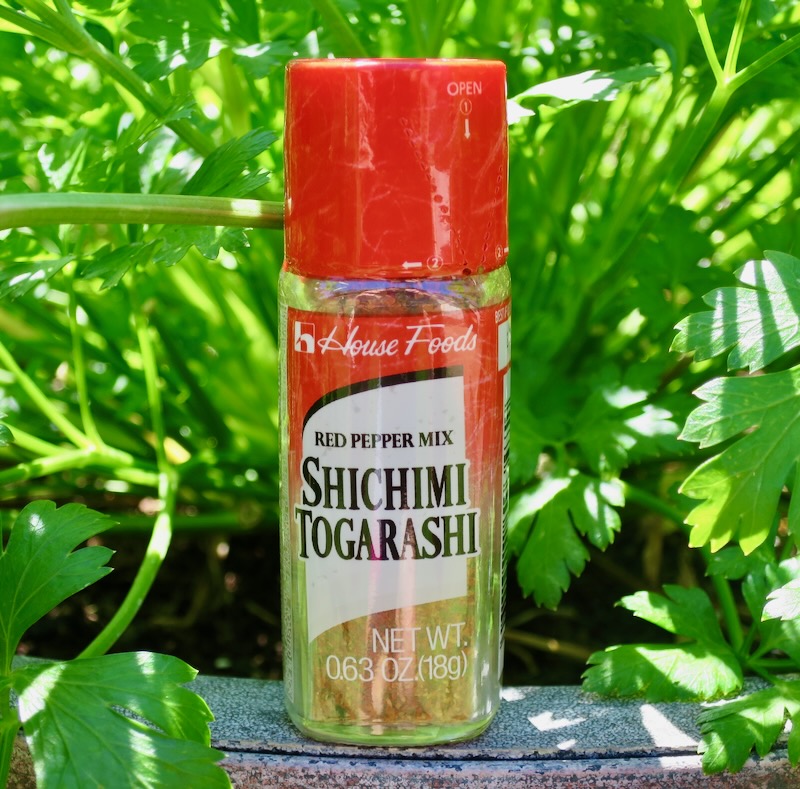
Shichimi togarashi red pepper mix adds a nice punch of flavor and some heat. I added a few dashes in the spicy tuna mixture but it’s an optional ingredient.

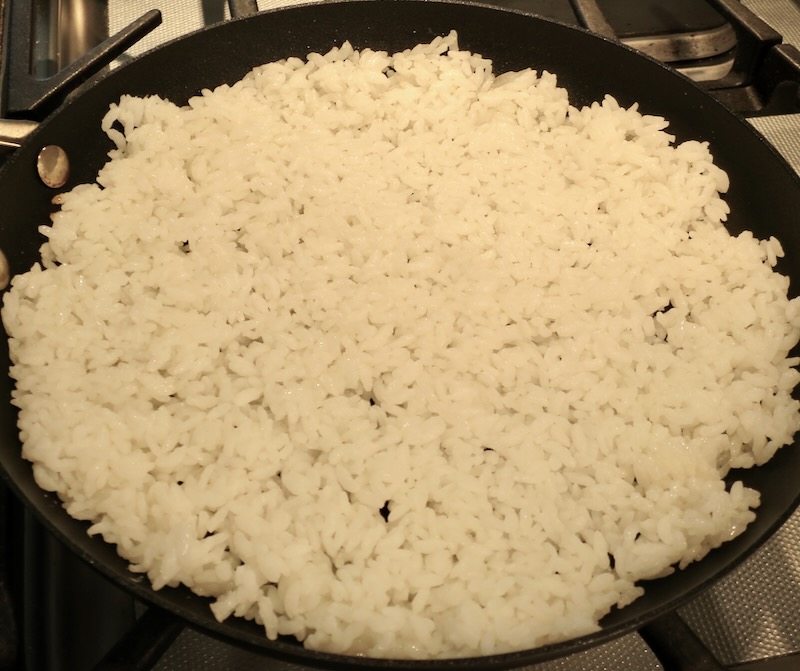
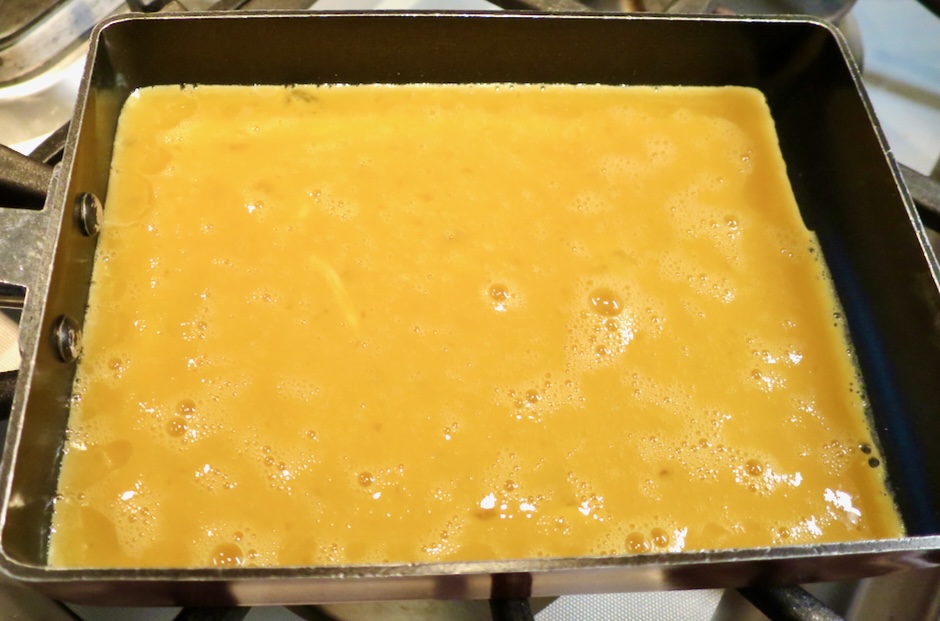
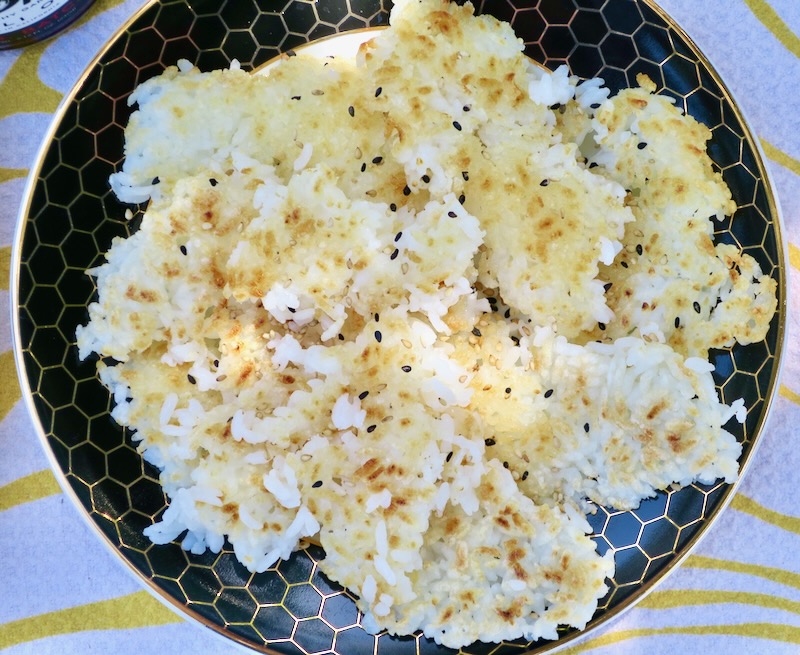
Crisping the rice is simple. A little oil in the pan to encourage easy movement and browning of the rice is all you need. Note that it is best to make the rice in advance so that it has time to firm up. I made my rice the day prior to using it but a 4 hour chill in the refrigerator works too.

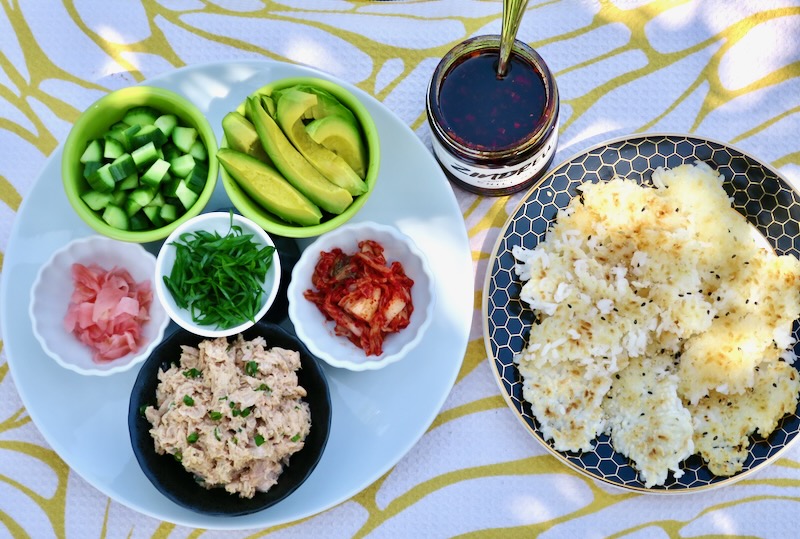
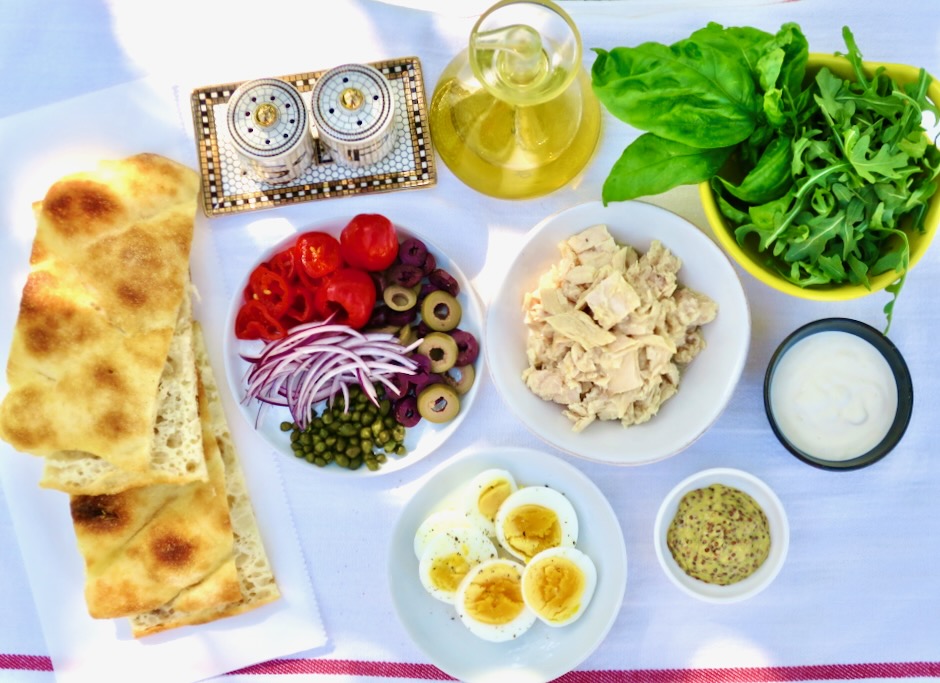
Here’s where you can improvise according to your taste. Besides the crispy rice, spicy tuna is my go-to. If you want a vegetarian version, swap the tuna with something well seasoned, such as sesame tofu or soy sauce eggs. A combination of textures creates an interesting dish so use crispy cucumbers or snap peas, velvety avocado slices, and something spicy such as chili crisp, kimchi, or sriracha for a bold kick.

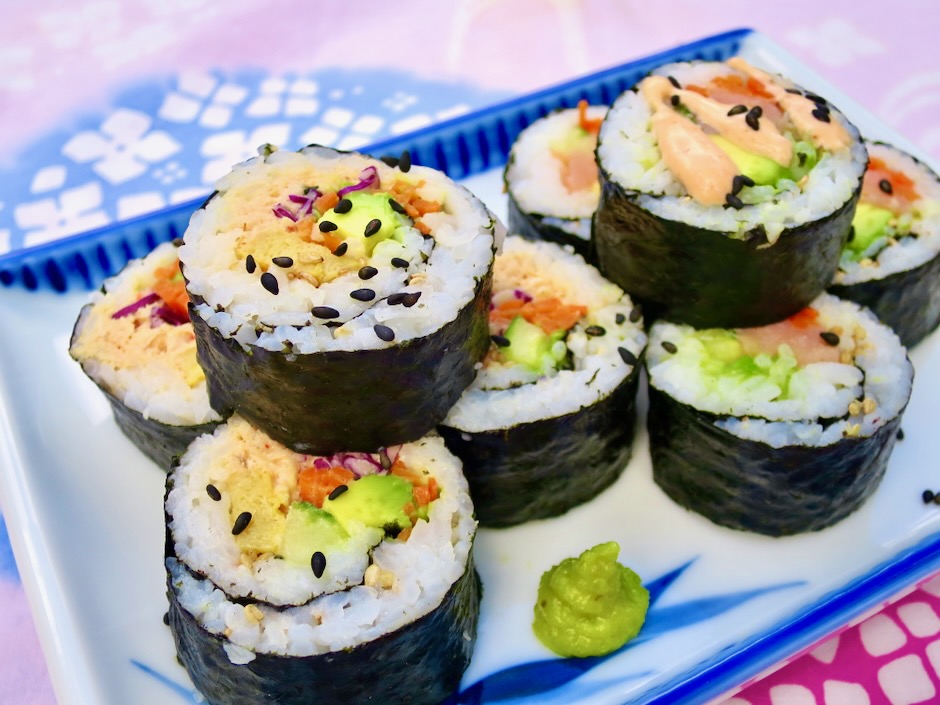
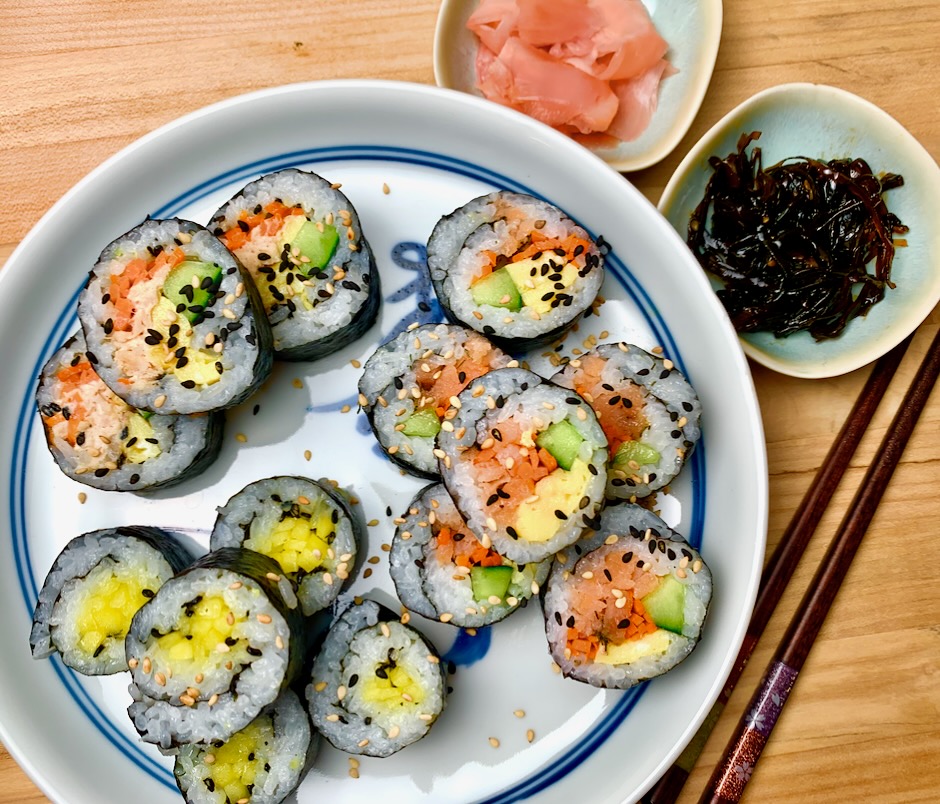
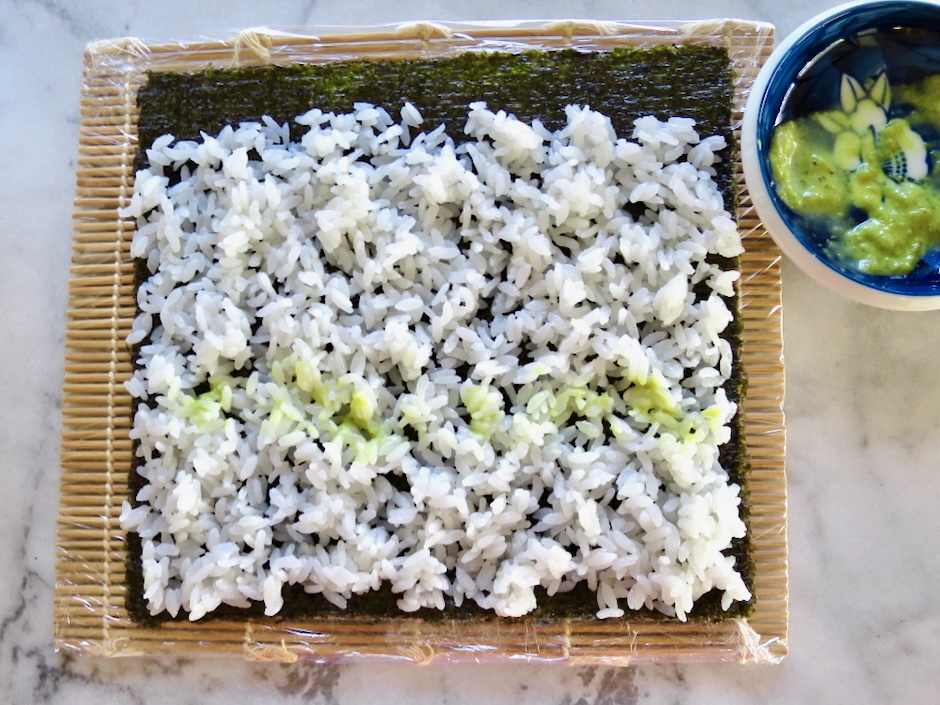
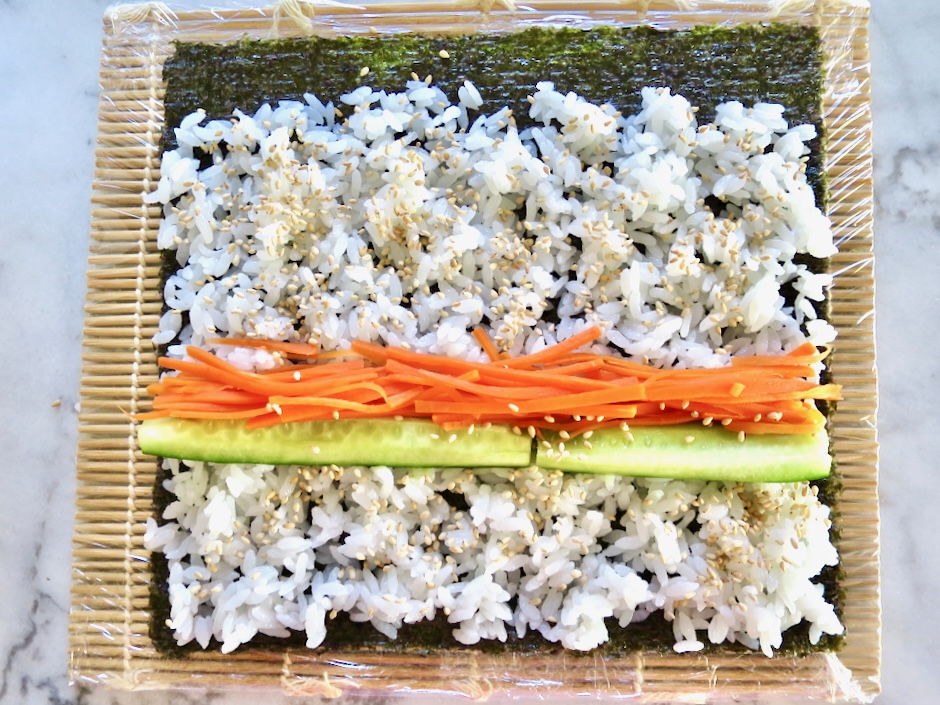
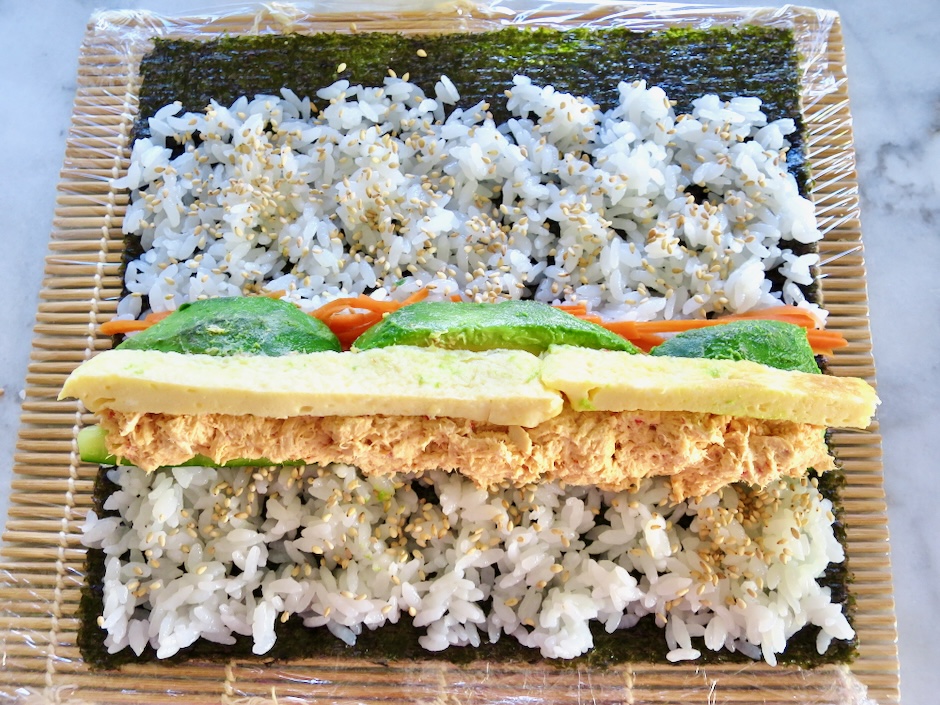
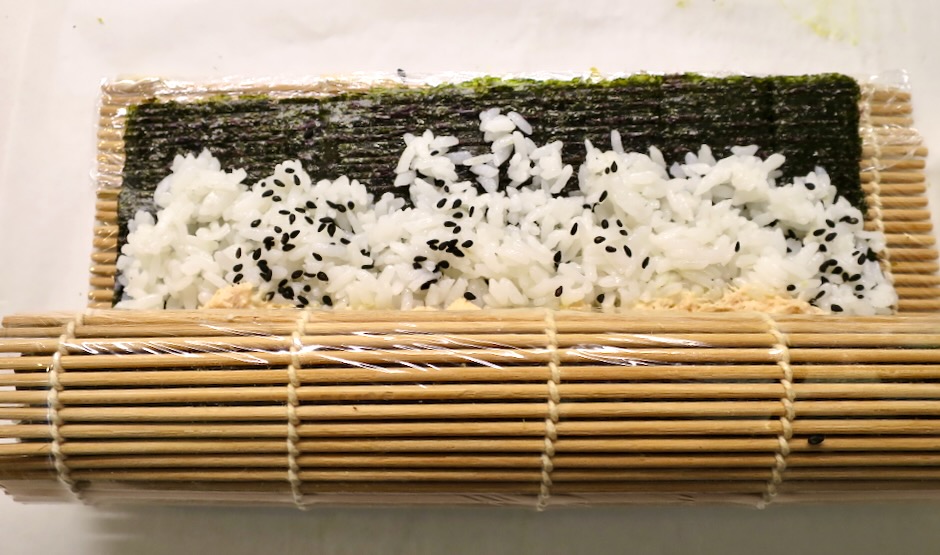
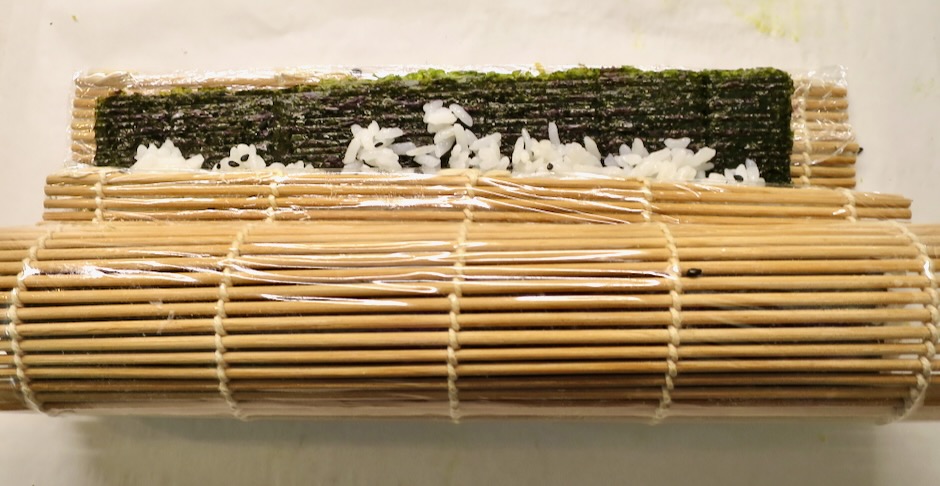
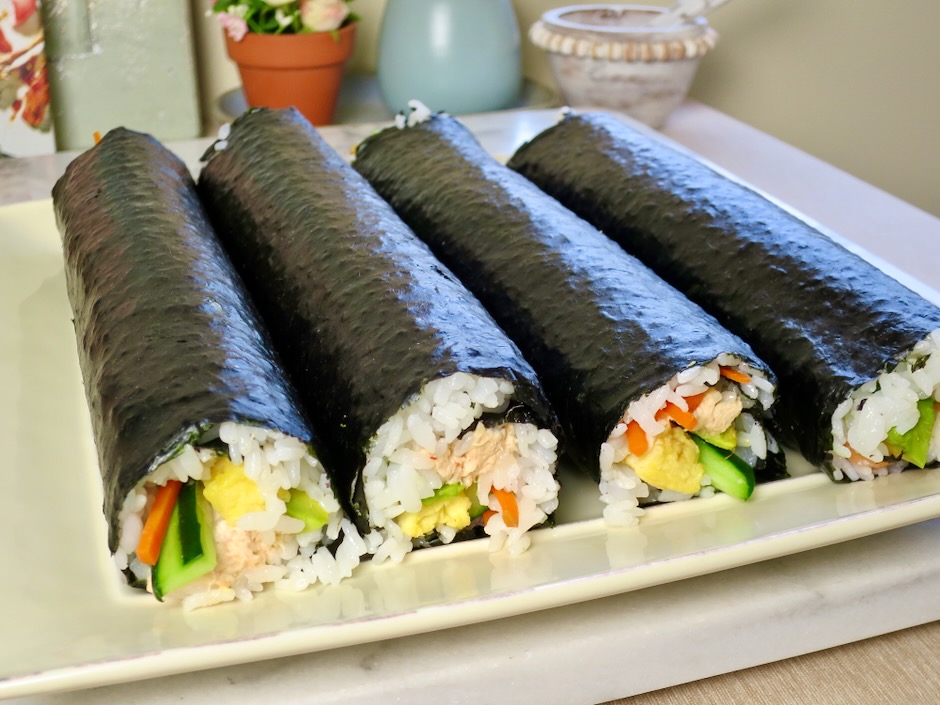
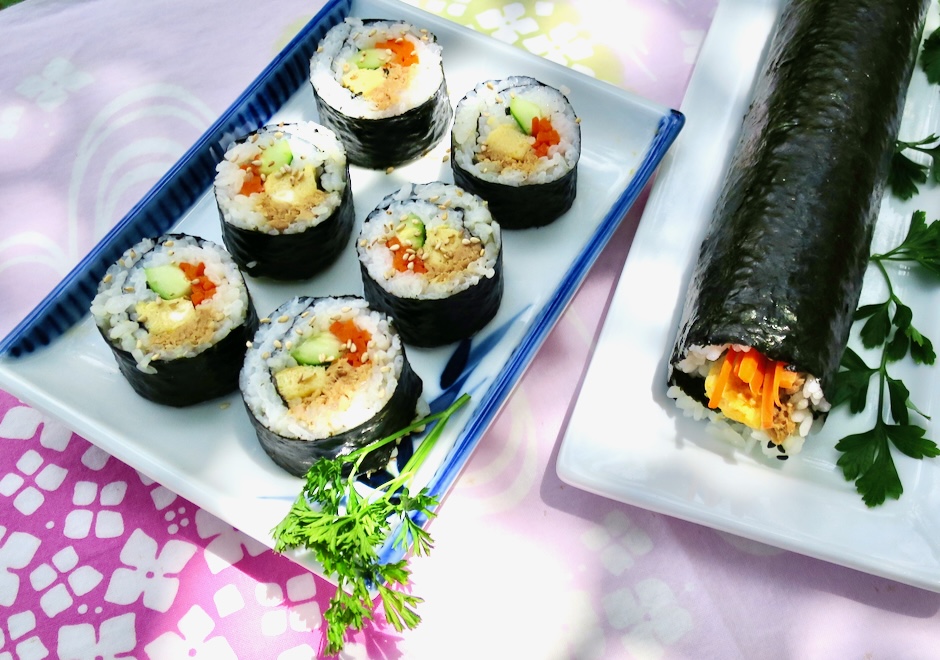
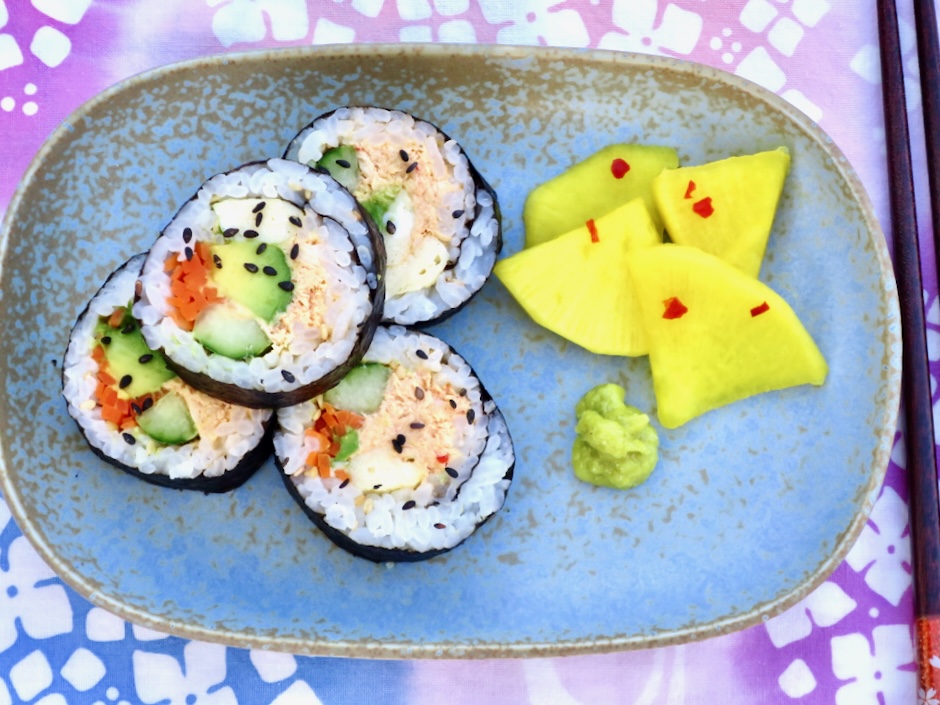
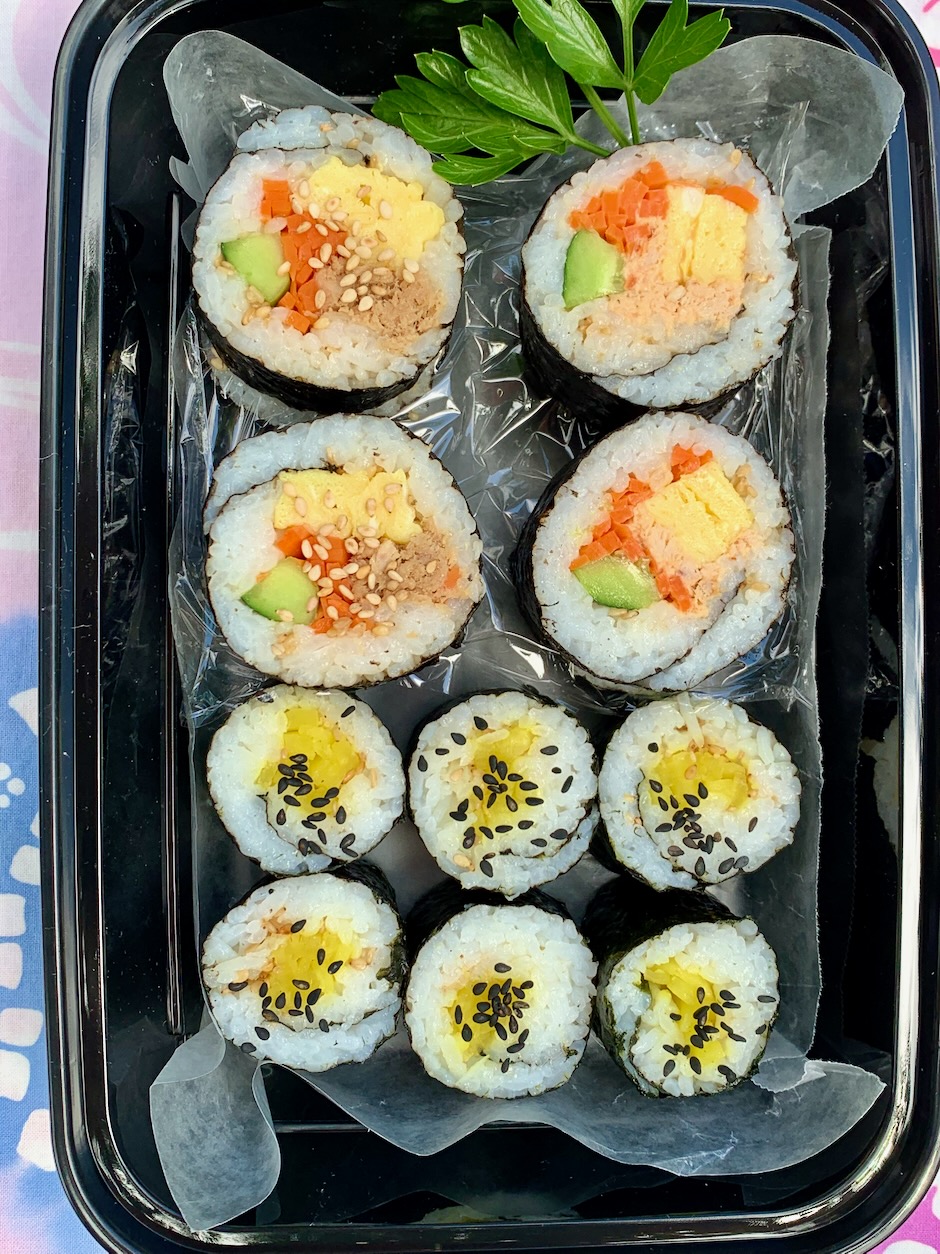
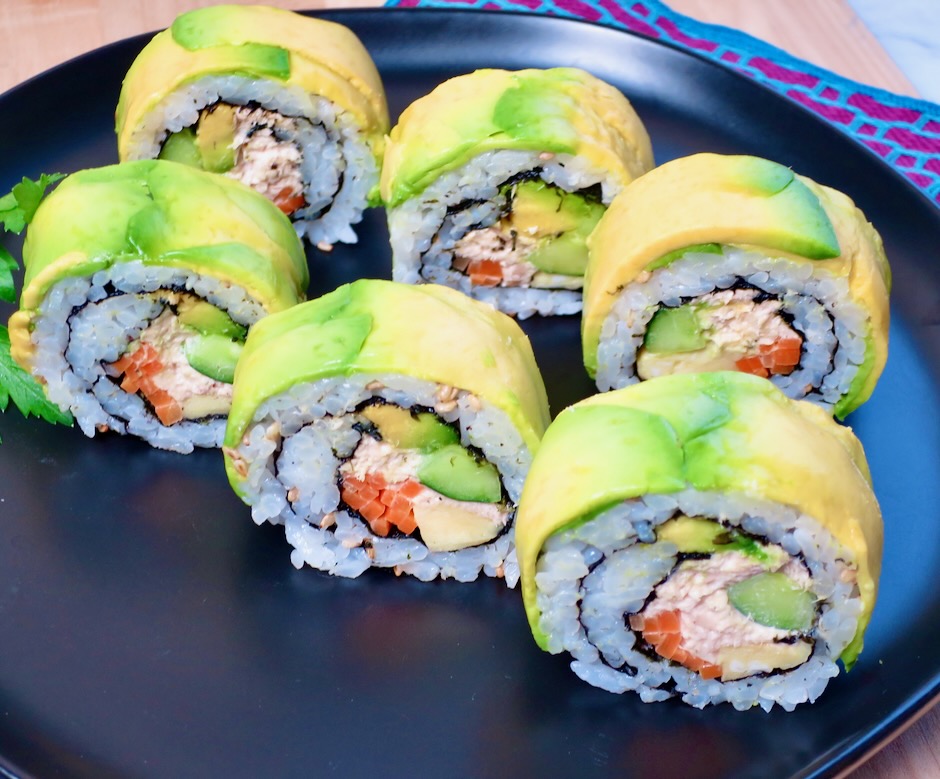
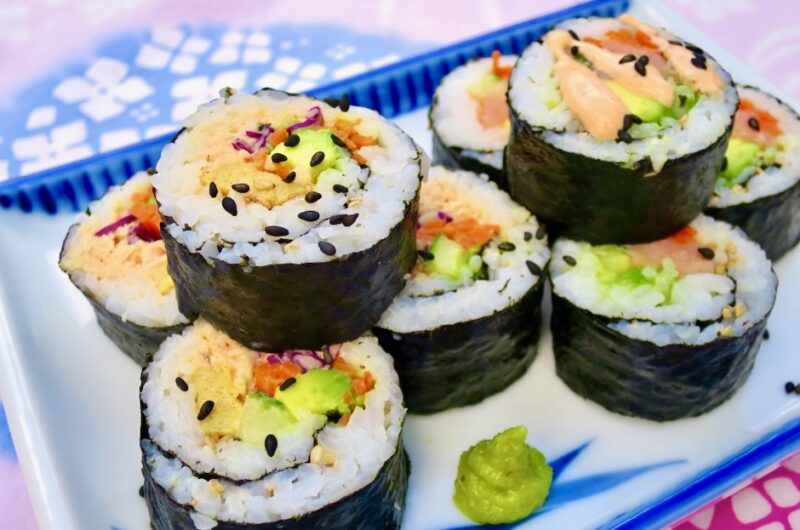
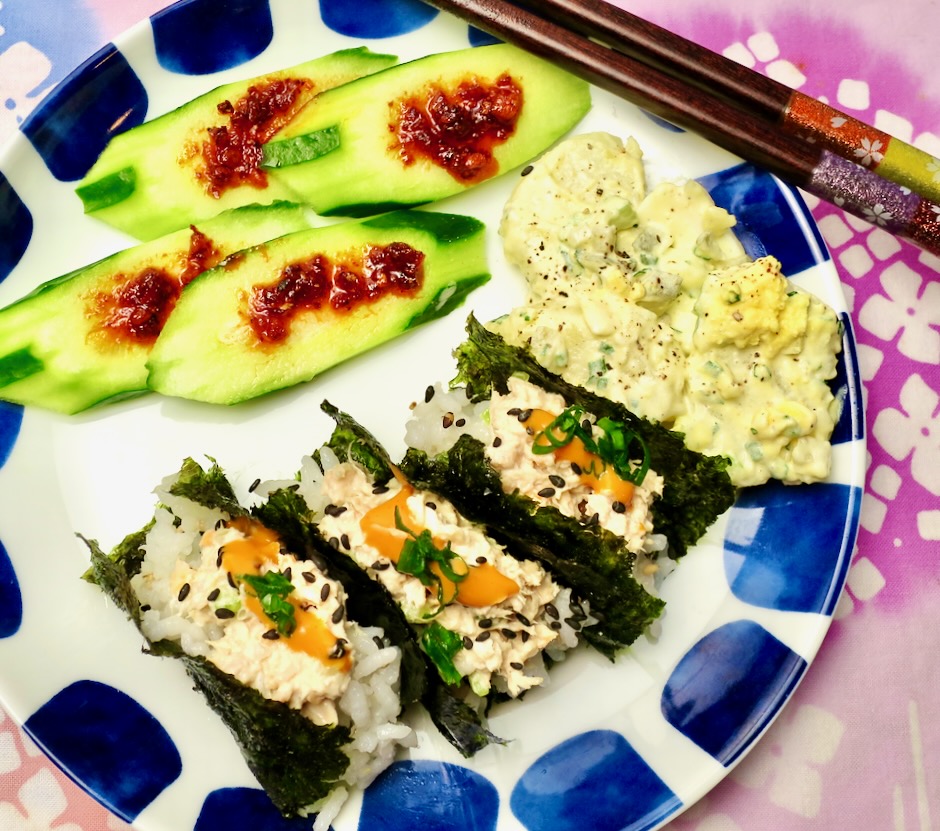
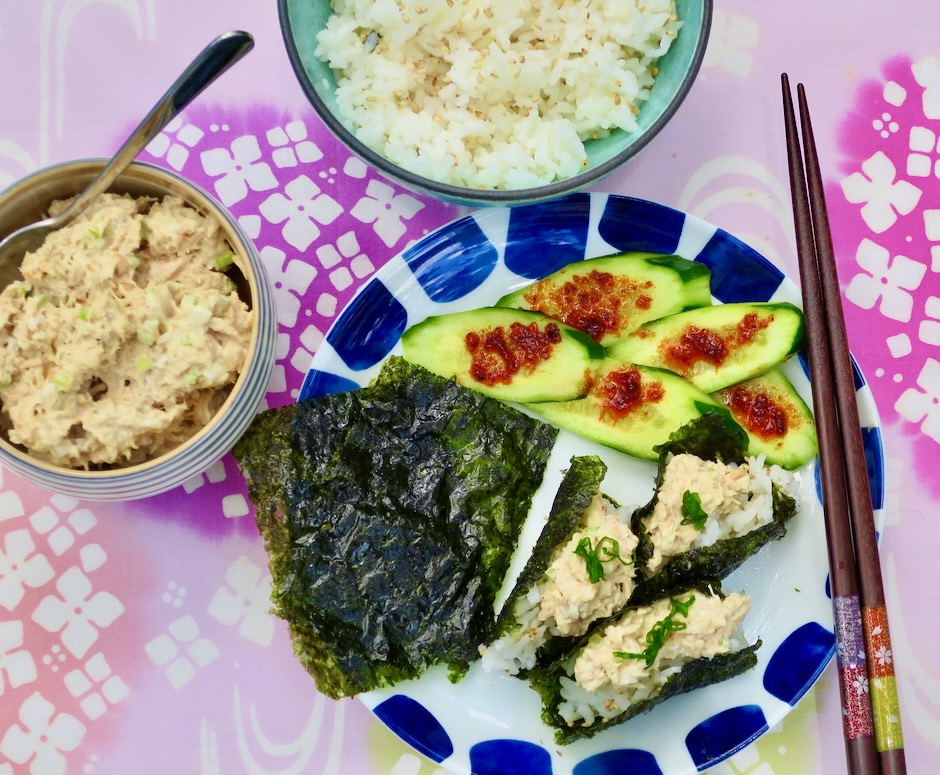
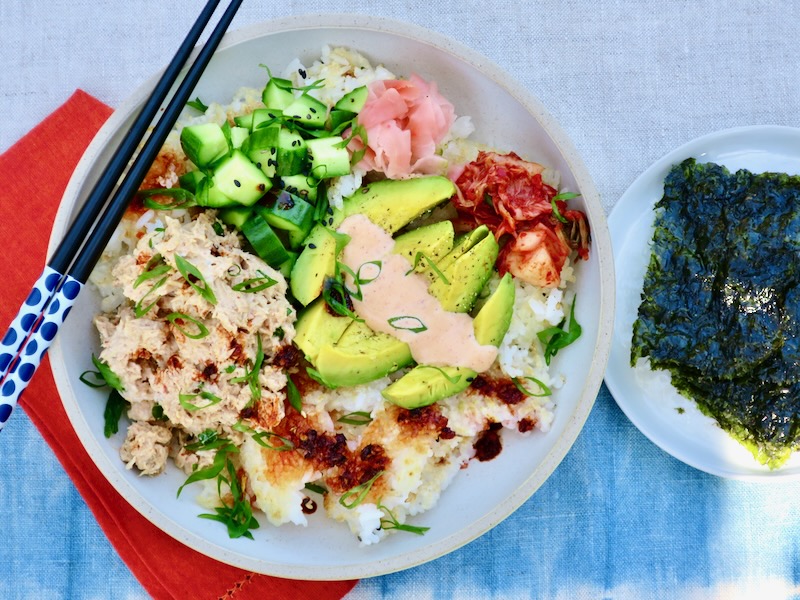
This beautiful crispy rice bowl is packed with umami flavors that make it one of the tastiest meals you can make at home. Serve it with wasabi nori, filling each piece with some of the ingredients before eating it in one bite. Delish!

Crispy Rice & Spicy Tuna Bowl

Recipe by Kiyo
Servings

2

servings

It’s best to use rice that has been cooked a day in advance and chilled thoroughly.
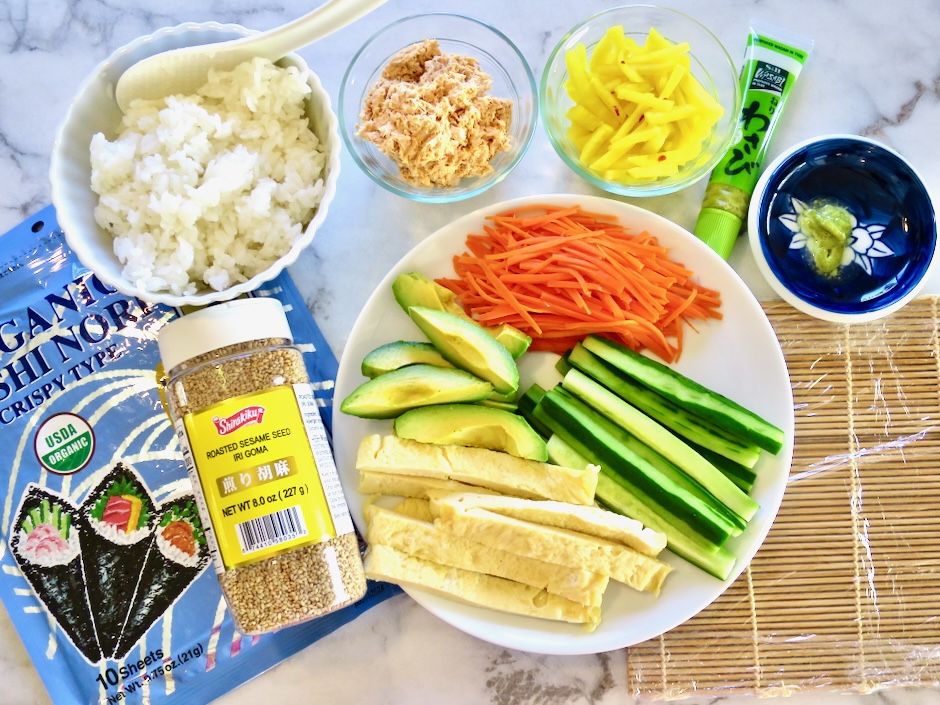
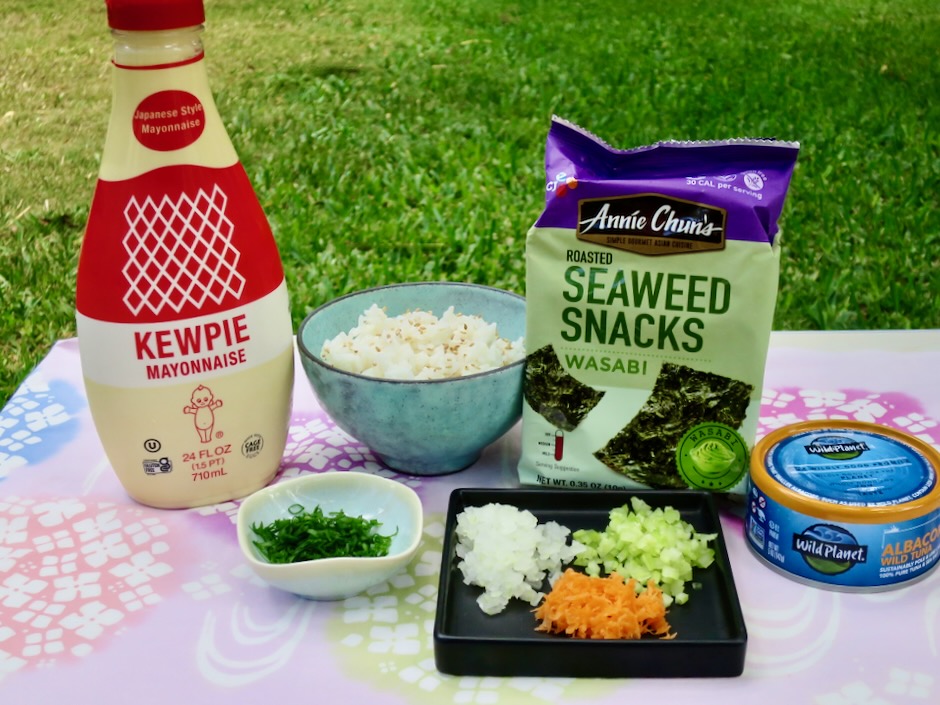
Ingredients

  • 1 rice cooker cup uncooked Japanese short grain white rice

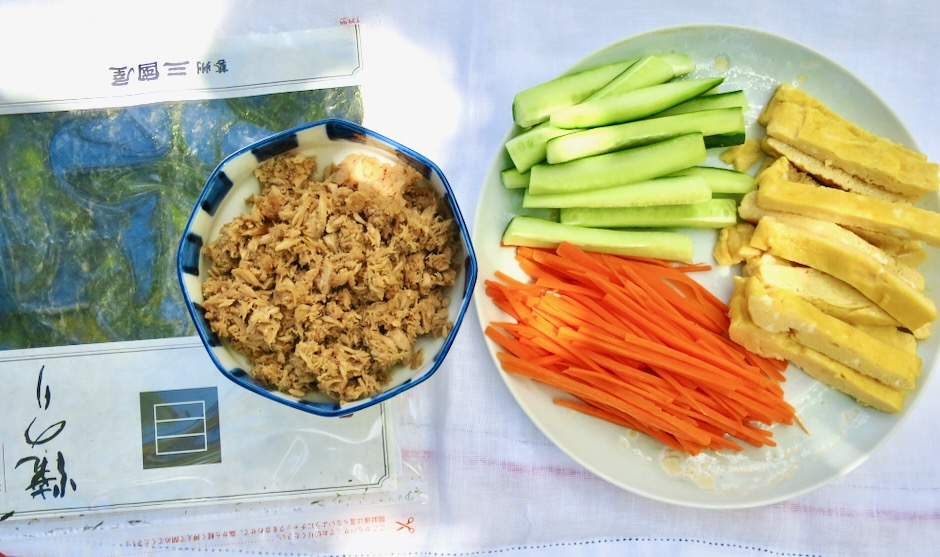
  • 1 can (5 ounce) tuna in olive oil, drained

  • 1 1/2 tablespoons mayonnaise

  • 2 teaspoons sriracha

  • 1/4 teaspoon shichimi togarashi pepper (optional)

  • 1 teaspoon finely chopped green onions + 1 tablespoon sliced green onions

  • 1 small Japanese cucumber, cubed

  • 1 medium avocado, sliced or cubed

  • Chili crisp

  • Sriracha mayonnaise (optional)

  • Pickled ginger, kimchi, sesame seeds (optional)

Directions

  • 4-24 hours in advance: Cook the rice according to rice cooker instructions. Transfer rice to a container or bowl and cool for 20 minutes then cover tightly and refrigerate until well chilled.
  • Remove chilled rice from the refrigerator 30 minutes prior to using.
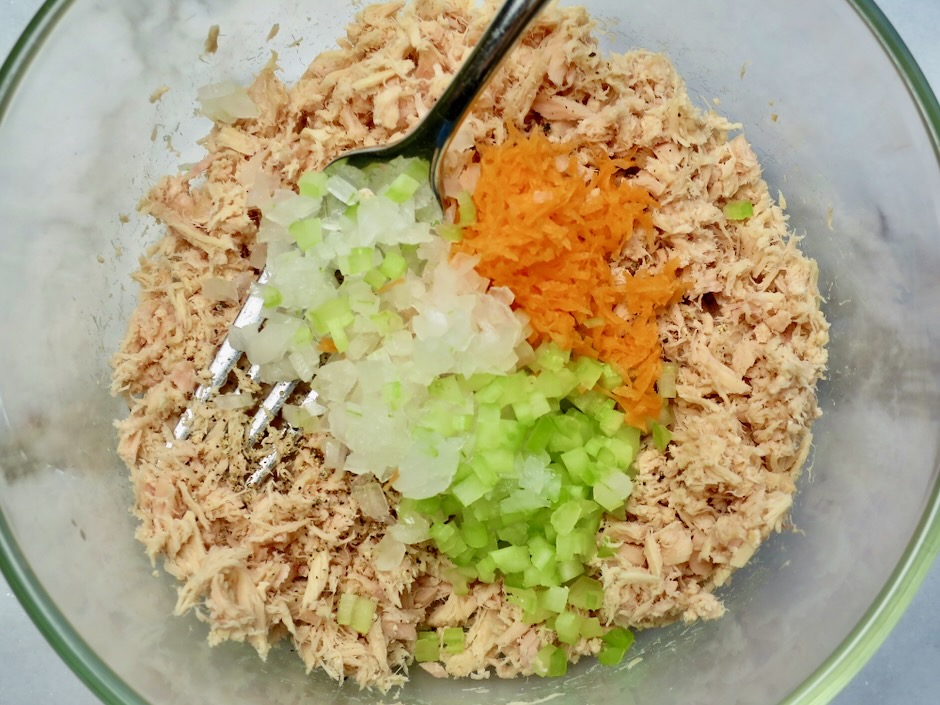
  • Combine drained tuna with mayonnaise, sriracha, shichimi togarashi (if using), and 1 teaspoon finely chopped green onions. Set aside.
  • Place a medium sized non-stick skillet (9-11 inches) over medium high heat. Add 1 tablespoon canola or other neutral oil to the pan. Once the oil is hot and shimmering, add rice, spreading it out with a spatula. Press down to allow as much contact with the pan as possible. Cook, adjusting heat lower if too high, until rice is golden brown on one side, about 5 minutes. Remove rice to a plate to cool a bit.
  • Break up cooled crispy rice into pieces and divide into two low sided bowls. Top with spicy tuna, diced cucumbers, avocado, ginger and kimchi if using. Drizzle chili crisp over some of the rice and tuna. Spoon sriracha mayo over the avocado if using. Sprinkle with sesame seeds and 1 tablespoon reserved green onions. Serve with wasabi nori and extra chili crisp on the side.
Appetizers, Dinner, Fish, Japanese, Lactose Free, Pickles, Recipes, Rice Dishes, Vegetarian, Veggies

Maki Sushi Rolls

April 28, 2024

Fresh homemade sushi is hard to beat and not as difficult to make as you might think. It’s pretty cool to be able to customize your rolls by using your favorite ingredients. Once your sushi ingredients are ready to go, the rolling happens quickly. Before you know it, you’ll have tasty maki sushi rolls ready for lunch or dinner.

There’s really no rule when it comes to the ingredients you can use in Maui-style maki sushi. Common ones include spicy tuna (canned), avocado, cucumber, sushi grade tuna, crab, salmon, tamago (egg) and other vegetables such as watercress, carrots, takuan (pickled radish). Shown above are tuna, smoked salmon, and takuan hosomaki (thinner rolls).

If you don’t have a tamagoyaki pan like the one above, use a small non-stick fry pan to cook the eggs.

Prepare the fillings for the sushi while the rice is cooking then refrigerate until ready to use. Wrap your sushi mat in plastic wrap. The mat will stay clean and won’t pick up any scents or oil from the sushi ingredients.

On most occasions I make spicy tuna but sometimes I make a sweet/salty version with soy sauce. This is the type you might find at local okazuya and bento stores. Besides adding flavor, crispy cucumbers, carrots and tamago add color and texture.

The first step is to place a sheet of nori shiny side down on your sushi mat. Spread rice over the nori leaving a 1-inch border free of rice. The amount of rice you use will determine the size of your roll and the amount of rolls you can make with the 2 cups of rice that you cook. My rolls are medium-sized since I don’t use too much rice. I usually end up with 3 medium rolls and 2 thinner (hosomaki) rolls. If you’re using wasabi paste dab it on the rice before adding the other ingredients.

Shaping the rolls will take a little practice but you’ll get the hang of it after your first roll. And it won’t matter much if the first few rolls don’t turn out perfectly. They will still be delicious.

Layer on your ingredients then begin rolling them up. You can choose your own fillings and make vegetarian rolls if you prefer.

Once you have the ingredients tucked into the roll, continue to roll while lifting the top portion of the mat up as you roll.

I packed a sushi bento for a friend and delivered it to his work place for a surprise snack.

I thought I would try an inside-out roll with avocado. To my surprise I didn’t botch the roll! We have lots of avocados now so I’ll give this another go very soon.

Maki Sushi Rolls

Recipe by Kiyo
Servings

4

servings

Depending on the amount of rice you use in each roll, this recipe will make 3 medium and 2 small rolls (hosomaki) or 4 medium rolls

Ingredients

  • Sushi Rice
  • 2 rice cooker cups short grain white rice

  • 1/4 cup unseasoned rice vinegar

  • 2 1/2 tablespoons granulated sugar

  • 1 1/2 teaspoons fine sea salt

  • Filling Ingredients
  • 1 small carrot, julienned (blanch 1 minute in 1 cup water mixed with 2 teaspoons sugar, 1 teaspoon mirin, and 1/2 teaspoon salt)

  • 1 small Japanese cucumber, cut into wide strips (remove any seeds with your knife)

  • 1 avocado, sliced

  • 1 (5 ounce) can tuna in water, drained (mixed with 3 tablespoons mayonnaise and 1 1/2 tablespoons sriracha + 1/4 teaspoon of shichimi togarashi, optional)

  • 3 eggs, whisked (mixed with 1 teaspoon sugar, 1 teaspoon mirin, 1/2 teaspoon light soy sauce) cooked over medium-low heat in a small pan to form a thick layer and sliced into 1/2-inch wide strips

  • 3/4 cup takuan (pickled radish) thinly sliced

  • wasabi paste

  • roasted sesame seeds

  • 5 sheets sushi nori

Directions

  • Cook rice according to rice cooker directions for sushi rice. While rice is cooking, combine rice vinegar, sugar and salt in a 1-cup glass measuring cup and give it a stir. Microwave for 20-25 seconds. Remove and stir until the mixture turns clear, about 2 minutes. Set aside until ready to use.
  • Place hot rice in a large shallow bowl or dish, such as a 9×13 glass baking dish. Immediately drizzle the prepared sushi vinegar over the warm rice and fold in gently to evenly season the rice. Using swift cutting motions gently break up the rice while fanning as you go (do not stir the rice or it will become clumpy and mushy). Fanning the rice helps to remove excess moisture and also gives the rice a shiny appearance. Cover rice with a damp kitchen towel or plastic wrap and allow to come to room temperature before using, about 1 hour. (Rice should not be left out for more than 2 hours for food safety reasons. Refrigerate sushi rolls if not eating within 2 hours).
  • Cover sushi mat with plastic wrap. Place a piece of nori shiny side down on the mat. Distribute rice evenly over the nori leaving 1-inch free of rice at the bottom portion. Begin placing your fillings onto the rice (upper third area). Lift the bottom edge (closest to you) of the sushi mat while also holding the fillings in place with your fingers and quickly fold over securing them in the first fold tucking in any ingredients that may have fallen out. Continue rolling the sushi away from you gently squeezing the mat to form a uniform sushi roll while lifting and moving the mat forward until the entire sheet of nori is rolled up. Slice and serve rolls with wasabi and soy sauce.

Notes

  • Though the rice may not be quite as soft, leftover sushi rolls can be refrigerated and eaten the following day. Double wrap them in plastic wrap then place in a freezer zip top bag. Remove from the refrigerator 1 hour prior to slicing and serving.
Dinner, Fish, Pasta, Recipes, Sauces, Vegetarian

Cilantro Macadamia Nut & Lime Pesto

April 10, 2024

Pesto alla Genovese (basil) is certainly the most classic of all pesto sauces, but there are many other variations that use different herbs in place of basil. Cilantro pesto is a delicious twist on traditional pesto. It has a fresh bright flavor and beautiful vibrant green color. Cilantro pesto is also very versatile. Use it with your favorite pasta, with fish or chicken, as a sandwich spread with salami and cheese, on pizza, with eggs any way, dolloped on tomatoes….

I avoid using pine nuts ever since I had a bad experience many years ago. These days I use raw cashews when making basil pesto. My cilantro pesto uses one of Hawaii’s favorite snacks, macadamia nuts. They are rich and buttery and add a smooth texture to the pesto.

Measure out 2 cups of packed cilantro leaves for this recipe. That would be 1-2 bunches of cilantro, depending on their size.

The food processor is a wonderful kitchen appliance to have. I’ve had mine for 15+ years now and it still works like a charm.

Fold the cheese into the processed pesto. Taste and add additional salt and lime juice if needed.

The pesto makes a perfect accompaniment to macadamia nut crusted mahi and saffron rice.

Cilantro Macadamia Nut & Lime Pesto

Recipe by Kiyo
Servings

1 cup

Ingredients

  • 1/3 cup (1.5 ounce) salted roasted macadamia nuts (or substitute with raw cashews)

  • 2 cups (2 ounces) firmly packed cilantro leaves

  • kosher salt

  • 1 large garlic clove, grated or minced

  • 1 tablespoon fresh lime juice

  • 1/2 cup extra virgin olive oil

  • 1/4 cup (.05 ounce) finely grated parmesan cheese

Directions

  • Pulse macadamia nuts in a food processor until coarsely chopped.
  • Add cilantro, 1/2 teaspoon kosher salt, garlic and lime juice. Pulse until the cilantro is finely chopped, scraping down sides of bowl as needed. Pour in olive oil and pulse until the pesto is smooth. Stir in grated parmesan cheese. Taste and adjust seasoning with additional salt and lime juice.

Notes

  • Pesto can be frozen in small containers for a few months.
Fish, French, Lactose Free, Recipes, Sandwiches

Tuna Nicoise Sandwich

March 9, 2024

For a clever twist on the classic Salad Niçoise, make a sandwich! This sandwich (known as pan bagnat in Nice, France) is made with some of the tastiest ingredients you might find in the many versions of this famous salad. Though there is much debate on which ingredients should be included in a Salad Niçoise, there will be no debate when you taste this tuna sandwich.

With so many choices of canned tuna available today, you’re bound to find some very good options. For this recipe a good tuna packed in olive oil is essential.

Having your mise en place ready will make it effortless to build your sandwich. Boil the eggs ahead of time, wash and dry your greens, and place all of the sandwich ingredients within easy reach.

Crispy Peppadew peppers have the perfect balance of sweet and tangy with a hint of heat. Their vibrant color and flavor make them a pretty addition to this sandwich. You can find these at your local olive bar or in jars in the pickle section of many markets.

With its distinctive peppery flavor, arugula adds a nice contrast to the rich tuna, eggs, and briny olives. If arugula is not your thing, you can substitute it with another green such as tender butter lettuce leaves.

Baguettes are typical for this sandwich but they can become a bit messy to eat. Choose bread or rolls that are a bit softer than a baguette. You can use ciabatta or something similar to that. If your bread is very thick, hollow out the inside a bit. I used a homemade pinsa bread which worked well as it is not too chewy or very thick. Serve your sandwich with a side of kettle chips and your favorite fizzy beverage.

Tuna Nicoise Sandwich

Recipe by Kiyo
Servings

2

servings

Adapted from Bon Appetit magazine

Ingredients

  • 1 large egg

  • 1/2 teaspoon lemon zest

  • 2 teaspoons fresh lemon juice

  • 1/8 teaspoon finely grated garlic

  • 1/4 cup mayonnaise

  • kosher salt

  • 1 can tuna in olive oil (6-7 ounce), lightly drained

  • 1/4 cup thinly sliced red onion

  • 1/2 cup torn basil

  • 6 Peppadew peppers, sliced (optional but recommended)

  • 1/4 cup pitted mixed olives, sliced

  • 1 tablespoon capers, drained

  • 1 1/2 tablespoons extra virgin olive oil

  • kosher salt and freshly ground black pepper

  • 2 ciabattas or other bread or rolls of your choice

  • 1 tablespoon whole grain mustard

  • 1 cup baby arugula

Directions

  • Using small tongs or a slotted spoon, gently lower egg into a small saucepan of boiling water. Cook, adjusting heat as needed to maintain a gentle boil for 8 minutes. Transfer egg to an ice bath. Once cool, peel and slice into 6 pieces.
  • Meanwhile, whisk lemon zest, lemon juice, garlic, and mayonnaise in a small bowl. Season with a pinch of kosher salt.
  • Placed drained tuna in a medium bowl and gently break up into large pieces with a fork. Add red onion slices, torn basil, Peppadew peppers, olives, capers and 1 1/2 tablespoons olive oil. Season with kosher salt and freshly ground black pepper. Gently stir to combine.
  • Spread both sides of bread with mayonnaise and the top side with mustard. Arrange arugula on bottom half and layer with tuna mixture. Top each sandwich with 3 pieces of egg. Season egg with salt and pepper. Cut sandwiches in half and serve with kettle chips and fizzy beverages.
Dinner, Fish, Japanese, Korean, Lactose Free, Recipes, Rice Dishes

Tuna, Rice & Nori Lunch

December 11, 2023

Tuna and rice wrapped in crispy and savory nori is one of my favorite combos to make for lunch. It doesn’t sound like anything special but once you try it you’ll understand why I love it so much. Think of it as an improvised hand roll. It couldn’t be simpler to whip up on short notice. When I was working, I would share it with a small group of friends at lunchtime. We all sat around the table and oohed and aahed as we ate our little tuna nori wraps.

Savory and tangy Kewpie mayonnaise replaces the usual Best Foods mayonnaise I use for tuna sandwiches. The velvety texture and rich flavor is perfect for this recipe.

With a plethora of canned tuna available these days it’s easy to find a good brand. Wild Planet does not have added water or broth which means it’s not going to be a mushy mess when you open the can.

A side of crispy cucumbers with chili crisp, kimchi or takuan and fresh fruit are the perfect pairing to complete your lunch. A drizzle of sriracha mayo over the tuna adds a nice kick to the nori wraps.

Tuna, Rice & Nori Lunch

Recipe by Kiyo
Servings

2

servings

Easy and delicious nori wraps are quick to prepare!

Ingredients

  • 1 rice cooker cup short or medium grain rice, cooked according to manufacturer’s instructions

  • 1 (5 ounce) can tuna in sea salt, such as Wild Planet)

  • Kewpie mayonnaise

  • 2-3 teaspoons finely chopped celery

  • 2 teaspoons finely chopped sweet onion

  • 2 teaspoons finely grated carrot

  • 2 teaspoons thinly sliced green onion

  • 1 teaspoon roasted sesame seeds

  • 1-2 packets Korean-style seaweed snacks, depending on size

Directions

  • Once rice has cooked, transfer to a bowl and gently mix in roasted sesame seeds. Cover with plastic wrap and set aside allowing rice to cool to room temperature.
  • In a medium bowl, flake the tuna with a fork. Mix in Kewpie mayonnaise (enough to moisten tuna generously, tuna should not look dry), celery, onion, and carrot. Transfer to a smaller bowl for serving.
  • Set out nori (just before serving to keep crisp), tuna salad, and rice. Make mini nori wraps by placing a small amount of rice on the nori, followed by tuna. Top with sriracha mayonnaise if using, and green onions. It’s best to make the nori wraps as you eat them so the nori stays crispy. Serve with your favorite side dishes such as potato salad, fresh fruit, kimchi and takuan pickles.
Dressing, Fish, Lactose Free, Recipes, Sandwiches

Green Goddess Tuna Salad Sandwich

October 24, 2023

When I first tried this tuna salad recipe, all I could say was “wow!” I still say it every time I have it. It’s no ordinary tuna salad made with the usual mayonnaise, onions and celery. Don’t get me wrong, I love a traditional tuna salad on soft sandwich bread loaded with pickles. But this green goddess tuna salad is on a different level of deliciousness and likely the finest tuna salad sandwich I have ever had.

Though you will need to spend a little more time on this tuna salad recipe than you normally would, it is 100% worth your time. A quick whirl with an immersion blender and you’ll have your green goddess dressing ready to go.

Once you make the green goddess dressing, your tuna salad will be quick to come together. The celery and shallots should be chopped and ready to go. Have some good bread ready and extra herbs for topping on the tuna salad.

The original recipe uses toasted English muffins in place of sandwich bread. I skipped this because I thought it might be difficult to eat since toasted English muffins can become quite chewy. So instead, I used toasted sourdough bread which worked great. You can also make it an open-face sandwich topped with a generous amount of herbs. Either way, you’ll find yourself thoroughly enjoying this heavenly tuna salad sandwich.

Green Goddess Tuna Salad Sandwich

Recipe by Kiyo
Servings

4

servings

Recipe adapted from Bon Appétit magazine

Ingredients

  • 1/4 cup basil leaves

  • 1/4 cup parsley leaves

  • 1/4 cup tarragon leaves

  • 1/4 cup + 1 tablespoon mayonnaise

  • 1/4 cup lactose free sour cream (or regular sour cream)

  • 1 teaspoon finely grated lemon zest

  • 1 1/2 tablespoons fresh lemon juice + 1 teaspoon, divided

  • 1 tablespoon extra virgin olive oil

  • 2 (5 oz) cans tuna in water, drained and flaked with a fork

  • 1 small celery stalk, finely chopped, about 2 tablespoons

  • 1 1/2 tablespoons finely chopped shallot

  • 1 small garlic clove, finely grated, about 1/4 teaspoon

  • Kosher salt, freshly ground black pepper

  • 1 cup coarsely chopped mixed tender herbs (such as celery leaves, basil, parsley)

  • 1/4 cup slivered romaine (crunchy ribs section)

Directions

  • Purée basil, parsley, tarragon, mayonnaise, sour cream, lemon zest, 1 1/2 tablespoons lemon juice and 1 tablespoon olive oil with an immersion blender or small blender until very smooth and pale green. You may prepare the dressing a day in advance (storing it in the refrigerator will firm it up a bit). Add the dressing to flaked tuna. Mix in celery, shallot, and garlic. Season with salt and lots of pepper.
  • Toss chopped mixed herbs and slivered romaine with reserved 1 teaspoon lemon juice in a small bowl. Drizzle with a little olive oil, season with salt and pepper and toss again.
  • Build sandwiches with lightly toasted sourdough bread or bread of your choice. Top with herb salad.

Notes

  • The original recipe uses just one can of tuna. There is enough dressing for two 5 ounce cans. If using just one can of tuna, reserve some of the dressing for drizzling over crispy romaine salad.
Follow

Get every new post delivered to your Inbox

Join other followers: