Browsing Category

Dinner

Appetizers, Breakfast, Cheese, Dinner, Recipes, Side Dishes, Summertime Meal, Vegetarian, Veggies

Easy One-Bowl Corn Fritters

January 30, 2024

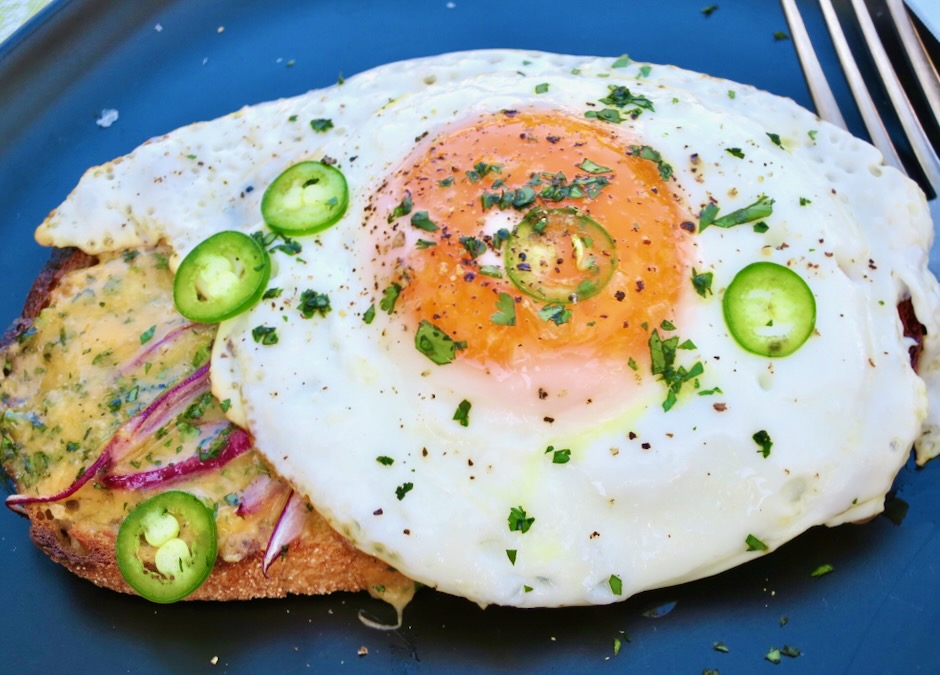
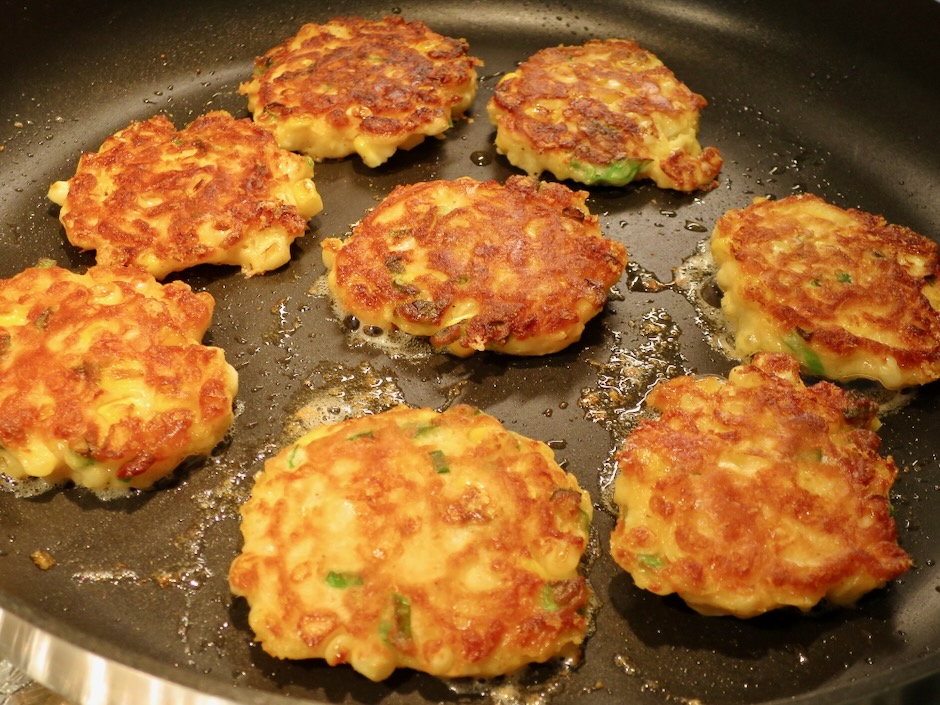
These easy one-bowl corn fritters are quick to make with simple pantry staples. Pan-fried until golden brown and crispy, the fritters pair nicely with many other dishes. Serve them as an appetizer or a side-dish at your next barbecue, and for breakfast with fried eggs and bacon.
For best results use fresh sweet corn. Frozen or canned corn will make an acceptable substitution as fresh corn is not always in season. Be sure to drain the corn well before adding it to the batter.

I have made the corn fritters with all flour and half flour and half cornmeal. As a whole grain, cornmeal adds a little extra nutritional value. If you have it, go ahead and use it. Otherwise using all flour is perfectly fine.

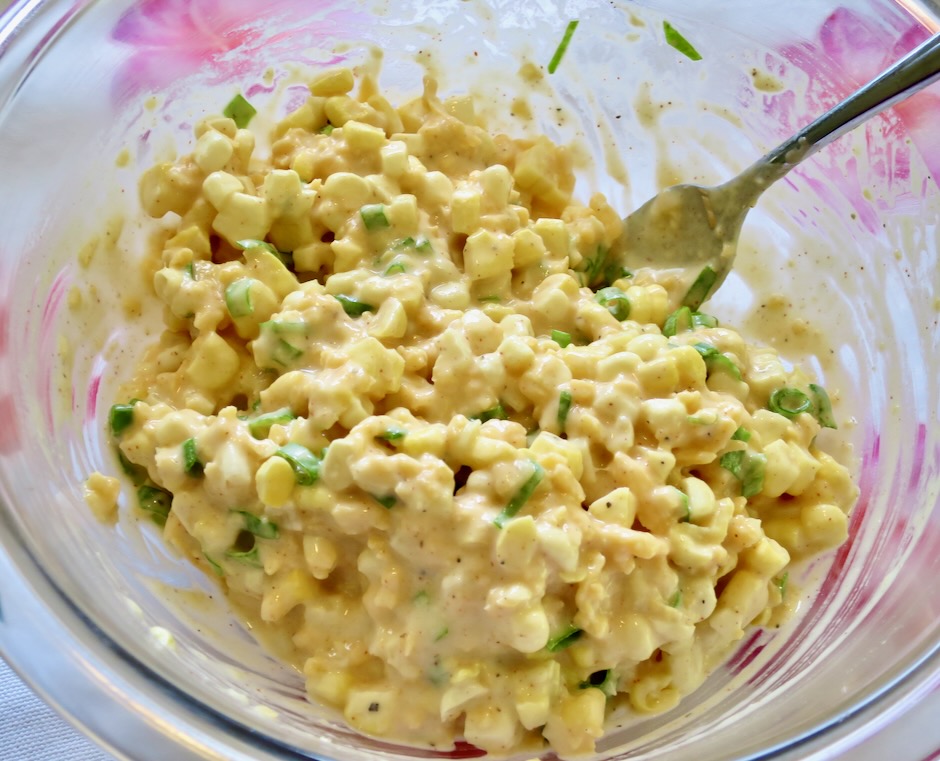
The batter is easy to work with. Drop spoonfuls into your frying pan and let the fritters cook until browned on both sides. They are best eaten immediately while they retain their crispy texture.

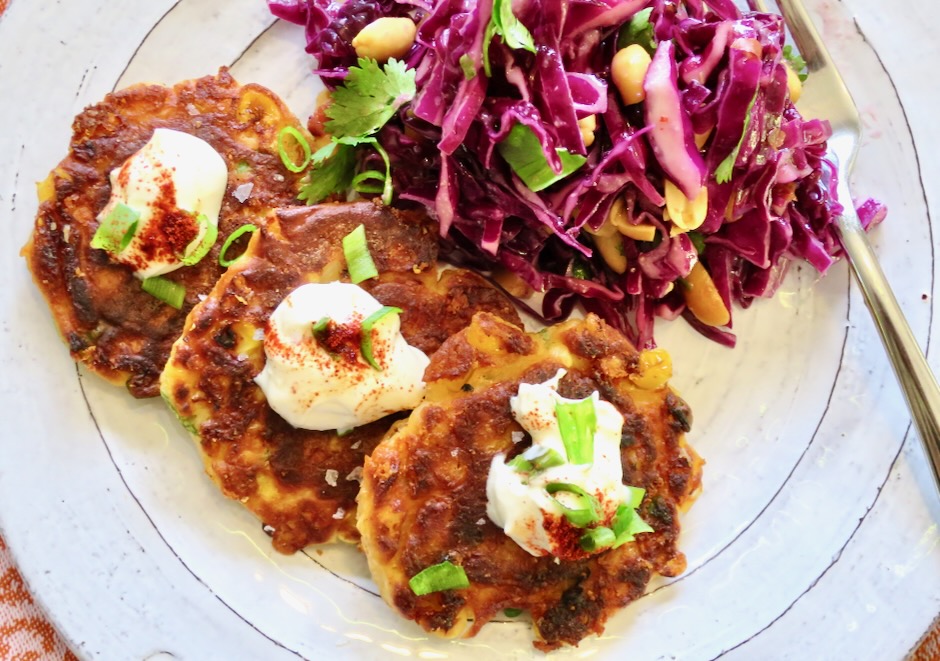
On most occasions I serve the fritters with a dollop of sour cream and a sprinkle of smoked paprika along with a crispy salad to complete the meal. I’ve had success freezing leftovers in a plastic container and reheating them in a pan with a bit of oil. They are the perfect snack for those lazy days when we don’t have the energy to cook and clean up the kitchen.

Corn Fritters

Recipe by Kiyo
Servings

4

servings

Adapted from NYT Cooking – Makes 16 fritters

Ingredients

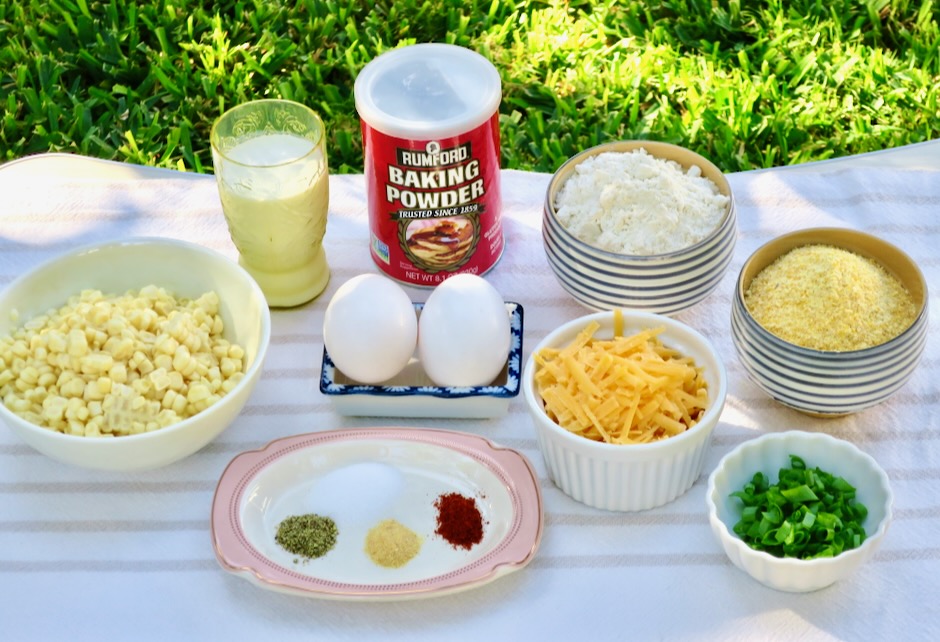
  • 2 large eggs

  • 2/3 cup (162g) lactose free whole milk, or regular whole milk

  • 1 teaspoon fine sea salt

  • 1/2 teaspoon garlic powder

  • 1/2 teaspoon freshly ground black pepper

  • 1/4 teaspoon ground cayenne (or up to 1/2 teaspoon)

  • 1/2 cup (60g) all-purpose flour (use 1 cup, 120g of flour if not using cornmeal)

  • 1/2 cup (75g) cornmeal, such as Bob’s Red Mill medium grind

  • 2 teaspoons baking powder

  • 3 cups (430g) fresh corn kernels (can substitute with frozen corn thawed and patted dry or canned, drained)

  • 1/4 cup chopped green onions

  • 1 cup (114g) sharp cheddar cheese, shredded

  • vegetable or canola oil for frying

Directions

  • In a large bowl, whisk together the eggs, milk, salt, garlic powder, black pepper, and cayenne pepper. Stir in the flour, corn meal if using and baking powder just until combined. Stir in the corn, green onions and cheddar cheese.
  • Heat a non-stick skillet over medium heat with enough oil to generous cover the bottom of the pan. You may use a cast iron skillet if you have one (heat over medium-low).
  • Once the oil is shimmering hot, add heaping tablespoons of batter to the pan. Use the back of a spoon to flatten into a round patties (do not crowd pan). Fry for 2 minutes then flip and fry for another 2 minutes then cook for an additional 2 minutes adding more oil as needed.
  • Remove fritters to a paper towel-lined baking sheet. Repeat until all fritters are fried. Serve with a dollop of sour cream and a sprinkle of smoked paprika.

Notes

  • Leftover fritters can be frozen in a plastic freezer container. Thaw and reheat in a skillet with a bit of oil over medium-low heat to warm and crisp up.
Dinner, Italian, Lactose Free, Pasta, Recipes, Salad, Side Dishes, Summertime Meal, Vegan, Vegetarian

Broken Pasta Salad

January 20, 2024

I fell in love with this salad immediately. Not only is it a gorgeous salad to bring to the table, the flavors and different textures are superb. The addition of maple syrup in the dressing adds the perfect touch of sweetness that pairs so well with the intense flavors of bitter radicchio and briny, salty olives.

The original recipe from Bon Appetit calls for broken lasagna noodles. I used ribbon shaped mafaldine pasta instead because it is what I had available. Similar to lasagna with its ruffled edges, mafaldine is a very versatile pasta to have on hand.

Castelvetrano olives are a favorite of mine. Here on Maui they can be tricky to find. Sadly, Whole Foods does not sell them at their olive bar any longer though they are available packaged. You could substitute Picholine olives if you can’t find Castelvetranos.

The salad dressing is delightfully sweet and tart thanks to the maple syrup, red wine vinegar and fresh lemon juice. A bit of nutritional yeast adds flavor and body to the dressing.

If you have any leftover salad, it can be stored in the refrigerator and eaten the next day. If possible, reserve some of the toasted almonds to sprinkle on just before serving so they retain their crunchy texture.

Broken Pasta Salad

Recipe by Kiyo
Servings

4-6

servings

Adapted from Bon Appetit magazine

Ingredients

  • 2/3 cups raw almonds

  • 1 pound mafaldine or wavy lasagna noodles, broken into 2-inch pieces

  • kosher salt

  • 1 large garlic clove, finely grated

  • 1/2 cup extra-virgin olive oil

  • 1/2 cup finely chopped parsley

  • 1/3 cup finely chopped basil

  • 1/4 cup fresh lemon juice (2 lemons)

  • 1/4 cup red wine vinegar

  • 2 tablespoons nutritional yeast

  • 1 1/2 tablespoons pure maple syrup

  • pinch of crushed red pepper flakes

  • freshly ground pepper

  • 1 small head radicchio, thinly sliced

  • 2 cups Castelvetrano olives, pitted and torn (can substitute with Picholine or other green olives)

Directions

  • Preheat toaster oven or oven to 400 degrees. Toast almonds on a rimmed baking sheet, tossing halfway through, until fragrant and slightly darkened, 6-9 minutes. Let cool slightly, then finely chop.
  • Meanwhile, cook noodles in a large pot of boiling salted water, stirring occasionally, until tender (you don’t want al dente pasta salad). Drain and rinse under cool water.
  • Stir almonds, garlic, oil, parsley, basil, lemon juice, vinegar, nutritional yeast, maple syrup, and red pepper flakes in a large bowl. Season dressing generously with salt and black pepper.
  • Add noodles, radicchio, and olives to dressing and toss to combine. Serve with crusty sourdough bread.
Dinner, Japanese, Lactose Free, Ramen, Recipes

Dry Mein with Crunchy Bean Sprouts & Chili Crisp

January 13, 2024

Here on Maui (and beyond), Sam Sato’s is known for their wide variety of local-style menu items (plate lunches). But they are most famous for their dry mein noodles. A bowl of well seasoned thick noodles is particularly delicious when dressed with hot mustard. While dining in at Sam Sato’s is the ideal way to enjoy this unique dish, it’s not always convenient when you have a craving. So with just a few basic ingredients why not whip up a bowl of dry mein at home?

When I’m on Oahu I make a stop at Nijiya, a Japanese market conveniently located at Ala Moana Center. Their shelves are stocked with all kinds of goodies. They sell Sun Noodle’s Kaedama #18 thick noodles so I usually bring a few packages back home with me. I haven’t seen them on Maui, but a good substitute would be Sun Noodle’s saimin noodles which are sold in many markets here in Hawaii (Foodland, Safeway, Times, Island Grocery) or any other fresh, thick ramen.

I love a spicy kick when I eat ramen. So adding a dollop of chili crunch on my noodles is a must. My favorite at the moment is Zindrew Crunchy Garlic Chili Oil (O.G. Batch jar). It has the perfect heat level for my taste and the jar has lots of crunchy garlic pieces. Very yummy. They also offer a spicier version (X Batch jar) if that’s your thing. Another option for those who prefer less heat is S&B Crunchy Garlic in Chili Oil. This is a mild chili oil with large pieces of very crispy garlic. As they say on the label, Umami Topping! It is easily found here in Hawaii at Longs, Safeway, Foodland and Times. If you are unable to find it at your local market, it is available online. Other times I use hot mustard powder mixed with a bit of water and soy sauce. This is the typical accompaniment offered at Sam Sato’s.

I use a good amount of bean sprouts (6 ounces) in this dish. They add a welcoming crispy texture when mixed in with the fresh ramen.

Making your own dry mein at home allows you to control the amount of oil and salt you use.

If you can’t make up your mind about which chili crunch to use, go ahead and use both as I sometimes do. A little heat and lots of crunchy garlic = noodle bliss.

Dry Mein with Crunchy Bean Sprouts & Chili Crisp

Recipe by Kiyo
Servings

2

servings

Ingredients

  • 9 – 11 ounces fresh thick ramen noodles

  • 6 ounces (about 3 cups) bean sprouts, rinsed

  • 1/3 cup finely chopped green onions (reserve 2 tablespoons for serving)

  • 1/2 teaspoon instant soup base (such as S&S)

  • 2 1/2 teaspoons soy sauce

  • salt and pepper

  • 2-3 teaspoons canola or vegetable oil

  • hot mustard, chili crisp and/or crunchy garlic chili oil for serving (optional but recommend)

Directions

  • In a 1-cup measuring cup, combine 1/2 teaspoon instant soup base such as S&S with 1/4 cup warm water. Stir in 2 1/2 teaspoons soy sauce. Set aside.
  • Bring a large pot of water to a boil. Add bean sprouts and blanch for 1 minute. Using a spider strainer or large slotted spoon, transfer bean sprouts to a colander to drain then to a bowl. Reserve pot with water for ramen.
  • Bring water back to a boil over high heat. Add ramen and cook to al dente, 60 seconds less than package directions. Drain in colander under cool running water to stop the cooking and to remove excess starch. Set aside.
  • In large skillet, preferably one with 2-inch sides, heat 2-3 teaspoons oil (depending on the amount of noodles you use). Add green onions, reserving 2 tablespoons for serving. Toss in oil for 20 seconds. Add ramen to the pan and toss with the oil and green onions. Add 3 tablespoons of the soy sauce seasoning, tossing to coat the noodles (use 2 1/2 tablespoons if using less than 11 ounces of ramen). The noodles should be well coated but not saucy (you will not need all of the sauce). Stir in bean sprouts. Allow sauce to evaporate for 30 seconds. Season with salt and pepper to taste. Divide noodles between two bowls. Top with reserved green onions. Serve with hot mustard mixed with soy sauce, chili crisp and/or crunchy garlic in chili oil.
Appetizers, Cheese, Dinner, Kimchi, Korean, Mexican, Recipes, Vegetarian

Kimchi Quesadillas

January 6, 2024

Mexican food is one of the most beloved cuisines in the world and for good reason. The wide variety of distinctive flavors used in Mexican cuisine create bold, flavorful dishes. This hybrid Mexican-Korean quesadilla is a tasty way to use some of your homemade kimchi. The fiery flavor of the kimchi combined with melted cheese in a warmed flour tortilla is delicious.

I try to keep a jar of homemade kimchi in the refrigerator at all times. There are so many dishes I love to use it in. Noodles, soup, kimchi & Spam fried rice make tasty meals.

Pan frying the kimchi in a dab of butter will help to decrease the liquid a bit.

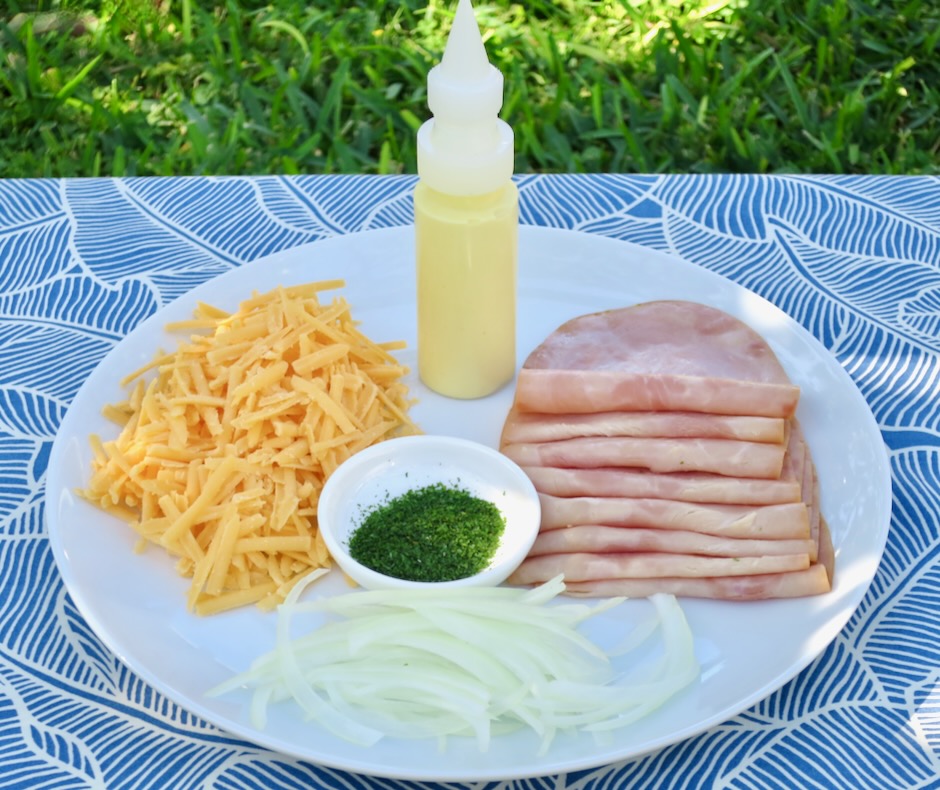
Layer the ingredients then fold the tortilla over. It’s so easy to prepare and with minimal ingredients, this quesadilla is the perfect party appetizer. Prepare the quesadillas a few hours in advance and store in the refrigerator. Just before your guests arrive heat up your skillet and pan fry the quesadillas.

Allow some of the cheese to spill out into the pan. This creates the most delicious crispy-edged quesadilla.

Serve with crispy cabbage slaw or your favorite side dishes such as Mexican rice and refried beans. If you have leftovers, serve them for breakfast or brunch the following day along with fried or scrambled eggs.

Kimchi Quesadillas

Recipe by Kiyo
Servings

4

servings

Ingredients

  • 4 medium flour tortillas (7-inch, I use cooked Tortilla Land flour tortillas)

  • 1 cup kimchi, drained and coarsely chopped

  • 2 teaspoons Earth Balance Buttery Sticks or regular butter

  • 4 ounces sharp cheddar, coarsely grated (about 1 1/4 cup)

  • 2 tablespoons diced onion

  • 1 medium avocado, sliced thinly into 16 pieces

  • 2 teaspoons canola or vegetable oil

  • 1/4 cup Green Valley lactose free sour cream or regular sour cream

  • 2 teaspoons sriracha

  • 1 teaspoon finely chopped cilantro

Directions

  • Heat butter in a medium pan (large enough to accommodate two folded tortillas) over medium heat. Add chopped kimchi and sauté just until there is no kimchi liquid left, about 2 minutes. Transfer kimchi to a small plate. Wipe pan clean.
  • Combine sour cream, sriracha and cilantro in a small bowl, set aside.
  • Evenly divide cheese onto one side of each tortilla. Top with onions, kimchi, and avocado. Fold the tortilla over and press very gently.
  • Heat a teaspoon of canola or vegetable oil in the pan over medium heat. Once hot, transfer two of the folded tortillas to the pan. Cook until nicely browned, allowing some of the cheese to spill out into the pan. You can also scatter a bit of cheese around the open edges of the tortillas to form a crispy edge. Flip and cook the other side. Transfer the tortillas to a plate and cover with foil while you cook the remaining two tortillas (heat another teaspoon of oil before adding tortillas to pan).
  • Slice each tortilla into three pieces. Serve with a dollop of sour cream sriracha sauce on each slice.
Dinner, Fish, Japanese, Korean, Lactose Free, Recipes, Rice Dishes

Tuna, Rice & Nori Lunch

December 11, 2023

Tuna and rice wrapped in crispy and savory nori is one of my favorite combos to make for lunch. It doesn’t sound like anything special but once you try it you’ll understand why I love it so much. Think of it as an improvised hand roll. It couldn’t be simpler to whip up on short notice. When I was working, I would share it with a small group of friends at lunchtime. We all sat around the table and oohed and aahed as we ate our little tuna nori wraps.

Savory and tangy Kewpie mayonnaise replaces the usual Best Foods mayonnaise I use for tuna sandwiches. The velvety texture and rich flavor is perfect for this recipe.

With a plethora of canned tuna available these days it’s easy to find a good brand. Wild Planet does not have added water or broth which means it’s not going to be a mushy mess when you open the can.

A side of crispy cucumbers with chili crisp, kimchi or takuan and fresh fruit are the perfect pairing to complete your lunch. A drizzle of sriracha mayo over the tuna adds a nice kick to the nori wraps.

Tuna, Rice & Nori Lunch

Recipe by Kiyo
Servings

2

servings

Easy and delicious nori wraps are quick to prepare!

Ingredients

  • 1 rice cooker cup short or medium grain rice, cooked according to manufacturer’s instructions

  • 1 (5 ounce) can tuna in sea salt, such as Wild Planet)

  • Kewpie mayonnaise

  • 2-3 teaspoons finely chopped celery

  • 2 teaspoons finely chopped sweet onion

  • 2 teaspoons finely grated carrot

  • 2 teaspoons thinly sliced green onion

  • 1 teaspoon roasted sesame seeds

  • 1-2 packets Korean-style seaweed snacks, depending on size

Directions

  • Once rice has cooked, transfer to a bowl and gently mix in roasted sesame seeds. Cover with plastic wrap and set aside allowing rice to cool to room temperature.
  • In a medium bowl, flake the tuna with a fork. Mix in Kewpie mayonnaise (enough to moisten tuna generously, tuna should not look dry), celery, onion, and carrot. Transfer to a smaller bowl for serving.
  • Set out nori (just before serving to keep crisp), tuna salad, and rice. Make mini nori wraps by placing a small amount of rice on the nori, followed by tuna. Top with sriracha mayonnaise if using, and green onions. It’s best to make the nori wraps as you eat them so the nori stays crispy. Serve with your favorite side dishes such as potato salad, fresh fruit, kimchi and takuan pickles.
Appetizers, Dinner, Eggs, Japanese, Lactose Free, Recipes, Side Dishes

Momofuku’s Soy Sauce Eggs

November 26, 2023

One thing is for sure, I will never get bored with eating eggs. The humble egg is versatile, nutritious, and so tasty. One of my favorite egg preparations is this easy soy sauce recipe. They can be eaten as a snack, in ramen, on rice, on toast with smashed avocado or in a salad. Marinating eggs in a simple sauce for just a few hours transforms them into a delectable treat.

Momofuku’s soy sauce egg recipe calls for sherry vinegar which has a smooth and toasty flavor. A reliable brand is O California which can be found at Safeway and Whole Foods here on Maui. Vinegar lasts more or less indefinitely so it is a good investment. If you are unable to locate sherry vinegar you can substitute it with unseasoned rice vinegar.

Egg yolks vary in color depending on the chicken’s diet. According to an article from America’s Test Kitchen, a paler yolk has the same nutritional value as one with a darker color. With that being said, I’m always delighted when I crack an egg open that has a vibrant yellow-orange color. For soy sauce eggs, you definitely want yolks with a deeper color. Ka Lei Eggs (Hawaii) are a good choice.

You’ll want to have a timer handy when boiling the eggs. To ensure your eggs have that velvety, jammy texture they need to be boiled for exactly 6 minutes and 50 seconds. Once the timer goes off the eggs will immediately go into an ice bath to stop from cooking any further.

I found that using my 4-cup glass measuring cup worked perfectly for marinating the eggs. A clean paper napkin over the top helps to submerge the eggs in the umami rich sauce.

The eggs are ready to eat in just a couple of hours and can be left to marinate for up to 6 hours.

These delicious eggs can be served as an appetizer or snack.

My favorite accompaniment for the eggs is a bowl of rice sprinkled with furikake and served with homemade kimchi or Japanese pickles on the side.

Momofuku’s Soy Sauce Eggs

Recipe by Kiyo
Servings

6

servings

Recipe adapted from Food52

Ingredients

  • 6 tablespoons warm water

  • 1 tablespoon sugar

  • 2 tablespoons sherry vinegar

  • 1/2 cup low-sodium soy sauce

  • 1/4 cup regular soy sauce

  • 6 large eggs

  • Maldon or other flaky salt for serving

  • Freshly ground black pepper for serving

Directions

  • In a medium bowl, whisk together the water and sugar to dissolve the sugar, then stir in the sherry vinegar and soy sauces.
  • Bring a medium pot of water to a boil. Carefully place eggs into the boiling water and cook for exactly 6 minutes and 50 seconds. You may stir slowly for the first minute to distribute the heat evenly. Meanwhile, fill a large bowl with cold water and ice. When the eggs are done, transfer them to the ice bath.
  • Peel the eggs once they are cool. Transfer the eggs to the soy sauce mixture and marinate in the refrigerator for at least 2 hours, and up to 6 hours, making sure they are completely submerged.
  • Remove the eggs from the sauce. You can save the sauce mixture for another round of eggs if you wish.
  • To serve, cut the eggs in half and season with salt and pepper. Any leftover eggs can be stored in an airtight container for 4-5 days.
Follow

Get every new post delivered to your Inbox

Join other followers: