Browsing Category

Dinner

Dinner, Japanese, Pasta, Recipes, Salad, Vegan, Vegetarian, Veggies

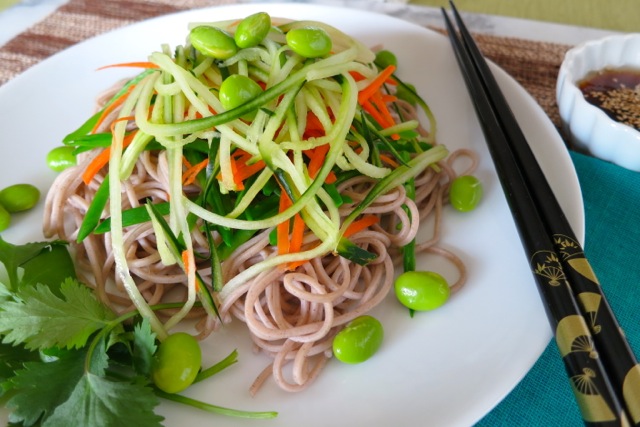
Soba Salad with Cucumber, Carrot, Snow Peas & Edamame

May 16, 2013

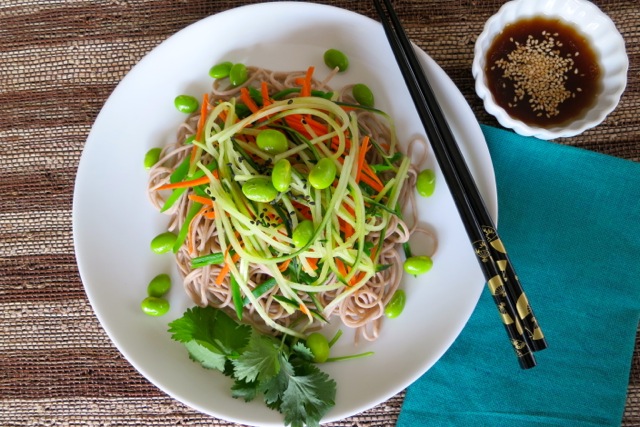
Soba Salad 2Here’s a refreshing noodle salad that is especially delicious on a warm summer day.  The salad can be made in advance and refrigerated until you’re ready to serve it.  In fact, you can make it a day in advance and it will be in perfect condition the following day.
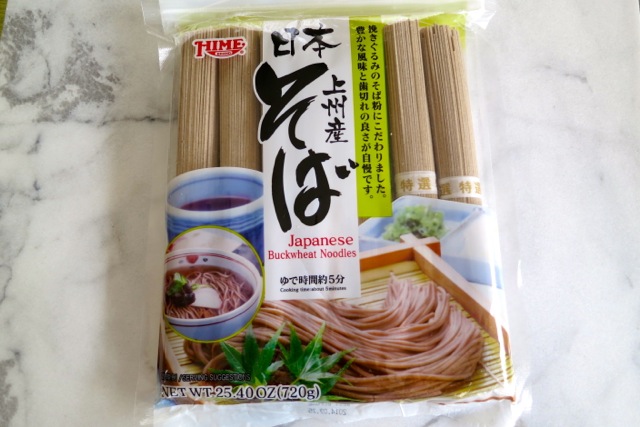
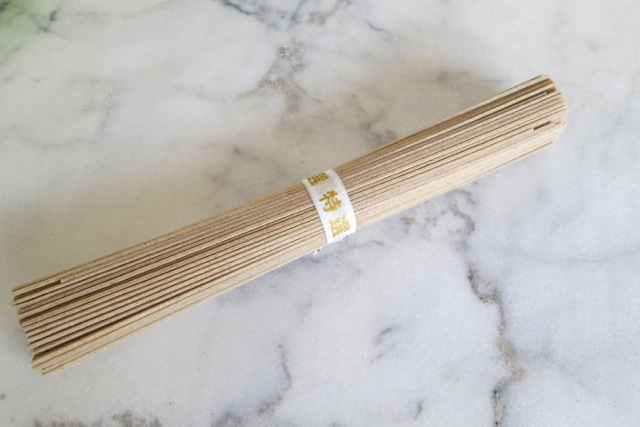
Soba NoodlesSoba noodles can be served hot or cold with toppings such as tempura,  fish cake, nori, mushrooms, egg, vegetables, and fish.  I love all preparations but my first choice is the cold version with a refreshing dressing drizzled over noodles topped with delicately sliced vegetables.Soba BundleI have only tried fresh soba noodles once, on a visit to Honolulu.  They were delicious.   But in the absence of fresh noodles, the dried variety works fine.
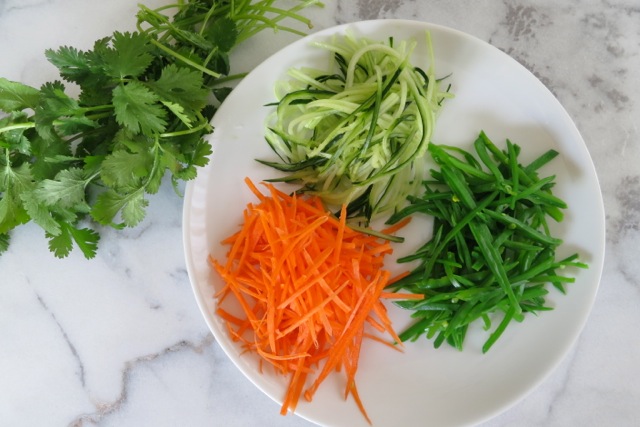
VeggiesI like to use carrot, cucumber, snow peas and edamame.  You can use almost any vegetable. The important thing to remember is to julienne your vegetables so they are similar in size to the soba noodles.  This creates a pretty tangle of colorful vegetables combined with the noodles.

Soba Salad

Soba Noodle Salad with Cucumber, Carrot, Snow Peas & Edamame

Serves 2

Ingredients

Dressing

1/4 cup rice vinegar (unseasoned)

1 tablespoon sweet mirin

1 1/2 tablespoons soy sauce

1 1/2 teaspoons sesame oil

2 tablespoons canola oil

2 teaspoons brown sugar

2 teaspoons roasted sesame seeds

freshly ground pepper

Salad

2 bundles soba noodles (about 6 ounces)

2 ounces snow peas (about 16)

1/2 small carrot, julienned

1/2 Japanese or English cucumber, julienned

1/4 cup boiled edamame

fresh cilantro (optional)

Preparation 

Place all of the dressing ingredients in a small jar and shake to combine or whisk together in a small bowl.

Cook soba noodles as directed on the package (check the noodles 1 minute prior to the total cooking time to test for doneness).  Rinse noodles under cold water and drain well.  Divide noodles into two wide bowls or large salad plates.

Blanch the snow peas in boiling water for 25 seconds.  Place in an ice water bath to stop the cooking.  Drain well on paper towels.  Thinly slice blanched peas on the diagonal.

Julienne the carrot and cucumber.  You can remove the skin of the cucumber or leave it on.  I prefer to remove strips of the skin so that some of the bright green color remains.

Layer the snow peas, carrot and cucumber on the noodles.  Scatter the edamame on and around the noodles.  If you enjoy cilantro, add chopped cilantro over the soba salad.

Drizzle sesame dressing over the salad and serve.

Chicken, Dinner, Japanese, Recipes

Chicken Katsu

April 30, 2013

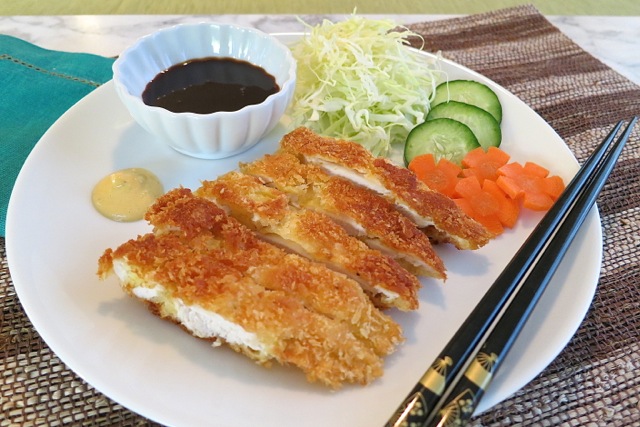
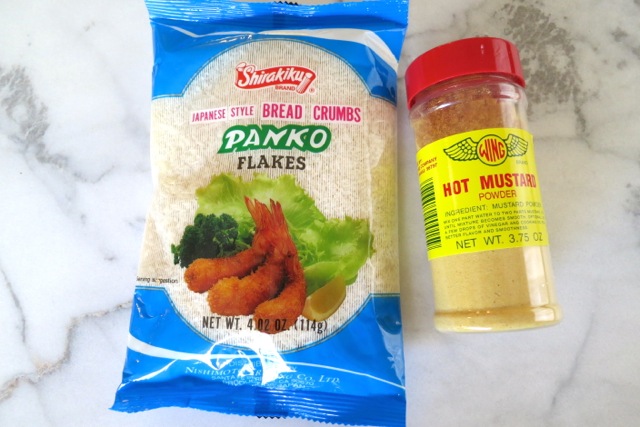
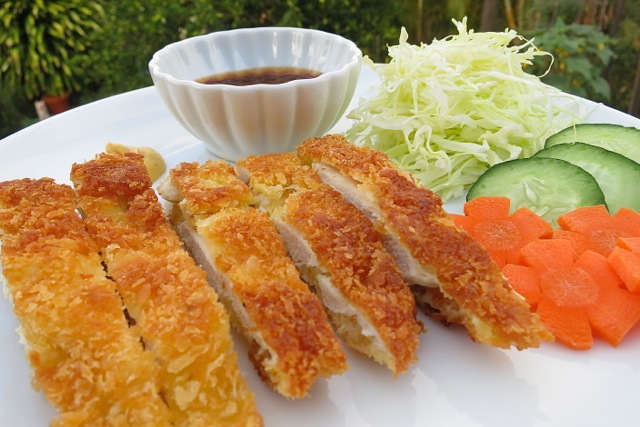
Chicken Katsu PlateMy friend Colleen recently told me about the Coastal Range Organics chicken she purchased at Costco and how much she likes it.  Typically when I go to Costco I zoom around with my cart trying to dodge the shoppers that clog the aisles.  I zero in on the items that are familiar to me and don’t pay attention to other products.  So thanks, Colleen, for bringing the Coastal Range Organics chicken to my attention!  I found it to be superior to the chicken I always bought in the past.Panko & Hot MustardChicken katsu is one of my favorites and very simple to prepare.  Chicken breasts become much more tender when pounded and this also allows them to cook evenly.  Properly prepared chicken katsu has a crunchy exterior and tender interior.

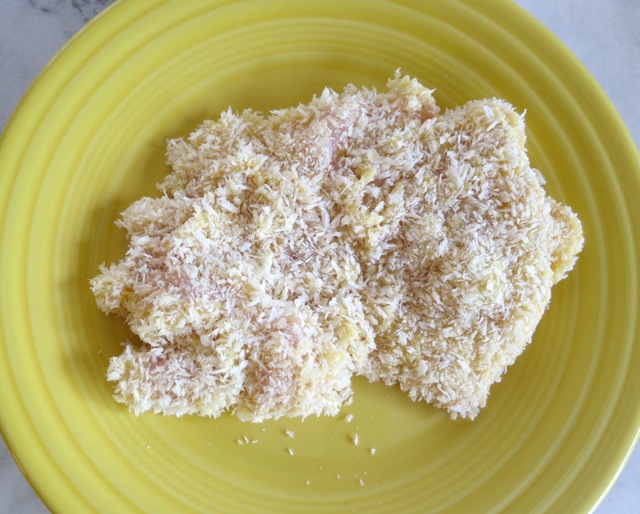
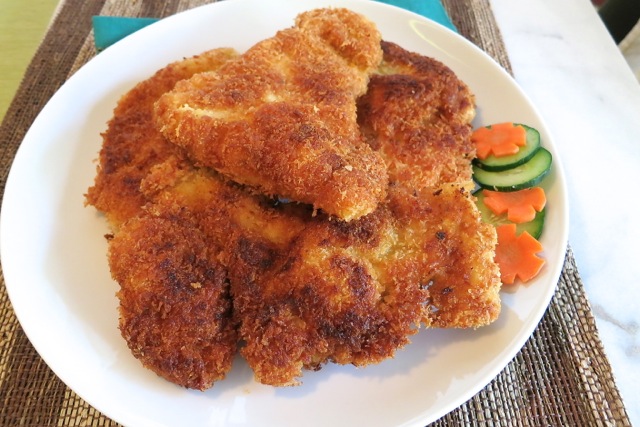
Panko Crusted ChickenLightly dust your pounded chicken cutlets in flour then in the egg mixture.  Repeat this process once again and finally coat the chicken with panko.  The double coating of flour and egg gives the chicken a super crunchy crust.

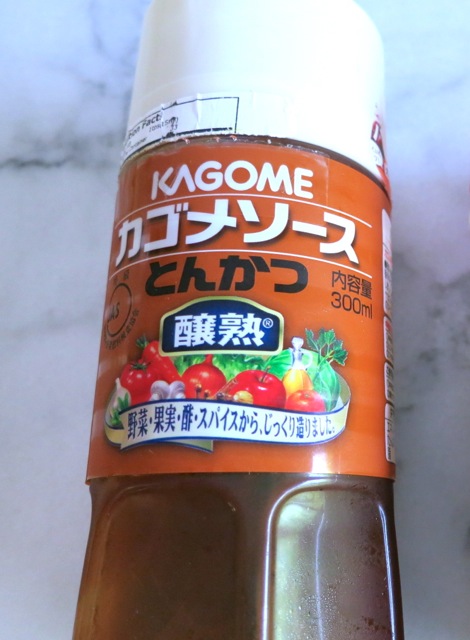
Tonkatsu Sauce

There are many brands of tonkatsu sauce but the selection here on Maui is very limited.  I’ve tried a few and found this brand to be my favorite so far.

Chicken Katsu

Chicken Katsu 2

Chicken Katsu

Serves 4 -6

Ingredients

3 large boneless, skinless chicken breasts, cut in half crosswise and pounded 1/3 inch thick.

1/2 cup flour

3 large eggs

2 1/c cups panko (4 oz. package)

3/4 cup canola oil

Preparation

Cut each chicken breast in half, crosswise.  Pound chicken in a Ziploc bag until each piece is about 1/3 inch thick.

Place flour and panko on two large paper plates.  Whisk eggs in a wide, shallow bowl.

Lightly salt and pepper the chicken.  Dust the chicken in flour then in the beaten eggs.  Repeat this step one more time then dredge the chicken in panko, patting the panko crumbs on both sides of the chicken.

In a large 12 inch saute pan, heat 3/4 cup canola oil over medium high heat.  Once the oil is hot, add half of the chicken to the pan and cook for 3 minutes or until nicely browned.  Turn chicken over and cook for about 2 minutes more.  Remove chicken to a paper towel lined plate.  Continue cooking the rest of the chicken.

Cut chicken into 3/4 inch slices and serve with finely shredded cabbage, hot mustard, tonkatsu sauce and steamed rice.  With its sweet and tangy dressing, cucumber  and carrot namasu is a perfect side dish.


Dinner, Recipes, Side Dishes, Vegan, Vegetarian, Veggies

Choy Sum with Sesame Soy Chili Dressing & Fried Shallots

April 19, 2013

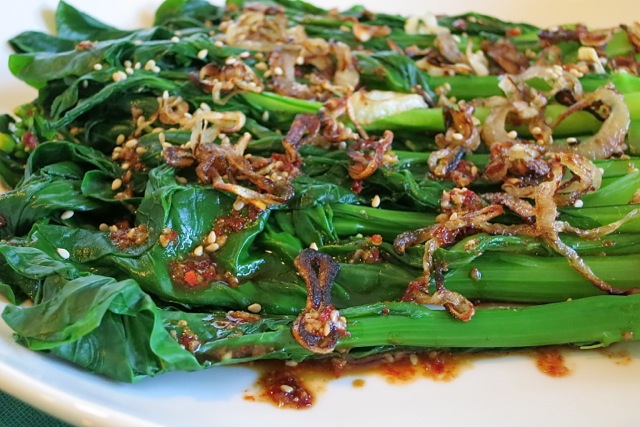
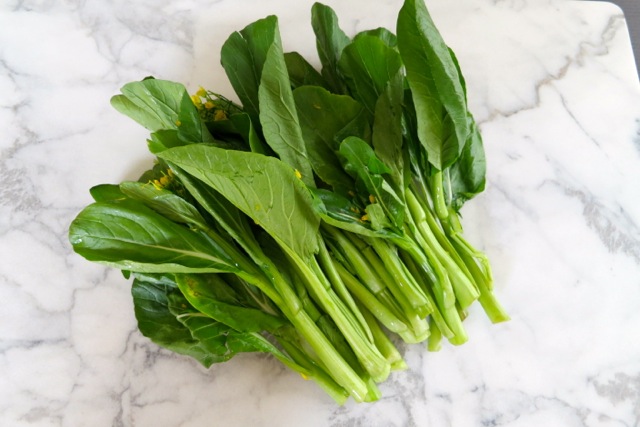
Choy SumI recently found some beautiful choy sum at one of our local grocery stores.  Also known as Chinese Flowering Cabbage, choy sum is delicious blanched or steamed for just a few minutes and served with a simple dressing of soy sauce and sesame oil.  Many people drizzle oyster sauce over their choy sum.  This delicious vegetable will be the highlight of your meal.

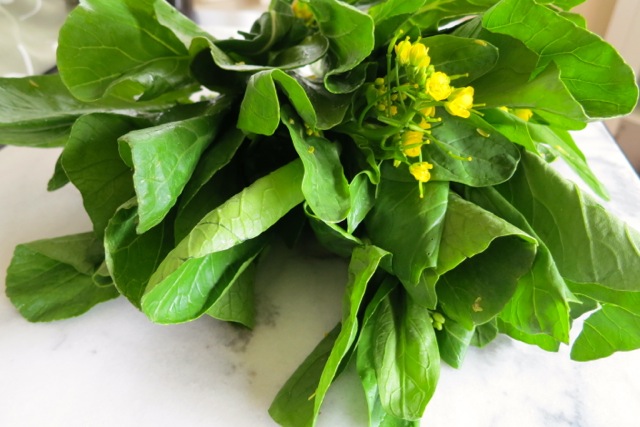
Choy SumThe bright green leaves are not only attractive but very healthy and unlike other vegetables that may need their stems trimmed or removed, choy sum stems are actually the best part, tender yet crunchy.

Choy Sum #2If you are unable to find choy sum you can substitute baby bok choy and it will be equally delicious.

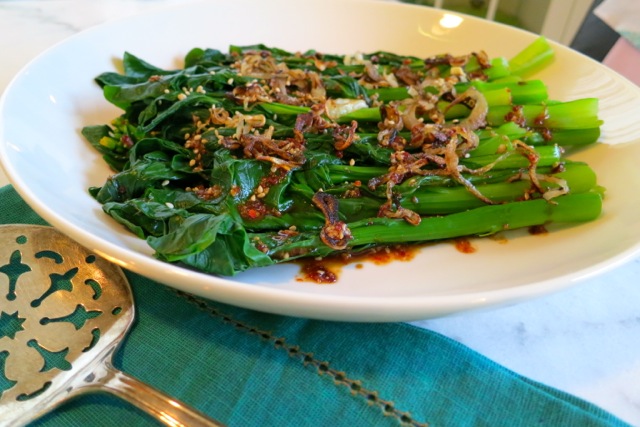
Choy Sum with Fried Shallots

Choy Sum with Sesame Soy Chili Dressing & Fried Shallots

Serves 2 as a side dish

Ingredients

1 large shallot

1 bunch (about 14 oz.) choy sum

2 tablespoons soy sauce

few pinches of sugar

2 teaspoons sesame oil

1 medium garlic clove, crushed

1 teaspoon Korean chili flakes (optional)

1/4 teaspoon red chili pepper flakes

2 teaspoons ground, roasted sesame seeds

roasted sesame seeds for sprinkling over the choy sum

Preparation

Slice shallot into very thin pieces.  Heat 2 teaspoons canola oil in a small skillet over medium heat and fry shallots until nicely browned and crispy, about 7- 10 minutes.

Snap off  any large outer choy sum leaves along with their stems and rinse them with the smaller bunches of choy sum making sure to remove any dirt between the stems.

Fill a large sauté pan with water (about 1 1/2 inches) and heat until boiling. Add choy sum and cook briefly just until the choy sum is al dente, about 3 minutes (turn choy sum once).  Remove to paper towel lined plate and pat dry.

Combine soy sauce, sugar, sesame oil,  garlic, Korean chili flakes if using, red chili pepper flakes and ground sesame seeds in a small bowl.

Place choy sum on a large platter and scatter crispy shallots over the greens.  Drizzle the dressing over the choy sum, sprinkle with sesame seeds and serve.

Bread, Breakfast, Dinner, Recipes, Side Dishes

Betty’s Cornbread

March 29, 2013

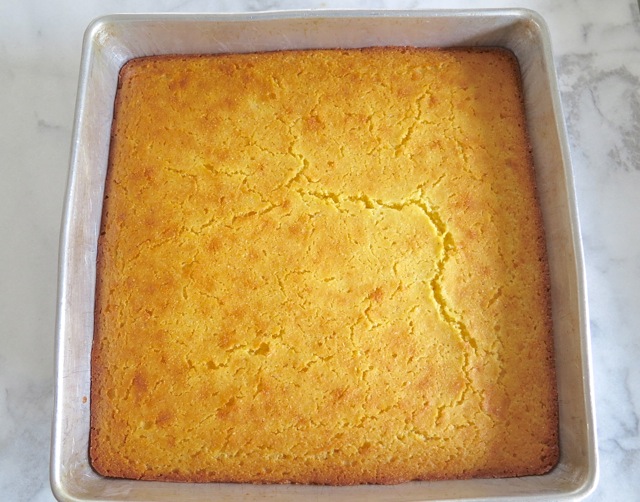
Corn BreadMy mom was a fabulous cook.  Everything she made was delicious and in particular her brownies and lemon meringue pie.  I kept a few of her old cookbooks and every now and then I’ll come across a page where she had made some notes about the recipe. Some are hysterical, for instance the recipe for Blended Almond Paste: “Burned out blender doing this.  Don’t make this!” And Griddle Cakes: “terrible!” And then there are a couple of recipes with a big X over the entire page which I assume was because they were just so bad that there would be no repeat effort.  She was a big fan of Julia Child and James Beard and needless to say, these notes did not appear in either of these chef’s cookbooks.

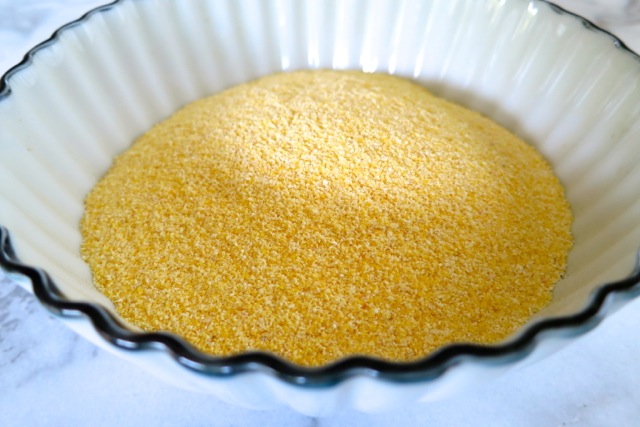
Corn MealI wrote down this recipe of hers many years ago and continue to make it, first because it is delicious and second because it is ready in just 30 minutes.  This is a hearty cornbread and doesn’t have a fine cakey texture like some other cornbreads I’ve tried.  It has a bit of flour in the recipe however it is mostly cornmeal which is why I love it.

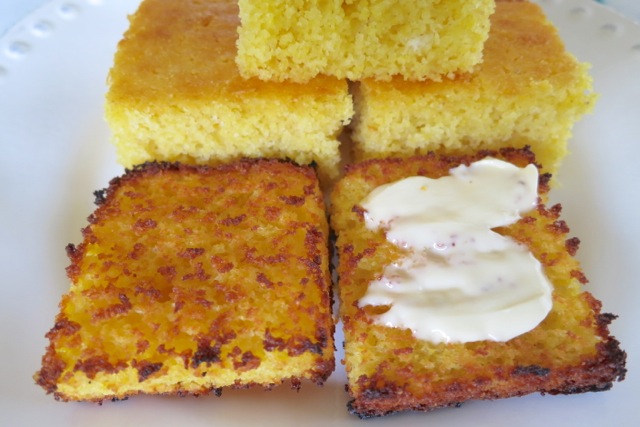
Toasted Corn BreadOnce the cornbread has cooled in the pan for 10 minutes or so, I cut it into 16 pieces.  My favorite way to eat cornbread is to slice a piece in half and toast it in my toaster oven until it is nicely browned and the edges are extra crispy.  A pat of butter is all it needs. Don’t you agree?

Betty’s Cornbread

16 pieces

Ingredients

1 1/2 cups cornmeal

1/2 cup flour

4 teaspoons baking powder

1/2 teaspoon salt

1/2 cup sugar

1 1/4 cups milk

2 large eggs

2/3 stick butter, melted

Preparation

Preheat oven to 400 degrees

Butter a 9 x 9 inch pan.

In a large bowl combine cornmeal, flour, baking powder, salt and suger.  Stir to combine.

Pour 1 1/4 cup milk into a 2-cup measuring cup.  Add eggs and whisk until just combined. Melt butter and add to the milk and eggs.

Pour wet ingredients into the dry ingredients in 3 stages.  Stir to combine then pour batter into your pan.

Bake for 25 minutes.  Using a toothpick check the bread after 20 minutes to see if it is done (some ovens run hotter than others).

Cool cornbread in the pan for 10 minutes then slice and serve.  The cornbread freezes beautifully.

***For lactose free version use lactose free milk and Earth Balance buttery sticks.

Bread, Dinner, Recipes

Refrigerator Rolls

March 24, 2013

Refrigerator RollsA few years ago while checking out food blogs I happened to see this recipe.  These refrigerator rolls looked so light and fluffy, the perfect roll to serve  with a special holiday dinner. I could envision leftover ham sandwiches using these soft, eggy rolls.  Thanks to Cafe Johnsonia blog I added it to my recipe box and have been making them ever since.

Milk, Butter, Sugar

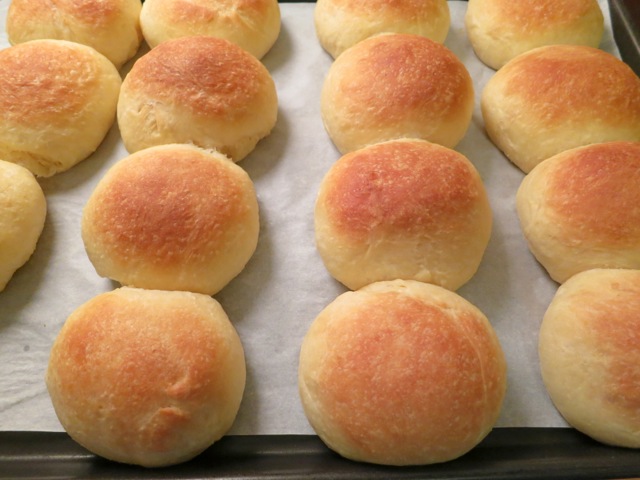
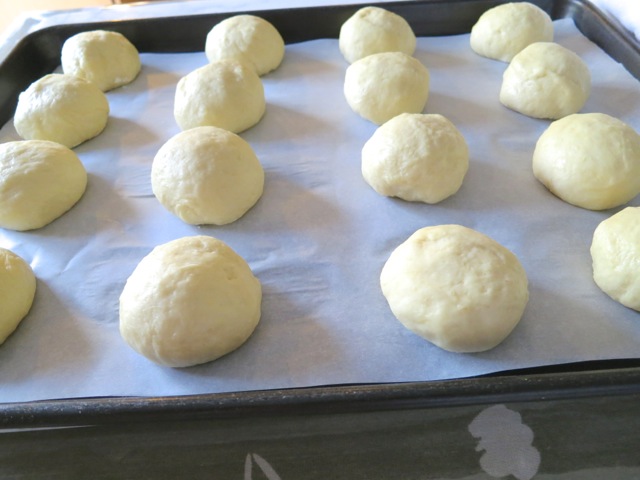
Rising RollsPlace the rolls on a parchment lined baking sheet and let rise until doubled in size.

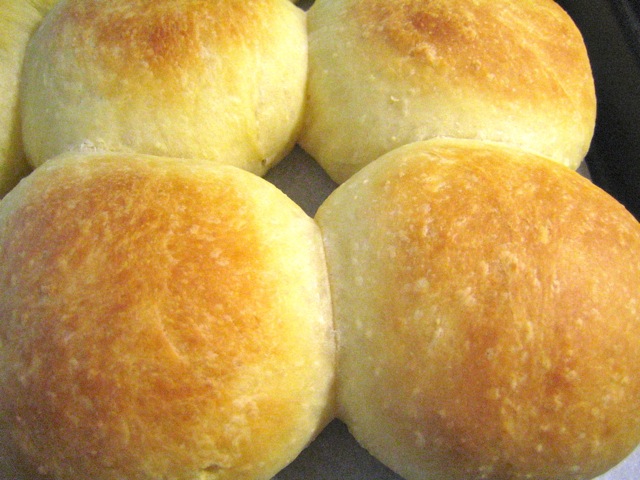
Regrigator Roll Baked

Refrigerator Rolls

From Cafe Johnsonia blog

16 rolls

Ingredients

1 stick unsalted butter

1 cup milk – scant (whole or 2%)

1/4 cup sugar

3 eggs

3 cups flour

1 cup bread flour

1 tablespoon instant yeast

2 teaspoons salt

Preparation

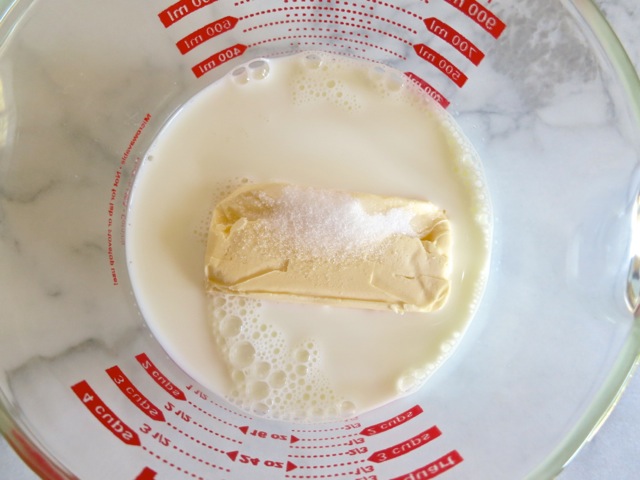
Place butter, milk and sugar in a 4 cup measuring cup.  Microwave for about 1  1/2 minutes until the butter is almost melted, the sugar dissolved, and the mixture is very hot to the touch (about 140 degrees).

In a large bowl whisk the eggs well.  Slowly drizzle the hot milk mixture into the eggs while whisking continuously.  The bowl and the eggs should be warm (110 degrees is the perfect temperature).  If you are in need of a reliable kitchen thermometer I would suggest the Thermapen.  It’s the best.

Place the flour and yeast in a bowl of an electric mixer fitted with a paddle attachment.  Turn the mixer on low to evenly distribute  the yeast.  With the mixer running, add the liquids in a slow, steady stream.  When all the liquid has been added, turn the mixer up to medium and let it run for 1 minute.  Add the salt.  Keep mixing for  2 – 3 minutes, or until the dough starts to form strong webs as it mixes.

Rub the inside of a very large bowl with oil. Place the finished dough in the bowl and cover with plastic wrap.  Place dough in a warm, draft-free spot where it can rise.

When the dough has doubled in size (check after 1 hour) sprinkle it with 1 tablespoon of flour (no more) and punch it down. Wrap the bowl well with a few layers of plastic wrap.  Refrigerate the dough until chilled, about 2 hours.  The dough can be kept overnight and up to 5 days.

Once you are ready to bake the rolls, remove the dough from the refrigerator and place on a lightly floured surface.  Cut the dough into equal pieces.  You can make small rolls (24), medium rolls (16) or large rolls (12).

Roll the dough into a rough ball and place your finger in the center of the dough.  Push your finger up from the bottom while using  your other hand to form a round ball on the top.  Squish the flaps on the underside together.  The dough should be quite smooth and will get smoother once the rolls have risen.

Place the rolls on a baking sheet lined with parchment paper.  Cover the rolls with a clean kitchen towel and let rise, until doubled in size.  This usually takes at least 1 hour and depends on your climate and the temperature in your home.

Preheat your oven to 375 degrees.  Brush the tops of the rolls with melted butter.  Bake  for about 10 – 15 minutes, until golden.  Check rolls at the 10 minute mark so they do not over bake.

These rolls are soft, fluffy and tender.  They freeze beautifully if you have leftovers or prefer to make them in advance of serving them.

***For lactose free rolls use lactose free milk and Earth Balance buttery sticks.

Dinner, Recipes, Tofu, Vegan, Vegetarian

Baked Mock Chicken Tofu

March 20, 2013

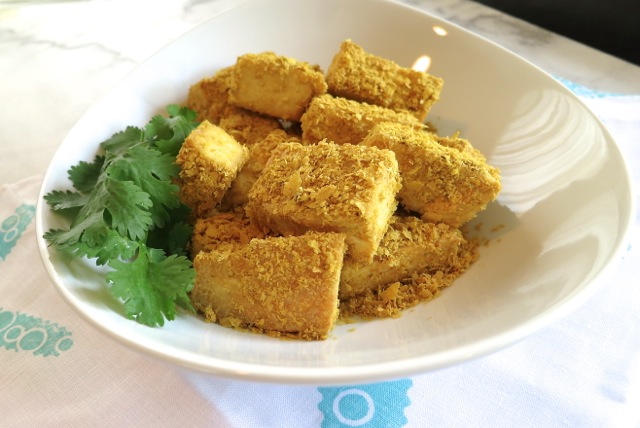
Baked Mock Chicken TofuThis is one of the easiest and most satisfying tofu dishes I know of.  Other than the tofu there are just 3 ingredients.  Long ago I tried this at our local Down to Earth grocery store.  I was immediately hooked, like many other people I know.  The original recipes calls for pan frying the tofu however baking it is much easier. You just set the timer for 30 minutes and using a foil lined pan for the tofu means there’s no clean up.

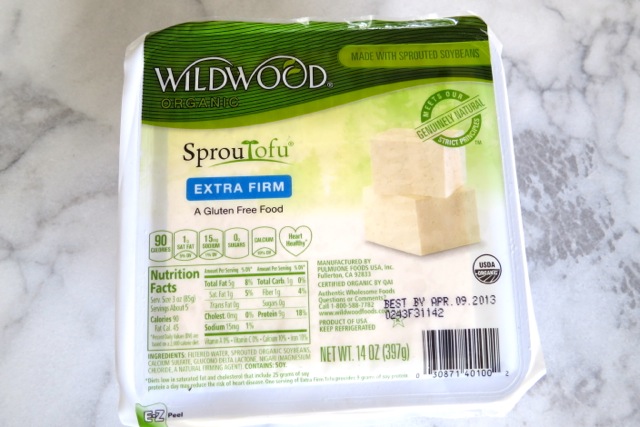
Extra Firm TofuThe key to making this correctly is to use extra firm tofu such as Wildwood.  Though I like House Foods brand tofu for other dishes, House extra firm tofu is not firm enough for this recipe.

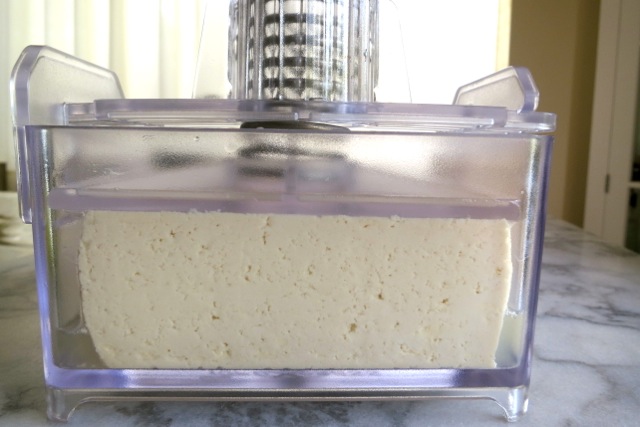
TofuXpressI use my TofuXpress all the time and highly recommend it if you bake tofu often.  In just 1/2 hour a third of a cup of water was pressed out of the tofu block.  Worth the price and no more wasting paper towels.

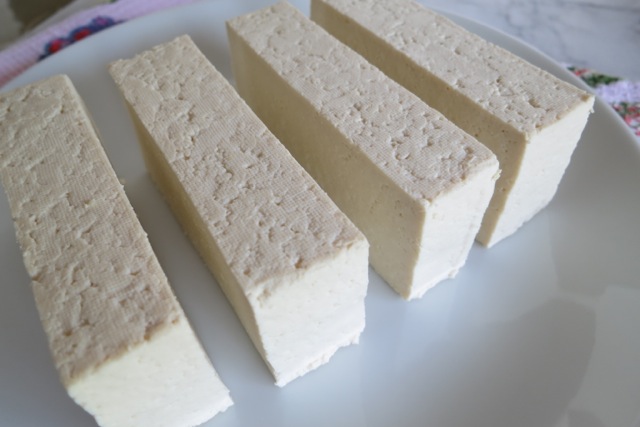
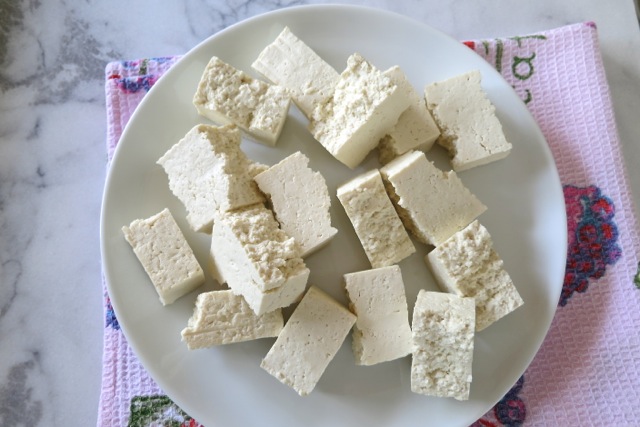
Tofu SlabsCut the tofu into 4 slabs then break each slab into 4 random pieces for a total of 16 pieces.

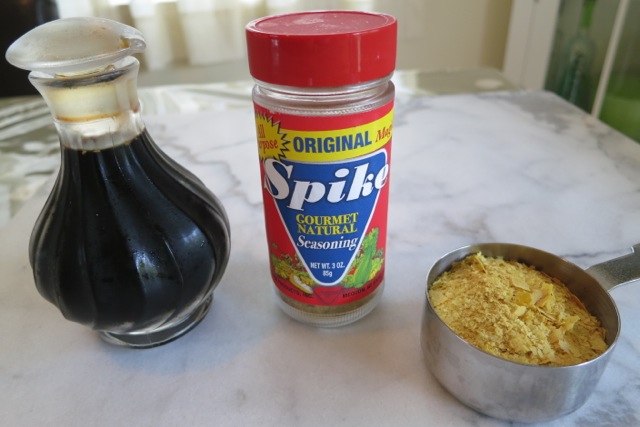
Tofu Pieces Tofu SeasoningThe other three ingredients are soy sauce, Spike seasoning and nutritional yeast.  You can find nutritional yeast in the bulk section of your local health food store.

Baked Mock Chicken Tofu 2

Baked Mock Chicken Tofu

Adapted from Down to Earth’s Mock Chicken Tofu Recipe

Serves 2 as a main course

Ingredients

1 package (14 oz) extra firm tofu such as Wildwood

olive or canola oil

1 1/2 teaspoons soy sauce, lite or regular

1 teaspoon Spike seasoning

1/4 cup – 1/3 cup nutritional yeast flakes

Note: Exact measurements are not critical for this recipe. I don’t measure the soy sauce, Spike or nutritional yeast when making this dish, however, the above measurements are typically the amounts I use.  Some prefer less of one ingredient and some prefer more.  I’m very fond of nutritional yeast so I pour it on generously.  I think it’s the key savory ingredient that makes this dish so tasty.

Preparation

Preheat oven to 350 degrees.  If using a toaster oven there’s no need to preheat.

If you have a TofuXpress press the tofu for 30 -45 minutes.  Drain water, cut tofu into four slabs and break each slab into 4 random sized pieces (total 16).

No press?  Slice the tofu into four slabs and place in a single layer on paper towels. Layer additional paper towels on top of the tofu slabs.  Place a cutting board on top of the tofu with a few books or heavy cans to help press out the water quickly. Follow the steps above, breaking slabs into random pieces.

Place the tofu on a foil lined baking pan.  Drizzle a bit of olive or canola oil over the tofu pieces and toss to coat all sides.  You won’t need much oil,  just enough so the tofu doesn’t stick to your pan.

Bake at 350 degrees for 30 minutes.

Let tofu cool for 10 minutes then transfer to a large bowl. Drizzle soy sauce over the tofu, tossing to coat all pieces.  Add the Spike seasoning and toss again. Lastly, add the nutritional yeast flakes and toss so that all of the tofu is well coated.  If you have any leftovers it will keep for a couple of days and makes for a tasty lunch served with brown rice.

Follow

Get every new post delivered to your Inbox

Join other followers: