Browsing Category

Dinner

Bread, Breakfast, Dinner, Lactose Free, Recipes, Veggies

Bacon & Cheddar Zucchini Bread

September 25, 2016

Bacon & Cheddar Zucchini Bread

Bacon and cheddar cheese are a perfect match.  This savory zucchini bread, which incorporates that perfect match, does not require any rising, kneading, or special care.  Mix all of the ingredients together and bake it in a loaf pan.  Then, wait patiently while it cools before you cut a thick slice and toast it until the edges are pleasingly crisp.  This recipe is adapted from Carolyn over at Food Gal.  The recipe comes from Katie Sullivan Morford’s new cookbook Rise & Shine. Katie uses kalamata olives and green onions but I wanted to use bacon, because…bacon!  I also used chives from the garden in place of the green onions.  As Carolyn mentions, this savory bread is not just for breakfast.  I toast slices and serve it with roasted meat or grilled chicken.  It is reminiscent of cornbread in many ways.  Serve it with a pat of butter.  Yum!

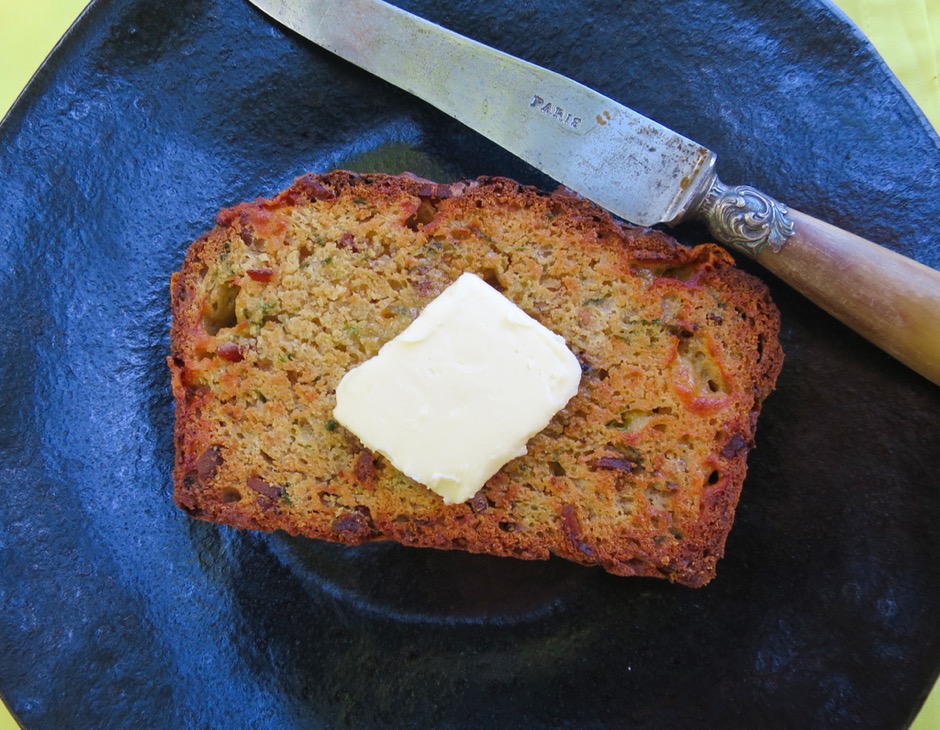
Toasted Zucchini Bread with Butter

Grated Zucchini

I haven’t grown zucchini but I hear that they are prolific producers and many home gardeners end up with more than they know what to do with.  I also read a few stories that gave me a good laugh: people will leave bags of excess zucchini in unattended cars or on strangers doorsteps. Fortunately, this recipe doesn’t require that much zucchini.

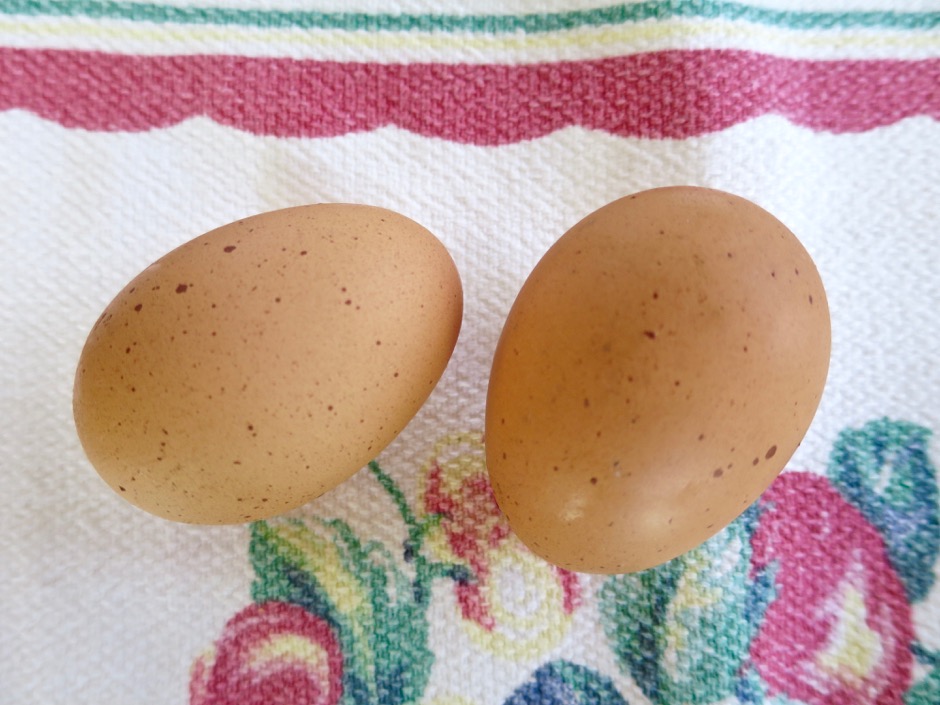
Fresh Eggs

I love the beautiful speckled brown eggs my neighbor Judy shares with us.

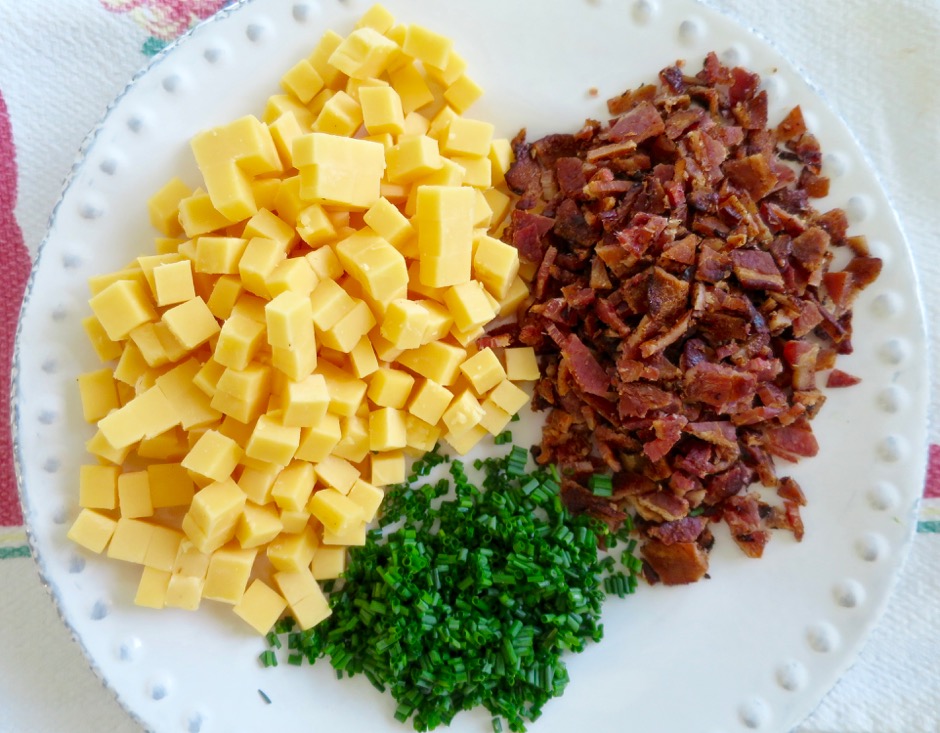
Extra Sharp Cheddar, Bacon, Chives

Use extra sharp cheddar and fairly lean bacon for the best flavor and texture.  This rustic bacon and cheddar zucchini bread turns out perfectly each time you bake it.

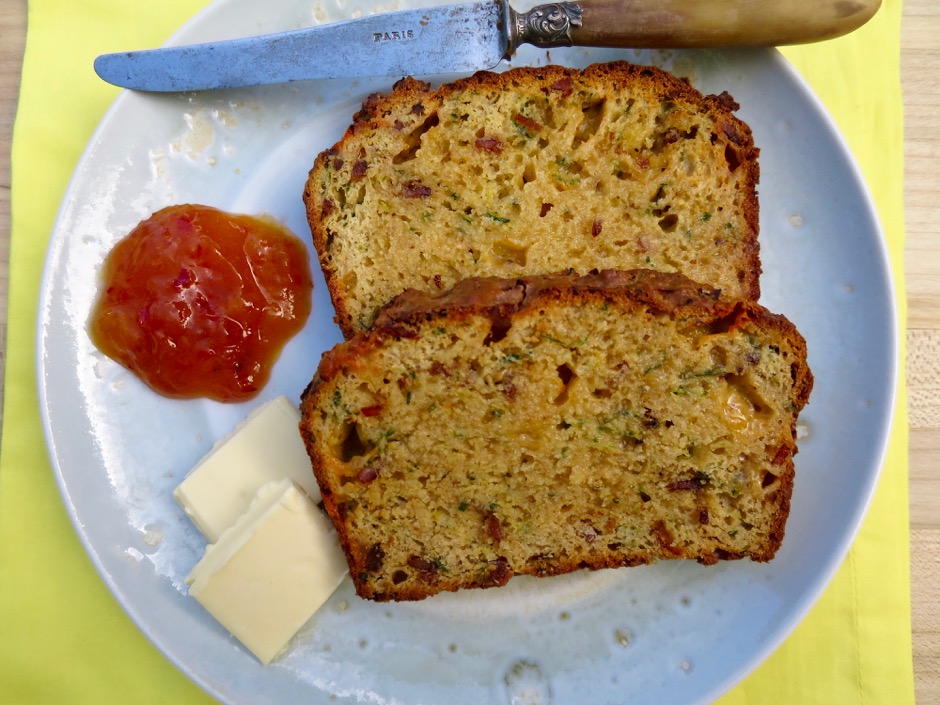
Bacon & Cheddar Zucchini Bread with Butter & Mango Pepper Jam

Bacon & Cheddar Zucchini Bread


Bacon & Cheddar Zucchini Bread
 
Adapted from Food Gal
Author:
Serves: 1 large loaf
Ingredients
  • 2 cups coarsely grated zucchini (about 2 medium zucchini)
  • 1½ teaspoons kosher salt, divided
  • 1½ cups white whole wheat flour (spooned and leveled)
  • 1 cup all-purpose flour (spooned and leveled)
  • 2 teaspoons baking powder
  • ½ teaspoon baking soda
  • ¼ teaspoon freshly ground black pepper
  • 2 large eggs
  • ⅓ cup extra virgin olive oil
  • ½ cup plain lactose free yogurt (Green Valley lactose free or regular yogurt)
  • ½ cup lactose free milk (or regular milk)
  • 2 tablespoons chopped chives
  • ½ cup chopped cooked bacon
  • 6 ounces extra sharp cheddar cheese, cut into ⅓-inch cubes
Preparation
  1. Preheat oven to 350 degrees. Generously grease a 9x5-inch loaf pan with oil or nonstick cooking spray and set aside.
  2. Place grated zucchini into a colander set in the sink or over a bowl. Sprinkle with 1 teaspoon of the salt and toss together. Leave zucchini in the colander to allow the salt to draw out some of the liquid.
  3. Meanwhile, in a large bowl, whisk together the white whole wheat and all-purpose flour along with the baking powder, baking soda, black pepper, and remaining ½ teaspoon salt.
  4. In a medium bowl, whisk together the eggs, olive oil, yogurt, and milk until combined.
  5. Squeeze out the liquid from the zucchini, removing as much of the moisture as possible, The zucchini will remain moist but should not be wet. Add the zucchini to the egg mixture along with the scallions and bacon. Mix to combine.
  6. Add the egg mixture to the flour mixture and stir gently with a spoon or rubber spatula, just until the streaks of flour disappear. Add the cheese and stir just enough to distribute it throughout the dough.
  7. Transfer dough to the prepared loaf pan and using your spatula, smooth the top. The dough will be rough and craggy.
  8. Bake for about 50 - 55 minutes, or until the loaf is golden and a wooden skewer inserted into the center comes out clean. Transfer pan to a cooling rack for 15 minutes. Run a knife around the edge of the bread, tip the pan over, and gently dislodge the bread onto the cooling rack. Allow bread to cool for 30 minutes or so, before serving.


Chicken, Dinner, Lactose Free, Recipes

Chicken Adobo

September 14, 2016

Chicken Adobo

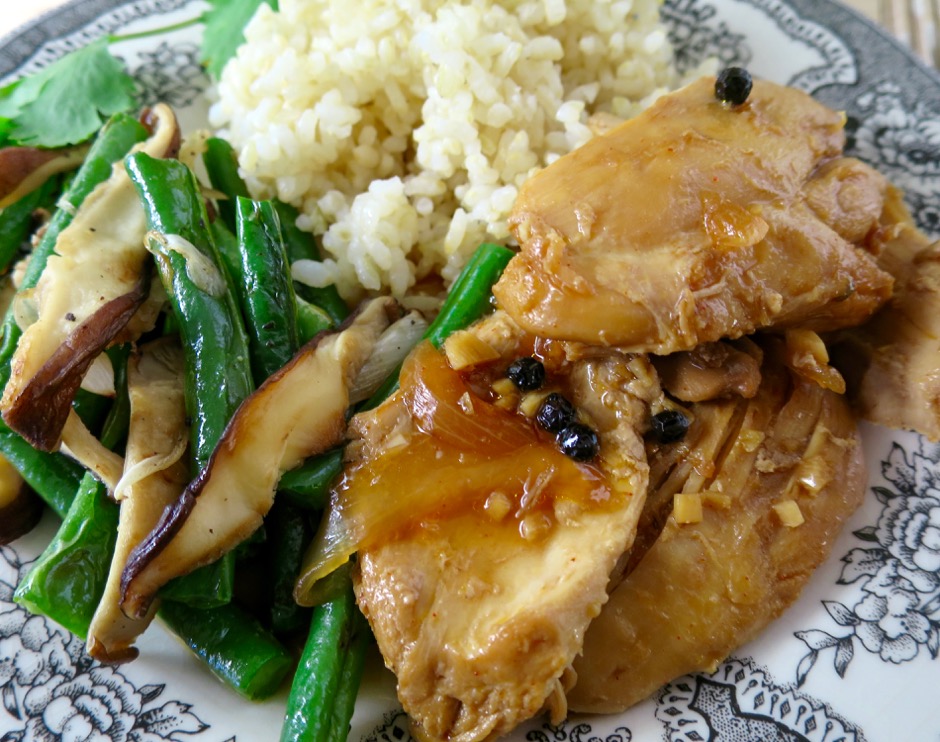
Vinegar of all types are a staple in my pantry.  They all have their place in recipes whether it may be for a dressing, poached eggs, pickles, or in this case, Chicken Adobo (the Filipino version which is popular here in Hawaii).  The combination of vinegar, soy sauce, peppercorns, and garlic are sublime. I saved my mom’s recipe card for this dish and noticed she added paprika to the sauce. She didn’t note down how much to use but 1/4 teaspoon seems to be about right. Oh, and my mom also mentioned that she added chili water or “a piece of pepper” to the sauce so I added a few of our homemade nacho rings to add a bit of zing to the sauce.  What a delight!

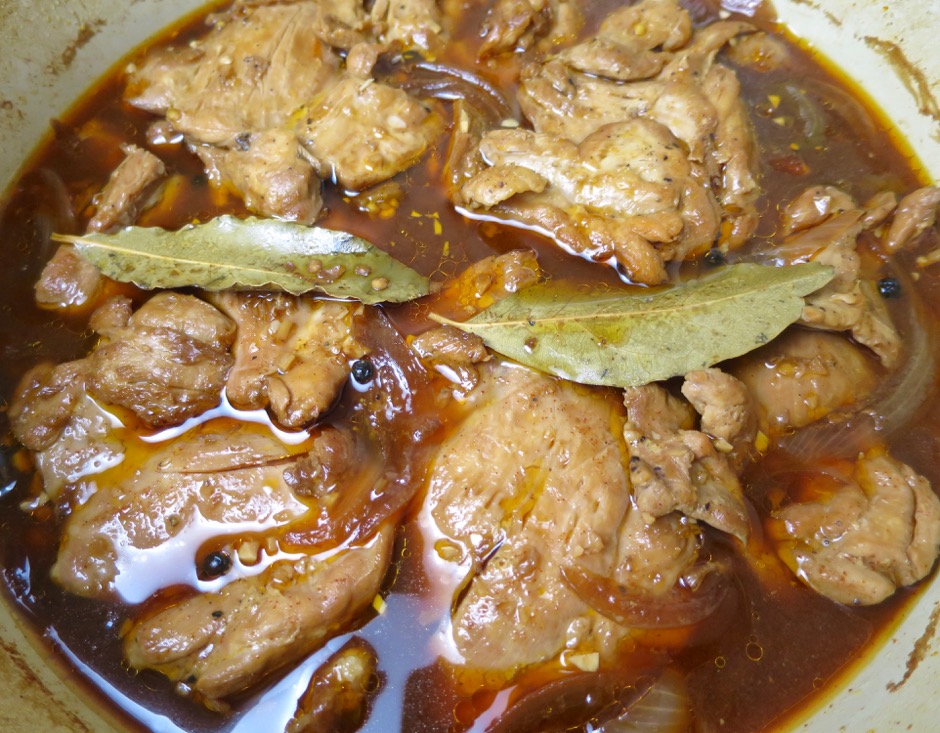
Chicken Adobo

I use boneless and skinless chicken thighs though bone-in chicken thighs would work well too.  Add another 5 – 10 minutes cooking time if using bone-in chicken thighs.

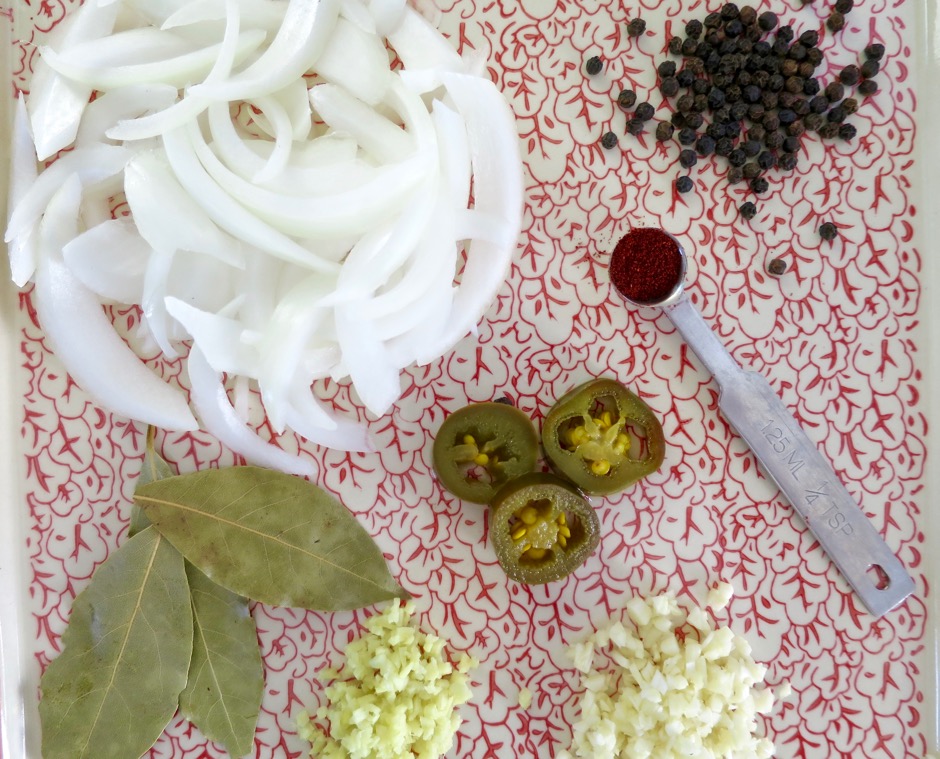
Chicken Adobo Seasonings

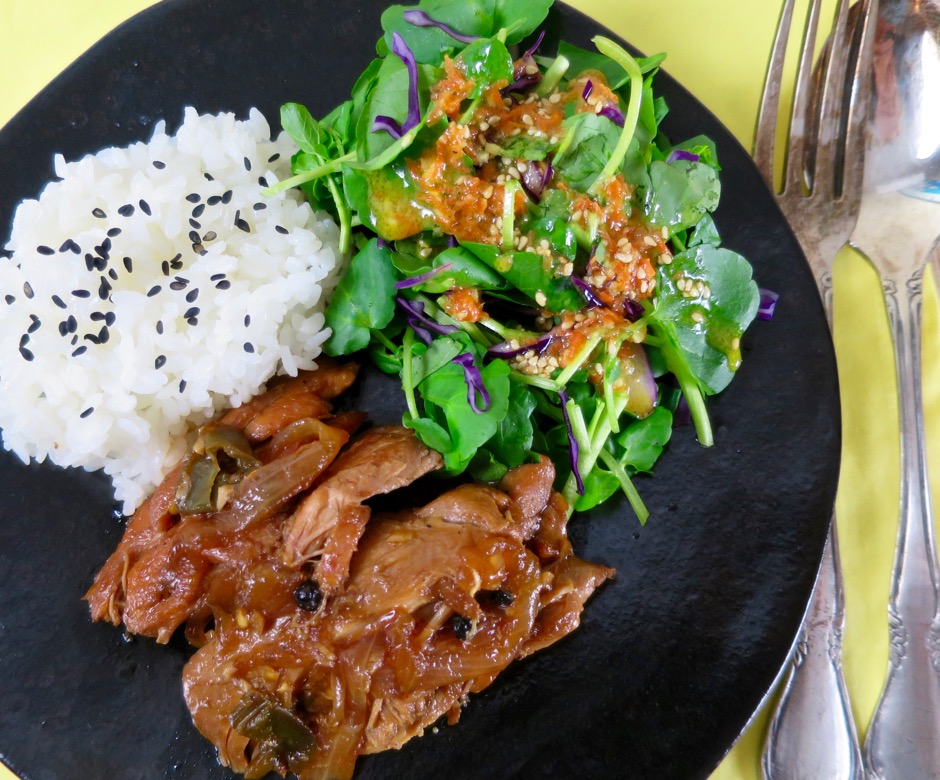
I’ve loved chicken adobo from my childhood in Honolulu. It is easy on the budget and so delicious.  Plus, everything goes into one pot!

Chicken Adobo

Chicken Adobo
 
Author:
Serves: 4 servings
Ingredients
  • 2½ pounds boneless skinless chicken thighs trimmed well
  • ¾ cup apple cider vinegar
  • ⅓ cup + 2 tablespoons water
  • ⅓ cup soy sauce (Kikkoman recommended)
  • 1 teaspoon packed brown sugar
  • ¼ teaspoon paprika
  • 3 ounces sliced onion
  • 1 tablespoon minced garlic
  • 2 teaspoons minced ginger
  • 2 nacho rings or hot pepper rings (optional)
  • 2 bay leaves
  • 1½ teaspoons whole black peppercorns
Preparation
  1. Preheat oven to 325 degrees.
  2. Trim any visible fat from chicken.
  3. Combine vinegar, water, soy sauce, brown sugar, and paprika in a medium bowl or measuring cup.
  4. In a medium sized Dutch oven or other oven-proof pot with a lid, brown half of the chicken pieces in a bit of canola oil over medium - medium-high heat. Remove chicken to a plate and brown the rest of the chicken. Once all of the chicken has been browned, return it to the pot. Add the vinegar mixture, onion, garlic, ginger, nacho rings if using, bay leaves and black peppercorns. Give the sauce a stir and bring to a boil over medium-high heat. Cover the pot and transfer to the oven. Set your timer for 50 minutes.
  5. Remove the pot from the oven and let chicken adobo rest for 5 minutes. Serve chicken with steamed white or brown rice and your choice of vegetables. Bok choy, green beans with shiitake mushrooms, snap peas or broccoli go well with this meal. Feel free to drizzle some of the sauce over your chicken and rice.


Beef, Dinner, Mexican, Recipes

Dry-Rubbed Ribeye Steak

September 2, 2016

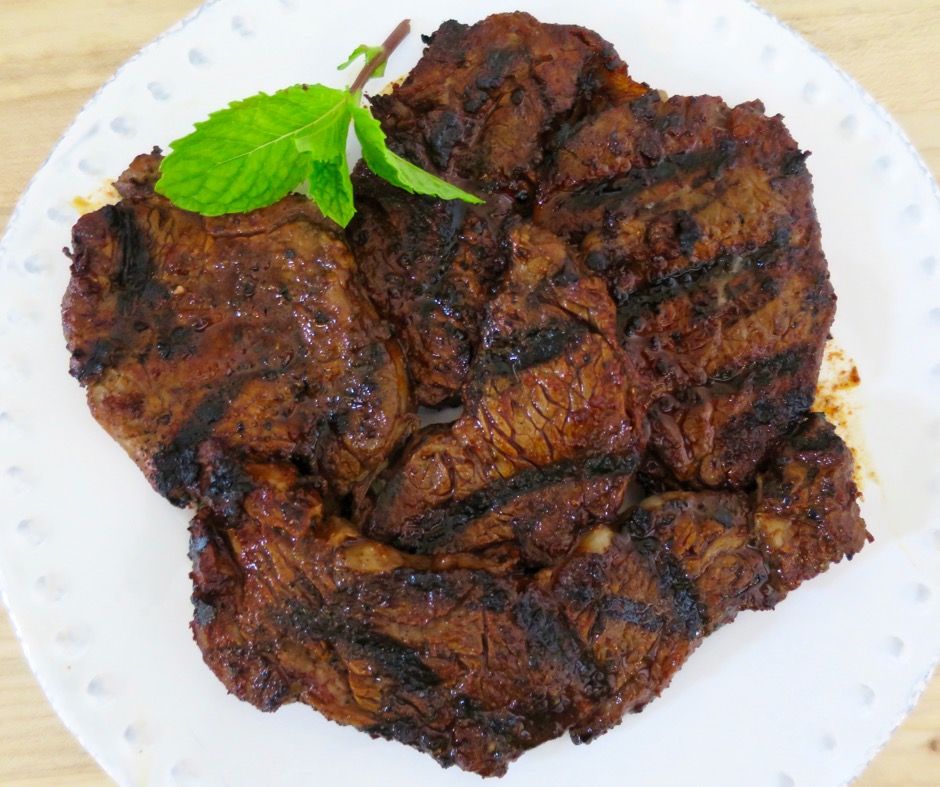
Dry-Rubbed Grilled Ribeye

Grilling a steak always makes for a quick delicious meal, especially when that steak is liberally coated with a flavorful mixture of spices!  This particular dry rub is adapted from Bon Appetit magazine.  We used the dry rub on skirt and ribeye steaks.  Both were delicious, but there’s something about the tenderness and flavor of a ribeye that is truly satisfying.

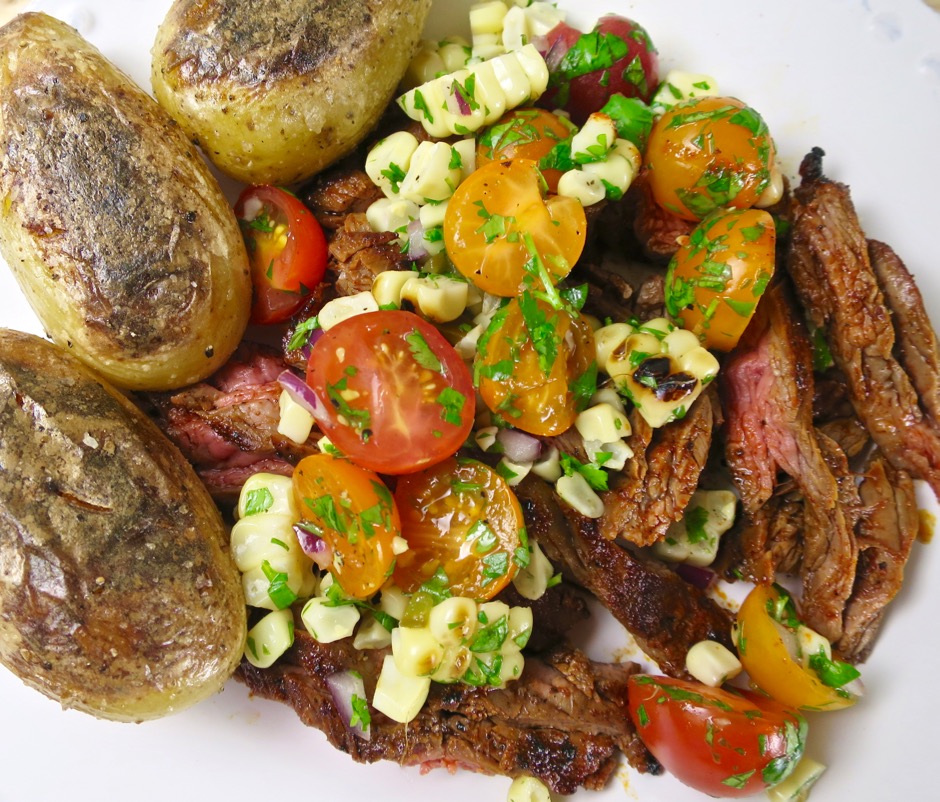
Dry-Rubbed Grilled Ribeye with Corn Salsa

Serve the steak thinly sliced with grilled corn salsa and roasted potatoes.  This is a wonderful meal to make for a small group of friends.  You can prepare the salsa and potatoes in advance, grill the steak and serve everything on a big platter.

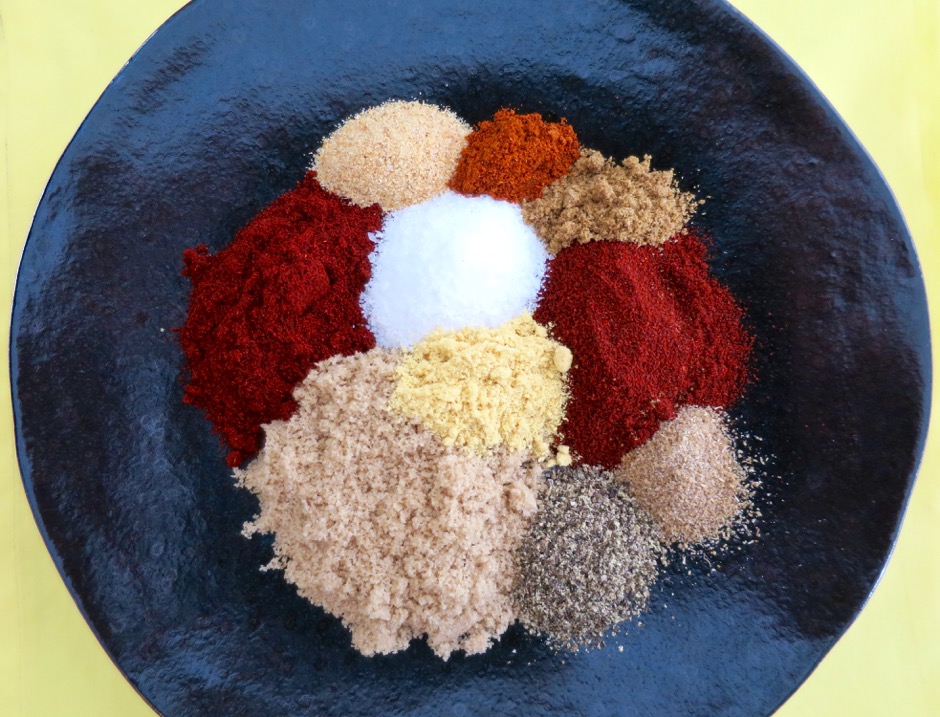
Dry Rub Spices

If you like your steak quite spicy, use the 1 teaspoon of cayenne called for in the original recipe. I used a half teaspoon instead, and it was perfect since I like to drizzle our homemade hot sauce over my tacos.

Dry-Rubbed Ribeye

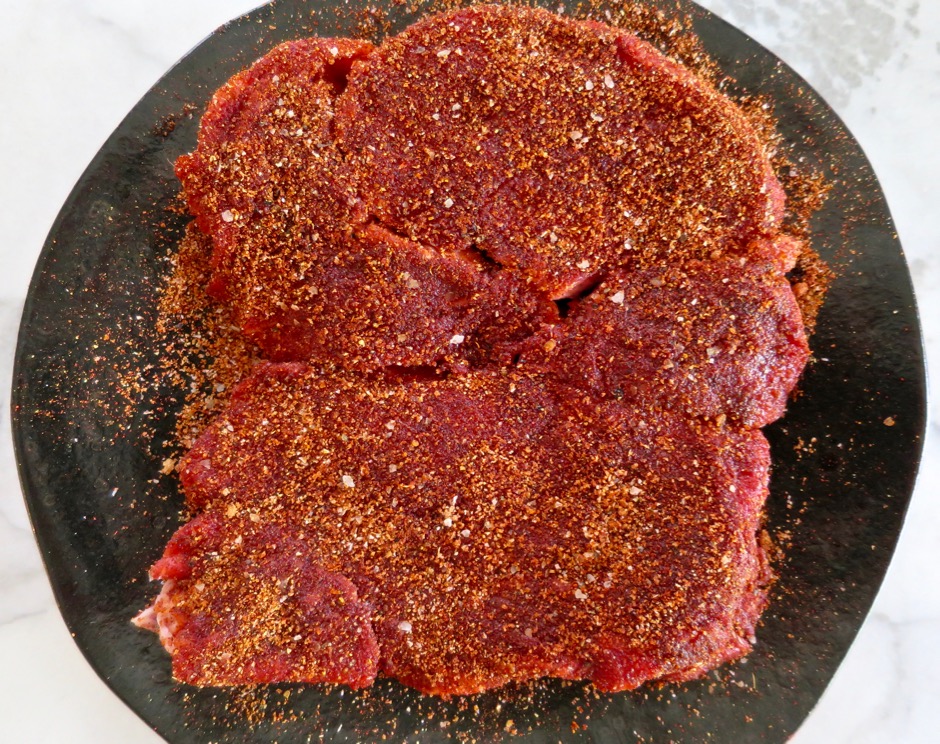
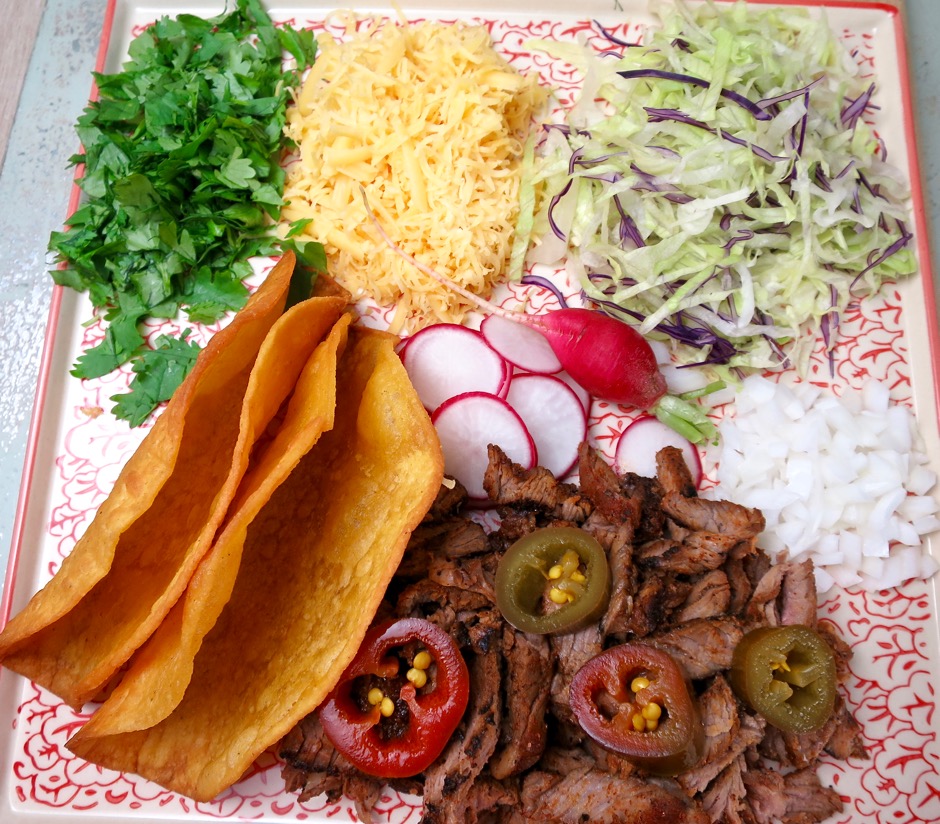
We butterflied two center-cut ribeye steaks then liberally coated each side with the dry rub and a drizzle of canola oil to help the dry rub adhere better.  One of our favorite ways to serve the grilled steak is in crispy tacos (a tasty version of carne asada).

Dry-Rubbed Grilled Ribeye Tacos


Dry-Rubbed Ribeye Steak
 
Adapted from Bon Appetit magazine
Author:
Serves: 4
Ingredients
  • 2 tablespoons light brown sugar
  • 1 tablespoon hatch mild chile powder (or ancho chile powder)
  • 1 tablespoon paprika
  • 2 teaspoons kosher salt
  • 1 teaspoon freshly ground black pepper
  • ½ teaspoon cayenne pepper
  • 1 teaspoon granulated garlic
  • 1 teaspoon English mustard powder
  • ½ teaspoon ground coriander
  • ½ teaspoon ground cumin
  • 1½ pounds ribeye steak (butterflied to make thinner steaks)
Preparation
  1. Combine all dry rub ingredients in a small bowl.
  2. Coat steaks with all of the dry rub. Drizzle a little canola oil over the steaks to help the rub adhere.
  3. Grill steaks to your desired doneness. Serve steaks with roasted potatoes and grilled corn salsa or as a filling in crispy tacos.


Chicken, Dinner, Lactose Free, Mexican, Pressure Cooker, Recipes

Pressure Cooker Chicken Chile Verde

July 30, 2016

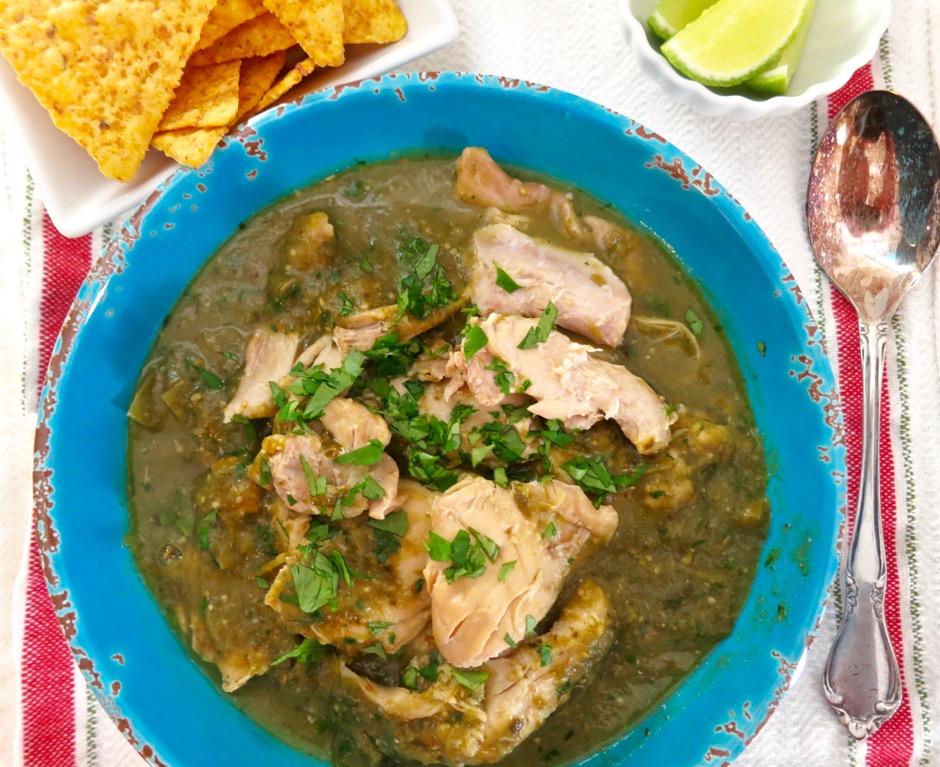
Pressure Cooker Chicken Chile Verde

We bought a pressure cooker several years ago and each time I use it, I appreciate its usefulness more and more. Some say that with pressure cooking there will be less flavor because of the shortened cooking time involved, but the opposite is true.  Your food actually maintains flavor and nutrients when cooking in the closed environment of a pressure cooker unlike with other longer stove top cooking techniques.  Besides being able to serve fork tender meat such as beef stew in just 25 minutes, pressure cooking keeps the kitchen cool and uses less energy.  Chile verde is one of our favorite dishes.  So Serious Eats, Kenji Lopez-Alt’s version of pressure cooker chicken chile verde was definitely a must try recipe.

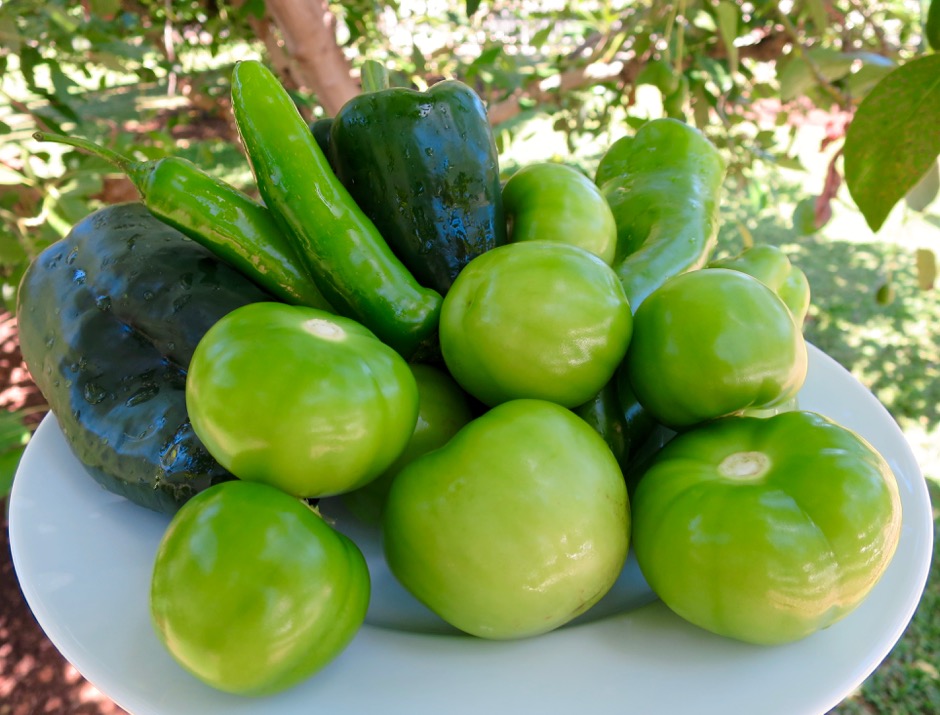
Chiles & Tomatillos

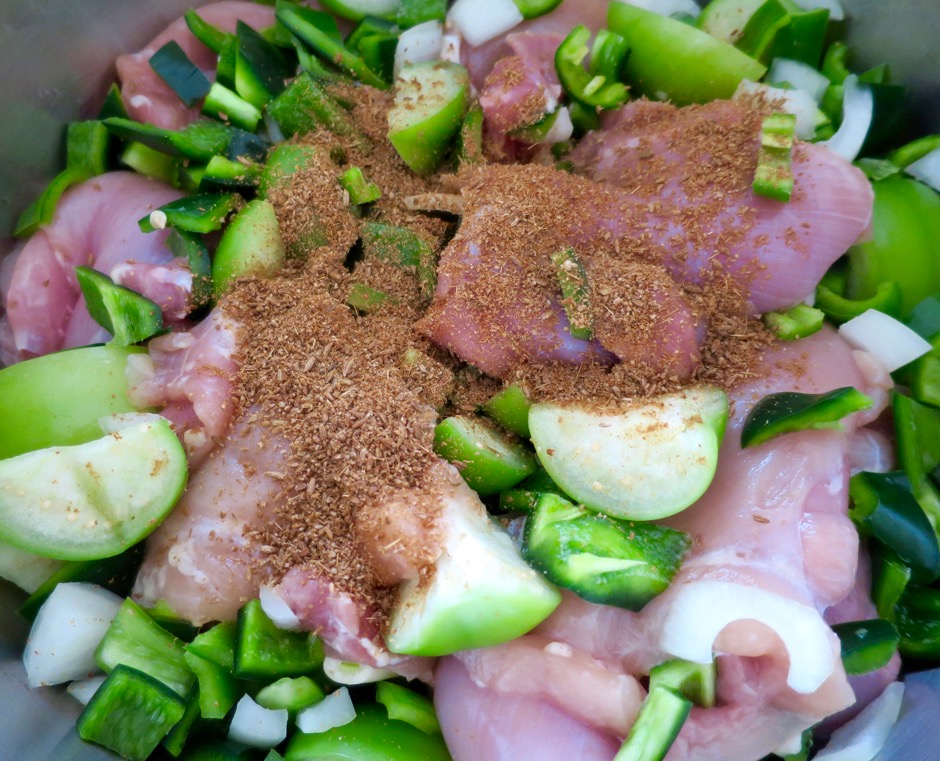
Beautiful chiles, tomatillos, onion and garlic go into the pot along with the chicken.  It couldn’t be easier.  It may seem odd that there is no liquid in the recipe, but under pressure all the liquid necessary comes from the tomatillos, peppers, onions and garlic.

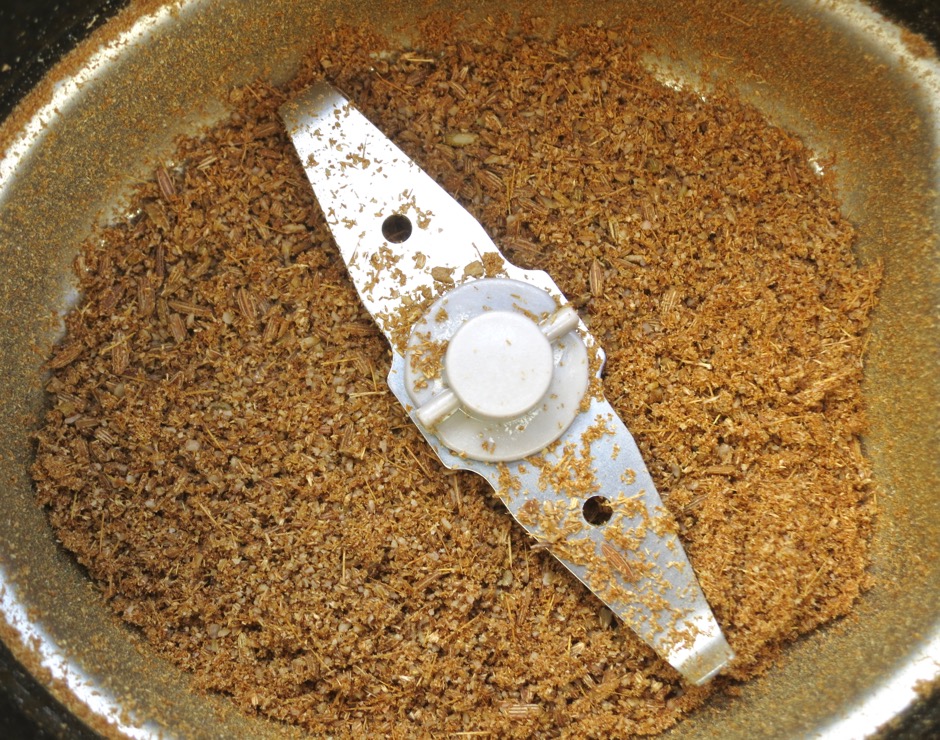
Toasted & Ground Cumin Seeds

You’ll get the freshest flavor if you toast and grind cumin seeds, but in a pinch you can use ground cumin.

Pressure Cooker Chicken Chile Verde Ingredients

All the ingredients go into the pressure cooker.  Seal the lid and in no time at all you will have the most delicious chicken chile verde.

Pressure Cooker Chicken Chile Verde Tacos

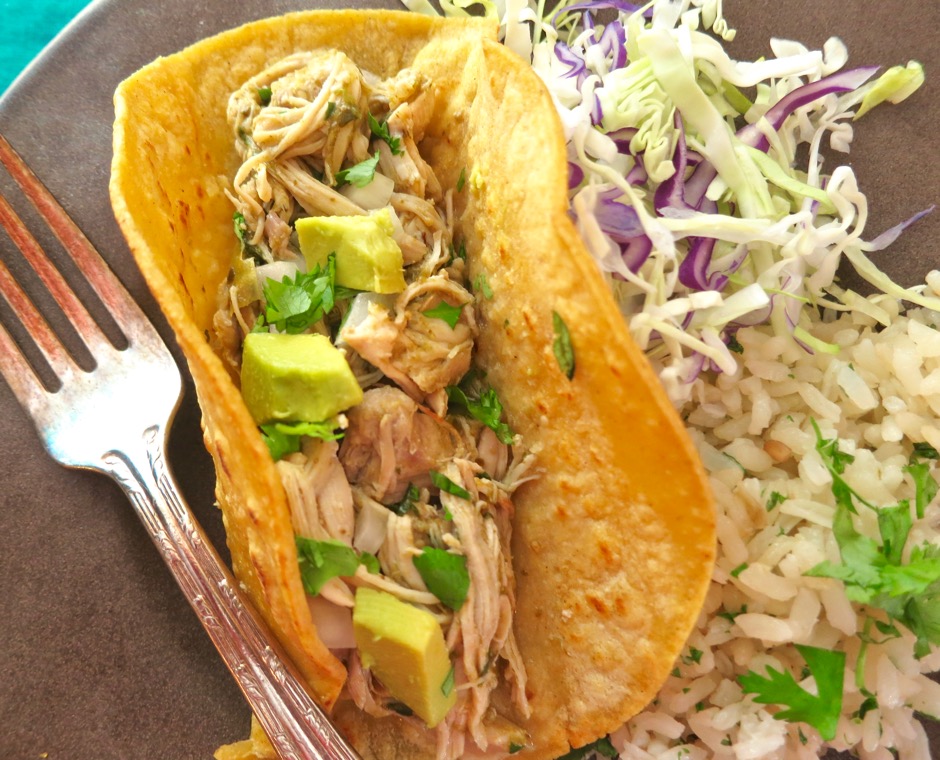
The chicken becomes so tender, it pulls apart effortlessly and makes a great filling for tacos or burritos.

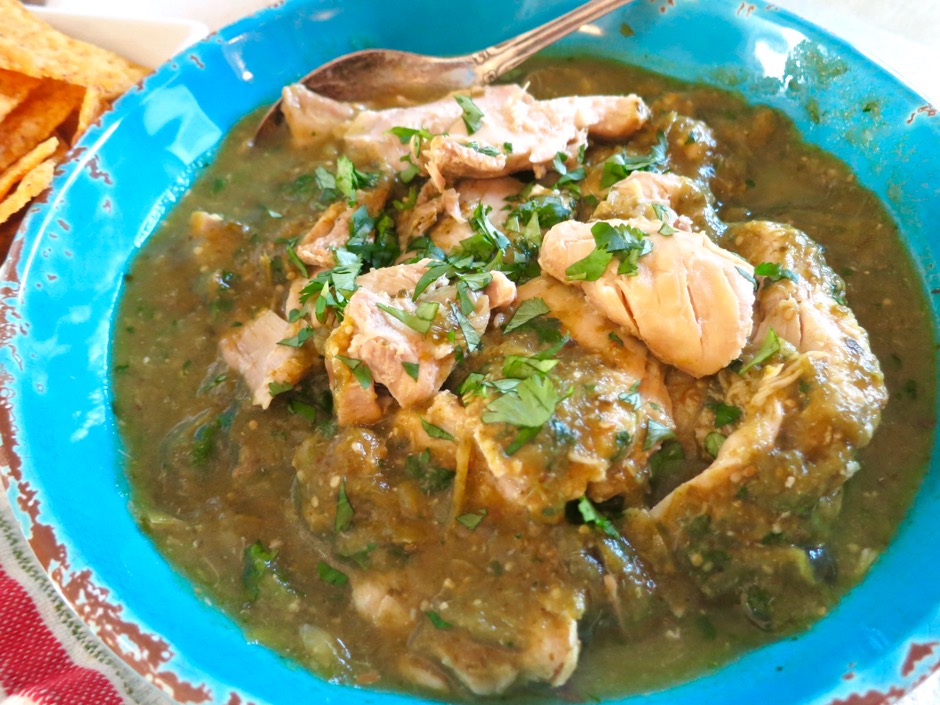
Pressure Cooker Chicken Chile Verde

Pressure Cooker Chicken Chile Verde
 
Recipe adapted from Kenji Lopez-Alt (Serious Eats)
Author:
Cuisine: Mexican
Serves: 6
Ingredients
  • 3 pounds boneless, skinless chicken thighs, trimmed well
  • 1 pound tomatillos, husks discarded, rinsed and quartered
  • 1 pound poblano peppers, roughly chopped, seeds and stems discarded
  • 6 ounces Anaheim peppers, roughly chopped, seeds and stems discarded
  • 2 Serrano or jalapeño chiles, roughly chopped, stems discarded
  • 1 medium onion - about 10 ounces, roughly chopped
  • 6 medium garlic cloves, peeled
  • 1 tablespoon whole cumin seeds, toasted and ground
  • 2½ teaspoons kosher salt, divided
  • ½ cup packed cilantro + more for garnish
  • 2 teaspoons fish sauce
  • corn tortillas for serving
Preparation
  1. Combine chicken, tomatillos, poblano, Anaheim peppers, Serrano chiles, onion, garlic, cumin and 1½ teaspoons kosher salt in your pressure cooker. Heat over medium-high heat until gently sizzling then seal pressure cooker. Once the pressure cooker comes up to pressure, lower the heat to a low burner setting so that it maintains pressure without exceeding it. Cook for 20 minutes. Turn off the heat and use the quick pressure release method either by pressing the button on the handle or by running cold water over the lid in the sink. Once all pressure has been released it is safe to open the lid.
  2. Using tongs, transfer chicken to a bowl. Add cilantro and fish sauce to remaining contents of pressure cooker. Blend with an immersion blender and season with additional 1 teaspoon kosher salt to taste (I prefer to keep the sauce a bit on the chunkier side).
  3. Return chicken to sauce and coarsely shred if desired. Serve chicken over rice, in tacos or burritos.


Dinner, Fish, Lactose Free, Recipes, Sandwiches

Grilled Tuna Burgers

July 3, 2016

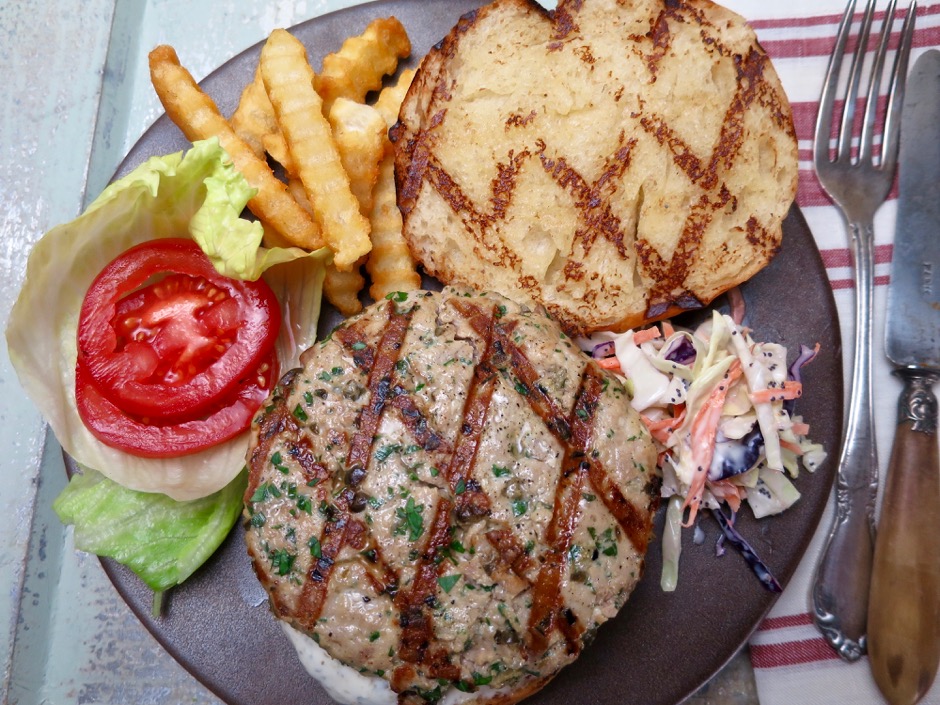
Grilled Tuna Burger

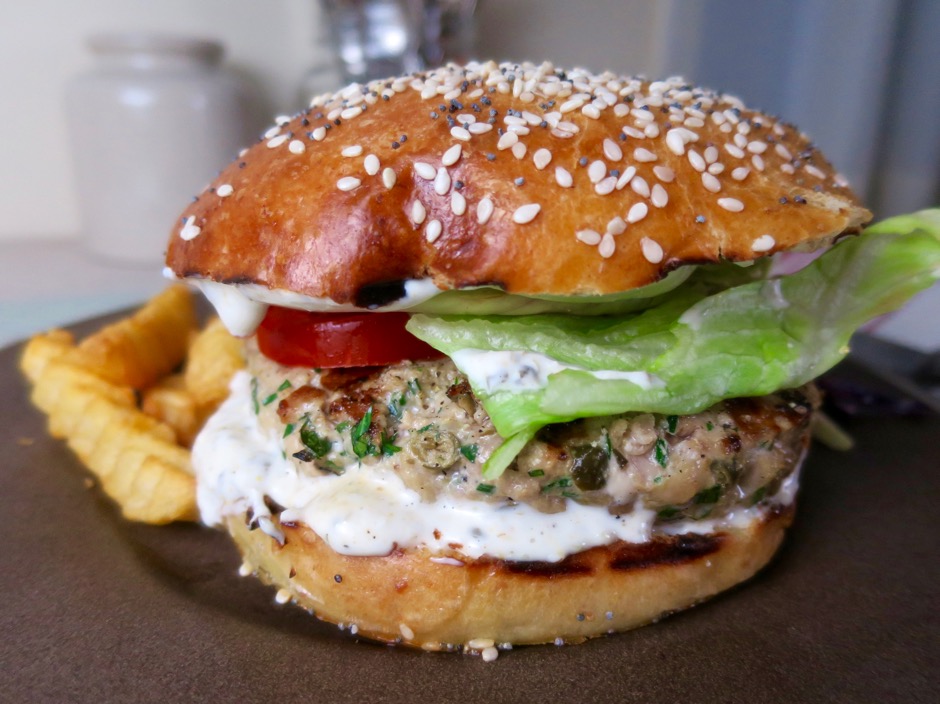
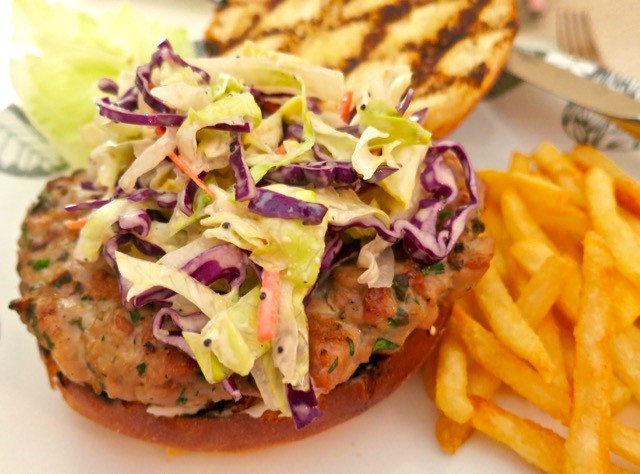
Tuna (ahi) tartare  and poke in all its variations, are all the rage.  There are also various versions of tuna burgers which incorporate many of the same ingredients as these popular dishes.  This recipe, however,  pays homage to the traditional steak tartare.  It incorporates many of the classic ingredients that are found in steak tartare such as Dijon mustard, capers, shallots and chives.  We love to grill these tasty tuna burgers and serve them on homemade brioche buns with Ina Garten’s tartar sauce.

Fresh Ahi (tuna)

Only very fresh fish makes its way into our kitchen. I always ask if the fish was cut the same morning, if not, I look elsewhere.  Fish can be kept for a few days in the refrigerator and be just fine, but I favor fish that doesn’t sit around for very long.  One of the most unpleasant things I can think of is opening up a package of smelly fish.  So try to find the freshest ahi (tuna) that you can, even if it means taking a trip to another store.

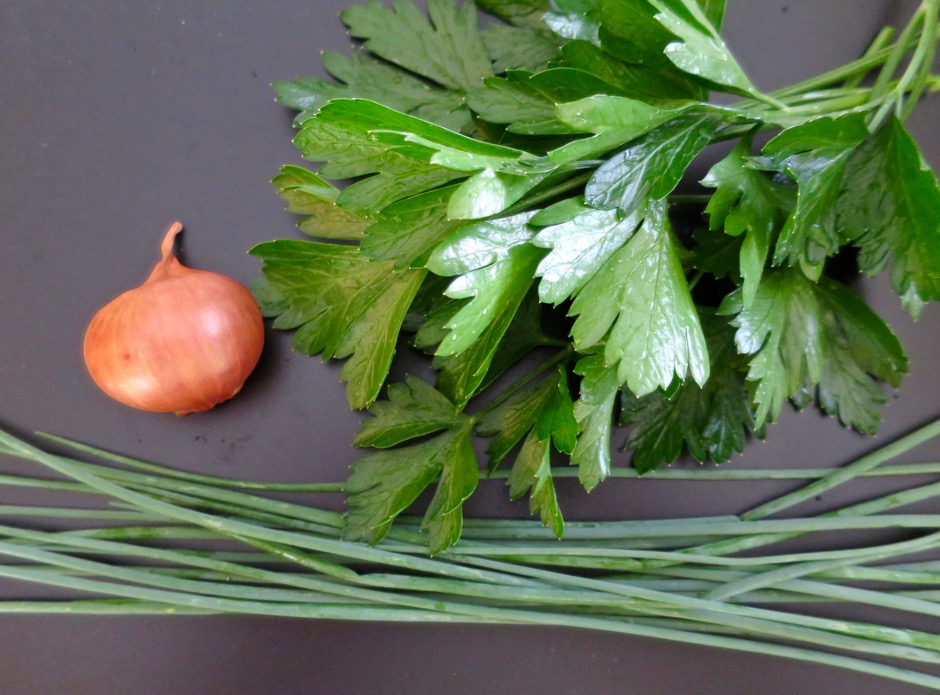
Shallot, Parsley, Chives

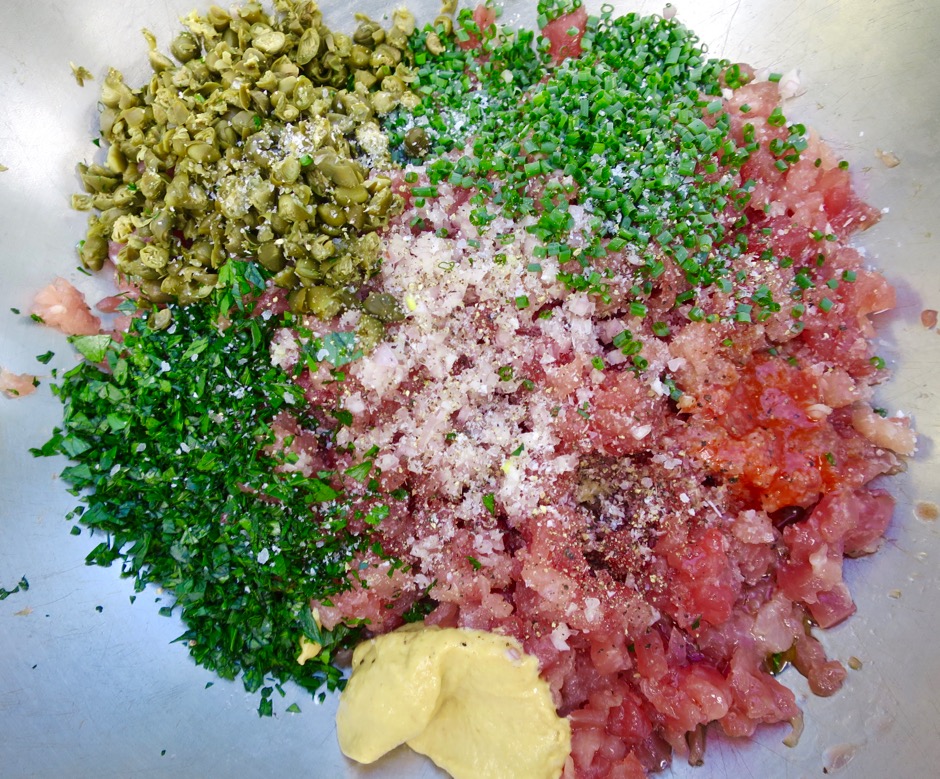
Tuna Burger Ingredients

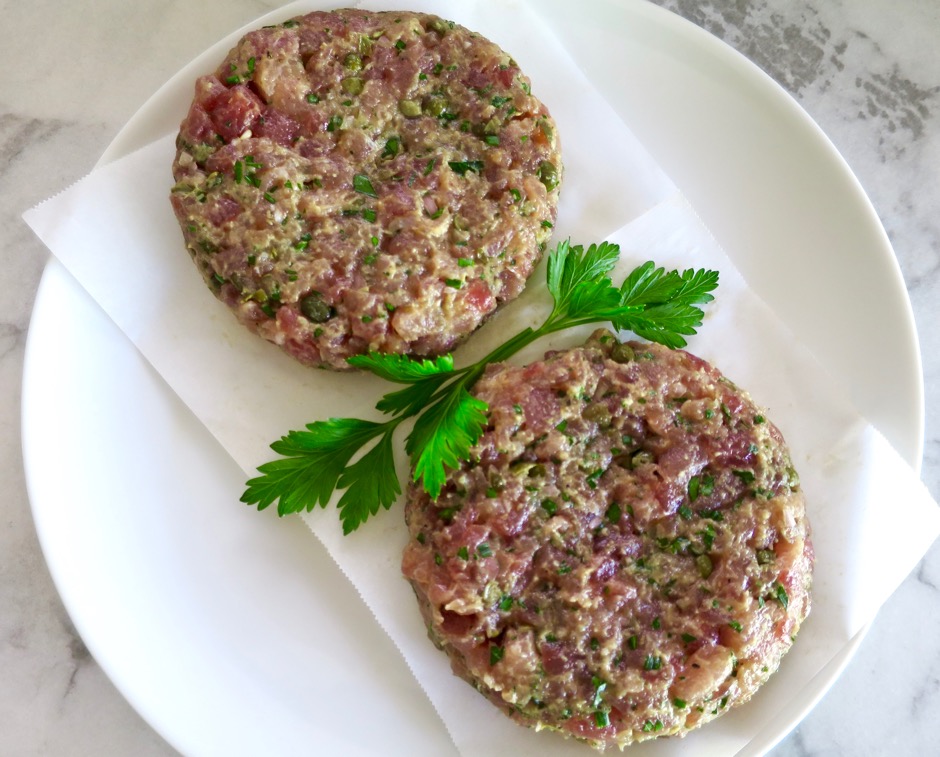
All of the ingredients are mixed up together in a large bowl, then formed into patties.  You can do this a few hours in advance which will help to firm up the patties before you grill them. Place the patties on individual pieces of parchment paper, cover loosely and store them in the refrigerator.

Tuna Burger Patties

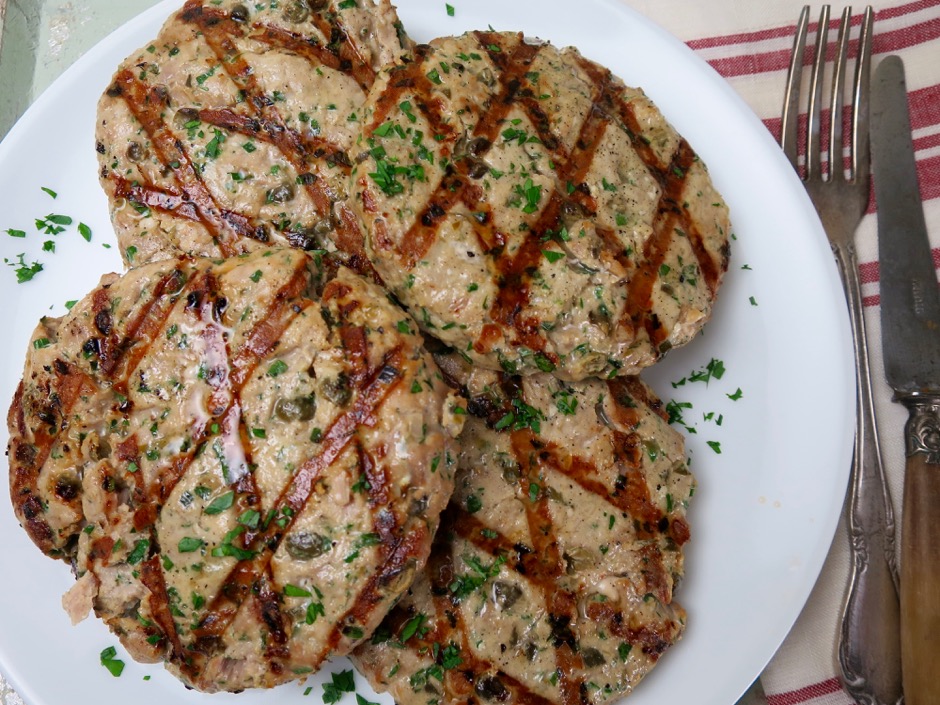
Grilled Tuna Burgers

We ate two of the fish burgers for dinner, and the other two for lunch the following day.  Wrapped in foil and placed in the toaster oven to warm up a bit, they were just as good as they were on the first day.

Grilled Tuna Burger

Grilled Tuna Burgers
 
Adapted from Eating Well magazine
Author:
Serves: 4
Ingredients
  • 1¼ pound fresh tuna (ahi) finely chopped
  • 1 heaping tablespoon finely chopped shallot
  • ¼ cup capers, rinsed, drained, and coarsely chopped
  • ¼ cup finely chopped parsley
  • 1½ tablespoons finely chopped chives
  • 1 tablespoon extra virgin olive oil
  • 1 tablespoon Dijon mustard
  • 1 teaspoon red wine vinegar
  • 1 teaspoon Worcestershire
  • ½ teaspoon hot sauce, such as Frank's
  • ¼ teaspoon kosher salt
  • ¼ teaspoon freshly ground pepper
  • toasted buns, sliced onion and tomato, crisp lettuce, tartar sauce or mayonnaise for serving
Preparation
  1. Finely chop the tuna. Place tuna in a large bowl. Add shallot, capers, parsley, chives, olive oil, mustard, vinegar, Worcestershire, hot sauce. salt and pepper. Mix gently until combined.
  2. Divide tuna mixture into four even servings (about 6 ounces each) and form into patties.
  3. Grill tuna burgers over medium high heat for about 4 minutes on the first side so the patties set. Flip and cook 3 -4 minutes on the second side or until they are cooked to your desired doneness.

Appetizers, Dinner, Fish, Japanese, Lactose Free, Recipes

Tuna Tartare with Avocado & Radish

June 17, 2016

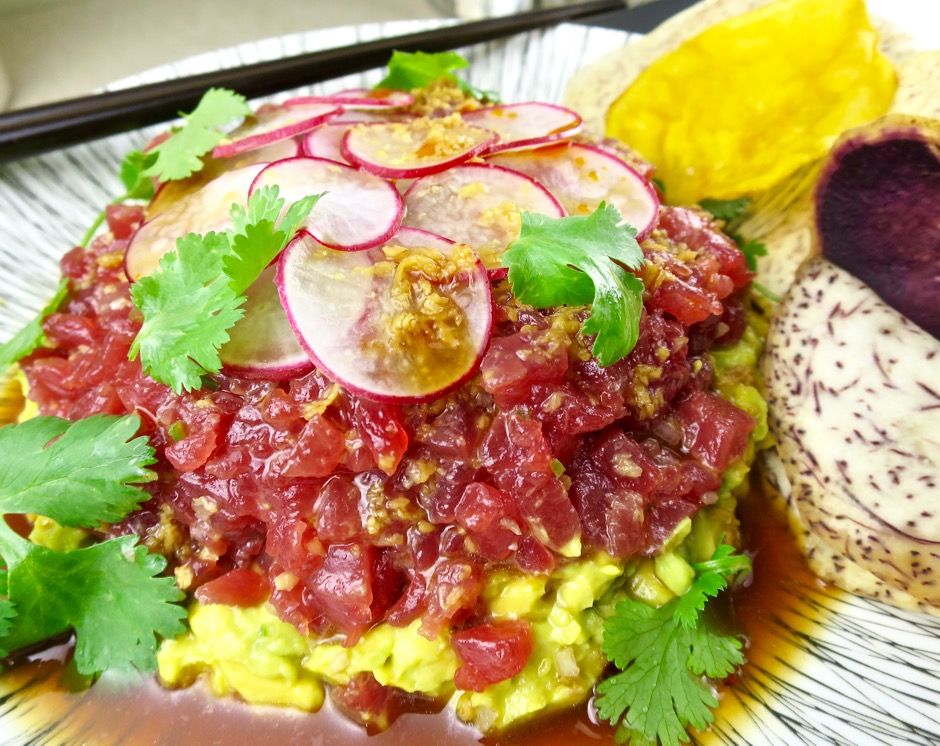
Tuna Tartare with Avocado & Radish

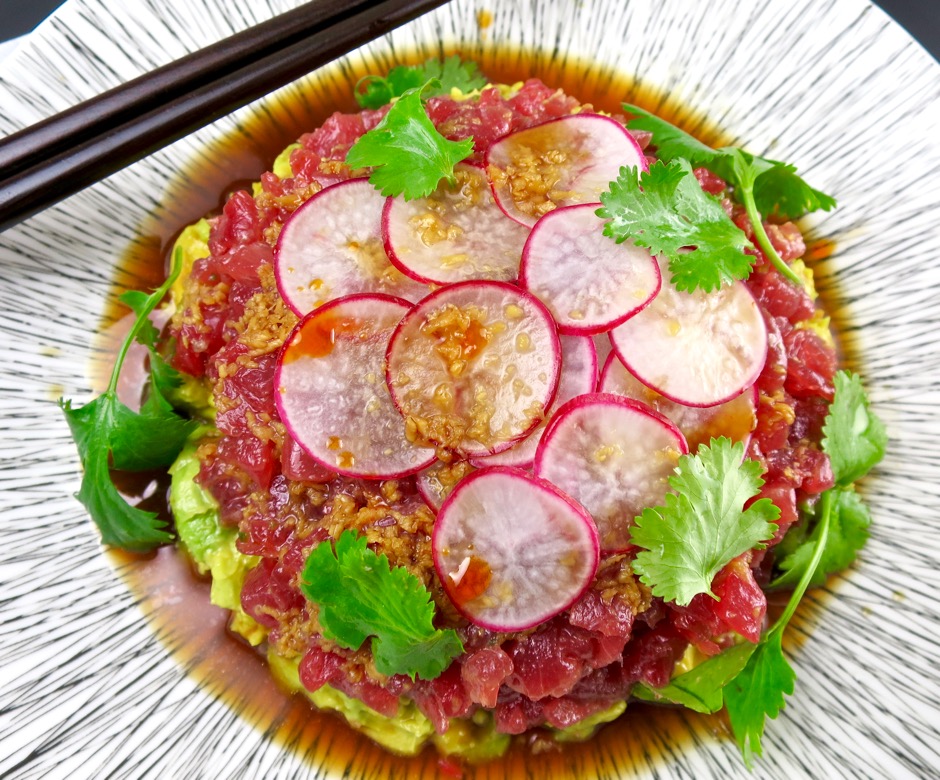
Over the years, we have enjoyed many different versions of tuna tartare.  The best have been at favorite restaurants (those from Plouf in San Francisco and BLT in Honolulu come to mind).  However, with this recipe, we are making a version at home which rivals or even surpasses our previous favorites.  It’s hard not to love this tuna tartare.  There’s something about the rich and creamy avocado, silky fish, and delightful ponzu-like dressing.  It all goes together so very well.  And, it’s really the perfect summer meal for a warm day when cooking over the stove or turning on the oven just seems out of the question.  This dish relies on using the best quality sashimi grade tuna. Fresh, well chilled, and cut just this morning type-of-tuna from a reliable source is what you are looking for.  I can’t wait to make it again.

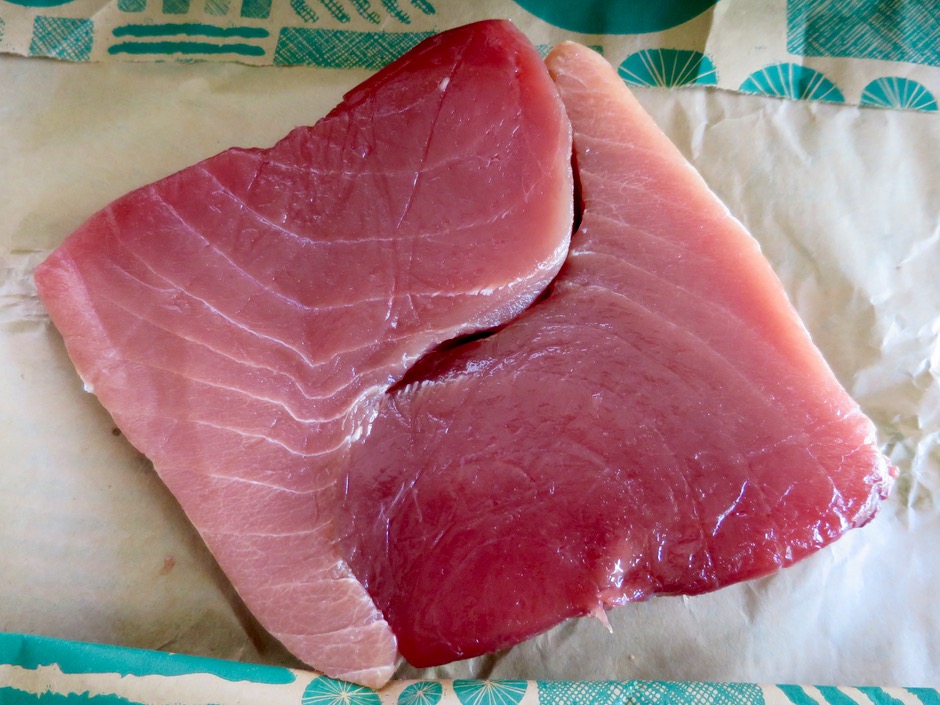
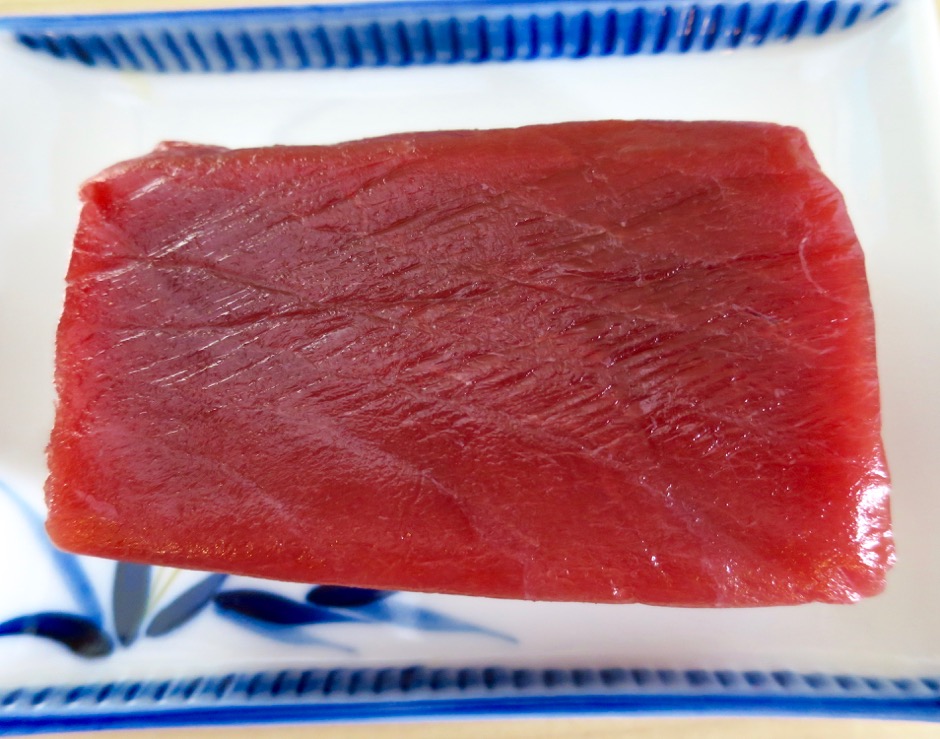
Sashimi Grade Ahi (yellowfin tuna)

Though I usually pay a dear price for the tuna at Whole Foods, I find the quality to be superb.  I always ask the staff at the counter whether the fish was cut that morning.  If it has been sitting around for more than a day, I skip it, and try again the following week. I find it most satisfying when the fish is very well chilled before serving.  Keep the fish in the refrigerator until you are ready to plate and serve the tartare.
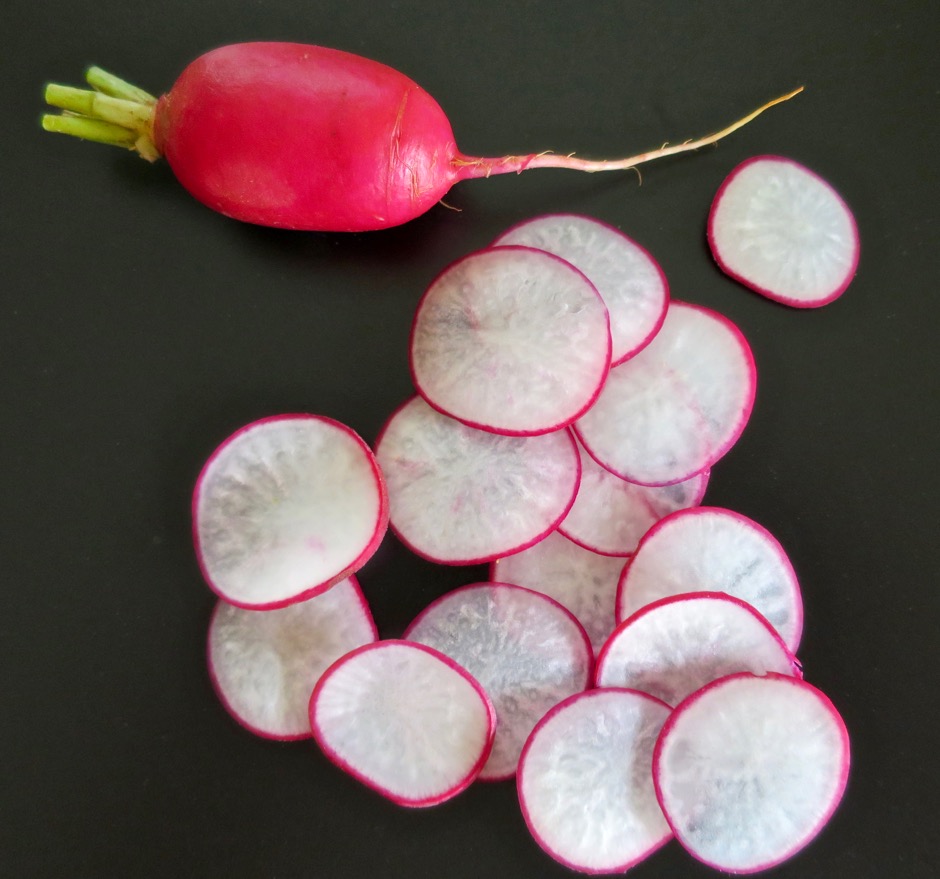
Radish

I didn’t eat radishes when I was a child, except for the long and slender daikon variety that is commonly used to make Japanese pickled takuan.  These days I enjoy these pretty red radishes in salads as well as in this ahi tartare preparation.  The secret is to slice them ever so thinly and soak them in an ice water bath for a half hour to really crisp them up.

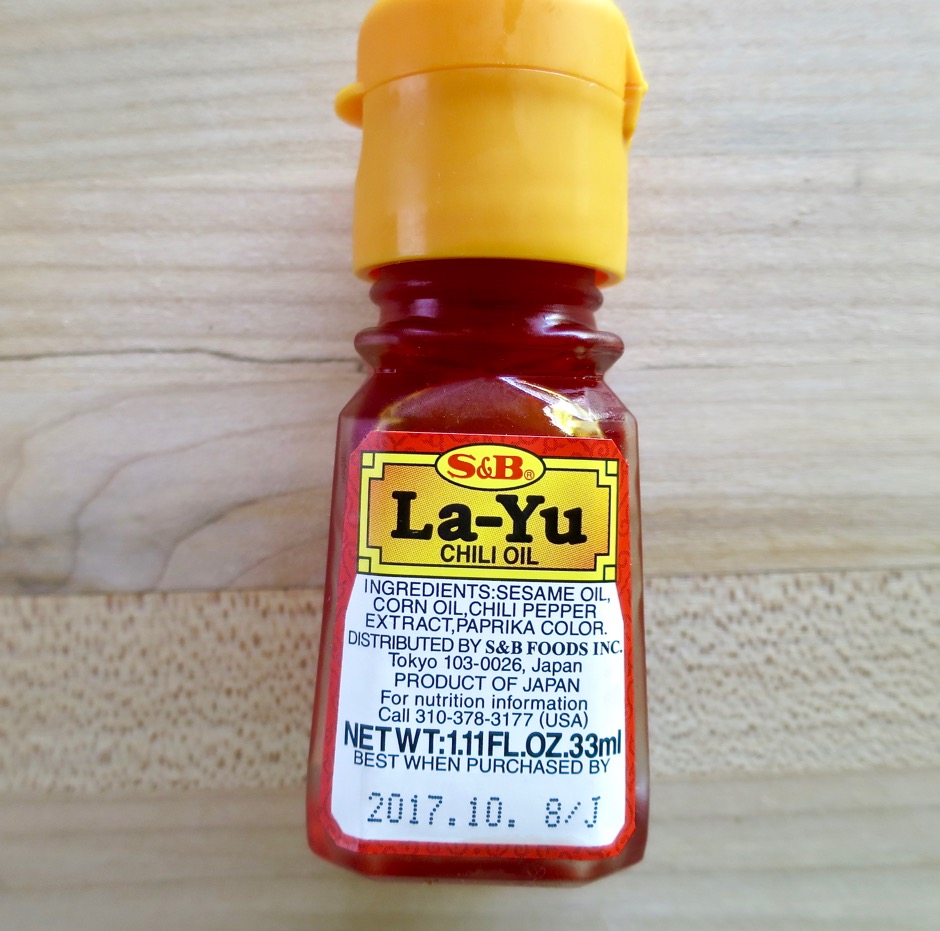
Chili Oil

Tuna Tartare with Avocado & Radish + Taro Chips

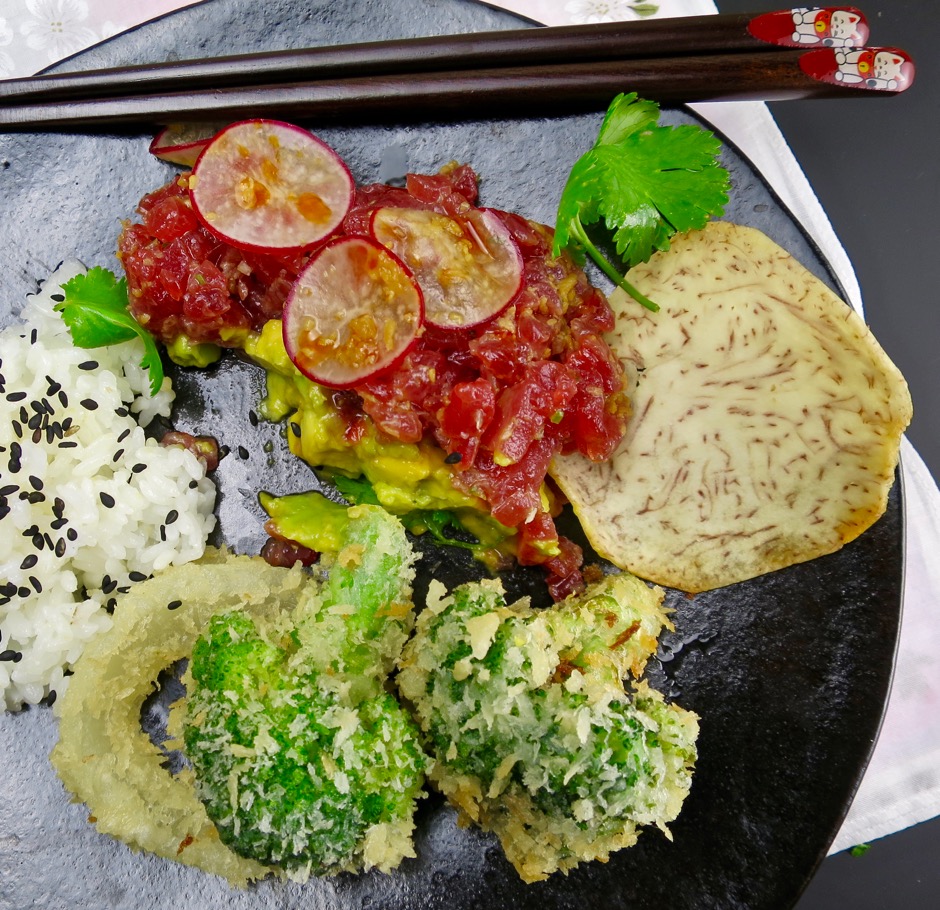
Serve the tartare with taro chips as an appetizer or as an entrée with rice and a side of crispy vegetable tempura.

Tuna Tartare with Rice & Vegetable Tempura

Tuna Tartare with Avocado & Radish
 
A lovely appetizer for a warm summer evening. Adapted from Bon Appetit Magazine.
Author:
Serves: 4 as an appetizer
Ingredients
  • Dressing:
  • 2 teaspoons finely grated lime zest (from two small or one large lime)
  • 2 tablespoons fresh lime juice
  • 1 tablespoon granulated sugar
  • 2 tablespoons + 2 teaspoons soy sauce
  • 2 tablespoons Champagne vinegar or white wine vinegar
  • 1 tablespoon + 2 teaspoons finely grated peeled ginger
  • Tuna:
  • 10 ounces sashimi grade tuna, very finely diced and well chilled
  • 4 teaspoons olive oil, divided
  • 1 teaspoon minced seeded serrano chile
  • 1 teaspoon minced shallot
  • kosher salt
  • 1 large avocado, halved, pitted and finely diced
  • 2 radishes very thinly sliced, chilled in an ice water bath for 30 minutes
  • chili oil
Preparation
  1. Combine lime zest, lime juice, sugar, and 2 tablespoons water in a small saucepan. Bring to a boil (this will happen in no time at all). Transfer liquid to a small glass bowl, cover and let cool completely. Strain cooled liquid through a fine-mesh sieve into a small bowl. Whisk in soy sauce, vinegar, and ginger. The dressing can be made 2 days in advance. Cover and chill.
  2. Toss tuna with 2 teaspoons olive oil in a medium bowl. Add chile and shallot, season lightly with salt.
  3. Mix diced avocado with remaining 2 teaspoons olive oil in a medium bowl. Season with salt.
  4. To assemble the tuna tartare, you may use a round mold or gently shape the avocado with your hands as I do, onto a serving platter. Arrange tuna over the avocado keeping a circular shape. Spoon some of dressing over the tuna and around the avocado. Top with radish slices and more dressing. Drizzle with chili oil. Serve right away.
 

Follow

Get every new post delivered to your Inbox

Join other followers: