Browsing Category

Dinner

Chicken, Dinner, Lactose Free, Recipes, Smoker, Summertime Meal

Smoked Chicken Breasts

December 14, 2024

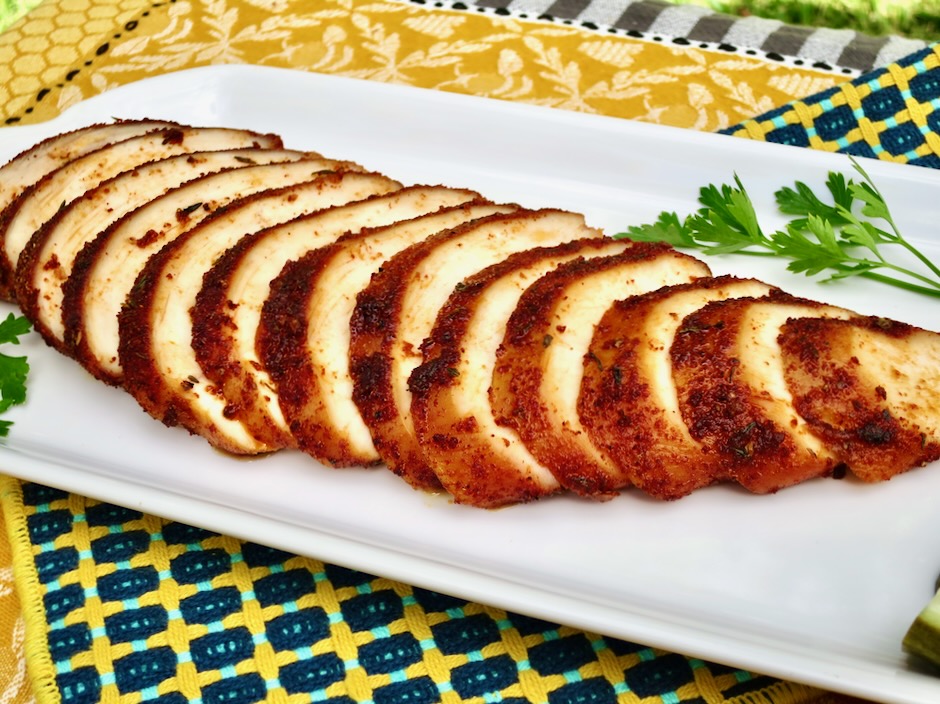
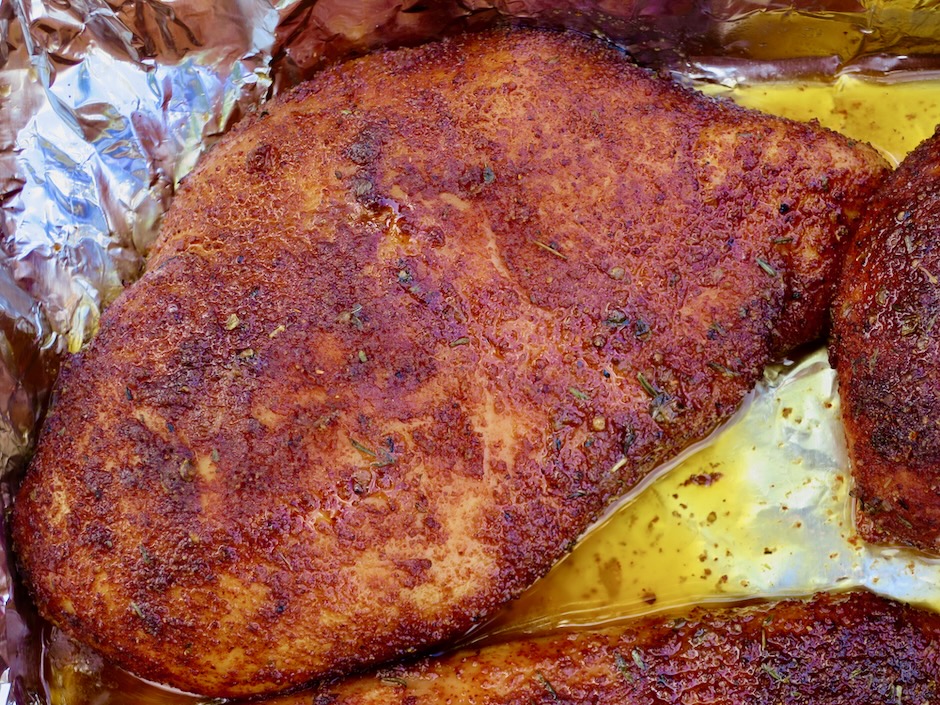
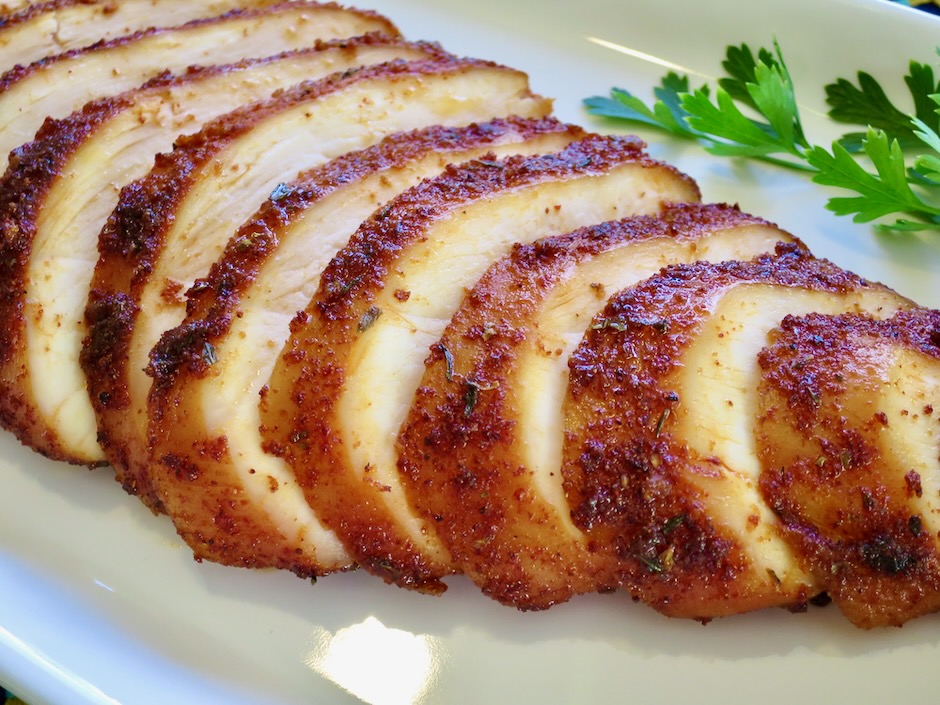
These scrumptious smoked chicken breasts are the bomb! They are tender, juicy and smoky. A quick brine ensures they are moist throughout. They are very versatile and go well with numerous side dishes. They will definitely be the star of your meal.

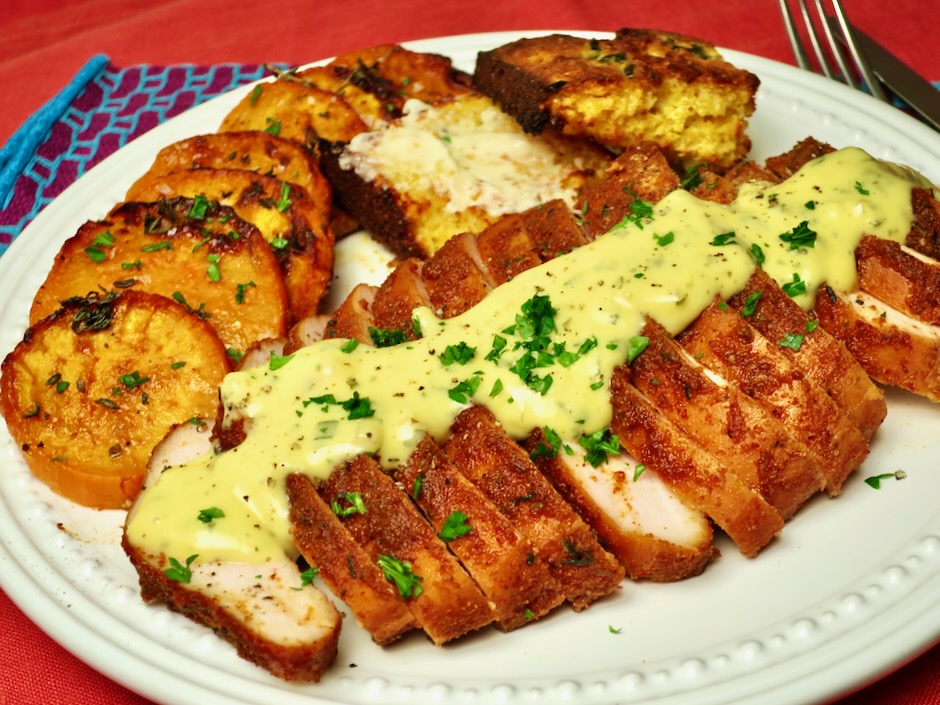
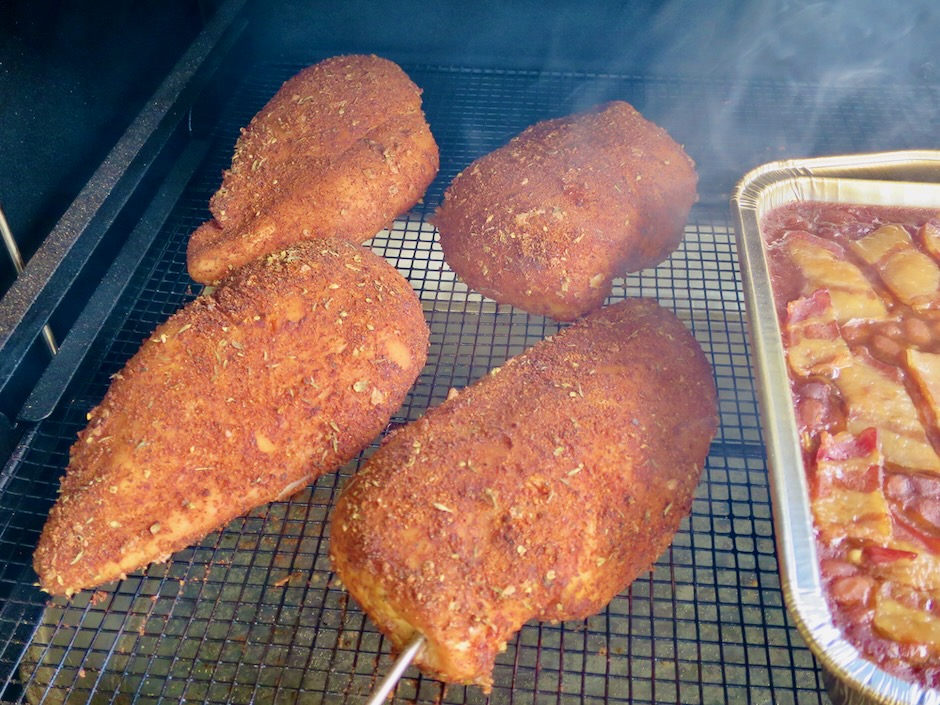
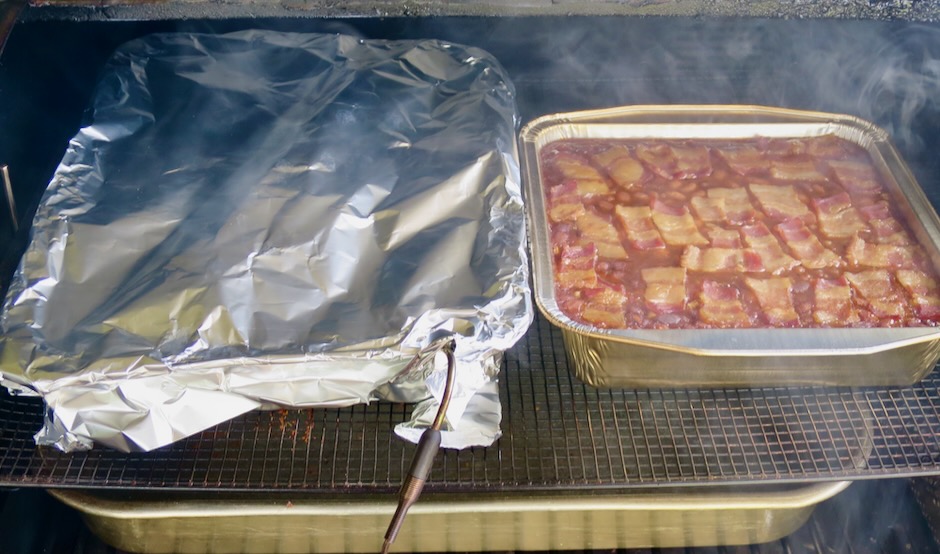
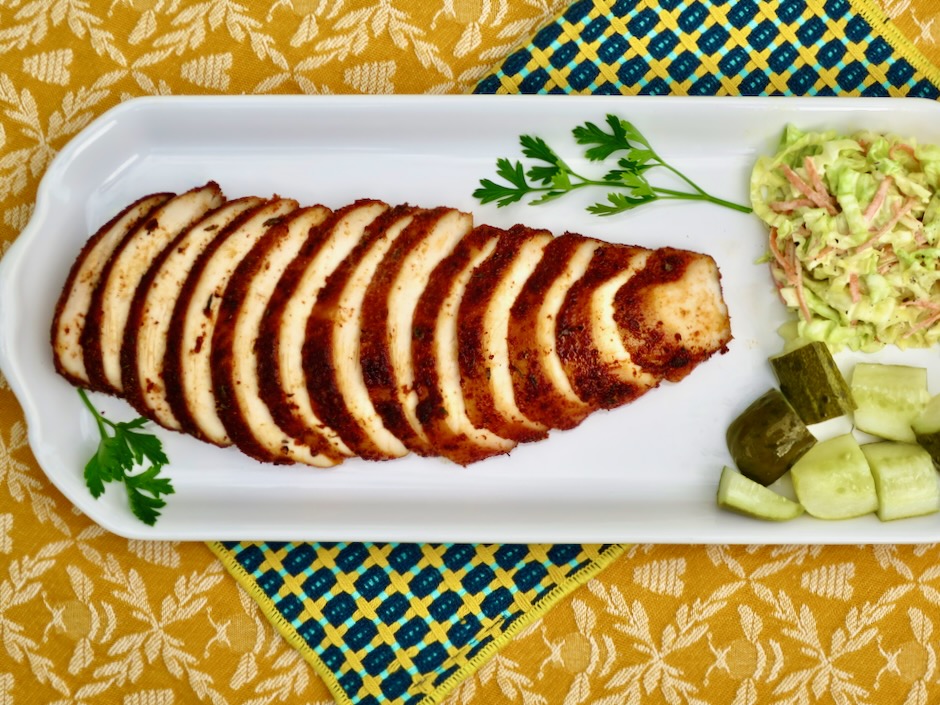
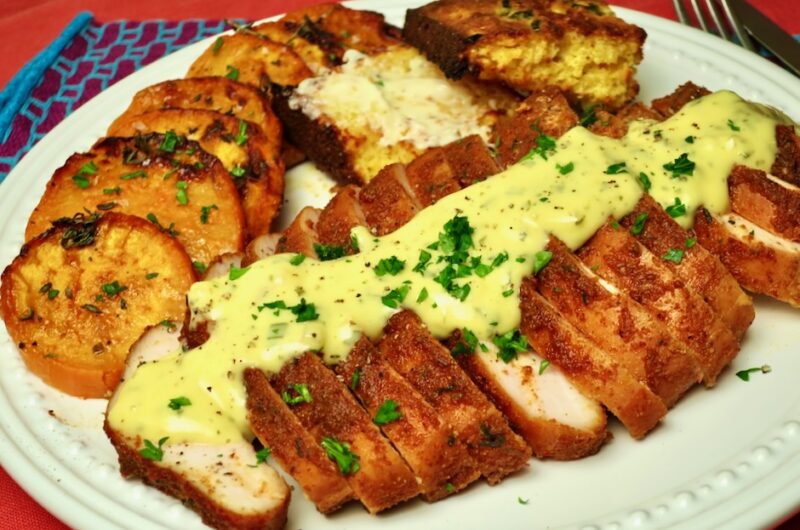
Sometimes I serve them fancy, draped with béarnaise sauce, and other times with smoky baked beans (why not make use of the smoker?) or simply sliced for sandwiches with a slice of pepper jack cheese, lots of Dijon mustard and crunchy iceberg lettuce.

I highly recommend brining the chicken breasts. It only takes a few hours and the brine is quick to prepare. You can also use this recipe with pork tenderloins. They turn out juicy and melt-in-your-mouth tender.

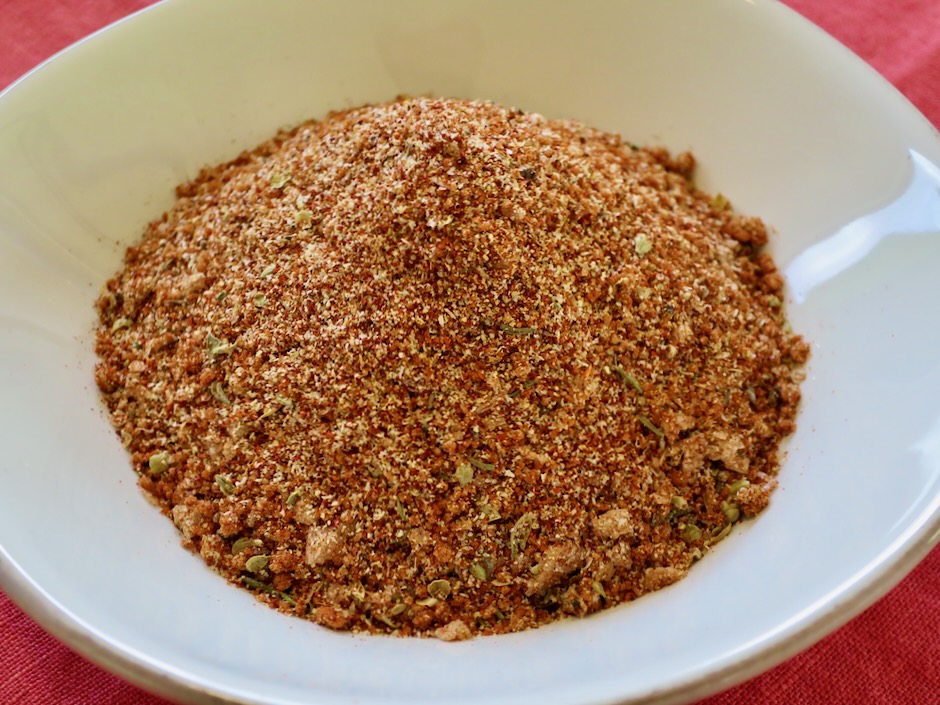
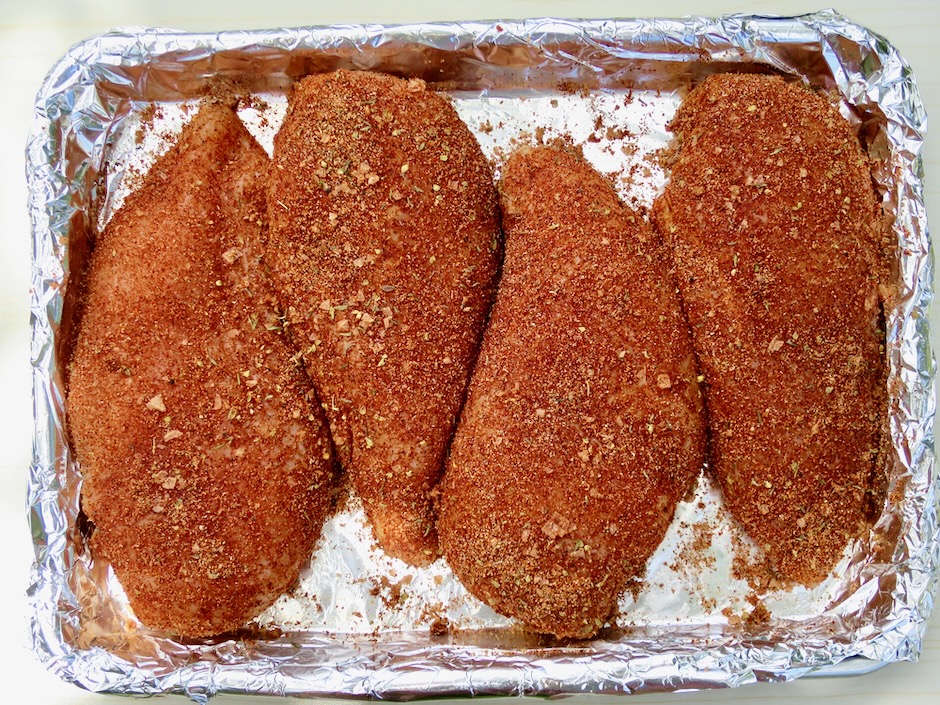
A dry rub seasons the chicken while it’s smoking. It gives the chicken a gorgeous color and ensures the chicken is full of flavor.

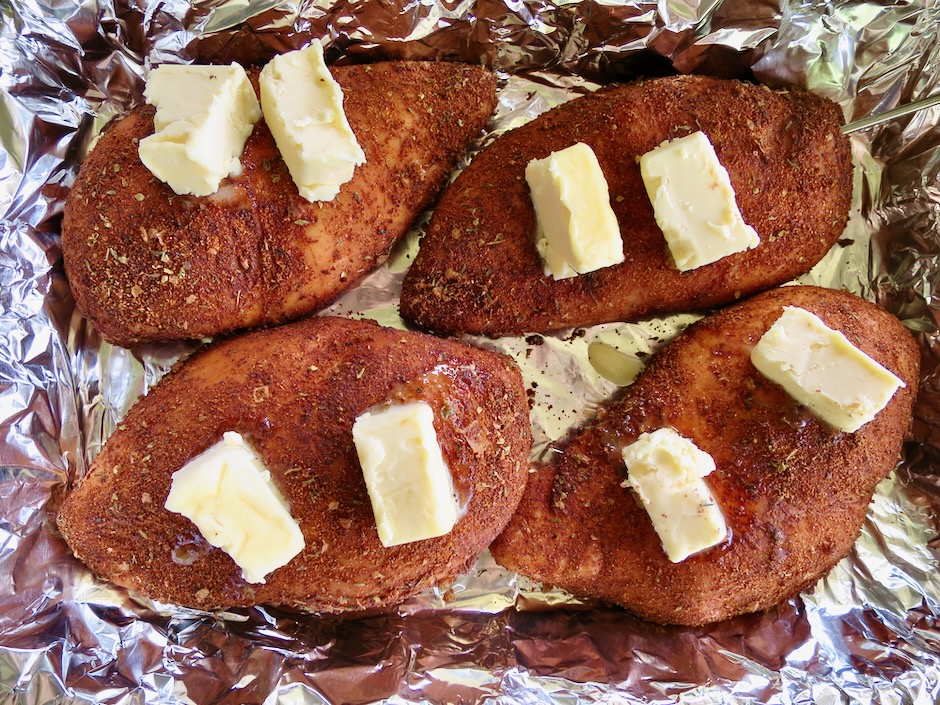
During the last phase of smoking, move the chicken to a pan, add butter and cover tightly with foil. This step is crucial to ensure the chicken is juicy and tender without having a dry, tough exterior.

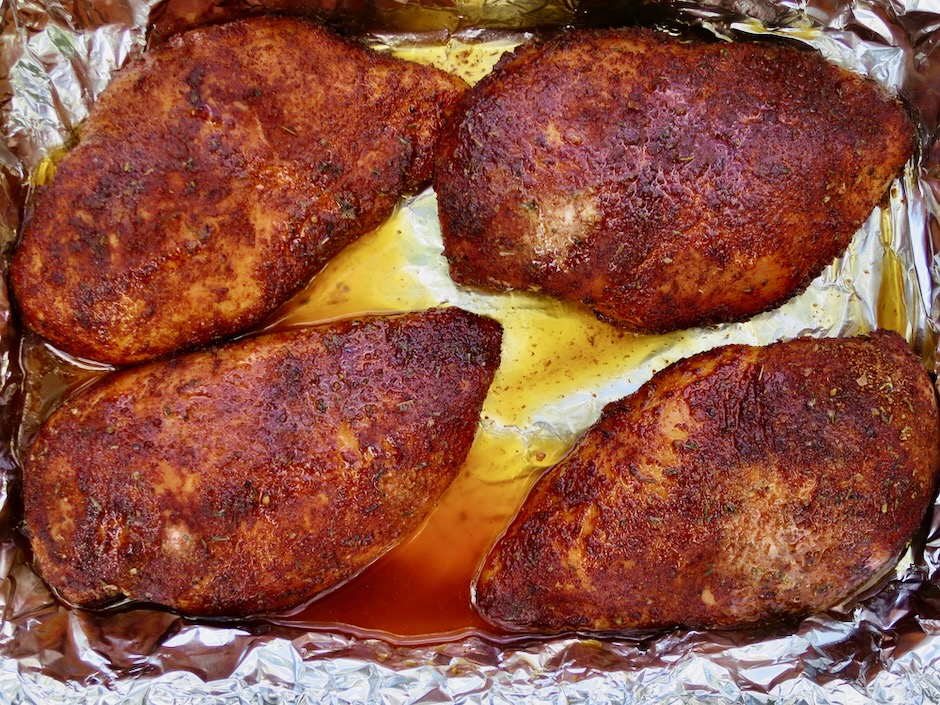
These mouth watering smoked chicken breasts are out of this world.

Smoked Chicken Breasts

Recipe by Kiyo
Servings

6-8

servings

Recipe adapted from Celebration Generation blog
Special Equipment: Pellet Smoker, Digital Thermometer
Optional: Smoke Tube, Digital Remote BBQ Thermometer

Chicken

  • 6 large fresh boneless, skinless chicken breasts

  • 2 cups water

  • 2 cups ice water

  • 1/4 cup Diamond Crystal kosher salt or 2 tablespoons + 2 teaspoons Morton’s kosher salt

  • 2 tablespoons honey or maple syrup

  • 1 tablespoon black peppercorns

  • 2 teaspoons mustard seeds

  • 1 large garlic clove, pressed

  • 1 bay leaf

  • 1 small-medium lemon sliced into wedges

  • Dry Rub
  • 2 tablespoons smoked paprika

  • 1 tablespoon brown sugar

  • 1 tablespoon onion powder

  • 2 teaspoons garlic powder

  • 1 1/2 teaspoons smoked fine sea salt (or regular salt) or 3 teaspoons smoked flaky salt such as Maldon

  • 1 teaspoon mustard powder

  • 1 teaspoon freshly ground black pepper

  • 1 teaspoon ground cumin

  • 1/2 teaspoon dried oregano

  • 1/2 teaspoon dried thyme

Directions

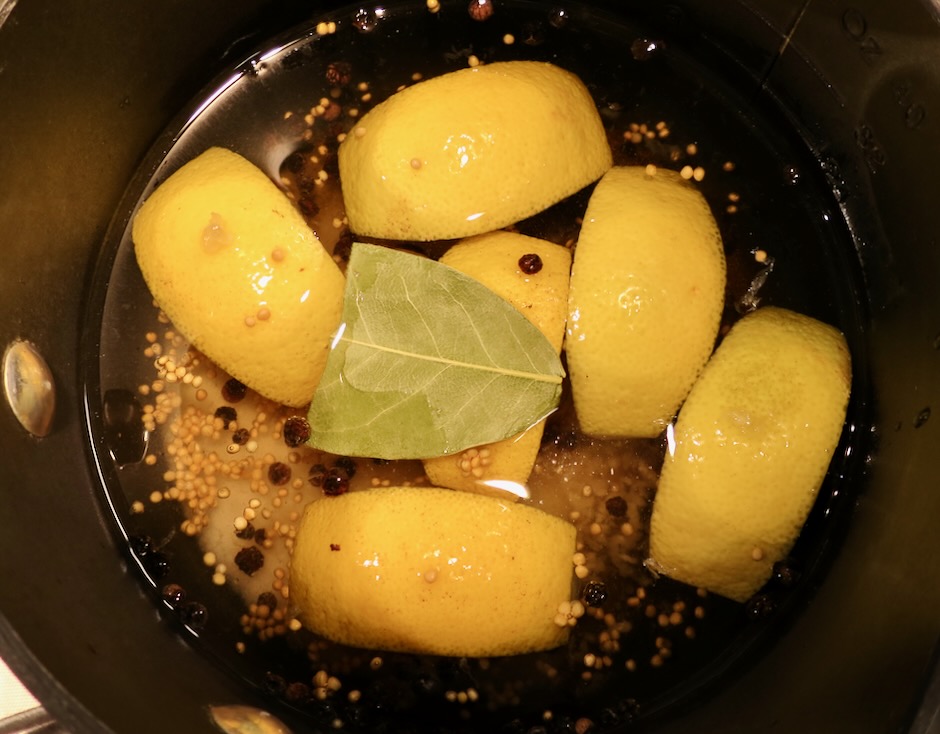
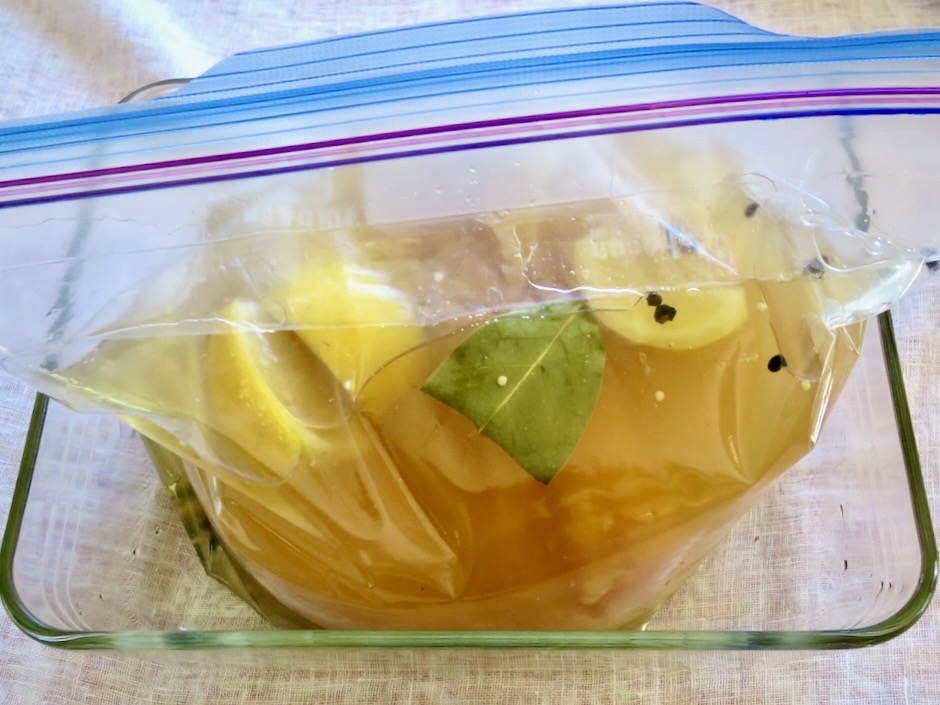
  • Measure 2 cups of water into a medium pot. Add the salt, honey or maple syrup, peppercorns, mustard seeds, pressed garlic clove, bay leaf, and sliced lemon wedges. Bring to a boil, reduce heat, and simmer for 5 minutes.
  • Remove pot from heat, transfer brine to a large bowl. Add 2 cups of ice water and stir to combine. Place bowl in the refrigerator to completely cool, about 1 hour. You can speed up the process by placing the bowl in an ice bath.
  • Place chicken breasts in the bowl with the cooled brine and cover with plastic wrap, or transfer the brine and chicken to a zip top freezer bag placed in a bowl (just in case of leakage). Let chicken brine for 3 hours in the refrigerator.
  • Remove chicken from the brine, pat dry with paper towels. Discard brine. If you have time, place the chicken on a plate and return to the refrigerator uncovered, to air-dry for 30-60 minutes. Otherwise, continue with coating the chicken with the dry rub.
  • Preheat smoker to 225 degrees. For additional smoky flavor, use a pellet smoke tube. Place it on one side of the smoker. We use the A-Maze-N Smoke Tube. If you have a remote BBQ thermometer set it to 135 degrees and insert it into the thickest part of one of the chicken breasts. Smoke the chicken for 2 hours or until a thermometer reads 135 degrees. Transfer chicken (probe in place, reset to 157-160 degrees) to a disposable aluminum pan. Place a few cubes (about 1/2 tablespoon each cube) on top of each chicken breast. Cover the pan tightly with foil. Turn smoker temperature up to 265 degrees. Continue to cook chicken for another 20-30 minutes or until it reaches 157-160 degrees.
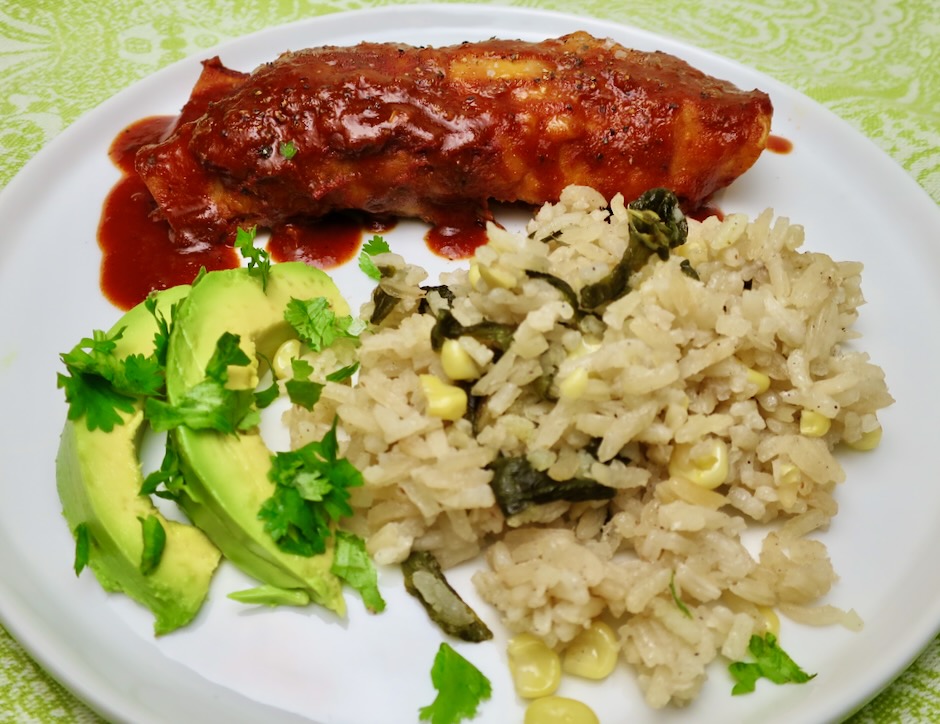
  • Slice smoked chicken into 1/3-1/2 inch slices. Serve with your favorite barbecue sauce, bĂ©arnaise sauce, or honey mustard dip. Leftover chicken makes the best smoked chicken sammies.

Notes

  • Leftover whole chicken breasts can be vacuum sealed and frozen for a few months. Defrost overnight in the refrigerator and slice thinly for a delicious sandwich.
Dinner, Lactose Free, Mexican, Recipes, Rice Dishes, Side Dishes

Rice with Poblanos & Corn

November 25, 2024

This beautiful rice dish, fragrant from roasted poblanos and sweet corn kernels, is a flavorful side dish to accompany your favorite Mexican meals. The poblanos give the rice a rich smoky flavor and fresh corn kernels add a sweet and satisfying texture.

The hint of allspice in the rice adds a warm depth of flavor that makes this rice unlike other rice dishes I often make.

Long grain or jasmine rice works well for this dish. I love the scent of jasmine rice as it cooks, filling the kitchen with its light floral scent.

A toaster oven is the way to go when roasting the poblanos. If you don’t own one, you can easily roast them in your oven or on a grill. You want them to get nicely charred so that smoky flavor shines through in the rice.

I love how the poblanos rise to the top as the rice cooks. It’s one of the most beautiful rice dishes to serve as part of your Mexican inspired meal.

I serve this delicious rice with all types of Mexican food including, but not limited to, enchiladas. It also makes a tasty snack on its own.

Rice with Poblanos & Corn

Recipe by Kiyo
Servings

6-8

servings

Adapted from Nopalito cookbook

Ingredients

  • 1 1/2 tablespoons vegetable or canola oil

  • 2 cups jasmine or long grain white rice

  • 1 tablespoon Earth Balance Buttery Sticks or regular butter

  • 2/3 cup finely chopped white onion

  • 1 1/4 cups fresh corn kernels (from about 2 small ears of corn) or 3/4 cup canned or frozen corn well drained

  • 1 1/4 teaspoons Diamond Crystal kosher salt or 3/4 teaspoon fine sea salt

  • 1/4 scant teaspoon ground allspice (optional but recommended)

  • 3 cups chicken broth (for vegetarian version, Better Than Bouillon No Chicken Base or other vegetarian broth of choice)

  • 3 medium poblano chiles (1/2 pound), roasted, peeled, seeded stemmed and sliced into 1 x 1/4-inch strips (see notes below)

Directions

  • Heat the oil in a large saucepan (one that has a lid, such as a Dutch oven) over medium to medium- high heat until very hot but not smoking. Add the rice and cook, stirring often, until it starts to become milky white, about 2-3 minutes, adjusting the heat as needed.
  • Clear a space in the center of the pan and add the butter, onion and corn. Stir together with the rice and cook over medium heat until the onion begins to soften, about 2-3 minutes. Add the salt and allspice, stirring well. Stir in the broth. Bring to a boil, add the poblanos, stir and bring back to a boil. Turn the heat down to low, cover the pot and set a timer for 20 minutes. Do not open the pot while the rice is cooking.
  • Turn off the heat and let rice sit covered for 15 minutes before fluffing and serving. (The lid will have quite a bit of condensation on it. When uncovering the rice, quickly flip the lid over so the water does not drip into the rice).

Notes

  • To roast the chiles, wash, pat dry and place on a foil lined baking sheet. Broil in a toaster oven (4 inches from broiler element) or regular oven (6 inches from broiler element) for 15+ minutes, turning frequently with tongs to allow charring on all sides. Place the roasted peppers in a bowl covered with plastic wrap or a zip top bag and allow the peppers to sweat for 15 minutes to soften the skin before peeling.
  • I found that using 1 1/2 cups frozen or canned corn (in place of fresh) added too much moisture to the rice so I decreased the amount to 3/4 cup. Leftover rice can be frozen for a few months.
Beef, Dinner, Lactose Free, Mexican, Recipes

Beef Birria

November 14, 2024

Tender beef braised in a rich sauce perfumed with chiles and warm spices makes some of the best tacos on the planet. Rich and flavorful, birria is now my favorite Mexican beef dish. Though you see birria used mainly for tacos, it is equally delicious shredded for burritos and quesadillas. You can even serve it as a main dish with Mexican rice and beans. And no doubt, it would also make a superb filling for tamales.

This dish was traditionally made with goat meat, but beef, lamb and chicken can also be used. My preference is to make birria with beef although I’m curious about trying it with chicken too.

My favorite way to serve birria is to tuck some of the shredded meat into corn tortillas with a bit of cheese and pan fry until crispy. It is the same technique I use for tacos dorados.

Dried chiles make the sauce velvety rich and flavorful. Most birrias are not spicy though you can add a few hot chiles for a bolder flavor. To please all palates, keep the birria on the mild side and have your favorite hot sauce available for those who want to spice it up.

Dried chiles are vibrantly colored and can be smooth (Guajillo) or wrinkly (Ancho). They add a depth of flavor that is slightly sweet, smokey and totally satisfying.

Toasting spices intensifies their flavor which in turn enhances the taste of the birria sauce.

Cooked low and slow, the birria emerges from the oven looking crazy good.

Serve the birria with a side of sliced avocado and Mexican rice like this one, or this one. Add some grated cheese, jalapeños, sour cream, and lots of diced onion and cilantro for the perfect taco.

Beef Birria

Recipe by Kiyo
Servings

8 – 10

servings

Special equipment: Large Dutch oven with cover, large high powered blender such as Vitamix

Ingredients

  • Beef
  • 4 pounds chuck steak, cut into 3-inch cubes

  • Kosher salt (about 1 tablespoon Diamond Crystal or 1 1/2 heaping teaspoons Morton’s)

  • Freshly ground black pepper

  • Canola oil for frying

  • Sauce
  • 1 teaspoon black peppercorns

  • 1 teaspoon cumin seeds

  • 1 teaspoon coriander seeds

  • 1 small cinnamon stick

  • 2 medium ancho chiles, stems and seeds removed

  • 4 guajillo chiles, stems and seeds removed

  • 2-3 chile de arbor (optional for spicy version)

  • 1 medium onion, diced (about 1 1/2 cups)

  • 6 cloves of garlic, smashed

  • 7 ounces fire roasted tomatoes (half of a 14 ounce can)

  • 1 tablespoon apple cider vinegar

  • 2 tablespoons fresh lime juice

  • 4 cups beef stock

  • 1/8 teaspoon (a pinch) ground cloves

  • 2 teaspoons Mexican oregano

  • 1 bay leaf

  • Kosher salt

  • Freshly ground black pepper

  • To serve
  • Corn tortillas, diced onions, cheddar or other melty cheese, cilantro, nacho rings, sour cream, Mexican rice

Directions

  • Preheat oven to 325 degrees with rack on bottom third level.
  • Beef
  • Toss meat cubes with kosher salt (about 1 tablespoon Diamond Crystal kosher salt or 1 1/2 heaping teaspoons Morton’s) and freshly ground black pepper. Heat 1 tablespoon canola or vegetable oil in a large Dutch oven (one that will accommodate all of the beef and sauce) over medium-high heat. Sear beef in batches, until deeply browned adding more oil as needed. Transfer beef to a bowl. Do not wash pot.
  • Sauce
  • In a small skillet toast peppercorns, cumin seeds, coriander seeds and cinnamon stick on medium-low heat tossing frequently for 1-2 minutes. Remove cinnamon stick and set aside. Transfer peppercorns and seeds to a small bowl to cool.
  • Bring a medium pot of water to a boil. Remove from heat and add chiles (seeded and stemmed) submerging them in the hot water. Let soak for 15 minutes to soften. Drain and transfer to a large high powered blender (Vitamix or similar).
  • Using the same Dutch oven, heat a few teaspoons of oil over medium heat and sautĂ© onions until softened, about 4 minutes. Add crushed garlic and sautĂ© another minute. Add toasted spices (except cinnamon stick). Add 2 cups of beef stock, vinegar and lime juice. Deglaze the pan. Transfer mixture to a high powered blender along with rehydrated chiles. Add additional 2 cups beef stock, tomatoes, ground cloves and oregano. Blend until completely smooth.
  • Add beef back to the Dutch oven and pour sauce over the meat. Give it a stir so the meat is nicely coated and covered with the sauce. Add bay leaf and toasted cinnamon stick. Bring to a simmer then transfer to oven and cook covered until meat is very tender and can easily be shredded with a fork, about 3 hours.
  • Remove bay leaf and cinnamon stick. Taste and season with more salt if needed. Transfer beef to a large bowl and shred with two forks. See note below on how to prepare corn tortillas for pan frying. You may also choose to serve the birria on warmed corn tortillas or wrapped in a soft flour tortilla.

Notes

  • If making pan fried tacos, prepare corn tortillas by lightly spraying or brushing oil on each side. Place tortillas on foil, slightly overlapping. Bake for about 4 minutes at 400 degrees until tortillas are pliable. This will allow you to fill and fold the tortillas without them cracking. Place some shredded meat on half of the tortilla and sprinkle a little cheese over the meat. Fold tortilla and pan fry in a bit of canola oil following my tacos dorados recipe.

Cheese, Dinner, Italian, Pasta, Recipes, Summertime Meal, Vegetarian, Veggies

Roasted Tomatoes, Fresh Herbs & Feta Pasta

October 25, 2024

This simple yet stunning pasta dish is ready to serve in under an hour. The tomatoes are roasted with olive oil and garlic until they become jammy, allowing their flavor to intensify, yielding spectacularly sweet-tart tomatoes perfect over pasta.

Finely crumbled feta is the perfect cheese for this recipe. Its salty flavor compliments the roasted tomatoes and the addition of fresh herbs adds a bright flavor to the dish.

Using a variety of cherry and grape tomatoes makes the final dish pop with color. If your market sells only red cherry tomatoes, use them! Your dish will be just as delicious.

Use your favorite herbs to sprinkle over the pasta. I used parsley, basil and lots of refreshing mint.

Slicing the tomatoes in half and roasting cut side up allows them to take on a nice color and a bit of caramelization.

Long and delicate pasta or shorter shapes like campanelle or orecchiette pairs well with this dish. If you want to serve the tomatoes as an appetizer, scoop some on grilled sourdough bread and sprinkle with crumbled feta cheese and fresh herbs. Delicious!

Roasted Tomatoes, Fresh Herbs & Feta Pasta

Recipe by Kiyo
Servings

2

servings

Ingredients

  • 1 pound cherry tomatoes or a variety of cherry and grape tomatoes sliced in half

  • 2 1/2 tablespoons extra virgin olive oil

  • 3/4 teaspoon kosher salt

  • 1/4 teaspoon freshly ground black pepper

  • 2 pinches red pepper flakes (optional)

  • 1 medium garlic clove, minced

  • 1/4 cup finely crumbled feta cheese (Mt. Vikos recommended)

  • Handful of fresh herbs, chopped (use your favorites: basil, mint, parsley, chives, tarragon)

  • 4 -5 ounces dried pasta (angel hair, spaghetti, linguine, orecchiette, campanelle)

Directions

  • Preheat oven or large toaster oven to 425 degrees.
  • Place sliced tomatoes in a baking dish large enough to fit them in a single layer. Drizzle 2 1/2 tablespoons extra virgin olive oil over the tomatoes. Season with 1/2 teaspoon kosher salt, 1/4 teaspoon black pepper, and a few pinches of red pepper flakes if using. Toss the tomatoes in the seasoned olive oil. Using small tongs or a spoon, arrange tomatoes cut side up. Roast for 20 minutes. Remove tomatoes from the oven and add the garlic. Turn heat up to 450 degrees and roast for another 5 minutes. Remove the dish from the oven and set aside.
  • While the tomatoes are roasting, cook your pasta according to package directions. Drain and transfer pasta to a low sided serving dish. Give the tomatoes a stir, taste and adjust seasoning with additional salt and pepper. Spoon tomatoes and their juices over the pasta. Sprinkle feta cheese over the top along with the fresh herbs. Serve immediately.

Notes

  • Any leftover pasta can be eaten the following day. For a breakfast dish, discard any liquid from the pasta. Combine the pasta and tomatoes with a few whisked eggs and extra cheese if you like. Cook in a buttered skillet over medium low heat, flipping once. Serve with fresh herbs and hot sauce.

Appetizers, Dinner, Japanese, Lactose Free, Pork, Recipes

Smash Gyoza

October 17, 2024

These open-faced gyozas are ingenious as well as delicious. The dumpling wraps become crispy around the edges and the filling has a superb savory flavor. They are reminiscent of mini tostadas and can be served with a drizzle of sauce or with additional toppings such as chopped kimchi, green onions and sesame seeds.

Gyoza wraps are readily available at most markets either in the frozen or chilled foods section. If you don’t use them all, freeze the leftover wraps for your next round of smash gyoza. They will keep well for several months.

I used green cabbage in my gyoza but you can certainly used Napa cabbage. I love how green cabbage retains its crunchy texture even after being salted and drained.

Ground pork is typically used when making gyoza. If pork is not your thing, use ground chicken (dark meat or a combination of dark and light) or pressed and crumbled extra firm tofu.

Little scoops of pork are placed in a skillet then topped with a gyoza wrapper and smashed gently with the bottom of a small bowl (I use a Pyrex bowl) or firm spatula.

The gyoza are flipped once during the cooking time which crisps up the wrapper. I like to get a little color on the filling because it adds a lot of flavor making the gyoza extra tasty.

If you are making the gyoza as a main dish, serve it with crunchy sliced cucumbers, kimchi and onigiri (Japanese rice balls) dusted in furikake.

Smash Gyoza

Recipe by Kiyo
Servings

4-6

servings

Delicious crispy smash gyoza makes the best appetizer or dinner!

Ingredients

  • 1/2 pound green cabbage, finely chopped (about 2 cups) or 1 pound Napa cabbage (about 4 cups)

  • 2 teaspoons kosher salt, divided

  • 1/3 cup finely grated carrot, chopped into short pieces

  • 1/4 cup green onions, finely chopped (reserve 2 teaspoons for serving)

  • 1 teaspoon finely minced or grated garlic

  • 1 teaspoon finely minced or grated ginger

  • 1 pound ground pork (or substitute with ground chicken)

  • 1 tablespoon soy sauce

  • 1 teaspoon roasted sesame oil

  • 1 teaspoon sugar

  • 1/2 teaspoon pepper (white if available)

  • 22-26 gyoza wrappers

  • vegetable oil for frying

  • Serve with: roasted sesame seeds, kimchi, onigiri, sliced cucumbers (optional)

  • Dipping Sauce
  • 2 tablespoons light soy sauce (such as Kikkoman)

  • 2 tablespoons unseasoned rice vinegar

  • 1/2 teaspoon sugar

  • 1 teaspoon sriracha or chili oil (add more to increase spice level)

Directions

  • Combine dipping sauce ingredients in a small bowl. Set aside until ready to use, or refrigerate if making well in advance.
  • Toss finely chopped green cabbage with 1 1/2 teaspoons kosher salt. Let drain in a colander for 15 minutes. Squeeze out moisture then transfer to a clean kitchen towel and wring out additional liquid so the cabbage is quite dry.
  • In a large bowl, combine cabbage with carrots, green onions, garlic, ginger and pork. Add soy sauce, sesame oil, sugar, 1/2 teaspoon pepper and reserved 1/2 teaspoon kosher salt. Knead the mixture until thoroughly combined and smooth.
  • Heat 1 tablespoon of vegetable oil in a large nonstick skillet over medium heat until shimmering. Add tablespoon sized mounds of pork filling in the skillet, leaving space between each for the gyoza wrappers. Place gyoza wrapper on top of each mound of filling and gently smash (not completely flat) with the bottom of a small glass bowl (I use a Pyrex bowl) or firm spatula. Cover with a lid and cook for 2 minutes or until nicely browned and the meat is cooked through (160 degrees). Flip gyoza and cook uncovered for another minute or so, until the gyoza wrapper is a little crispy around the edges. Remove to a plate and repeat with remaining filling, adding extra oil as needed.
  • To serve, sprinkle reserved green onions and roasted sesame seeds over the gyoza and drizzle with dipping sauce.
Dinner, Recipes, Side Dishes, Vegetarian, Veggies

Roasted Sweet Potatoes with Parmesan & Thyme

October 8, 2024

These roasted sweet potatoes are a perfect dish for the upcoming holiday season, but equally welcome anytime of the year. The sweet potatoes have tender interiors with slightly crisp edges. A bit of parmesan adds that “je ne sais quoi” to the dish, that pleasing flavor that’s also known as umami.

If you buy sweet potatoes that are not too large/thick you will have room to layer more rows which makes for a stunning dish.

The recipe is pretty straight forward. Peel, slice, mix, arrange and bake the sweet potatoes. If you have a large toaster oven as I do, feel free to use it!

Overlapping the sweet potato slices makes for a gorgeous presentation. A sprinkling of Maldon sea salt and fresh sprigs of thyme are the final touch before bringing the dish to the table.

This recipe serves four people. Double or triple the recipe if you are serving a larger group of guests.

Roasted Sweet Potatoes with Parmesan & Thyme

Recipe by Kiyo
Servings

4

servings

Ingredients

  • 2 medium sweet potatoes (about 1 3/4 pounds) peeled, ends trimmed, sliced into 1/3-inch pieces

  • 1 teaspoon finely minced garlic

  • 1 tablespoon extra virgin olive oil

  • 2 tablespoons salted butter, melted

  • 1/4 cup finely grated parmesan cheese (Parmigiano Reggiano recommended)

  • 3/4 teaspoon kosher salt

  • 1/2 teaspoon freshly ground black pepper

  • 1/2 teaspoon Italian seasoning (or a combination of dried oregano, basil and marjoram if you have it)

  • Fresh thyme sprigs

  • Maldon sea salt (optional)

Directions

  • Preheat oven (or large toaster oven if it will accommodate your baking dish) to 425 degrees. Lightly butter or oil a baking dish that will accommodate the potatoes.
  • Place sliced potatoes, garlic, olive oil, and melted butter in a resealable bag making sure the potatoes are evenly coated. Add the parmesan cheese, salt, pepper, Italian seasoning. Seal the bag and mix the seasonings with the potatoes.
  • Arrange the potatoes (larger pieces around the exterior) overlapping slightly to fill the baking dish. Sprinkle the potatoes with a few torn thyme sprigs.
  • Bake uncovered for 30-35 minutes, or until the potatoes are tender and slightly browned around the edges. If you would like a bit more color on the edges of the potatoes, broil for about 2 minutes. Sprinkle with fresh thyme sprigs and Maldon flaky sea salt before serving.

Notes

  • The sweet potatoes are best served straight out of the oven. Leftovers will keep for a few days and can be reheated in the oven or microwave.
Follow

Get every new post delivered to your Inbox

Join other followers: