Browsing Category

Dessert

Dessert, Lactose Free, Recipes

Maple Apple Upside-Down Cake

April 6, 2015

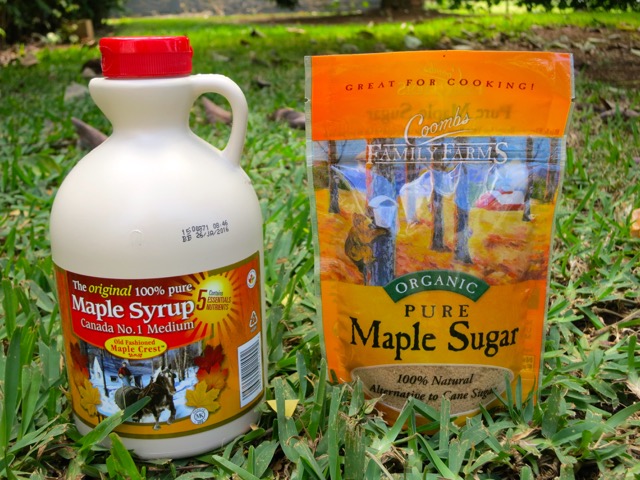
Maple Apple Upside-Down CakeI recently received three jugs of pure maple syrup as gift from a several friends who visit from the mainland and Canada.  I love pure maple syrup on blueberry pancakes or waffles, but I don’t eat them often enough to make a dent in all of the syrup stashed in my cupboard. I thought this Maple Apple Upside-Down Cake would be a good way to start.  I first noticed the recipe in Food & Wine magazine.  It was developed by Joanne Chang, a well-known pastry chef and owner of Flour, a bakery in Boston.  I noticed that the recipe called for baking the cake for 1 1/2 hours!  This didn’t seem right so I searched around and found a couple of other versions of this recipe, one of them by Wendy of bookcooker blog.  Wendy says to bake the cake for 45 – 60 minutes. That made sense!

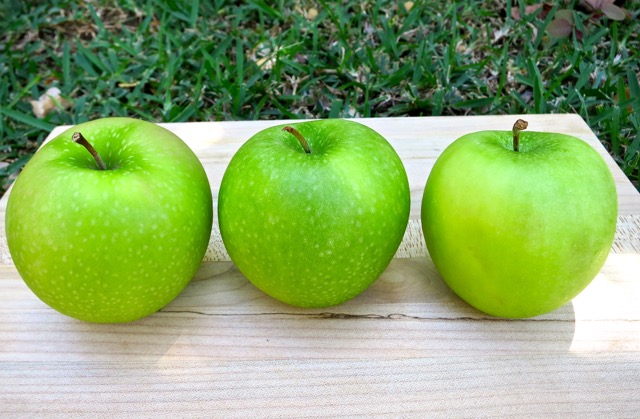
Granny Smith ApplesGranny Smith apples hold up well when baked.  Their tart flavor balances the sweetness of the maple syrup.

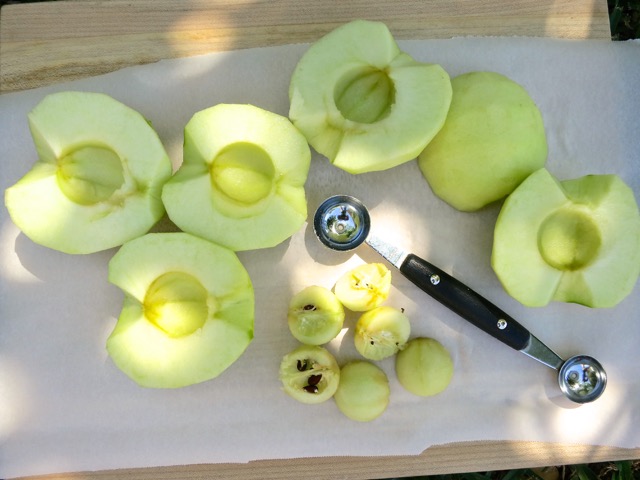
Peeled & Cored Granny Smith ApplesI long ago discovered the value of using a melon ball corer to remove the seeds and core of apples.  One single swoop and you’re done.

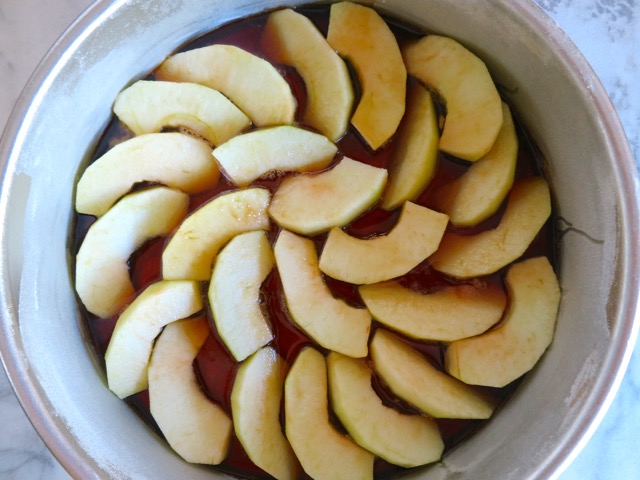
Apples over Maple SyrupArrange the sliced apples in two concentric circles over the thickened syrup.

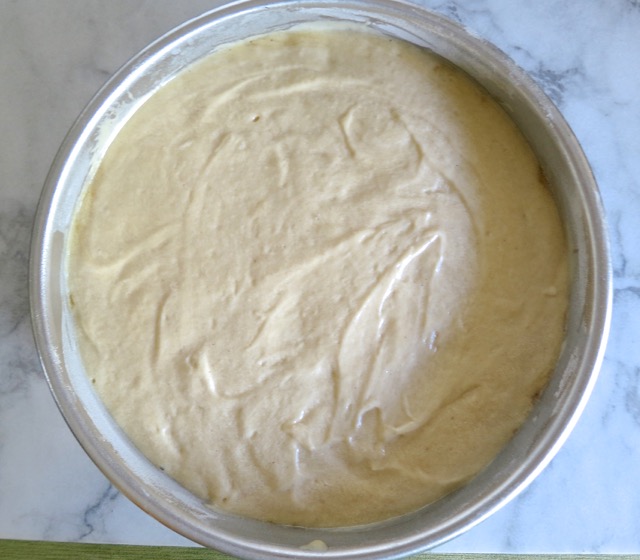
Cake Batter over Apple SlicesSmooth the cake batter over the apples and bake until golden brown.

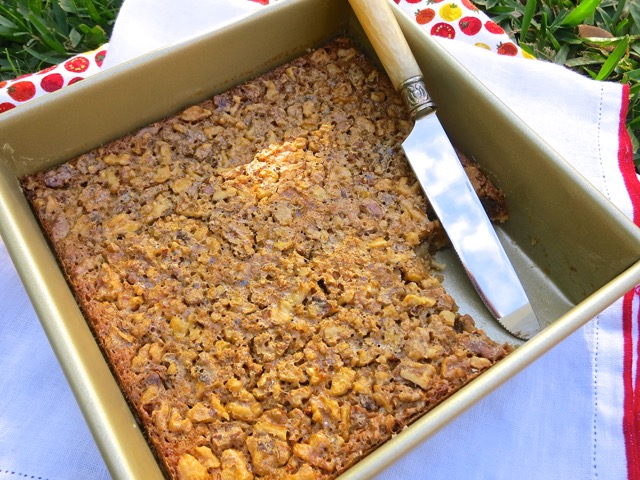
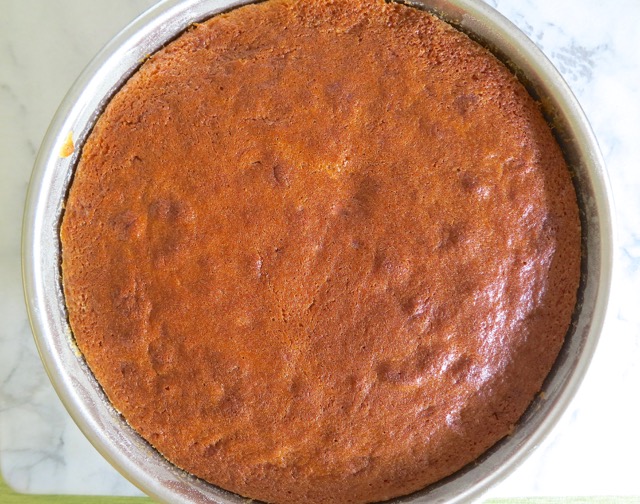
Baked Maple Apple Upside-Down Cake

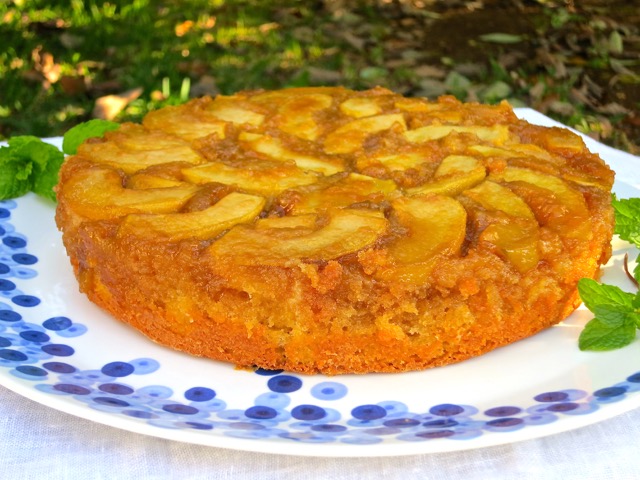
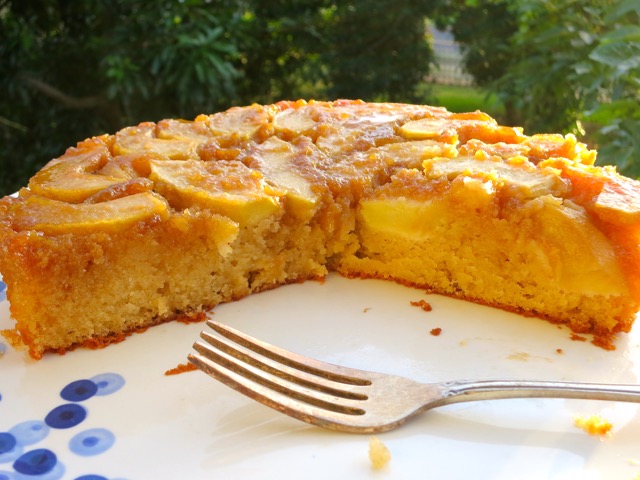
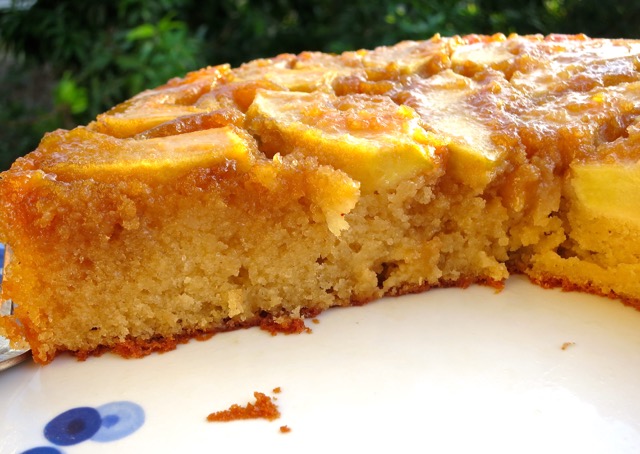
Maple Apple Upside-Down CakeThe maple syrup infuses the apples and the cake.  Yummy.

Maple Apple Upside-Down Cake

Maple Apple Upside-Down Cake

Maple Apple Upside-Down Cake

Serves 10 – 12

Adapted from Food & Wine and bookcooker blog

 Ingredients

1 cup pure maple syrup

3 Granny Smith apples – peeled, cored and quartered, each quarter cut into 3 equal slices (the Granny Smith apples I bought were large but if you have smaller apples you can cut the apple into eighths)

2 cups all-purpose flour

1 teaspoon baking powder

1/2 teaspoon baking soda

1/2 teaspoon salt

3 large eggs

3/4 cup buttermilk (I used lactose free milk with 1 tablespoon lemon juice since there is no lactose free buttermilk available here on Maui)

1 tablespoon vanilla extract

1 1/2 sticks Earth Balance Buttery Sticks, softened (or unsalted butter,  increase the salt to 1 teaspoon)

1 1/3 cups sugar

Preparation

Preheat the oven to 350°.  Butter and flour a 10-inch round cake pan with 3-inch high sides. (You may use a 9-inch cake pan with 2 1/2-inch sides.  You will not need all of the batter).

In a small saucepan, bring the maple syrup to a boil over high heat, then simmer over medium-low heat until very thick and reduced to 3/4 cup, about 20 minutes.  Pour the thickened syrup into the cake pan.  Arrange the apples in the pan in 2 concentric circles. If your apples are on the large side and you are using a 9-inch pan, you may not need all of the apple slices.

In a bowl, whisk together the dry ingredients.  In a glass measuring cup, whisk the eggs with the buttermilk and vanilla.  In the bowl of a standing electric mixer fitted with the paddle, beat the butter and sugar at medium speed until fluffy, about 3 – 5 minutes.  Beat in the dry and wet ingredients in 3 alternating batches until the batter is smooth; scrape down the side of the bowl.  Mix until just combined.

Pour the batter over the apples and smooth the top with a spatula.  Bake for 50 – 60 minutes, until the top is lightly browned and a tester inserted into the middle of the cake comes out clean.  Let the cake cool in the pan on a rack for 50 minutes.

Place a plate on top of the cake and invert the cake onto the plate. Let the cake cool slightly, then cut into wedges and serve.


Cookies, Dessert, Lactose Free, Recipes

Corn Flake Cookies with Bittersweet Chocolate

March 29, 2015

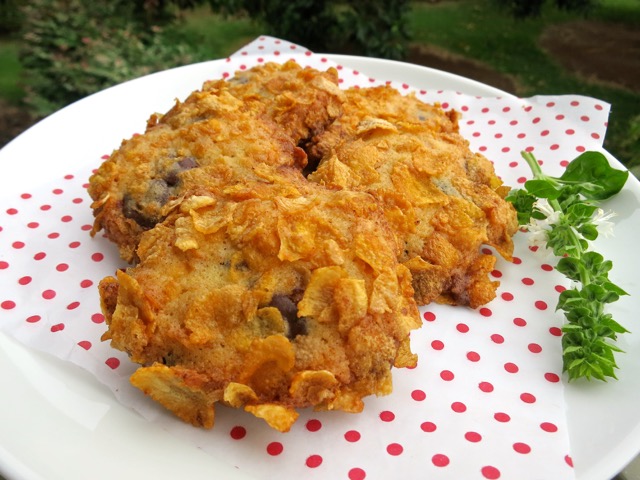
Corn Flake Cookies with Bittersweet Chocolate ChipsI long ago grew out of breakfast cereal.  However, with the thought of a crisp corn flake cookie in mind, I found myself once again, in the cereal aisle of Safeway.  I  made a batch of oatmeal cookies that included corn flakes, but I still had almost an entire box left.  Since I wasn’t about to eat corn flakes for breakfast, I was bent on baking more cookies.

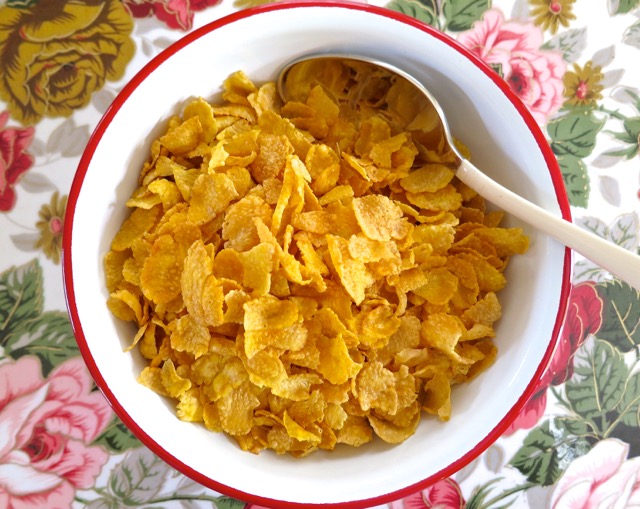
Corn FlakesI stumbled upon a recipe simply titled Cornflake Cookies on riceandbread.com.  The short list of ingredients and the idea of using up another 3 – 4 cups of corn flakes got me thinking that this would be the perfect recipe to put a dent into that box of cereal.

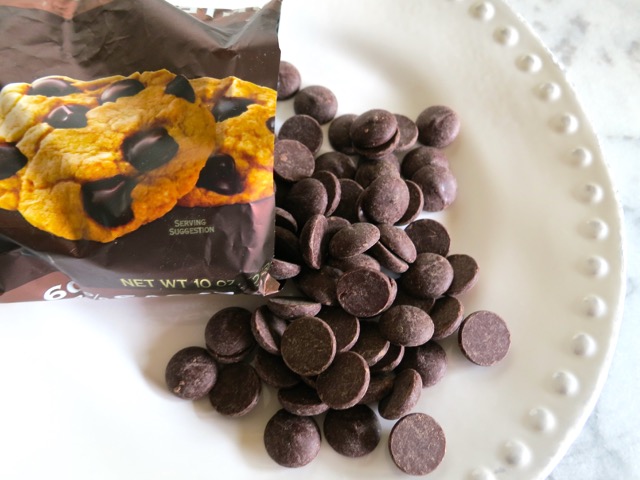
Bittersweet Chocolate ChipsAs it turned out, the recipe also include a small portion of chocolate chips.  Excellent!  I doubled the amount called for and used bittersweet chocolate.

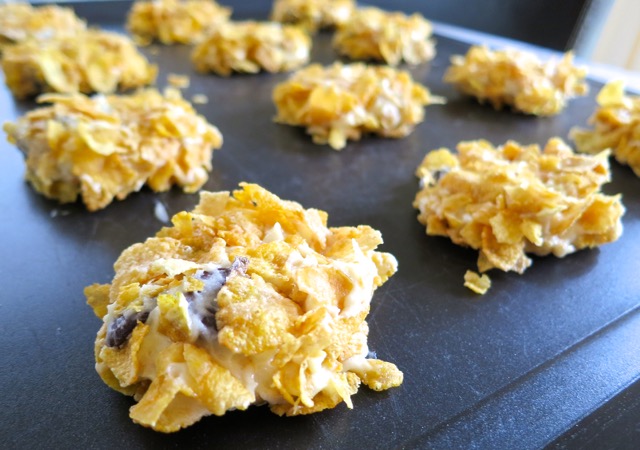
Corn Flake Cookie Dough with Bittersweet Chocolate ChipsI was just a bit skeptical about rolling the cookie dough into large pieces of corn flakes, but they turned out to be the perfect, crispy, delightful cookie.

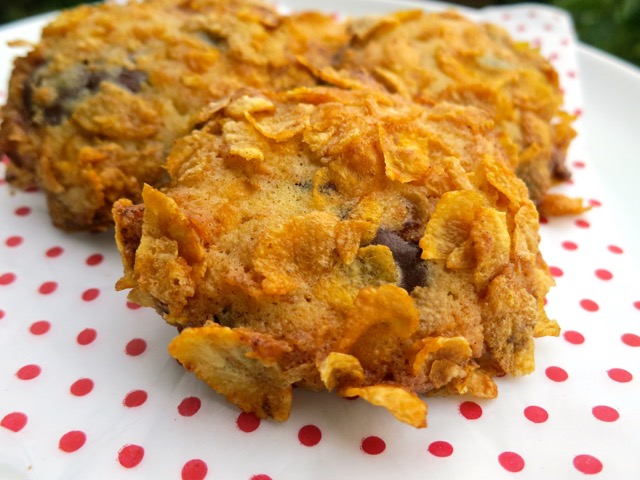
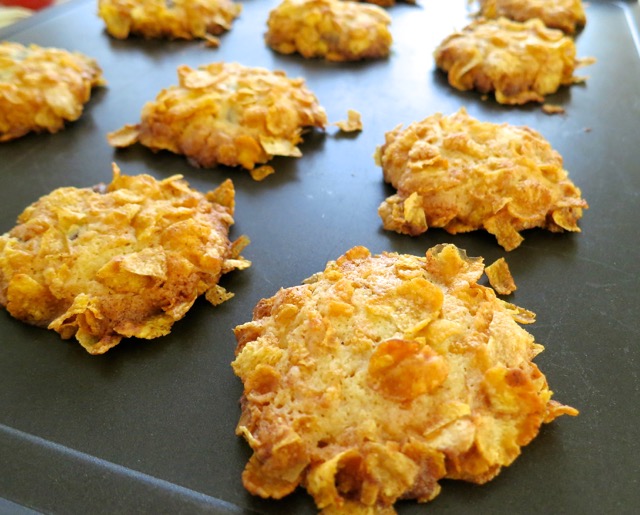
Baked Corn Flake Cookies with Bittersweet Chocolate ChipsThe corn flakes turn golden brown and crisp up as they bake.

Corn Flake Cookies with Bittersweet Chocolate Chips

Corn Flake Cookies with Bittersweet Chocolate 

Adapted from riceandbread.com

Makes 18 cookies

Ingredients

1 stick + 1 tablespoon Earth Balance Buttery Sticks (or salted butter) at room temperature

1/2 cup sugar

1 large egg

1/2 teaspoon vanilla extract

1 cup flour

1/4 teaspoon salt

1 teaspoon baking powder

3 – 4 cups corn flakes, divided, very lightly crushed

1/2 cup bittersweet chocolate chips

Preparation

Preheat oven to 350°.  Line a baking sheet with parchment paper.

In a medium bowl, cream butter and sugar together until light and fluffy.  Beat in egg and vanilla.

In a small bowl, combing flour, salt and baking powder.  Fold flour mixture into butter mixture.  Stir in 1 cup corn flakes and bittersweet chocolate chips.

Scoop cookie dough into tablespoon sized balls and roll into remaining lightly crushed corn flakes.  I like to press the dough down very lightly in the center so the cookies are a bit more even.  Bake for about 17 – 19 minutes (oven temperatures vary, check at 15 minutes) or until the cookies are perfectly golden, rotating the pans halfway through the baking time for even cooking.  Cool on baking sheet for 5 minutes before transferring to a wire rack to cool completely.


Cookies, Dessert, Lactose Free, Recipes

Crispy Oatmeal Corn Flake Cookies

February 28, 2015

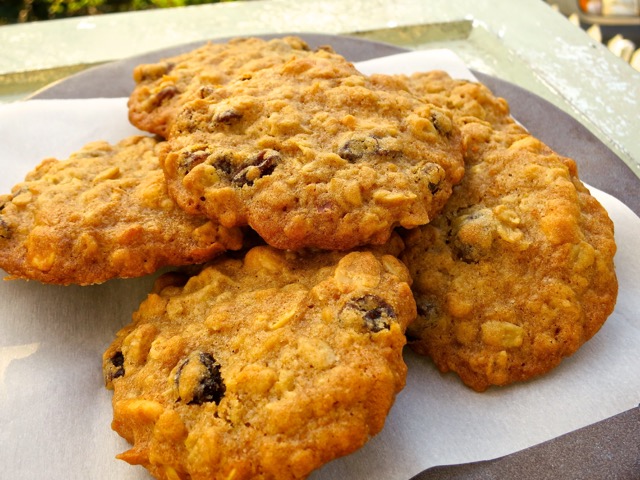
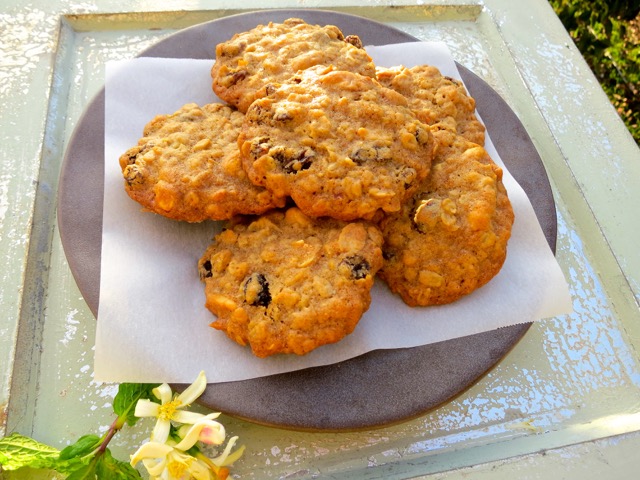
Crispy Oatmeal Corn Flake CookiesBack in the 70’s I had a recipe for corn flake cookies. They were light, crispy, and so delicious.  I don’t have the recipe anymore, but I haven’t forgotten about how good they were.  I’m always looking out for cookies that include corn flakes because I know they will have the nice crunchy texture I love.  I was skimming through a local magazine (I don’t recall the name of the magazine) that had a recipe for Grandma’s Oatmeal Raisin Cookies.  Corn flakes were listed as an ingredient so I quickly jotted down the recipe.  I thought it was interesting that lard was listed as an ingredient as well.  I don’t cook with lard and used Earth Balance Buttery sticks instead.  You could try the original recipe that uses half lard and half butter, or use butter only.

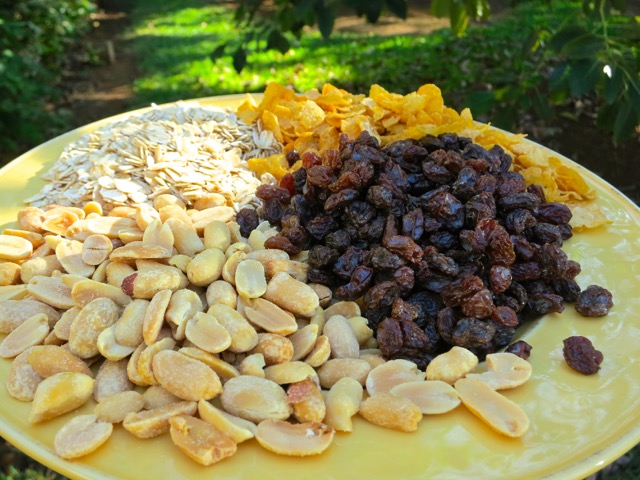
Oatmeal, Corn Flakes, Raisins, PeanutsThe original recipe left out the amount of salt to use and didn’t specify how long to bake the cookies.  No matter, the cookies turned out so well.  Though they are considered oatmeal cookies, the corn flakes are present and add such a nice crunch along with peanuts.  They are my new favorite cookie.

Crispy Oatmeal Corn Flake Cookies

Crispy Oatmeal Corn Flake Cookies

Updated 11/08/15

Adapted from the original recipe: Grandma’s Oatmeal Raisin Cookies

Makes about 40 cookies

Ingredients

1 cup Earth Balance Buttery Sticks (or 1 cup unsalted butter), room temperature

1 cup sugar

1 cup firmly packed brown sugar

2 eggs

2 1/4 cups flour

1 teaspoon baking soda

1/2 teaspoon kosher salt (1 teaspoon kosher salt if using unsalted butter)

1 cup corn flakes

2 cups oatmeal (regular, not quick cooking)

1 cup peanut halves (unsalted, do not chop)

1 cup raisins

Preparation

Preheat oven to 325°

Cream butter and sugars together.  Add eggs and stir to combine well. Mix in flour, baking soda and salt.  Fold in corn flakes, oatmeal, peanuts and raisins into the batter.

Drop rounded mounds of dough (about 1 heaping tablespoon, or more for larger cookies) on un-greased non-stick cookie sheets flattening the dough slightly before baking.

Bake for about 15 minutes, rotating pan once during baking period, until cookies are golden brown.

Let cookies cool on the pan for several minutes after baking before transferring them to a wire rack to cool completely.  Serve right away or freeze in an airtight container between layers of waxed paper.


Dessert, Lactose Free, Recipes

Darkest Chocolate Cake with Red Wine Glaze

January 4, 2015

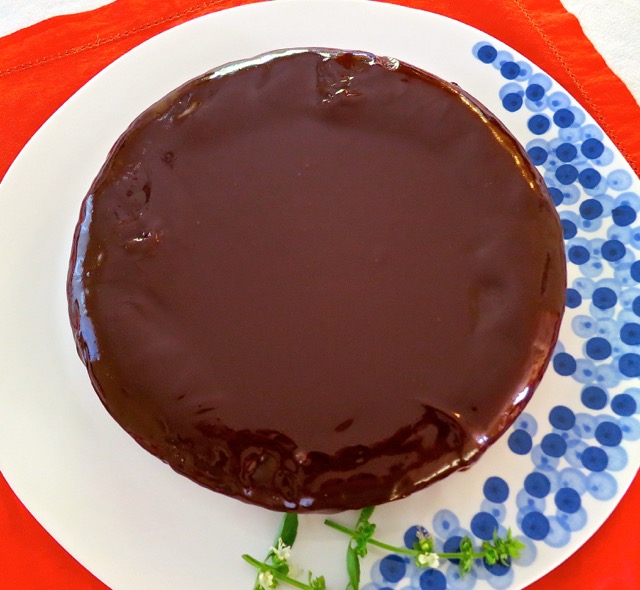
Darkest Chocolate Cake with Red Wine GlazeI was thumbing through my February 2014 issue of Bon Appetit and came upon an article titled “The Dark Side.”  It immediately caught my attention, not just because of the quirky title, but due to the fact that the recipes were all about chocolate.  Chocolate is one of  the most popular foods in the world and I am one of its many admirers! The Mast brothers,  owners of the Mast Brothers Chocolate in Brooklyn, shared some of their fabulous recipes in this issue.  Darkest Chocolate Cake with Red Wine Glaze?  I found the red wine glaze especially intriguing.

Darkest Chocolate Cake with Red Wine GlazeThis is a beautiful cake to serve at a small party.  It’s delicious and can be made 2 days in advance.  If you have any leftovers, slice, wrap, and freeze the cake for one of those nights when you crave something from “the dark side.”

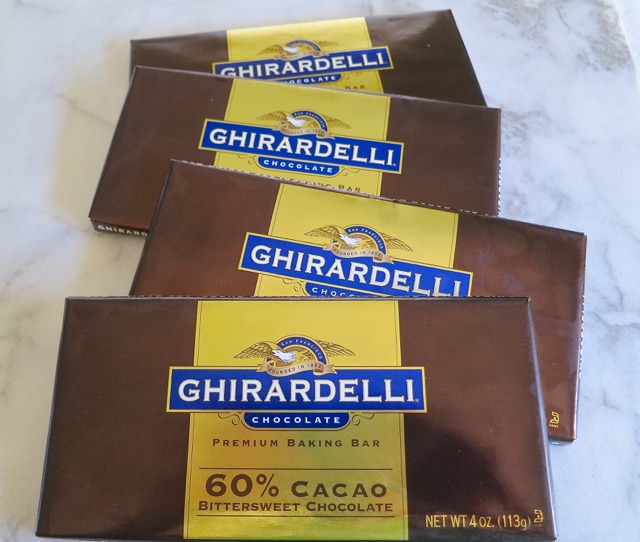
Ghirardelli chocolate barsYou’ll need a pound of chocolate for this recipe.  Half of it goes into the cake batter, and the other half for the red wine glaze.

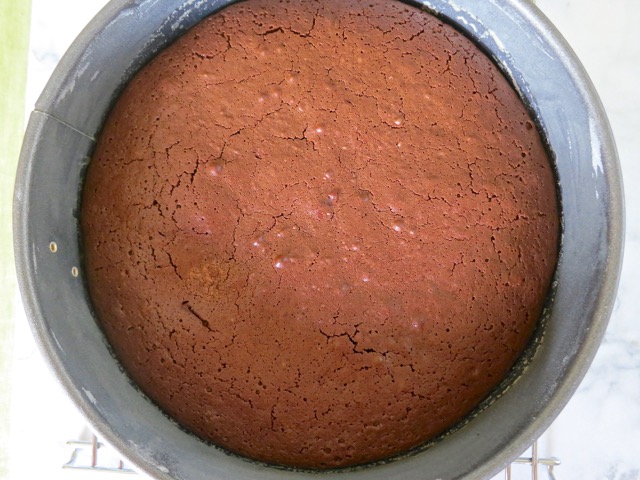
Baked Darkest Chocolate CakeThis particular cake fluffs up while baking and then deflates as it cools.  Don’t worry, it will be just fine.

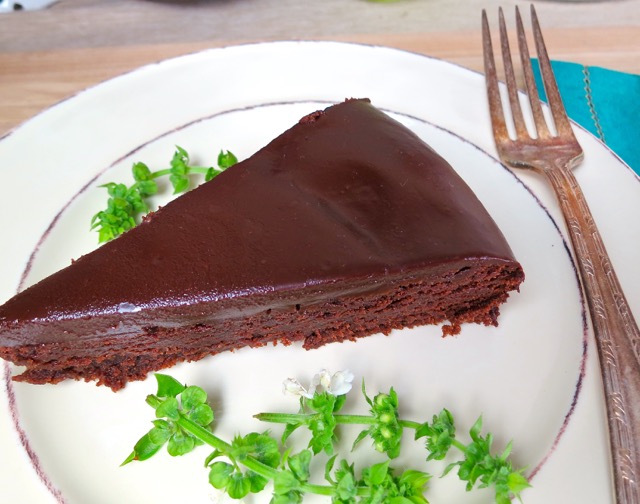
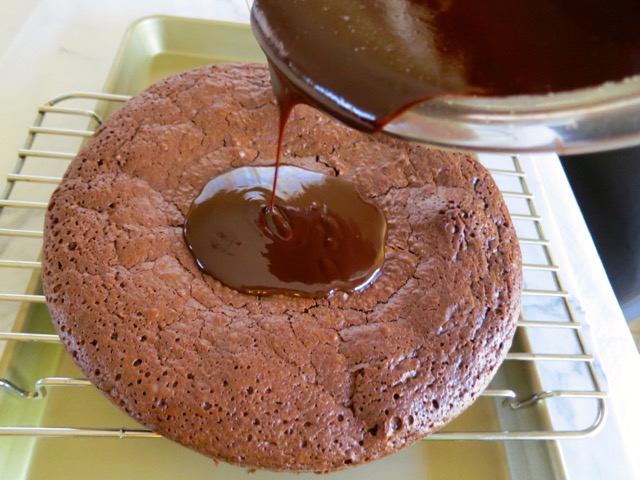
Red Wine GlazeThe red wine chocolate glaze is poured over the cake.  The glaze might seem thin at first, but it sets up beautifully (see photo below).

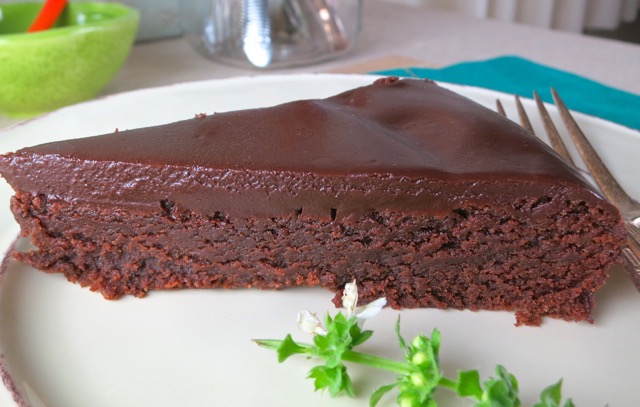
Darkest Chocolate Cake with Red Wine GlazeThis cake reminds me of a chocolate decadence cake I used to make many years ago.  It’s rich but not too sweet, thanks to the bittersweet chocolate (and red wine).  It’s now my favorite chocolate cake.

Darkest Chocolate Cake with Red Wine Glaze

Adapted from the Mast Brothers Bon Appetit Recipe

Serves 10

Cake

1 cup (2 sticks) unsalted butter, cut into pieces, plus more for the pan (I used lactose free Earth Balance Buttery Sticks)

1/3 cup all-purpose flour, plus more for the pan

8 oz. bittersweet chocolate, chopped (I used 60% cacao that I had in my cupboard but the original recipe uses 70% cacao)

1 cup sugar

4 large eggs

3/4 teaspoon kosher salt (1/2 teaspoon if using Earth Balance Buttery Sticks)

Glaze and Assembly

8 oz. bittersweet chocolate, finely chopped (I used 60% cacao but you may use 70% cacao)

1/4 cup (1/2 stick) unsalted butter cut into small pieces (I used Earth Balance Buttery Sticks)

1/4 teaspoon kosher salt

1/2 cup powdered sugar

1/3 cup red wine (such as Pinot Noir)

Special Equipment: A 9″ springform pan

Cake: 

Lightly  butter and flour pan.

Heat chocolate, sugar, and 1 cup butter in a heatproof bowl set over a saucepan of simmering water (bowl should not touch water), stirring, until chocolate is almost completely melted, about 3 – 5 minutes; remove from heat and continue to stir until chocolate is completely melted.  Let cool completely.  (I transfer the chocolate mixture to a clean bowl, cover with plastic wrap and place in the refrigerator for 10 minutes).

While the chocolate mixture is cooling, preheat the oven to 325°.

Using an electric mixer on medium speed, add eggs to chocolate mixture one at a time, beating to blend after each addition.  Beat until mixture has a mousse-like consistency.  Reduce speed to low and add salt and 1/3 cup flour; mix until smooth.  Scrape batter into prepared pan.

Bake cake until top is firm and edges are slightly darkened, about 50 minutes (time varies depending upon individual oven temperatures).  The original recipe mentions that a tester inserted into the cake’s center will come out clean before it is truly done (55 – 65 minutes).  I followed the recipe exactly the first time I made the cake and it turned out a bit dry when I left it in the oven for more than 50 minutes so I now remove the cake from the oven when a tester inserted into cake’s center comes out clean.  Set your timer for 45 minutes to see if your cake is done.  If it needs more time, set the timer for a few more minutes and test again. Transfer pan to a wire rack and let cake cool completely in pan before turning out.

Glaze:

Heat chocolate, butter, and salt in a heatproof bowl set over a saucepan of simmering water (bowl should not touch water), stirring, until chocolate and butter are melted, about 5 minutes.  Whisk in powdered sugar.

Meanwhile, bring wine just to a boil in a small saucepan.

Remove chocolate mixture from heat and whisk in wine; let cool until slightly thickened and a rubber spatula leaves a trail in mixture when stirring, 8 – 10 minutes.

Set cake over a wire rack set over a rimmed baking sheet.  Pour glaze over cake and spread it across the top and over the edges with an offset spatula.  Let cake stand at room temperature until glaze is set, about 2 hours.


Dessert, Lactose Free, Recipes

Lactose Free Pumpkin Pie & Best Ever Pie Crust

November 23, 2014

Lactose Free Pumpkin PieThe best pumpkin pie recipes typically utilize sweetened condensed milk or some combination of whole milk and heavy cream.  As I am lactose intolerant, when I bake a pumpkin pie, I always use lactose free whole milk.  Recently I discovered Organic Valley lactose free half and half in my local market. So this time, I used the half and half in my recipe and the pie that emerged from my oven was unexpectedly rich and beautiful.

Lactose Free Pumpkin Pie SliceI like to chill my baked pumpkin pie thoroughly.  It helps to firm up the filling.  For the crust, my favorite recipe is Best-Ever Pie Crust from Epicurious.  I use Earth Balance buttery sticks (in place of butter), and Earth Balance shortening.  I also substitute 2 tablespoons of the water with vodka for a double pie crust recipe.

Lactose Free Pumpkin Pie

Lactose Free Pumpkin Pie & Best Ever Pie Crust

Pie Crust

Ingredients

1 1/4 cups unbleached all-purpose flour

3/4 teaspoon sugar

1/4 teaspoon salt

1/2 stick (1/4 cup) chilled Earth Balance Buttery Sticks cut into 1/2 inch cubes

1/2 stick (1/4 cup) frozen Earth Balance shortening (or other non-hydrogenated vegetable shortening) cut into 1/2 inch cubes

2 tablespoons ice water

1 tablespoon vodka

Preparation

Blend flour, sugar, salt in food processor.  Add buttery sticks and shortening.  Using pulse on/off turns, blend until mixture resembles coarse meal.  Transfer mixture to medium bowl, add water and vodka, and mix with fork until dough begins to clump together, adding more water by teaspoons if dry.  Gather dough together, flatten into a disk, and wrap in plastic.  Refrigerate at least 30 minutes.

Meanwhile, preheat oven to 350 degrees.

Roll out dough (I use lightly floured parchment paper) for 9-inch pie plate.  Line dough with parchment paper or foil and weight down with pie weights or dried beans.  Bake for about 15 minutes or until pie crust is very light/golden-colored.

Remove pie crust to a cooling rack.

Pie Filling 

Ingredients

3 large eggs – room temperature

1 can (15 ounce) Libby’s pumpkin purée

2/3 cup packed brown sugar

1/3 cup granulated sugar

1 teaspoon cinnamon

1/2 teaspoon ground ginger

1/2 teaspoon ground allspice

pinch of ground nutmeg

1/2 teaspoon salt

1 tablespoon corn starch

1/2 teaspoon vanilla

2/3 cups lactose free half and half or whole milk

Preparation

Preheat oven to 425 degrees.

Whisk eggs in a large bowl until a bit foamy, about 30 seconds.  Whisk in remaining ingredients except half and half.  Mix until smooth, then whisk in half and half or milk.  Pour into prepared crust.  Bake 15 minutes then turn the heat down to 350 degrees.  Continue to bake for another 40 minutes or until filling has set.

Remove pie to a cooling rack.   Let cool to room temperature before refrigerating.

*If the edges of the crust start to brown too much, this is the perfect way to avoid burning the crust!


Dessert, Fruit, Lactose Free, Recipes

Lilikoi Bars

August 11, 2014

Lilikoi BarsLemon bars are a favorite dessert of mine since they’re easy to make and most importantly, taste great.  Creamy and rich from the eggs, a bit of sweetness with a hit of tartness, they are a wonderful dessert.  This is a variation on the classic lemon bar. In this recipe I used lilikoi (passion fruit) an exotic tropical fruit which has an extraordinarily fragrant scent. Once the fruit is open, the entire room is filled with a wonderful essence that lingers in the air.  It’s mesmerizing….

Coconut FlakesNow that we grow our own lilikoi I’m always searching for new recipes.  The fruit hangs gracefully from the vines and drops to the ground once ripe.  They can be left on the counter for a few days and will become more fragrant as each day passes. Their taut skin becomes wrinkled, and honestly, they look very homely at this stage.  But don’t throw them out!  This is perfect time to get out the food mill if you have one, and collect the precious juice.  The food mill is ingenious.  It presses out the juice from the fruit and leaves all the seeds behind.  If you don’t have a food mill use cheese cloth or a jelly bag to  strain the juice.  I freeze the juice in 1 and 2 cup containers to use later.  Speaking of searching for new recipes, I found this excellent recipe on Hungry Cravings.  The shredded coconut in the crust is absolutely divine.  The coconut becomes nicely toasted as the crust bakes and adds a delicious note to the bars.  Don’t leave it out.

Crust IngredientsThis is the perfect recipe.  Mix up the crust ingredients, dump it in the pan, press and bake it.  You end up with a beautiful, golden crust with hints of toasted coconut.

Lilikoi Bar CrustYou can see the bits of coconut in the baked crust.  I didn’t have finely shredded coconut on hand so I chopped up some coconut flakes and it worked out fine.

Fresh Eggs

Lilikoi Bar FillingNot only does this recipe have coconut flakes in the crust, it also incorporates coconut milk into the lilikoi layer which adds a subtle richness along with the eggs.

Baked Lilikoi Bars

Lilikoi Bars

Lilikoi-Coconut Bars (Passion Fruit-Coconut Bars)

Updated 9/23/15

Adapted from Hungry Cravings

Ingredients

For the crust:

1 1/2 sticks cold unsalted butter, cut into small pieces (I used lactose-free Buttery Sticks)

1 3/4 cups all-purpose flour

3/4 cups powdered sugar

1/4 cup shredded coconut (I used unsweetened)

3/4 teaspoon kosher salt (1/2 teaspoon kosher salt if using Buttery Sticks)

For the lilikoi-coconut layer:

4 large eggs

1/4 cup coconut milk

6 ounces fresh lilikoi juice

1 1/4 cups sugar

3 tablespoons all-purpose flour

1/4 teaspoon kosher salt

powdered sugar, for dusting

Preparation

Make the crust:

Line a 9 x 13-inch baking pan with heavy-duty aluminum foil leaving an overhang on all sides.  This makes it a breeze to lift out the entire tart once thoroughly cooled.  Lightly butter the foil. Whisk together the flour, powdered sugar, coconut, and salt in a large bowl.  Add the butter and using a pastry cutter, cut the butter into the flour until the mixture resembles coarse crumbs.  Transfer the dough to the baking dish and press into an even layer and up the sides of the pan about 1/3 – 1/2 inch. Refrigerate at least 15 minutes and up to 30 minutes.  Don’t skip this step as it will help to keep the crust from shrinking and pulling away from the sides of the pan which will cause the lilikoi mixture to seep under the crust. While dough is chilling in the refrigerator, pre-heat the oven to 350° then bake for about 20 – 22 minutes, or until lightly browned.

Make the lilikoi-coconut layer:

Blend together the eggs, coconut milk, and lilikoi juice in a small bowl.  Whisk together the sugar, flour, and salt in a large bowl.  Add the lilikoi mixture to the sugar mixture and whisk until smooth.  Pour over the baked crust and bake for 16 – 18 minutes, or until just set.  Let cool to room temperature then transfer to the refrigerator until ready to serve.

Using the edges of foil, lift the bars out of the pan and transfer to a cutting board.  Cut into portions and dust with powdered sugar just before serving.


*Updated the dough procedure to include pressing dough up the sides of the pan about 1/3 – 1/2 inch prior to baking.  This provides a barrier for the lilikoi mixture when you pour it over the baked crust (it could seep down the sides of the baked crust if this is not done).


Follow

Get every new post delivered to your Inbox

Join other followers: