Browsing Category

Chicken

Chicken, Mexican, Recipes

Enchiladas Suizas

December 24, 2013

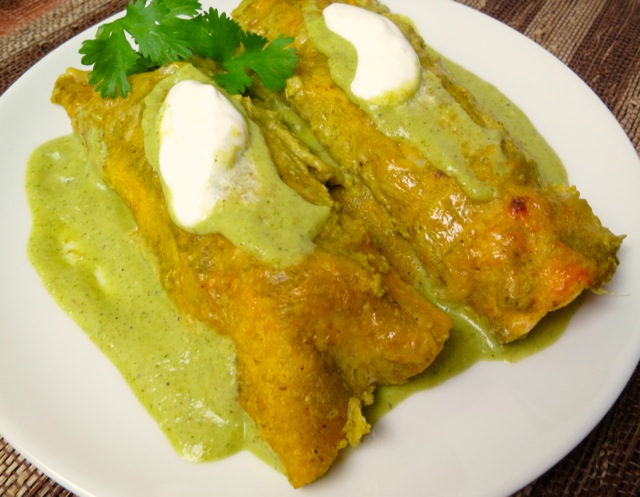
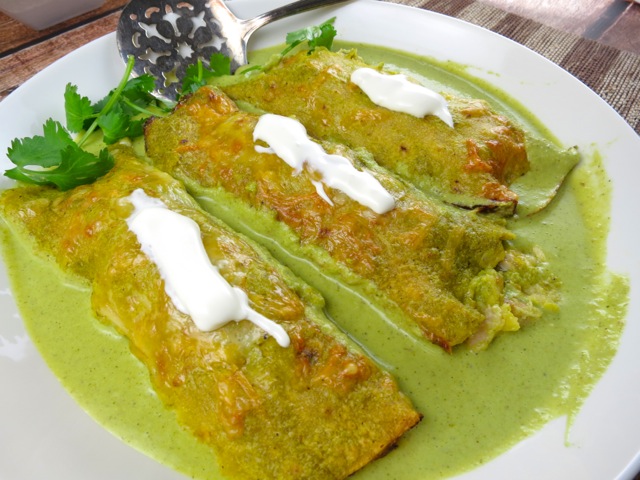
Enchiladas SuizasIf you are a fan of Saveur magazine as I am, you may recall The Mexico Issue (Aug/Sept 2012), loaded with mouth-watering recipes.  As mentioned in the magazine, “the flavors of Mexico are some of the freshest, boldest, and most delicious in the world.”  I couldn’t agree more.  This unique enchilada dish is particularly delectable. Quoting from Saveur, “This cheesy, creamy dish originated at a Sanborns café in Mexico City in 1950. Its name, ‘Swiss enchiladas’ alludes to its copious use of dairy.”
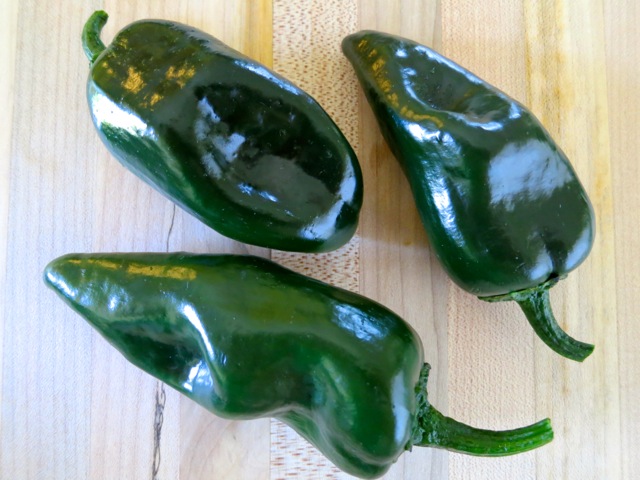
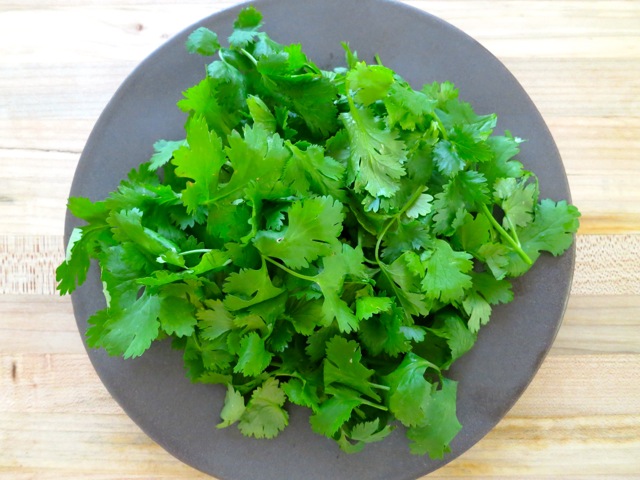
Poblano PeppersPoblano and Serrano peppers, cilantro and tomatillos give the sauce a beautiful green hue. The sour cream adds a subtle richness to the sauce.
Cilantro

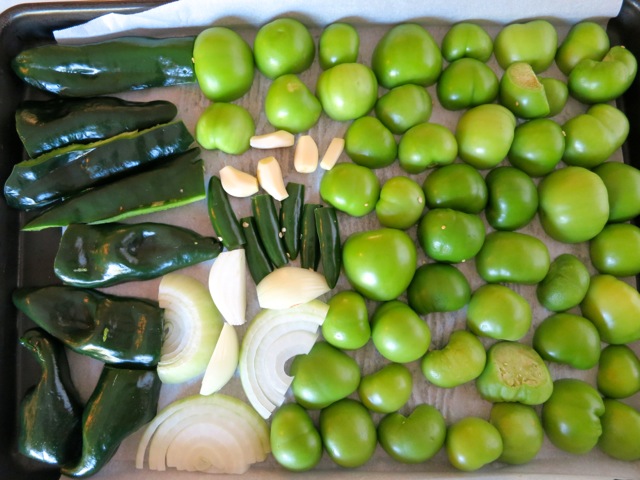
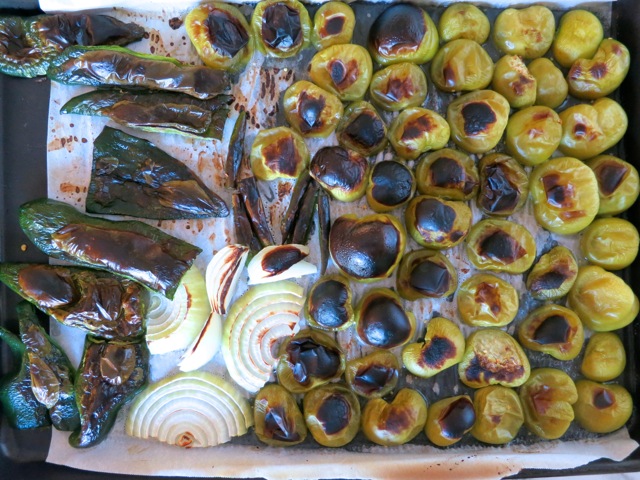
Peppers, Onion, Garlic & TomatillosRoasting the peppers, onions, garlic and tomatillos gives the sauce a slightly sweet and smokey edge and depth of flavor that goes so well with the mild cheese topping.  Roasted Peppers, Onion, Tomatillos
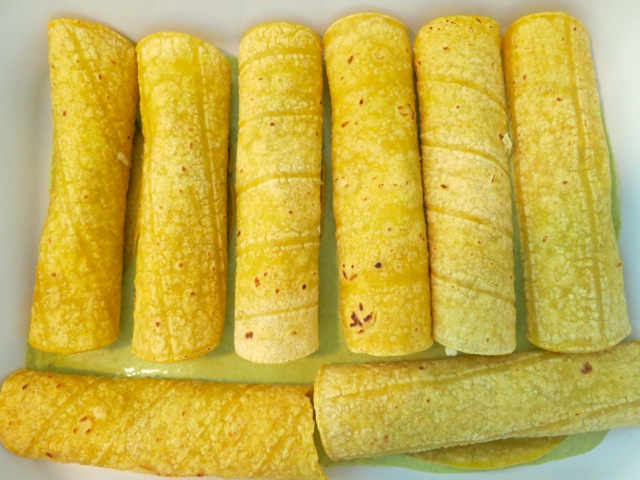
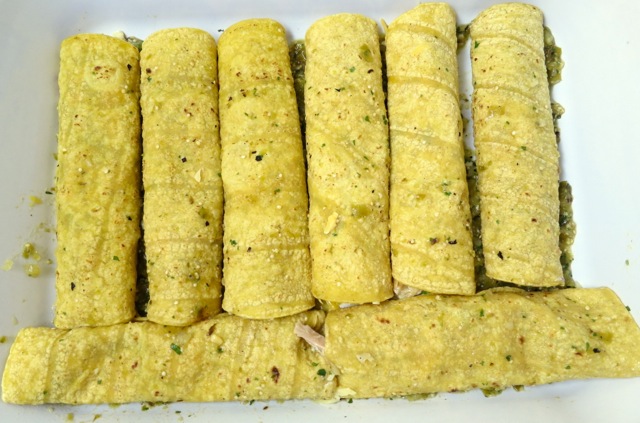
Rolled Enchiladas

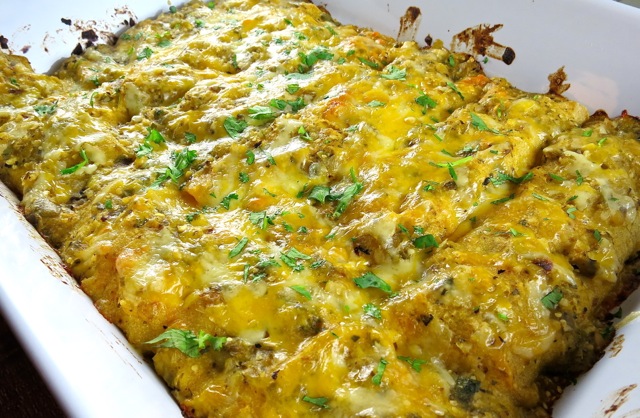
Enchiladas Suizas

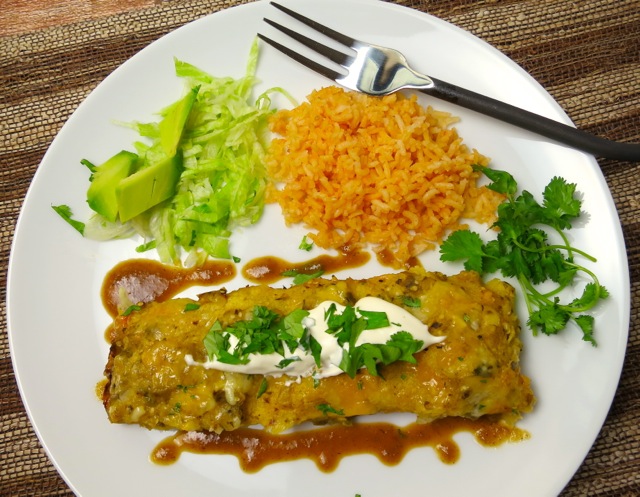
Enchiladas Suizas

Adapted from Saveur Magazine

Makes 8 large enchiladas

Ingredients

1 1/2 pounds tomatillos, husks removed, rinsed

2 – 4  serrano chiles (depending on how much spice you prefer), stemmed and seeded and cut in half

2 – 3 poblanos, stemmed and seeded and cut in half (if the poblanos are very large use just 2)

1/2 large onion, sliced 1/2 inch thick

4 whole cloves garlic

1 cup roughly chopped cilantro

1 cup sour cream (I used Green Valley Organics lactose free sour cream)

1 cup boiling water

1/2 teaspoon cumin seeds, toasted in a dry sauté pan

1 1/2 teaspoon kosher salt

8  – 6 inch corn tortillas

1 deli roasted chicken, skin and bones removed, shredded

1 cup shredded queso Oaxaca or white cheddar

Preparation

Arrange an oven rack 4″ from the broiler and heat broiler to high.  Place tomatillos, serranos, poblanos, onion and garlic on a foil or parchment lined baking sheet (with sides) and broil, turning as needed, until blackened all over, about 10 minutes (I took the garlic cloves out after roasting for 5 minutes so they wouldn’t burn).  Let cool for about 10 minutes then peel and discard skins from peppers.  I pinched off the blackened areas of the tomatillos too. Roughly chop the poblanos.

Transfer the roasted ingredients to a blender along with the cilantro, sour cream, cumin seeds, and boiling water.  Add the salt and puree until smooth.  Set aside.

Here are my directions for preparing the tortillas from my previous post:

To prepare the corn tortillas – the traditional method is to briefly fry them in oil in a skillet until pliable.  Cook’s Illustrated has developed a method that is faster and uses considerably less oil.  The tortillas are arranged on a cookie sheet and lightly sprayed on both sides with cooking oil (Pam).  They are then baked in a 400 degree oven for about 4 minutes. When done, let them cool and they are ready to be filled and rolled.  Do not skip this step.  It keeps the tortillas intact during the baking process.

Place shredded chicken in a large bowl and toss with 1 cup of the enchilada sauce until evenly coated.  Divide chicken evenly among tortillas and roll tortillas tightly around chicken.  Pour about 1 cup of enchilada sauce in the bottom of a 9″ x 13″ baking dish, and place tortilla rolls in dish, seam side down.  Pour a bit of sauce over rolls, and cover evenly with cheese.

Heat oven to 375 degrees.  Bake enchiladas uncovered, until sauce is bubbling and cheese is melted, about 25 minutes.  Remove from the oven and let cool for 10 minutes.  Serve with extra sauce.


Chicken, Dinner, Mexican, Recipes

Chicken Enchiladas with Roasted Tomatillo Chile Salsa

October 17, 2013

Enchilada plateMy folder of “must try” recipes is bulging at the seams.  I tear out pages of recipes from my food magazines and print out recipes from the internet determined to make them “one day soon.”  Some day, I’ll get to those recipes, I’m sure of it!  I’ll bet many of you can relate to this eccentricity of mine.  This enchilada recipe never made it to that folder. After reading it I was determined to make it for dinner right away.

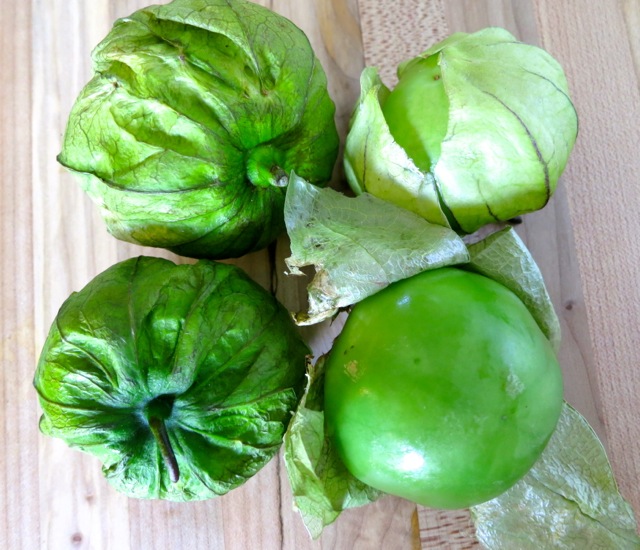
TomatillosPretty tomatillos hidden under their papery husks.

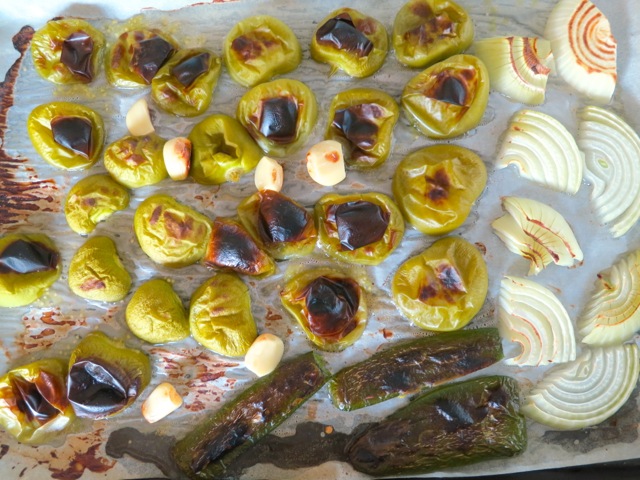
Roasted tomatillosRoasted tomatillos, jalapeño, garlic and onions.

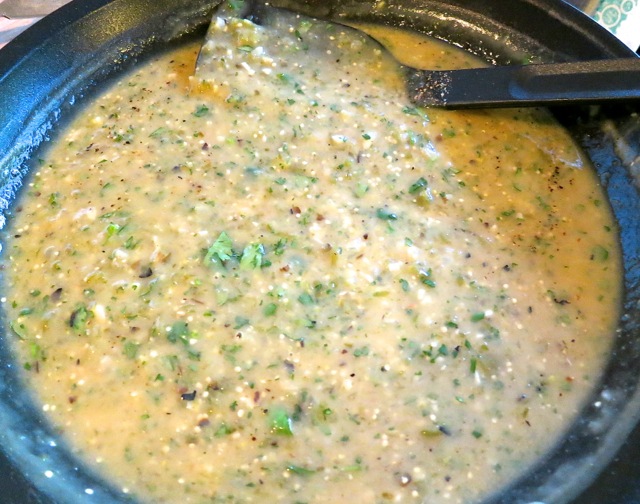
VelouteVelouté with tomatillo chile salsa.

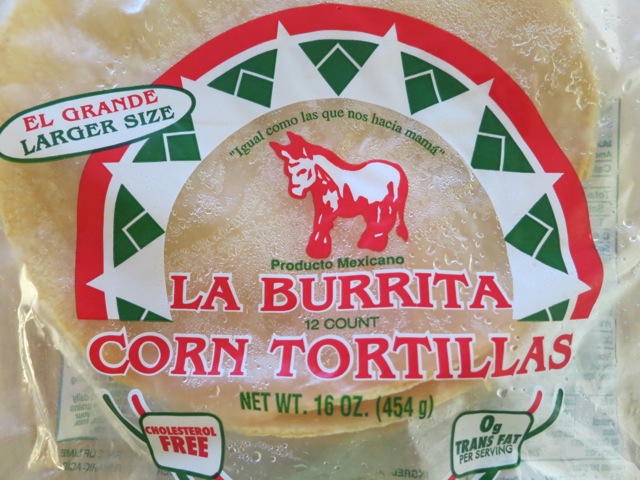
TortillasThese El Grande corn tortillas measured 7 inches across and worked perfectly.

Rolled Enchiladas 2Place a scoop of chicken-enchilada mix in each tortilla, roll them up and place seam side down.  The original recipe from Tyler Florence calls for flour tortillas but we used large corn tortillas instead.

Enchiladas 2The scent of roasted tomatillos, corn tortillas and cheese filled the air while they were baking.  Once they were done we finally had the chance to sit down and enjoy the enchiladas.  The verdict – these are the best chicken enchiladas we have ever had.  Since we hadn’t invited any of our friends over on this particular evening, we had leftovers for the next couple of days.  The enchiladas were out of this world!

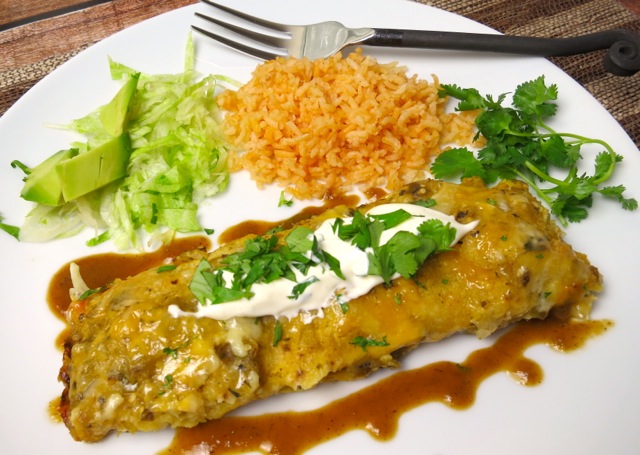
Enchilada plate 2

Chicken Enchiladas with Roasted Tomatillo Chile Salsa

Adapted from Tyler Florence’s recipe

Makes 8 large enchiladas

Ingredients

Roasted Tomatillo Chile Salsa:

1 1/2 pounds tomatillos, husked and rinsed

1 white onion, peeled and cut into thick slices

4 medium garlic cloves, peeled

2 jalapeños, cut in half lengthwise, seeds removed

2 teaspoons ground cumin

1 teaspoon salt

1/2 cup chopped cilantro

juice of 1/2 lime

Enchiladas:

1 tablespoon olive oil

1/2 medium onion, finely diced

2 garlic cloves, minced

1 1/2 teaspoons ground cumin

1/4 cup all-purpose flour

2 cups chicken stock (store-bought is fine)

chopped cilantro

1 deli roasted chicken, boned and shredded

salt and pepper

8 large corn tortillas

1/2 pound Monterey jack or extra sharp cheddar cheese, shredded

Preparation

For the salsa:

Broil the tomatillos, onion, garlic and jalapeños for approximately 10 minutes.  Watch carefully so they don’t burn.  Transfer the roasted vegetables and any juices on the bottom of the pan to a food processor.  Add the cumin, salt, cilantro, and lime juice and pulse mixture until well combined but still a bit chunky.

Enchiladas:

Preheat the oven to 375 degrees.

Heat 1 tablespoon olive oil in a medium saucepan over medium heat.  Add the onion and cook until soft and caramelized, about 5 – 7 minutes.  Add the garlic and cumin then cook for another minute.  Sprinkle on the flour and stir to ensure the flour doesn’t burn then gradually add the chicken stock to make a velouté. Continue stirring over a low simmer until the flour cooks and the liquid thickens.  Turn off the heat, add 1 cup of the roasted tomatillo chile salsa, and some additional fresh chopped cilantro and fold in the shredded chicken. Season to taste with salt and pepper.

To prepare the corn tortillas – the traditional method is to briefly fry them in oil in a skillet until pliable.  Cook’s Illustrated has developed a method that is faster and uses considerably less oil.  The tortillas are arranged on a cookie sheet and lightly sprayed on both sides with cooking oil (Pam).  They are then baked in a 400 degree oven for about 4 minutes. When done, let them cool and they are ready to be filled and rolled.  Do not skip this step.  It keeps the tortillas intact during the baking process.

Take a large baking dish (I used an 11 x 14 inch dish) and smear the bottom with some of the reserved tomatillo salsa.  Place a small amount of the reserved salsa on a plate and coat each tortilla lightly on both sides.  Put a scoop of the shredded chicken-enchilada mix on top of the tortilla followed by a sprinkle of shredded cheese.  Fold the tortilla over the filling and roll like a cigar to enclose it.  Place the tortilla seam side down in the baking dish and continue to do the same with the remaining tortillas.  Finally pour over some of the salsa and top with the remaining cheese.  Bake uncovered for about 30 minutes until the cheese is bubbly.  Garnish with cilantro and serve with the best Mexican rice – Sopa de Arroz.  We drizzled John’s Tomatillo Jalapeño Hot Sauce on the plate.

Chicken, Dinner, Japanese, Recipes

Chicken Katsu

April 30, 2013

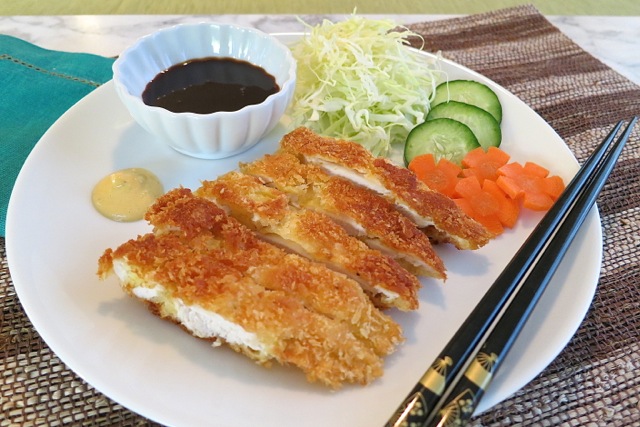
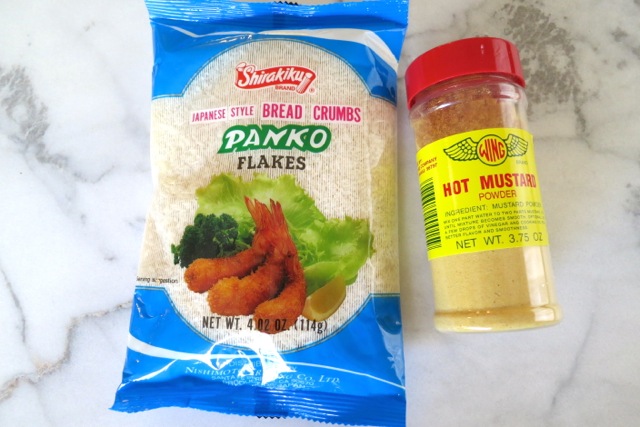
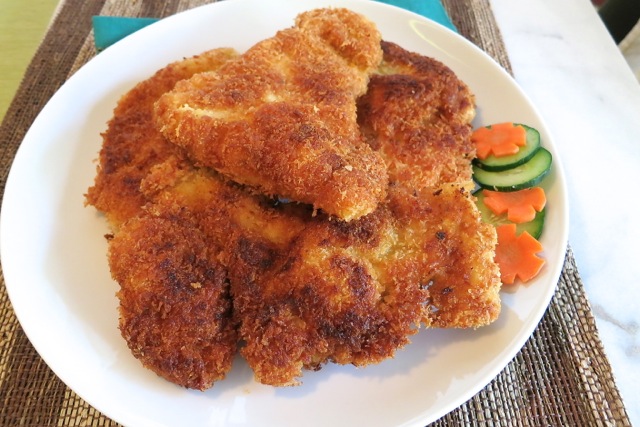
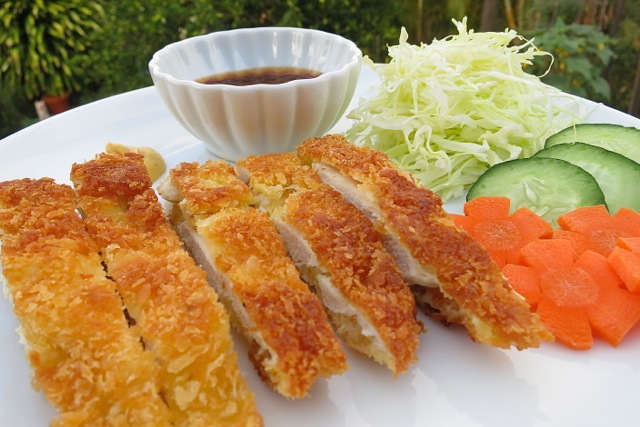
Chicken Katsu PlateMy friend Colleen recently told me about the Coastal Range Organics chicken she purchased at Costco and how much she likes it.  Typically when I go to Costco I zoom around with my cart trying to dodge the shoppers that clog the aisles.  I zero in on the items that are familiar to me and don’t pay attention to other products.  So thanks, Colleen, for bringing the Coastal Range Organics chicken to my attention!  I found it to be superior to the chicken I always bought in the past.Panko & Hot MustardChicken katsu is one of my favorites and very simple to prepare.  Chicken breasts become much more tender when pounded and this also allows them to cook evenly.  Properly prepared chicken katsu has a crunchy exterior and tender interior.

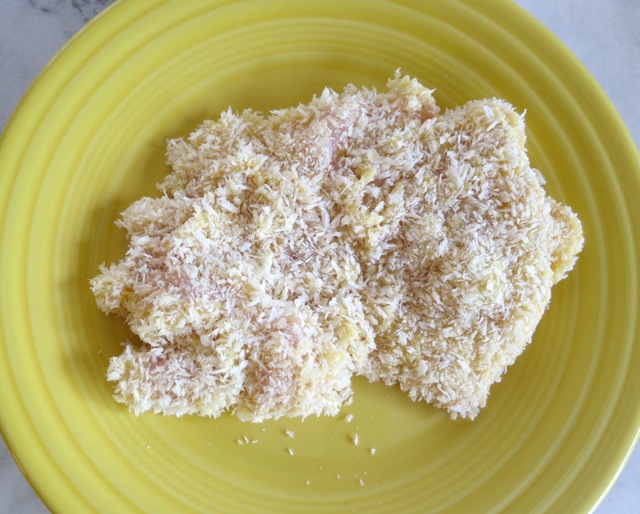
Panko Crusted ChickenLightly dust your pounded chicken cutlets in flour then in the egg mixture.  Repeat this process once again and finally coat the chicken with panko.  The double coating of flour and egg gives the chicken a super crunchy crust.

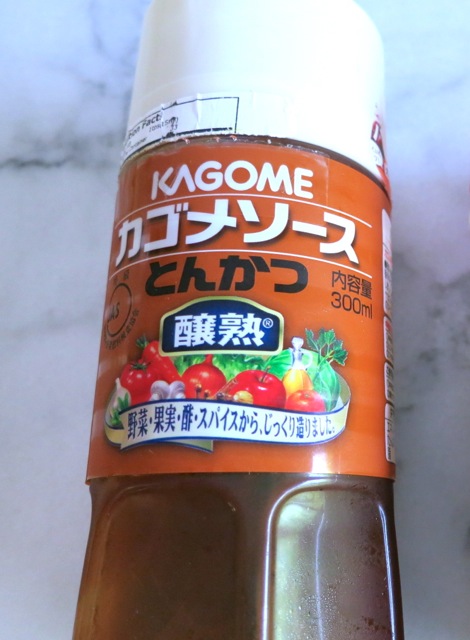
Tonkatsu Sauce

There are many brands of tonkatsu sauce but the selection here on Maui is very limited.  I’ve tried a few and found this brand to be my favorite so far.

Chicken Katsu

Chicken Katsu 2

Chicken Katsu

Serves 4 -6

Ingredients

3 large boneless, skinless chicken breasts, cut in half crosswise and pounded 1/3 inch thick.

1/2 cup flour

3 large eggs

2 1/c cups panko (4 oz. package)

3/4 cup canola oil

Preparation

Cut each chicken breast in half, crosswise.  Pound chicken in a Ziploc bag until each piece is about 1/3 inch thick.

Place flour and panko on two large paper plates.  Whisk eggs in a wide, shallow bowl.

Lightly salt and pepper the chicken.  Dust the chicken in flour then in the beaten eggs.  Repeat this step one more time then dredge the chicken in panko, patting the panko crumbs on both sides of the chicken.

In a large 12 inch saute pan, heat 3/4 cup canola oil over medium high heat.  Once the oil is hot, add half of the chicken to the pan and cook for 3 minutes or until nicely browned.  Turn chicken over and cook for about 2 minutes more.  Remove chicken to a paper towel lined plate.  Continue cooking the rest of the chicken.

Cut chicken into 3/4 inch slices and serve with finely shredded cabbage, hot mustard, tonkatsu sauce and steamed rice.  With its sweet and tangy dressing, cucumber  and carrot namasu is a perfect side dish.


Chicken, Dinner, Japanese, Recipes

Chicken Karaage

January 21, 2013

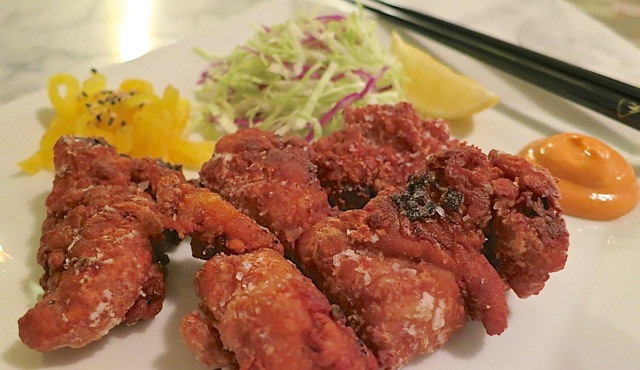
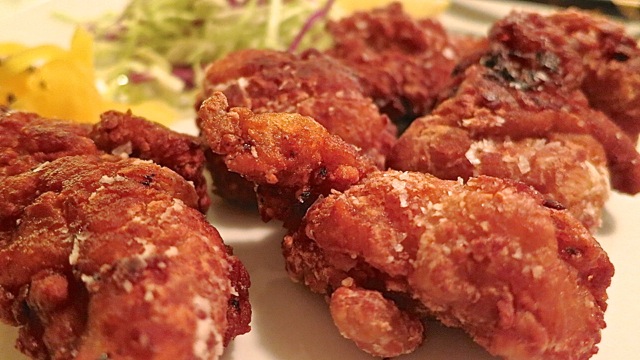
Chicken KaraageChicken karaage or Japanese fried chicken is a quick and delicious meal to prepare for your friends and family, a real crowd pleaser.  Because the chicken is boneless and cut into small pieces, it cooks quickly and that means you spend less time standing over your stove.

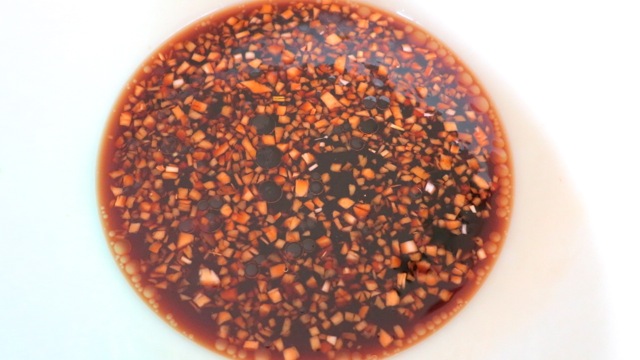
Karaage MarinadeThe marinade for the chicken is flavorful and made with ingredients you’re likely to have in your pantry.  Fresh ginger is the only item you might need to pick up at the market before you make this dish.  Though I only made dinner for two, the marinade will season up to 10 chicken tenders.  Just remember to turn the pieces now and then so each one soaks up the tasty sauce before frying.

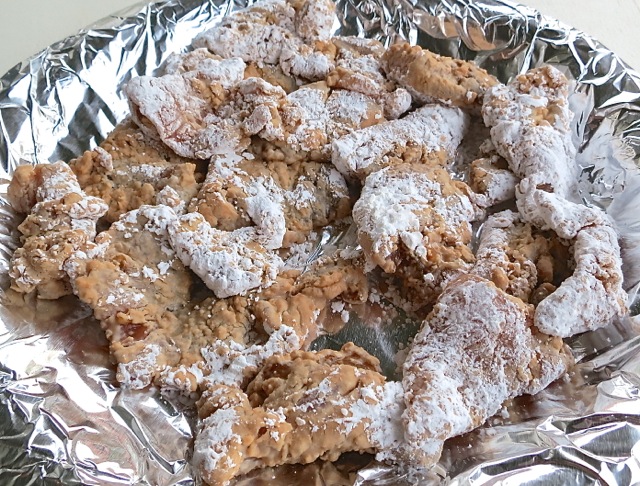
Chicken Karaage CoatingLet the marinated chicken absorb the corn starch before frying.

Chicken Karaage - Japanese Fried Chicken

Chicken Karaage

Serves 2

Ingredients

6 chicken tenders – each cut into 3 pieces

1 cup corn starch

canola oil for deep-frying

Marinade

1/4 cup soy sauce

2 tablespoons mirin (sweetened rice wine)

2 tablespoons Sherry (Amontillado if available)

1/4 teaspoon sesame oil

2 medium garlic cloves – minced

1 teaspoon finely minced or grated ginger

Preparation

Combine soy sauce, mirin, sherry, garlic and ginger in a medium bowl large enough to hold the chicken pieces.  Marinate chicken in refrigerator for about 1/2 hour, turning chicken pieces occasionally.

Place corn starch in a pie plate or medium bowl.  Once the chicken is ready to fry, remove pieces from marinade and coat well in cornstarch.  Transfer chicken to a plate and continue with the rest of the chicken.

Let the marinated chicken pieces absorb the corn starch until they turn a light brown color (see photo above).  Now they are ready to cook.

In a wok or sauce pan heat oil over medium high heat – 355 degrees.  Use just enough oil to cover the chicken for deep-frying.

Once the oil is hot, cook chicken in batches.  Try not to over crowd the pan.  This will cause the heat to drop and the chicken will become greasy if the oil is not hot enough. Turn chicken after 1 minute and continue to fry until cooked through, about 1 1/2 minutes more. The chicken should be a deep brown color on both sides.  Remove a piece of chicken from the pan to check for doneness.

Transfer cooked chicken to a paper towel lined plate and sprinkle with coarse salt.  Continue to cook the rest of the chicken.

Place fried chicken on a serving plate with lemon slices or as I prefer, with Sriracha hot sauce on the side.

Beef, Chicken, Dinner, Japanese, Recipes, Vegan, Vegetarian

Granny’s Teriyaki Sauce

November 20, 2012


A recipe named after “Granny” might not sound all that exciting but if you love homemade teriyaki sauce this is really delicious. My mom gave me her recipe card for this sauce a long time ago and she made a note on it “the best.”  She was right. It’s the best teriyaki sauce I have ever had.

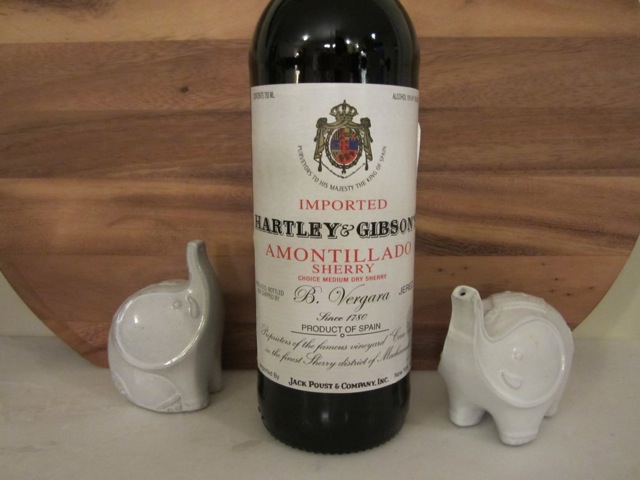
The secret ingredient that makes this sauce so tasty is sherry.  So go ahead and buy a bottle of sherry.  Not the cooking sherry they sell in the condiment aisle, decent sherry like Hartley & Gibson’s Amontillado sherry which you can find at a full service grocery store or liquor store.  Stash the bottle in your cupboard until your next craving for really good teriyaki sauce, it will last indefinitely.

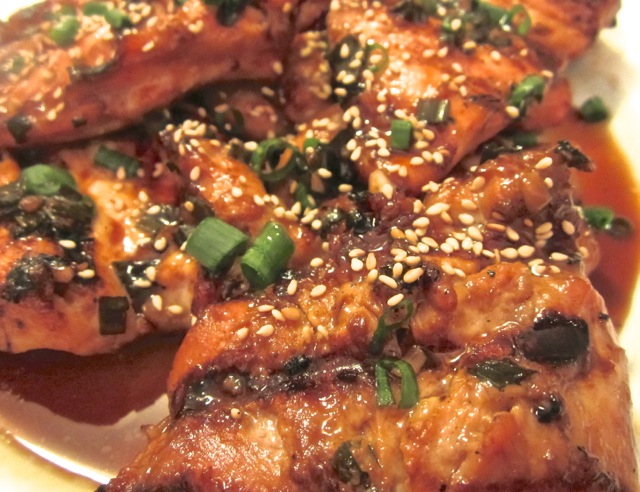
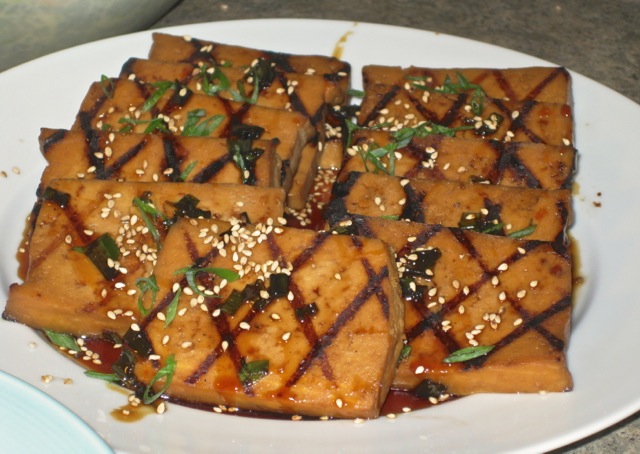
You can use this marinade for chicken, tofu, fish and beef.  I use part of the sauce to marinate whatever I’m cooking and simmer the rest of the sauce until it becomes thick and syrupy.  I drizzle this on grilled chicken, tofu or fish and finish with a few sliced green onions before serving.  Really good.

Granny’s Teriyaki Sauce

Ingredients

1/2 cup sugar

1/2 cup plus 2 tablespoons soy sauce (Kikkoman recommended)

4 tablespoons sherry (Hartley & Gibson’s or similar quality)

1 tablespoon canola oil

2 large garlic cloves chopped

green onions, sliced (use a good amount since they tend to shrink quite a bit once mixed into the sauce)

Preparation

Combine sugar with soy sauce and sherry until the sugar has dissolved.  Add oil, garlic and chopped green onions.

Use to marinate boneless chicken breasts chicken thighs, or your favorite cut of steak for about 3 hours.  For tofu and fish such as salmon or ahi marinate for just one hour or so.  Turn pieces occasionally.

Note: Prior to marinating your chicken, fish, beef or tofu reserve part of the sauce and simmer until syrupy, about 10 minutes on medium low heat.  Watch so the sauce does not boil and burn.  You can do this in advance, the sauce will thicken as it cools.  Drizzle over grilled chicken, fish, beef or tofu.  Sprinkle on green onions and roasted sesame seeds before serving. For a larger quantity of meat double the recipe.

Chicken, Dinner, Japanese, Recipes

Mochiko Chicken

November 3, 2012

With the tsunami warning taking place the other night, many of us stayed up way past our bedtime listening to updates from the Pacific Tsunami Center.  Luckily there was no damage caused by the tsunami here in Hawaii.  The following day was like any other Sunday, people picnicking at the beach, shopping, doing errands and going about their merry way.  Since I was one of those people who didn’t get much sleep the night before, I wasn’t too keen on making anything fancy for dinner.

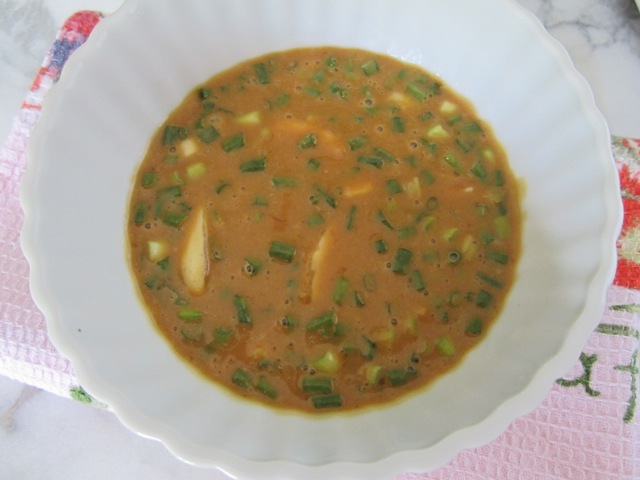
Mochiko Chicken Marinade

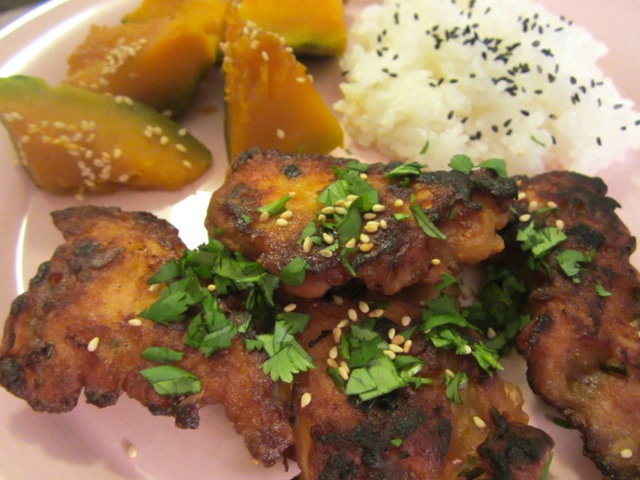
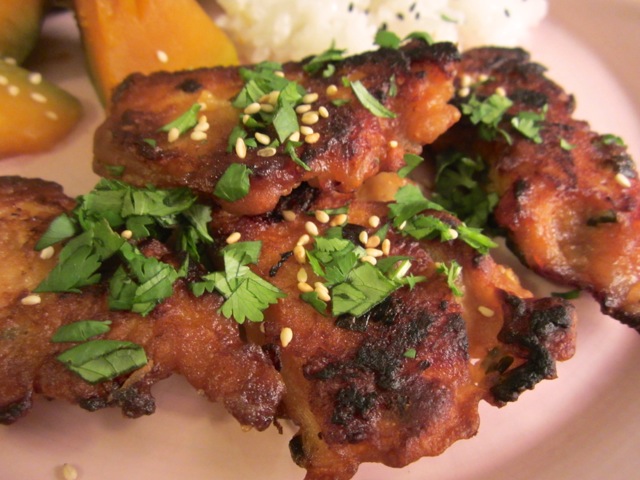
I found this recipe in our local newspaper years ago.  This version of mochiko chicken is delicious.  It makes a great picnic lunch along with some onigiri and Kabocha No Toroni. All of these dishes can be eaten without heating up.

Mochiko Chicken

Serves 4

Ingredients

4 tablespoons sugar

5 tablespoons soy sauce

1/4 cup sesame oil

1 tablespoon oyster sauce

2 eggs, beaten

5 tablespoons cornstarch

3 tablespoons flour

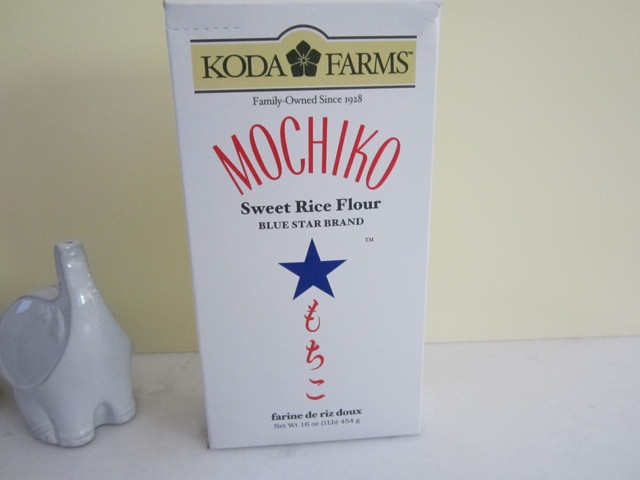
6 tablespoons mochiko flour

3 garlic cloves, crushed

1/2 cup chopped green onions

few dashes of salt

4 large boneless, skinless chicken breasts cut into pieces about two inches in length

canola oil for frying

Preparation

Combine the sugar and soy sauce until the sugar has dissolved.  Add the rest of the ingredients except the chicken.  Mix marinade well and pour into a large bowl or Ziplock bag.  Add the chicken and marinate in the refrigerator for a minimum of two hours.

Pour enough oil into a large fry pan to a depth of 1/4 inch and heat over medium high heat.  Fry the chicken in batches for about 3 – 4 minutes per side or until the chicken is cooked through.  The cooking time will depend on how thick your pieces of chicken are.  I prefer to pound the chicken breasts so they cook evenly and quickly.  This also tenderizes the chicken.  Alternately you can use chicken tenders or if you prefer, chicken thighs.

Remove the chicken and drain on a paper towel lined plate.  Serve right away or pack it up and take it to the beach.


Follow

Get every new post delivered to your Inbox

Join other followers: