Browsing Category

Bread

Bread, Lactose Free, Recipes, Vegan, Vegetarian

Josey Baker’s Adventure Bread

June 19, 2014

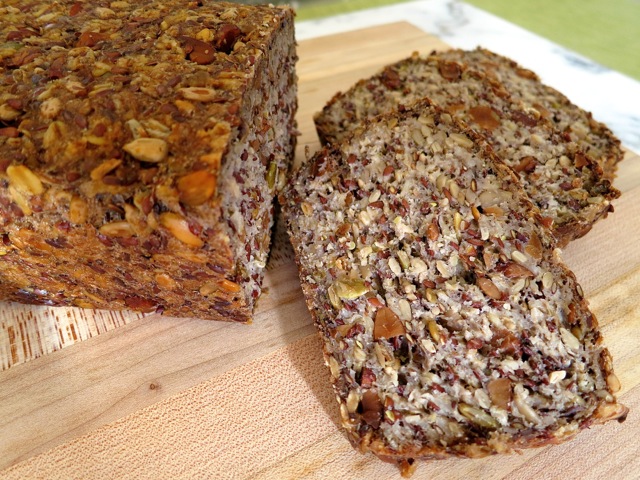
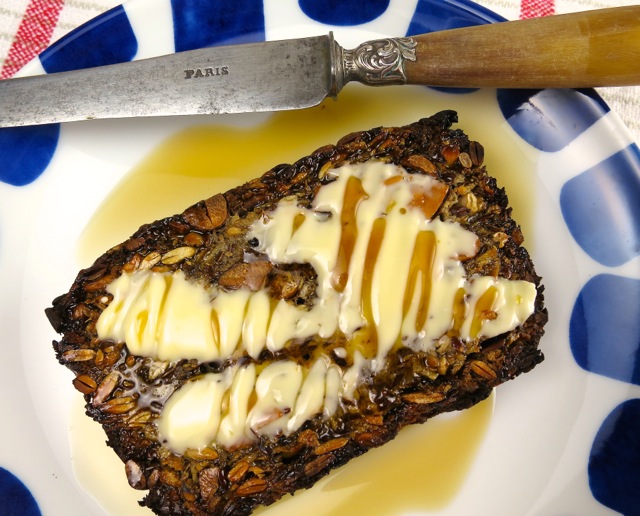
Toasted Adventure Bread with Maple SyrupAdventure bread.  What a clever name!  The moment I read David Lebovitz’ post about Josey Baker’s Adventure bread, chock-full of nuts, seeds, and oats, I knew I had to make it right away.
Adventure Bread

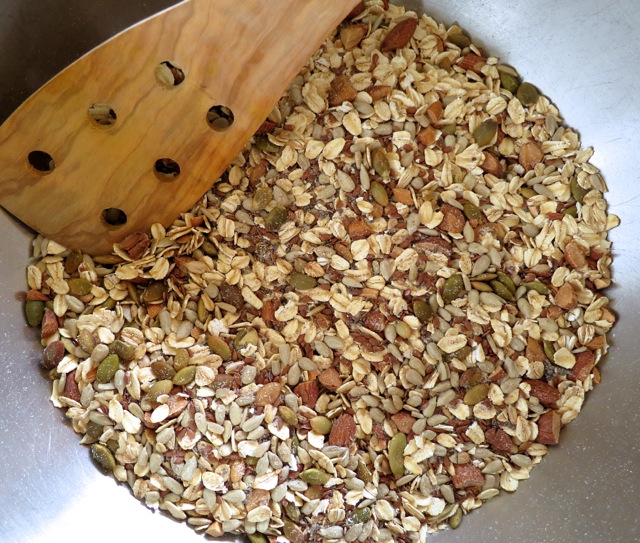
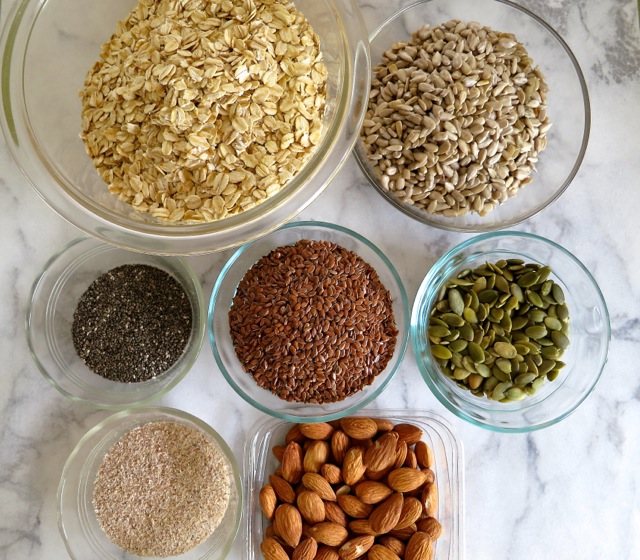
Psyllium Husks, Chia Seeds, Oats, Sunflower Seeds, Pumpkin Seeds, Almonds, Flax SeedsYou might wonder what holds this gluten and flour free, hearty loaf together.  The secret binder is psyllium husks.  This bread’s allure is hard to explain but you’ll fall in love with it as soon as you try it. Toasted until utterly crunchy and smothered with butter and honey or pure maple syrup, it is the perfect way to start (or end) your day.
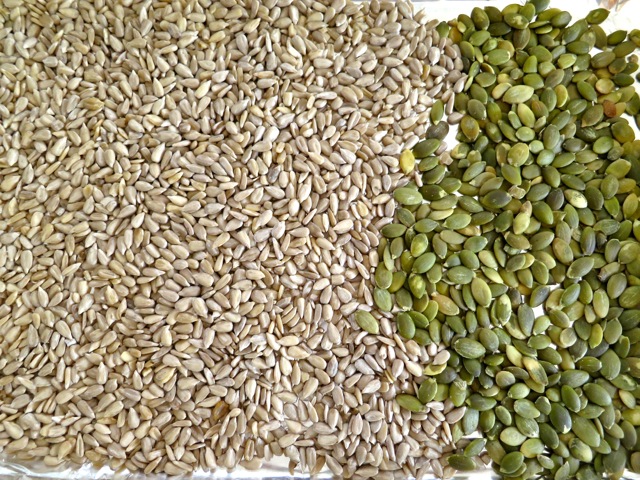
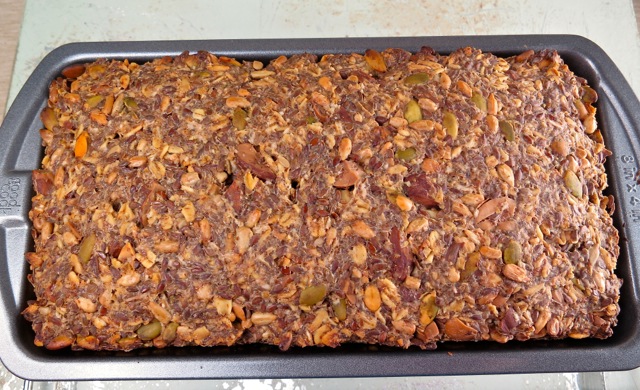
Sunflower & Pumpkin SeedsThere is an abundance of sunflower, pumpkin, and flax seeds, plus 3/4 cups toasted almonds and 2 1/4 cups of rolled oats. I was curious to know how much this loaf weighed.  I set the pan on my kitchen scale and found it weighed 3 1/2 pounds!  I knew I was in for a real treat when the loaf was baking and the scent of toasted almonds filled the air.
Adventure Bread Dry Ingredients

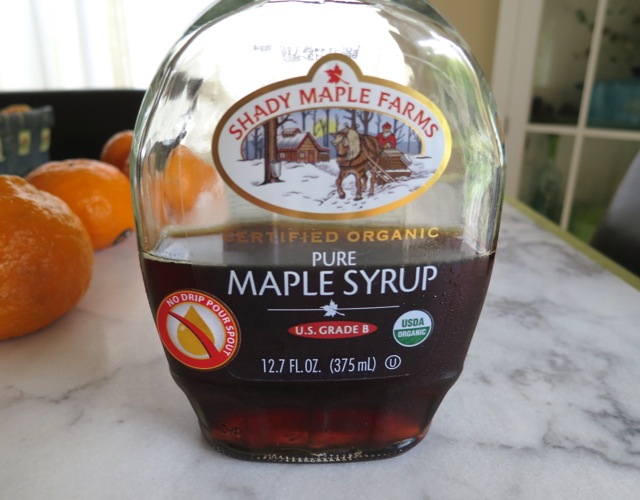
Organic Maple SyrupIt’s essential to use pure maple syrup.  No substitutions!

Baked Adventure Bread

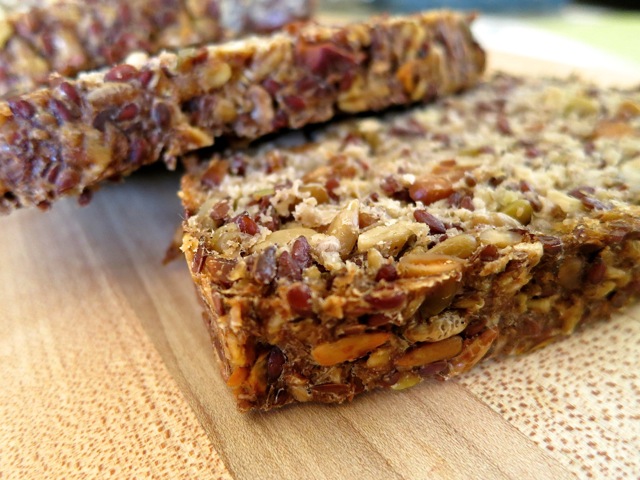
Sliced Adventure Bread

Josey Baker’s Adventure Bread

One eight-inch loaf pan

From David Lebovitz blog

Ingredients

Dry:

2 1/4 cups (235g) rolled oats

1 cup (160g) sunflower seeds (hulled)

1/2 cup (65g) pumpkin seeds (hulled)

3/4 cup (90g) almonds, toasted and coarsely chopped

3/4 cup (120g) flax seeds

1/3 cup (25g) psyllium husks

3 tablespoons (25g) chia seeds

2 teaspoons (12g) fine sea salt

Wet:

2 tablespoons (40g) pure maple syrup

1/4 cup (55g) olive oil

2 1/2 cups (600g) water

Preparation

Toast the sunflower and pumpkin seeds. Preheat your oven to 350ºF.  Spread the seeds on a baking sheet and toast until they start to brown, about 15 minutes, stirring halfway during baking.  Watch closely so they do not burn.  Toast the almonds for about 7 minutes. I used my toaster oven set to 300ºF.

Combine the dry ingredients in a large bowl.  Pour in the wet ingredients, and as Josie instructs, “mush up your dough real good with strong hands or a big spoon.”  Since this is all the handling your dough will encounter, mix it well.   Scoop the dough into your oiled pan and smooth out the top.  Place the pan in your refrigerator for at least a few hours, or up to a whole day.

Remove the bread from the refrigerator and let it come to room temperature.  Put a rack in the middle of the oven and preheat to 400ºF.  Bake the bread for about an hour, then take it out and gently remove the loaf from the pan.  Let it cool on a rack for at least 2 hours, or until completely cool.  Josie says not to rush this step.

The bread is best sliced thin (about 1/2 inch) and then toasted until crunchy edges form.  I use my toaster oven and toast the slices for at least 8 – 10 minutes.  Spread with butter and drizzle with honey, or top with your favorite jam, jelly, or maple syrup.

*The bread freezes nicely.  Slice and freeze in a Ziplock bag.


Bread, Breakfast, Dessert, Fruit, Recipes

Maui Mango Bread

November 9, 2013

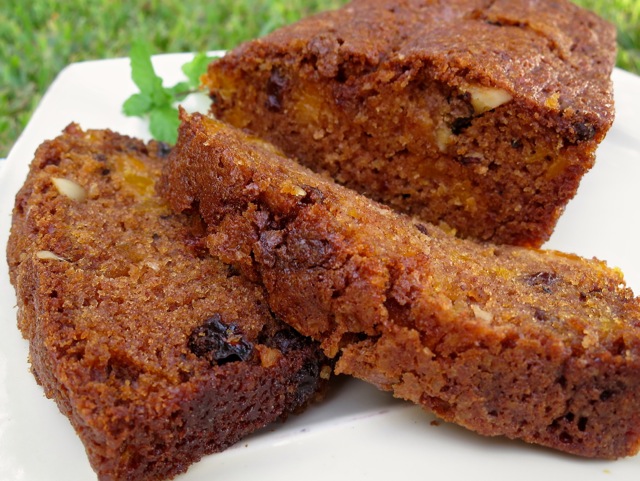
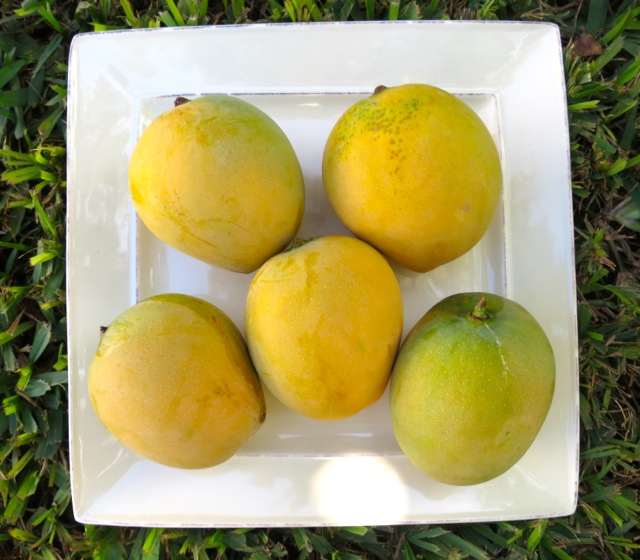
Maui Mango BreadSummer has come and gone and so have most of the mangoes on our two trees.  I haven’t had to buy fruit for months since we’ve had fresh mangoes every day.  What a dream!  Well we have just a few of those glorious golden orbs left and as it happens they all ripened at the same time.  I couldn’t let this opportunity pass: time to break out my mango bread recipe.

White Pirie MangoesI adore these exceptionally sweet mangoes as do my family and friends.  They don’t have a very long shelf life, they ripen a day or two after they’re picked.   A quick chill in the refrigerator and they are ready to eat.

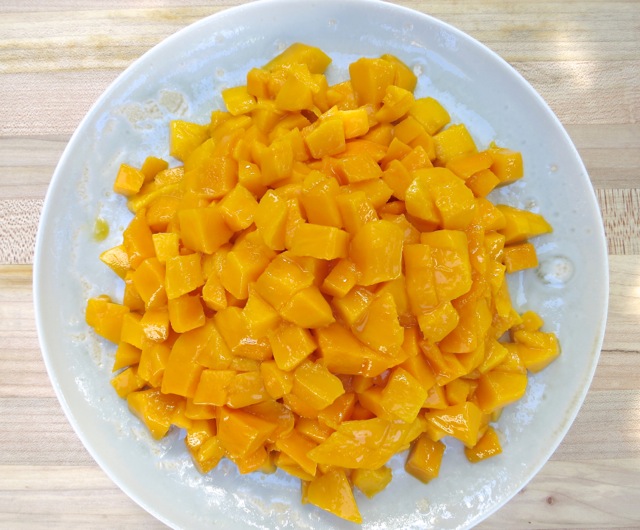
Diced White Pirie MangoesThe White Pirie mango has a deep orange color and is delightfully fragrant.

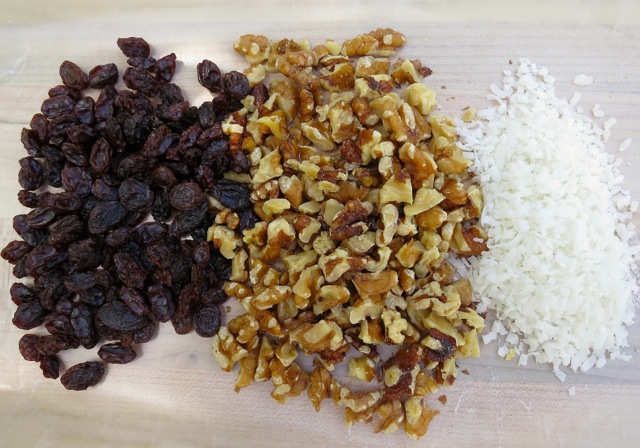
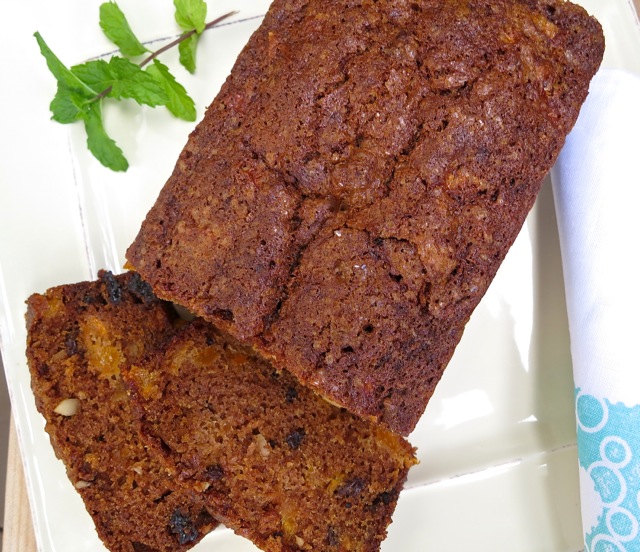
Raisins, Walnuts, CoconutThough mango is the star of this recipe, the combination of raisins, walnuts, coconut and cinnamon bring it all together to make a moist and luscious cake.  Thanks to my friend Tamoe who shared her recipe with me.

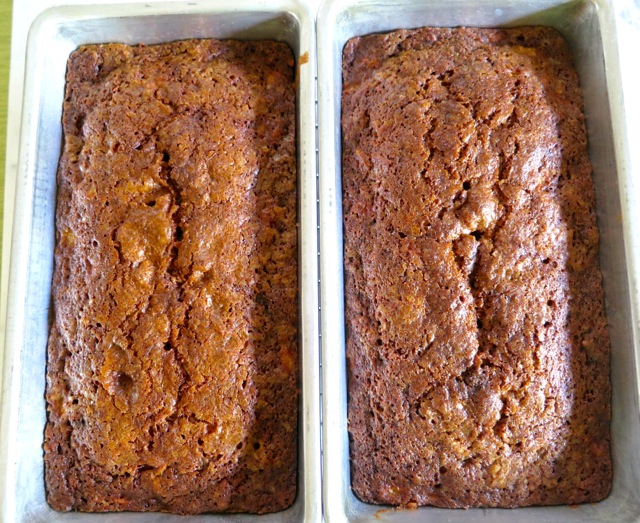
Mango Bread Loaves

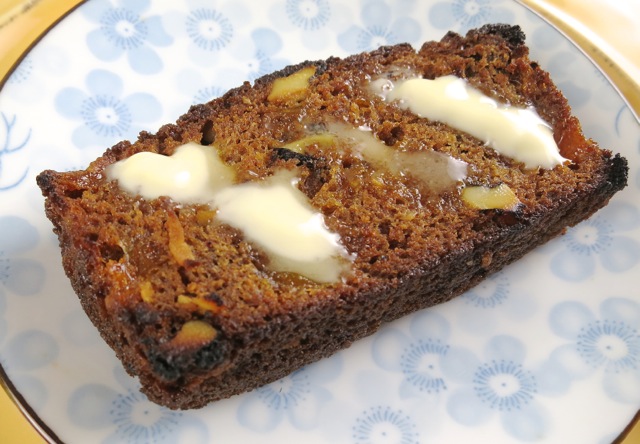
Maui Mango BreadToasting  a thick slice of mango bread and serving it with a pat of butter takes it to another level.

Toasted Mango Bread

Maui Mango Bread 

Adapted from Tamoe’s Mango Bread recipe

Makes two loaves

Ingredients

2 cups flour

1 1/4 cups sugar (or up to 1 1/2 cups sugar if your mangoes are not on the sweeter side)

2 teaspoons baking soda

1 1/2 teaspoons cinnamon

1/2 teaspoon salt

3/4 cup plus 2 tablespoons canola oil

3 large eggs, well beaten

1/2 teaspoon vanilla

2 cups finely chopped mango

1/2 cup chopped walnuts

1/2 cup raisins

1/8 cup shredded sweetened coconut

demerara sugar (optional but recommended)

Preparation

Preheat oven to 350 degrees.

Butter two 8 inch loaf pans.

Place flour, sugar, baking soda, cinnamon and salt in a large bowl and mix well.  Mix in the oil, beaten eggs and vanilla.  Add the mangoes, walnuts, raisins and coconut.  Pour into loaf pans and bake for 55 – 60 minutes.  If using demerara sugar, bake the bread for 10 minutes then sprinkle the sugar over the tops of each loaf.  (If you add the sugar before baking the bread, it will dissolve into the batter).  Continue baking for another 45 minutes. Since oven temperatures vary, it’s a good idea to check the bread after it has baked for 53 minutes.  If it needs more time, check again every 2 minutes to prevent over baking.

Note: If you are using dark pans the bread will bake quicker than in light pans so check for doneness at 50 minutes.


Bread, Breakfast, Dinner, Recipes, Side Dishes

Betty’s Cornbread

March 29, 2013

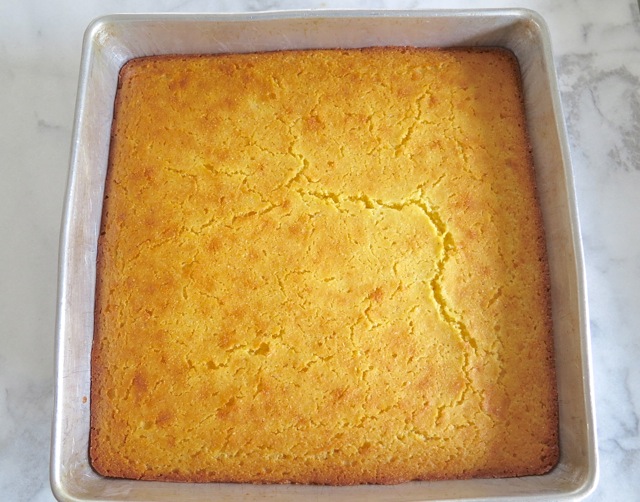
Corn BreadMy mom was a fabulous cook.  Everything she made was delicious and in particular her brownies and lemon meringue pie.  I kept a few of her old cookbooks and every now and then I’ll come across a page where she had made some notes about the recipe. Some are hysterical, for instance the recipe for Blended Almond Paste: “Burned out blender doing this.  Don’t make this!” And Griddle Cakes: “terrible!” And then there are a couple of recipes with a big X over the entire page which I assume was because they were just so bad that there would be no repeat effort.  She was a big fan of Julia Child and James Beard and needless to say, these notes did not appear in either of these chef’s cookbooks.

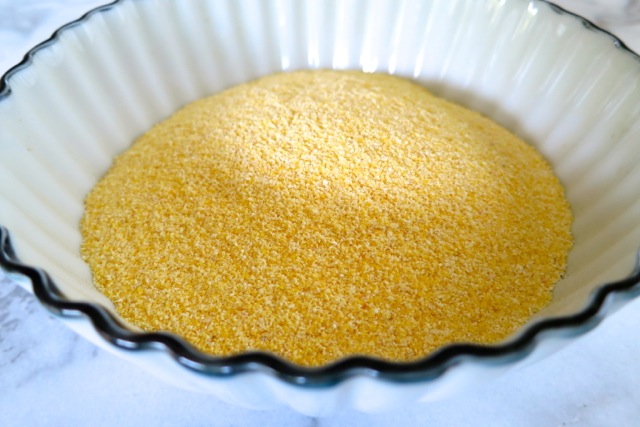
Corn MealI wrote down this recipe of hers many years ago and continue to make it, first because it is delicious and second because it is ready in just 30 minutes.  This is a hearty cornbread and doesn’t have a fine cakey texture like some other cornbreads I’ve tried.  It has a bit of flour in the recipe however it is mostly cornmeal which is why I love it.

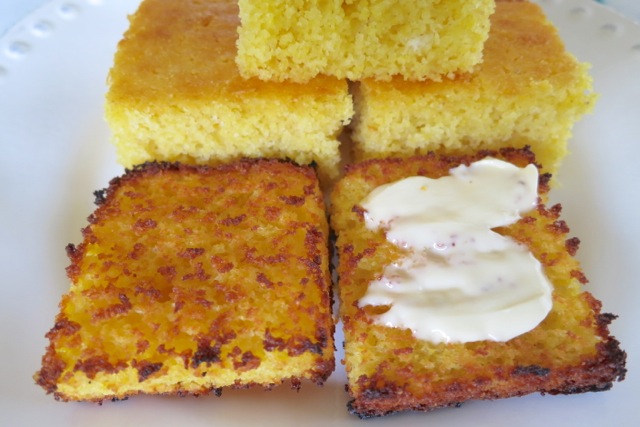
Toasted Corn BreadOnce the cornbread has cooled in the pan for 10 minutes or so, I cut it into 16 pieces.  My favorite way to eat cornbread is to slice a piece in half and toast it in my toaster oven until it is nicely browned and the edges are extra crispy.  A pat of butter is all it needs. Don’t you agree?

Betty’s Cornbread

16 pieces

Ingredients

1 1/2 cups cornmeal

1/2 cup flour

4 teaspoons baking powder

1/2 teaspoon salt

1/2 cup sugar

1 1/4 cups milk

2 large eggs

2/3 stick butter, melted

Preparation

Preheat oven to 400 degrees

Butter a 9 x 9 inch pan.

In a large bowl combine cornmeal, flour, baking powder, salt and suger.  Stir to combine.

Pour 1 1/4 cup milk into a 2-cup measuring cup.  Add eggs and whisk until just combined. Melt butter and add to the milk and eggs.

Pour wet ingredients into the dry ingredients in 3 stages.  Stir to combine then pour batter into your pan.

Bake for 25 minutes.  Using a toothpick check the bread after 20 minutes to see if it is done (some ovens run hotter than others).

Cool cornbread in the pan for 10 minutes then slice and serve.  The cornbread freezes beautifully.

***For lactose free version use lactose free milk and Earth Balance buttery sticks.

Bread, Dinner, Recipes

Refrigerator Rolls

March 24, 2013

Refrigerator RollsA few years ago while checking out food blogs I happened to see this recipe.  These refrigerator rolls looked so light and fluffy, the perfect roll to serve  with a special holiday dinner. I could envision leftover ham sandwiches using these soft, eggy rolls.  Thanks to Cafe Johnsonia blog I added it to my recipe box and have been making them ever since.

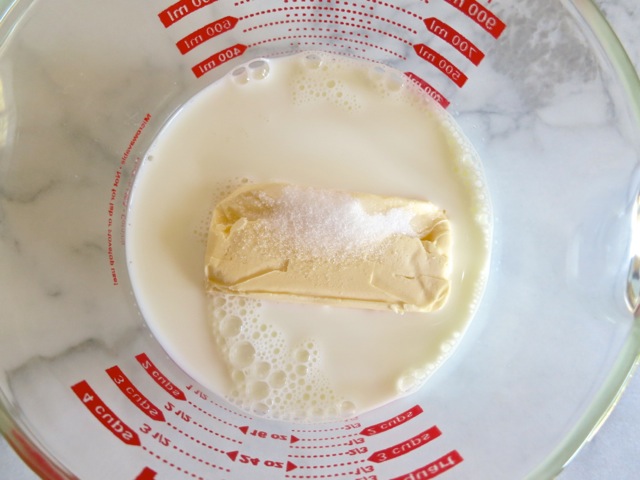
Milk, Butter, Sugar

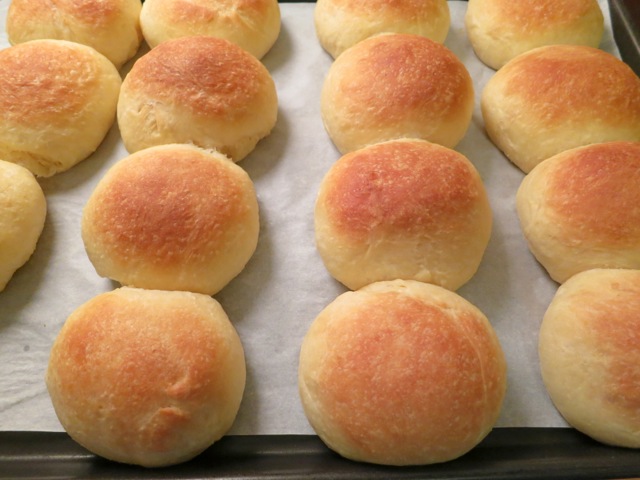
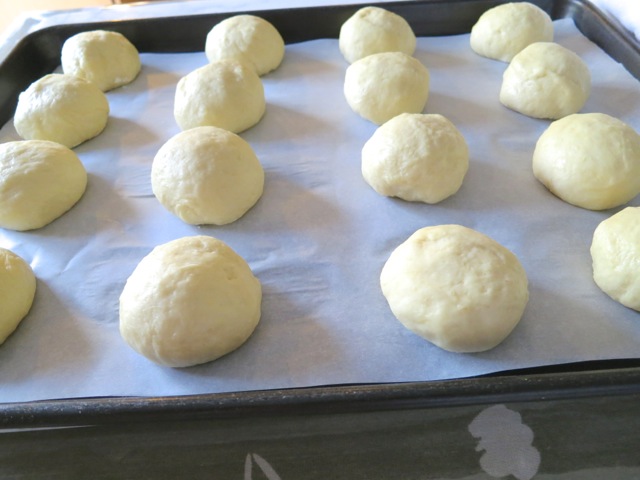
Rising RollsPlace the rolls on a parchment lined baking sheet and let rise until doubled in size.

Regrigator Roll Baked

Refrigerator Rolls

From Cafe Johnsonia blog

16 rolls

Ingredients

1 stick unsalted butter

1 cup milk – scant (whole or 2%)

1/4 cup sugar

3 eggs

3 cups flour

1 cup bread flour

1 tablespoon instant yeast

2 teaspoons salt

Preparation

Place butter, milk and sugar in a 4 cup measuring cup.  Microwave for about 1  1/2 minutes until the butter is almost melted, the sugar dissolved, and the mixture is very hot to the touch (about 140 degrees).

In a large bowl whisk the eggs well.  Slowly drizzle the hot milk mixture into the eggs while whisking continuously.  The bowl and the eggs should be warm (110 degrees is the perfect temperature).  If you are in need of a reliable kitchen thermometer I would suggest the Thermapen.  It’s the best.

Place the flour and yeast in a bowl of an electric mixer fitted with a paddle attachment.  Turn the mixer on low to evenly distribute  the yeast.  With the mixer running, add the liquids in a slow, steady stream.  When all the liquid has been added, turn the mixer up to medium and let it run for 1 minute.  Add the salt.  Keep mixing for  2 – 3 minutes, or until the dough starts to form strong webs as it mixes.

Rub the inside of a very large bowl with oil. Place the finished dough in the bowl and cover with plastic wrap.  Place dough in a warm, draft-free spot where it can rise.

When the dough has doubled in size (check after 1 hour) sprinkle it with 1 tablespoon of flour (no more) and punch it down. Wrap the bowl well with a few layers of plastic wrap.  Refrigerate the dough until chilled, about 2 hours.  The dough can be kept overnight and up to 5 days.

Once you are ready to bake the rolls, remove the dough from the refrigerator and place on a lightly floured surface.  Cut the dough into equal pieces.  You can make small rolls (24), medium rolls (16) or large rolls (12).

Roll the dough into a rough ball and place your finger in the center of the dough.  Push your finger up from the bottom while using  your other hand to form a round ball on the top.  Squish the flaps on the underside together.  The dough should be quite smooth and will get smoother once the rolls have risen.

Place the rolls on a baking sheet lined with parchment paper.  Cover the rolls with a clean kitchen towel and let rise, until doubled in size.  This usually takes at least 1 hour and depends on your climate and the temperature in your home.

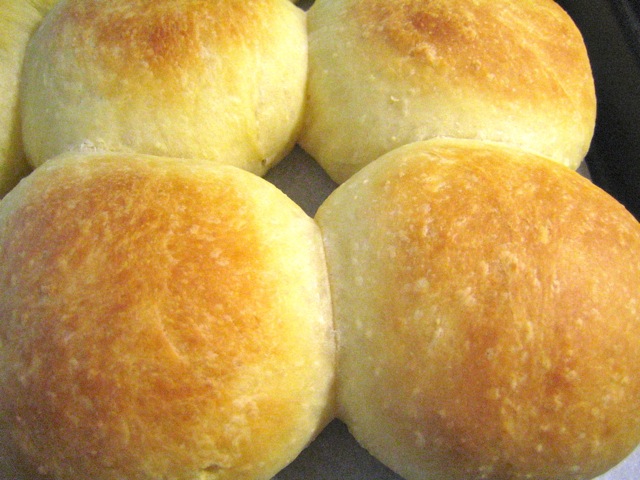
Preheat your oven to 375 degrees.  Brush the tops of the rolls with melted butter.  Bake  for about 10 – 15 minutes, until golden.  Check rolls at the 10 minute mark so they do not over bake.

These rolls are soft, fluffy and tender.  They freeze beautifully if you have leftovers or prefer to make them in advance of serving them.

***For lactose free rolls use lactose free milk and Earth Balance buttery sticks.

Bread, Recipes, Salad, Sandwiches, Side Dishes, Vegan, Vegetarian, Veggies

Tomato & Arugula Salad on Sourdough Toast

February 12, 2013

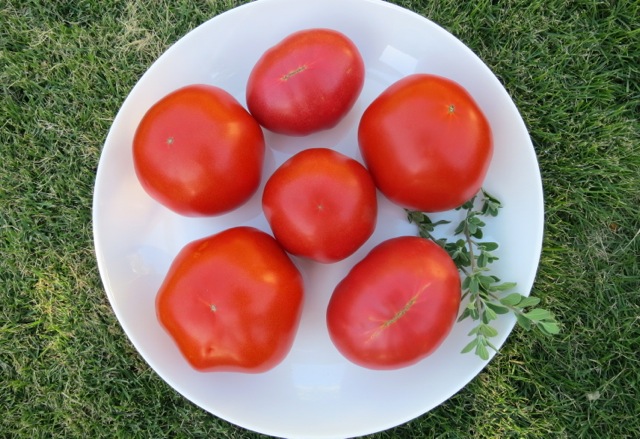
Tomatoes from the GardenOur Big Beef and Odoriko tomatoes are flourishing on the vines and that means lots of sliced tomatoes, fresh tomato sauce, salsa, and roasted tomatoes.  One of my favorite ways to eat a vine ripened tomato (just picked and warm from the sun) is in a simple salad.

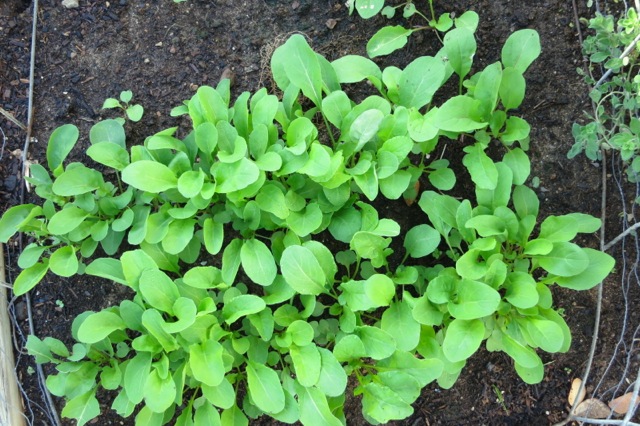
Baby ArugulaThe arugula I’ve long been waiting for my husband to plant is finally here.  Tender arugula leaves tossed with a bit of extra virgin olive oil and fresh lemon juice sprinkled with sea salt is one of the simplest ways to enjoy these slightly peppery leaves.  This time I used fresh herb vinaigrette, which by the way is super on potatoes and salad Nicoise.

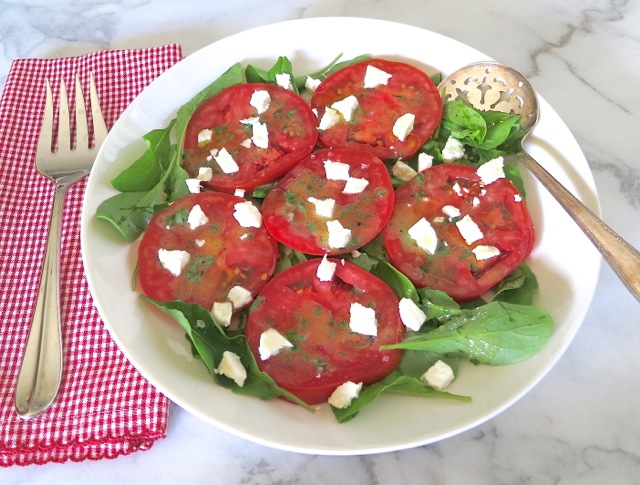
Tomato & Arugula SaladThis salad is a snap to put together and you could eat it with or without the sourdough toasts.  I think the best part is the way the bread soaks up the olive oil and juice from the tomatoes!

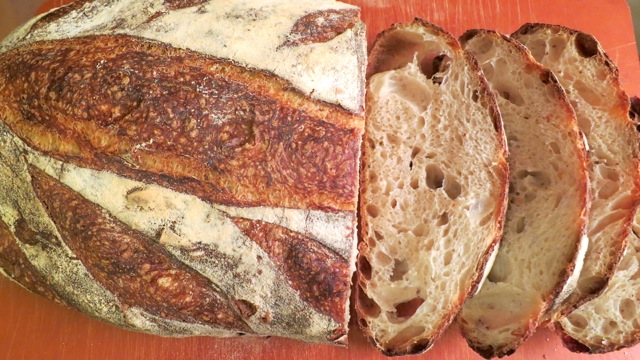
Tartine Country Bread SlicedMy husband John baked two loaves of gorgeous country sourdough bread.  Toast a few slices, drizzle with olive oil and pile the tomatoes and arugula salad on top of the bread.

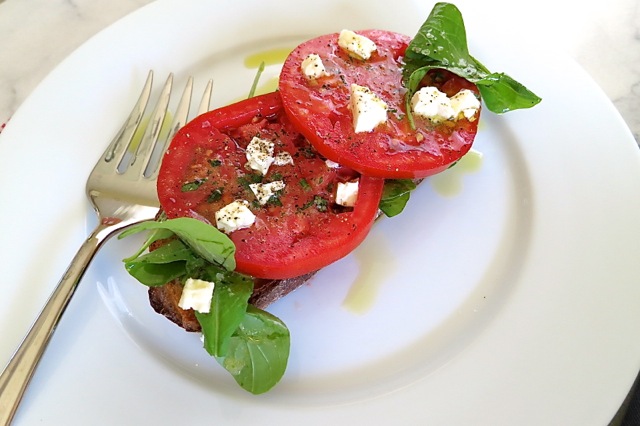
Tomatoes on Sourdough

Tomato & Arugula Salad on Sourdough Toast

Ingredients

4 large slices (or more if you want) toasted sourdough bread

handful of baby arugula

2 large vine ripened tomatoes, cut into 1/3 inch thick slices

crumbled feta cheese

fresh herb vinaigrette

extra virgin olive oil

sea salt such as Maldon

freshly ground black pepper

Preparation

Toast the sourdough bread.  Transfer to a plate and drizzle extra virgin olive oil over each slice.  Sprinkle the bread with sea salt.

Scatter the arugula into a wide shallow bowl or plate.  Place sliced tomatoes on the arugula and dress with a few spoonfuls of fresh herb vinaigrette.  Sprinkle crumbled feta on the salad and drizzle a bit of extra virgin olive oil over the entire salad.  Season with sea salt and freshly ground pepper.

Serve the salad on the toasted bread making sure to scoop up all of the dressing and juice from the tomatoes.

***To make this dish vegan, omit the cheese.

Bread, Breakfast, Dinner, Lactose Free, Recipes, Side Dishes

Chive Biscuits

January 11, 2013

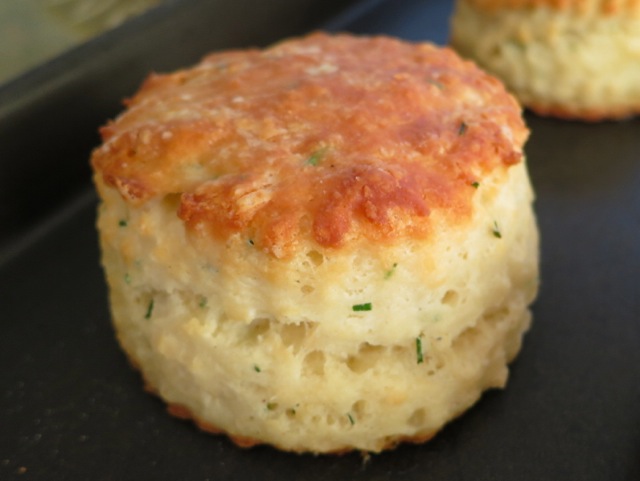
Chive BiscuitHere it is, January which is supposed to be our “winter.” Usually we are 10 degrees cooler this time of the year but it feels like summer.  I bought a pretty Nic & Zoe sweater on my last trip to Oahu and I still haven’t had the opportunity to wear it.  Lord love a duck!

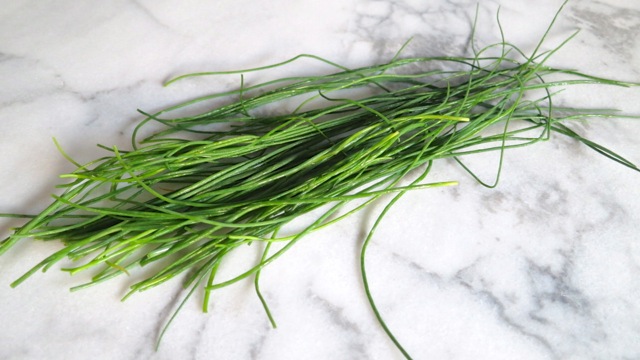
ChivesWith this unbelievable weather you’d think that all the herbs in the garden would be flourishing.  Unfortunately the chives took a dive.  They’ve been replanted  a few times, moved from their original spot and have always done well.  The Italian parsley has grown into a huge bush and towers over the chives which aren’t getting their share of sunlight.  I was able to collect just enough to use in this recipe I adapted from Serious Eats.

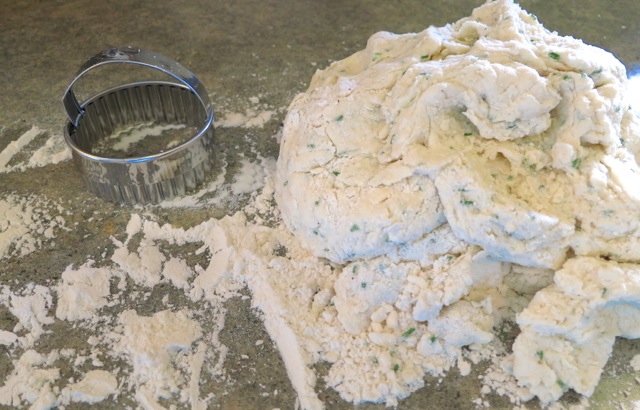
Chive Biscuit DoughIt takes just 30 minutes to make these biscuits.   If you don’t have chives you can substitute tender green scallions.

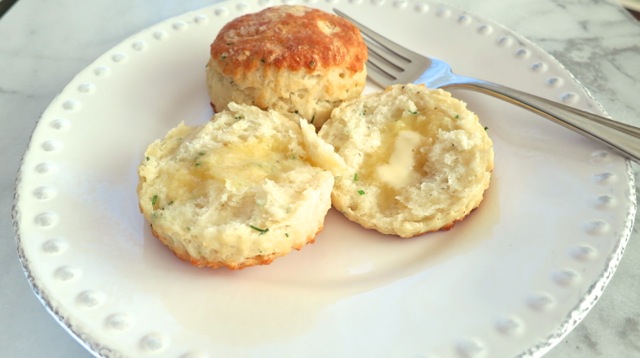
Baked Chive Biscuits

Biscuits & Butter

Chive Biscuits 

Makes 12 Biscuits

Ingredients

2 cups flour

1 cup cake flour

3 teaspoons baking powder

2 teaspoons sugar

3/4 teaspoon salt

1/2 teaspoon baking soda

1/4 teaspoon pepper

1 stick Earth Balance Buttery Sticks cut into small cubes

1/4 cup minced chives or more if you prefer

12 ounces Green Valley lactose free plain yogurt plus 4 tablespoons lactose free milk to measure 1 3/4 cups total

Preparation

Preheat oven to 425 degrees

In a large bowl sift flour, cake flour, baking powder, sugar, salt and baking soda.  Whisk in pepper.

Add cold cubes of Buttery Sticks to flour mixture.  Use a pastry blender to combine butter with dry ingredients until the texture resembles coarse meal.  Alternately place dry ingredients in a food processor, add Buttery Sticks and pulse until a coarse meal texture forms.

Add chives and yogurt mixture to dry ingredients and stir until combined.  Turn dough onto a floured surface and knead up to 6 times.  Pat dough into a 1 inch round.  Use floured biscuit cutter to stamp out 12 biscuits and place on a large cookie sheet or jelly roll pan.

Bake for 12 -15 minutes, turning the pan once half way through the baking time.  Transfer the pan to a cooling rack.  Serve right away while still warm.  These biscuits are really good split and toasted until crispy and brown served alongside poached or fried eggs and crispy bacon.

***Feel free to use regular butter, yogurt and milk in place of lactose free products

Follow

Get every new post delivered to your Inbox

Join other followers: