Browsing Category

Beans

Beans, Dinner, Recipes, Salad, Side Dishes, Vegetarian, Veggies

Tomato-Wax Bean Salad with Chickpeas, Feta and Dill

August 8, 2021

Tomato-Wax Bean Salad with Chickpeas, Feta & Dill

The summer weather has been quite brutal here in South Maui.  With temperatures reaching 90+ degrees, it’s hard to imagine cooking up a fancy meal in the kitchen all afternoon.  If you’re looking for a superb summer salad, consider making this.  Not only does this salad make a satisfying lunch, it can be transformed into a delightful dinner served with some good sourdough bread or focaccia.  

Salad Ingredients

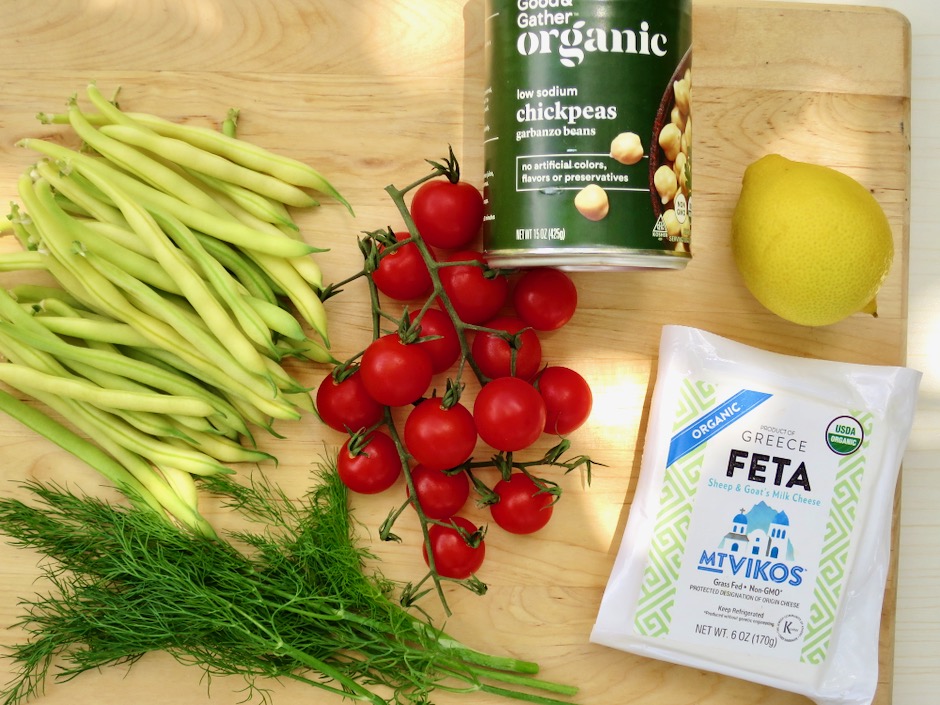
You will briefly turn on the stove to cook the beans for a few minutes until they are tender-crisp.  No other cooking is required for this dish.

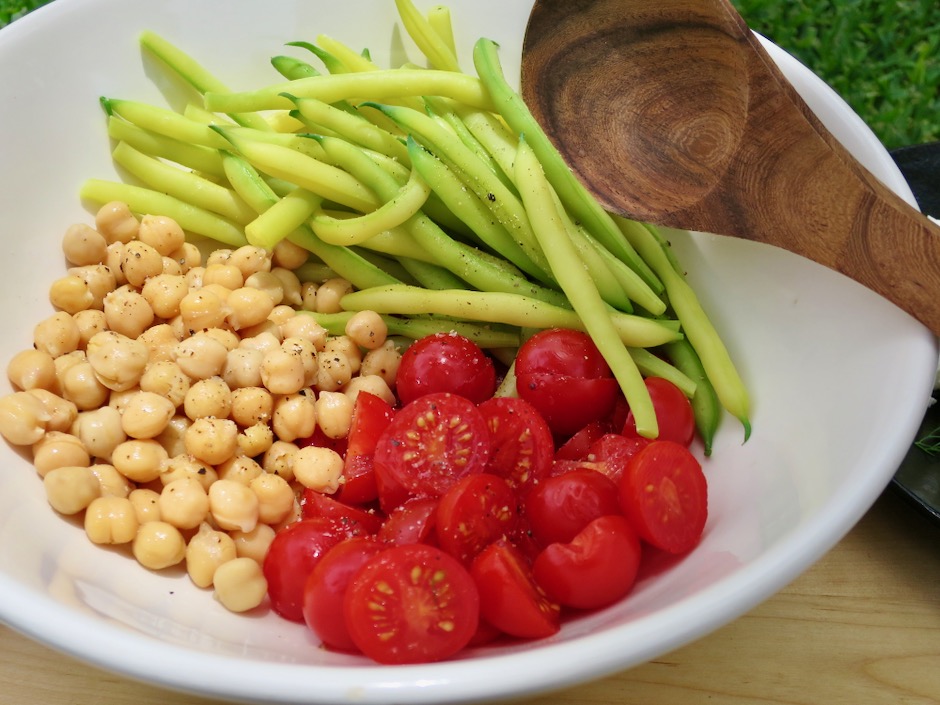
Wax Beans from the Garden, Cherry Tomatoes, Chickpeas

We grew these beautiful beans in the garden just before the summer heat became too much for successfully growing most vegetables.  There are plenty of green beans at the market that will work perfectly for this recipe.
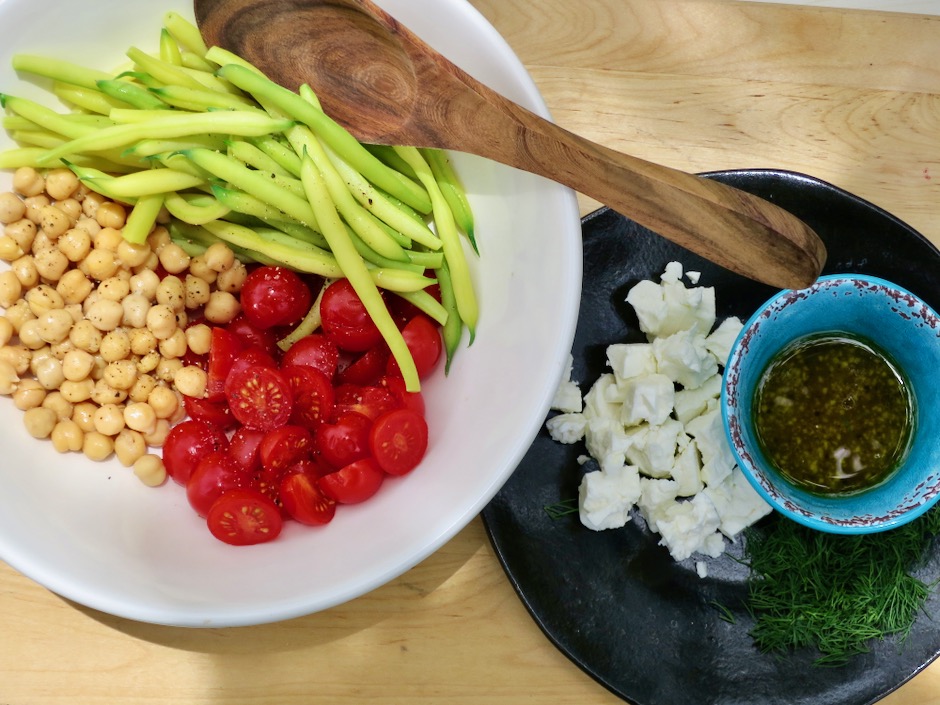
Wax Beans from the Garden, Cherry Tomatoes, Chickpeas, Feta, Dressing

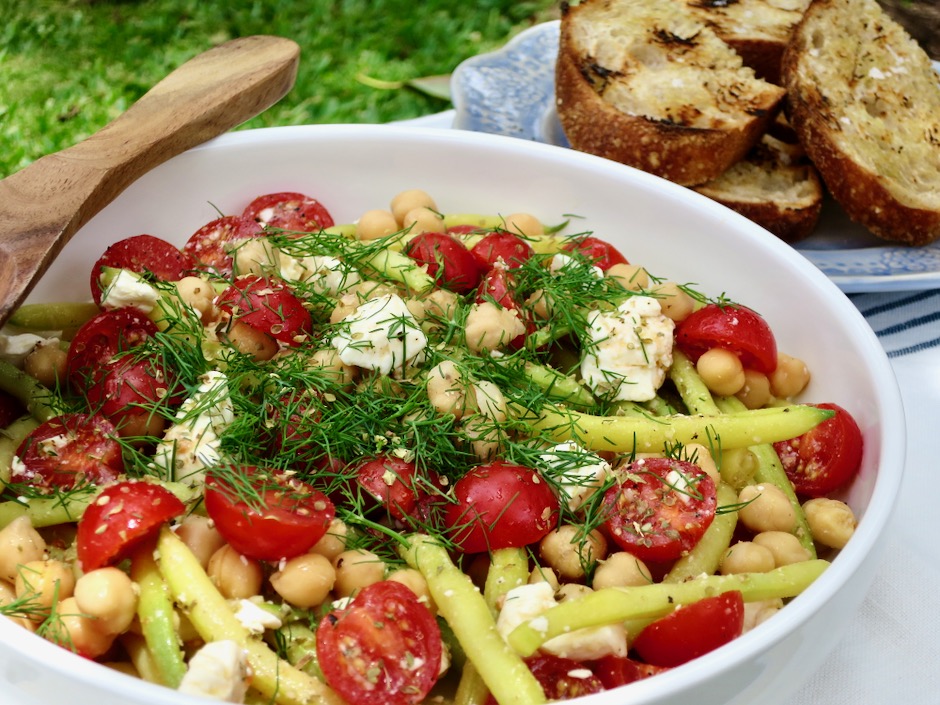
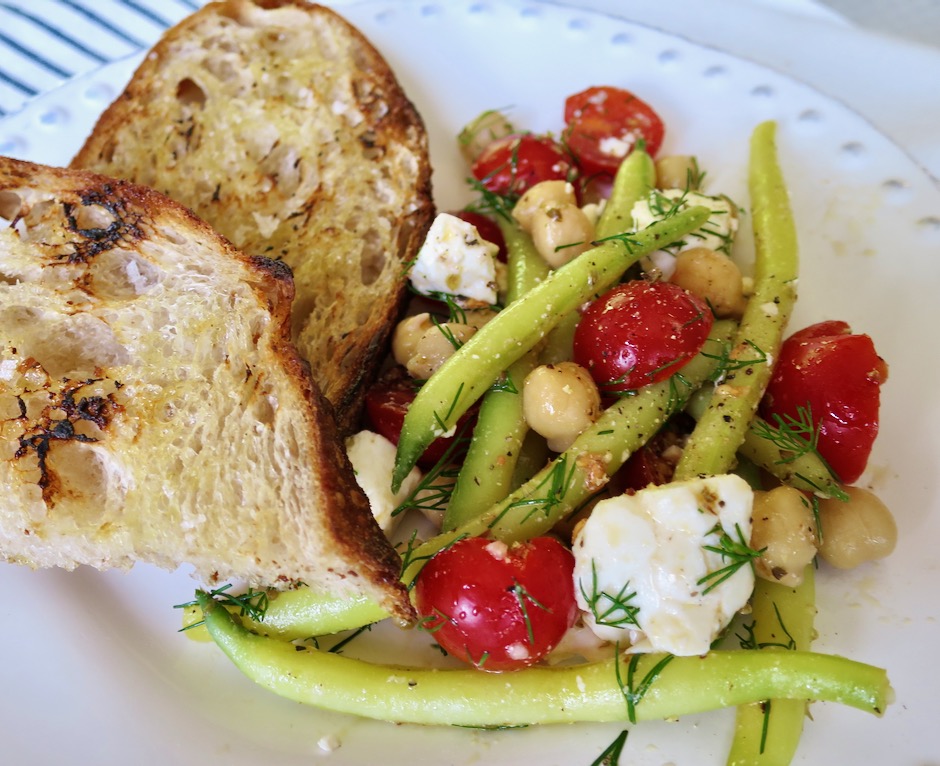
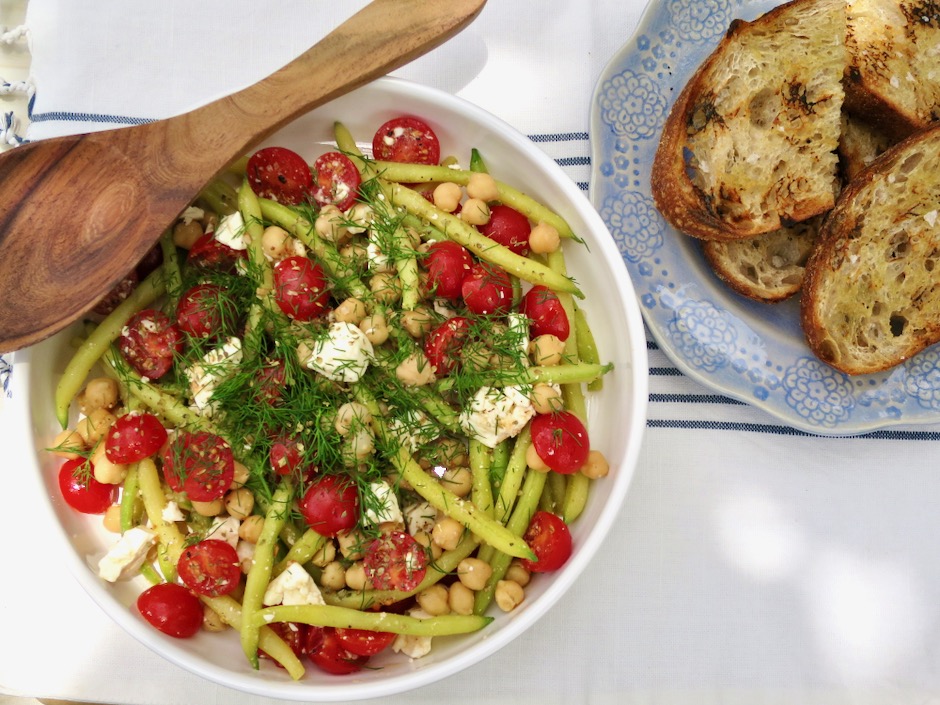
The crisp beans, juicy tomatoes, earthy chickpeas and creamy feta works out to be the perfect combination, with fresh dill being the icing on the cake.  A bright and tangy dressing makes this salad sing.

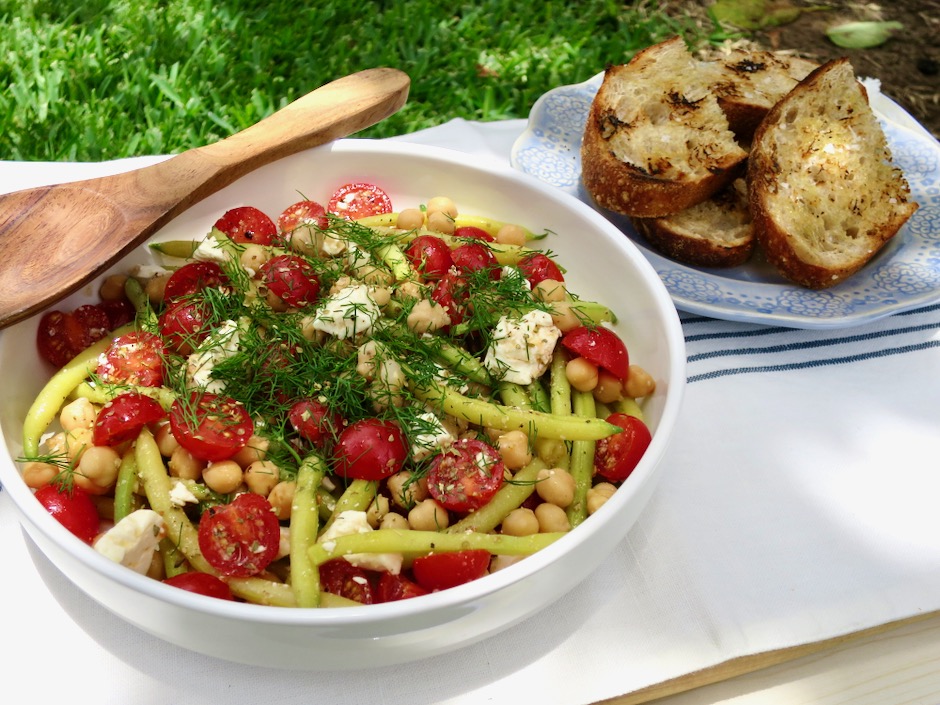
Tomato-Wax Bean Salad with Chickpeas, Feta & Dill

I highly recommend grilling some good sourdough bread to accompany the salad.  The slightly smoky flavor of the bread completes the meal.  Toasted cornbread or focaccia would also be a good option.


Tomato-Wax Bean Salad with Chickpeas, Feta & Dill with Grilled Bread

Tomato-Wax Bean Salad with Chickpeas, Feta, Dill & Grilled Bread

Tomato-Wax Bean Salad with Chickpeas, Feta and Dill
 
Adapted from New York Times Cooking
Author:
Serves: 2 - 4 as side dish
Ingredients
  • 6 ounces wax beans or green beans
  • 1 tablespoon fresh lemon juice
  • ½ tablespoon red wine vinegar
  • 1 small garlic clove, minced (or ½ medium clove)
  • 1½ tablespoons extra-virgin olive oil
  • ½ pint cherry tomatoes, halved
  • ½ can (15-ounce) chickpeas, drained and rinsed
  • 2 ounces crumbled (large pieces) feta, Mt. Vikos recommended
  • 1 tablespoon roughly chopped fresh dill
  • ¼ teaspoon dried oregano
Preparation
  1. Bring a medium saucepan of water to boil over high heat. Add ½ teaspoon salt, then green beans. Cook until beans are tender and crisp, about 2 minutes. Transfer beans to a bowl of ice water to cool. Drain in a colander and blot dry with a kitchen towel.
  2. In a small bowl, put lemon juice, vinegar, garlic, a pinch of salt and some black pepper to taste. Whisk in olive oil.
  3. Add cherry tomatoes, green beans and chickpeas to a wide salad bowl. Season with salt and pepper. Add dressing and toss to coat. Add feta and toss once more. Let marinate 10 minutes, tossing occasionally. To serve, sprinkle generously with dill and dried oregano.


Beans, Dinner, Lactose Free, Recipes, Side Dishes, Smoker
Smoked Baked Beans

June 27, 2021

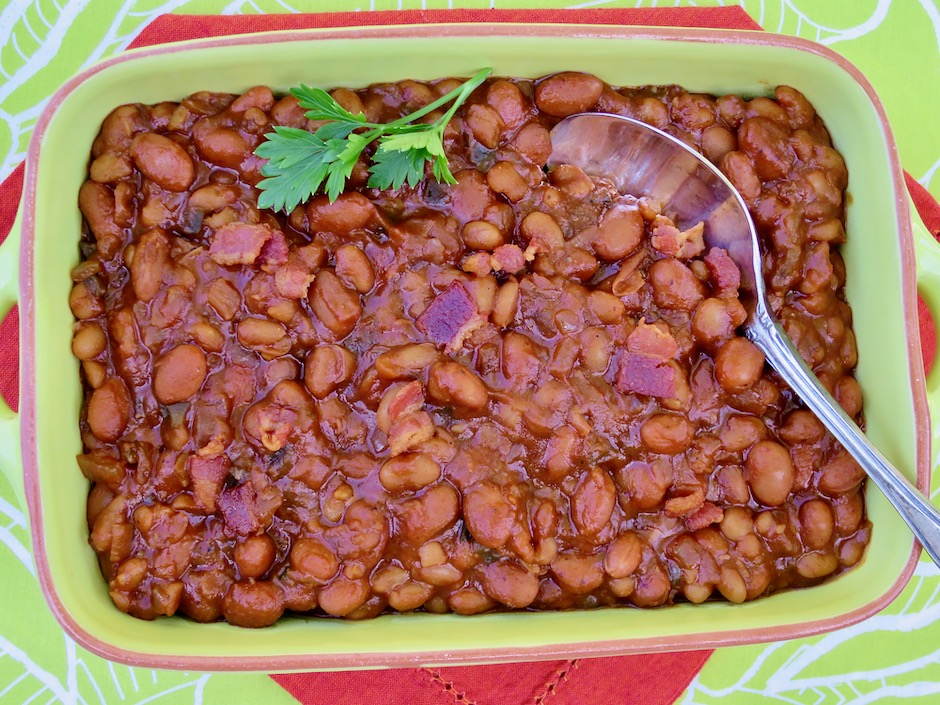
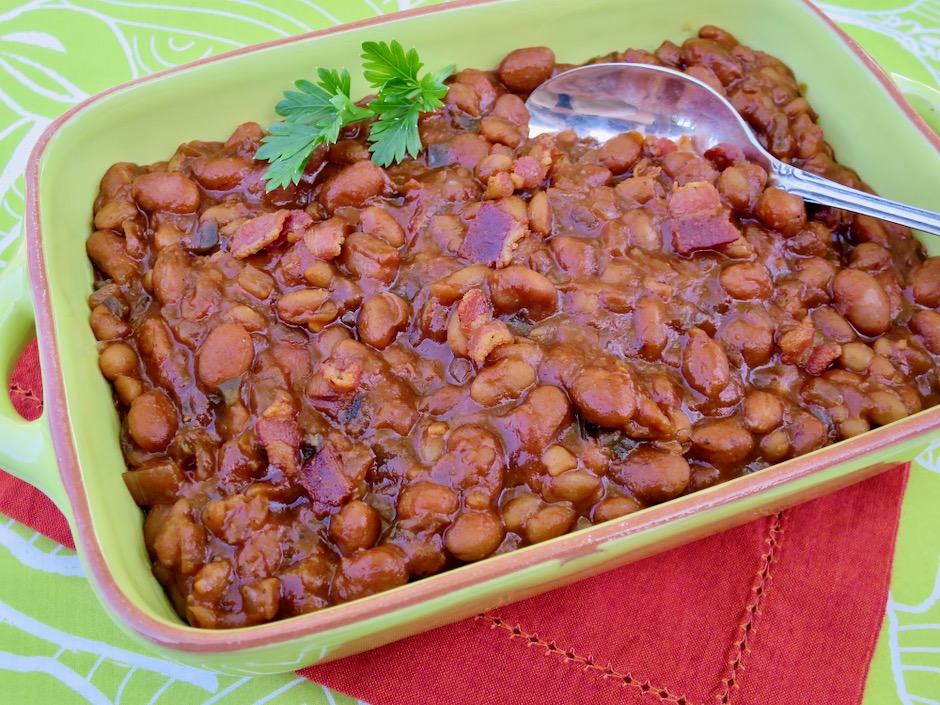
Smoked Baked Beans

There is a myriad of ready-to-eat canned beans that are great for a quick meal. However, if you are looking for baked beans that are over the top, you will fall in love with these smoky, sweet, and tangy beans with bacon.  They are a delicious side dish for grilled or fried chicken, barbecue ribs or anything from the grill for that matter, including burgers.  The subtle smoky flavor is one you can’t get from canned beans.  The recipe calls for a smoker, so if you have one, you’ll be delighted with the final result.  

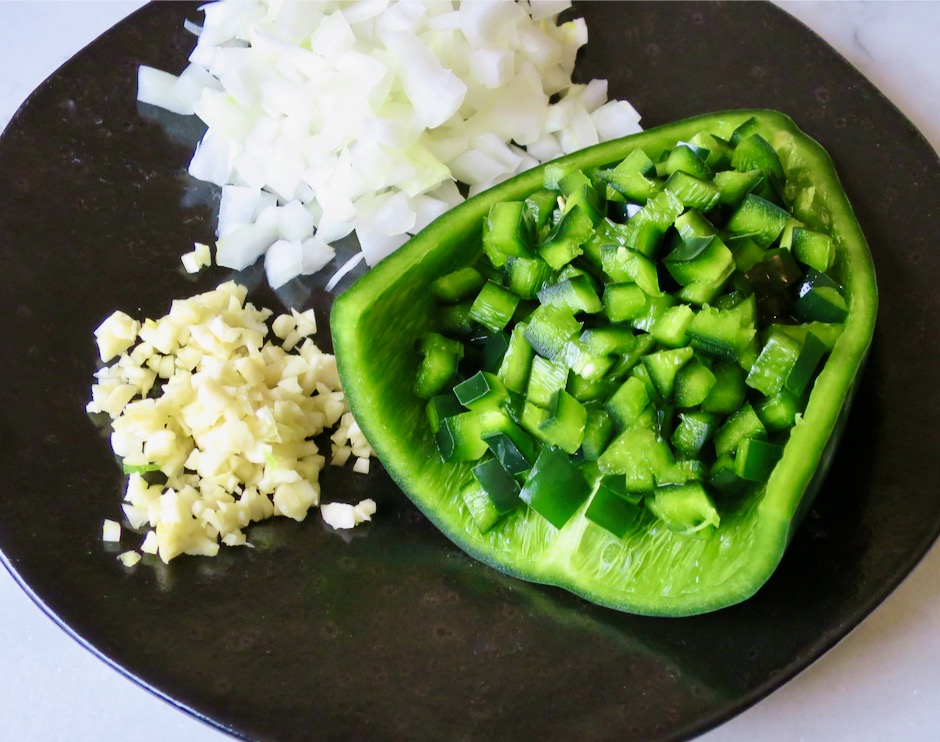
Onion, Poblano Pepper, Garlic

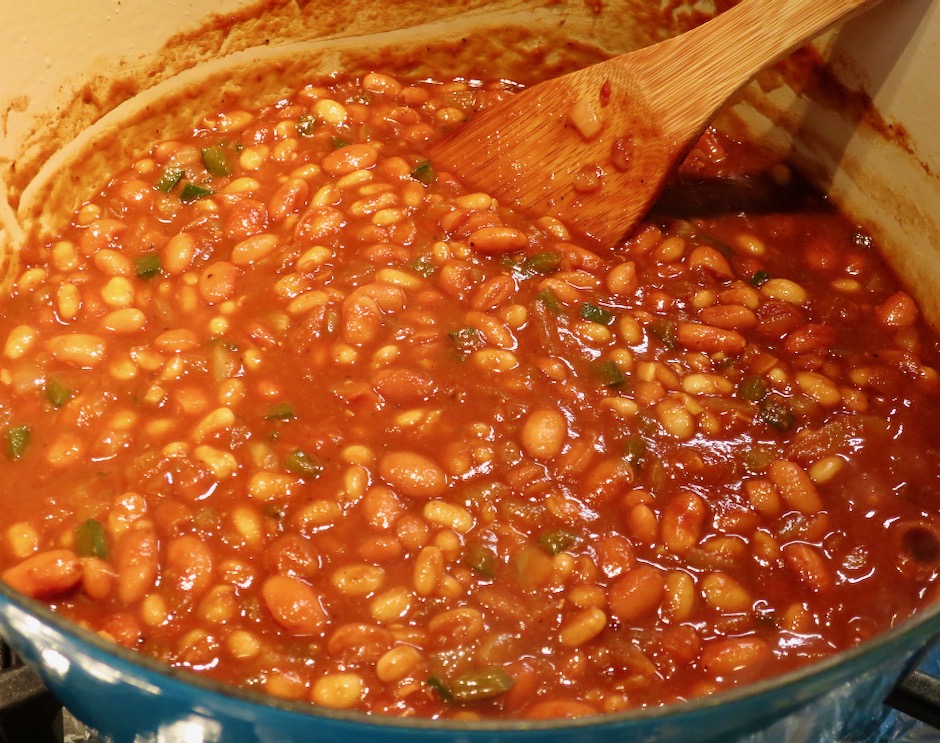
This recipe is made with canned pinto and white beans which simplifies this terrific dish.  Feel free to switch out the beans with others that you may have on hand, such as cannellini beans, black beans, or use all pinto beans.  The aromatics are garlic, onion and a bit of poblano pepper.  The flavorful sauce includes cider vinegar, molasses, maple syrup, Dijon mustard, tomato paste, chili powder, and barbecue sauce.  

Preparing Beans for the Smoker

Smoked Baked Beans

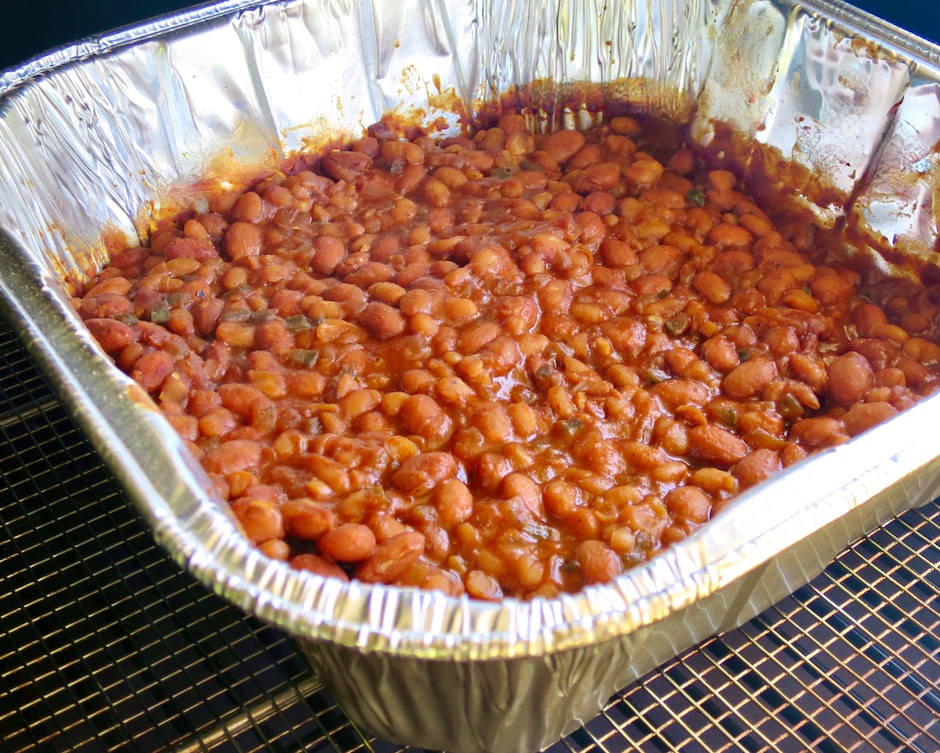
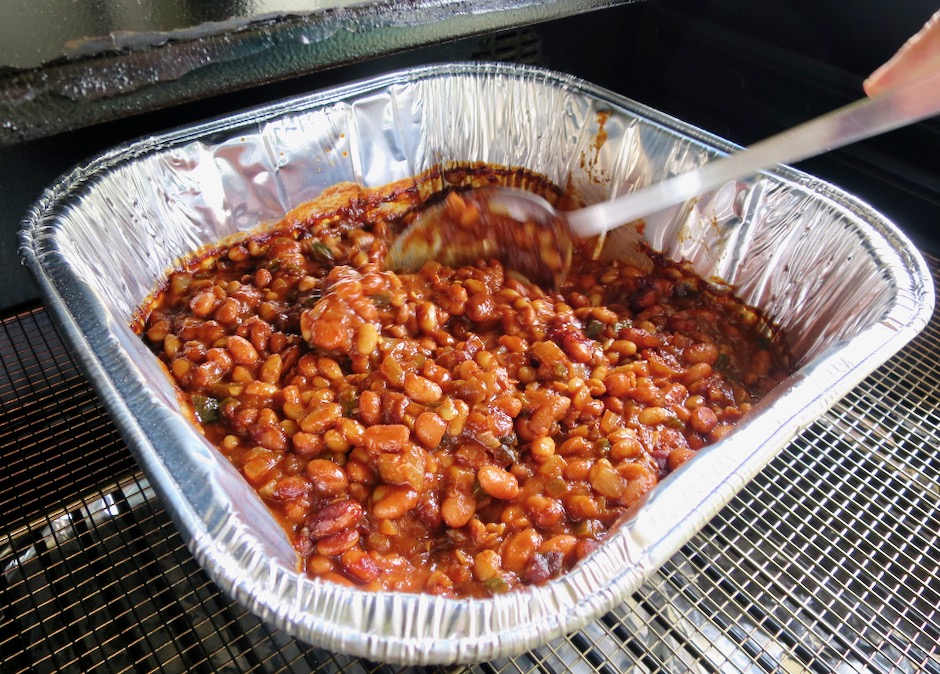
The beans will spend a few hours in the smoker.   All you need to do is give them a stir now and then which will ensure that smoky, savory flavor you’re looking for.

Smoked Baked Beans

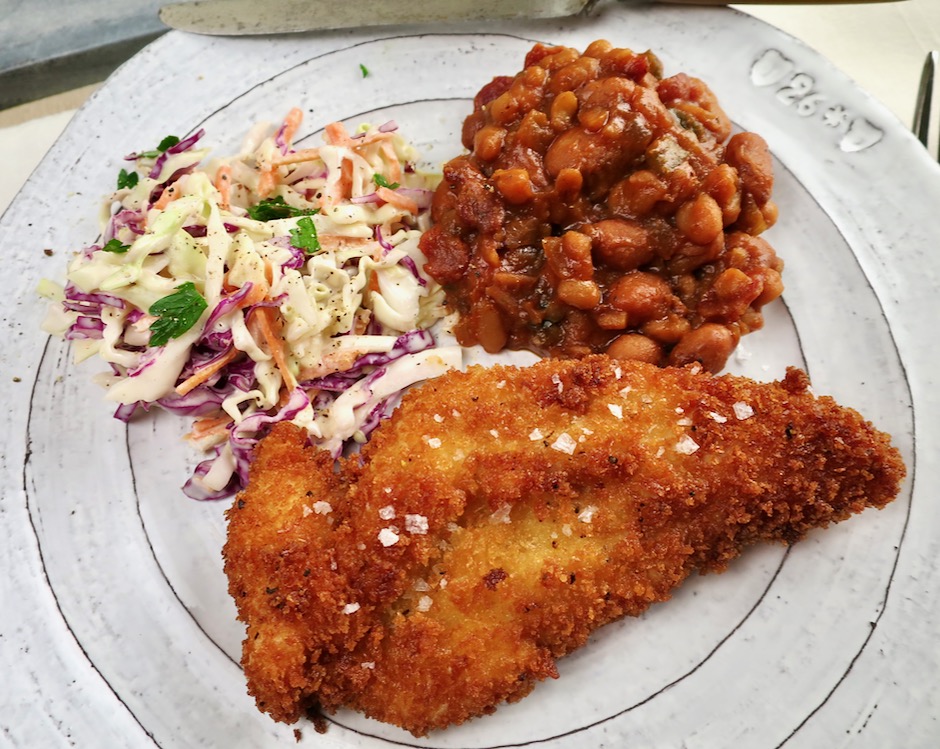
Smoked Baked Beans with Fried Chicken & Coleslaw

Serve the beans with your favorite meals. One of ours is extra crispy fried chicken tenders and coleslaw.  

Smoked Baked Beans with Bacon

Smoked Baked Beans
 
Author:
Serves: 6
Ingredients
  • 4 slices medium thick bacon, chopped into ½-inch pieces
  • 2 cups sweet or yellow onion, diced
  • 2 medium garlic cloves, minced
  • ½ small poblano, seeded and diced (about ⅓ cup)
  • 2 15-ounce cans pinto beans, rinsed and drained
  • 2 15-ounce cans small white beans, rinsed and drained
  • 1 cup barbecue sauce
  • 3 tablespoons apple cider vinegar
  • 2 tablespoons molasses
  • ¼ cup maple syrup
  • 2 tablespoons tomato paste
  • 2 tablespoons Dijon mustard
  • 2 teaspoons mild chili powder
  • 1¼ teaspoons kosher salt
  • ½ teaspoon freshly ground black pepper
Preparation
  1. Preheat smoker to 225 degrees
  2. In a large Dutch oven (I use my 5½ quart) sauté bacon until crisp. Drain on paper towels, leaving behind the rendered bacon fat. Add onions and poblano pepper to the pan and cook over medium heat until softened, about 5 minutes. Add garlic, stir for another minute.
  3. Add drained beans and the rest of the ingredients (except cooked bacon). Stir to combine. Bring to a boil then carefully transfer to a medium sized disposable aluminum pan. Place pan, uncovered, directly on smoker grates. Smoke for about 3 hours, stirring beans every 30 minutes. During the last hour of cooking add ¼ - ½ cup of water to moisten the beans (these beans are meant to be thick and savory, without a lot of liquid). Stir in crispy bacon bits just before serving the beans.


Beans, Dinner, Japanese, Lactose Free, Pasta, Recipes, Vegan, Vegetarian, Veggies

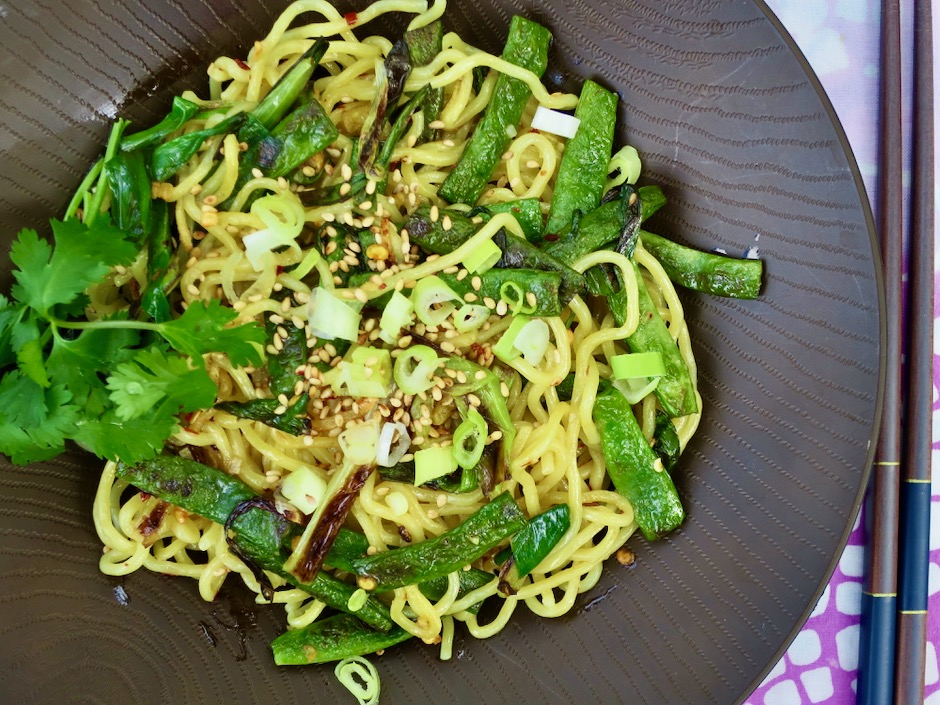
Ramen with Charred Scallions, Green Beans & Chile Oil

May 5, 2021

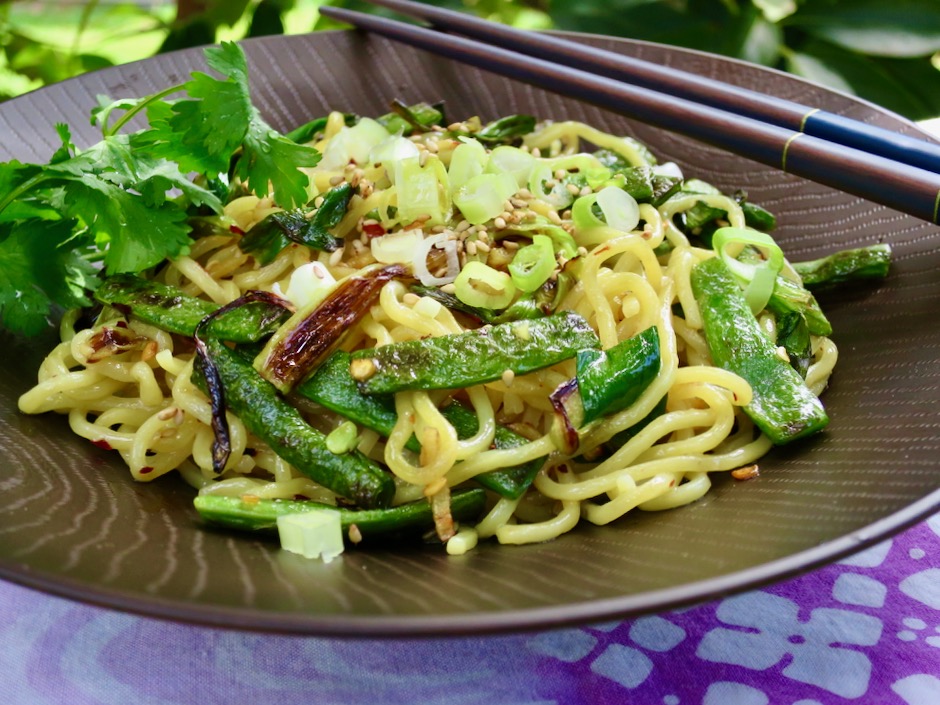
Ramen with Charred Scallions, Green Beans & Chile Oil

Lately I’ve been having fun making all sorts of different ramen dishes. Fresh ramen is best for this dish if you can find it.  Luckily here on Maui, a few select markets sell fresh Sun Noodle ramen.  The original recipe from The NY Times calls for 3-ounce packages of ramen, however, Sun Noodle ramen comes in 5-ounce packages, so that is what I used here.

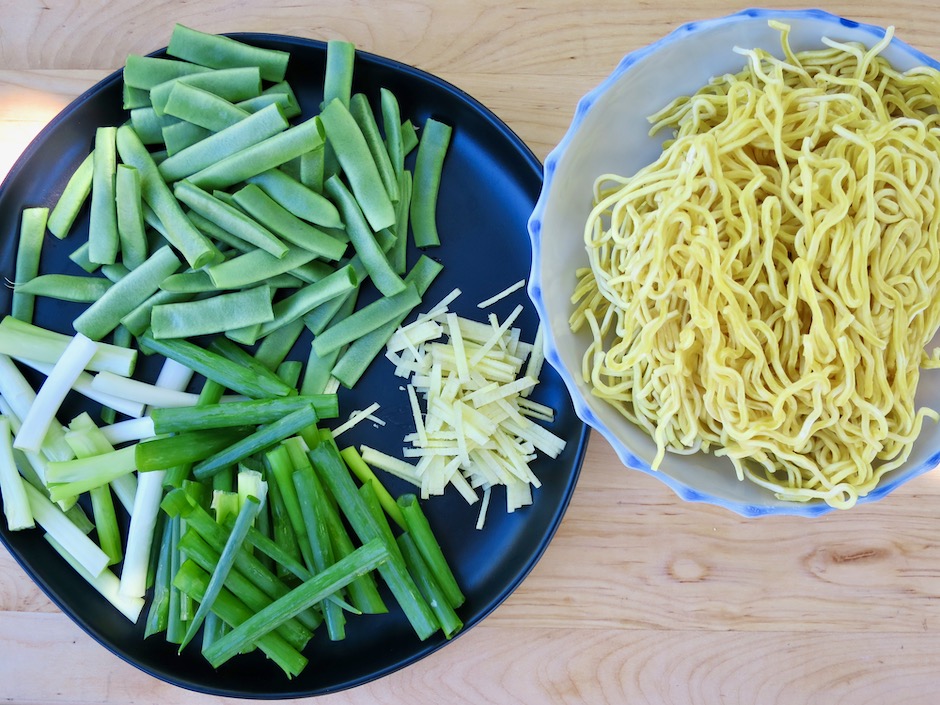
Green Beans, Ginger, Scallions, Ramen

Anything that calls for fresh ginger gets my attention immediately.  I love the refreshing flavor it brings to various dishes.  There’s no shortage of it here.  It’s used in the chile oil and also stir-fried with the ramen.

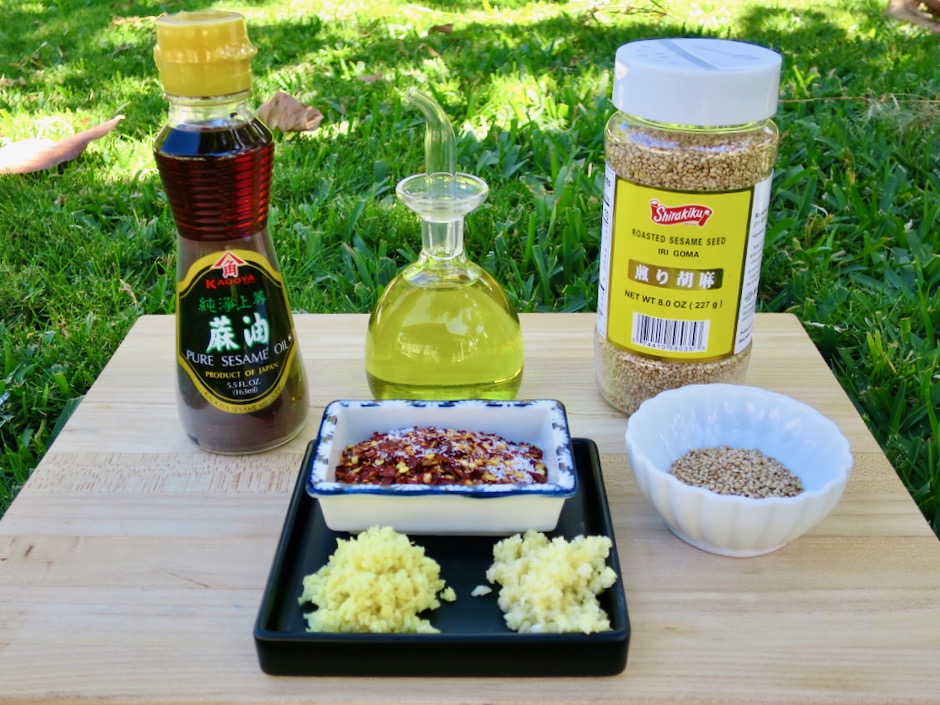
Chile Oil Ingredients

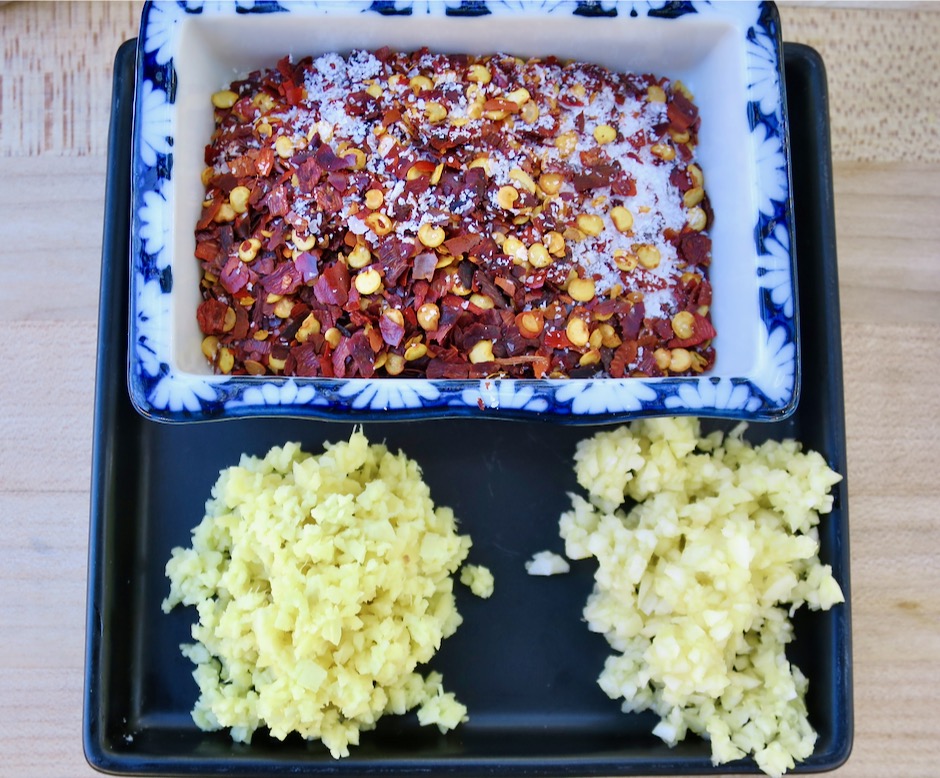
Red Pepper Flakes, Kosher Salt, Ginger, Garlic

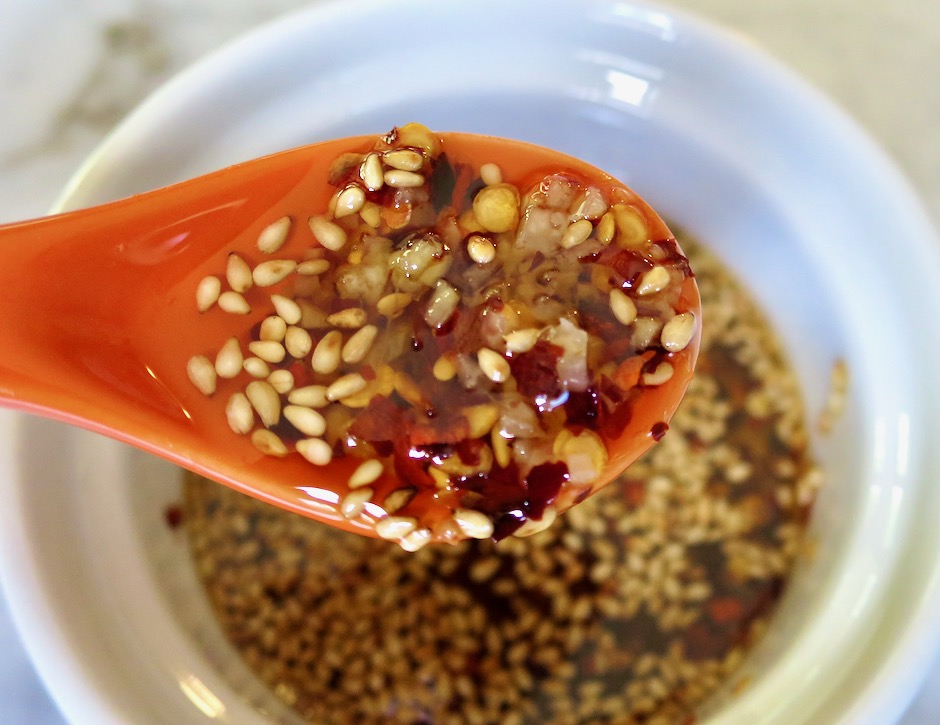
The chile oil is so easy to prepare and it tastes divine.  Besides using it for this ramen recipe, you might drizzle it over soft cooked eggs served over rice, on tofu, over steamed bok choy or other greens.  

Chile Oil

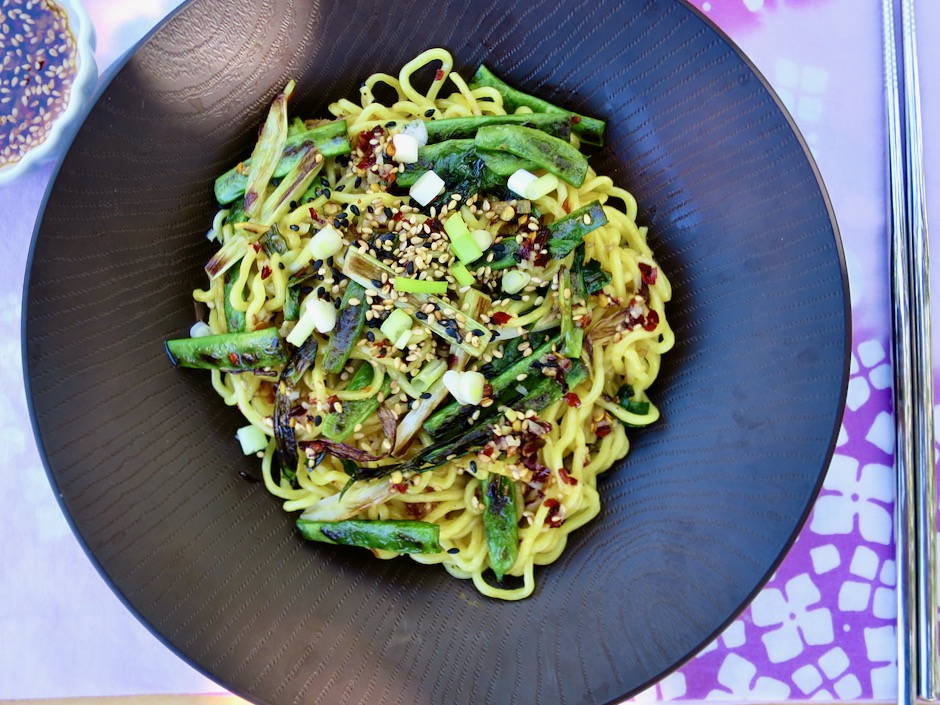
We used flat green beans that we grew in the garden but you can use regular round green beans as well.  Just make sure your wok or pan is hot so they get a nice char. The flavor of the charred beans adds so much flavor to this dish.

Ramen with Charred Scallions, Green Beans & Chile Oil

Ramen with Charred Scallions, Green Beans & Chile Oil

Ramen with Charred Scallions, Green Beans & Chile Oil
 
Adapted from NY Times Cooking
Author:
Serves: 2
Ingredients
  • Chile Oil:
  • 1 tablespoon red pepper flakes
  • ¾ teaspoon kosher salt
  • ¼ cup grapeseed or canola oil
  • 1 piece ginger (1/2-inch), peeled and finely chopped
  • 1 garlic clove, minced
  • 1 teaspoon roasted white sesame seeds
  • ½ teaspoon sesame oil
  • Noodles:
  • 2 (4-5 ounce) packages fresh ramen (I use Sun Noodle brand)
  • 1 bunch scallions (6 pieces), white and green parts separated and cut into 2-inch pieces
  • 1 tablespoon grapeseed or canola oil
  • 8 ounces green beans, trimmed and cut into 2-inch pieces
  • 1 (1-inch) piece ginger, peeled and julienned
  • ½ tablespoon roasted white sesame seeds
  • salt and pepper
Preparation
  1. Prepare the chile oil: Add the red pepper flakes and salt to a heatproof bowl. Place the oil, ginger and garlic in a small saucepan, and heat over medium until it bubbles, about 1-2 minutes. Remove from the heat and carefully pour the hot oil over the red pepper flakes. Add the sesame seeds and sesame oil, and stir well. Set aside while you make the rest of the dish. (You can make the chile oil a few days in advance, store in an airtight jar in the refrigerator).
  2. Prepare the noodles: Bring a large pot of water to a boil. Add the ramen and cook according to package directions, until just tender. Drain, rinse with cold water and drain well again.
  3. Heat a wok or large deep skillet on high. When smoking hot, add ½ tablespoon oil, toss in the green beans and season with salt. Cook, tossing the beans for 2 - 3 minutes, until charred. Remove beans from the wok and set aside.
  4. Heat the same wok or skillet over high, and when smoking, add 1 tablespoon of oil, along with the scallions, both white and green parts, and the ginger. Allow the scallions and ginger to sizzle for 20 seconds, to release their aromas, then stir-fry for 2 - 3 minutes until the scallions have a nice scorch.
  5. Add the green beans and noodles back to the pan, along with 1 to 1½ tablespoons of chile oil, and season with salt and pepper to taste. Toss well to combine, just until the noodles are heated through (you want to keep the noodles chewy and not overcook them). Divide noodles between two bowls, top with roasted sesame seeds and more chile oil.


Beans, Dinner, Lactose Free, Recipes, Vegan, Vegetarian

Falafel

June 7, 2020

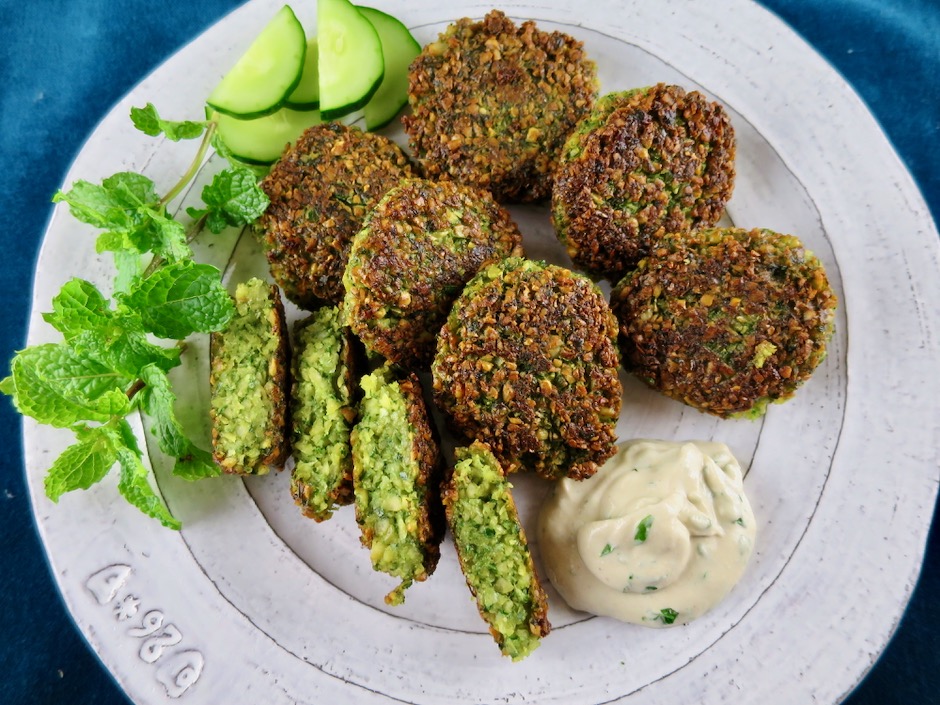
Beautiful Falafel

I have always loved falafel though it’s not something you find often in Hawaii, and especially where we live, Maui.  Cook’s Illustrated developed their recipe a few years back and I finally got around to making it.  Maybe it took so long because in my mind I thought it would be a time consuming and fussy recipe.  But once I made my own falafel, it was so delicious I was convinced that it was worth the effort and as it turned out, it’s not very fussy at all.

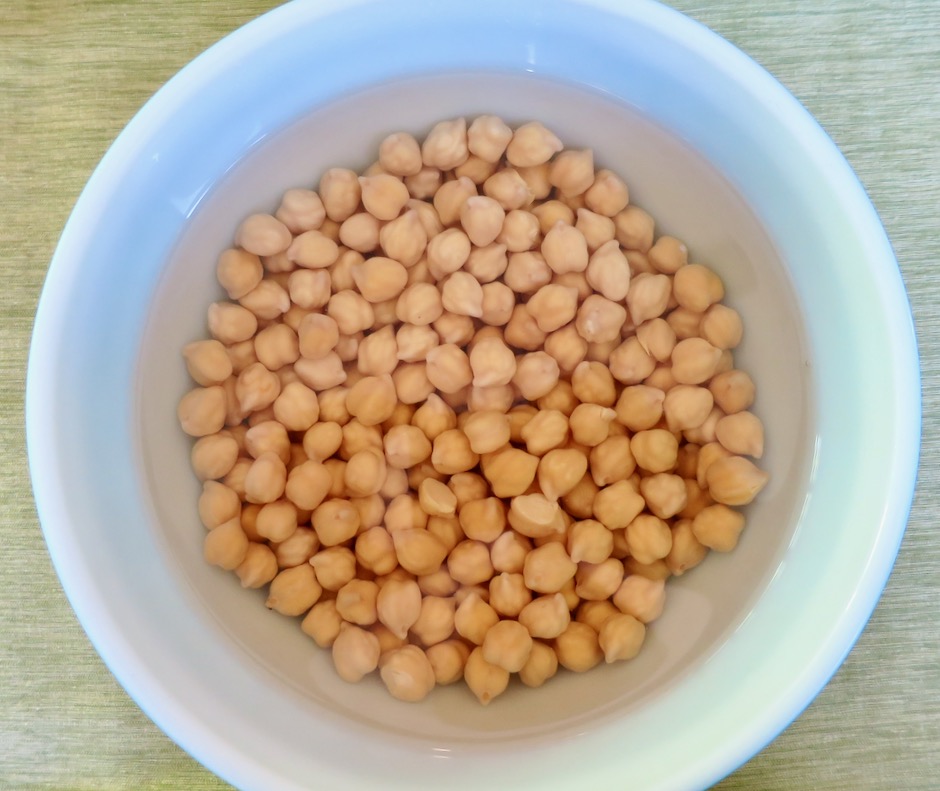
Soaking Dried Chickpeas

One of the important things to know is that dried chickpeas rule in this recipe.  I soak them in the evening before I go to bed, then drain them in the morning.

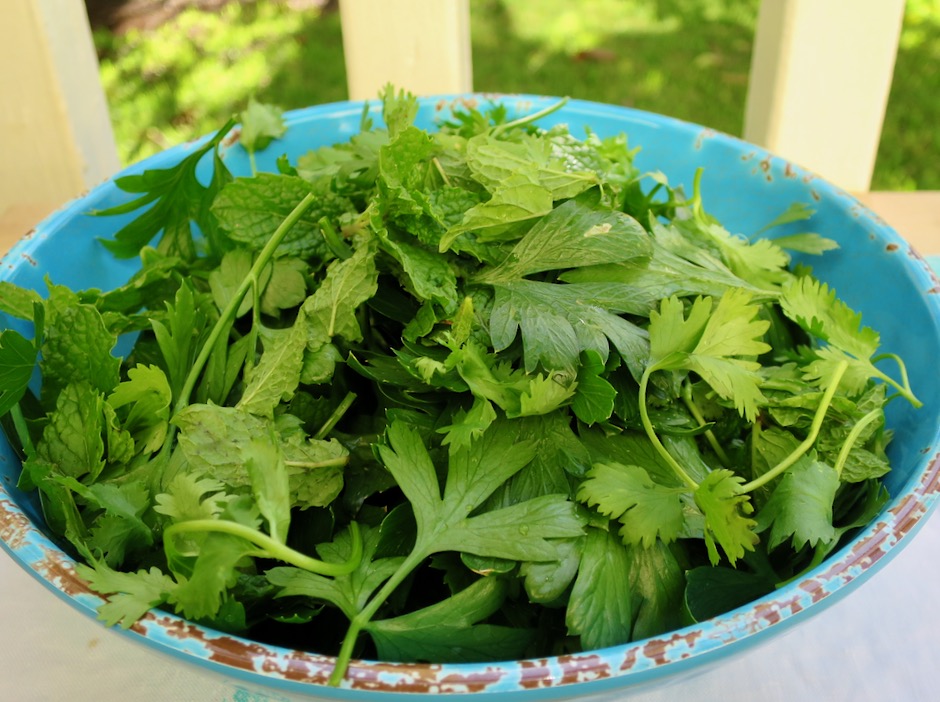
Fresh Parsley, Cilantro and Mint

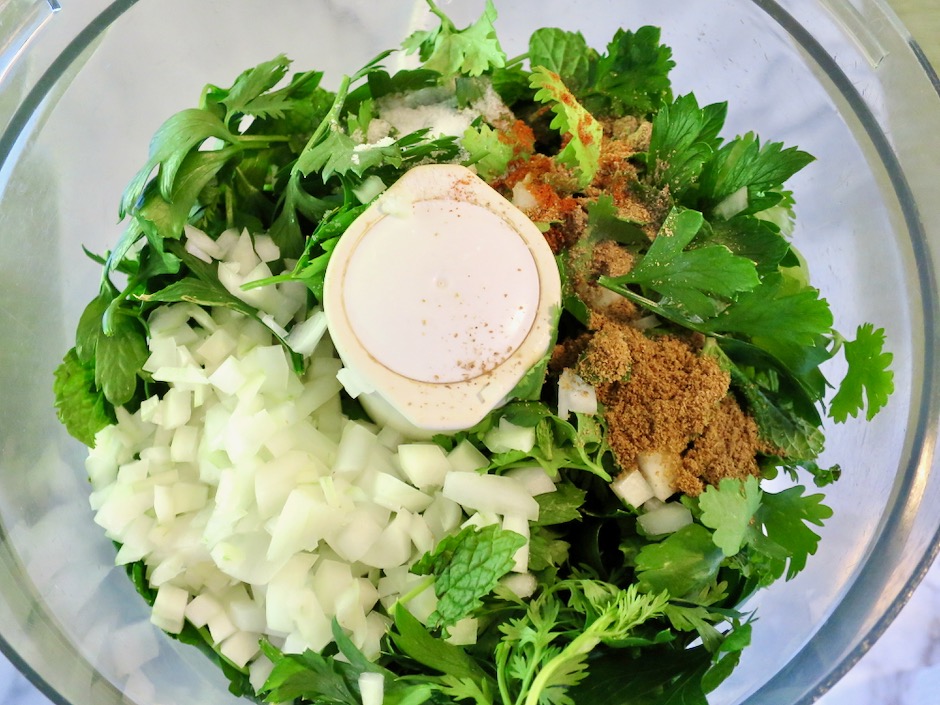
Good falafel is full of fresh herbs and spices like cumin, coriander and a bit of cayenne pepper.  The herbs make for a gorgeous color and terrific flavor in each bite.

Fresh Parsley, Cilantro, Mint, Onion, Garlic & Spices

Falafel Mix

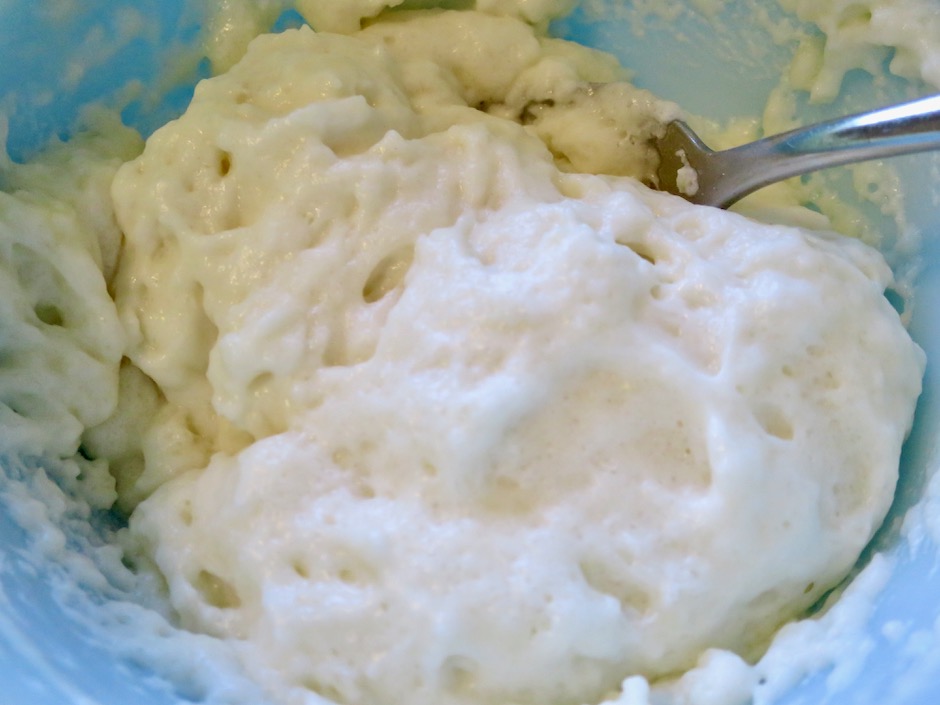
Cook’s Illustrated incorporated the Asian bread-baking technique of using tangzhong in their falafel. This helps to make a cohesive mixture that ensures the falafel is moist and tender once cooked.  The tangzhong for this recipe, consists of flour, water and baking powder.  Try to work quickly once the tangzhong is ready. The baking powder is full of life.

Tangzhong Paste

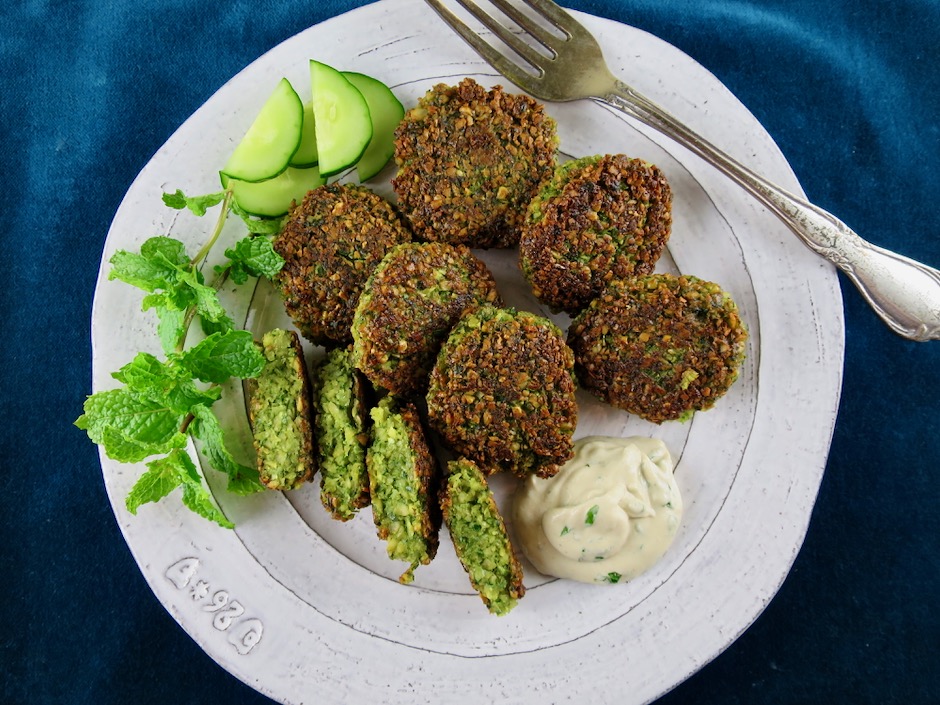
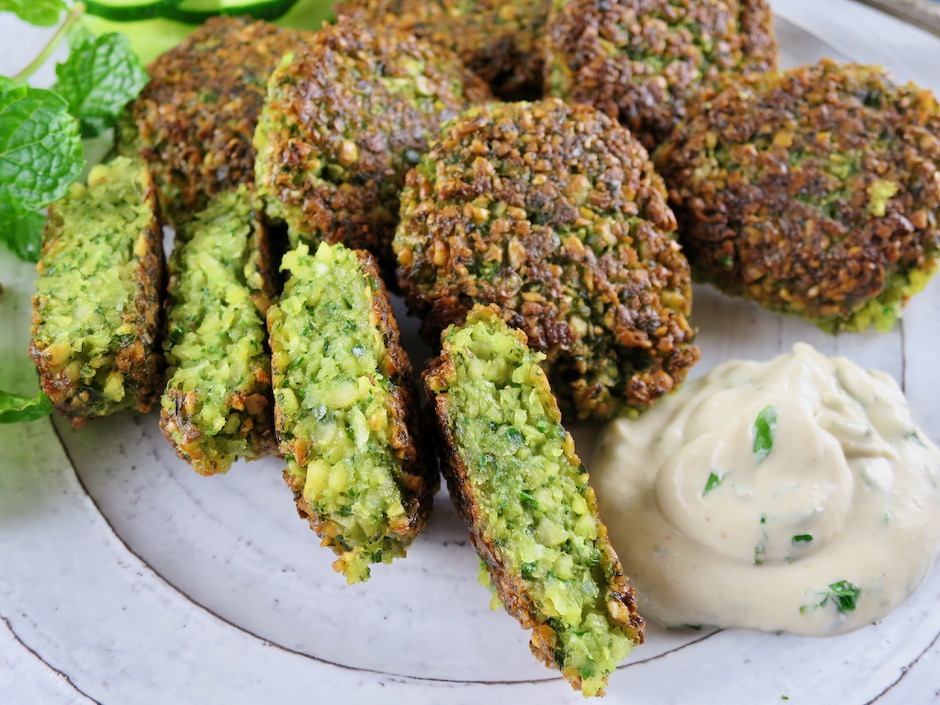
Beautiful Falafel

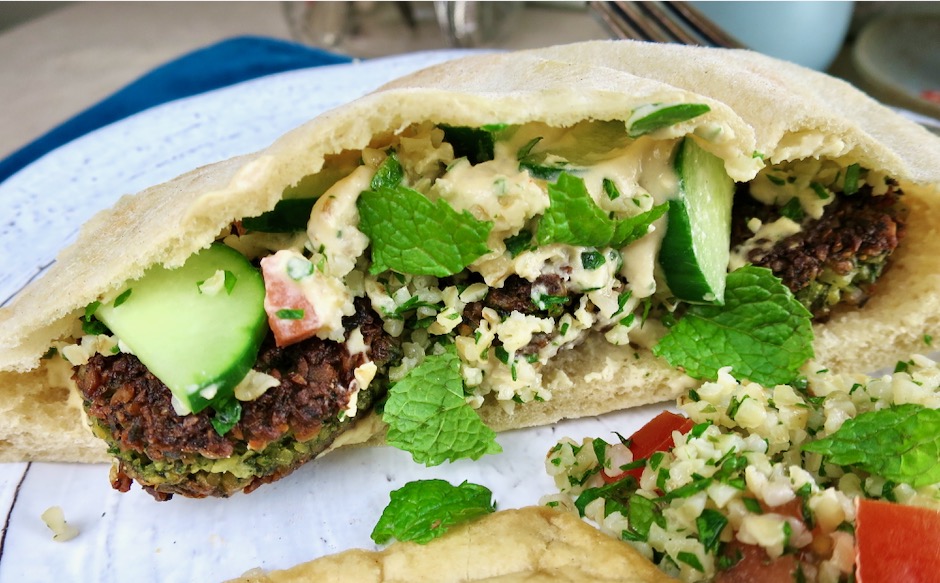
These beautiful falafel patties are crisp on the exterior with tender interiors.  They cook quickly and evenly and are easy to stuff into soft, warmed pitas.  I pan- fried my falafel in a bit of oil, however, the original recipe instructs you to deep fry the falafel.  You may prefer to follow this step if you shape your falafel into balls rather than patties. Serve the falafel with tahini sauce.

Falafel with Tahini Sauce in Pita Bread

Falafel with Tahini Sauce

Falafel
 
Delicious falafel adapted from Cook's Illustrated
Author:
Serves: 20
Ingredients
  • 8 ounces dried chickpeas, picked over and rinsed
  • 2 ounces fresh herbs: Italian parsley, cilantro and mint
  • ½ cup chopped onion (fine)
  • 2 garlic cloves, minced
  • ¾ teaspoon ground coriander
  • 1 teaspoon ground cumin
  • 1 teaspoon fine sea salt
  • ⅛ teaspoon cayenne pepper (up to ¼ teaspoon for spicier falafel)
  • ¼ cup all-purpose flour
  • 2 teaspoons baking powder
  • oil for shallow frying or more for deep frying
Preparation
  1. Place chickpeas in a large bowl and cover with water by 2 to 3 inches. Make sure your bowl has plenty of space for the chickpeas to expand. Cover and soak in the refrigerator for at least 8 hours or up to 24 hours.
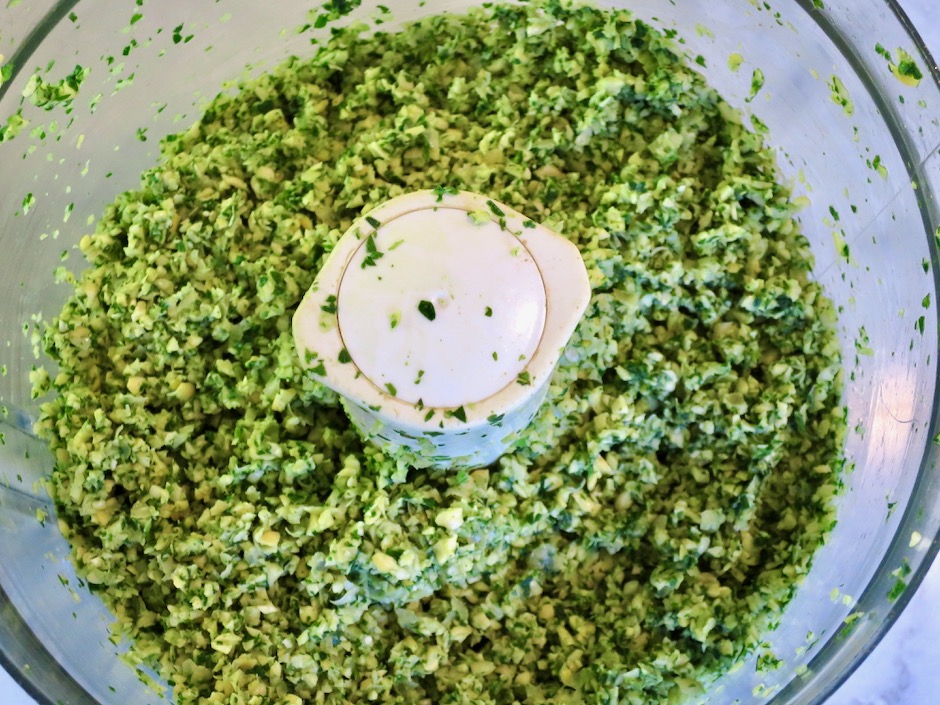
  2. Process Italian parsley, cilantro, mint, onion, garlic, coriander, cumin, salt and cayenne pepper in a food processor for 5 seconds. Scrape down the sides of the bowl. Continue to process until the mixture resembles pesto, about 5 seconds longer. Add drained chickpeas and pulse 6 times. Scrape down the sides of the bowl. Continue to pulse until the chickpeas are coarsely chopped and resemble sesame seeds, about 6-10 more pulses. Transfer mixture to a large bowl and set aside.
  3. Whisk flour and ⅓ cup water in a bowl until no lumps remain. Microwave, whisking every 10 seconds, until mixture thickens to stiff, smooth pudding-like consistency that forms a mound when dropped from end of whisk into bowl; 20-40 seconds. Stir baking powder into the flour paste.
  4. Add flour paste to chickpea mixture and using a rubber spatula, mix until fully incorporated. Divide mixture into 20 pieces (24 if forming balls) and gently form into a patty shape. If making balls, roll mixture into golf ball-size spheres. Transfer patties to a parchment paper-lined rimmed baking sheet. The formed falafel can be refrigerated for up to 2 hours, covered.
  5. Heat enough oil to reach ¼-inch up the sides of a wide high sided skillet (mine has 3" sides) over medium to medium-high heat. (If deep frying, heat oil in a Dutch oven over medium-high heat to 325 degrees and fry half at a time for about 5 minutes until deep brown in color). Once the oil is hot, add patties and fry, turning the falafel to ensure all sides have browned nicely. You may need to turn the heat down if it's too hot (medium). Transfer cooked falafel to a paper towel-lined baking sheet. Serve with tahini sauce (see link to recipe above).


Appetizers, Beans, Dinner, Lactose Free, Recipes, Side Dishes, Vegan, Vegetarian

Creamy Fresh Herb Hummus

November 24, 2019

Creamy Fresh Herb Hummus

Homemade hummus is the best.  It is so easy to prepare and the end product is certainly worth the 30 minutes you spend making it. All the ingredients except for the herbs and pistachios go into the food processor.  Blitz away until the mixture is as smooth as you want it to be.  We enjoy eating hummus with homemade pita chips and falafel.  Hummus keeps well in the refrigerator and makes a great snack for home or work.

Chickpeas with Skins Removed

This time around I decided to remove the skins from the chickpeas. It took me about 9 minutes to pinch off the skins from a can of beans.  I didn’t mind the extra step since I enjoy spending time in the kitchen.  Of course this is optional, but I found the hummus to be magnificently smooth.  I came upon a curious recipe from the Minimalist Baker blog.  The undrained chickpeas and garlic cloves are heated in the microwave for a few minutes making the chickpeas very smooth and creamy when blended together with the other ingredients.  The garlic mellows a bit which makes for a well-balanced hummus.

Chickpeas & Garlic

When you microwave the chickpeas use a large bowl since the chickpea liquid tends to expand. I cover the bowl with plastic wrap leaving a small vent for air to escape.  Once the chickpeas come out of the microwave I drain them, saving just a few tablespoons of the liquid for later.  Then everything goes into the food processor until smooth and creamy.  Place the warm hummus in a container and refrigerate until cool.  Transfer the cooled hummus to a serving plate, add your favorite fresh herbs, pistachios, and a swirl of olive oil.  Dust with cayenne pepper and serve with pita chips.

It’s really a chore to stir tahini in the container or jar that it comes in.  The bottom of the container usually has solid pieces of tahini that are hard to get at.  These days I just pour the entire container into a bowl and whisk away until the tahini is mixed to perfection.  The thought of having to clean another bowl might discourage you but you will save a lot of frustration. It only takes a minute to wash the bowl!

Creamy Fresh Herb Hummus

Creamy Fresh Herb Hummus
 
Author:
Serves: 6
Ingredients
  • 1 can (15 ounce) chickpeas, drained with liquid reserved, skins removed (optional)
  • 3 medium garlic cloves, peeled
  • ¼ cup + 1 tablespoon well stirred tahini
  • 2½ - 3 tablespoons fresh lemon juice
  • ¾ teaspoon kosher salt
  • 2-3 tablespoons cold water
  • 1-2 tablespoons reserved chickpea liquid
  • ¼ teaspoon ground cumin
  • ⅛ teaspoon cayenne (optional) + more for serving
  • 2 tablespoons extra virgin olive oil + more for serving
  • handful of fresh herbs
  • pistachios, salted and shelled
Preparation
  1. Drain and reserve the liquid from the chickpeas. Pinch off the skins from the chickpeas
  2. Transfer chickpeas, reserved liquid and 3 garlic cloves to a large bowl. Cover with plastic wrap leaving a small vent for the air to escape. Microwave for 3½ - 4 minutes.
  3. Drain chickpeas, reserving 2 tablespoons of liquid. Transfer chickpeas to a food processor along with the garlic cloves, tahini, lemon juice, salt, 2 tablespoons cold water, 1 tablespoon chickpea liquid, cumin, cayenne and olive oil. Process until mixture is smooth, scraping down the sides as needed. If the hummus is too thick, add water or chickpea liquid until it is the texture you prefer. Keep in mind the hummus will thicken a bit once refrigerated. Transfer mixture to a container and refrigerate until chilled.
  4. When ready to serve, spoon hummus onto a serving plate. Place fresh herbs in the center and top with pistachios. Drizzle olive oil over hummus and sprinkle a bit of cayenne over the top. Serve with pita chips.


Beans, Dinner, Lactose Free, Recipes, Soups, Veggies

Vegetable & Farro Soup

November 20, 2017

Vegetable & Farro Soup

Though the seasons change ever so slightly here in Hawaii, a warm bowl of soup is still soothing once November comes around. The days are still sunny and the beaches are full of people, yet there’s a noticeable difference in the temperature.  This soup is based on one that is served at Eataly in New York City.  It’s really quite simple to make, and it doesn’t need to simmer for hours.  The soup is brimming with healthy vegetables, beans and whole grain farro. It is light yet satisfying.

Carrots, Onion, Celery, Leeks, Peas, Beans

The vegetables are sliced thin which enables them to be cooked for a shorter period.  This soup is ready to eat in 40 minutes.

Sliced Leeks

Use only the white and light tender green parts of the leek. Slice the leek into narrow strips so that they cook up nicely in a few minutes.

Farro

It seems that only a few years ago farro could not be found at any of our local markets. I would purchase farro on my annual trips to San Francisco and bring it home to Maui.  These days you can buy farro in the bulk section at most markets.

Vegetable & Farro Soup

Vegetable & Farro Soup
 
Adapted from Mario Batali's recipe for Eataly
Author:
Serves: 6
Ingredients
  • 2 tablespoons extra virgin olive oil
  • ¾ cup thinly sliced celery (about 2 celery ribs)
  • 1 cup thinly sliced sweet onion
  • 1 cup thinly sliced leek, white and pale green parts only (1 medium leek)
  • ¾ cup farro
  • 1½ tablespoons tomato paste
  • 5 cups chicken broth
  • 2 cups water
  • 1 cup canned small white beans, rinsed and drained
  • 1 small bay leaf (or half of a medium-sized bay leaf)
  • 1 heaping cup thinly sliced carrots (halved lengthwise and sliced crosswise ¼-inch thick)
  • 1 cup frozen peas
  • 1 teaspoon finely chopped fresh marjoram
  • 2 teaspoons finely chopped Italian parsley
  • 1 teaspoon finely chopped fresh oregano (optional)
  • salt and freshly ground black pepper
  • 2 tablespoons julienned basil for serving
Preparation
  1. In a large enameled Dutch oven or other heavy pot, heat the olive. Add the celery, onion and leek and cook over moderately high heat, stirring a few times, until softened. Add the farro and tomato paste and cook, stirring until the grains are coated, about 30 seconds.
  2. Add the chicken broth and water to the pot and bring to a boil. Add the beans and bay leaf and simmer over low heat for 20 minutes.
  3. Add the carrots and cover the pot. Simmer on low for 20 minutes or until the carrots are just tender.
  4. Add the peas and fresh herbs. Simmer until the peas have warmed up, about 5 minutes. Season with kosher salt and freshly ground black pepper. Sprinkle basil over each serving.


Follow

Get every new post delivered to your Inbox

Join other followers: