Browsing Category

Appetizers

Appetizers, Lactose Free, Recipes

Crispy Furikake Chex Mix

January 20, 2016

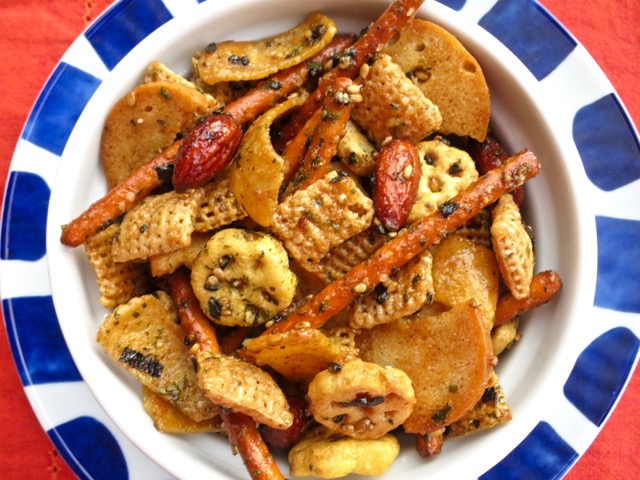
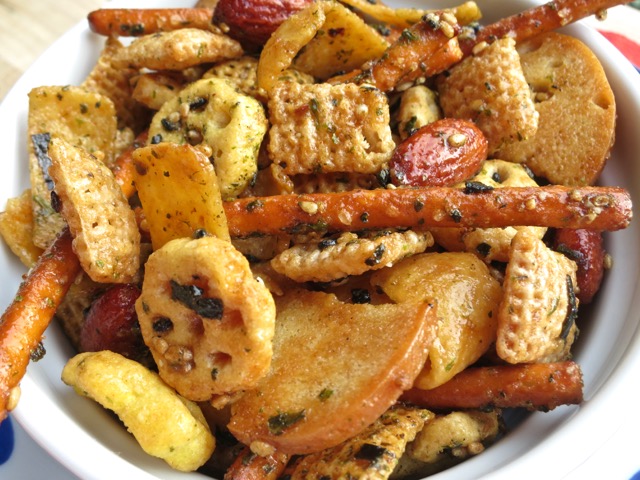
Crispy Furikake Chex MixHere’s a crunchy, sweet and salty snack that all of my co-workers love.  I make two pans at a time and pack them in whatever containers I have handy. When at work and having a stressful day, snack on this.  Relaxation ensues!

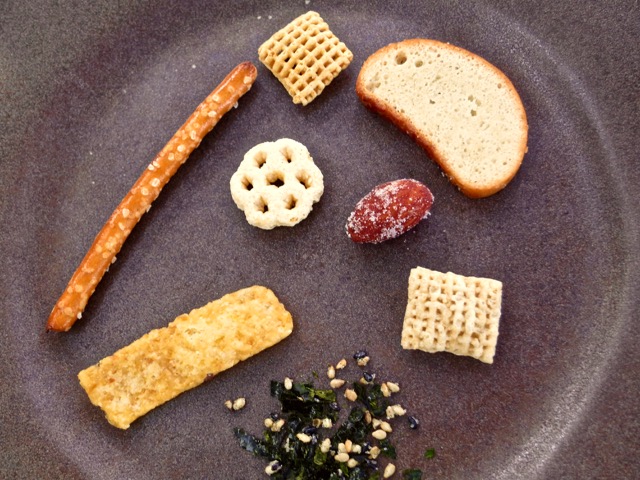
Chex Mix IngredientsThere are many variations of this delicious treat.  It’s up to you what crunchy ingredients you want to include. This time I tossed together pretzel sticks, corn Chex, Stacey’s bagel chips, rice Chex, honey roasted almonds, Honeycomb cereal, furikake and Fritos.  Your imagination is the only limit.

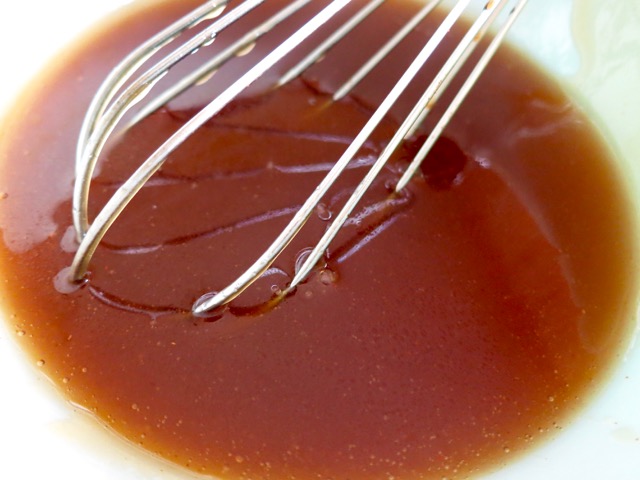
Chex Mix SauceThere is a bit of soy sauce in this recipe that lends a subtle saltiness to this snack.  Also a few dashes of cayenne pepper adds a nice zing. This is my favorite furikake mix.

Crispy Furikake Chex Mix

Crispy Furikake Chex Mix
 
Author:
Serves: 12 cups
Ingredients
  • ½ cup + 2 tablespoons Earth Balance Buttery Sticks (or butter)
  • ¼ cup vegetable oil
  • ¼ cup + 1 tablespoon light corn syrup
  • 1 tablespoon + 1 teaspoon soy sauce (not light)
  • 1 teaspoon Worcestershire sauce
  • ½ cup granulated sugar
  • few dashes cayenne pepper
  • 2 cups corn Chex
  • 2 cups rice Chex
  • 1 cup Honeycomb cereal
  • 2 cups pretzel sticks
  • 2 cups broken bagel chips
  • 2 cups Fritos
  • 1 cup honey almonds or regular roasted almonds
  • ½ cup furikake
Preparation
  1. Preheat oven to 250 degrees.
  2. Line two large rimmed baking pans with foil.
  3. Stir ½ cup + 2 tablespoons Buttery Sticks, vegetable oil, corn syrup, soy sauce, Worcestershire sauce, sugar, and cayenne pepper in a medium pot over medium-low heat until sugar dissolves. Transfer mixture to a small bowl, whisk to combine and cool slightly.
  4. Combine corn Chex, rice Chex, Honeycomb cereal, pretzels, bagel chips, Fritos, and almonds in a large bowl. Pour sauce over cereal mixture and toss well (I use disposable gloves). Sprinkle furikake over mixture, toss again. Bake for 1 hour and 15 minutes, stirring mixture every 15 minutes. Let cool completely on pans. Store in airtight containers.


Appetizers, Breakfast, Dinner, Lactose Free, Pork, Recipes, Rice Dishes

Spam Musubi

August 12, 2015

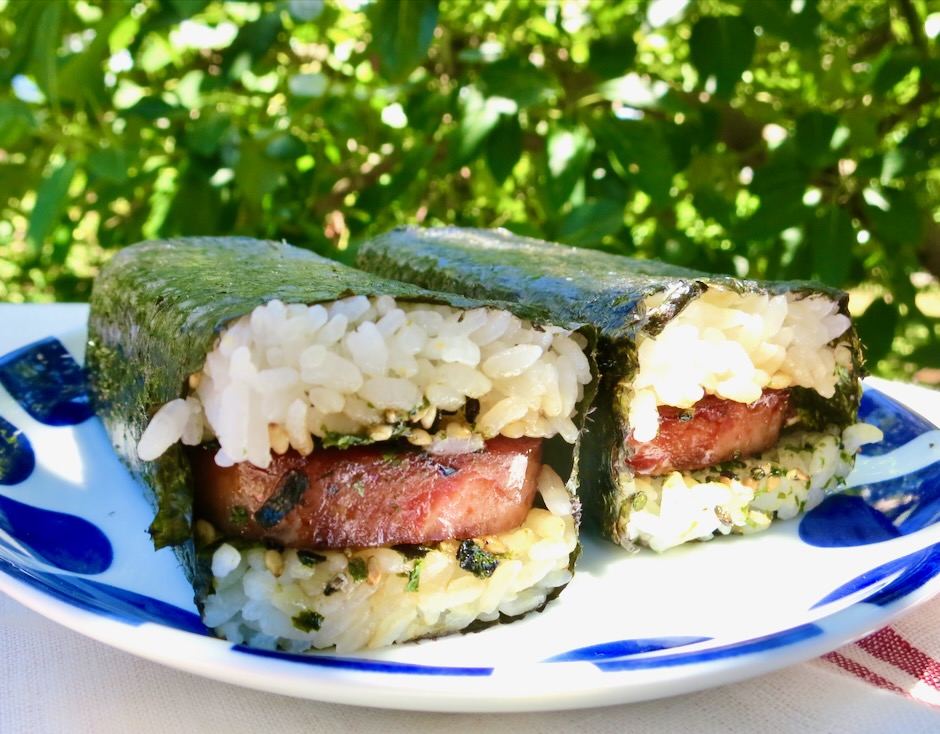
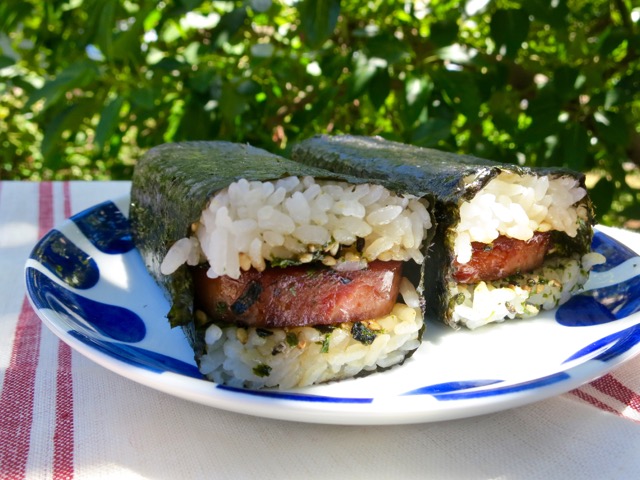
It’s true.  Every now and then I eat Spam.  Phew!  Now that I got that out-of-the-way, let’s move on to my latest Spam preparation:  The beloved Spam musubi.  Found at local convenience stores, airports, and mom and pop stores, Spam musubi is a tasty snack that travels well in your bag, backpack, and even fits snugly in your pocket.  It’s an island favorite.

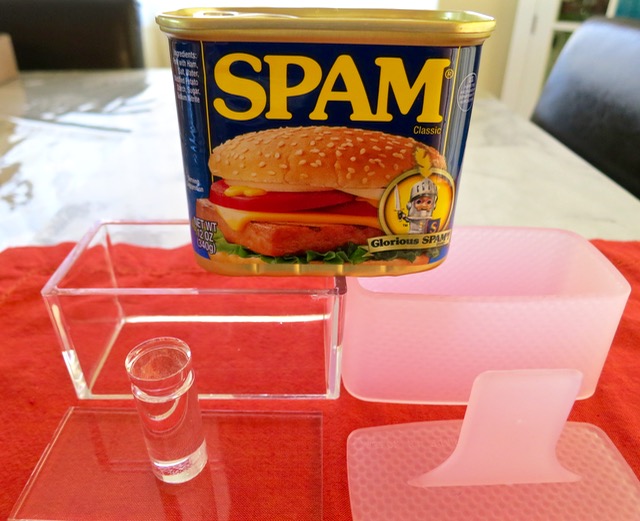
Spam & Musubi Presses

I have a good laugh every time I see the little man on the Spam can announcing “Glorious Spam!”

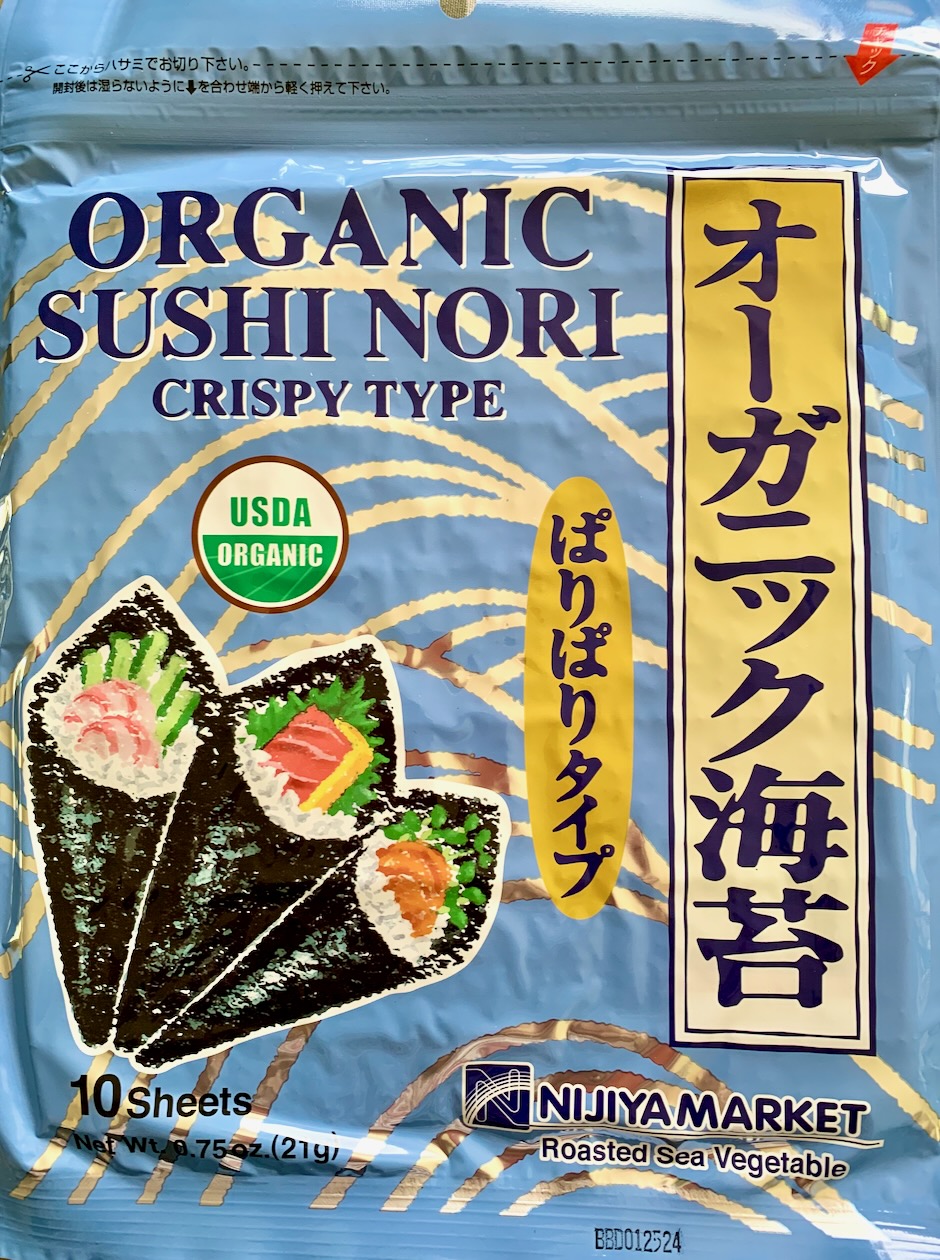
If you live near a Nijiya Japanese market, I recommend buying this nori.  It is not expensive and it’s a good nori for Spam musubi as well as maki sushi rolls.

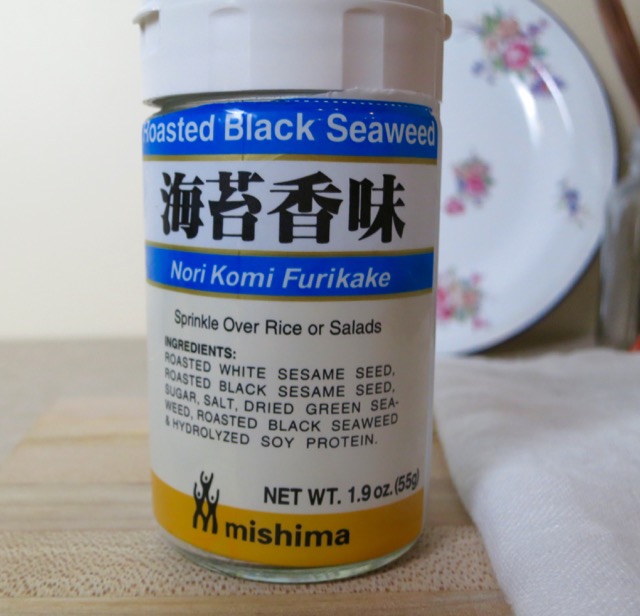
Favorite Furikake

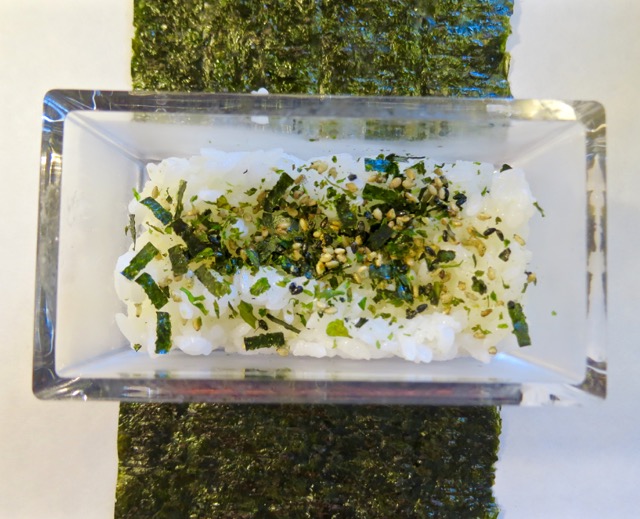
There’s a large variety of furikake at the markets.  Salmon, shiso, wasabi, and more.  I favor the simple combination of nori flakes with black and white roasted sesame seeds.  It’s perfect for Spam musubi.

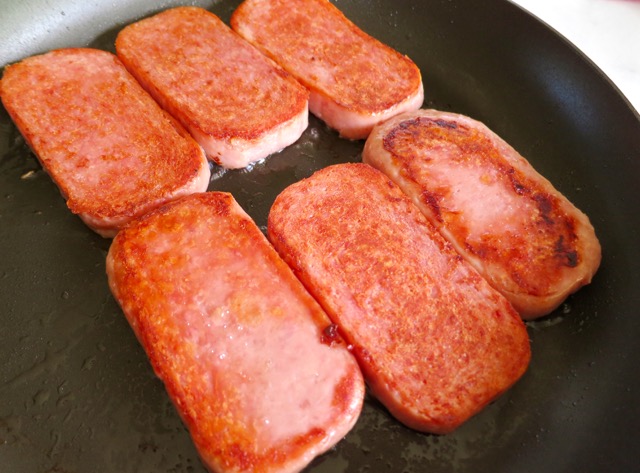
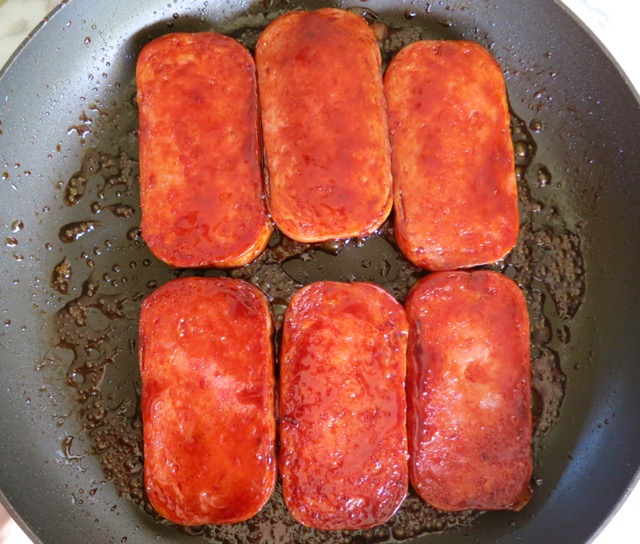
Fried Spam

Slice the Spam into eight pieces.  Fry the Spam for a few minutes on each side until lightly browned.

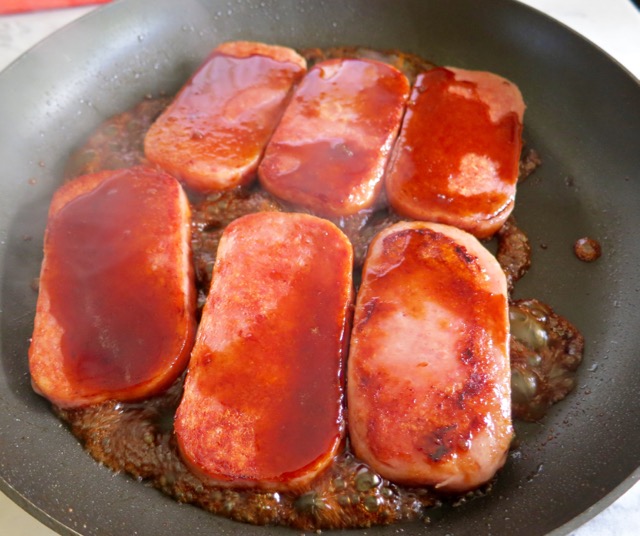
Seasoned Spam

Add your soy sauce mixture and turn the Spam over and over in the sauce to coat well.  This will take just a minute.

Ready for Musubi!

Perfectly cooked Spam and seasoned Spam.

Making Spam Musubi

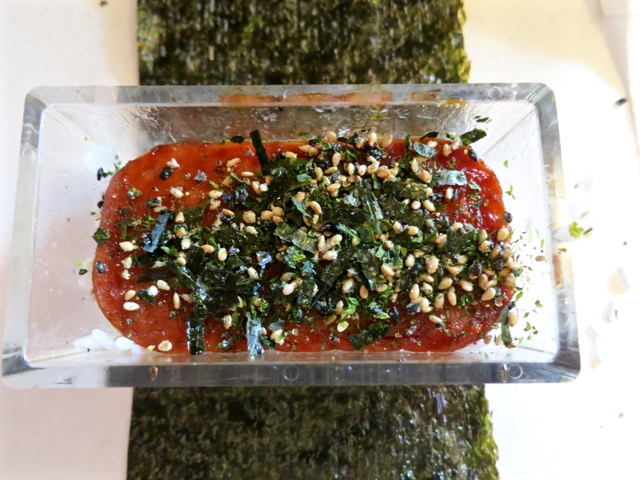
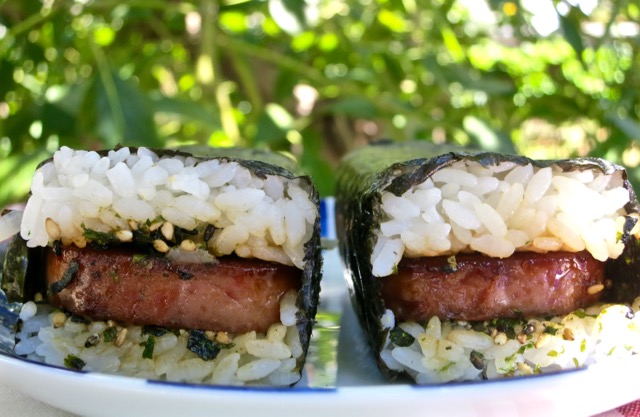
Making Spam musubi is quick and easy.  Cook the rice, pan fry the Spam, put it all together, press, eat.

Making Spam Musubi

I bookmarked this recipe from Serious Eats  years ago and finally got around to making it.  Not all Spam musubis are alike.  This one is a winner.

Spam Musubi

Recipe updated 7/28/23 to make 8 Spam musubi (originally 6)

Spam Musubi
 
Quick and easy snack that packs and travels well. Adapted from Kathy Chan's recipe/Serious Eats blog.
Author:
Cuisine: Hawaiian-Style
Ingredients
  • 3 cups short grain or medium grain white rice, cooked according to package directions
  • 1 can original or 25% less sodium Spam
  • 3 tablespoons brown sugar
  • 3 tablespoons less sodium soy sauce (Kikkoman recommended)
  • 4 pieces sushi nori, cut in half lengthwise to make 8 pieces
  • furikake
Preparation
  1. Slice Spam into 8 equal sized pieces (slice across the longest portion of Spam)
  2. Mix together brown sugar and soy sauce, set aside.
  3. Fry Spam on medium-high heat for a few minutes on each side, or until lightly browned. Turn heat down to medium-low, add brown sugar and soy sauce mixture and turn Spam over a few times to coat well. If the pan seems too hot, take it off the burner for a few seconds. You want the soy sauce mixture to caramelize a bit and coat the Spam nicely (watch closely so that it doesn't burn). Remove Spam to a plate to cool.
  4. Lay a piece of nori on a clean work surface. Place musubi shaper on top of the nori (in the center). Scoop enough rice into the musubi shaper to make a thin layer. Press the rice firmly with the musubi compressor. Sprinkle furikake over the rice, add a piece of Spam, more furikake, and lastly, more rice. Press firmly using the musubi compressor. You want the musubi to hold together when you eat it. To remove Spam musubi, hold the shaper and lift it up as you continue to press down on the musubi. Gently remove the compressor (if the rice sticks a bit loosen it with a butter knife). Wrap the nori around the musubi tightly.  You may need to trim a bit of the nori if it's too long.
  5. Serve right away or wrap and pack for a mid-morning or afternoon snack.

Appetizers, Bread, Eggs, Recipes, Sandwiches

Pickled Egg Salad Crostini with Prosciutto

June 1, 2015

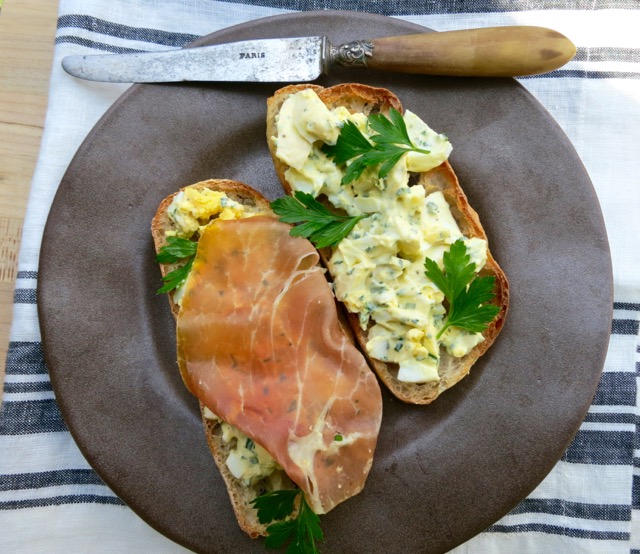
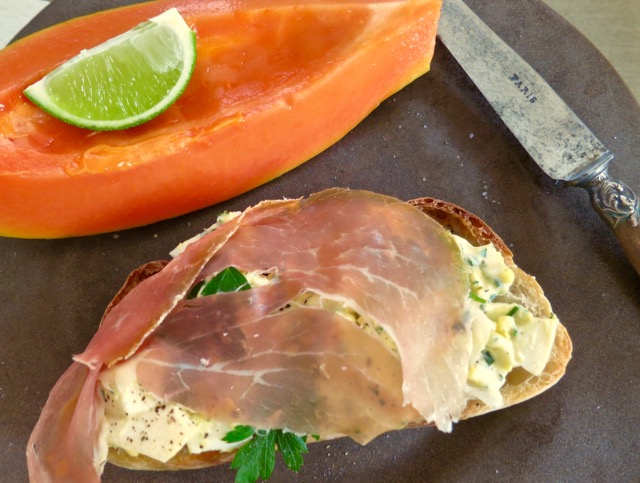
pickled egg sandwich - 1 (2)Bon Appetit’s February 2015 issue shared a story about SHED, part market, part café, part events center in Healdsburg.  I love wine country and visited Healdsburg some years back, but unfortunately it was an overnighter and we had little time to explore the town and look for interesting places to dine.  Next time, however, I’ll be sure to visit SHED.  The article featured a brief story about this lovely place as well as several recipes.  As one who loves eggs, this one caught my attention immediately.  It’s delicious.

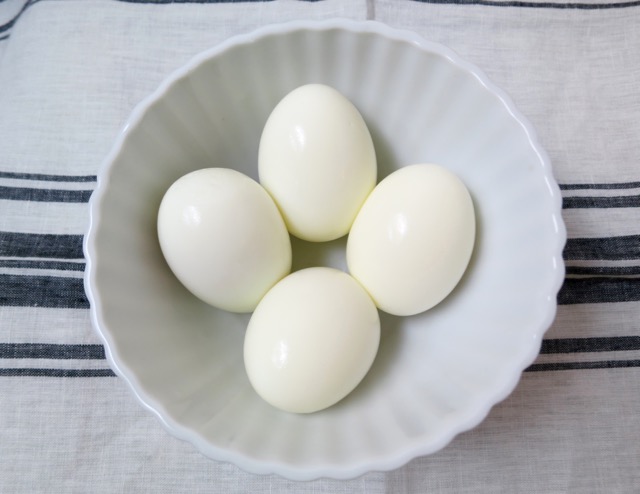
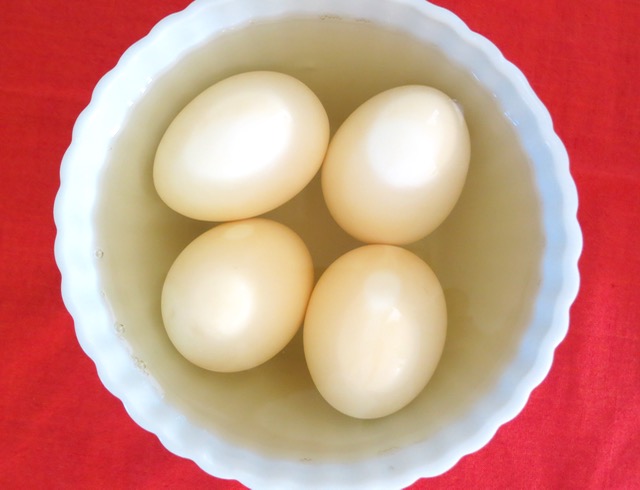
eggs for pickling - 1 (1)Hard boiled eggs are pickled for 12 hours then chopped up with herbs and mayonnaise added to it. Good country-style bread or ciabatta is toasted until golden brown then topped with the egg salad and a paper-thin slice of prosciutto (or Serrano ham).  It’s really perfect for lunch.  I’m planning to make it using small pieces of bread, and serve it at my next dinner party as an appetizer.

eggs pickling - 1

pickled egg sandwich - 1 (8)

Pickled Egg Salad Crostini with Prosciutto

Adapted from Bon Appetit February 2015 Issue

Serves 2

Ingredients

1/3 cup apple cider vinegar

1/3 cup distilled white vinegar

3/4 teaspoon sugar

1 teaspoon kosher salt, plus more

4 extra-large eggs

1/4 cup or more mayonnaise

1 heaping tablespoon chopped fresh chives

1 tablespoon chopped fresh parsley

4 1/4″- thick slices country-style bread or ciabatta

1 1/2 tablespoons olive oil

1 garlic clove

chervil or parsley leaves with tender stems (for serving)

4 slices prosciutto or Serrano ham

Preparation

Bring vinegars, sugar, 1 teaspoon salt, and 1/3 cup water to a simmer in a medium saucepan. Let cool.

Meanwhile, place eggs in a small saucepan and add water to cover by 2″.  Bring to a boil, immediately turn down heat to medium and let eggs simmer for 10 minutes (set your timer!). Transfer eggs to a bowl of ice water to cool.  Drain, peel, and return to a small bowl.  Add cooled pickling liquid; cover and chill at least 12 hours.  Remove eggs from pickling liquid. Coarsely chop; mix with mayonnaise, chives, and parsley in a medium bowl.  Season with pepper.  I found the eggs to be perfectly seasoned from the pickling liquid so I didn’t add any additional salt.

Preheat oven (I used my toaster oven) to 425°. Place bread on a baking sheet and drizzle with olive oil.  Toast until golden brown, 6 – 8 minutes.  Rub with garlic.  Top each toast with pickled egg salad, some chervil or parsley, and a slice of prosciutto.


Appetizers, Chicken, Dinner, Fish, Lactose Free, Recipes, Sauces, Vegan, Vegetarian

Avocado-Lime Sauce Vierge

January 31, 2015

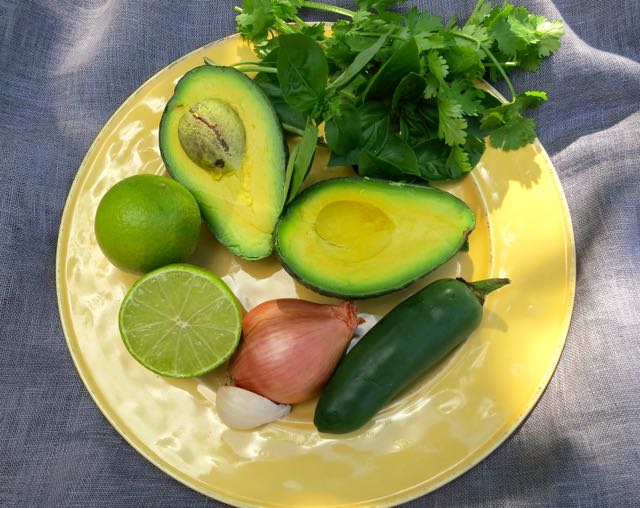
Avocado, Basil, Cilantro, Jalapeno, Shallot, Garlic & LimeThis fantastic recipe from Bon Appetit is a winner.  Sauce Vierge is a French sauce literally meaning virgin sauce because it is not cooked.  There are so many variations, often using tomatoes as the base of the sauce.  The main ingredients found in most of the recipes are olive oil, fresh herbs and lemon juice.  This recipe includes luscious avocado, the juice and pulp of a lime, and jalapeño pepper.  Brilliant!

Avocado-Lime Sauce Vierge IngredientsThe original recipe calls for 1/2 cup olive oil and a half of an avocado.  I switched it around a bit and used a whole avocado and 1/4 cup of olive oil.  I don’t care for sauces or dressings that are heavy on the oil so this worked out perfectly.

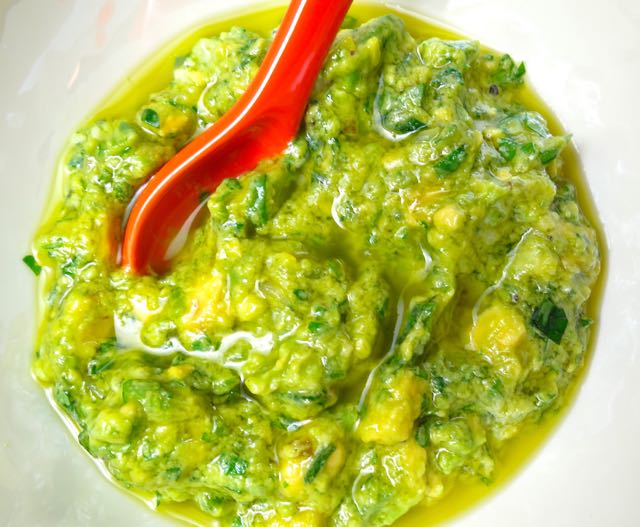
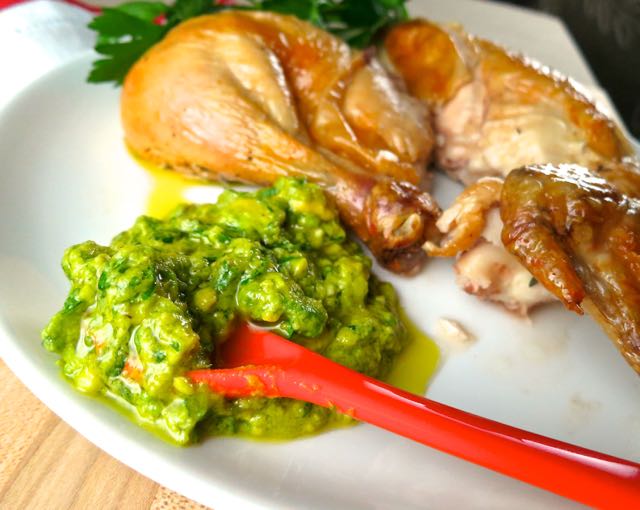
Avocado-Lime Sauce ViergeThe article suggests serving this sauce with grilled fish, roast chicken, or huevos rancheros.  We served it with a roast chicken and dipped tortilla chips in the leftover sauce the following day.  It was so good, I made more right away.

Avocado-Lime Sauce Vierge with Roasted Chicken

Avocado – Lime Sauce Vierge

Makes about 1 1/2 cups

Adapted from Bon Appetit

Ingredients

1 medium avocado, pitted, diced

1/4 cup extra-virgin olive oil

1 small jalapeño, seeded, finely chopped

1 small garlic clove, finely chopped

1 teaspoon finely chopped shallot

1 – 2 limes, halved (our limes from the garden are large and juicy so I used just 1 lime, taste as you go)

2 tablespoons chopped fresh basil

1 tablespoon coarsely chopped fresh cilantro leaves

sea salt and freshly ground black pepper

Preparation

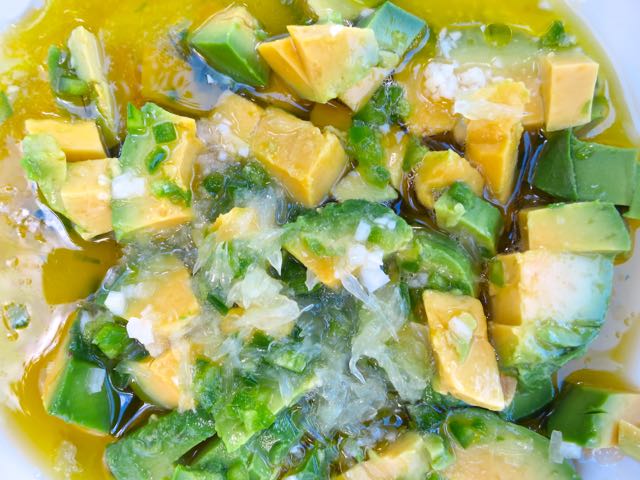
Dice avocado and place in a medium bowl.  Coarsely crush some of the avocado.  Stir in olive oil, jalapeño, garlic, and shallot.  Squeeze limes into avocado mixture.  Using a spoon, scrape pulp out of limes into mixture.  Stir to combine.  Do Ahead: Sauce can be made a few days in advance.  Press a piece of plastic wrap directly on surface of sauce.  Cover and refrigerate.  Bring sauce to room temperature before continuing.

Stir basil and cilantro into sauce just before serving.  Season with salt and pepper.  Drizzle with extra olive oil if desired.


Appetizers, Dinner, Eggs, Lactose Free, Pickles, Recipes, Salad, Side Dishes, Veggies

Pickled Beets, Red Onion & Eggs

September 14, 2014

Pickled Beets, Onion & EggsAnyone familiar with this blog, knows that I love pickles.  I think homemade pickles should be in every serious home cooks repertoire.  You’ll be rewarded with tangy-sweet and crunchy snacks that are delightful and with far more variety than you will find in your typical supermarket.

Beets, Red Onion & Hard-Boiled EggsThis appealing recipe comes from Food & Wine magazine.  Beautiful beets along with wedges of red onion and hard-boiled eggs are quickly “pickled” in a simple brine with whole peppercorns and fresh dill.  The onion and eggs take on the bright color of the beets, making this a gorgeous salad.  I adore eggs in any form and never having had one pickled, I had to try this recipe.

Layered Beets, Red Onion, Hard-Boiled Eggs and Dill

Pickled Beets, Red Onion & Hard-Boiled EggsThe pickles are ready to eat in 24 hours, after a brief soak in the brine.  Serve them as a simple salad alone or with pretty greens, or scattered on a platter with chunks of feta cheese nudged between the beets and onions.

Pickled Beets, Onion & Eggs

Pickled Beets, Red Onion & Eggs

Adapted from Food & Wine magazine

Serves 4

Ingredients

4 small red red beets

4 large eggs

1 small red onion

6 dill sprigs

1 cup raw, unfiltered apple cider vinegar

1 cup water

3 small crushed garlic cloves

3 tablespoons sugar

2 teaspoons whole black peppercorns

1 teaspoons yellow mustard seeds (optional)

1 tablespoon kosher salt

Preparation

Scrub the beets and wrap in foil.  Roast for 1 hour at 425°.  I used my handy toaster oven.  Peel and quarter the beets.

Place 4 eggs in a small pot, cover with water by 1 inch.  Bring to a boil and immediately turn the heat down to medium. Set a timer and let the eggs gently simmer for 10 minutes. Drain immediately and rinse under cold water.  Peel the eggs when you are ready to add them to the pickle brine.

Slice onion into small wedges (about 8).

In a saucepan, simmer the vinegar, water, garlic, sugar, peppercorns, mustard seeds if using, and salt.  Stir until the sugar and salt are dissolved.  Let cool to room temperature, about 15 minutes or so.

In a 1-quart glass jar (you might need a larger jar depending on the size of your beets) layer the beets, onion, hard-boiled eggs and dill springs.  Cover with the pickling liquid. Refrigerate overnight.

***The longer the eggs are in the brine, the more color they will absorb from the beets.  I prefer to keep part of the eggs white so I add the eggs to the brine no more than 24 hours before serving.  You can make the pickles a few days in advance and add the eggs to the jar when you are ready.  If you’ve eaten all the eggs and still have beets and onions, boil more and add to the brine!


Appetizers, Dinner, Korean, Pork, Recipes

Pork-Kimchi Dumpling Pancakes

May 22, 2014

Pork-Kimchi DumplingI can hardly wait to return to the Bay Area this summer.  I get excited just thinking of  all my favorite dishes at all my favorite restaurants such as Redd’s duck confit served on a bed of lentils with a poached egg or the best beef filet I’ve ever tasted at Alexander’s Steak House (where they give each table cotton candy on  a stick after dinner).  Speaking of my favorite vacation city, Corey Lee, owner of Benu restaurant in San Francisco was featured in the January issue of Food & Wine magazine.  This particular issue contains a slew of recipes I want to try, however, it was Corey Lee’s Pork-Kimchi Dumpling Pancakes that really caught my eye.

Scallions, Ginger, Kimchi, Tofu, GarlicThese savory dumplings are very easy to put together once your mise en place  is done.

Wonton Wrappers

Filling DumplingsA dollop of filling on the wonton wrapper, fold and press the edges together.

Filled Dumplings

Dumpling Pancake Ready to FryTen dumplings are arranged around the edge of an 8″ skillet, overlapping slightly.  After quickly frying the dumplings for 4 minutes, a slurry of cornstarch and water is added to the pan.  This creates crispy, lacy, edges and adheres the 10 dumplings together making one impressive pancake that you invert on a platter and serve with dipping sauce.

Pork-Kimchi Dumpling Pancake

Pork-Kimchi Dumpling Pancakes

Adapted from Corey Lee’s recipe ~ Food & Wine Magazine

6 – 8 servings

Ingredients

Dipping Sauce:

1/4 cup soy sauce

1 tablespoon white vinegar

1/2 tablespoon Korean chili flakes or 1/2 tablespoon crushed red pepper

1 tablespoon roasted sesame seeds

1 tablespoon sugar

Dumplings:

14 ounces ground pork

2 tablespoons minced scallions

1/2 cup finely chopped and drained kimchi

2 garlic cloves, minced

1 tablespoon minced peeled ginger

1 large egg, lightly beaten

1 tablespoon soy sauce

1 teaspoon kosher salt

1/4 cup firm tofu, finely chopped

30 round wonton wrappers

1 1/2 tablespoons cornstarch mixed with 1 cup + 2 tablespoons water

3 tablespoons canola oil

Preparation:

Mix all of the sauce ingredients until the sugar dissolves.  Set aside.

In a bowl, mix all of the dumpling ingredients except the wrappers, cornstarch and oil.  Arrange 4 wrappers on a work surface (keep the rest covered with a damp paper towel).  Brush the edges of the wrappers with water and drop 1 tablespoon of the filling in the centers of each wrapper.  Fold over one side of the wrapper to form a half-moon, pressing the edges together.  Transfer to a parchment-lined baking sheet and cover with plastic wrap; assemble the remaining dumplings.

In a bowl, stir the cornstarch with 1 cup plus 2 tablespoons of water to make a slurry.

Heat 1 tablespoon of the oil in an 8-inch non-stick skillet over moderate heat.  Arrange 10 dumplings around the edge of the skillet overlapping slightly (there should be almost no empty space).  Cook over moderate heat until golden on the bottom, about 4 minutes.  Drizzle one-third of the slurry over and around the dumplings, cover the skillet and cook for 1 minute.  Uncover and cook until the dumplings are cooked through and the slurry forms a thin crust, about 4 minutes.  Carefully invert the dumpling pancake onto a plate.  Repeat to make 2 more pancakes. Serve with dipping sauce.

Follow

Get every new post delivered to your Inbox

Join other followers: