Browsing Category

Appetizers

Appetizers, Dinner, Lactose Free, Mexican, Recipes, Sauces, Vegan, Vegetarian

Roasted Salsa Verde

June 6, 2021

Roasted Salsa Verde

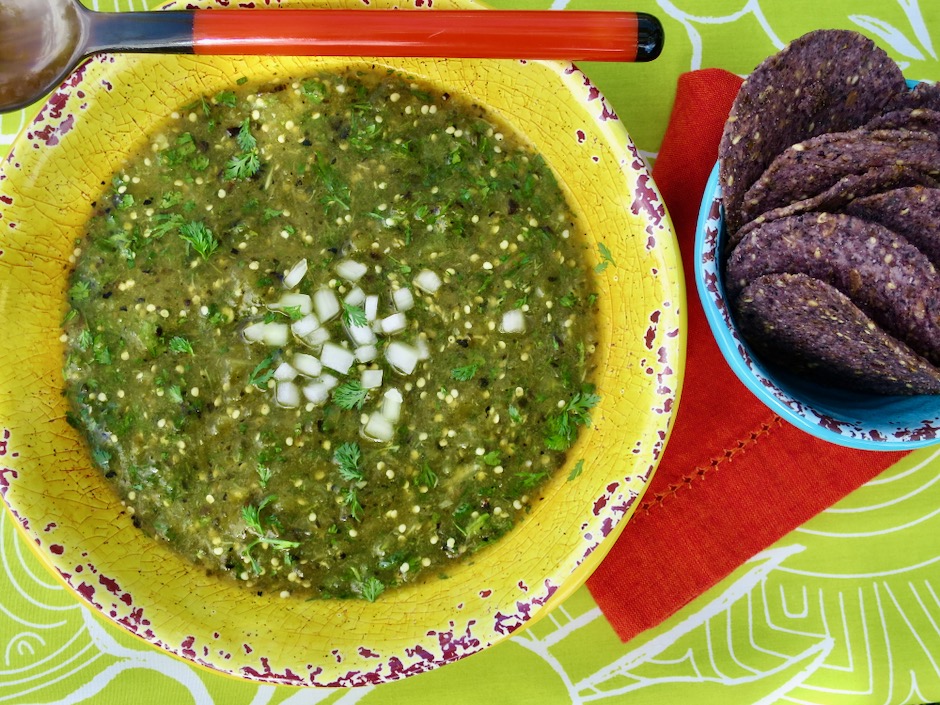
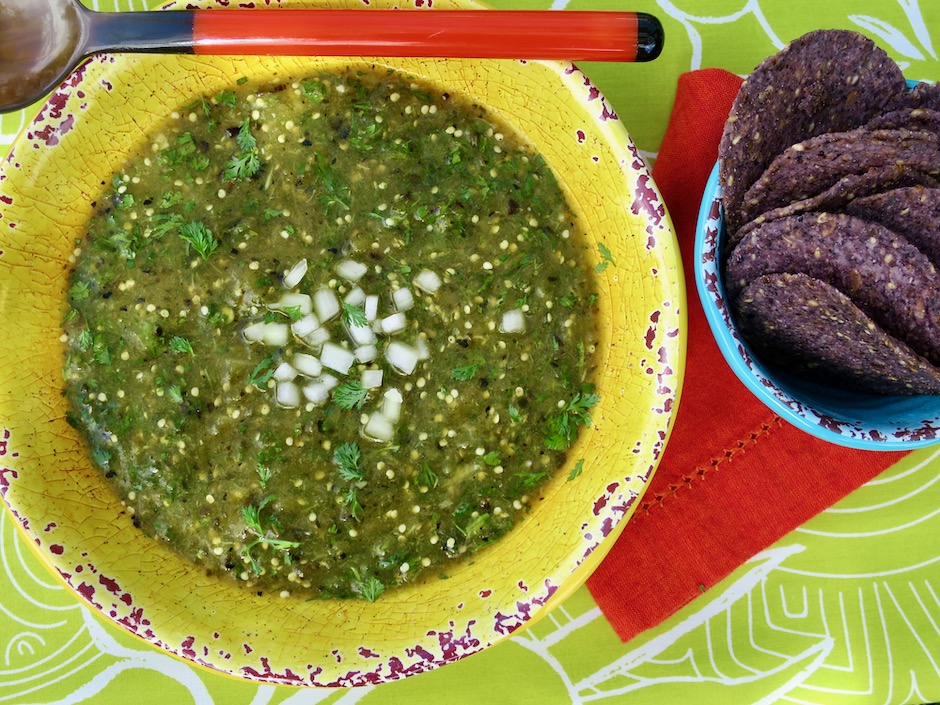
This tomatillo based salsa is delicious and because it’s homemade, it tastes far better than any jarred salsa found on the grocery store shelves.  I find that store-bought salsas tend to be quite salty so making my own allows me to add just the right amount of seasoning and heat from the peppers.  It’s very easy to make and can be eaten with tortilla chips or served with your favorite Mexican dishes.

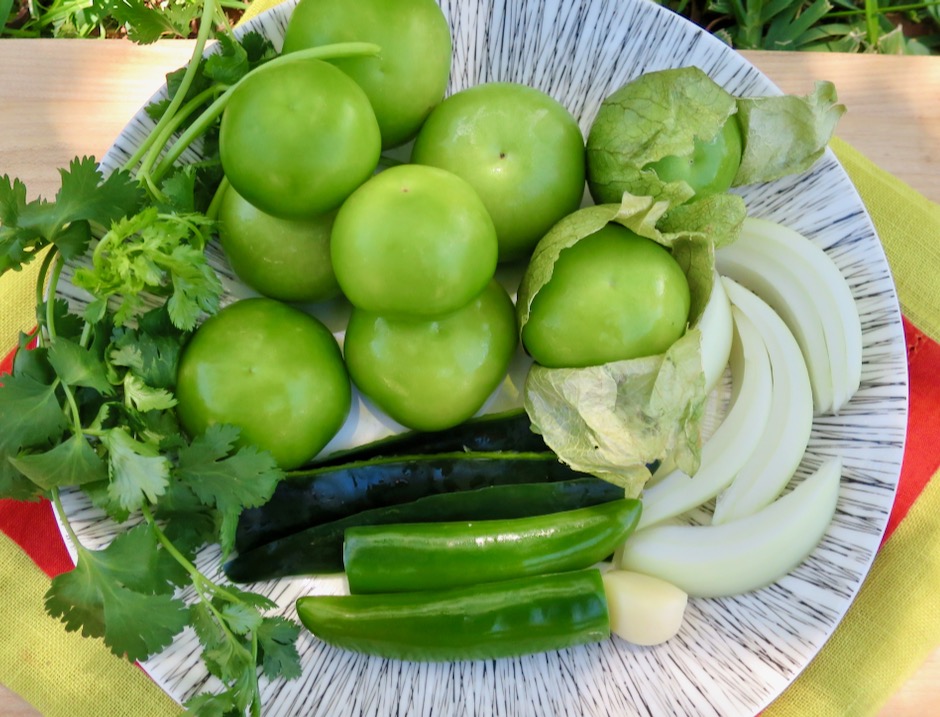
Cilantro, Tomatillos, Onion, Garlic, Serrano, Poblano

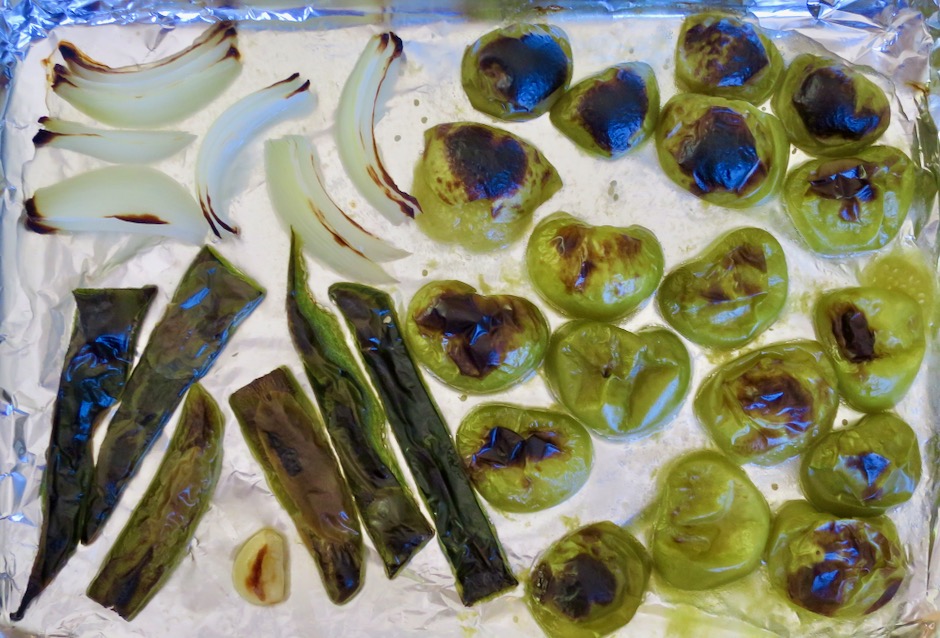
I made a small batch that was just the right amount for four meals, but feel free to double the recipe if you are serving more than two people.  Broiling the tomatillos, peppers, onion and garlic add an extra depth of flavor. Peppers can vary in heat.  Buy a couple of serrano peppers just in case using one is too mild for your taste.  

Roasted Salsa Ingredients

Instead of turning on my oven broiler, I use my Breville toaster oven which saves me from heating up the house during these hot summer days.

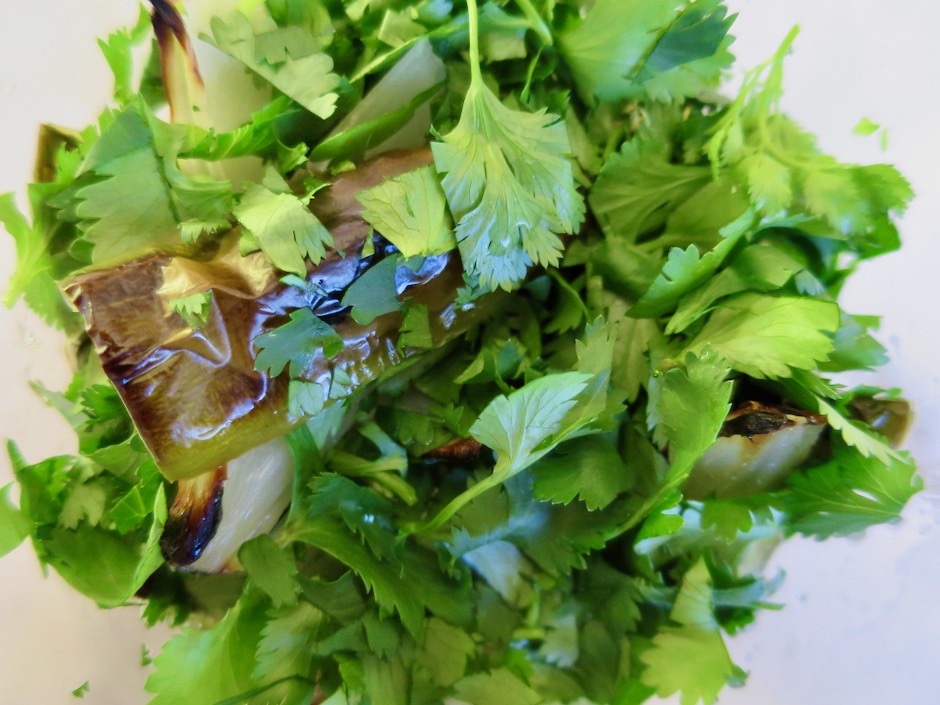
Roasted Salsa Ingredients + Cilantro

After the the tomatillos, peppers, onion and garlic are broiled, everything gets blended into a thick salsa with the immersion blender.  Do you have one of these gadgets?  It definitely comes in handy when you don’t want to drag out the big blender for a small project like this.  

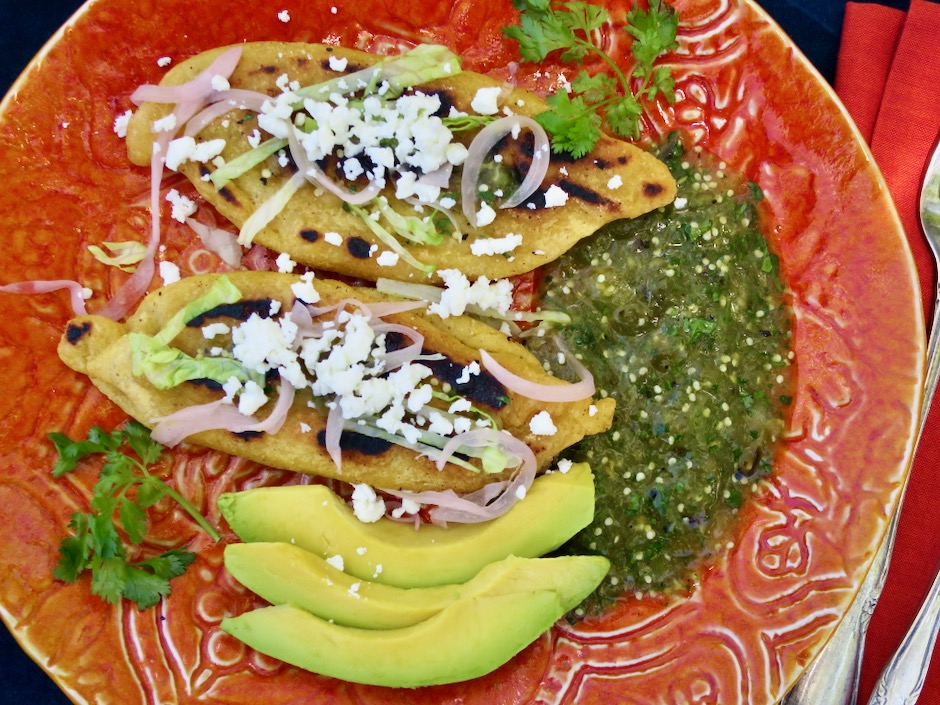
Roasted Salsa Verde with Tlacoyos

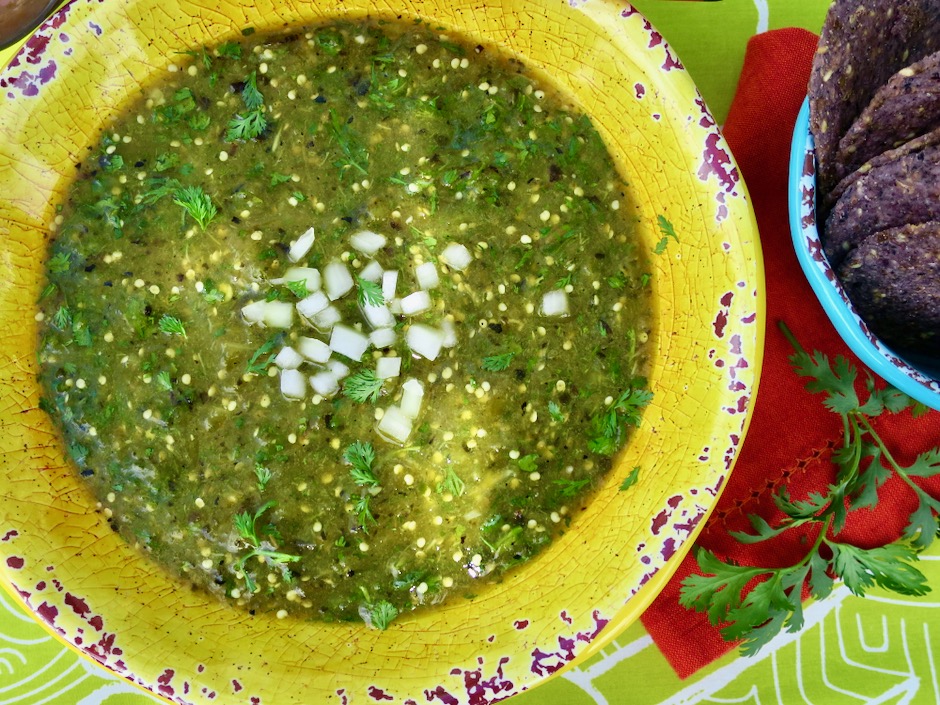
I usually chill the salsa a bit before serving it so plan ahead if you want to do the same.  Otherwise serve it at room temperature with crispy tortilla chips, tacos and burritos, or our new favorite Mexican dish: Tlacoyos.  It’s delicious on scrambled eggs scooped into warm corn tortillas.  

Roasted Salsa Verde

Roasted Salsa Verde
 
Author:
Serves: 4 servings
Ingredients
  • ¾ pound tomatillos, husked, washed and cut in half
  • 1 small garlic clove, peeled
  • ¼ small onion, cut into wedges
  • 1-2 serrano peppers
  • 3 strips of poblano pepper
  • ½ cup lightly packed cilantro, finely chopped (reserve 2 tablespoons)
  • ½ teaspoon kosher salt
  • ¼ teaspoon sugar
  • fresh lime juice
Preparation
  1. On a foil lined broiler pan, lay tomatillos cut side down, along with the garlic, onion and peppers. Broil for 10-15 minutes or until nicely charred (remove garlic clove earlier to avoid burning). Let cool for 5-10 minutes.
  2. Carefully lift foil and pour ingredients into immersion cup or food processor (including juices from tomatillos). Add cilantro, salt, sugar and a few squeezes of fresh lime juice. Blend or pulse just until ingredients are thoroughly combined and have a thick consistency. Remove to a serving bowl. Adjust seasoning with extra salt and lime juice. Stir in reserved 2 tablespoons of finely chopped cilantro.


Appetizers, Dinner, Japanese, Lactose Free, Recipes, Side Dishes, Vegan, Vegetarian

Spinach Ohitashi

February 22, 2021

Spinach Ohitashi

This is one of my favorite Japanese side dishes served with rice and cold tofu.  It makes for a very quick and delicious lunch.  It can be prepared well in advance and doesn’t need any attention until you drizzle the sauce over it. It is so refreshing and healthy.  

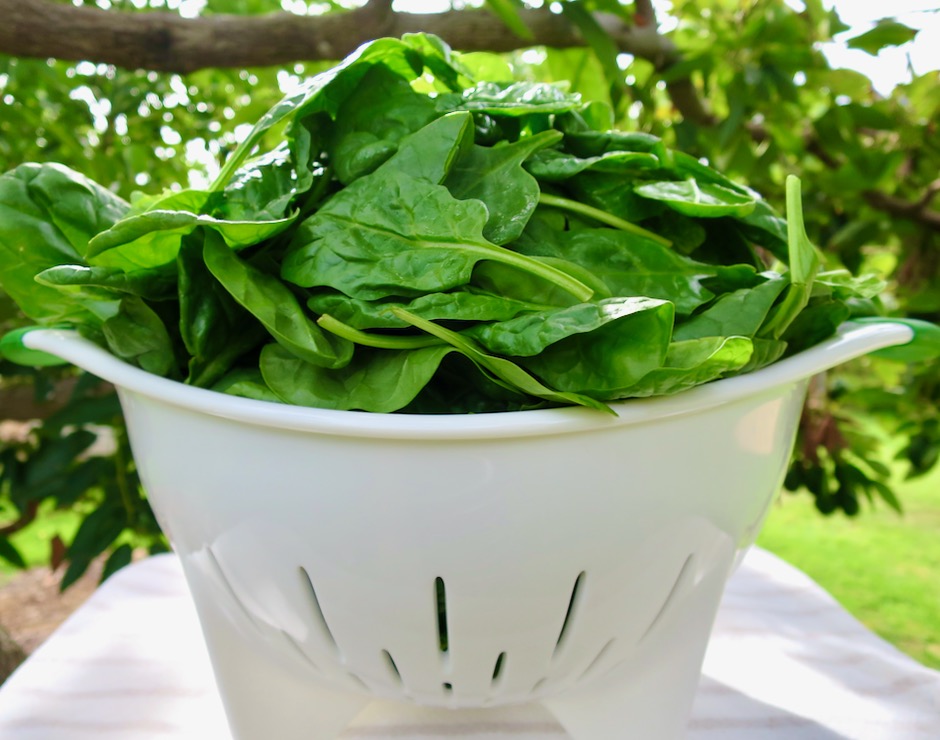
Fresh Baby Spinach Leaves

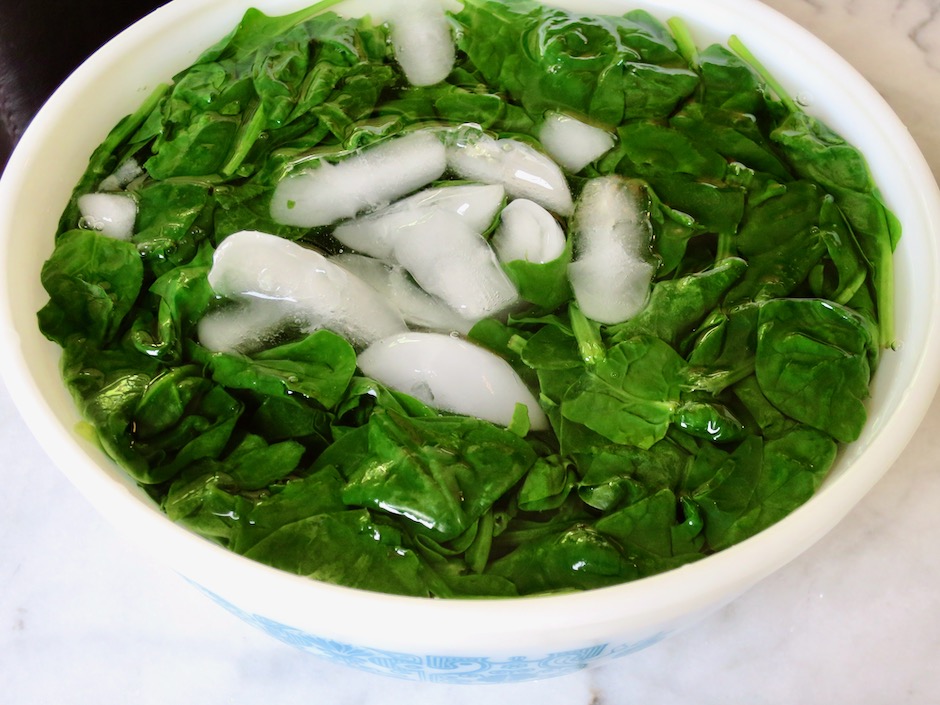
Spinach shrinks drastically when blanched so you’ll need a pound of fresh spinach for two servings.  Once blanched, the spinach goes into an ice bath to stop the cooking quickly.  

Spinach in Ice Bath

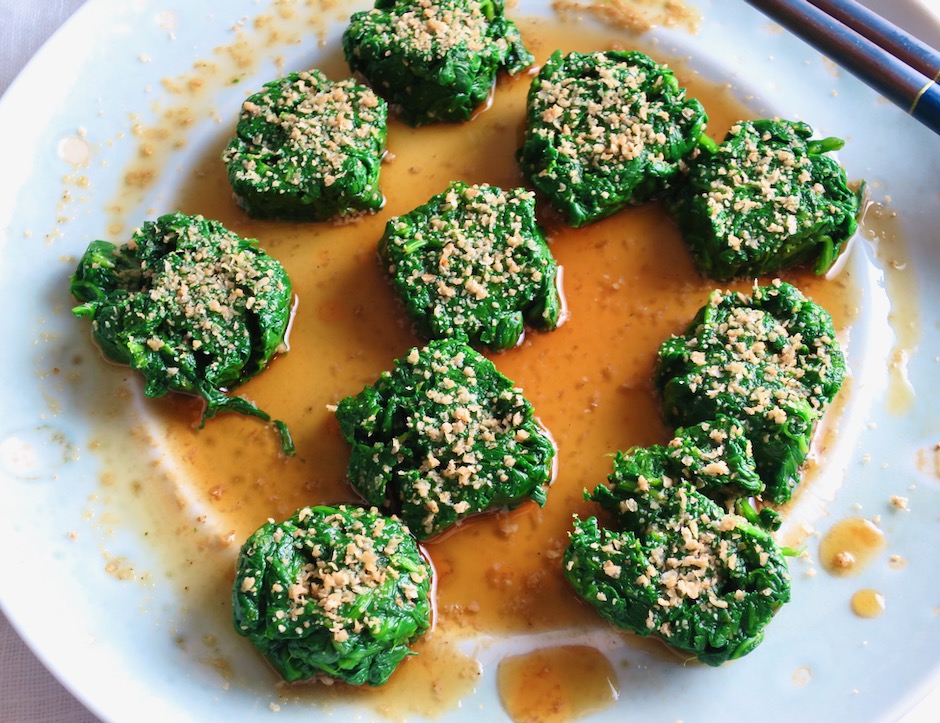
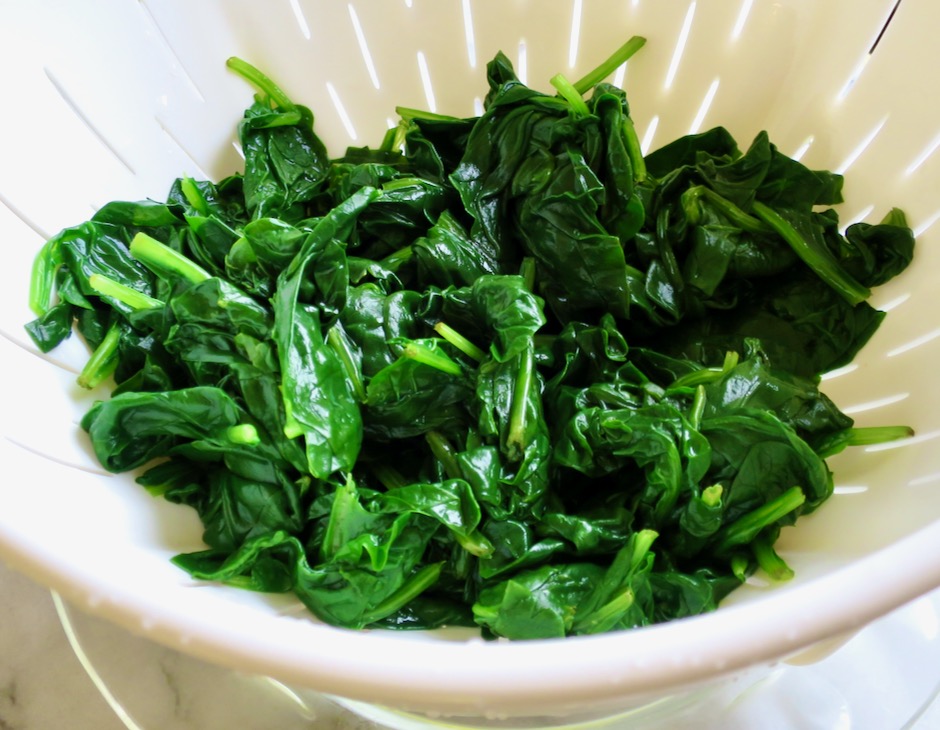
Blanched spinach has a gorgeous bright green color to it.  And with the sauce drizzled over and around the spinach it makes for a beautiful presentation.

Drained Blanched Spinach

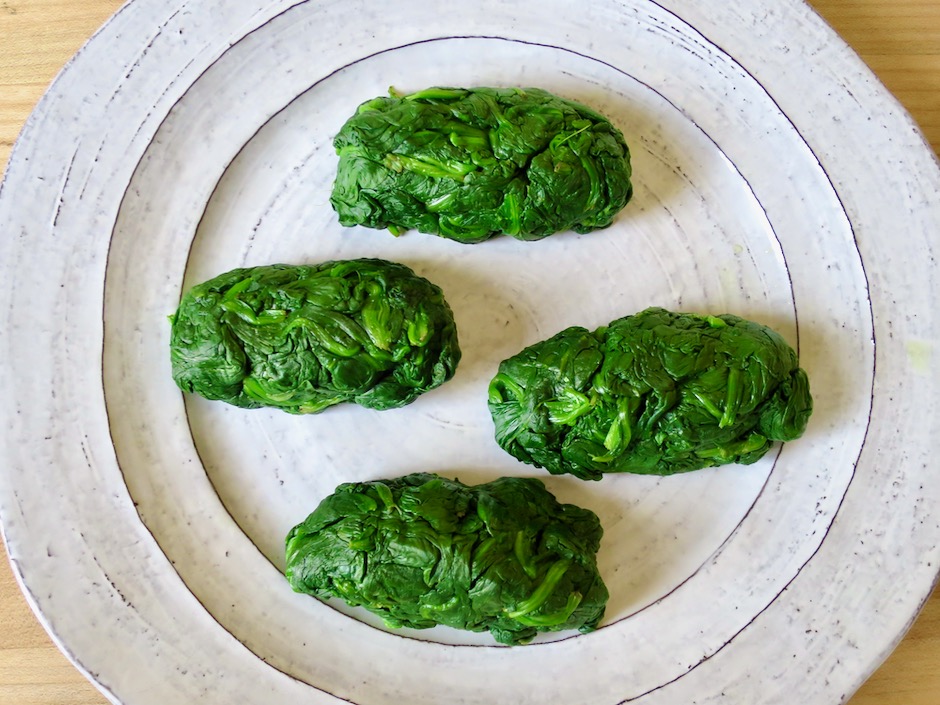
Spinach Rolls

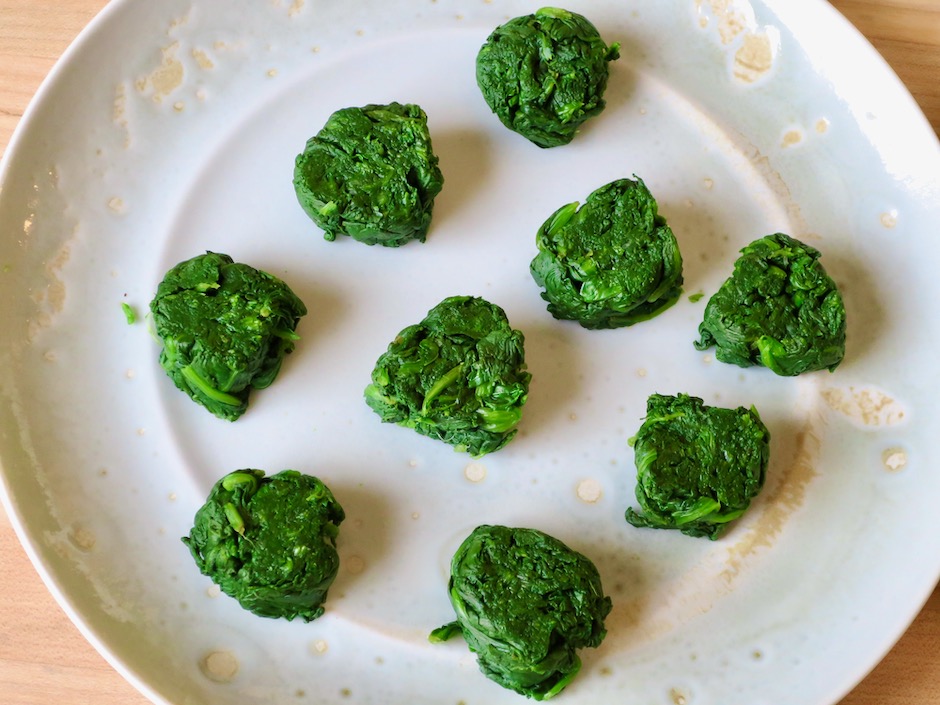
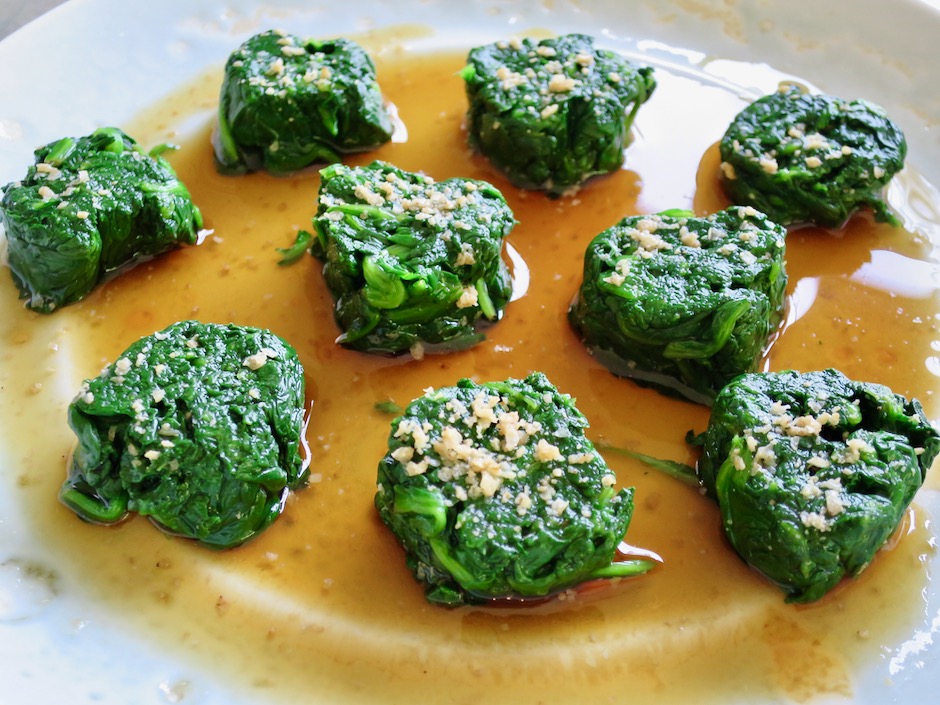
I divided the spinach (squeezed dry) into four equal pieces and shaped them into short rolls, then sliced them into rounds before adding the sauce.  

Sliced Spinach Rounds

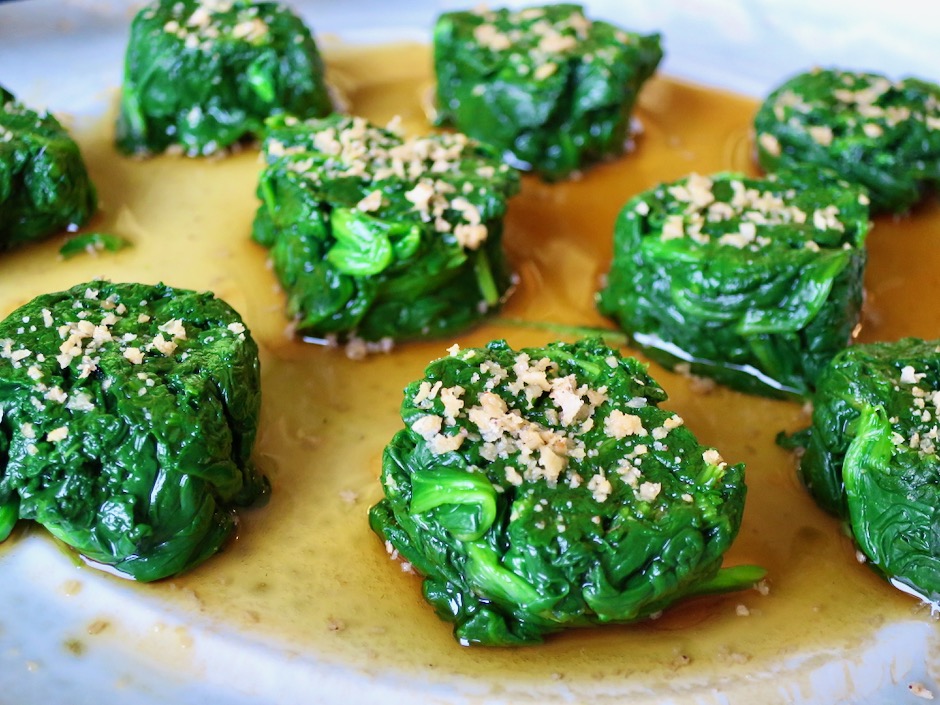
Spinach Ohitashi

Ground roasted sesame seeds are one of my favorite additions to this dish.  Not only does it give the spinach a delicious nutty flavor, it also adds contrast to the bright green rounds and golden sauce.  

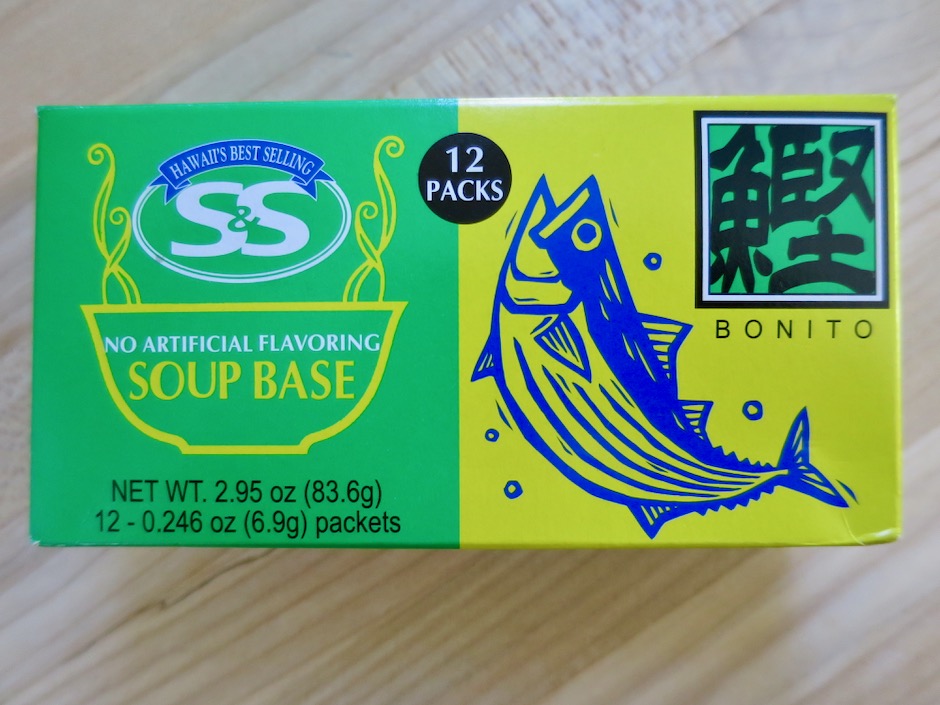
Instant Dashi

I opted to use instant dashi because of the small amount needed for the recipe.  It is convenient and tastes great in this sauce.

Tofu with Green Onions, Ginger & Soy Sauce

A side of tofu with green onions, ginger and soy sauce (and rice) complete a healthy meal for any day of the year. 

Spinach Ohitashi

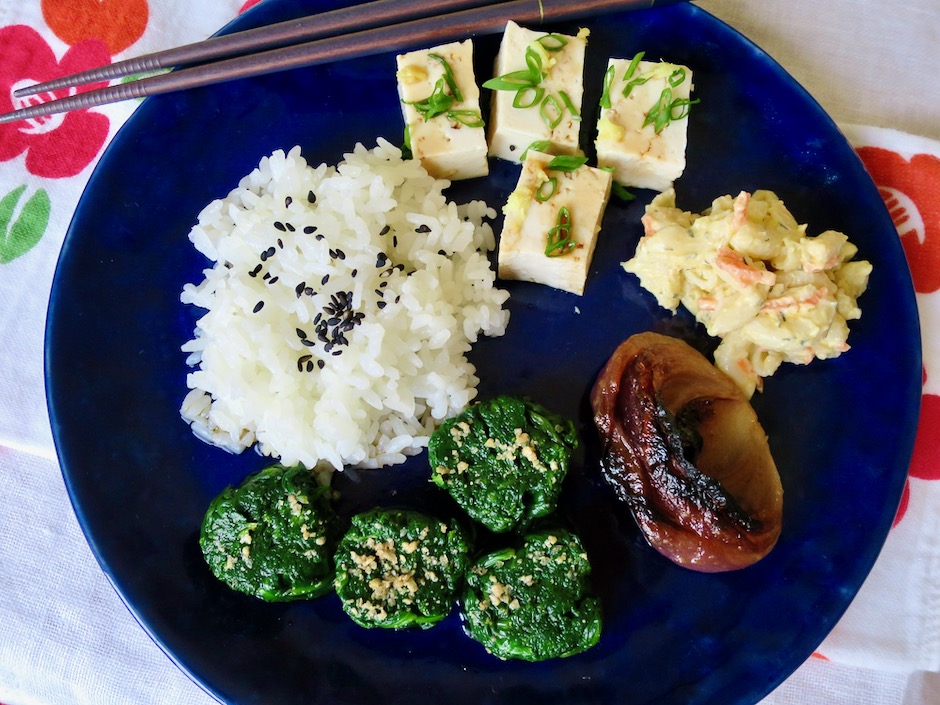
Spinach Ohitashi with Rice, Tofu, Mac Salad, Miso Onion

Spinach Ohitashi
 
Author:
Serves: 2
Ingredients
  • 1 pound fresh baby spinach leaves
  • ½ cup dashi (I used instant dashi picture above. ½ cup warm water mixed with 1½ teaspoons dashi powder)
  • 2 tablespoons soy sauce
  • 1 tablespoon mirin
  • roasted ground sesame seeds
Preparation
  1. Bring a large pot of water to a boil. Blanch the spinach just until wilted, about 30-40 seconds. Immediately drain and transfer spinach to an ice bath. Once thoroughly chilled, remove spinach to a colander to drain.
  2. Meanwhile, combine dashi with soy sauce and mirin in a glass measuring cup (can be made in advance and kept refrigerated until ready to use). Set aside.
  3. Divide spinach into four equal portions. Squeeze out as much water as possible from each portion and form into short rolls. Slice each roll into equal sized rounds (serrated knife works best). Place rounds of spinach on serving plate. Drizzle sauce over and around the spinach. Sprinkle tops with ground sesame seeds. Serve at room temperature or slightly chilled.


Appetizers, Dinner, Korean, Lactose Free, Potato Salad, Recipes, Side Dishes, Vegetarian

Korean Braised Potatoes ~ Gamja Jorim

November 21, 2020

Korean Braised Potatoes

These little potatoes are so delicious I could certainly eat them at least once a week accompanied by a bowl of rice and kimchi.  It may seem odd to eat potatoes with rice, but the sweet and salty, sticky glaze goes perfectly with warm rice.

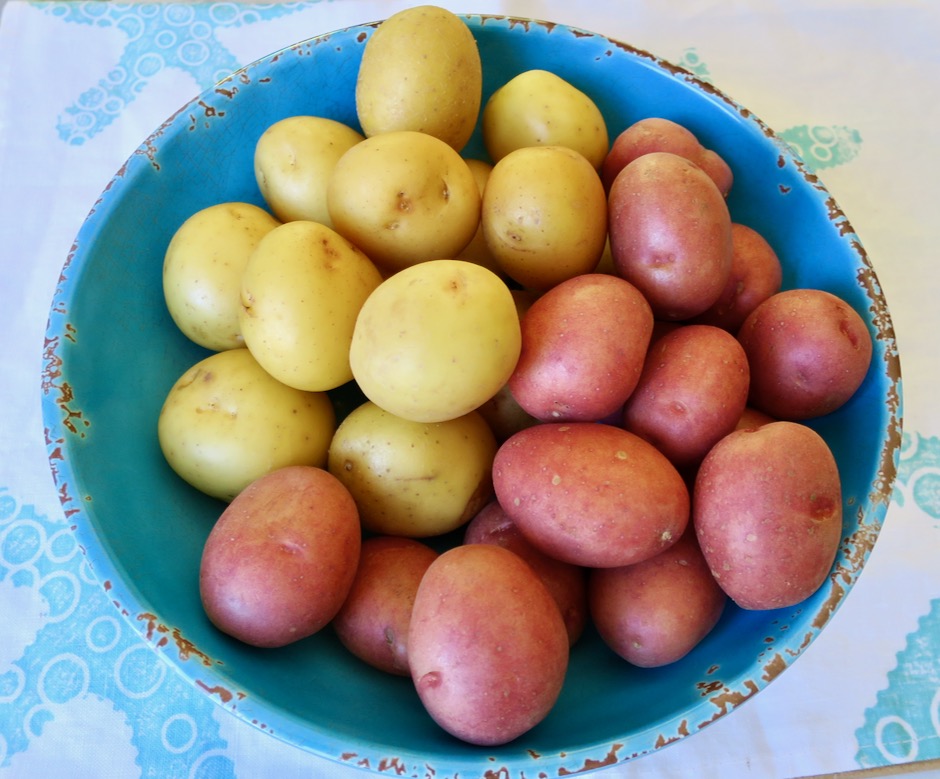
Baby Potatoes

You’ll want to seek out very small potatoes for this dish.  I found both yellow and red mini potatoes at our local Safeway.  The potatoes should be just about 1 1/4-inch wide and weigh less than an ounce each.

Baby Potatoes

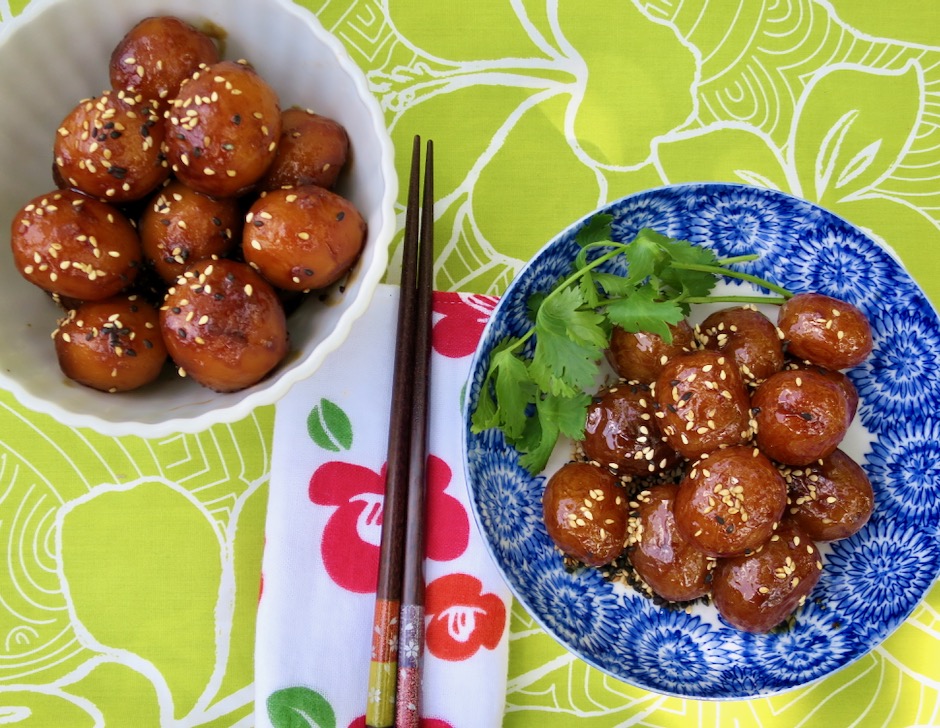
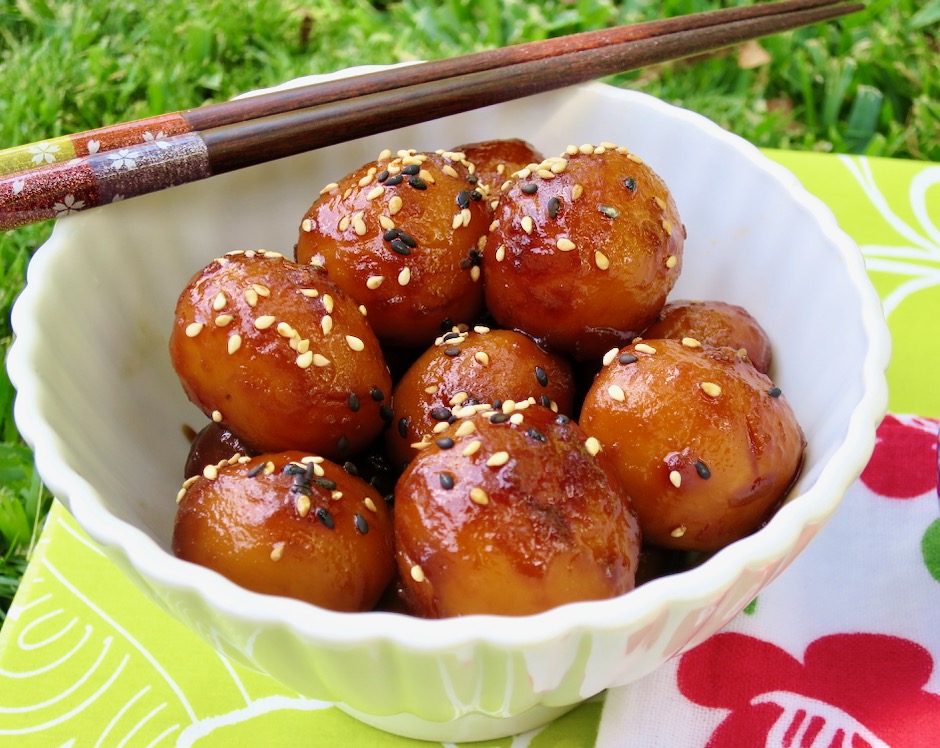
To peel or not to peel.  It’s totally up to you.  I do find that the peeled potatoes are a bit more flavorful because they absorb the sauce more than skin on potatoes.  However, unpeeled potatoes look so pretty with their crackly glazed skins.  Variety is the spice of life.

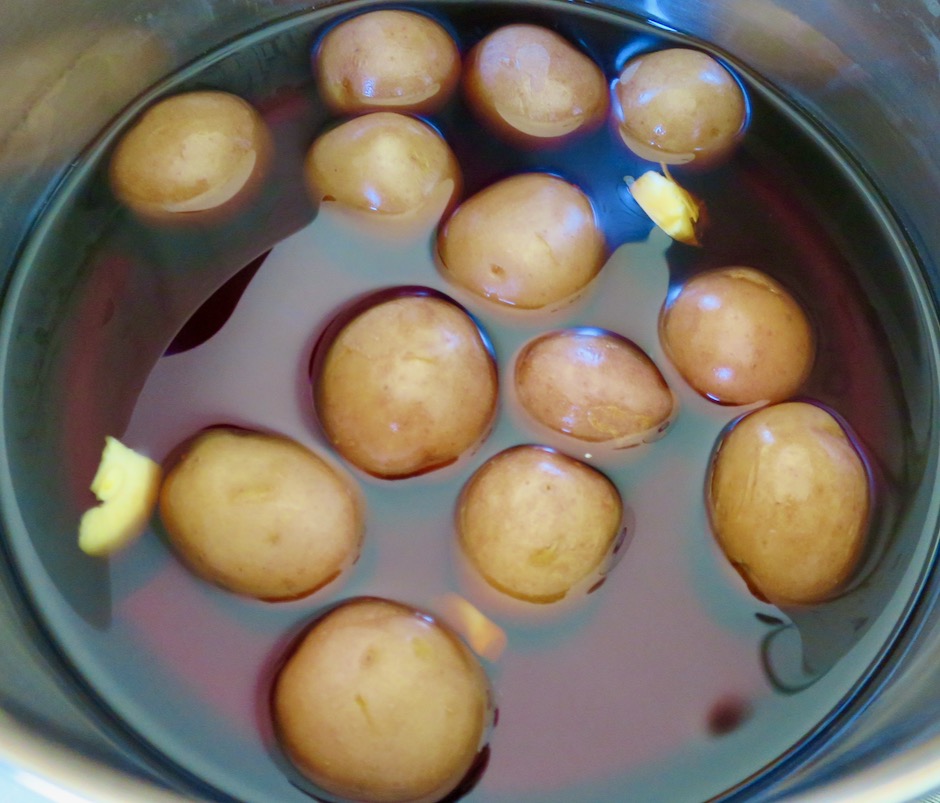
Skin On Baby Potatoes

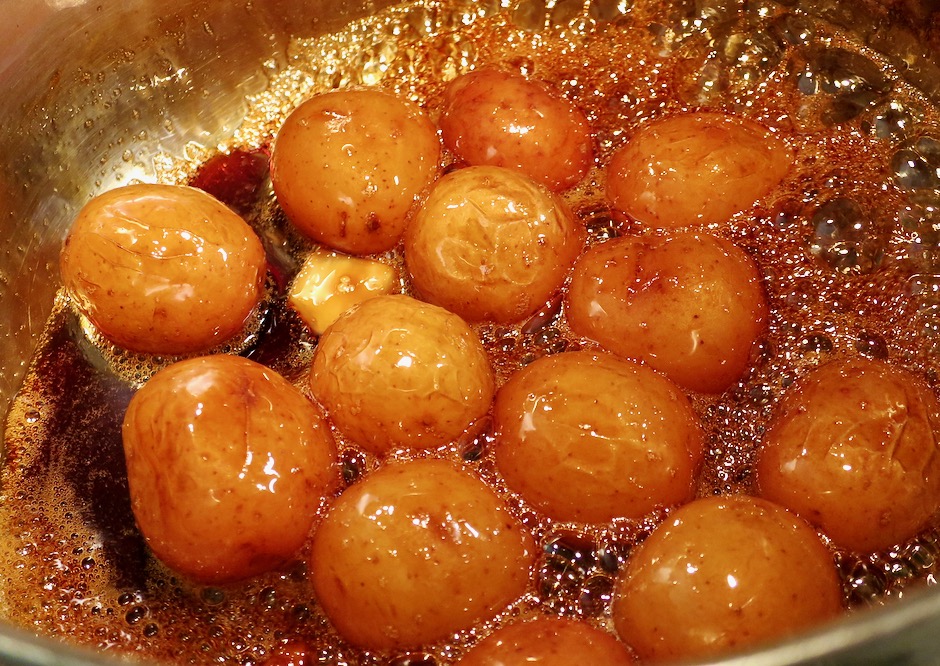
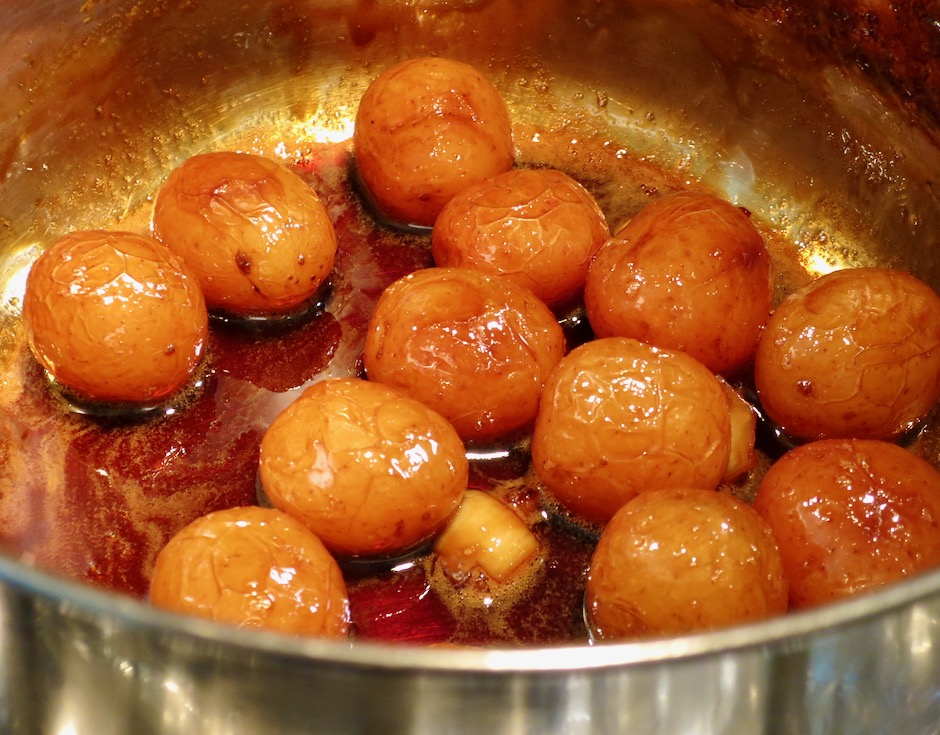
The cooked potatoes are first braised in the sauce on low heat.  Once the sauce has reduced by about half, you’ll want to turn the heat up a bit to further thicken the sauce.  Stand by the pot as the soy sauce and sugar mixture can burn quickly if left unattended.

Korean Braised Potatoes

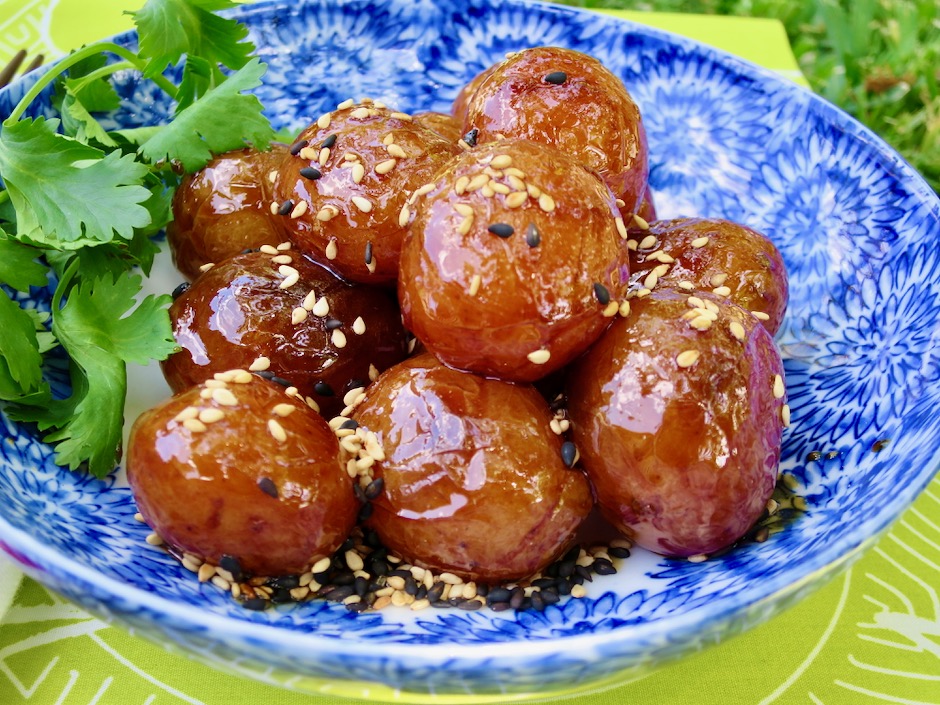
Korean Braised Potatoes

Here the sauce has reduced to the perfect consistency.  It will thicken as it cools so try not to reduce the sauce too much. The last thing you will do is gently turn the potatoes in the sauce before serving.

Korean Braised Potatoes

Sprinkle roasted sesame seeds over the potatoes just before you serve them.

Peeled & Unpeeled Korean Braised Potatoes

Korean Braised Potatoes with Meat Jun

Korean Braised Potatoes

Korean Braised Potatoes ~ Gamja Jorim
 
Author:
Serves: 4
Ingredients
  • 1 pound small yellow or red potatoes, about 1¼-inch in diameter weighing about 1 ounce or less each (peeled or skin on)
  • 4 tablespoons low sodium soy sauce
  • 2 tablespoons granulated sugar
  • 1 tablespoon honey
  • 1 tablespoon maple syrup
  • 3 medium garlic cloves, crushed
  • roasted sesame seeds
Preparation
  1. Place potatoes in a wide pot (Dutch oven works great) and cover with water. Bring to a boil then reduce heat and simmer until just tender, about 6-8 minutes. Check doneness after 6 minutes to ensure they don't overcook.
  2. While potatoes are cooking, combine 1 cup water with soy sauce, sugar, honey and maple syrup. Mix well to dissolve the sugar.
  3. Drain cooked potatoes and return to the pot. Add soy sauce mixture and crushed garlic. Bring to a boil, then turn heat down and keep at a lively simmer for 12-15 minutes. The liquid will have reduced by half. Increase heat to medium and reduce sauce until it is thick and coats the potatoes with a glaze, about 5 minutes (watch closely so the sauce does not burn). Transfer potatoes to a serving bowl and sprinkle with sesame seeds. Potatoes can be served warm or at room temperature and will keep for 3 days in the refrigerator.


Appetizers, Dinner, French, Fruit, Gardening, Recipes, Side Dishes, Veggies

Tomato Galette

October 11, 2020

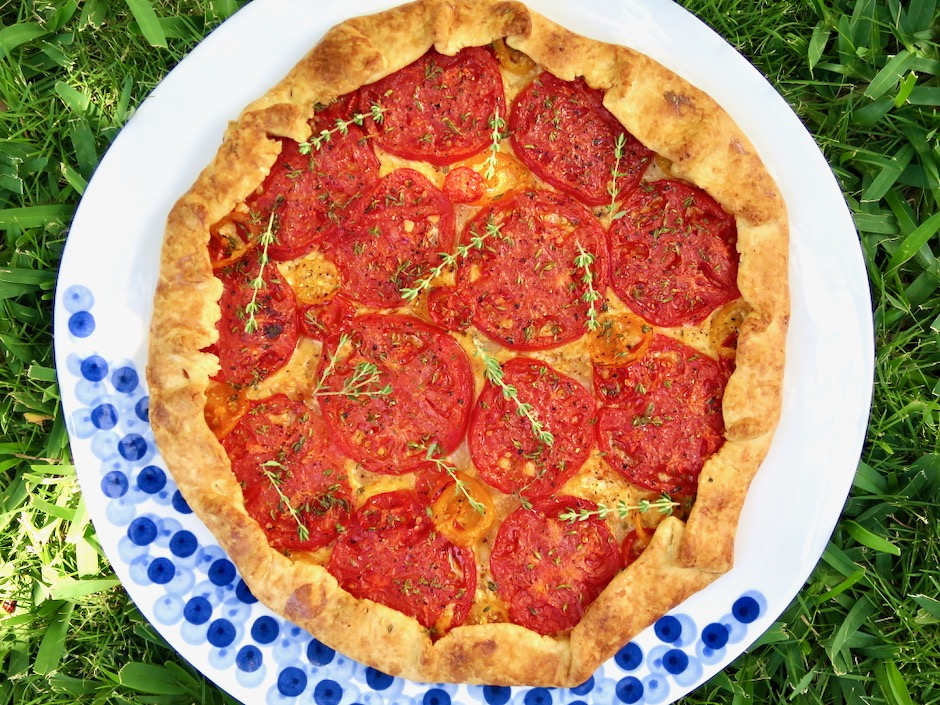
Tomato Galette with Thyme

One of the delights of a galette is its free-form crust.  The dough doesn’t require any trimming after being rolled out.  In fact, the ragged edges of the crust are what gives a galette its beautiful, rustic appearance.  Whether you are making a savory or sweet filling, a galette is a gorgeous dish to bring to the table.

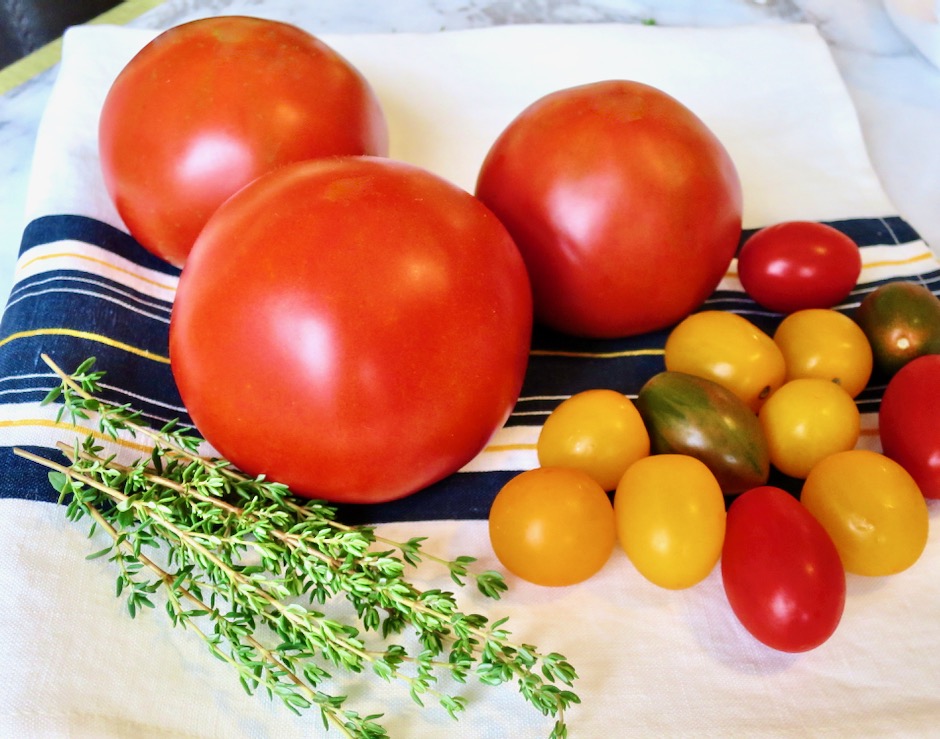
Tomatoes & Thyme

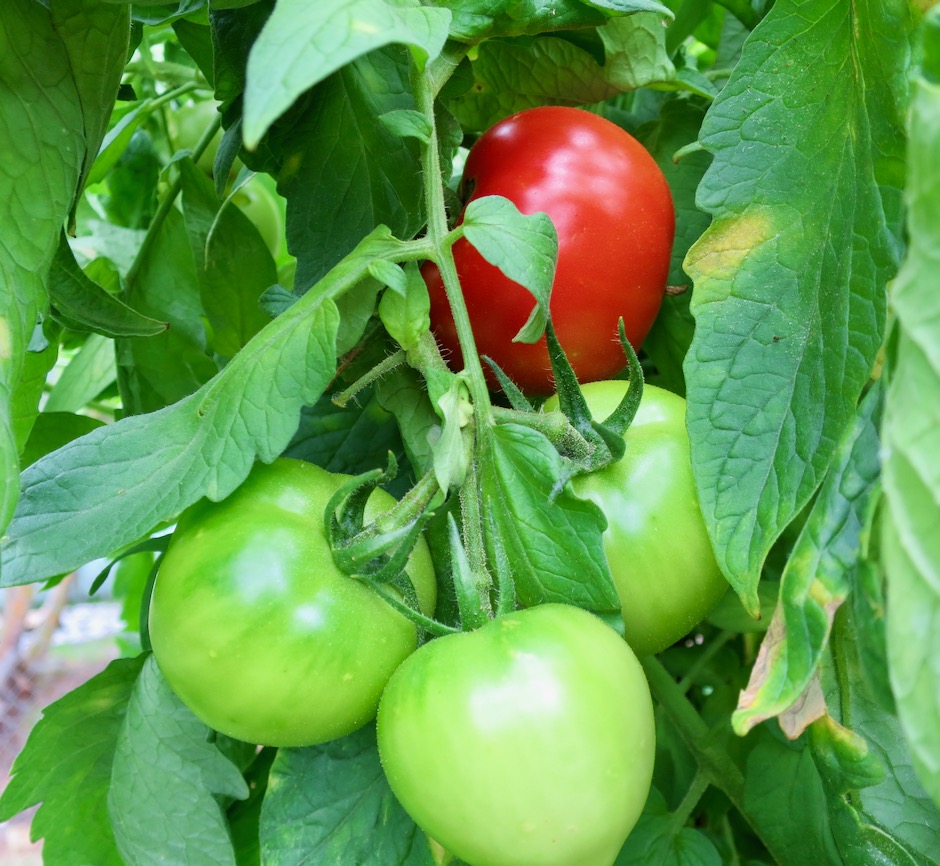
This year we grew Katana beefsteak tomatoes (Kitazawa Seed Co.) which turned out to be our new favorite.  They are meaty, juicy, and so flavorful with a gorgeous deep red color.  They are the perfect tomato for this galette and on a side note, they make for an exceptional BLT sandwich.

Katana Beefsteak Tomatoes in the Garden

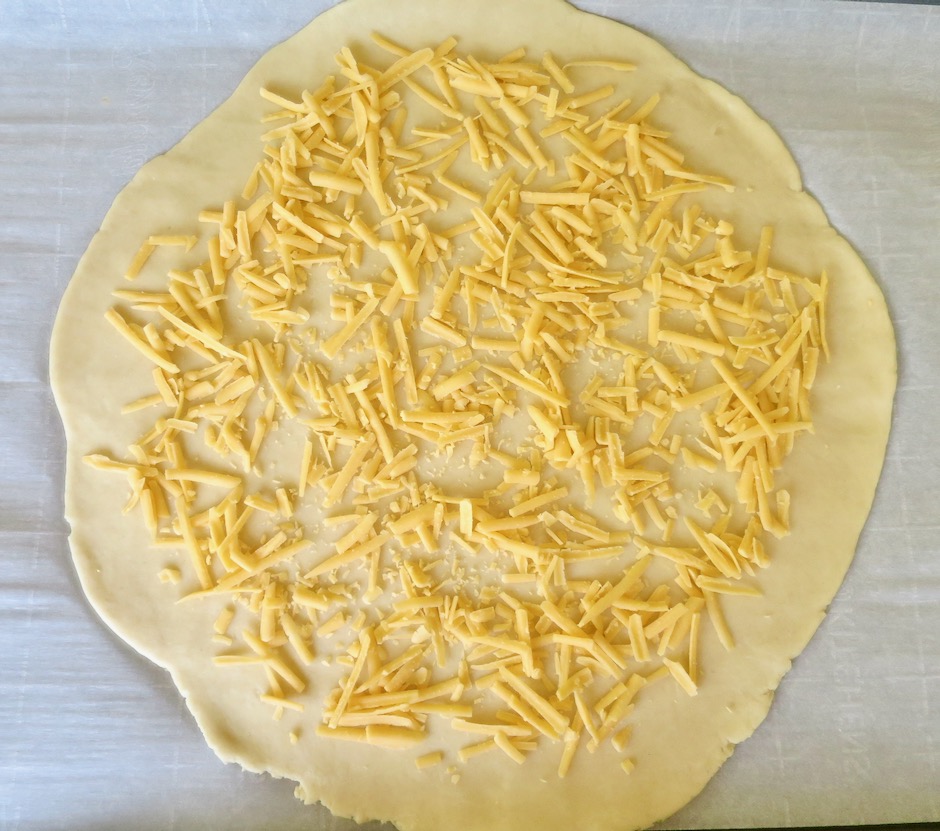
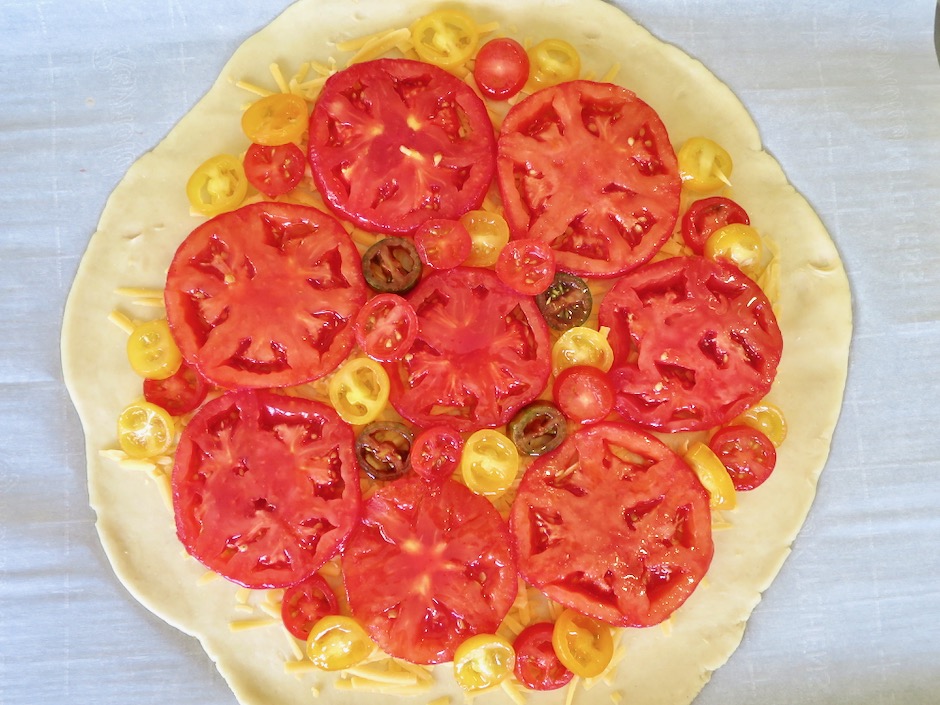
Sharp Cheddar Sprinkled Over Galette Dough

A sprinkling of sharp cheddar cheese is all you’ll need.  The small amount of cheese is just enough to add a bit of richness allowing the tomatoes to really shine.

Preparing Tomato Galette with Thyme

Choose tomatoes that are meaty and hold up well to slicing.  I prefer to peel the tomatoes (except for the mini ones) because the skin has a different texture than the tomato flesh and it is especially noticeable once tomatoes have been cooked.

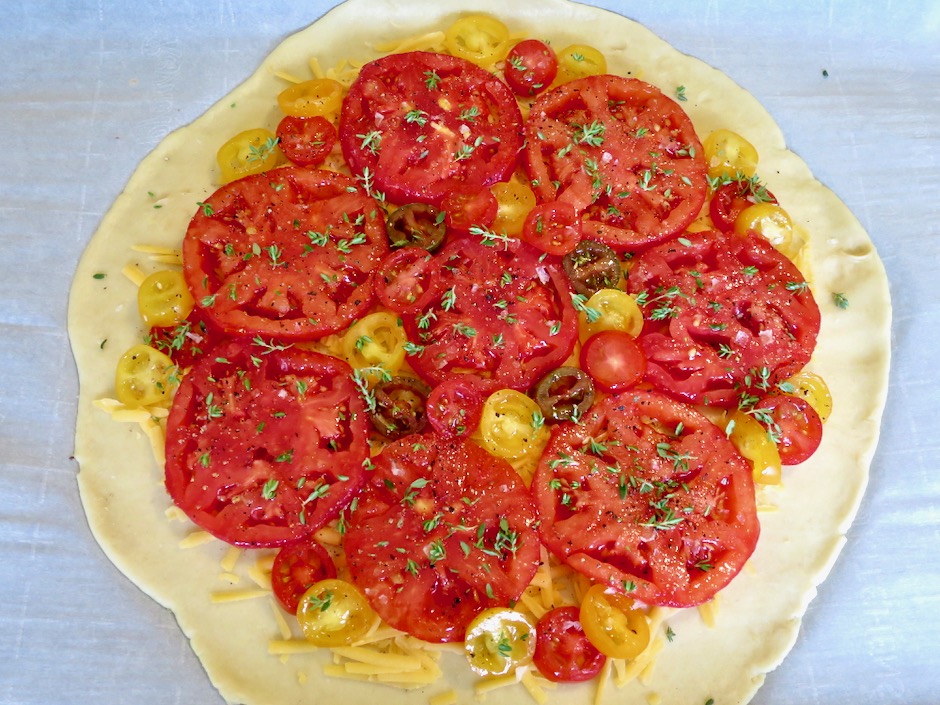
Preparing Tomato Galette with Thyme

Fresh thyme and tomatoes are a perfect match.  I included a handful of colorful sweet cherry tomatoes that added a nice contrast with the red beefsteaks.

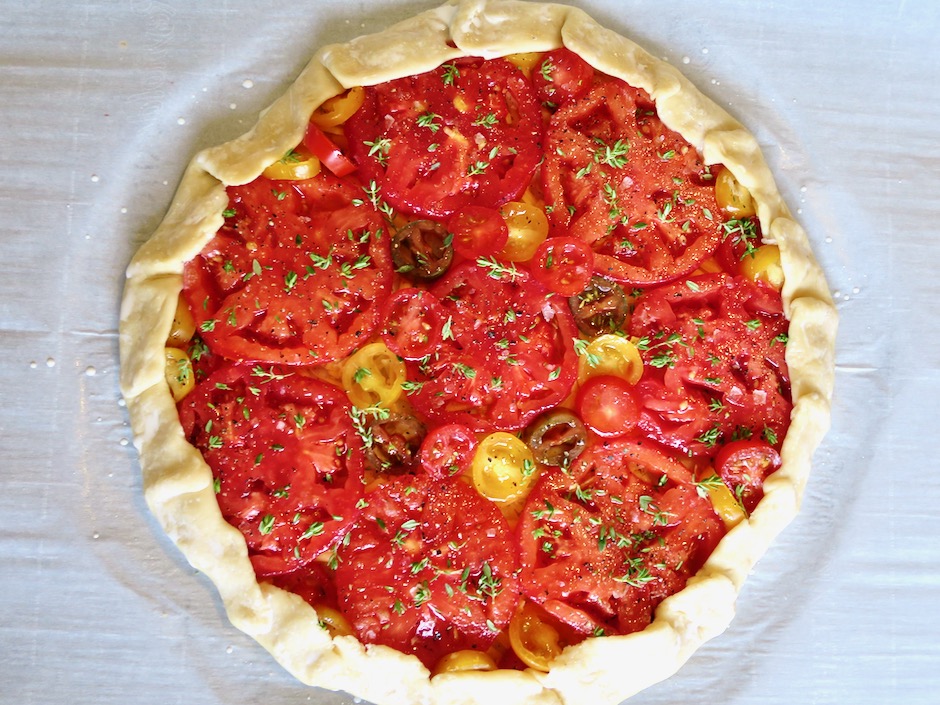
Tomato Galette with Thyme Ready to Bake

The edges of the dough are folded over the tomatoes to make a rustic crust that will bake up beautifully.

Tomato Galette with Thyme

Tomato Tart
 
Galette dough adapted from Dorie Greenspan's recipe
Author:
Serves: 4
Ingredients
  • For the dough:
  • 1½ cups (204g) all-purpose flour
  • ½ teaspoon sugar
  • ½ teaspoon kosher salt (1/2 teaspoon fine sea salt if using unsalted butter)
  • 1 Earth Balance Buttery Stick (8 tablespoons, 4 ounces, 113g), frozen for 30 minutes, then cut into small cubes
  • ¼ cup ice water
  • 1 tablespoon milk or cream for brushing the crust (optional)
  • For the tomato galette:
  • 1 cup coarsely grated sharp cheddar cheese, not packed
  • 1 pound meaty ripe tomatoes, peeled and sliced into ⅓-inch rounds
  • handful of assorted cherry tomatoes sliced (optional)
  • olive oil for brushing
  • Maldon sea salt or other flaky salt
  • freshly ground black pepper
  • a few fresh thyme sprigs
  • julienned basil (optional)
Preparation
  1. Place flour, sugar and salt in a food processor. Pulse a few times to blend. Add cubes of cold Buttery Sticks and pulse until mixture resembles coarse meal. Add some of the ice water and pulse. Continue to add more water, pulsing each time (about 3 additions). Use longer pulses until dough holds together when you pinch it (dough will not be formed into a ball). Transfer dough to a clean work surface and use the heel of your hand to smear small pieces of dough, which will help to incorporate the Buttery Sticks. Gather the dough and form into a flat disk. Place between 2 sheets of parchment paper. Roll out dough into a 12-inch circle. Place dough with parchment papers onto a sheet pan. Refrigerate for at least 2 hours. Keep refrigerated until you have all other ingredients ready to go.
  2. Preheat oven to 400 degrees ½ hour before you bake the galette. Meanwhile, place sliced tomatoes on paper towels if very juicy. This will help to avoid a soggy crust. Strip thyme leaves from stems and set aside.
  3. Remove galette dough from the refrigerator. Discard top layer of parchment paper. Sprinkle cheese over the dough leaving a 1½-inch border. Place tomatoes over the cheese in a single layer. Brush tomatoes with olive oil. Sprinkle Maldon or other flaky salt over the tomatoes along with a few grinds of black pepper. Sprinkle fresh thyme leaves over the top. Gently fold the pastry over the tomatoes, making pleats as you go. Brush edges with cream or milk (optional). Bake galette for about 35 minutes or until the crust is golden brown. Let galette cool for a few minutes before cutting into wedges. It is best served just warm or at room temperature. Sprinkle with julienned basil if using. The galette makes for a terrific meal served with a crispy green salad.


Appetizers, Dinner, Korean, Lactose Free, Recipes, Sauces, Tofu, Vegan, Vegetarian

Warm Tofu with Spicy Sauce

September 4, 2020

Warm Tofu with Spicy Dipping Sauce

I am a confirmed lover of tofu whether it’s baked, pan-fried, in miso soup, or simply served with grated ginger, slivered green onions and soy sauce.  I came across this recipe on Alexandra’s Kitchen blog recently.  The original recipe came from Ruth Reichl who was the Editor in Chief of the now defunct and beloved Gourmet magazine. It struck all the right notes: fast, savory and tasty.

Firm Tofu

Firm tofu is the best option for this recipe as it keeps its shape when sliced.

Gochugaru, Green Onions, Spicy Sauce

If you don’t have any gochugaru (Korean chili flakes) I suggest that you buy some right away.  With its gentle heat and smoky, fruity flavor, it’s the chili that I use most often.  I use gochugaru for Korean pan-fried steak, and in a dipping sauce for Korean pancakes and dumplings, as well as in kimchi.

Warm Tofu with Spicy Dipping Sauce

Serve the tofu with crispy cucumber slices, kimchi and Japanese rice.

Warm Tofu with Spicy Dipping Sauce

Warm Tofu with Spicy Sauce
 
Adapted from Alexandra's Kitchen blog & Gourmet Magazine
Author:
Serves: 2
Ingredients
  • 1 (14 ounce) package firm tofu
  • 1½ tablespoons soy sauce (Kikkoman recommended)
  • 1½ tablespoons low sodium soy sauce (Kikkoman recommended)
  • ½ teaspoon granulated sugar
  • 1 tablespoon roasted sesame oil (Kadoya recommended)
  • 1 teaspoon gochugaru (Korean chili flakes)
  • 2 teaspoons roasted sesame seeds (white or a mix of white and black)
  • ¼ - ½ teaspoon finely grated garlic
  • 3 tablespoons finely sliced green onions
Preparation
  1. Rinse the tofu, then cover with cold water in a medium saucepan. Bring to a simmer over medium-high heat. Turn heat down to keep warm.
  2. In a small bowl, combine the soy sauces and sugar. Mix until the sugar dissolves. Stir in the sesame oil, gochugaru, sesame seeds, garlic, and green onions. Set aside.
  3. Carefully drain water from pot and remove tofu to a paper towel-lined plate. Pat tofu dry. Transfer tofu to a shallow bowl and spoon some of the sauce over the top. Serve with Japanese rice and extra sauce on the side.


Appetizers, Canning, Jams & Jellies, Lactose Free, Recipes

Maui Jalapeno Pepper Jam

June 27, 2020

Maui Jalapeno Jam

Every year we grow hot peppers, jalapeños and fresnos.  Occasionally we have a particularly large crop, and after putting up our usual jars of pickled nacho rings, jalapeño hot sauce and Maui cowboy candy, we still have peppers left over. After a little research, John discovered a jalapeño jam recipe on the Serious Eats website.  He tweaked it a bit and this terrific, sweet, spicy jam is the result.

Mucho Nacho Jalapeños

These particular jalapeños are a hybrid known as Mucho Nacho.  They are particularly hot!

Seeded Mucho Nacho Jalapeños with and without Ribs & Pith

Prepare the peppers by cutting off the stems, slicing them lengthwise and removing the seeds with your fingers (disposable gloves are essential).  Contrary to popular myth, the seeds do not contain capsaician.  If you want a milder jam, remove the pith and ribs from the interior of the pepper as seen above.

Mucho Nacho Jalapeños Finely Chopped

Once the stems and seeds are removed, place the peppers in a bowl of a food processor fitted with a steel blade and pulse until the peppers are finely chopped.

Maui Jalapeno Jam

Late in the season your peppers may start ripening to red.  You can use them to make a beautiful red version of the jam.  Do not mix the two colors of peppers or you will end up with brown jam!Maui Jalapeno Jam

Maui Jalapeno Pepper Jam
 
Adapted from Serious Eats
Author:
Serves: 7 Jars
Ingredients
  • 28-30 medium-sized jalapeños (28 ounces after removing stems and seeds)
  • 1¼ cups cider vinegar
  • ¼ cup fresh lime juice
  • 1 teaspoon kosher salt (we use Diamond Crystal)
  • 6 tablespoons dry pectin (we use Ball brand Real Fruit Classic Pectin)
  • 6 cups granulated sugar
Preparation
  1. Special equipment: Food processor, boiling water canning equipment, (7) 8 ounce canning jars with rings and 2-piece lids.
  2. Wash jars, place in water filled canner. Bring water to a simmer.
  3. Wash peppers and remove stems. Slice in half lengthwise and remove the seeds with your fingers (gloves are essential). Place the peppers in the bowl of a food processor fitted with a steel blade and pulse until finely chopped. Transfer peppers to a deep saucepan. Stir in the cider vinegar, lime juice, salt and pectin. Bring to a rolling boil over high heat. Add the sugar and return to a rolling boil for 1 minute, stirring constantly. Remove the saucepan from heat.
  4. Remove jars from canner and ladle hot jam into hot jars leaving ¼-inch headspace. Secure lids and rings just to finger tight. Cover and process jars in boiling hot water bath for 10 minutes. Turn off heat, leave jars in hot water for additional 5 minutes. Remove jars and let cool for 24 hours. Serve on crackers with cream cheese, use as a spicy barbecue glaze, or a spicy PBJ.


Follow

Get every new post delivered to your Inbox

Join other followers: