Archives

Beans, Dinner, Lactose Free, Recipes, Soups, Veggies

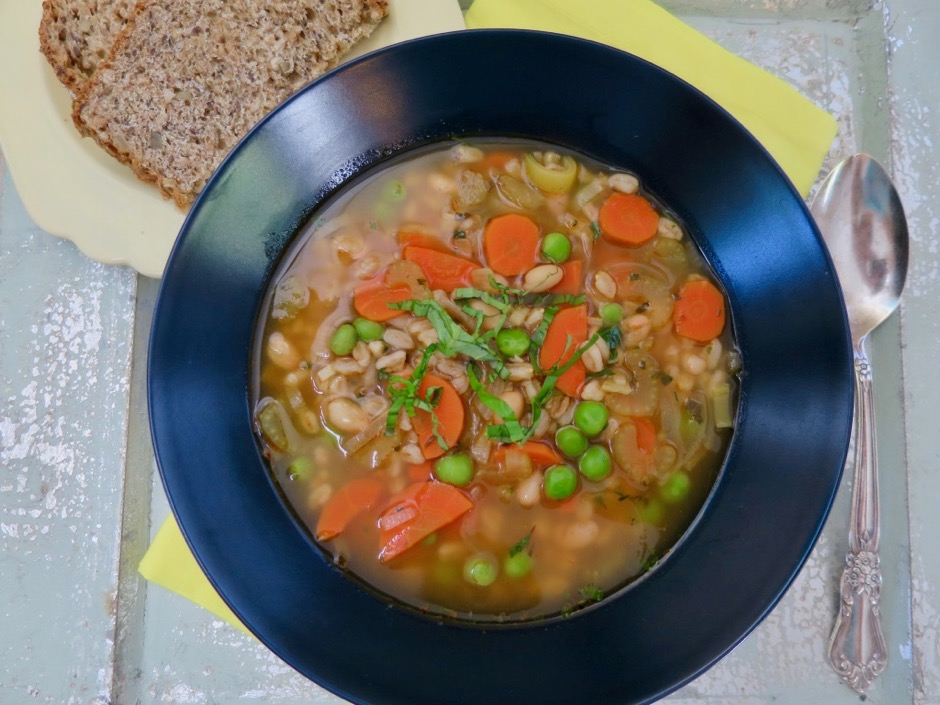
Vegetable & Farro Soup

November 20, 2017

Vegetable & Farro Soup

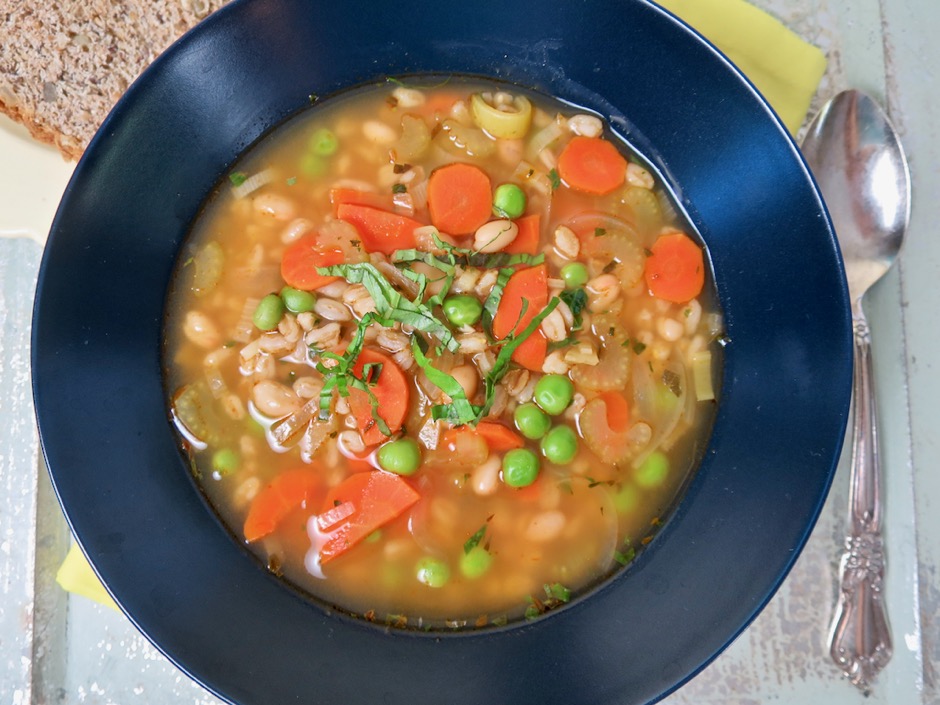
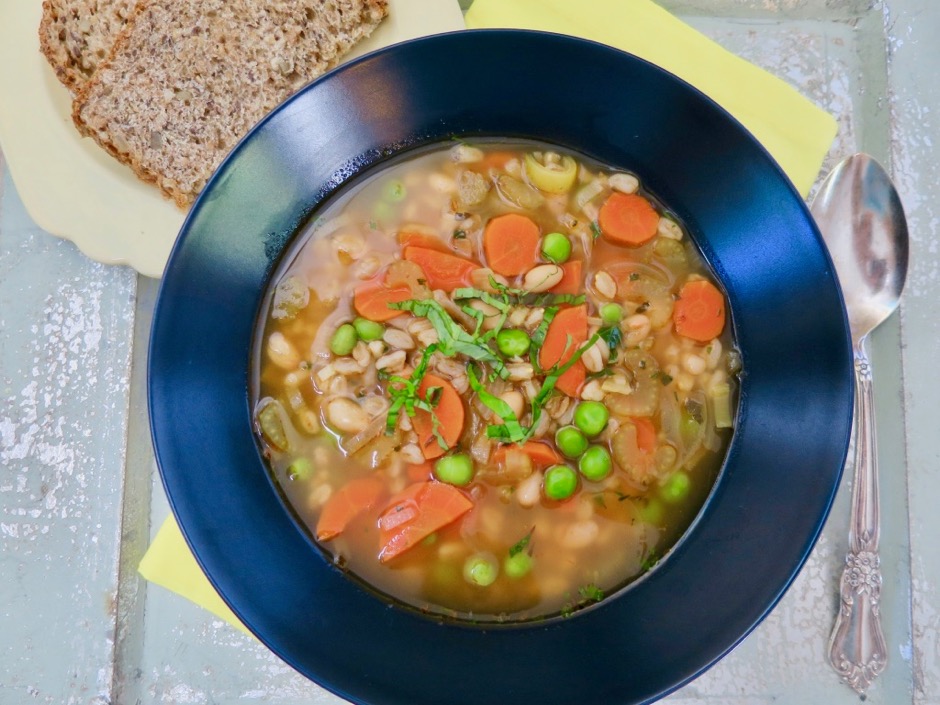
Though the seasons change ever so slightly here in Hawaii, a warm bowl of soup is still soothing once November comes around. The days are still sunny and the beaches are full of people, yet there’s a noticeable difference in the temperature.  This soup is based on one that is served at Eataly in New York City.  It’s really quite simple to make, and it doesn’t need to simmer for hours.  The soup is brimming with healthy vegetables, beans and whole grain farro. It is light yet satisfying.

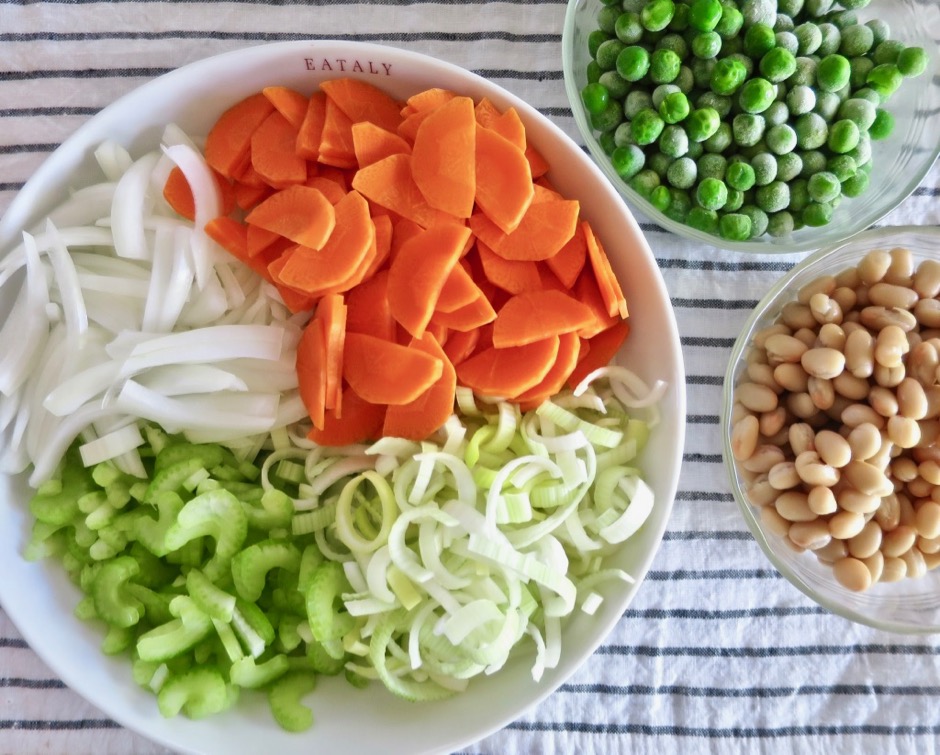
Carrots, Onion, Celery, Leeks, Peas, Beans

The vegetables are sliced thin which enables them to be cooked for a shorter period.  This soup is ready to eat in 40 minutes.

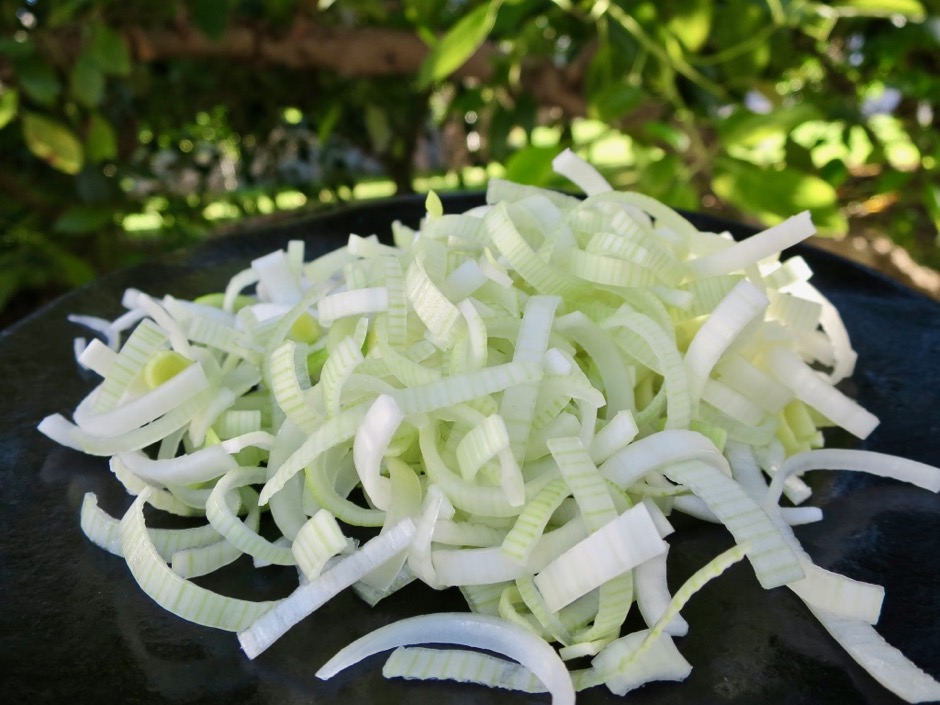
Sliced Leeks

Use only the white and light tender green parts of the leek. Slice the leek into narrow strips so that they cook up nicely in a few minutes.

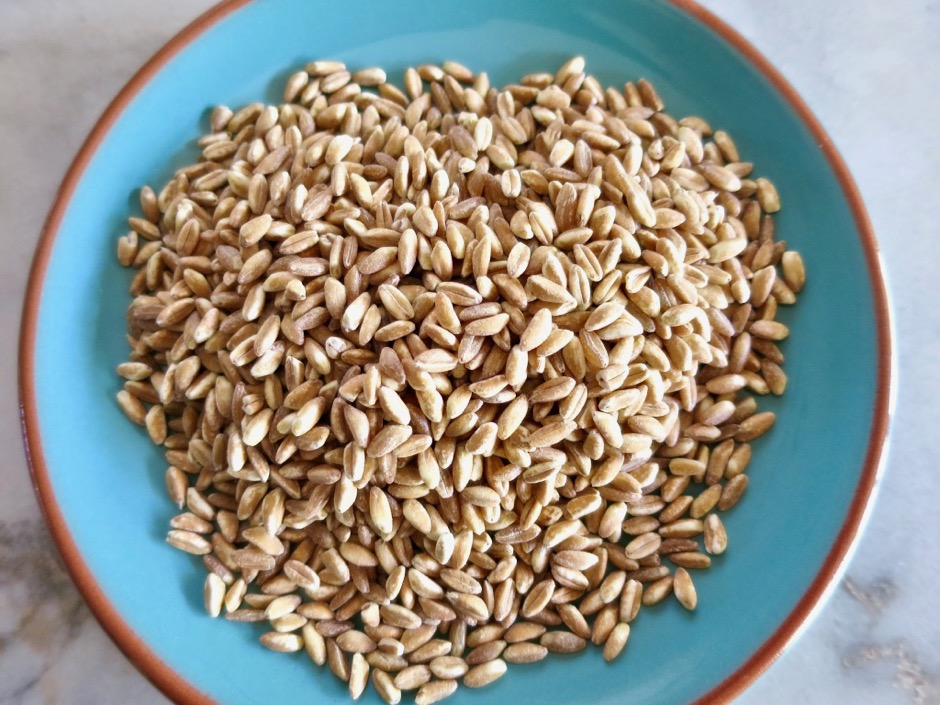
Farro

It seems that only a few years ago farro could not be found at any of our local markets. I would purchase farro on my annual trips to San Francisco and bring it home to Maui.  These days you can buy farro in the bulk section at most markets.

Vegetable & Farro Soup

Vegetable & Farro Soup
 
Adapted from Mario Batali's recipe for Eataly
Author:
Serves: 6
Ingredients
  • 2 tablespoons extra virgin olive oil
  • ¾ cup thinly sliced celery (about 2 celery ribs)
  • 1 cup thinly sliced sweet onion
  • 1 cup thinly sliced leek, white and pale green parts only (1 medium leek)
  • ¾ cup farro
  • 1½ tablespoons tomato paste
  • 5 cups chicken broth
  • 2 cups water
  • 1 cup canned small white beans, rinsed and drained
  • 1 small bay leaf (or half of a medium-sized bay leaf)
  • 1 heaping cup thinly sliced carrots (halved lengthwise and sliced crosswise ¼-inch thick)
  • 1 cup frozen peas
  • 1 teaspoon finely chopped fresh marjoram
  • 2 teaspoons finely chopped Italian parsley
  • 1 teaspoon finely chopped fresh oregano (optional)
  • salt and freshly ground black pepper
  • 2 tablespoons julienned basil for serving
Preparation
  1. In a large enameled Dutch oven or other heavy pot, heat the olive. Add the celery, onion and leek and cook over moderately high heat, stirring a few times, until softened. Add the farro and tomato paste and cook, stirring until the grains are coated, about 30 seconds.
  2. Add the chicken broth and water to the pot and bring to a boil. Add the beans and bay leaf and simmer over low heat for 20 minutes.
  3. Add the carrots and cover the pot. Simmer on low for 20 minutes or until the carrots are just tender.
  4. Add the peas and fresh herbs. Simmer until the peas have warmed up, about 5 minutes. Season with kosher salt and freshly ground black pepper. Sprinkle basil over each serving.



Dinner, Lactose Free, Recipes, Salad, Side Dishes, Vegan, Vegetarian, Veggies

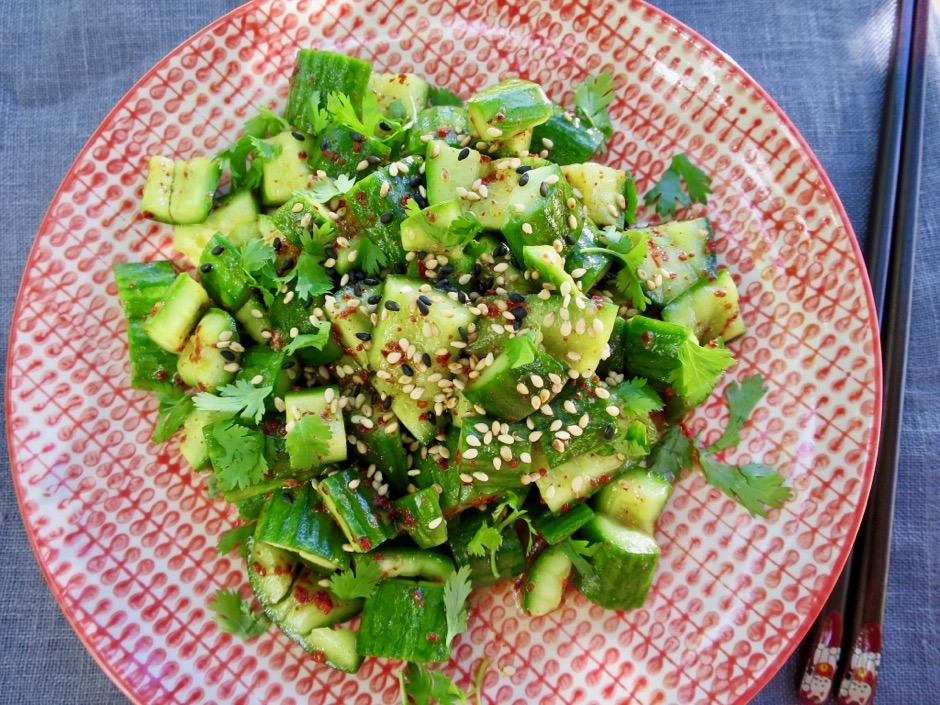
Chinese Smashed Cucumbers with Sesame Oil & Garlic

November 10, 2017

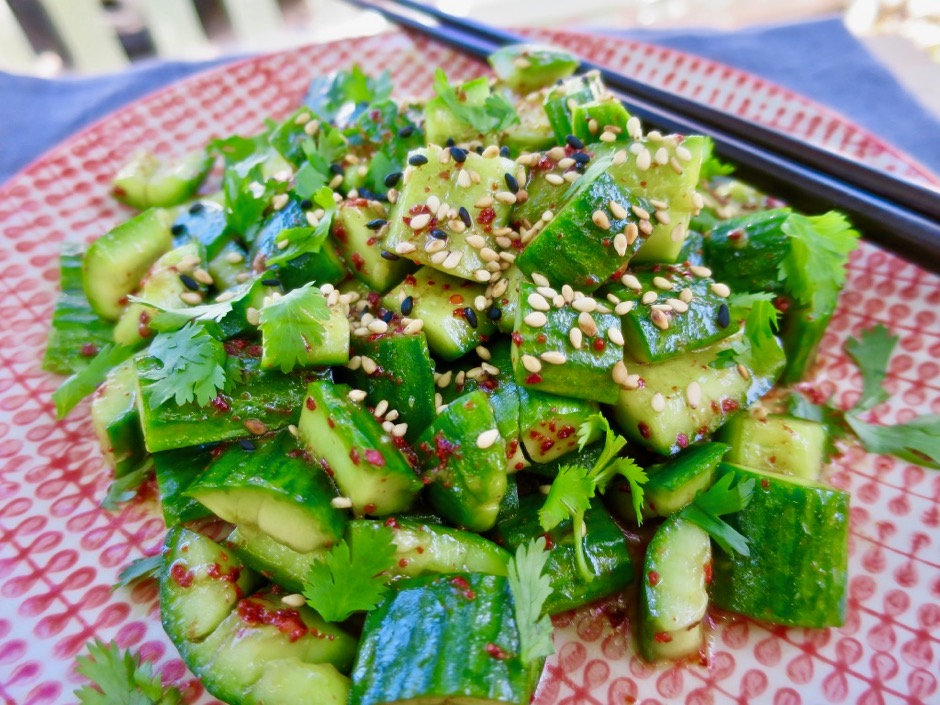
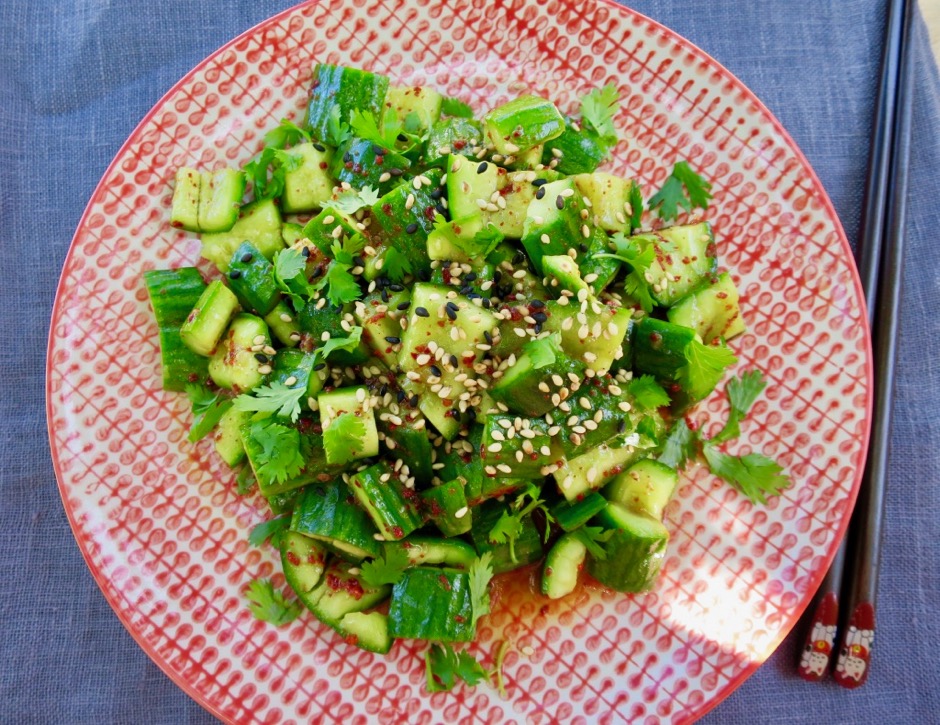
Chinese Smashed CucumbersI’m always on the look out for new and interesting pickle recipes. This quick cucumber pickle caught my eye because it reminds me so much of kimchi. It is savory, crunchy, salty, and the perfect side dish to serve with a bowl of rice and grilled teriyaki chicken, beef, fish, or tofu.

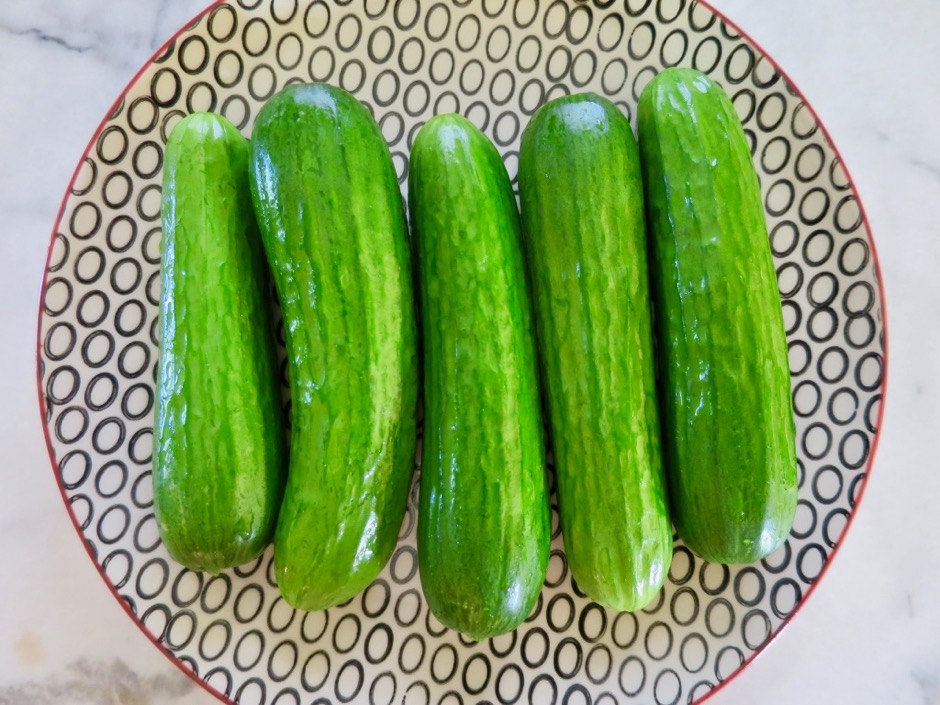
Keiki CukesUse thin-skinned cucumbers such as Keiki Cukes (found locally in Hawaii) or Japanese, Persian, or even English cucumbers.  Cucumbers with few seeds are what you are looking for.

Keiki Cukes

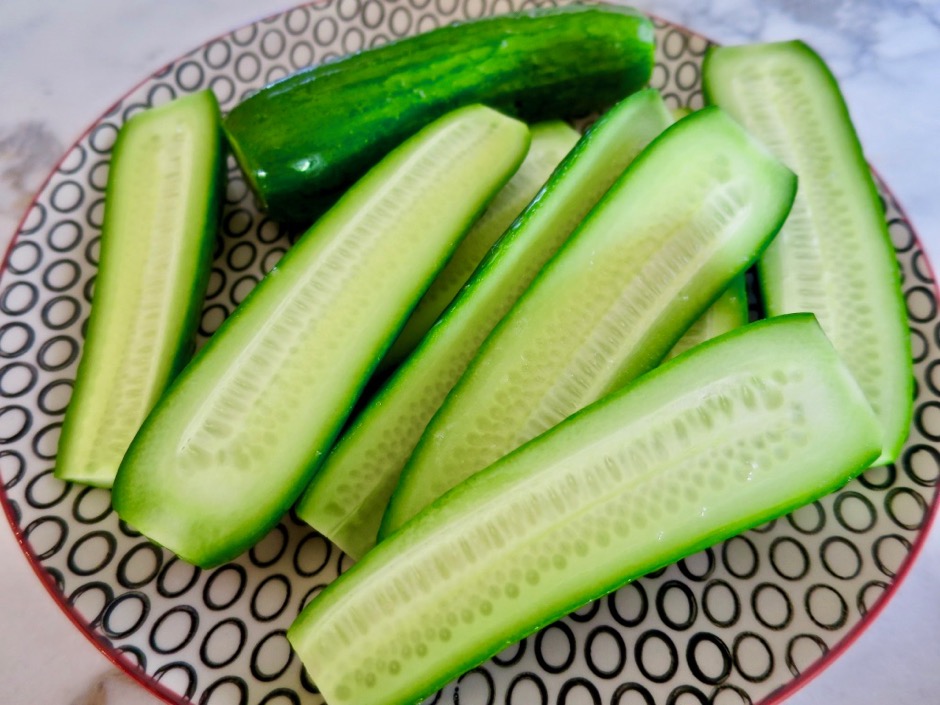
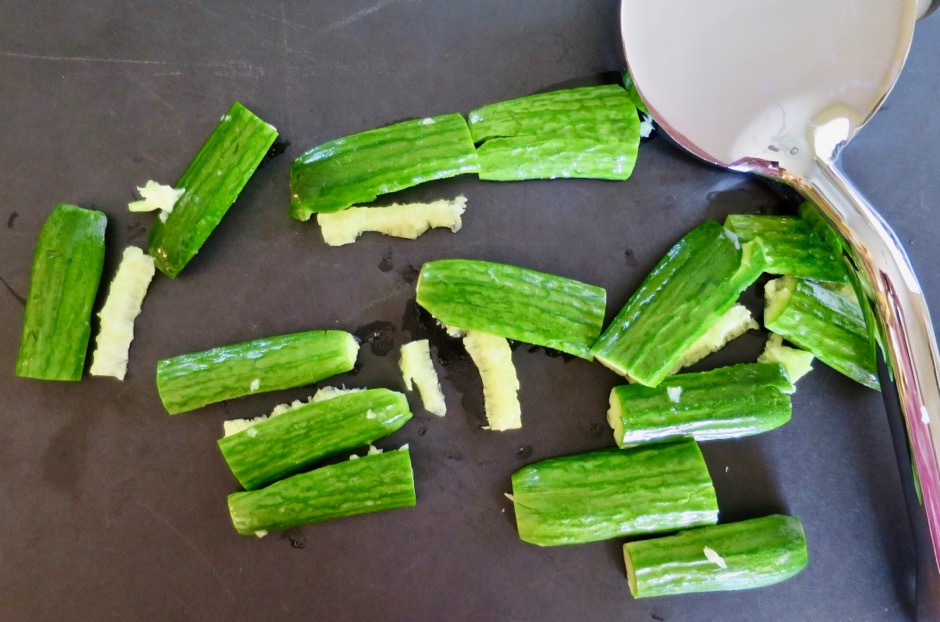
Smashed Keiki CukesIt’s amazing how the seed pockets detach from the cucumbers once they are smashed.  I use my mallet which works perfectly. You can use the blade of a large knife if you don’t have a mallet (or a small skillet).

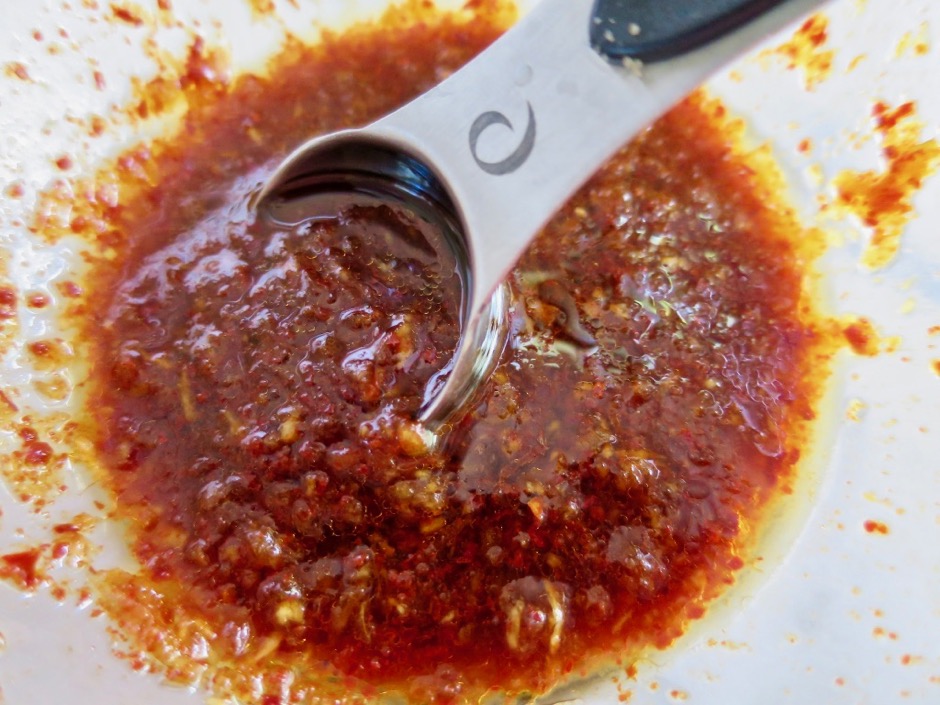
DressingThe dressing for the cucumbers is simple to prepare.  Mix everything together in a small bowl, set aside until ready to serve.  You could also drizzle this dressing over steamed bok choy, watercress, or blanched bean sprouts.

Chinese Smashed Cucumbers

Chinese Smashed Cucumbers

Chinese Smashed Cucumbers with Sesame Oil & Garlic
 
Adapted from New York Times Cooking
Author:
Serves: 4
Ingredients
  • 1½ pounds thin-skinned cucumbers
  • ¾ teaspoon kosher salt for dressing plus ¼ teaspoon for cucumbers
  • 1 teaspoon granulated sugar
  • 1 tablespoon + 1 teaspoon rice vinegar
  • 2 teaspoons sesame oil
  • 2 teaspoons soy sauce
  • 2 teaspoons extra virgin olive oil (sometimes I use avocado oil which is milder than olive oil)
  • ½ teaspoon grated garlic
  • 2 teaspoons gochugaru (medium heat Korean chili pepper flakes that have a fruity and slightly smoky flavor) or red chili pepper flakes to taste
  • Cilantro leaves
  • Toasted sesame seeds
Preparation
  1. Rinse cucumbers and pat dry. Cut crosswise into pieces about 4 inches long. Cut each piece in half lengthwise.
  2. Place cucumbers on a cutting board cut side down. Using a mallet or the blade of a knife, smash down lightly until the flesh breaks down a bit and the seeds separate. Slice pieces diagonally into bite-sized pieces leaving seeds behind.
  3. Place cucumber pieces in a strainer over a bowl and toss with ¼ teaspoon kosher salt and a few big pinches of sugar. Place a plate or bowl over the cucumbers and weigh it down with something heavy such as a large can of tomatoes. Set aside while you make the dressing.
  4. In a small bowl, combine ¾ teaspoon kosher salt, 1 teaspoon sugar, and rice vinegar. Stir until the salt and sugar have dissolved. Stir in sesame oil, soy sauce, grated garlic, and Korean chili flakes.
  5. When ready to serve, lightly pat dry cucumbers with paper towels and transfer to a serving bowl. Toss with 2 teaspoons olive oil. Stir in half of the dressing. Taste and adjust seasoning adding salt if needed. Stir in more dressing so that the cucumbers are well coated. Garnish with cilantro leaves and sesame seeds before serving.

 

Dinner, Fruit, Lactose Free, Recipes, Salad, Side Dishes, Vegan, Vegetarian, Veggies

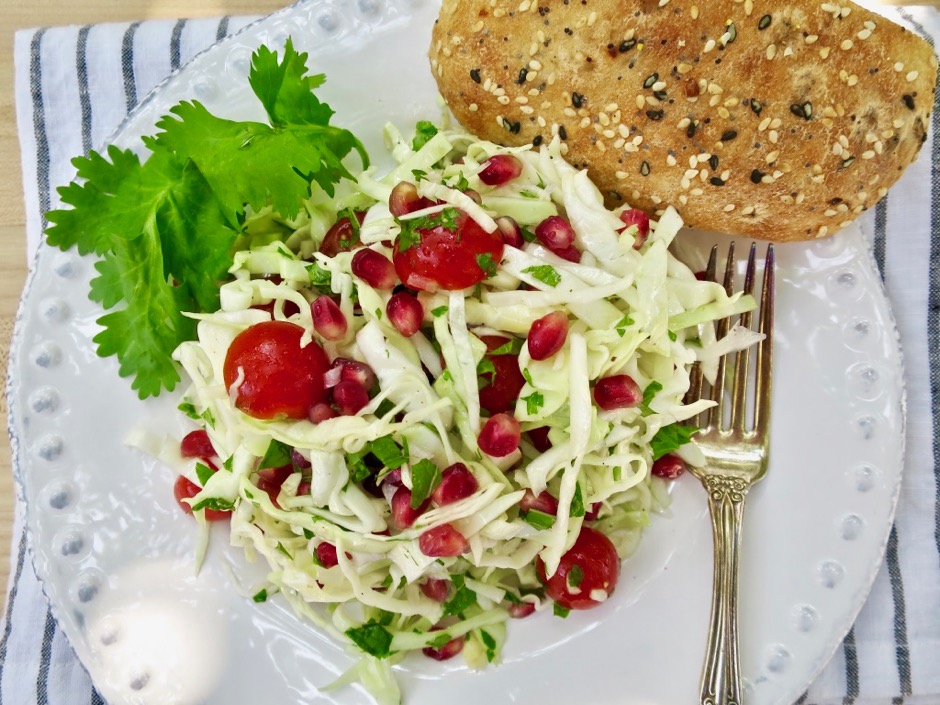
Crunchy Cabbage & Pomegranate Salad

October 24, 2017


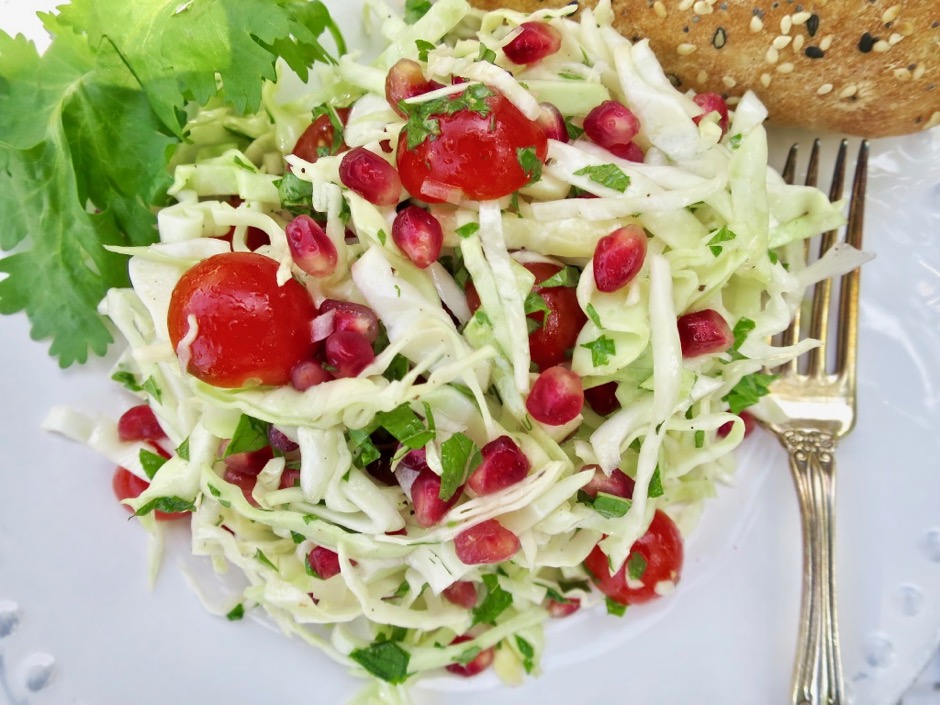
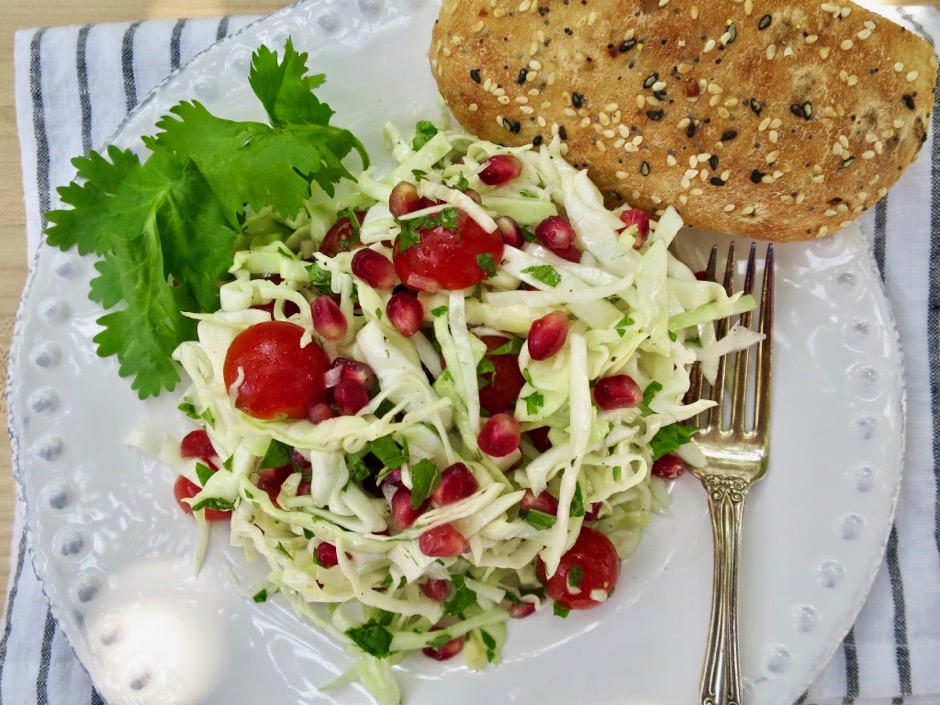
Crunchy Cabbage & Pomegranate Salad

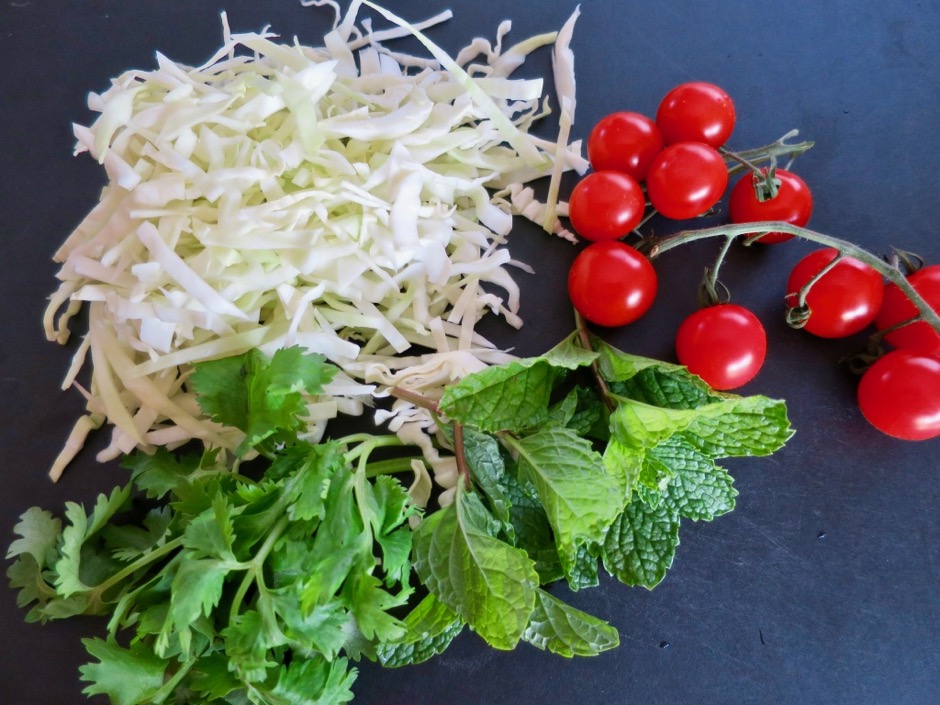
The beautiful pomegranate is in season now which means it’s a good idea to take advantage of their short appearance in your local markets.  If you don’t have plans to use it right away, store the fruit in your refrigerator where it should keep nicely for several weeks.  This simple and refreshing salad is highlighted by pomegranate and is quick to put together with just a few other ingredients.  If you are not a cilantro fan you can certainly omit it, but don’t leave out the mint as it is an integral ingredient that makes this salad stand out.

Cabbage, Tomatoes, Mint & Cilantro

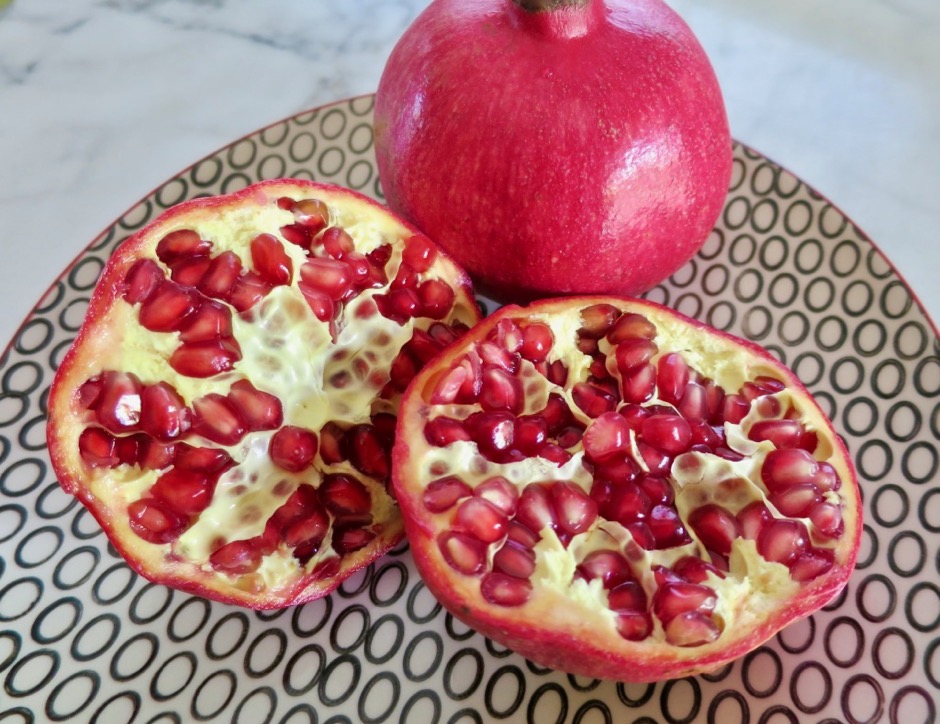
Pomegranate

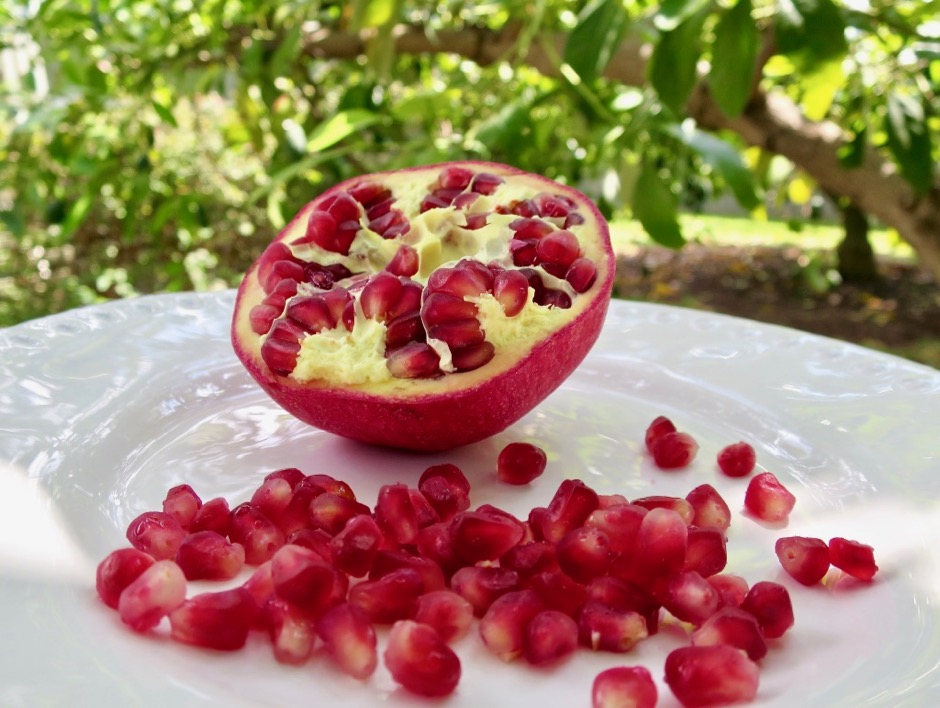
There are many video’s on how to remove the seeds from the rather bitter membrane that securely surrounds them.  Whichever method you use, beware that pomegranate juice stains so be careful not to get it on your clothing or counter.  It’s best to work with it in the sink.  Once you remove the seeds which are known as arils, you may store them in an airtight container and use them within 5 days.

Pomegranate

Crunchy Cabbage & Pomegranate Salad

Crunchy Cabbage & Pomegranate Salad
 
Adapted from Bon Appetit Magazine
Author:
Serves: 2
Ingredients
  • 2½ cups packed thinly sliced green cabbage
  • pinch of sugar
  • ¼ teaspoon kosher salt
  • 2 teaspoons fresh lemon juice
  • 2 teaspoons canola or avocado oil
  • 1 teaspoon white wine or champagne vinegar
  • 1 tablespoon finely chopped sweet onion
  • 8-10 cherry tomatoes, halved
  • 1 tablespoon chopped mint
  • 1 tablespoon chopped cilantro
  • 2 tablespoons pomegranate seeds
  • kosher salt and freshly ground black pepper
Preparation
  1. Toss cabbage with a pinch of sugar and ¼ teaspoon kosher salt in a medium bowl. Cover and refrigerate while you prepare the other ingredients.
  2. Combine lemon juice, oil and vinegar in a small bowl. Set aside.
  3. Add chopped onion, tomatoes, mint, cilantro and pomegranate seeds to cabbage. Toss with dressing. Season to taste with salt and pepper before serving.
 

Breakfast, Eggs, Lactose Free, Recipes, Rice Dishes

The Perfect Egg

October 11, 2017

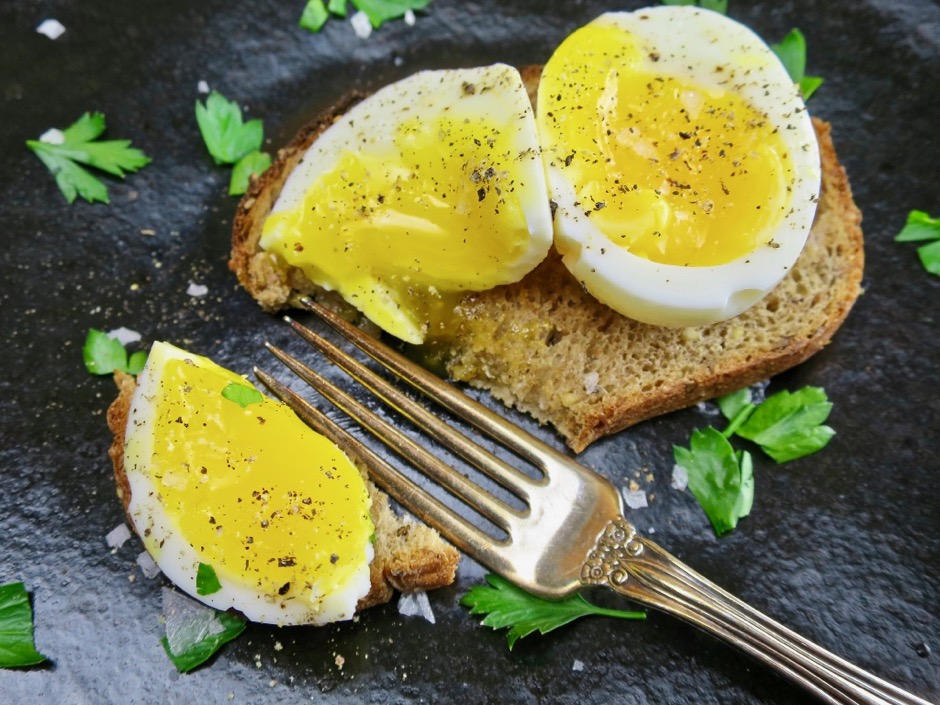
Eggs on Toast

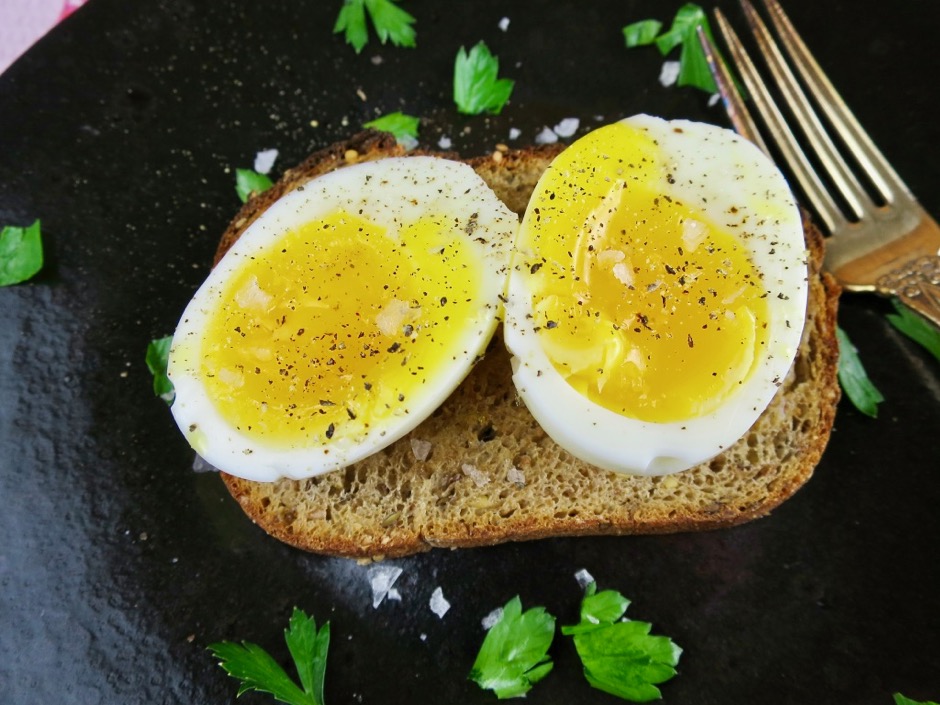
Over the years eggs have come in and out of favor with nutritional science.  Throughout all these ins and outs, they have remained one of my favorite foods. Now in good standing, eggs are recognized as a nutritious multi-purpose food. They are very inexpensive and can be prepared in numerous ways.  Fried, boiled, poached, scrambled, and steamed. They are delicious served for breakfast, lunch, or dinner.  I especially like eggs that have perfectly set whites with jammy yolks. This 6 1/2 minute egg achieves that ideal. The egg is steamed in a bit of water for exactly 6 1/2 minutes.  What you end up with is a beautiful egg that can be served in multiple ways.  Here I show you just a few of my favorite ways to eat this perfect food.

Egg on Rice served with Kimchi

Besides being fond of eggs, I also love all types of rice.  A perfectly cooked egg atop steaming rice is divine.

Eggs on Avocado Bacon Toast

When avocado season comes around, we toast John’s homemade country sourdough bread and top it with avocado, bacon and eggs. This is one of my favorite meals for lunch.

Eggs on Toast with Maldon Sea Salt & Parsley

The simplicity of a perfectly cooked egg on good bread can’t be beat.  Toast the bread, dab on some butter, and sprinkle Maldon sea salt over the egg.  A scattering of fresh parsley adds a wonderful fresh note to the egg toast.

The Perfect Egg
 
Author:
Serves: 2
Ingredients
  • 2 extra-large eggs (cold from the refrigerator)
  • flaky sea salt such as Maldon
  • freshly ground black pepper
  • toast or rice to serve with eggs
Preparation
  1. Bring ¾-inch of water to a boil over medium-high heat in a small saucepan with a tight fitting lid.
  2. Once the water begins to boil gently lower the eggs into the pan with tongs. Lower the heat to medium (water should still be boiling) cover the pan and start your timer. Six minutes and 30 seconds!
  3. Once the timer goes off, remove the eggs immediately and run under cold water for a minute or so to stop them from cooking further. Peel and serve the eggs on toast or rice. If you prefer to save the eggs for later, chill eggs in an ice bath for a few minutes as soon as they are removed from the pan. Store in the refrigerator until ready to use.


Chicken, Dinner, Lactose Free, Recipes

Peppadew Stuffed Chicken

September 28, 2017

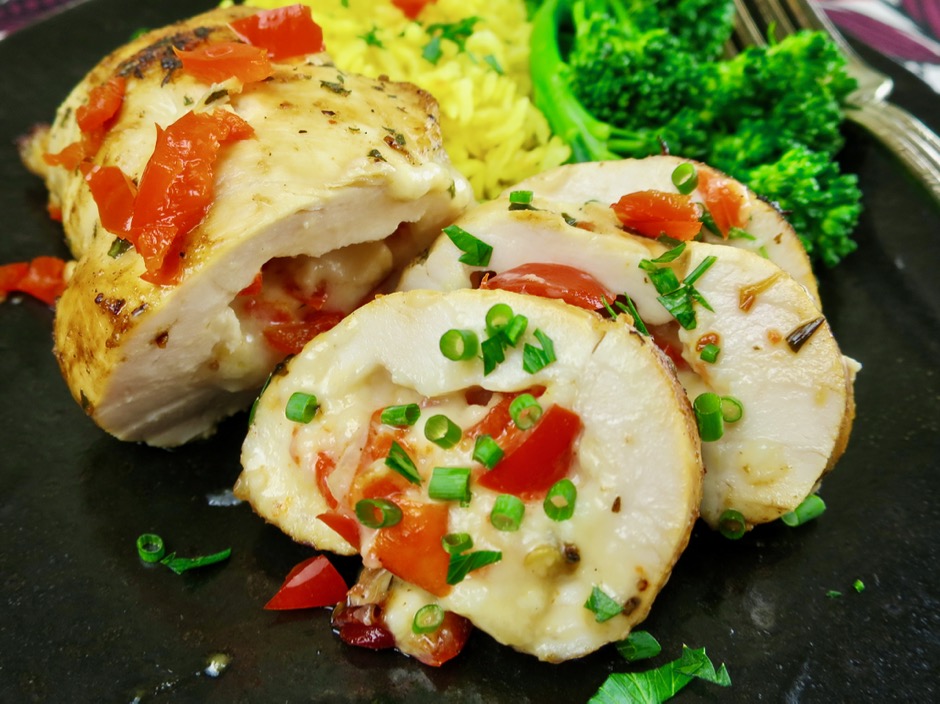
Stuffed Chicken Breasts with Peppadew Peppers, Cheese and Herbs

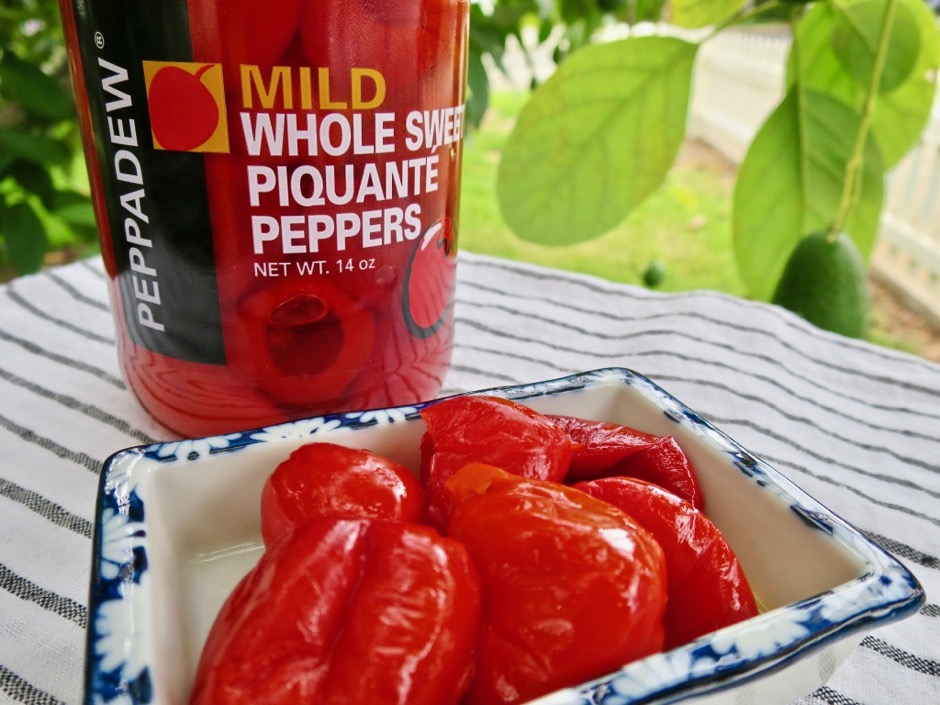
A recipe in a recent Bon Appetit magazine caught my attention with its beautiful bright red Peppadew peppers scattered over grilled chicken skewers.  I was curious to know more about these mild & sweet peppers. Peppadew peppers are adored by many not only for their delicious flavor and vibrant color, but for their versatility in recipes.  A quick visit to the internet will reveal numerous recipes such as stuffed Peppadew peppers, Peppadew poppers, Peppadew mac & cheese, Peppadew cheese spread, and more.

I ordered a couple of jars of peppers on-line only to find out later that they are available at our local Whole Foods and Foodland Farms markets at their olive bars. Upon receiving my order I was dying to taste a Peppadew. I found  the pepper to be crisp, tangy, sweet, and quite delicious.  I’m always searching for new ways to dress up the common chicken breast.  The idea of the peppers paired with chicken sounded perfect. After a brief search, I stumbled upon this recipe at the Peppadew-USA web site. With just a few ingredients and quick preparation, I had the makings of a tasty dinner.

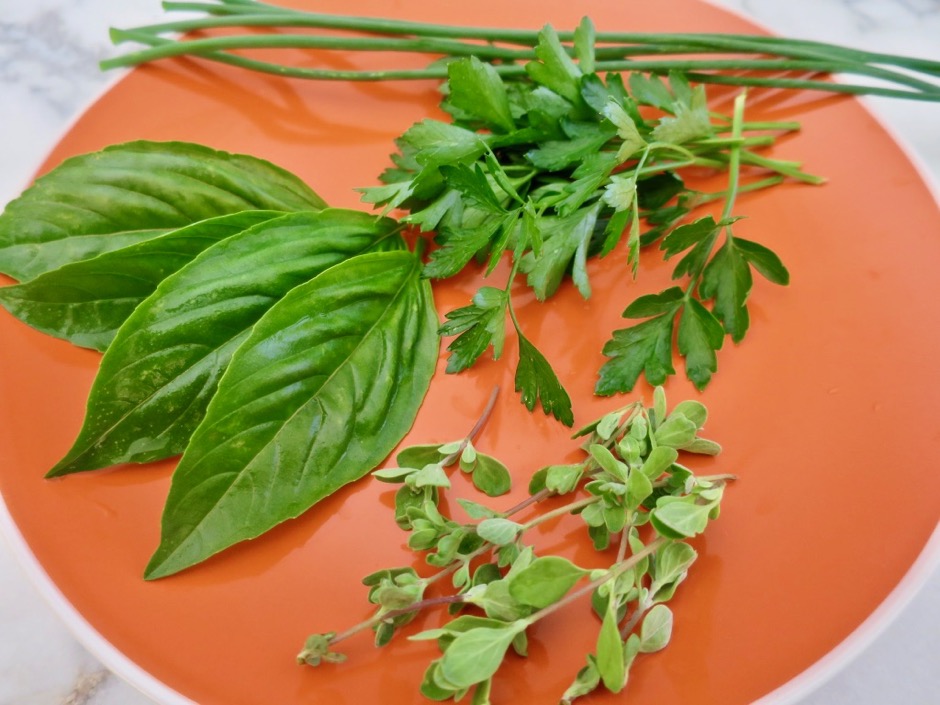
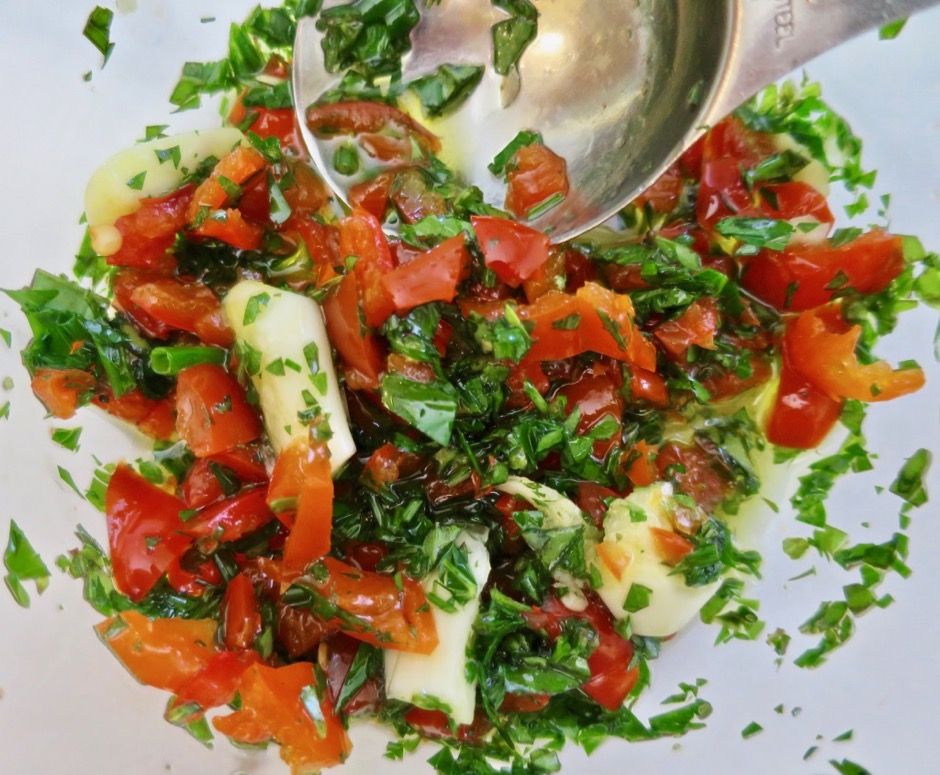
The recipe doesn’t note what herbs to use so I picked herbs from the garden that I thought would compliment the chicken; basil, chives, parsley, and marjoram.

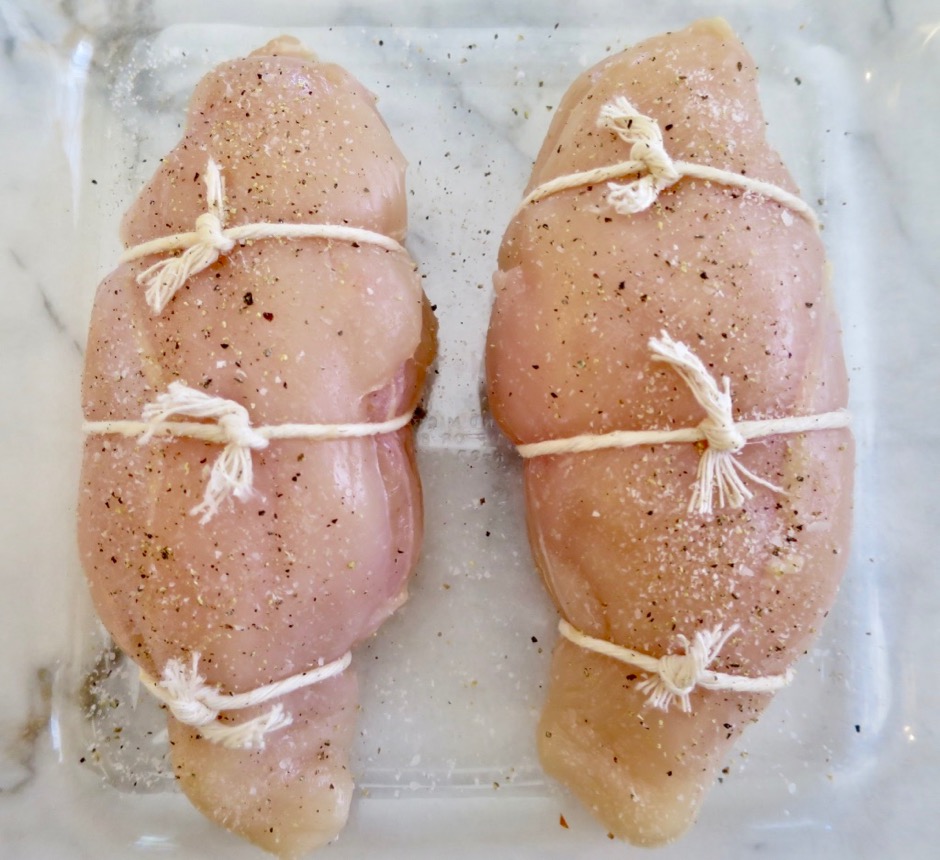
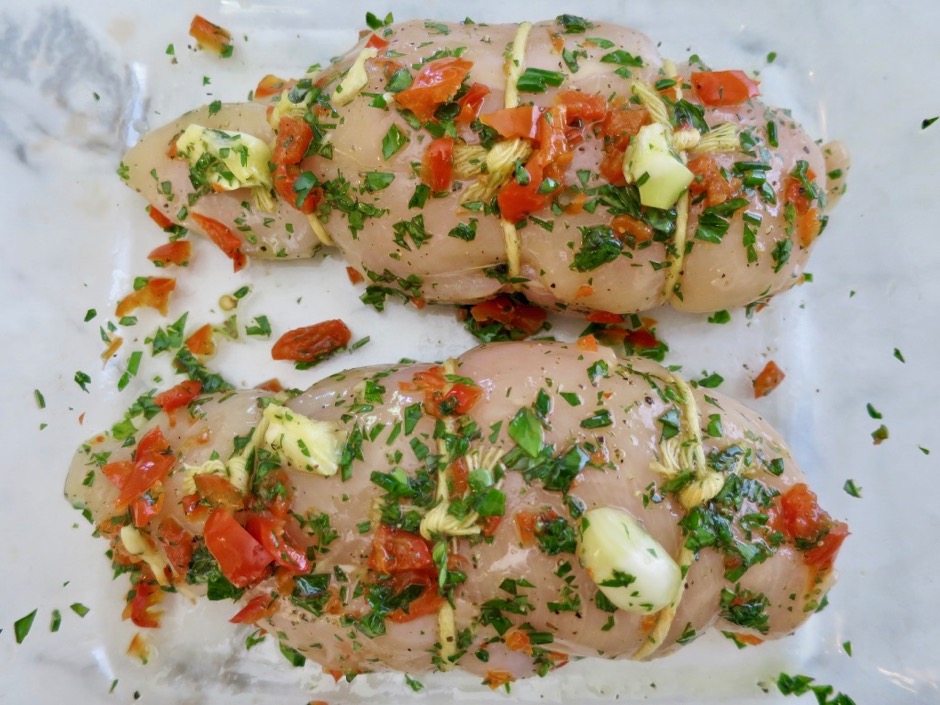
Tied Chicken Breasts

After stuffing the chicken I thought it would be best to tie the chicken breasts to ensure the filling stayed put, especially the cheese.  Making a small incision in the thickest part of the breast is suggested rather than  slicing a larger incision along one side of the chicken breast which would allow more of the filling to escape while baking.
Peppadews, Herbs, Garlic & Olive Oil

Stuffed Chicken Breasts with Peppadew Peppers, Cheese and Herbs

The chicken can be marinated overnight however if you are running out of time, a few hours will suffice. The stuffed chicken is first browned on the stove top then finishes baking in the oven.  This recipe turned out to be a favorite of ours.

Stuffed Chicken Breasts with Peppadew Peppers, Cheese and Herbs


Peppadew Stuffed Chicken
 
Adapted from Peppadew USA website
Author:
Serves: 2
Ingredients
  • 2½ ounces Peppadew peppers, chopped
  • 1½ tablespoons extra virgin olive oil plus more for the pan
  • 1 garlic clove, crushed
  • 2 tablespoons fresh herbs, chopped (basil, parsley, marjoram, chives)
  • 2 boneless, skinless chicken breasts
  • 2½ ounces yogurt cheese, an ideal substitute for those looking for lactose free cheese (or gouda)
  • kosher salt and freshly ground black pepper
Preparation
  1. Mix half of the chopped Peppadew peppers with the olive oil, crushed garlic, and herbs.
  2. To create a pocket in the chicken breast insert a sharp knife into the thickest part of the breast and make a 2½-inch incision without going through the opposite side. Stuff chicken with the cheese and remaining Peppadew peppers. Sprinkle chicken with kosher salt and freshly ground black pepper. Tie chicken breasts to secure filling.
  3. Transfer chicken breasts to a shallow dish and coat both sides with the marinade. Cover and refrigerate at least 4 hours or overnight.
  4. Preheat oven to 350 degrees.
  5. Heat a tablespoon of olive oil over medium to medium-high heat in a stainless steel pan or one that can be used in the oven. Add the chicken breasts and brown on each side. Transfer the pan to the oven. Bake for about 15 minutes or until the thickest part of the breast registers 165 degrees.
  6. Serve with broccolini, a salad, or other greens and saffron rice or your favorite rice pilaf.


Bread, Breakfast, Dessert, Fruit, Lactose Free

Crisp Sugar Topped Blueberry Muffins

September 9, 2017

Crisp Sugar Topped Blueberry Muffins

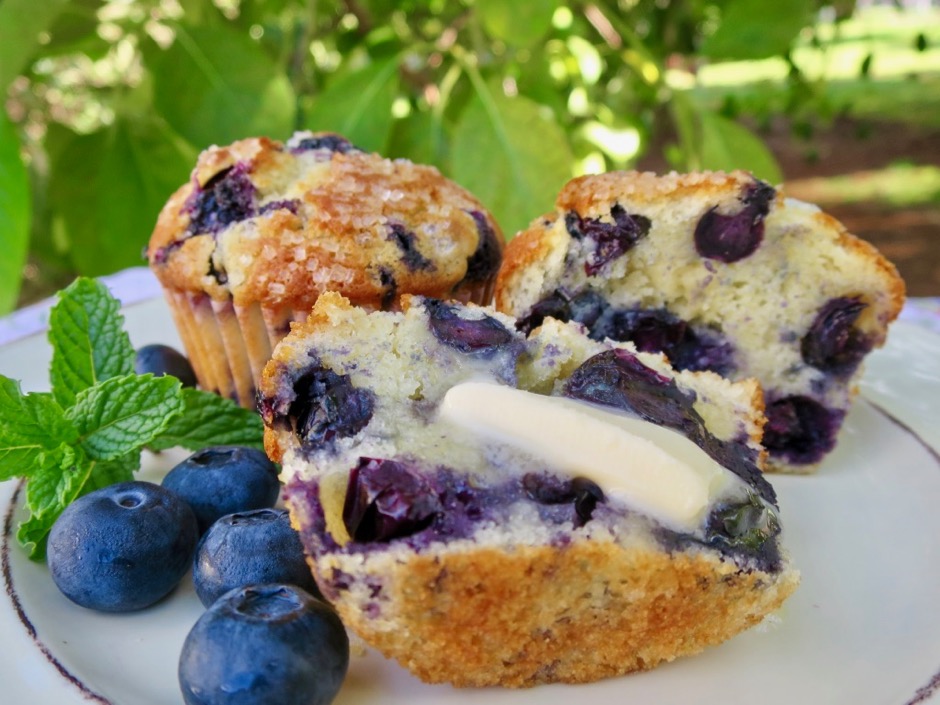
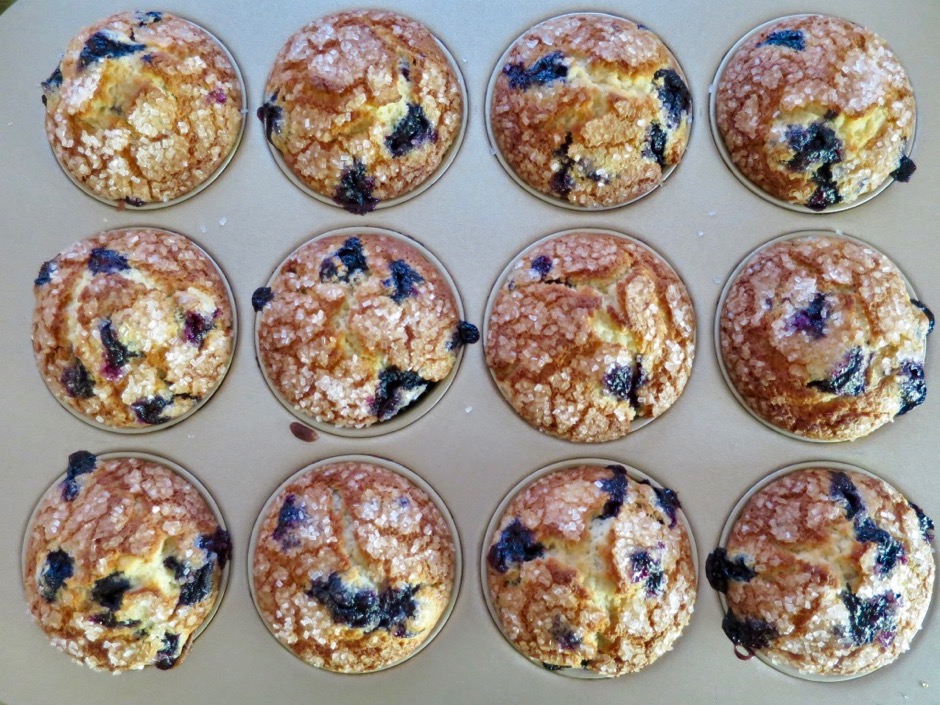
One of my favorite uses of the nutritious blueberry is in muffins. They are one of the easiest breakfast (or dessert) snacks to make.  All you need is a bowl for the dry ingredients and a measuring cup for the wet ingredients. Combine the two, fold in the blueberries and your batter is ready.  In less than 20 minutes you’ll have warm, crispy topped muffins with just the right amount of blueberries.  These are delicious split down the center, toasted and served with a pat of butter.

Crisp Sugar Topped Blueberry Muffins

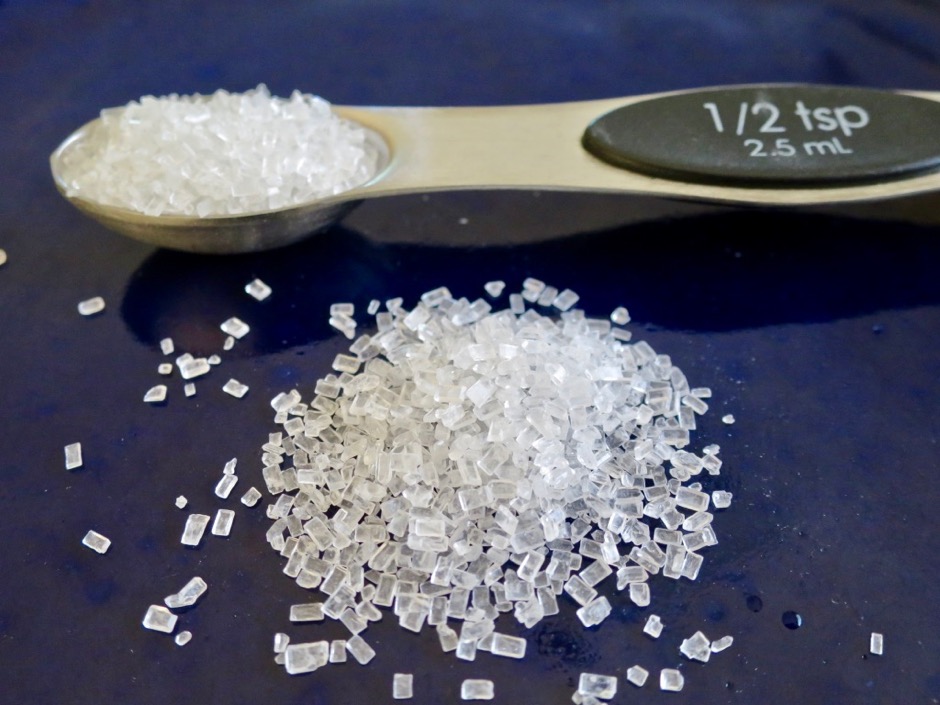
The sparkling sugar ensures the muffins have a perfectly crisp top that is not only a delight to eat but also gives the muffins that certain je ne sais quoi. Bob’s Red Mill decorative sparkling sugar works perfectly.

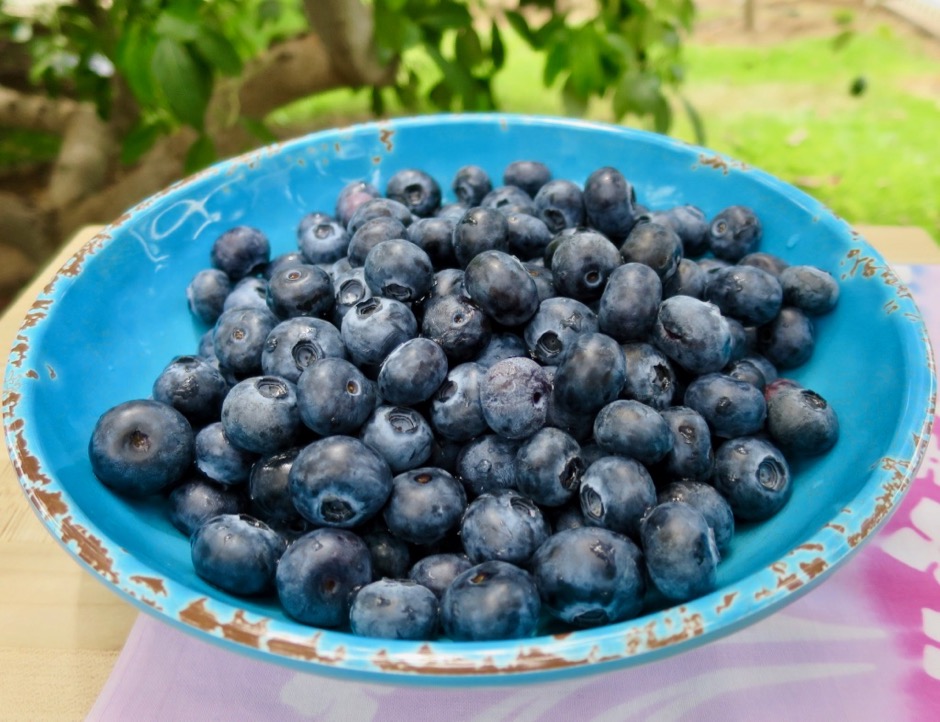
Blueberries

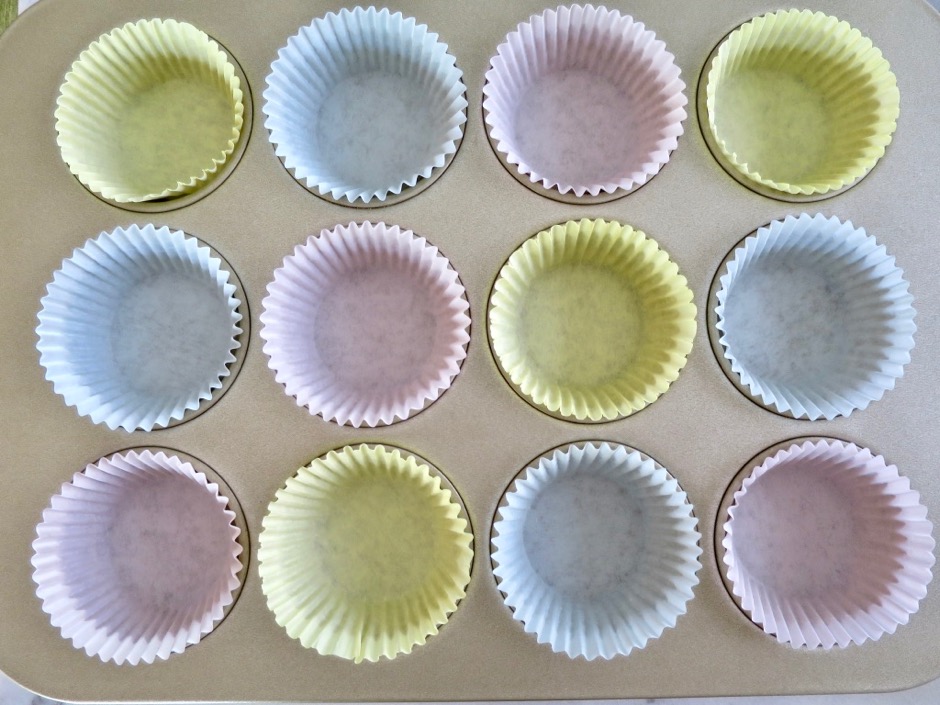
Muffin Liners

It’s best to use liners in your muffin tin to ensure that the muffins won’t stick to your pan.  Liners also mean easier clean up.

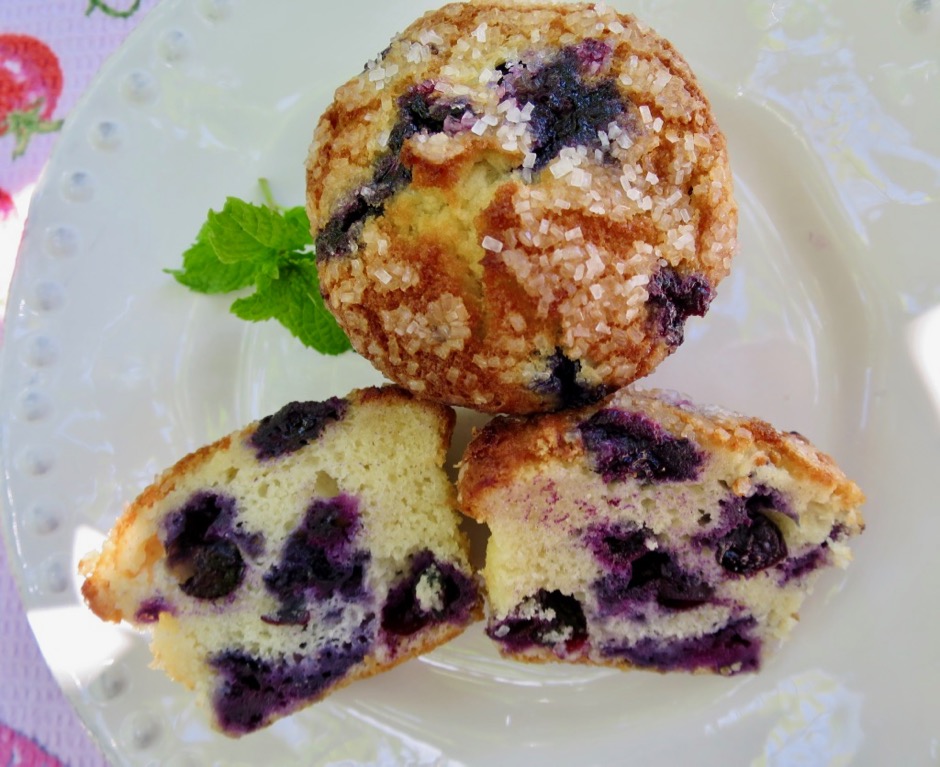
Crisp Sugar Topped Blueberry Muffins

These are beautiful muffins with crackly and crispy tops.  If by chance you have any leftover muffins, store them in the freezer in a heavy-duty plastic bag. They will keep well for more than a month.

Crisp Sugar Topped Blueberry Muffins


Crisp Sugar Topped Blueberry Muffins
 
Author:
Serves: 12
Ingredients
  • 2 cups all purpose-flour
  • 1 cup + 1 tablespoon granulated sugar
  • 2 teaspoons baking powder
  • ½ teaspoon salt
  • ¼ teaspoon cinnamon
  • ½ cup lactose free milk (or regular milk)
  • ¼ cup canola oil
  • 4 tablespoons Earth Balance Buttery Sticks, melted and cooled for 5 minutes (or regular salted butter)
  • 2 large eggs
  • 1 teaspoon vanilla extract
  • 2 cups (8 ounces) fresh blueberries
  • Sparkling sugar such as Bob's Red Mill Simply Sweet Decorative Sparkling Sugar
Preparation
  1. Preheat oven to 400 degrees.
  2. Line muffin tin with muffin/cupcake liners.
  3. In a large bowl whisk to combine the flour, sugar, baking powder, salt, and cinnamon. Set aside.
  4. In a 2 cup measuring cup, measure ½ cup milk. Add ¼ cup canola oil, melted Buttery Sticks, eggs, and vanilla extract. Whisk ingredients together.
  5. Pour wet ingredients into bowl of dry ingredients. Stir to combine. Fold in blueberries. Divide batter between a 12 cup paper-lined muffin tin. Sprinkle each muffin with ½ teaspoon of sparkling sugar.
  6. Bake for 18 - 22 minutes or until a toothpick inserted in the center comes out clean. Cool muffins in the pan for 10 minutes before removing to a rack to cool completely.


Follow

Get every new post delivered to your Inbox

Join other followers: