Archives

Cookies, Dessert, Lactose Free, Recipes

AK Cookies

September 15, 2018

AK Cookies

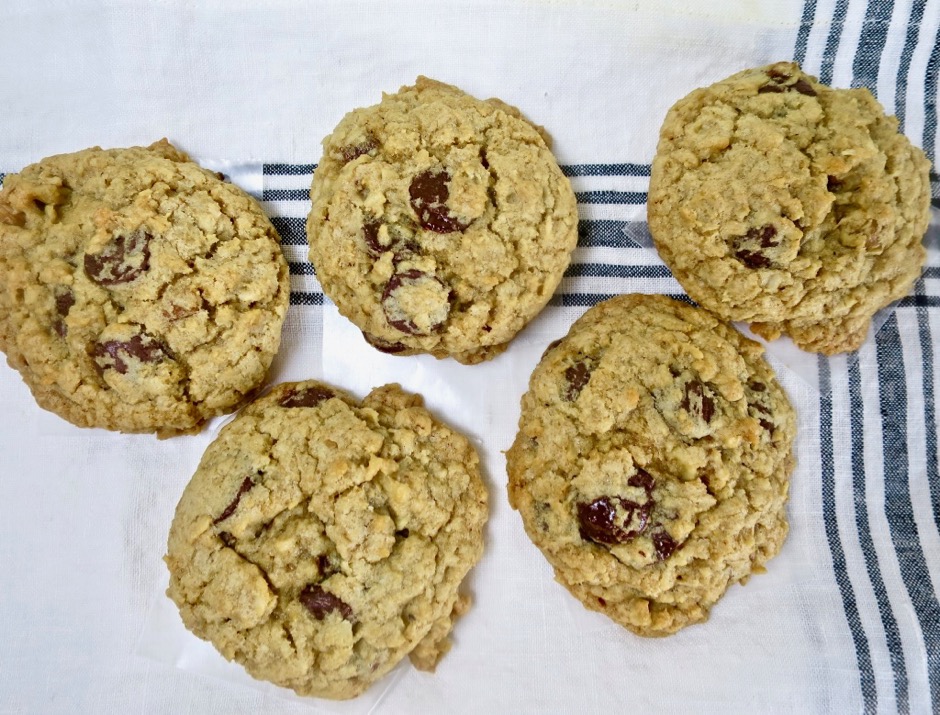
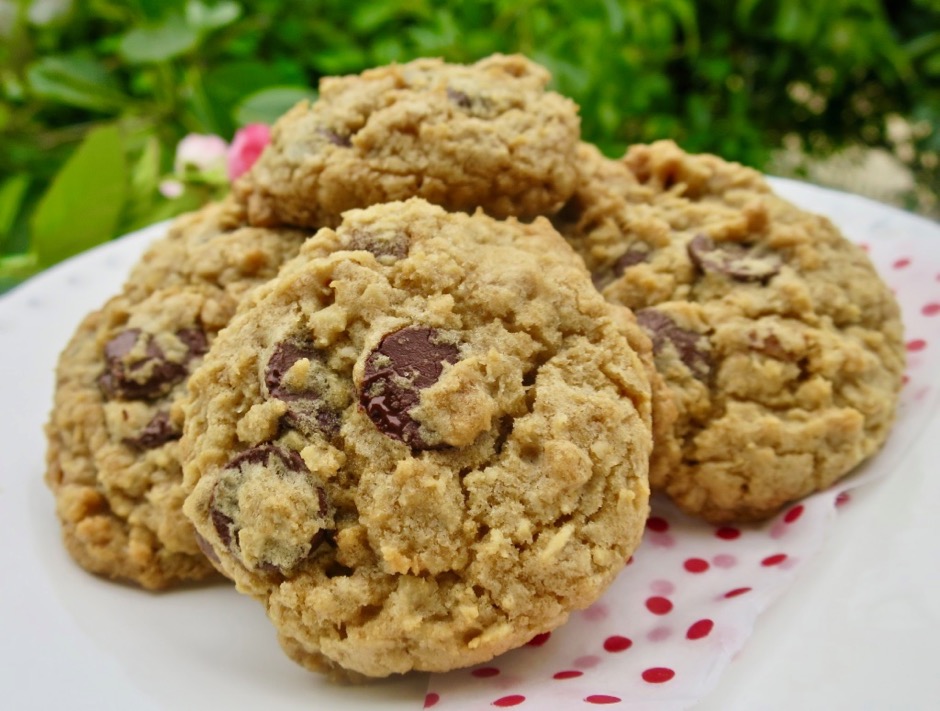
I’m always looking for new, interesting cookies. I stumbled upon these AK Cookies in the late and lamented Lucky Peach magazine.  The ingredients seemed like ordinary items you might have in your pantry and I loved the idea of adding shredded coconut to the dough.  Turns out these are more than just your ordinary cookies with chocolate, oatmeal and nuts.  The coconut adds the je ne sais quoi that turns on otherwise common cookie into something special.   This is a cookie that is equally appropriate with your morning coffee or served for dessert along with a scoop of vanilla ice cream.

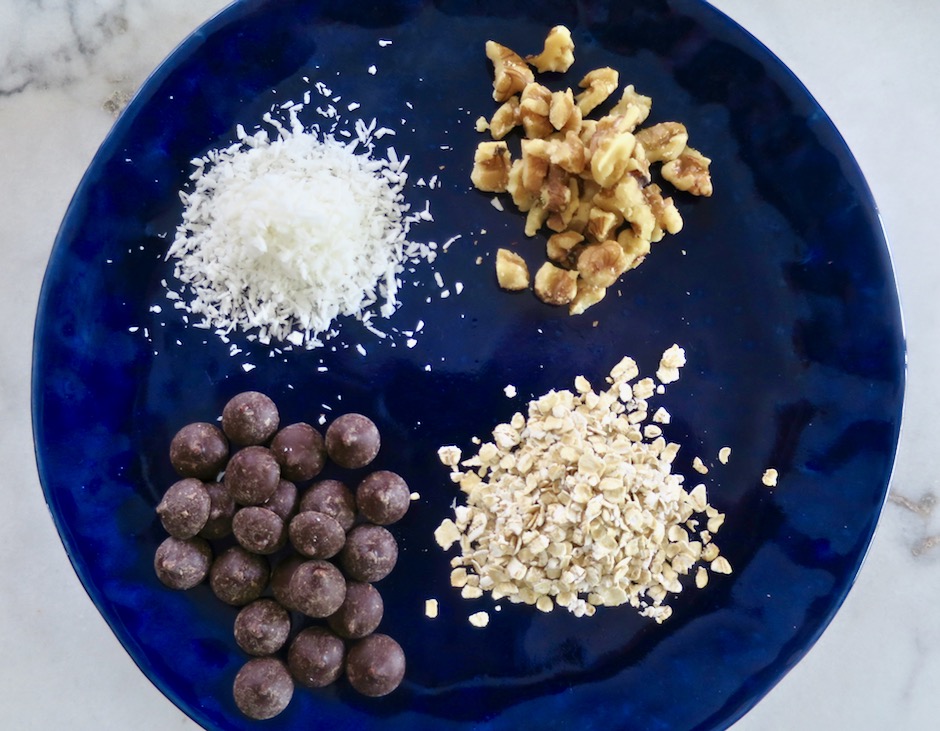
Shredded Coconut, Walnuts, Oatmeal, Chocolate

The curious name of the cookie appears to be a play on the place where Peter Meehan and his wife Hannah Clark first had these cookies while visiting friends in Anchorage, Alaska (hence AK). Whatever the name, these are cookie perfection.  There is an ideal combination of nuts, coconut, oatmeal, and chocolate in each bite.

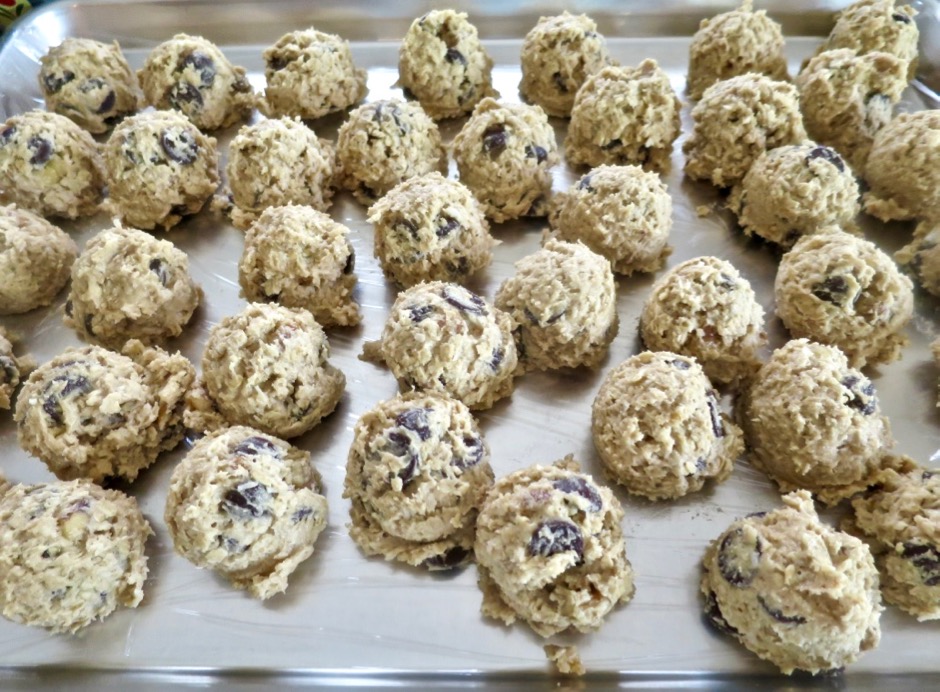
AK Cookie Dough

If you want to make bigger cookies, by all means go for it.  The recipe calls for using a 2-ounce ice cream scoop to make squash ball sized dough rounds. I used my Oxo Good Grips medium cookie scoop to make 40 smaller cookies. These guys freeze well.

AK Cookies

AK Cookies
 
Adapted from Hannah Clark, Lucky Peach Magazine
Author:
Serves: 40
Ingredients
  • 2 sticks Earth Balance Buttery Sticks (or unsalted butter)
  • 1 cup sugar
  • 1 cup lightly packed dark brown sugar
  • 2 large eggs
  • 1 teaspoon vanilla extract
  • 2 cups all-purpose flour
  • 1 teaspoon baking soda
  • ½ teaspoon kosher salt (1 teaspoon if using unsalted butter)
  • 1 cup shredded unsweetened coconut
  • 1 12-ounce bag semi-sweet or bittersweet chocolate chips (dark chocolate for lactose free)
  • 2 cups quick cooking oats
  • 1 cup coarsely chopped walnuts or pecans
Preparation
  1. Preheat oven to 350 degrees.
  2. Using a mixer fitted with the paddle attachment, cream the Buttery Sticks and sugars on medium-high speed until the mixture is pale tan and smooth, about 2 minutes. Add the eggs and vanilla and mix for another 4 minutes. Add the dry ingredients in order, mixing them in on low speed, just until each is incorporated into the dough.
  3. Use a medium scoop (I use Oxo) or a larger one for bigger cookies, to scoop all the dough onto a cookie pan and chill in the refrigerator for at least 30 minutes before baking.
  4. When you are ready to bake the cookies, space them well on a parchment-lined cookie pan (or use a Silpat) and bake for about 10 - 12 minutes. Bigger cookies will take a little longer to bake. Test cookies after 10 minutes of baking. They should be deep golden brown. Let the cookies cool on the pan for a few minutes, then transfer to a cooling rack. The cookies are best when fully cooled.

 

Appetizers, Dinner, Kimchi, Korean, Lactose Free, Recipes

Kimchi & Bacon SPAM Pancakes

August 29, 2018

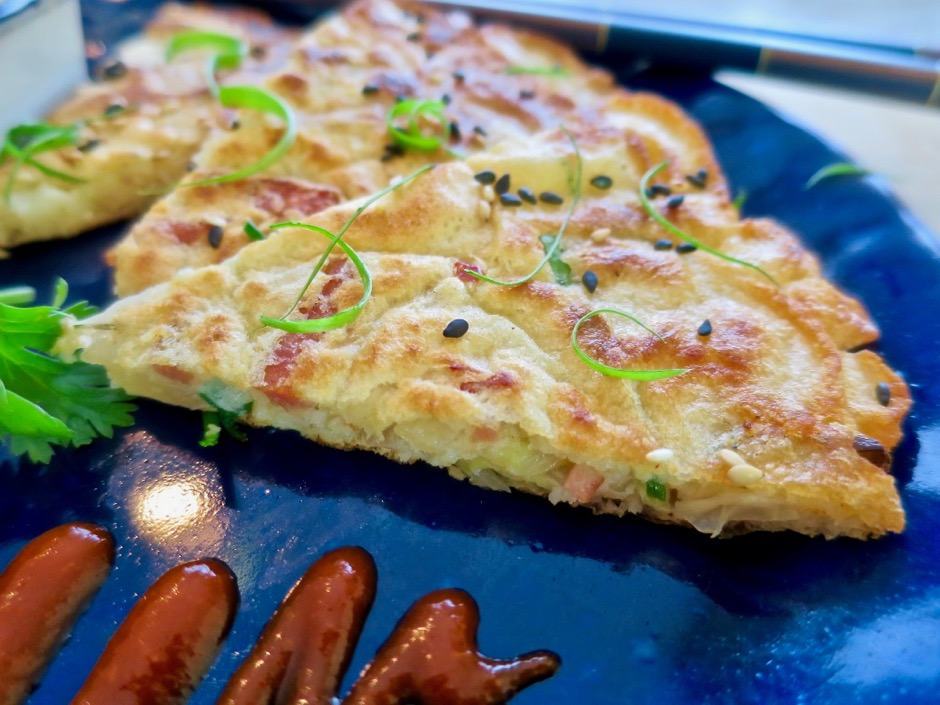
Kimchi Pancake with Bacon Spam

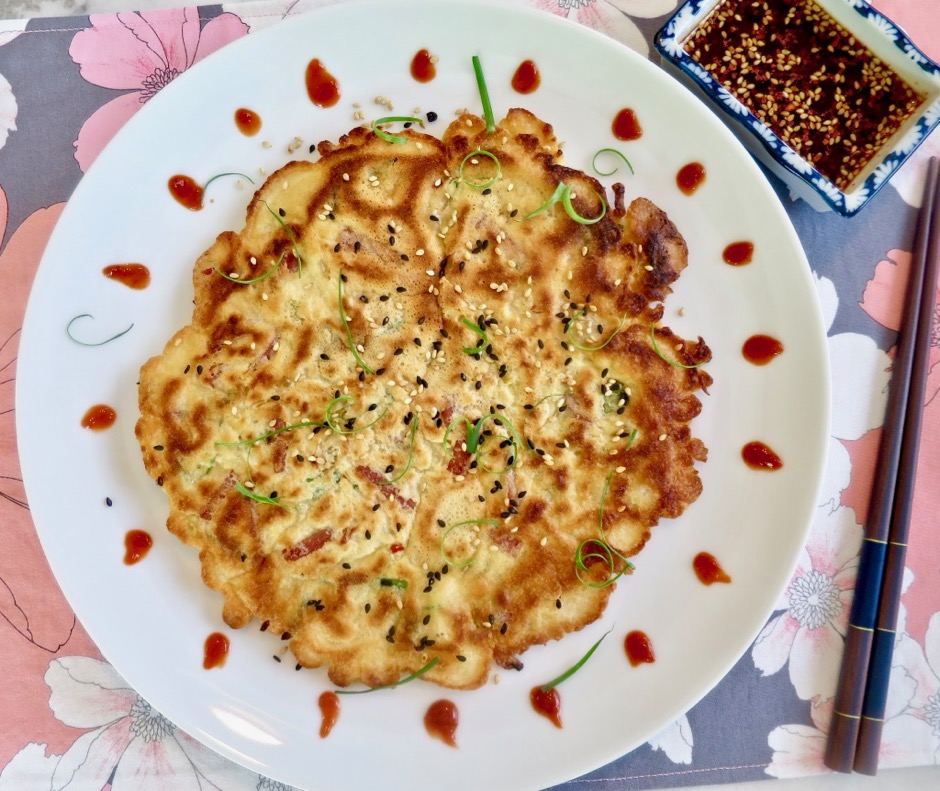
John’s favorite weekend breakfast is griddle cakes. I have to agree, they are delicious with pats of salty butter and maple syrup.  But the sweet breakfast pancake has savory relatives, one of which is this kimchi pancake.  It is mildly spicy, with a tangy flavor from the kimchi and delightfully crispy around the edges.  I couldn’t resist adding Bacon Spam to the pancake. Yum.

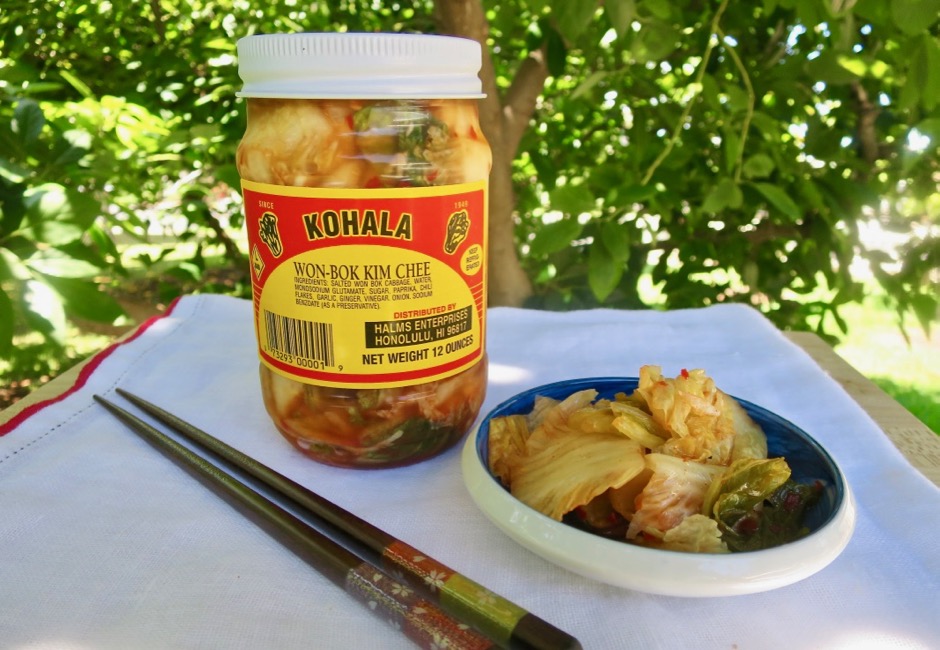
Kimchi

Use your favorite kimchi in these pancakes. Mild or spicy, either one works.

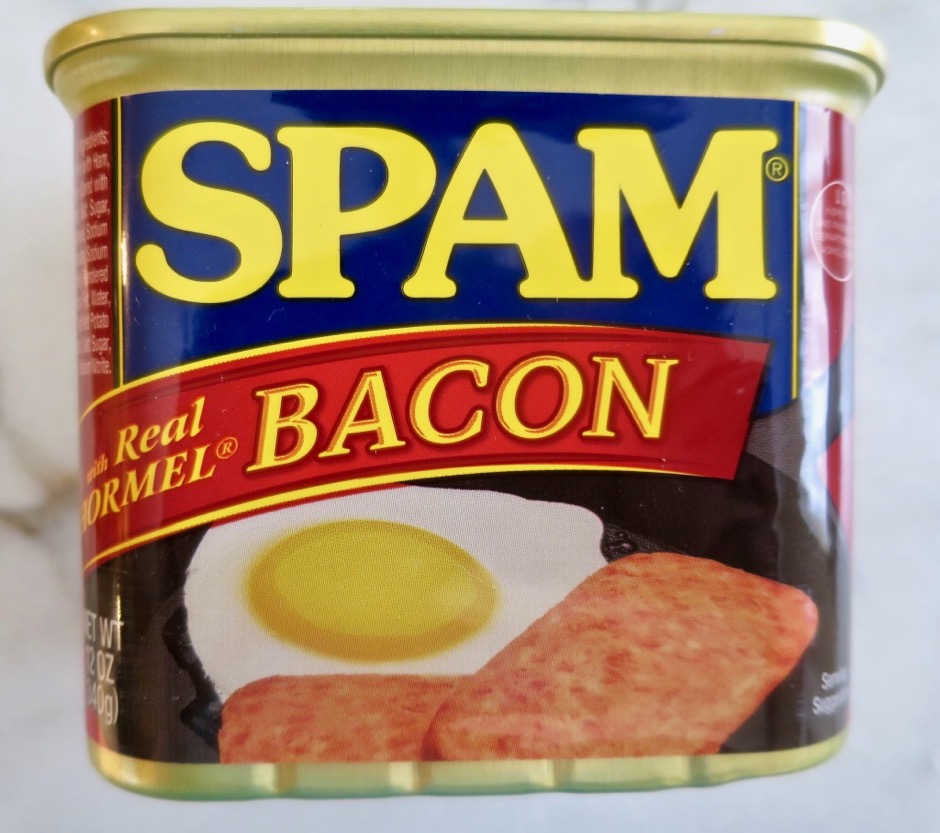
Bacon Spam

Don’t dismiss the idea of using Bacon Spam, it adds an abundance of flavor. But, you can skip it if you are not a Spam fan.

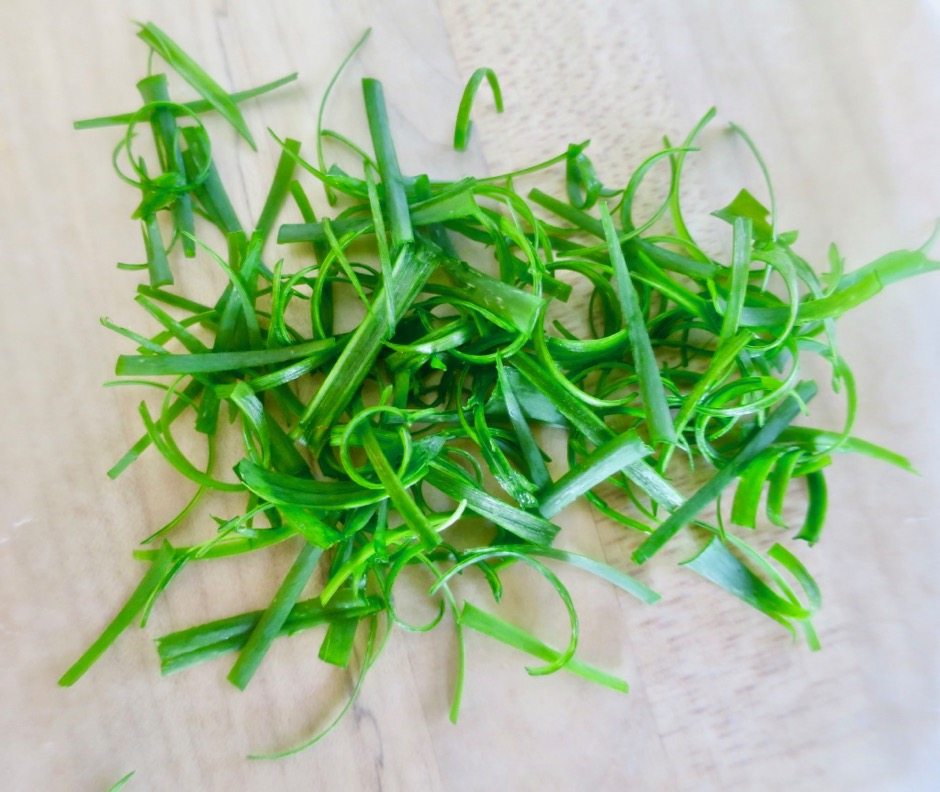
Sliced Green Onions

Lots of green onions (scallions) adds an additional depth of flavor to the pancakes.  Chopped, thinly sliced, or slivered are all acceptable.

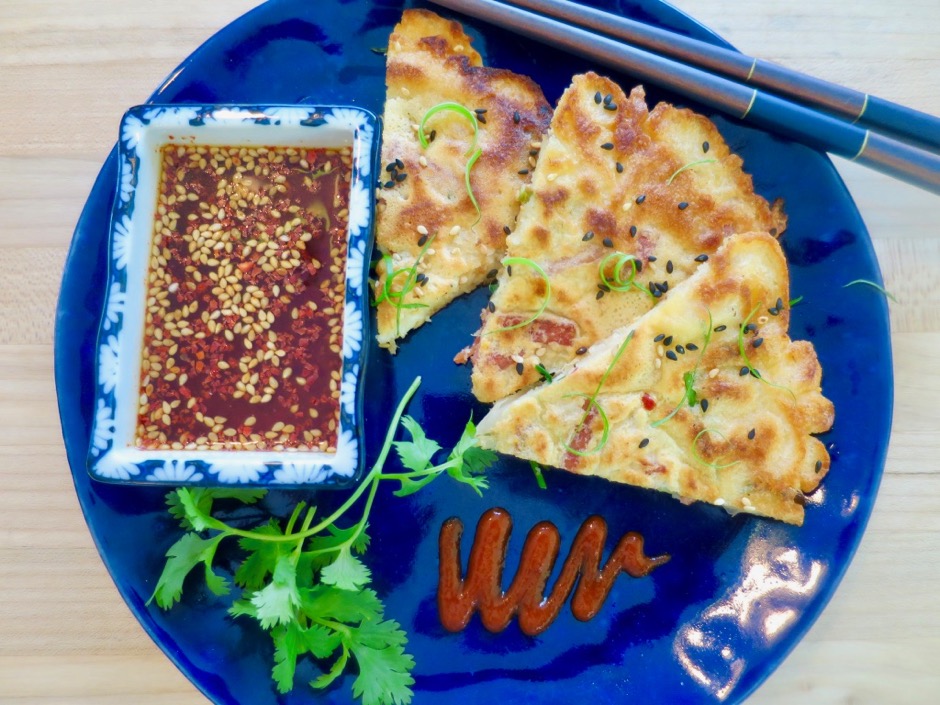
Kimchi Pancakes with Bacon Spam

The dipping sauce is a simple combination of soy sauce, rice vinegar, a dash a sugar, Korean chili flakes and roasted sesame seeds.  Serve the sauce with the pancakes and a drizzle of sriracha.

Kimchi Pancakes with Bacon Spam

Kimchi & Bacon SPAM Pancakes
 
Author:
Serves: 2 pancakes
Ingredients
  • Dipping Sauce:
  • ¼ teaspoon sugar
  • 2 tablespoons unseasoned rice vinegar
  • 2 tablespoons soy sauce
  • ¼ teaspoon Korean chili flakes (or dash of red pepper flakes)
  • ¼ teaspoon roasted sesame seeds
  • Pancakes:
  • 2½ ounces (3 thin slices) bacon Spam, cut into thin slices and fried until crisp (drain on paper towel lined plate)
  • ½ cup all-purpose flour
  • ½ cup rice flour
  • 1 extra-large egg, lightly beaten
  • ¾ cup cold seltzer water
  • ½ teaspoons sesame oil
  • ¾ teaspoon kosher salt
  • 1 cup kimchi, coarsely chopped
  • 4 green onions, sliced thinly
  • canola oil for frying
Preparation
  1. In a small bowl combine sugar with the rice vinegar, stirring until sugar has dissolved. Add soy sauce, Korean chili flakes, and sesame seeds. Set aside.
  2. In a large bowl, whisk flour and rice flour. Add the egg, seltzer water, sesame oil, and salt. Whisk until just combined. Add kimchi, fried Spam and green onions. Stir to combine.
  3. Heat 2 tablespoons canola oil in a 9-inch skillet between medium - medium high heat. Once oil is shimmering, pour half of the pancake batter into the pan. Quickly spread the batter to make a thin pancake. Cook for 3 minutes or so, until the bottom is golden and crisp, adjusting the heat as necessary so the pancake does not burn. Carefully flip the pancake and cook another 2 -3 minutes until nicely browned.
  4. Slide pancake onto a large plate. Add more oil to the pan and cook the second pancake.
  5. Scatter reserved green onions over the top of the pancakes along with roasted sesame seeds. Serve with sriracha and dipping sauce.


Beef, Dinner, Mexican, Recipes

Tacos Dorados

August 7, 2018

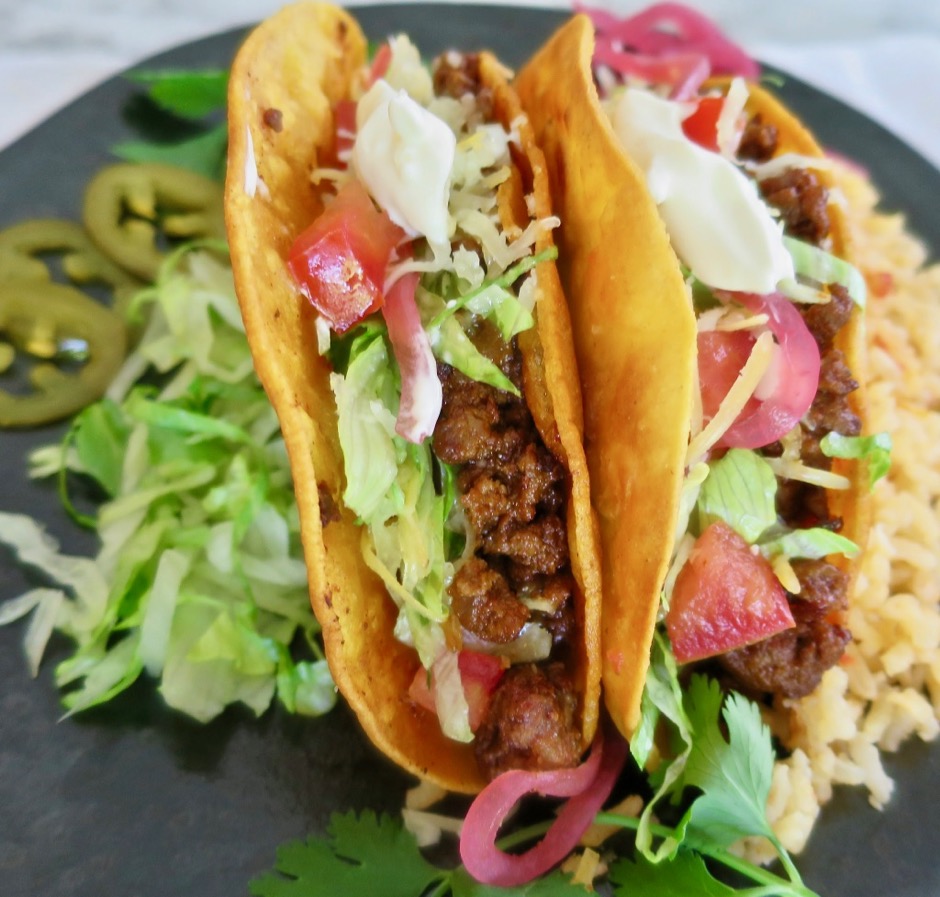
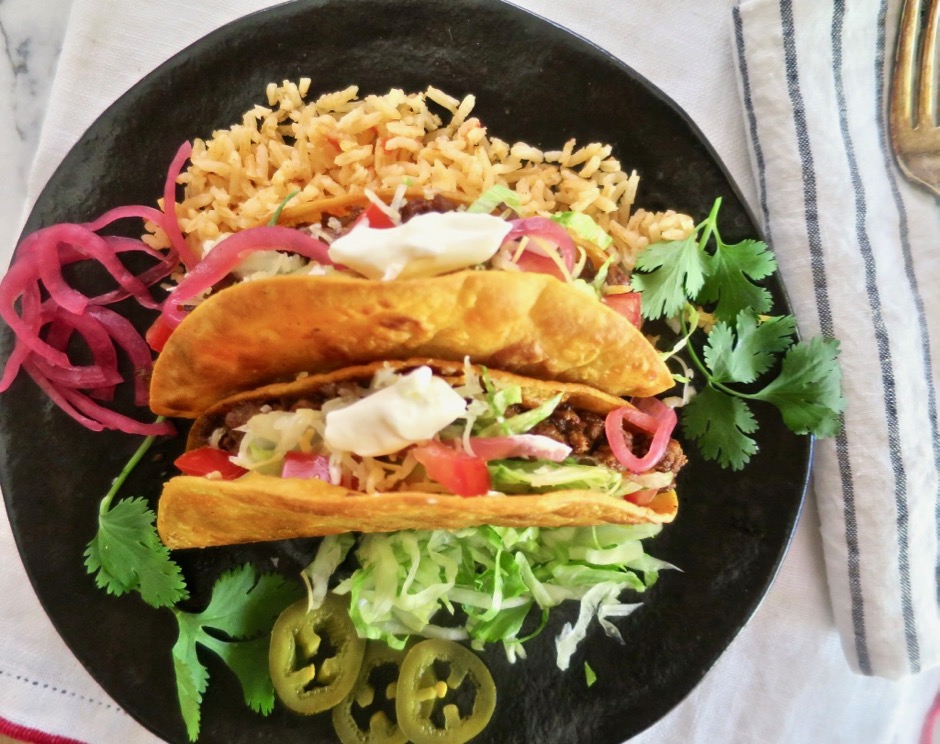
“The hard-shell taco has been an American staple for more than half a century.”  So opens “Introducing Tacos Dorados” in the July/August issue of Cook’s Illustrated. The crispy shell tacos have long existed in Mexico under the name tacos dorados or golden tacos.  We certainly enjoy a perfectly fried corn tortilla filled with savory meat and our favorite garnishes. Upon reading the article, I was intrigued by their promise of “the ultimate hard-shell tacos.” The Cook’s Illustrated recipe was a bit too elaborate for me so I decided to create my own version.  Voila, these are now our favorite tacos!

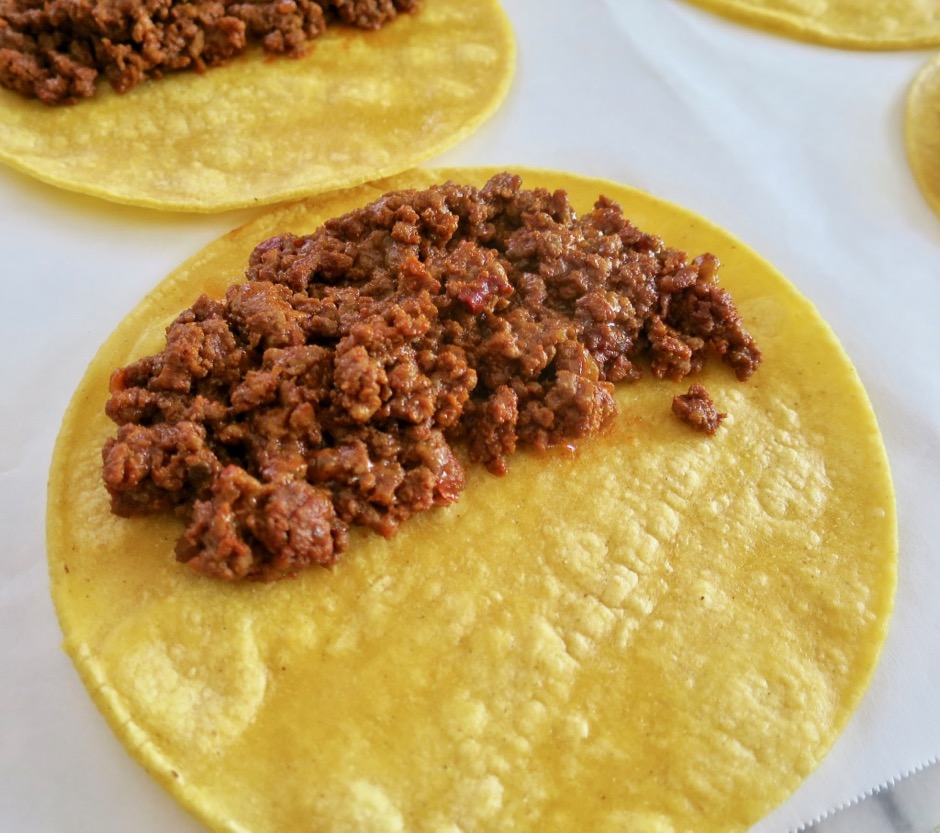
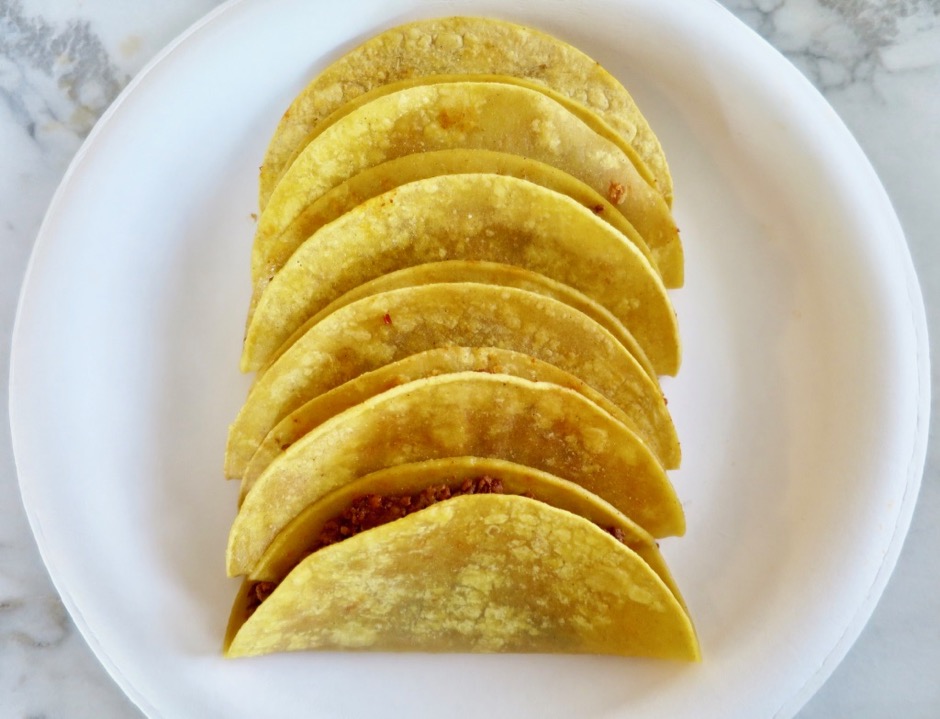
The meat filling is delicious. Once cooked, it is spooned on to one side of the prepared tortilla.  The tortillas are then folded over and ready to be fried.

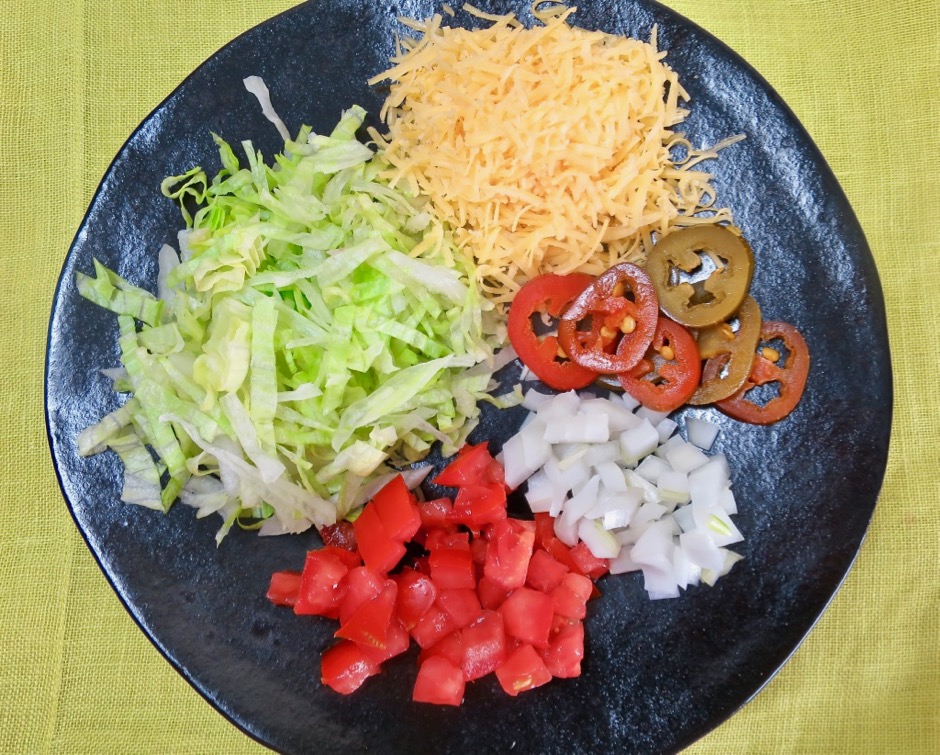
The cool thing about these crispy tacos is that the folded edge of the tortilla stays pliable.  Once they are fried crisp, you are able to pry them open and fill with your favorite taco garnishes.  And because the meat filling and garnishes are on one side of the tortilla and not stacked from the bottom up, each bite includes savory meat and whatever other fillings you prefer (ours are cheese, pickled jalapeños, onions, diced tomatoes, and crispy iceberg lettuce).  I serve these with my favorite sopa de arroz and Cuban style black beans.


Tacos Dorados
 
Adapted from Cook's Illustrated
Author:
Ingredients
  • 1 pound ground sirloin or 90 percent lean ground beef
  • vegetable oil
  • 1 cup finely chopped onion
  • 1½ tablespoons mild chile powder
  • 1 tablespoon paprika
  • 1½ teaspoons ground cumin
  • ¾ teaspoon garlic powder
  • ½ teaspoon dried oregano
  • 1½ teaspoons kosher salt
  • 1½ tablespoons tomato paste
  • 1½ teaspoons finely minced chipotle chile in adobo
  • 2 ounces finely shredded cheddar cheese (1/2 cup)
  • 12 (6-inch) corn tortillas
  • Taco Garnishes:
  • shredded iceberg lettuce
  • diced onion
  • diced tomato
  • pickled jalapeños
  • shredded cheddar cheese
  • sour cream
Preparation
  1. Adjust oven rack to middle position and heat oven to 400 degrees.
  2. Combine chile powder, paprika, cumin, garlic powder, oregano and kosher salt in a small bowl.
  3. Heat 1 tablespoon canola oil in a 12-inch skillet over medium heat. Add onion and cook, stirring occasionally until softened, about 5 minutes. Add spice mix to the onions, stirring constantly for 1 minute. Stir in tomato paste and chipotle chile and cook for another minute. Add ground sirloin and cook, using a wooden spoon to break meat into pieces no larger than ¼-inch, until beef is cooked through and no longer pink, 5-7 minutes. Transfer beef to a bowl; stir in cheddar until cheese has melted and mixture is homogenous. Wipe skillet clean with paper towels.
  4. Thoroughly brush both sides of the tortillas with canola oil (or spray lightly with cooking spray). Arrange tortillas, overlapping slightly, on a foil-lined baking sheet (2 rows of 6 tortillas). Bake until tortillas are warm and pliable, about 5 minutes. Reduce oven temperature to 200 degrees.
  5. Place 2 tablespoons of filling on 1 side of each tortilla. Fold and press to close tortilla. The filled tortillas can be covered and refrigerated for up to 8 hours.
  6. Set a small wire rack in a rimmed backing sheet (for first batch of cooked tacos). Heat ¼ cup oil in the skillet over medium to medium-high heat until shimmering. Arrange 6 tacos in the skillet with open sides facing away from you. Cook, adjusting heat so oil actively sizzles and bubbles appear around the edges of the tacos, until tacos are crispy and deeply browned on 1 side, about 2-3 minutes. Using a spatula, carefully flip tacos. Cook until browned on second side, about 2 minutes, adjusting heat as necessary.
  7. Remove skillet from heat and transfer tacos to a paper towel lined plate and blot tops with paper towels. Transfer tacos to prepared rack and place in oven to keep warm. Return skillet to medium to medium-high heat and cook remaining tacos.
  8. Serve tacos with your favorite garnishes, rice and beans.


Dessert, Fruit, Lactose Free, Recipes

Strawberry Ice Cream

July 20, 2018

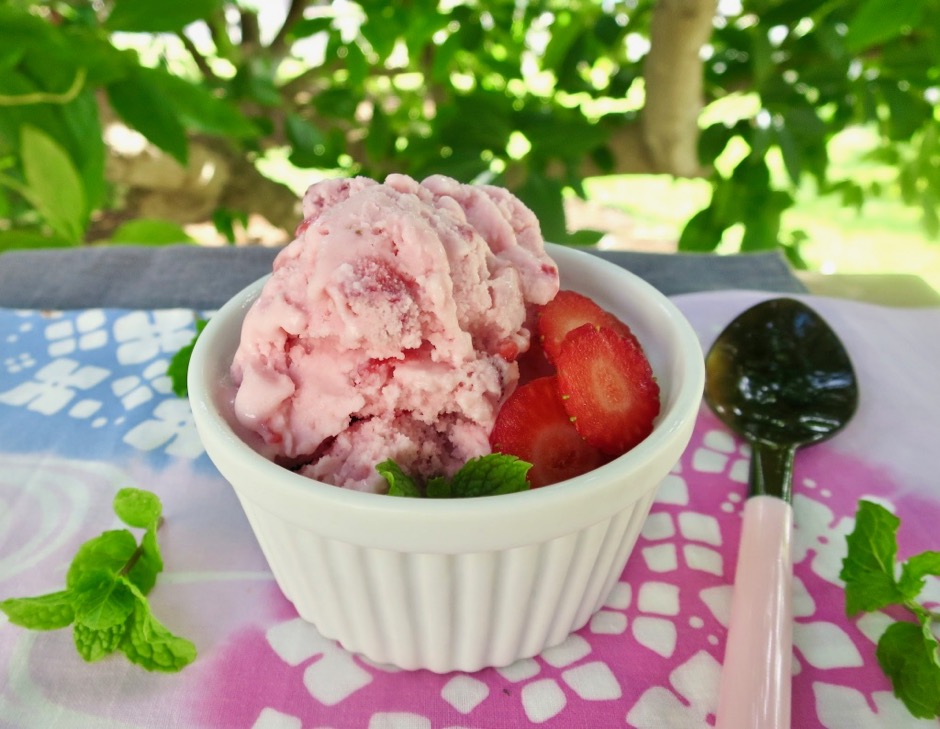
Strawberry Ice Cream Cone

These days there is a far better selection of good lactose-free products available to those of us who are lactose intolerant.  I love Green Valley’s lactose free yogurt, cream cheese and sour cream.  I’ve been told they will soon have lactose free cottage cheese available which is excellent news as I use it in my favorite cheesy beef stuffed shells.  Organic Valley makes lactose-free half and half, a real life saver when it comes to making desserts such as this strawberry ice cream.  I love the simplicity of this recipe from King Arthur Flour.  It doesn’t require simmering the sugar and cream, nor does it call for using eggs. It’s just a delight to be able to make lactose-free ice cream at home with the freshest fruit available as well as in flavors usually not found in markets.

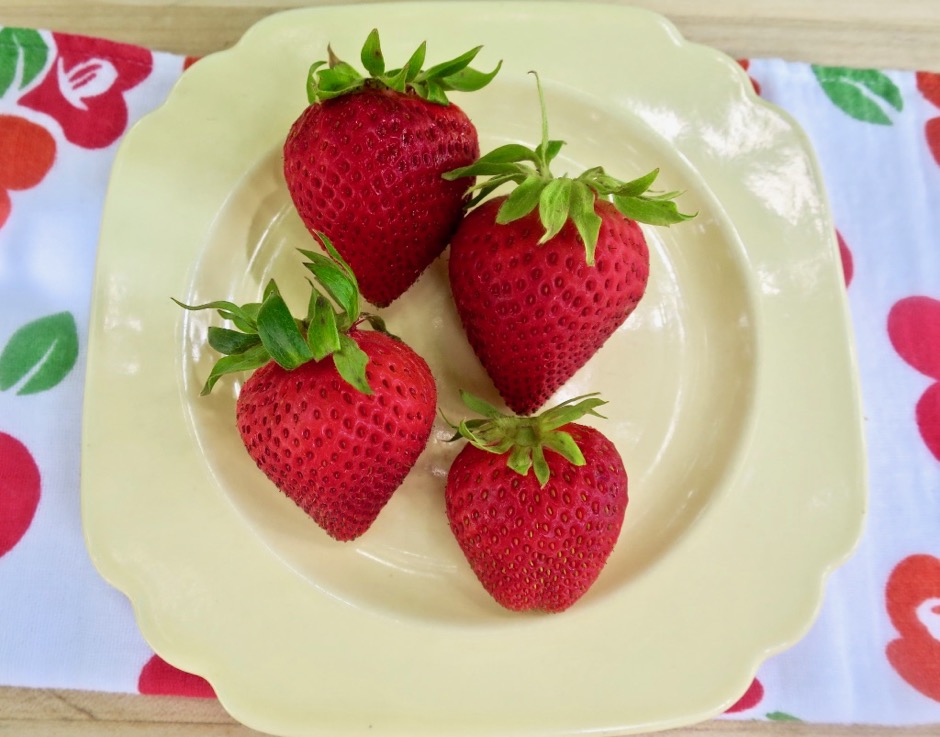
Fresh Strawberries

Strawberries are in season right now so it’s the perfect opportunity to whip up some homemade ice cream.  We still have some Pirie and Rapoza mangos on our trees which means mango ice cream is up next.

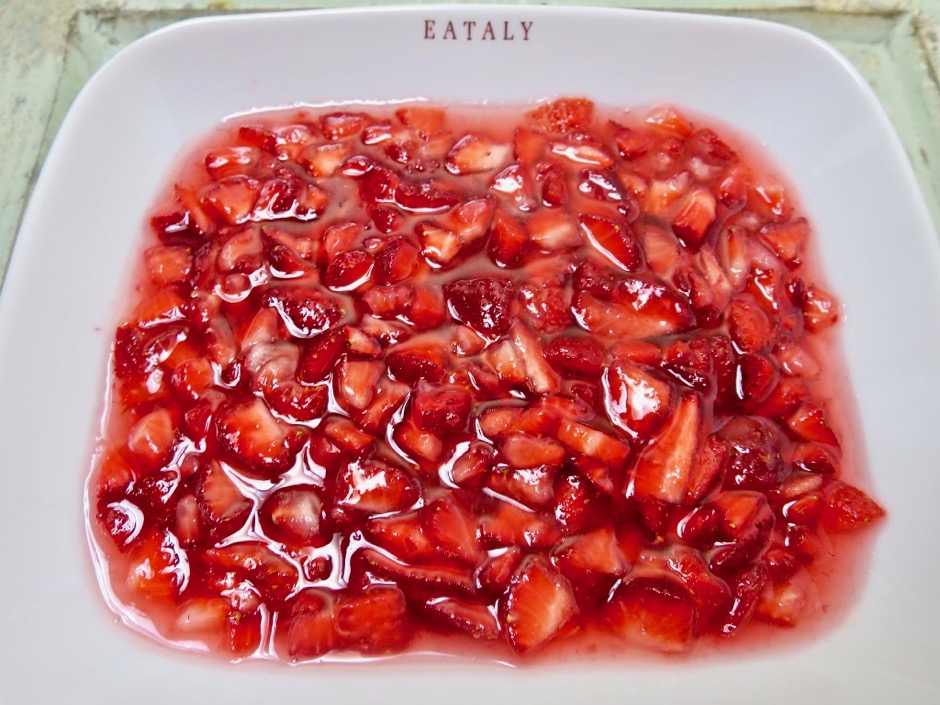
Strawberries, Sugar & Vodka

A portion of the strawberries are sliced thinly and mixed with sugar and vodka.  The strawberries eventually go into the ice cream during the last few minutes of churning.  They add a nice pop of extra strawberry flavor in every spoonful.

Strawberry Ice Cream

Strawberry Ice Cream
 
Adapted from King Arthur Flour
Author:
Serves: 5 cups
Ingredients
  • 1 pound fresh strawberries
  • 1¼ cups sugar, divided
  • 3 tablespoons 80-proof liquor such as vodka
  • ¼ cup light corn syrup
  • 2 cups Organic Valley lactose-free half & half (or regular half & half)
  • pinch of salt
Preparation
  1. Wash, hull, and quarter 6 ounces of strawberries. Slice the quarters very thinly. Place in a bowl and pour ½ cup of the sugar and the vodka over the berries. Mix, cover, and refrigerate at least 2 hours.
  2. Wash, hull and quarter the remaining berries, and puree with an immersion blender or regular blender. Strain through a fine-mesh strainer to remove the seeds. Measure out 1½ cups of the strained puree.
  3. In a large mixing bowl,whisk the remaining ¾ cup sugar with the puree. Whisk in the corn syrup and half & half until fully combined. Whisk in a pinch of salt, or to taste.
  4. Chill the mixture until very cold, about 2 hours. Transfer the mixture to the freezer and chill for another 15 minutes.
  5. Pour mixture into the ice cream maker and process according to the manufacturer's instructions. My Cuisinart takes about 25 minutes. In the last few minutes of churning, retrieve the sliced strawberries from the refrigerator and drain the liquid. Add the berries to the ice cream for the final few turns.
  6. Transfer the ice cream to a covered container and freeze for at least 4 hours or overnight.


Appetizers, Breakfast, Eggs, Recipes, Sandwiches, Sauces, Veggies

Pimento Cheese

July 2, 2018

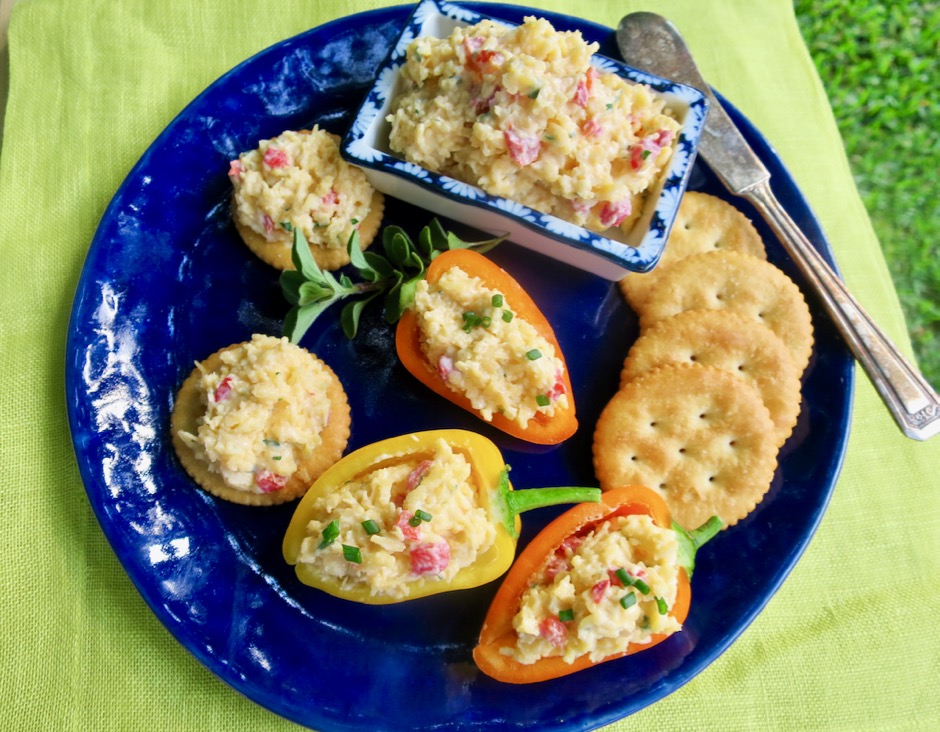
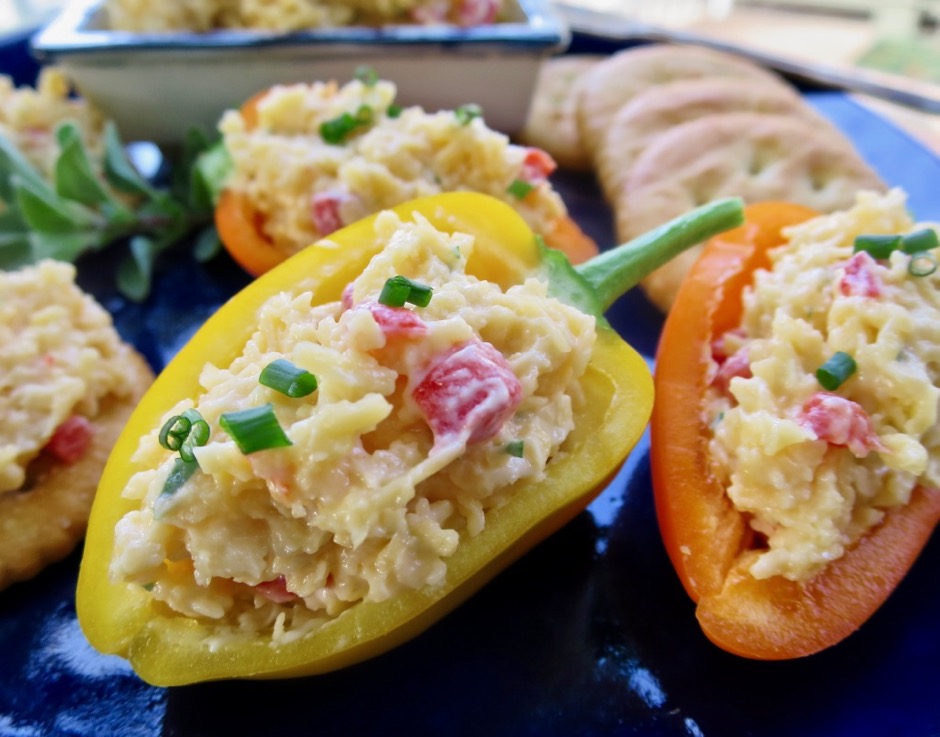
Pimento Cheese Appetizer

Pimento cheese is a divine dish, known in the American South as Carolina caviar, Southern pâté or caviar of the South.  There are numerous ways to enjoy it whether it’s right out of the bowl spread on crackers and crunchy vegetables, or melted and drizzled over scrambled eggs or nachos.  Pimento cheese makes a wonderful grilled cheese sandwich and I can’t imagine a better spread on a warm, buttery biscuit or over a grilled burger.

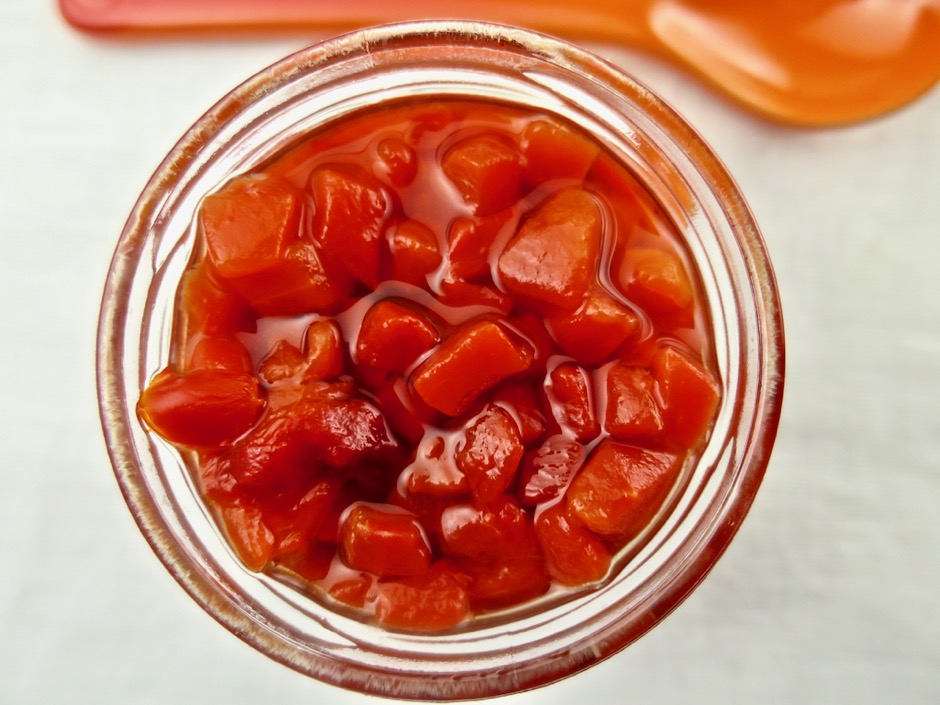
Pimentos

Jarred pimentos are mild, sweet and vibrantly red.

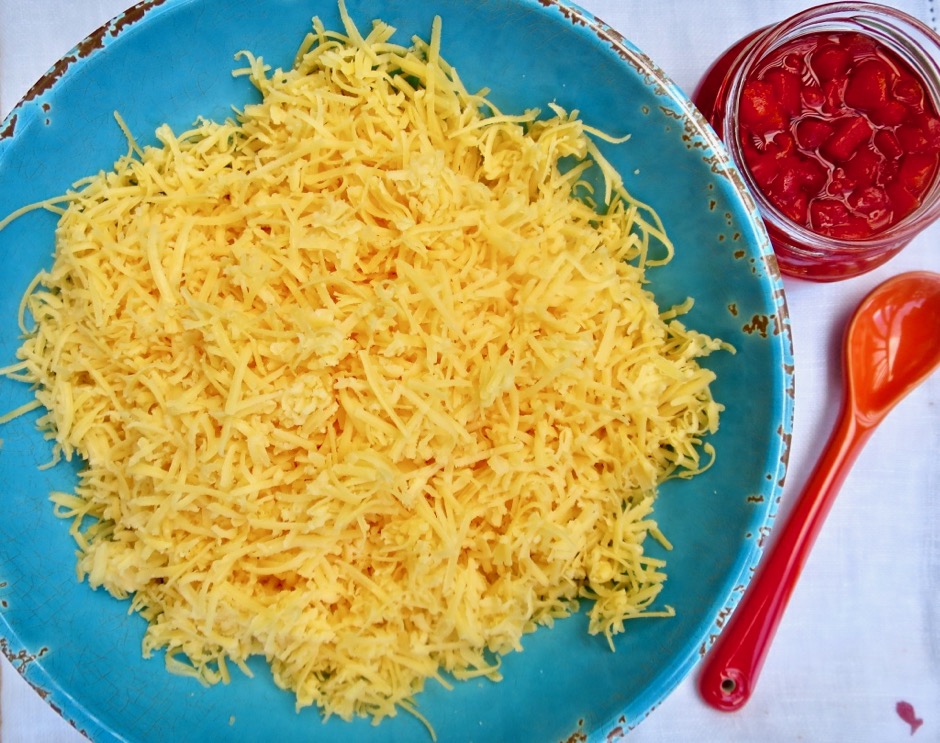
Grated Sharp Cheddar

Cheddar cheese, mayonnaise, and pimentos are the three main ingredients.  To add a little depth to my pimento cheese, I add a bit of Dijon mustard and Worcestershire, and sometimes a dash of cayenne pepper.  Louisiana-style hot sauce is another common addition. Next time I will add some of our homemade pickled jalapeños. Freshly grated cheese is a must for this recipe.  Pre-grated cheese has added ingredients to prevent it from clumping and getting moldy.  These ingredients greatly affect its melting quality and taste.  So get out your grater, it will take just a few minutes if that, to grate a block of cheese.

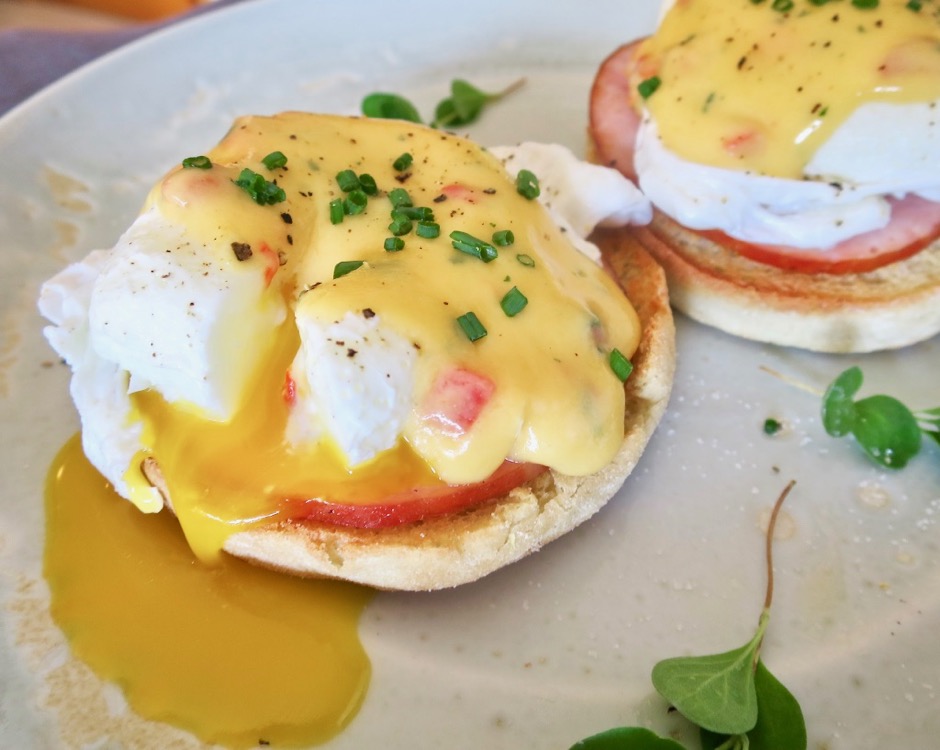
Pimento Cheese Eggs Benedict

Melted pimento cheese makes a fabulous sauce for Eggs Benedict.  I also like to drizzle it over soft scrambled eggs.

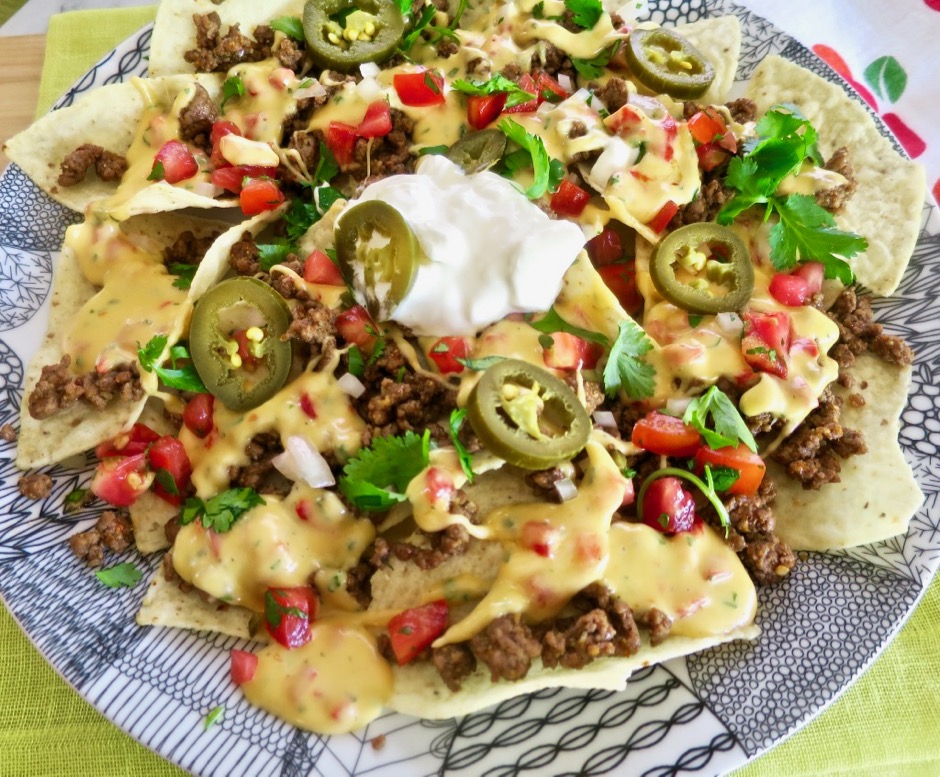
Pimento Cheese Nachos

Nachos!  I came across the idea to use pimento cheese on nachos from South Carolina’s curiously named “Garden & Gun” web site (named after a 1970s Charleston disco called the Garden & Gun Club).  This turned out to be the best cheese sauce for nachos.  Once melted, it is easy to drizzle over the corn chips and other toppings.

Pimento Cheese Stuffed Baby Bell Peppers

Pimento Cheese
 
Author:
Ingredients
  • ½ cup mayonnaise (not light)
  • 1 teaspoon dry mustard, such as Coleman's
  • 1 teaspoon Dijon mustard
  • ½ teaspoon Worcestershire sauce
  • 2 tablespoons diced pimentos
  • 1½ teaspoons finely chopped parsley
  • 8 ounce block of sharp cheddar, finely shredded
Preparation
  1. Combine mayonnaise, dry mustard, Dijon, Worcestershire sauce, pimentos and parsley in a medium bowl. Stir in shredded cheddar cheese. Refrigerate pimento cheese in an airtight container until ready to use.
  2. Spread on crackers and vegetables such as cucumbers and bright peppers for a lively and delicious party appetizer. To use over eggs or nachos, heat pimento cheese in a small saucepan over low heat, whisking constantly so that the mixture does not separate.
  3. Pimento cheese will keep for 5 days or so.


Beef, Dinner, Lactose Free, Pressure Cooker, Recipes

Pressure Cooker Cola Braised Short Ribs

June 12, 2018

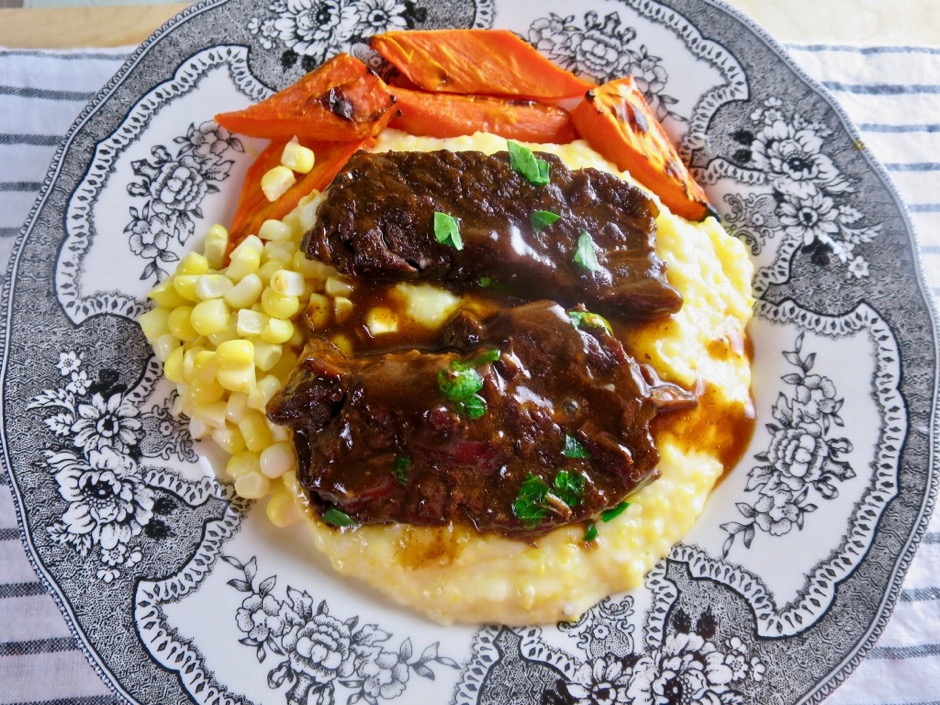
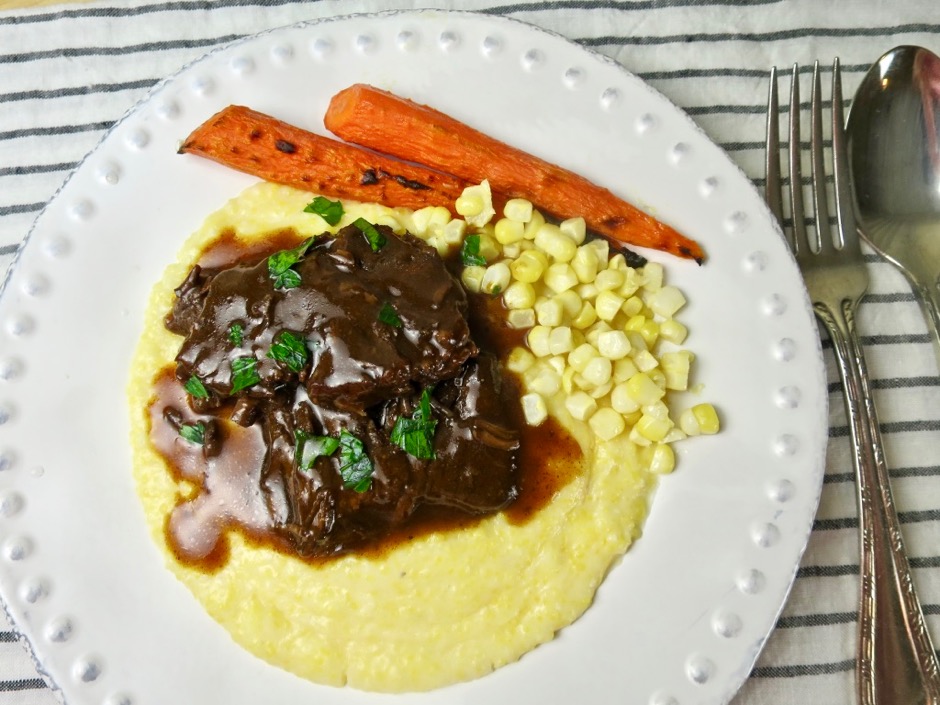
Pressure Cooker Cola Braised Short Ribs

These fall-apart tender short ribs make a quick dinner thanks to the magic of the pressure cooker.  On any given day, I look at dozens of recipes on-line and this one from Chowhound really stood out.  I must admit when I read “cola braised” my attention was drawn in.  I’ve loved Coca-Cola since I was a teenager.  I know sweet sodas are frowned upon these days, but I do enjoy a Coca-Cola once in a while. It’s the real thing after all!  Anyway, you might think the recipe makes sticky, sweet ribs but the combination of ingredients produces a perfectly divine, savory sauce that just begs for a bed of creamy polenta beneath it.

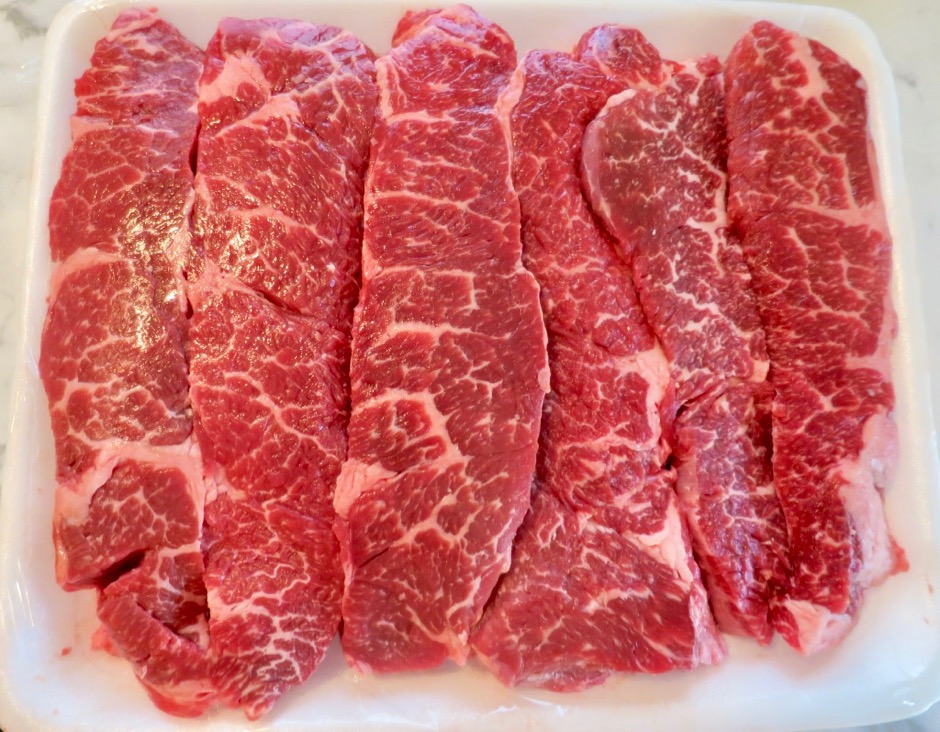
Boneless Short Ribs

The original recipe calls for bone-in short ribs.  I tried this the first time around, but found that the bones just got in the way and the membrane surrounding the bones was unpleasant.  I found beautiful boneless short ribs at Costco.  This is definitely the way to go.

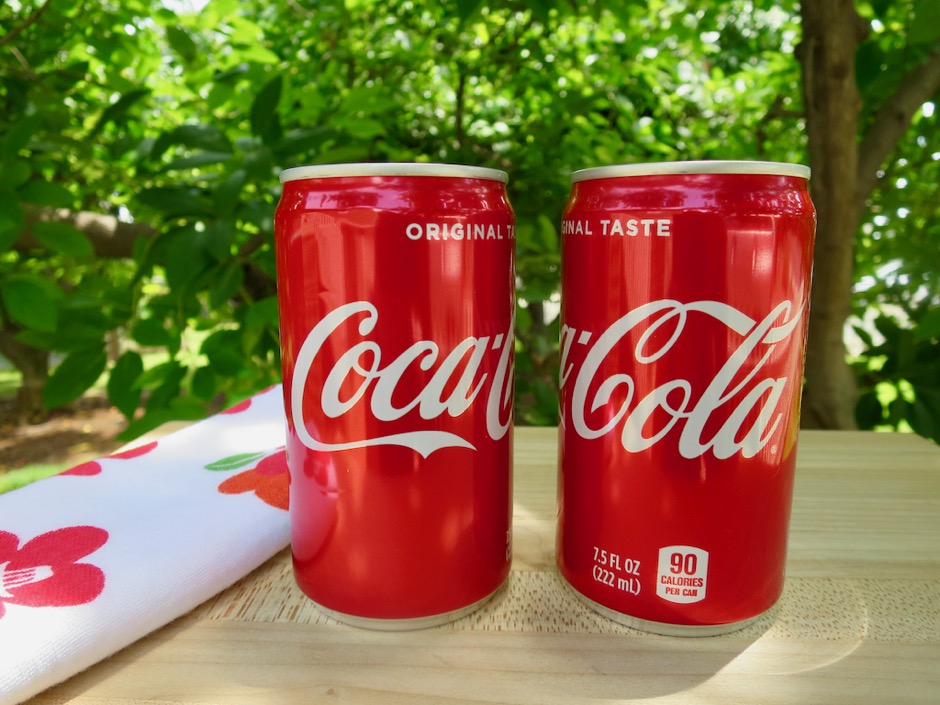
Mini Coca-Cola

Two mini cans of Coca-Cola are perfect for this recipe.

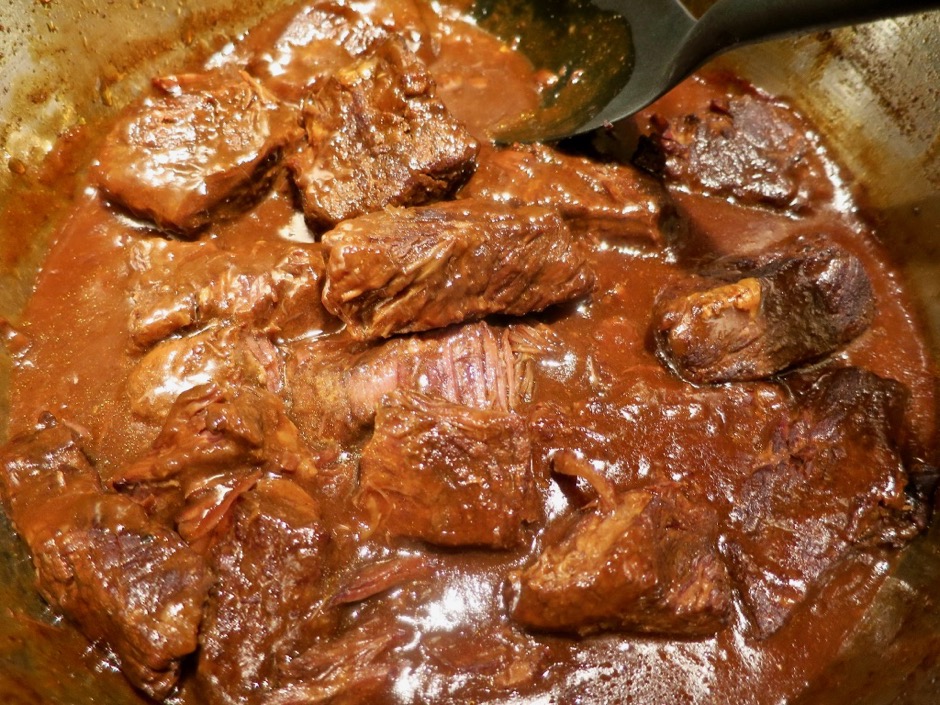
Pressure Cooker Cola Braised Short Ribs

You can see how tender the short ribs become after just 40 minutes in the pressure cooker.

Pressure Cooker Cola Braised Short Ribs

Pressure Cooker Cola Braised Short Ribs
 
Adapted from Amy Wisniewski - Chowhound
Author:
Serves: 4-6
Ingredients
  • 2 teaspoons kosher salt
  • 2 teaspoons paprika
  • ¾ teaspoon freshly ground black pepper
  • ¼ teaspoon cayenne pepper (and up to 1 teaspoon for more heat)
  • ½ teaspoon ground cumin
  • 4 pounds boneless short ribs, cut into 2½-inch length pieces
  • 2 tablespoons olive oil
  • 6 medium garlic cloves, peeled and smashed
  • ½ medium onion, small dice
  • 2 mini cans Coca Cola 7.5 ounces each
  • 2 tablespoons soy sauce
  • 2 tablespoons Worcestershire sauce
  • 2 tablespoons cornstarch
  • 2 tablespoons water
Preparation
  1. Combine the salt, paprika, black pepper, cayenne, and cumin in a small bowl. Rub the spice mixture evenly on all sides of the short ribs. Set aside.
  2. Heat the oil in a 6 - 8-quart stove-top pressure cooker over medium heat until shimmering. Working in batches, add enough short ribs to cover the bottom of the cooker without crowding them. Sear short ribs on both sides until nicely browned, about 5 minutes per batch. Transfer short ribs to a large plate and repeat with the remaining short ribs.
  3. Add the garlic and onion to the cooker and cook until softened, about 4 minutes. Add the Coca- Cola, soy sauce, and Worcestershire and using a wooden spoon, scrape up the browned bits from the bottom of the pressure cooker.
  4. Return the ribs to the pressure cooker, turn to coat them in the sauce, and lock the lid in place. Increase the heat and bring the cooker to high pressure. Adjust the heat to maintain high pressure per the instructions of your pressure cooker and cook for 40 minutes.
  5. Remove the pressure cooker from the heat and allow pressure to come down naturally for about 15 minutes. Carefully quick-release any pressure left in the cooker, then remove the lid.
  6. Transfer the ribs to a large plate and set aside. Pour the liquid through a strainer disposing of any solids. Return strained liquid to the pressure cooker over medium-high heat and bring the sauce to a boil. Mix the cornstarch and water together. Add half of the cornstarch mixture to the sauce, whisking constantly until the sauce is glossy and thickened (about 30 seconds). Add a bit more cornstarch mixture if you want a thicker sauce. Remove from the heat and add the reserved short ribs to the sauce, coating well before serving.


Follow

Get every new post delivered to your Inbox

Join other followers: